AWS News Blog
Create a Backup Website Using Route 53 DNS Failover and S3 Website Hosting
Route 53‘s new DNS Failover feature gives you the power to monitor your website and automatically route your visitors to a backup site if it goes down.
In today’s guest post, Product Manager Sean Meckley shows you how to use this powerful new feature on a fictitious website.
— Jeff;
DNS Failover pairs up well with Amazon S3s website hosting feature to create a simple, low-cost, and reliable way to deploy a backup website. Of course no one wants their site to go down, but things happen, whether due to deploying bad code, network outages, or other issues, and its helpful to have a backup which gives your customers a good experience in the event that your primary website does go down.
Lets say you’re running a website on an Amazon EC2 instance-for example a company website with some e-commerce functionality, or a blog, or a photo sharing site. For our example, well use internetkitties.com, a fictional website where visitors can log in and share their favorite cat photos.
If you’re using Route 53 today, heres what your Route 53 hosted zone might look like. Its pretty simple, with just three DNS records: two default records that come with your hosted zone, plus an A record for internetkitties.com pointing to the Elastic IP address of your EC2 instance.

Lets configure DNS Failover so that visitors to internetkitties.com will land on a friendly backup site in the event that the main internetkitties.com website experiences an outage.
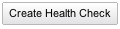
From the Route 53 console, click Health Checks in the left navigation bar and then click on the Create Health Check button:
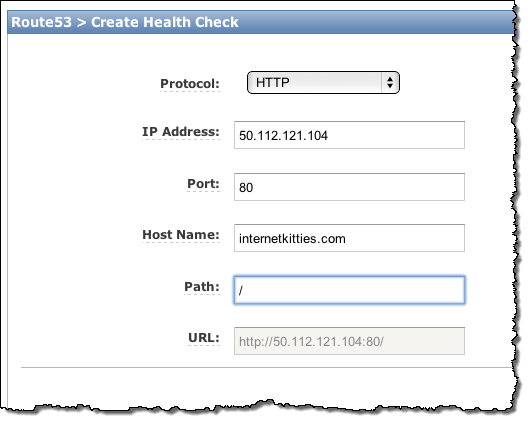
Click Create Health Check. This takes you to a page where youll enter the information that specifies what web page Route 53 should use as the target of its health check. Enter the IP address of your EC2 instance, along with the port (in most cases this will be port 80, the standard port for web pages served over HTTP), your sites domain name, and the specific web page that you want Route 53 to request (in this case, were entering just a forward slash, which means Route 53 will use your sites index page as the target of the health check). Click Create Health Check to continue.
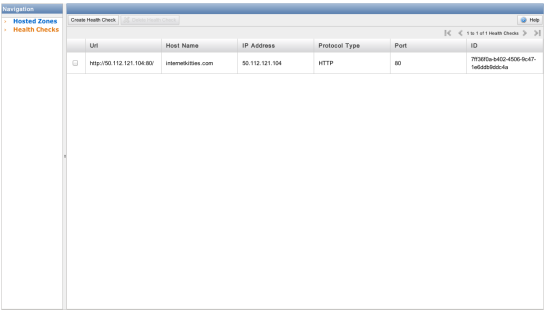
Now the console shows the health check that weve just created.
Click Hosted Zones in the left navigation bar to go back to our hosted zone, and click on the A record for internetkitties.com.
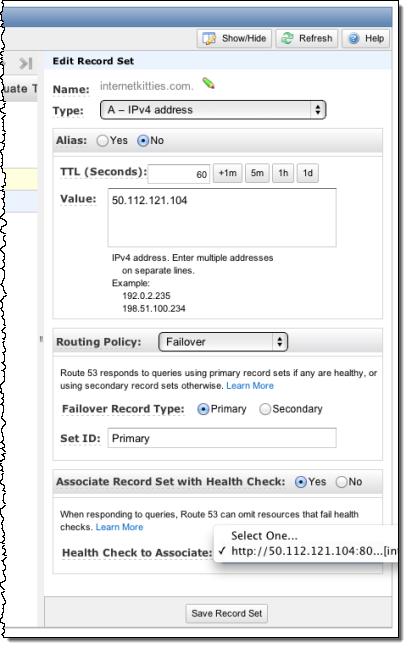
Now, in the Edit Record Set panel on the right side of the page, do the following:
- Set the TTL to 60 seconds. This limits the amount of time this DNS record will be cached within the Internets DNS system, which means that there will be a shorter delay between the time failover occurs and the time that end users begin to be routed to your backup site.
- Set the Routing Policy to Failover.
- Select Primary as the Failover Record Type.
- Select Yes for Associate Record Set with Health Check.
- Select the health check to associate with this record. In the drop-down that appears, you should see the health check we just created. Select this health check.
- Click Save Record Set.
Route 53 will now check the health of your site by periodically requesting your homepage and verifying that it returns a successful response (to be more specific, its checking independently from multiple locations around the world, with each location requesting the page every 30 seconds).
Now, configure your backup site on Amazon S3. For a full walk-through, check out this blog post on how to set up a static website on Amazon S3. You can decide what content to put on your static backup website. For example, you could create a nice fail whale page with a friendly message to your customers, and perhaps a phone number or email address so that your customers can reach you even though your website is down.
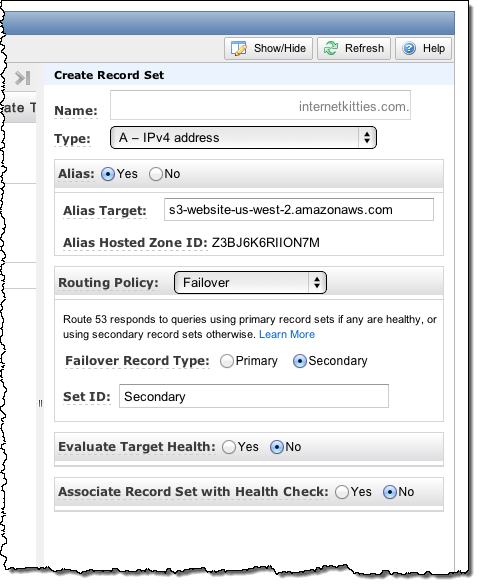
Back in the Route 53 console, go to your hosted zone and click Create Record Set. Enter the same DNS name as your primary website (in this case, were using the root domain internetkitties.com which is the same as the name of our hosted zone, so the Route 53 console suggests this for you). For the alias radio button, click Yes. Then, select your S3 website endpoint as the alias target.
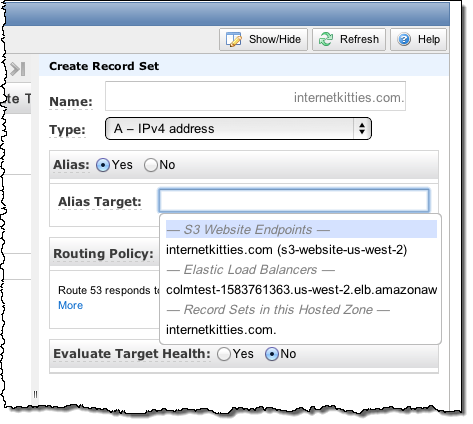
Now, set the Routing Policy to Failover, and select Secondary as the failover record type. Leave the remaining checkboxes (evaluate target health and associate record set with health check) at their default settings of No, and click Create Record Set.
Heres what your Route 53 hosted zone looks like after you’re finished.
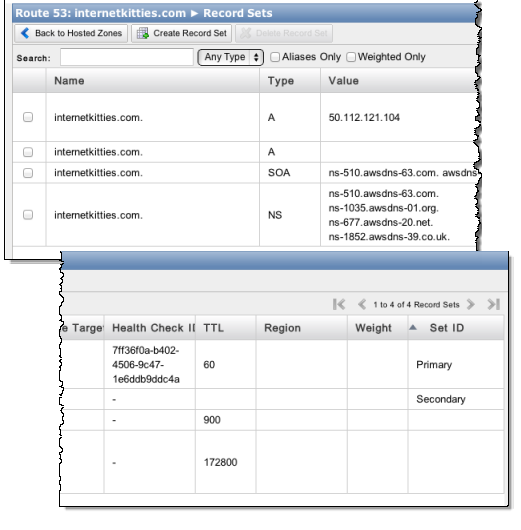
Thats itnow your primary site is being health checked by Route 53, and Route 53 will automatically start sending traffic to your new backup site on S3 if your primary site goes down for any reason.
Route 53 health checks support HTTP and TCP level checks, and may also be used in combination with Latency Based Routing, or Weighted Round Robin records to route around instance, availability zone or even region level problems. You can read more about Route 53 Health checks in the Route 53 Developer Guide.
— Sean Meckley, Product Manager, Route 53.