AWS for Games Blog
Stream a remote environment with NICE DCV over QUIC UDP for a 4K monitor at 60 FPS
In recent years, game development has become increasingly distributed. In 2020, COVID-19 accelerated the demand and innovation for remote solutions. Game teams of all shapes and sizes were left with two choices: rush to take home workstations and then use their virtual private network (VPN) to access the office, or leave office development workstations and remote desktop protocol (RDP) from home hardware. Now game developers are looking to define a more permanent future of work on their own terms by moving completely to the cloud.
More and more game studios are moving workstations and continuous integration / continuous deployment (CI/CD) pipelines to cloud infrastructure. By using AWS game development in the cloud solutions, teams are provided with the resources needed to rapidly code, deploy, and publish games remotely. Previously, to create distributed development pipelines, studios would need to ship hardware to engineers and spend significant amounts of time on-boarding employees to new environments. To reduce costs, dedicate more time to building immersive and entertaining worlds while supporting globally distributed workforces or hybrid work environments, developers are turning to AWS to transition to game production in the cloud (GPIC) solutions, solving use cases including remote QA testing, remote distribution of games to press, and the consolidation of 3D development streaming in immersive environments.
There is a fundamental goal shared by all game production in the cloud use cases – how can you ensure high Frames Per Second (FPS) while streaming? In this blog post, we’ll walk through the steps to configure a remote workstation to stream at 60 FPS and use QUIC UDP (user datagram protocol) communication with NICE DCV, a high-performance remote display and streaming protocol that provides customers with a secure way to deliver remote desktops and application streaming, in the AWS cloud.
Key takeaways:
- Setup an AWS workstation using the NICE DCV for Windows (g4dn with NVIDIA gaming driver) available on the AWS Marketplace. This AMI has QUIC UDP enabled by default.
- Configure and lock down the network to TCP (transmission control protocol) and UDP connections
- Access the workstation with DCV Viewer using QUIC UDP and install development software
Disclaimer: The steps in this blog are meant for tutorial purposes and initial streaming proof of concepts, and not a full-enterprise solution. Contact us to design an architecture that works for your organization.
Prerequisites
Before starting this tutorial, developers should have the following:
- An AWS account with limits increased for Amazon Elastic Compute Cloud (Amazon EC2) G4dn instances for the number of workstations you need
- Account access permissions to create and configure Amazon Virtual Private Cloud (VPC) networking and security groups, as well as spin up G4dn instance family EC2 on-demand instances
- Intermediate knowledge of Windows and AWS Identity & Access Management (AWS IAM), security groups, and VPC networking
- We recommend initially setting up your demo off any VPN or internal network to understand the basics before introducing additional variables
- ~60 Minutes, depending on software installed
Quick version – AWS CloudShell automated workstation script (10 Minutes)
If you would like to spin up a workstation for testing games or other software using the command line and an automated script, check out the following single-script AWS CloudShell .sh file available on the AWS Samples GitHub. This was written to support the same Amazon Machine Image (AMI) used in this blog to demo NICE DCV with QUIC UDP.
This AWS sample deploys a small amount of infrastructure via infrastructure as code, allowing users to deploy a workstation and login in only a few commands by using AWS CloudShell, a browser-based shell, directly in the AWS console. Because both the script in the AWS Samples GitHub and this blog use the NICE DCV AMI, you will not need to subscribe on the AWS Marketplace. However, you will want to ensure you have limits increased for G4dn instance before proceeding with either the AWS Sample quick version or the step-by-step walkthrough outlined in this blog.
Walkthrough (~60 minutes)
Part 1: The server – launching the NICE DCV server AMI
Configure your networking: VPC, security groups, and route tables
1. Create a VPC. For this demo you are going to use a 10.0.0.0/16 IPv4 CIDR block VPC in us-east-1 (N. Virginia), or your preferred region.
2. Add an internet gateway and update the routes of the VPC to include the internet gateway.

3. Attach the internet gateway to your nicedcv-quicudp-demo VPC.
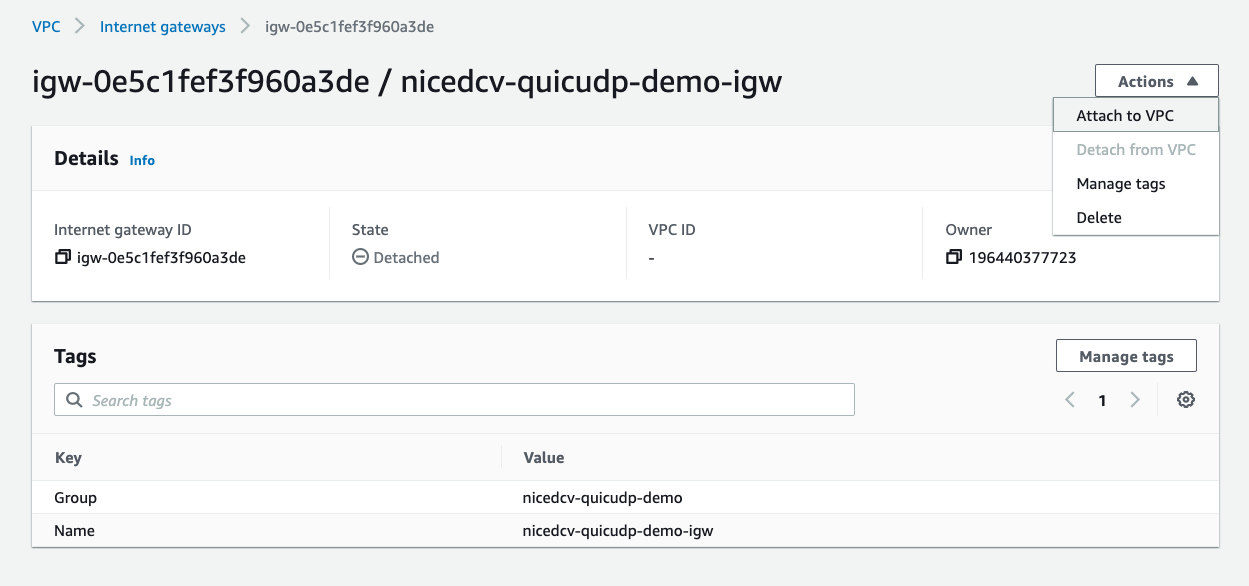
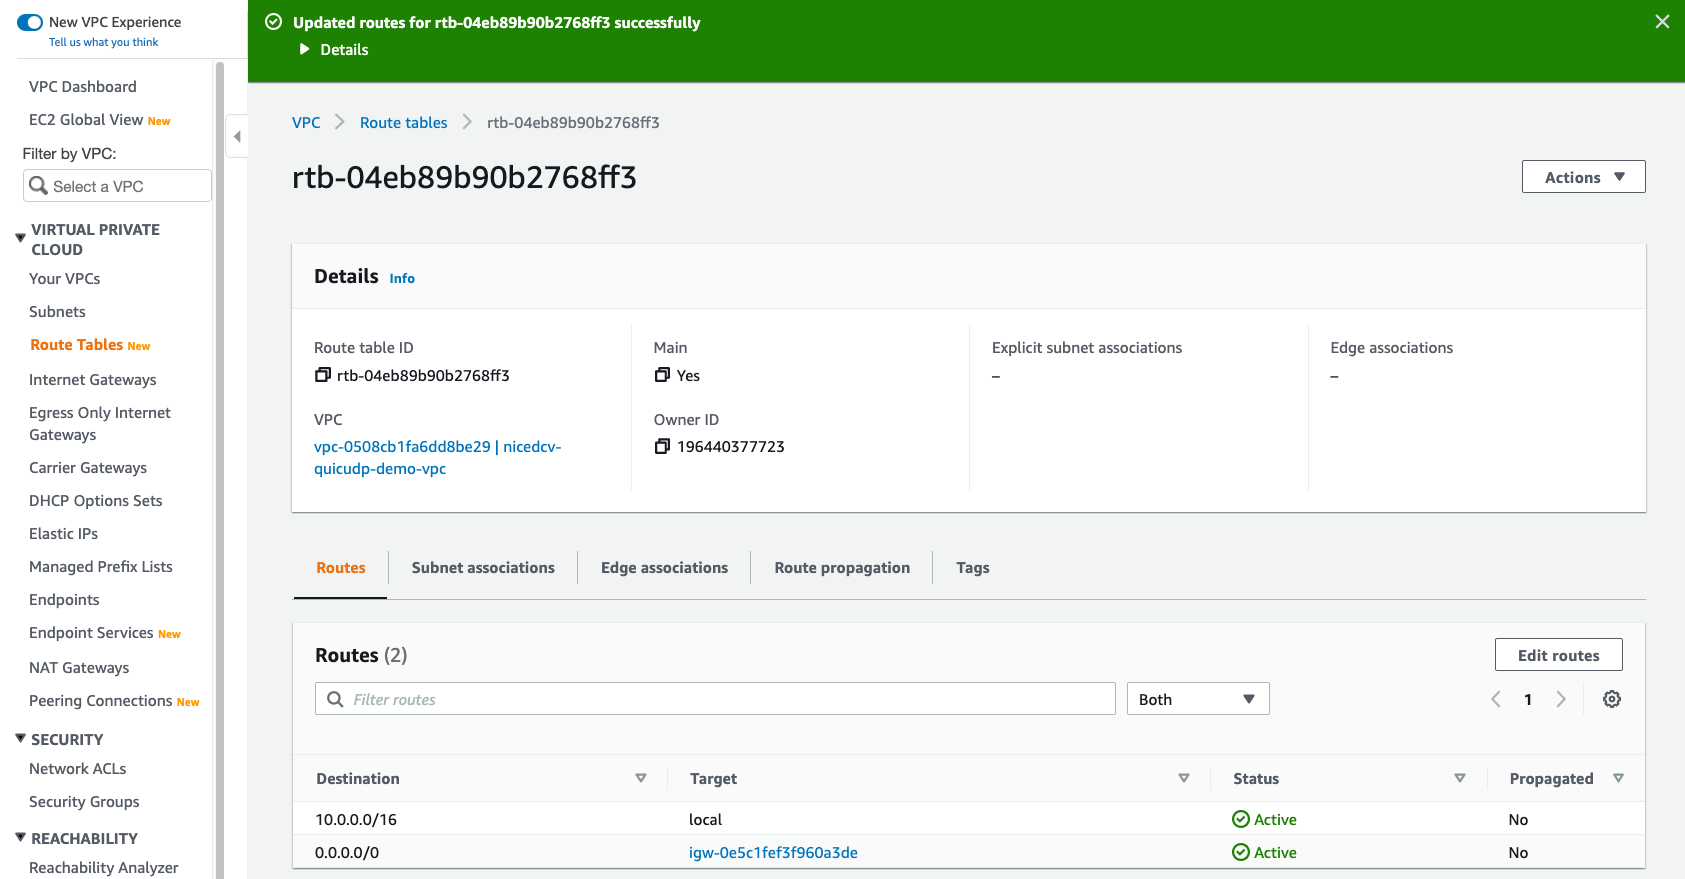
4. Configure the routes to allow public internet through the Internet Gateway.
5. Create your subnets. In this demo you will create 2 subnets – 1 Public (10.0.1.0/24) and 1 Private (10.0.2.0/24) using /24 masks. This will give you up to 255 IPs (251 not dedicated to Amazon) to work with per subnet and leave your VPC and subnets plenty of room to grow.

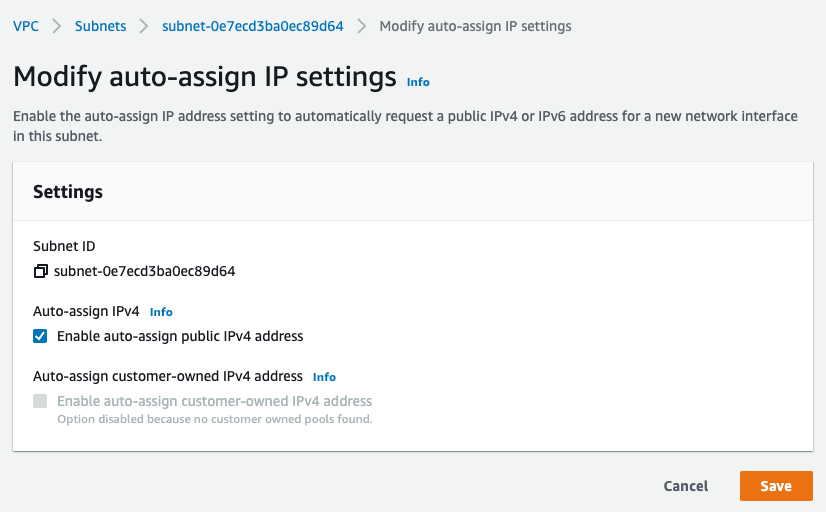
6. Select your PublicSubnetA. Go to Actions and select Modify auto-assign IP settings. On this screen check the box “Enable auto-assign public IPv4 address.” When instances are launched in this subnet they will automatically get a public IPv4 Address. Select Save.
A note about workstation networking security best practices: This blog does not focus on high availability of workstation architecture or fleet designs for networking with remote workstations in order to focus on NICE DCV; however, it is recommended to logically isolate remote workstations for one team from another. Logical isolation through public and private subnets, as well as restricting networking to smaller CIDR block ranges, enables you to have more control over sensitive information stored on the workstation Amazon Elastic Block Store (Amazon EBS) volumes by protecting access through the networking design. For most workstations, you will want to have your instances in a private subnet. To decrease complexity and avoid adding private hosted zones, bastion hosts, and NAT (network address translation) gateways, as well as steps to handle routing between public and private subnets, this blog will spin up the instance in the public subnet, but lock down access to your IP only.
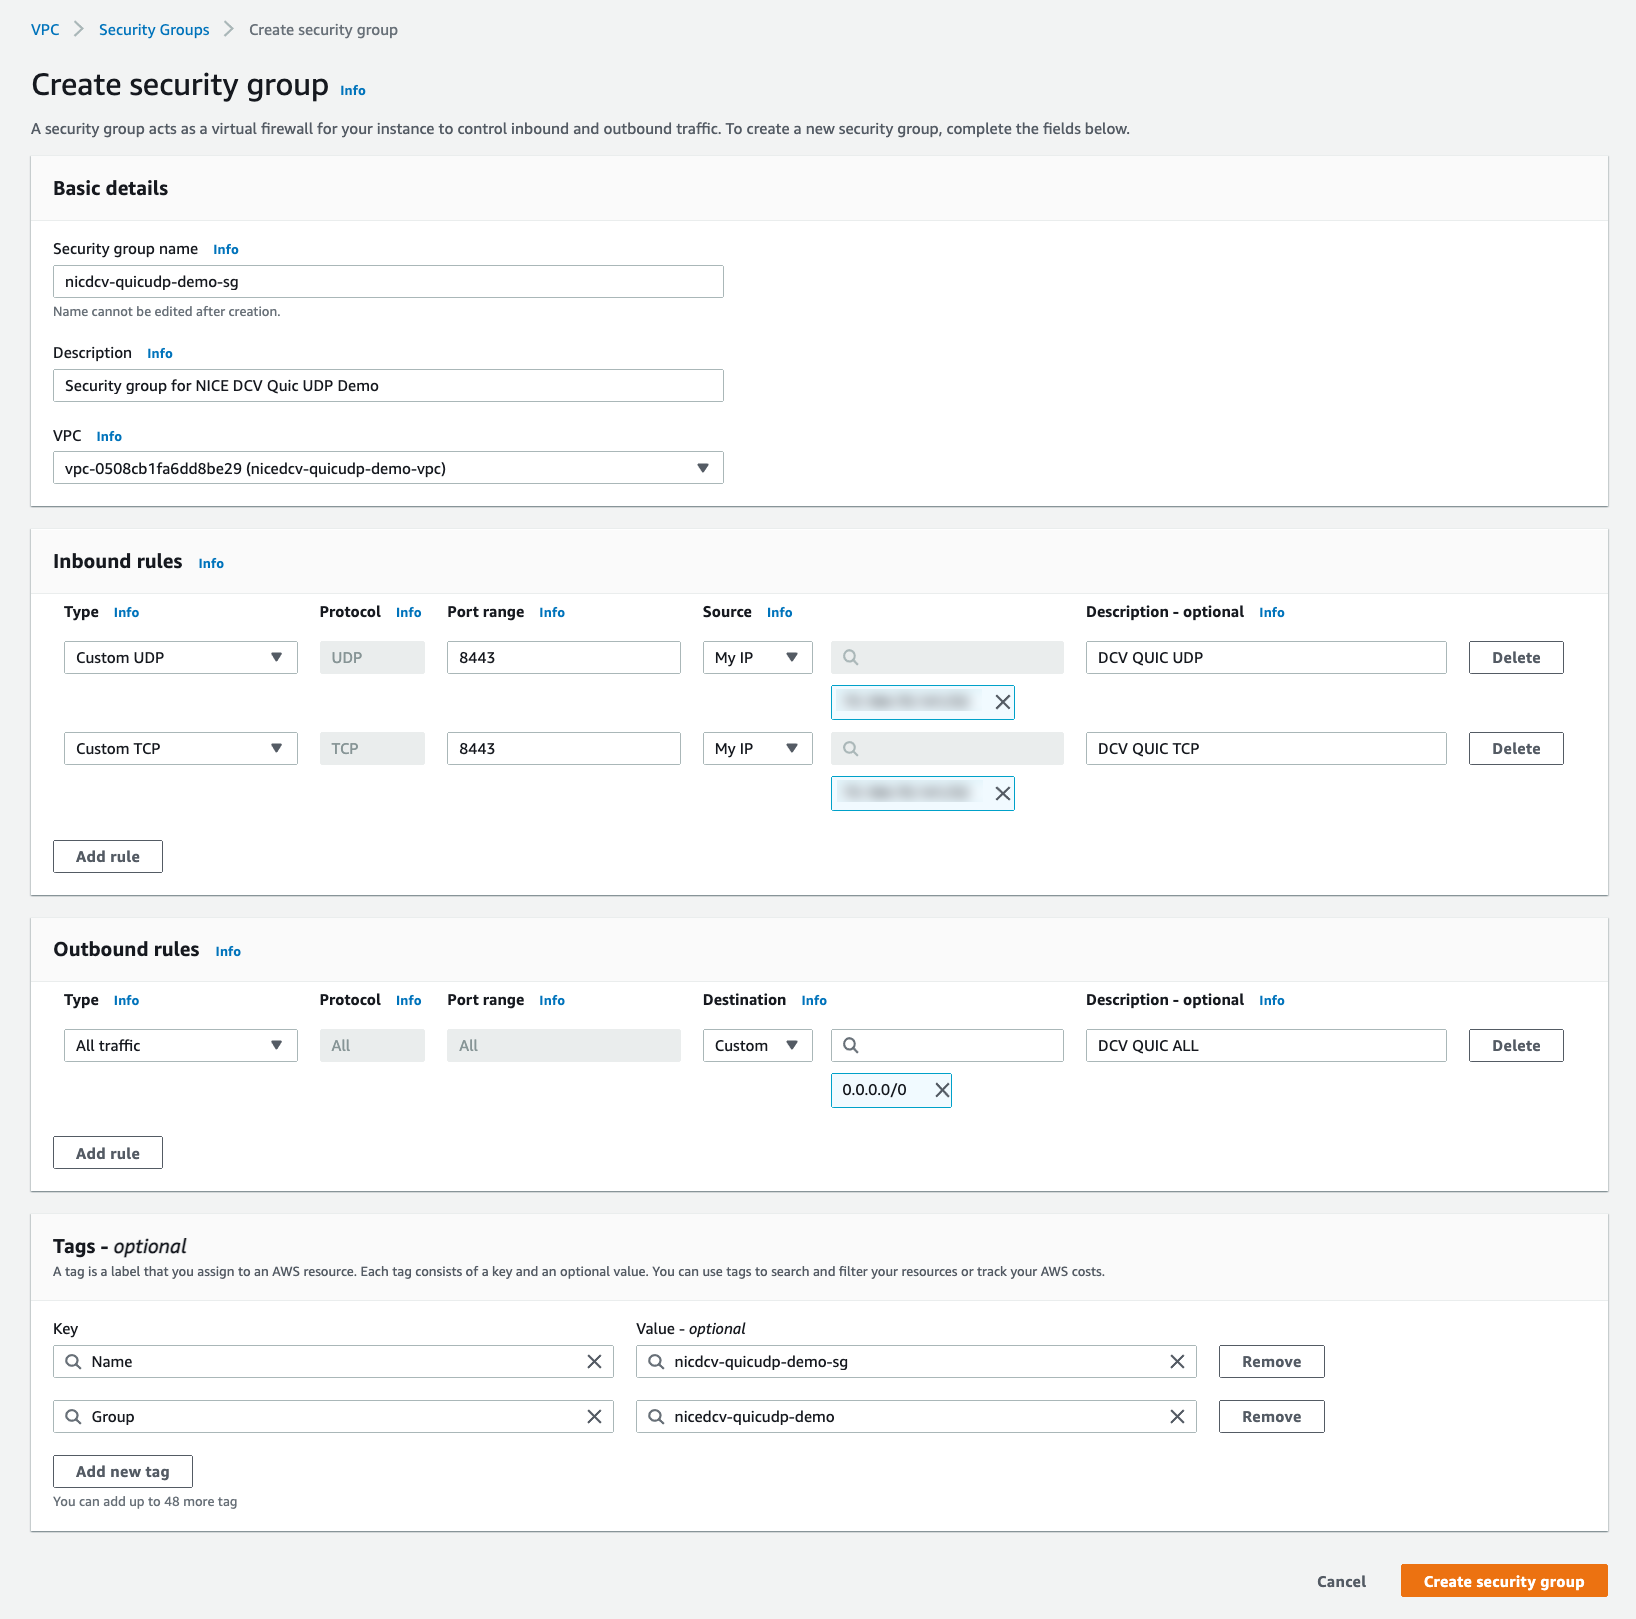
7. Create a new security group for the demo. Create two inbound rules: Create one for Custom UDP with Port Range as 8443 and source set to My IP. Create a second inbound rule for Custom TCP with Port Range 8443 and source set to My IP. This means only inbound traffic from your IP will be allowed to access the instance.
8. Keep the outbound rule with type set to All Traffic with destination 0.0.0.0/0. Select the button Create security group.
Spin up a workstation with the NICE DCV AMI
Now that you’ve created your networking, you are ready to create your first workstation.
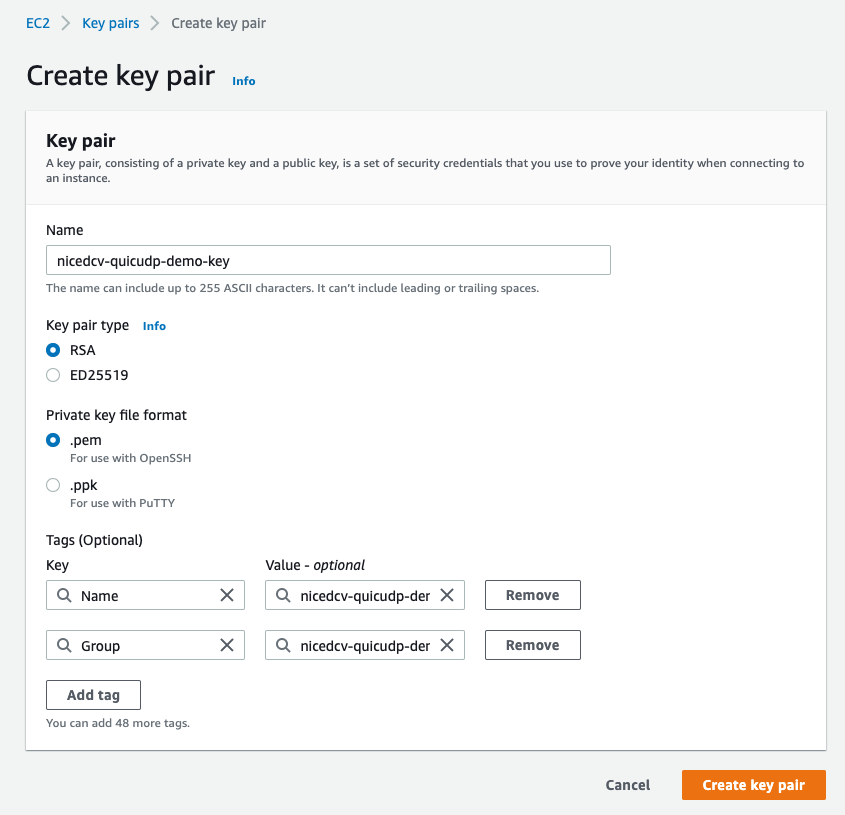
1. In the EC2 console, create a new Key Pair. We will use this to generate a password to login to your remote workstation. Important: Store the .pem file in a safe location. This file can be used to access your instance and retrieve your Windows administrator password.
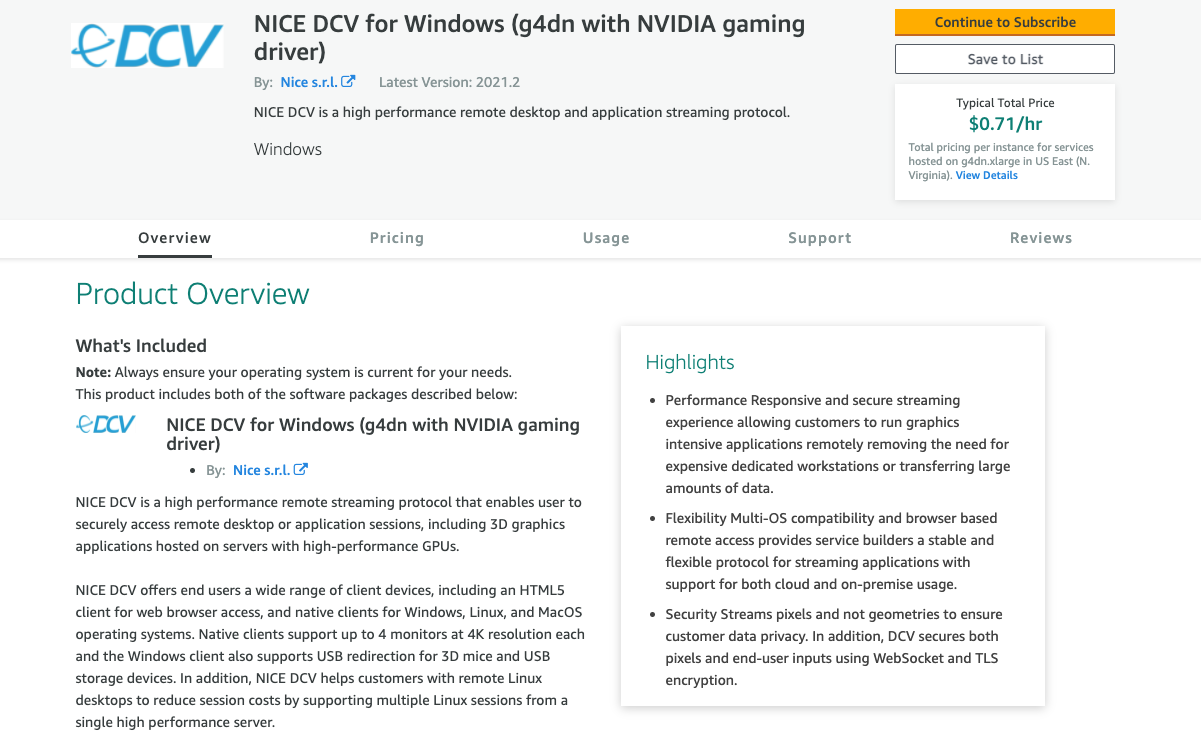
2. On the AWS Marketplace, visit the NICE DCV for Windows (g4dn with NVIDIA gaming driver) page. Select Continue to Subscribe.
Note: If you prefer to not use an AWS Marketplace AMI and manage the installation of NVIDIA gaming drivers yourself, you can also manually install NICE DCV server on an instance by accessing it from NICE DCV. However, the AWS Marketplace AMI may save you time.
3. DCV is an Amazon company. This means you will not need to subscribe to the marketplace listing and will see “Subscriptions are not required for this product.” Select Continue to Configuration.
4. For this demo, the tested delivery method is 64-bit (x86) Amazon Machine Image (AMI), software version 2021.2 (September 9, 2021) and US East (N. Virginia). You will be charged a per hour fee for the AMI dependent on your g4dn size chosen. Press to Continue to Launch.
5. In the AWS Marketplace you will not be able to configure storage. Many developers will need more storage for their workstations or use case in order to install the software they need to do development or games they would like to test. On the “Launch this software” page change Choose Action in the dropdown to Launch from Website.
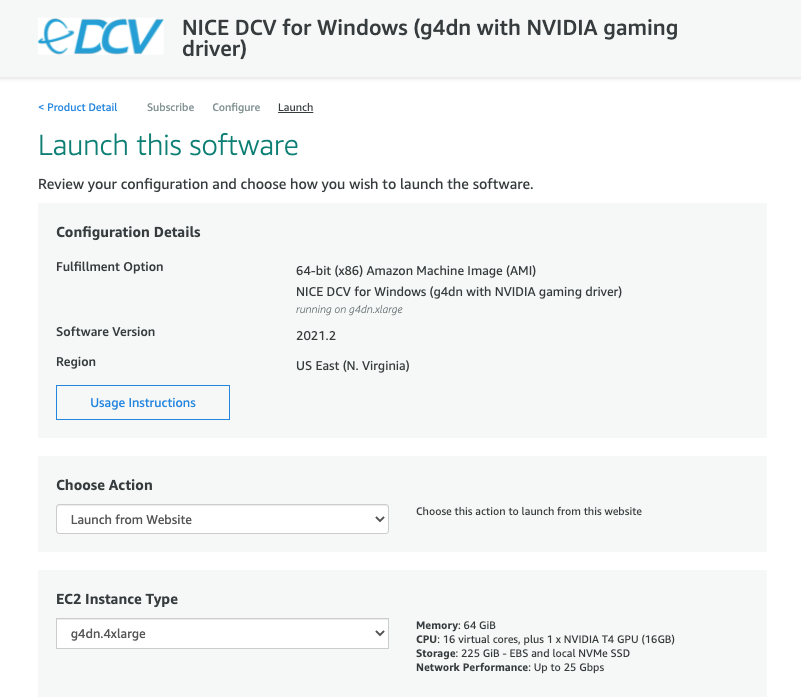
6. Change the EC2 Instance Type to g4dn.4xlarge which will give your machine 16 VCPU over an NVIDIA Tesla T4 GPU (16 GB). Change VPC settings to the VPC you created earlier, subnet settings to your public subnet, security group settings to your demo security group, and key pair to the demo key pair you created earlier. Select Launch.
Your instance will be launched in the EC2 Console.
Give yourself more Storage in Windows
You may find you need more storage on C: drive than you initially thought to store all the games and applications you want to test on G4dn with NICE DCV over QUIC. Let’s modify your volume which will be used for C: drive.
1. In EC2 for the instance to go the Storage tab. Select the Volume ID for device name /dev/sda1 which currently shows 30 GIB.
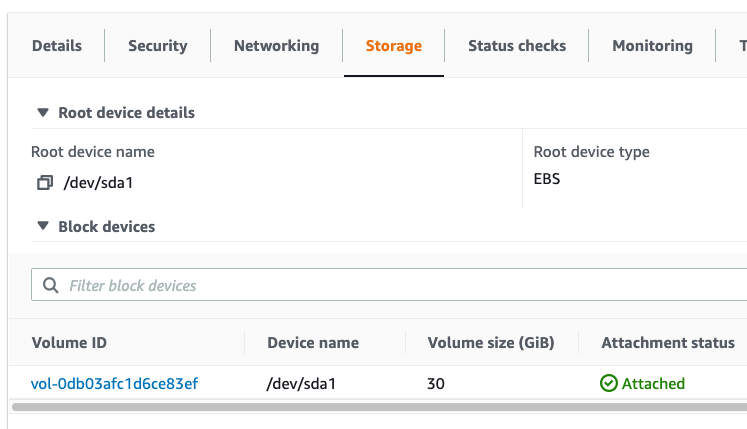
2. Under Actions select Modify Volume. It is best practice before changing your volume sizes to create a snapshot, but as this is a blog and you have just created this instance, go ahead and modify the volume. Under Size, change from 30 to 250 to give yourself plenty of application space. Select Modify.

3. Under the Modify Volume Screen, read the information provided, and select Yes. This can take 10-20 minutes to fully optimize, but you can proceed forward with the next steps.
Get your workstation password
If your instance has finished initializing and shows as 2/2 checks passed in the Status Check of the EC2 console, you are now ready to login to the workstation.
1. Select your instance. Under your instance in the EC2 Console select Connect. Then select RDP client.
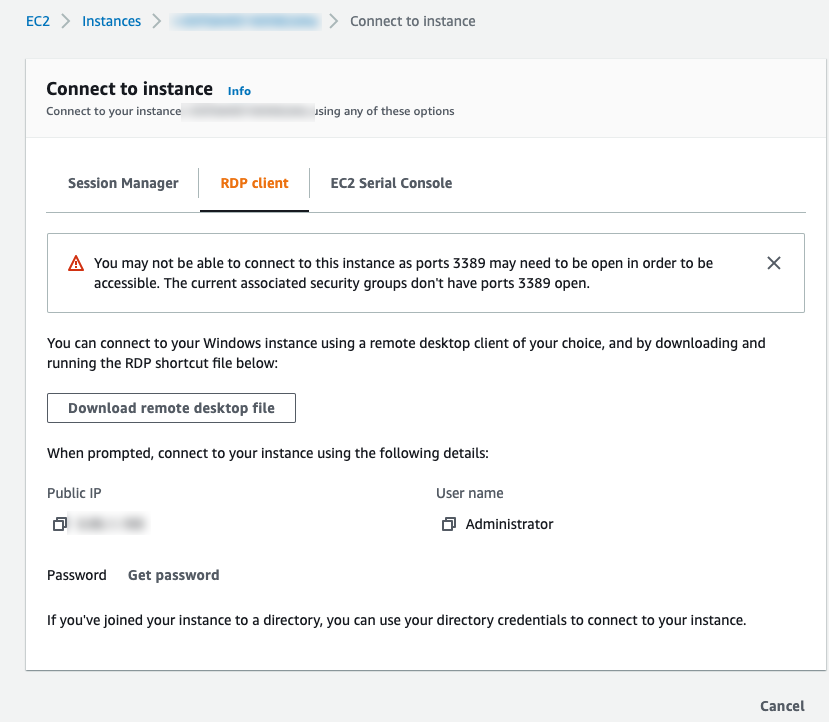
Take note of the Public IP. You will also need your password.
2. To retrieve this, choose Get Password. Under Browser upload the .pem file for the key pair made earlier. Then select Decrypt Password. Copy the decrypted password somewhere safe.
Part 2: The client – download DCV Viewer and login to your workstation over QUIC UDP
1. Download your preferred DCV client from https://www.nice-dcv.com/. For this example, this blog uses the MacOS (x86_64) client and was tested on version 2021.2 on macOS Catalina 10.15.7 on a 2019 MacBook Pro.
2. Install and load DCV Viewer on your local computer. In DCV Viewer, select Connection Settings. Then select Protocol and check to ensure in the dropdown QUIC (with Datagram Extension)/UDP is selected. Check both ports are set to 8443 and select Apply.
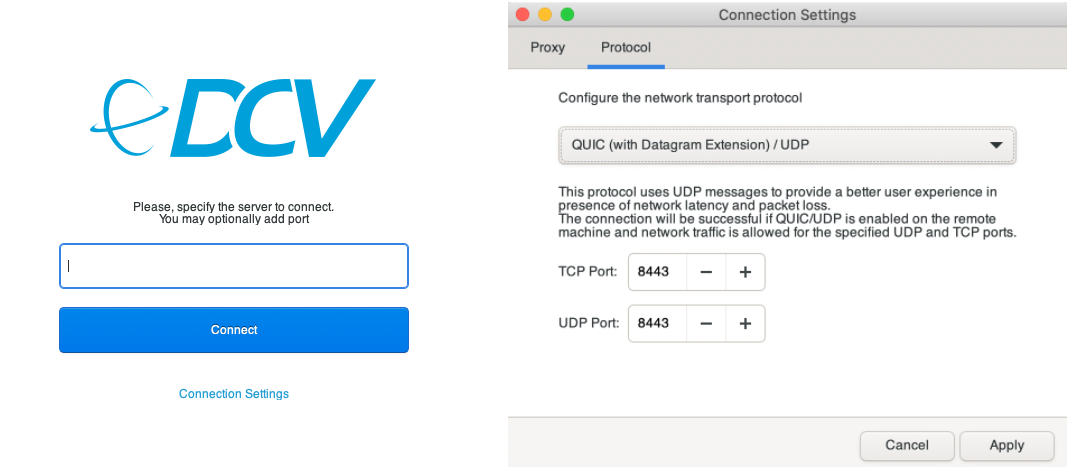
3. Back on the connection screen, enter in your Public IP for your host followed by Administrator and your password retrieved earlier using your key pair.
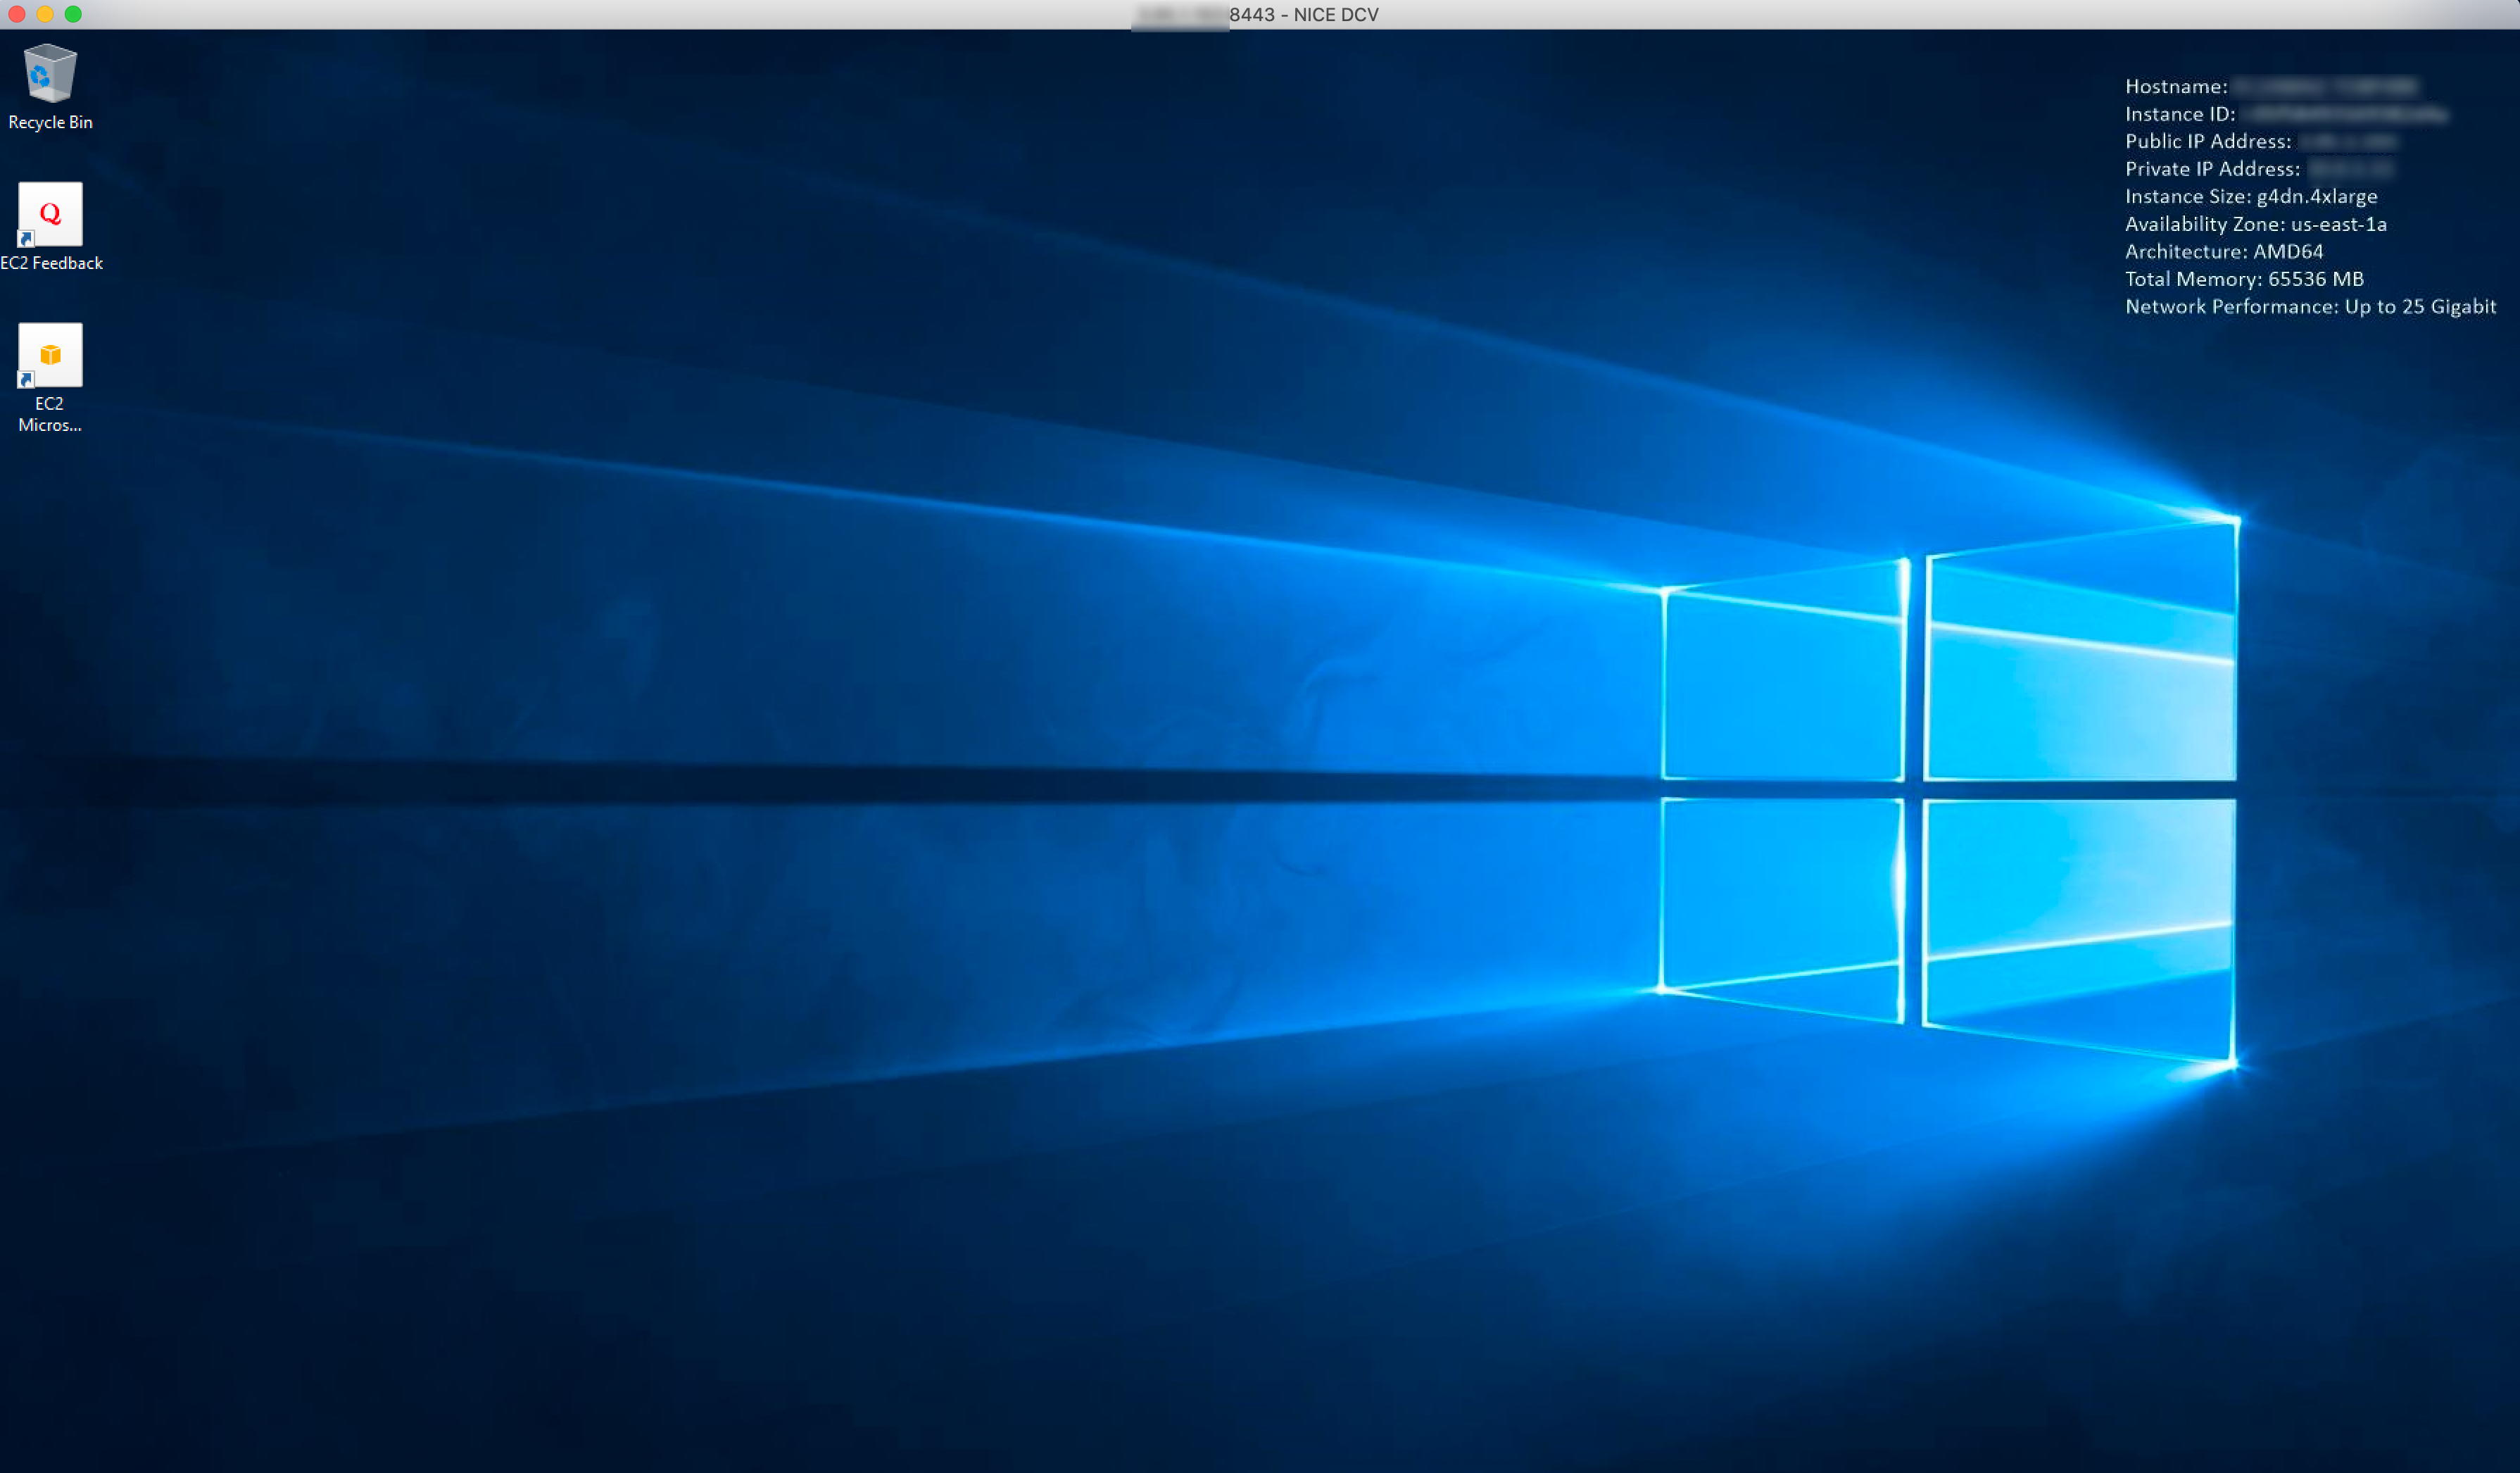
4. Select connect. You should see a Windows screen with 8443 in the top of the NICE DCV viewer window.
5. In search, type Disk Management. When prompted to Initialize Disk select Okay. You will see Disk 0 as a 250.00 GB You will also see Disk 1 which is Unallocated and 209.55 GB.
6. You will also want to allocate your Disk 1 storage to create a D: drive. Right mouse select in the striped space of Disk 1 and select New Simple Volume. Select Next in the Wizard. Keep the defaults at 214574 and select Next again.
7. Keep “Assign the following drive letter D” and select Next. Keep all default settings and format as NTFS. Select Next and then, you can either keep the title “New Volume“ or erase and select Finish. You should now see your D: drive where you’ll be able to store games and applications. Right mouse select and set to “Mark this partition as active”.
8. Your Volumes should now look like this in Windows.

How much space you need is ultimately up to how many applications and games you intend to run on the machine. C: is an EBS volume that can be detached from the instance itself. D: drive in this case, anything stored on D, will be gone when the instance is terminated.
Install software and test frame rate
Once you’ve successfully connected to your instance over QUIC UDP, you can install the software you need for development or games testing. Some software in the cloud, when managing fleets of workstations at scale, require licensing servers or enterprise-licensing agreements. Other software, such as IDEs (integrated development environment) and CI/CD solutions may need additional storage decoupled from the workstation and architecture to round out the deployment in order to offload the version control and build process from the workstation. Finally, for those deploying virtual machines for eSports events, developers may need machines as close as possible to their end players and deliver at low latency. Your AWS account team can help you scale and design your workstation solution depending on your software needs and use case.
In this example, you will use the workstation as a PC to test a game for a remote QA usability testing scenario and ensure we are getting an ideal frame rate we desire before providing this workstation to a remote QA employee.
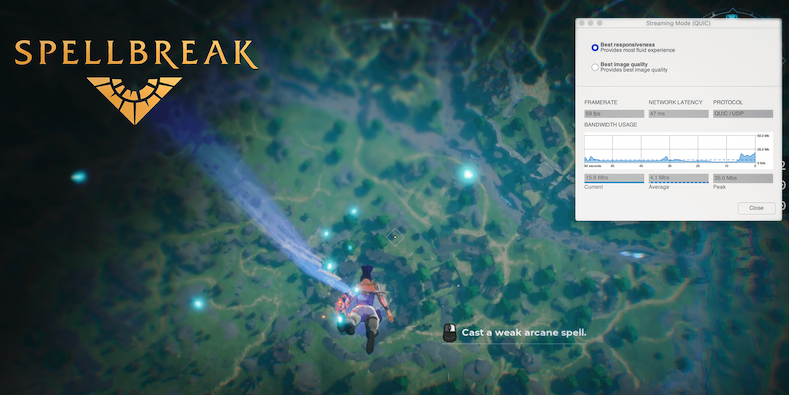
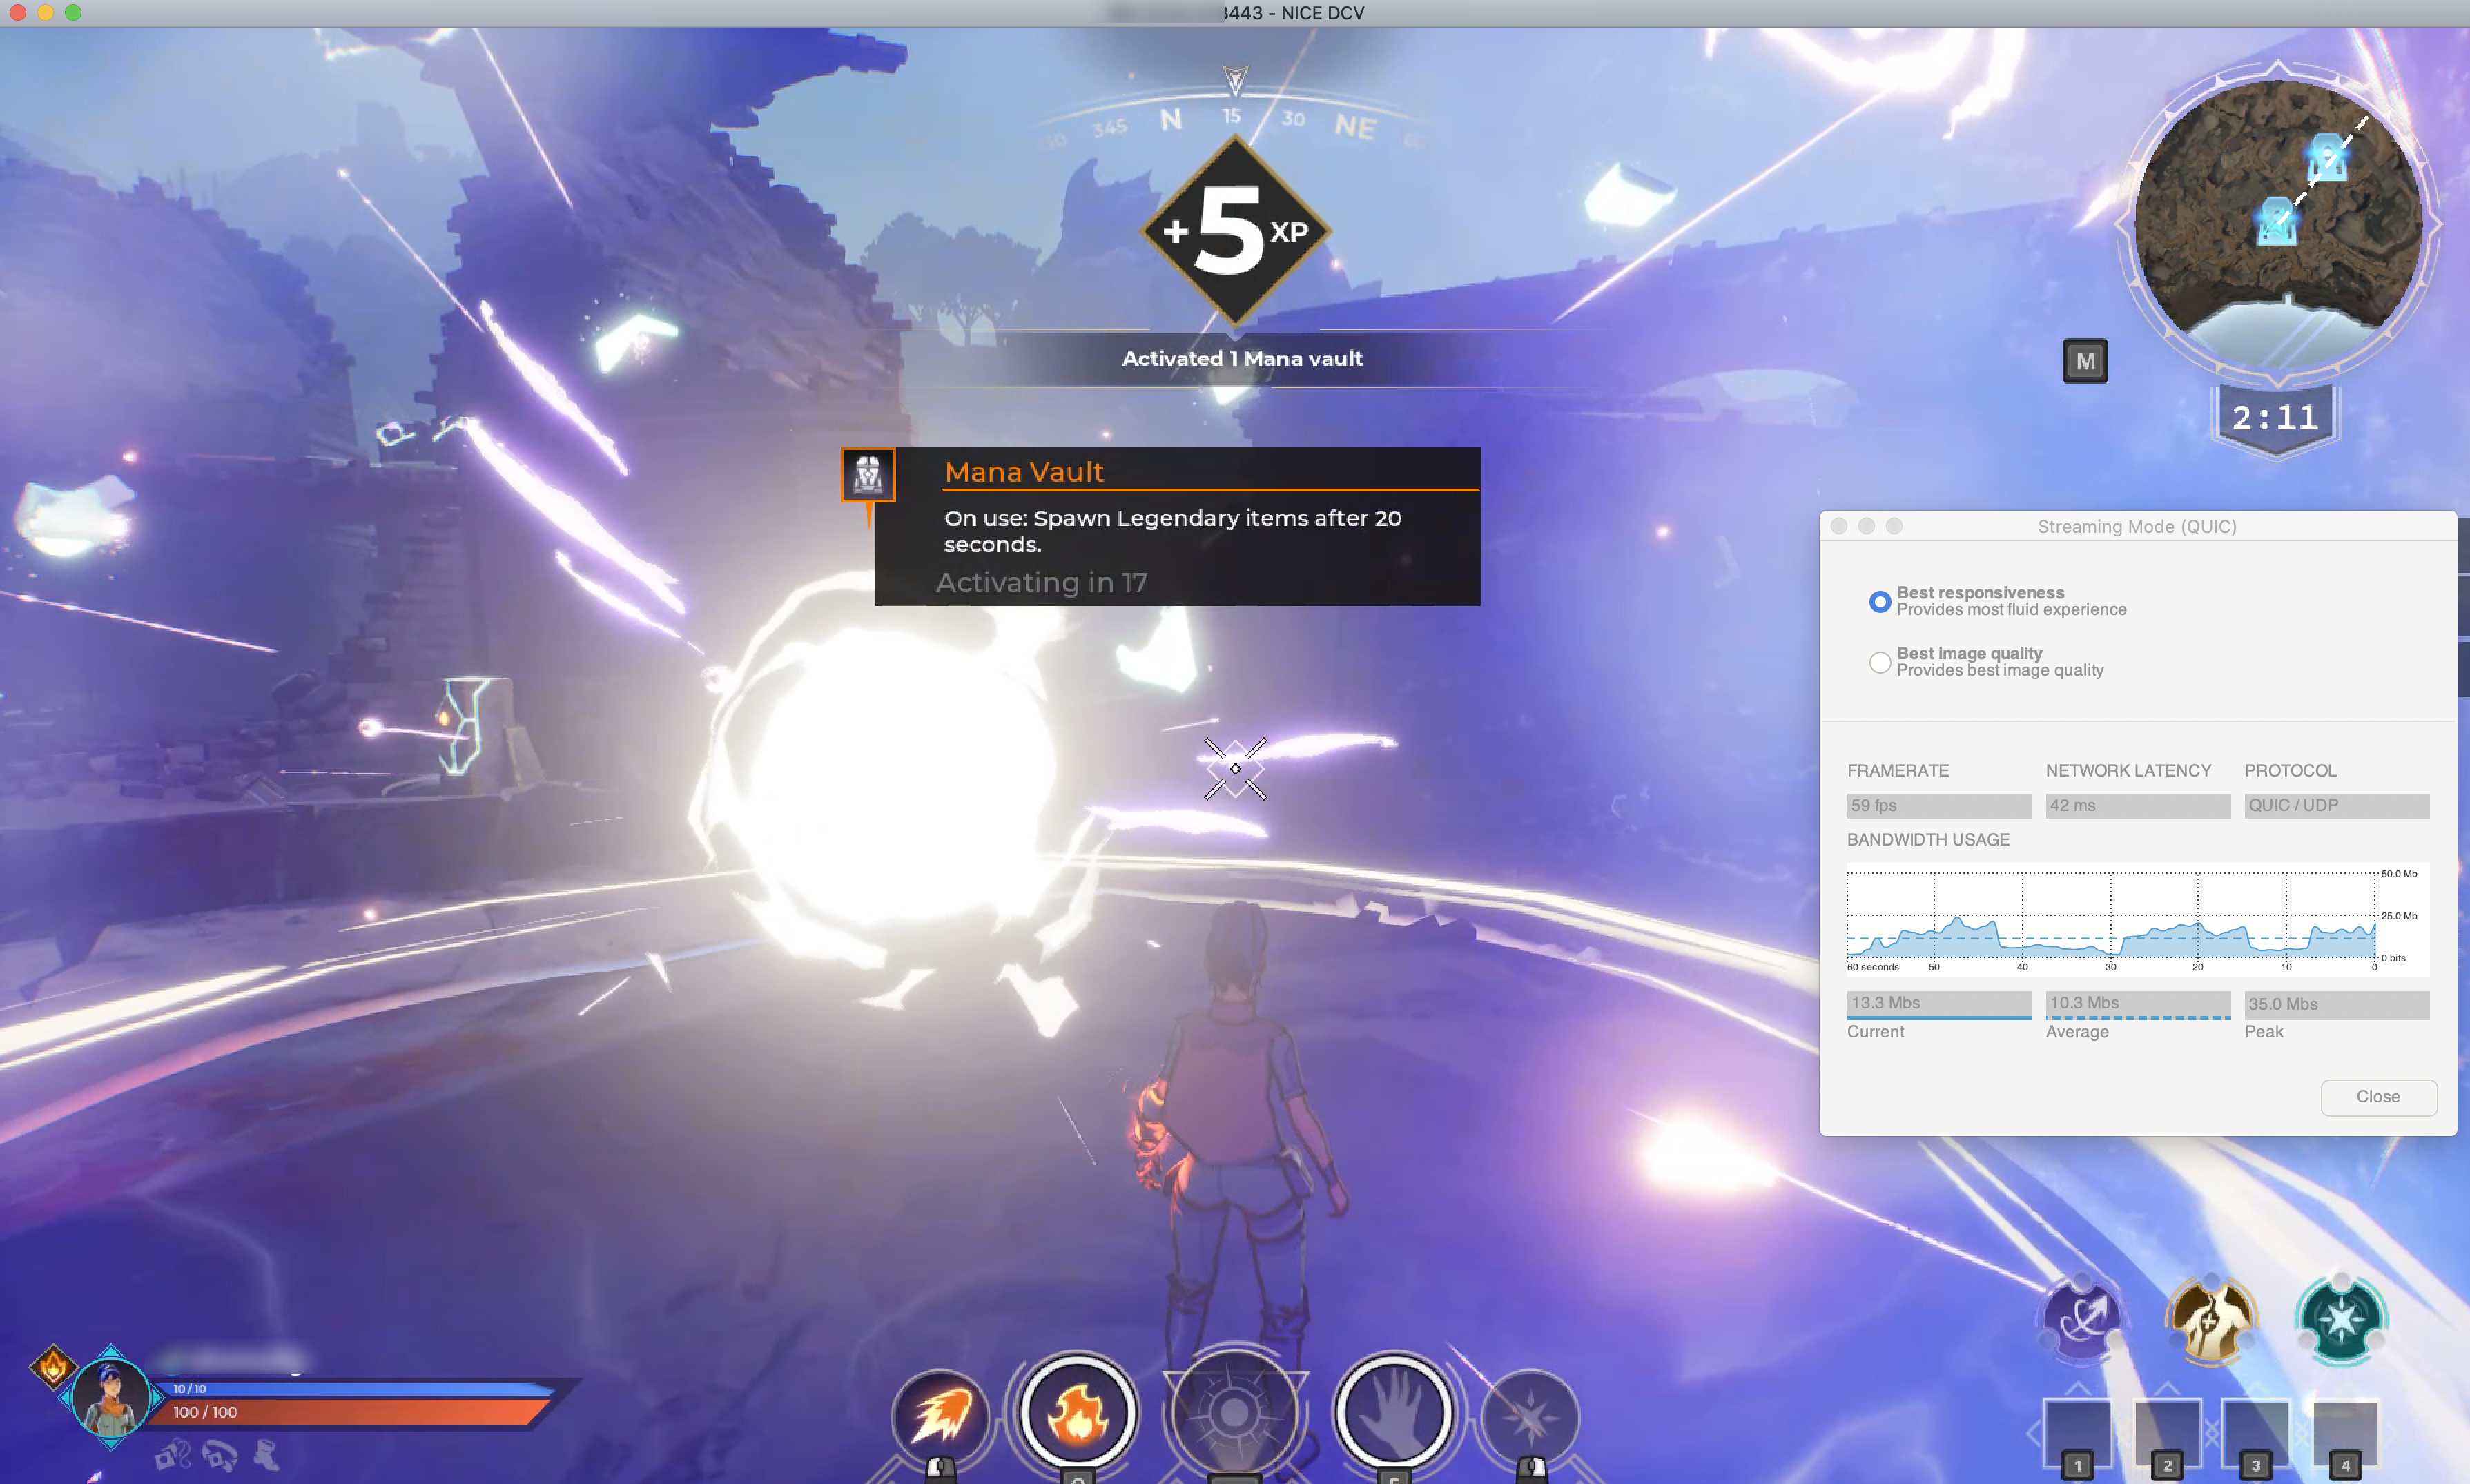
Once in Windows, check to ensure you are connected via QUIC UDP by going to Connection > Streaming Mode. This will load the Streaming Mode window and show display Streaming Mode (QUIC). You will also use this window to check your frame rate later on. Right now FPS will show as 0 as you are not doing anything on the machine, as NICE DCV understands when pixels are not changing.
For this example, we have downloaded the Free-to-play Battle Royale Game Spellbreak developed by AWS customer Proletariat and installed it into C: drive. Spellbreak is a fun, action-packed spell slinger set in a fantasy world. This screenshot shows Spellbreak which can run up to 60 FPS on an EC2 G4dn.4xlarge from a user located in Atlanta on a 2019 16-inch Mac Book Pro with a 3072 x 1920 display resolution, accessing an instance in us-east-1.
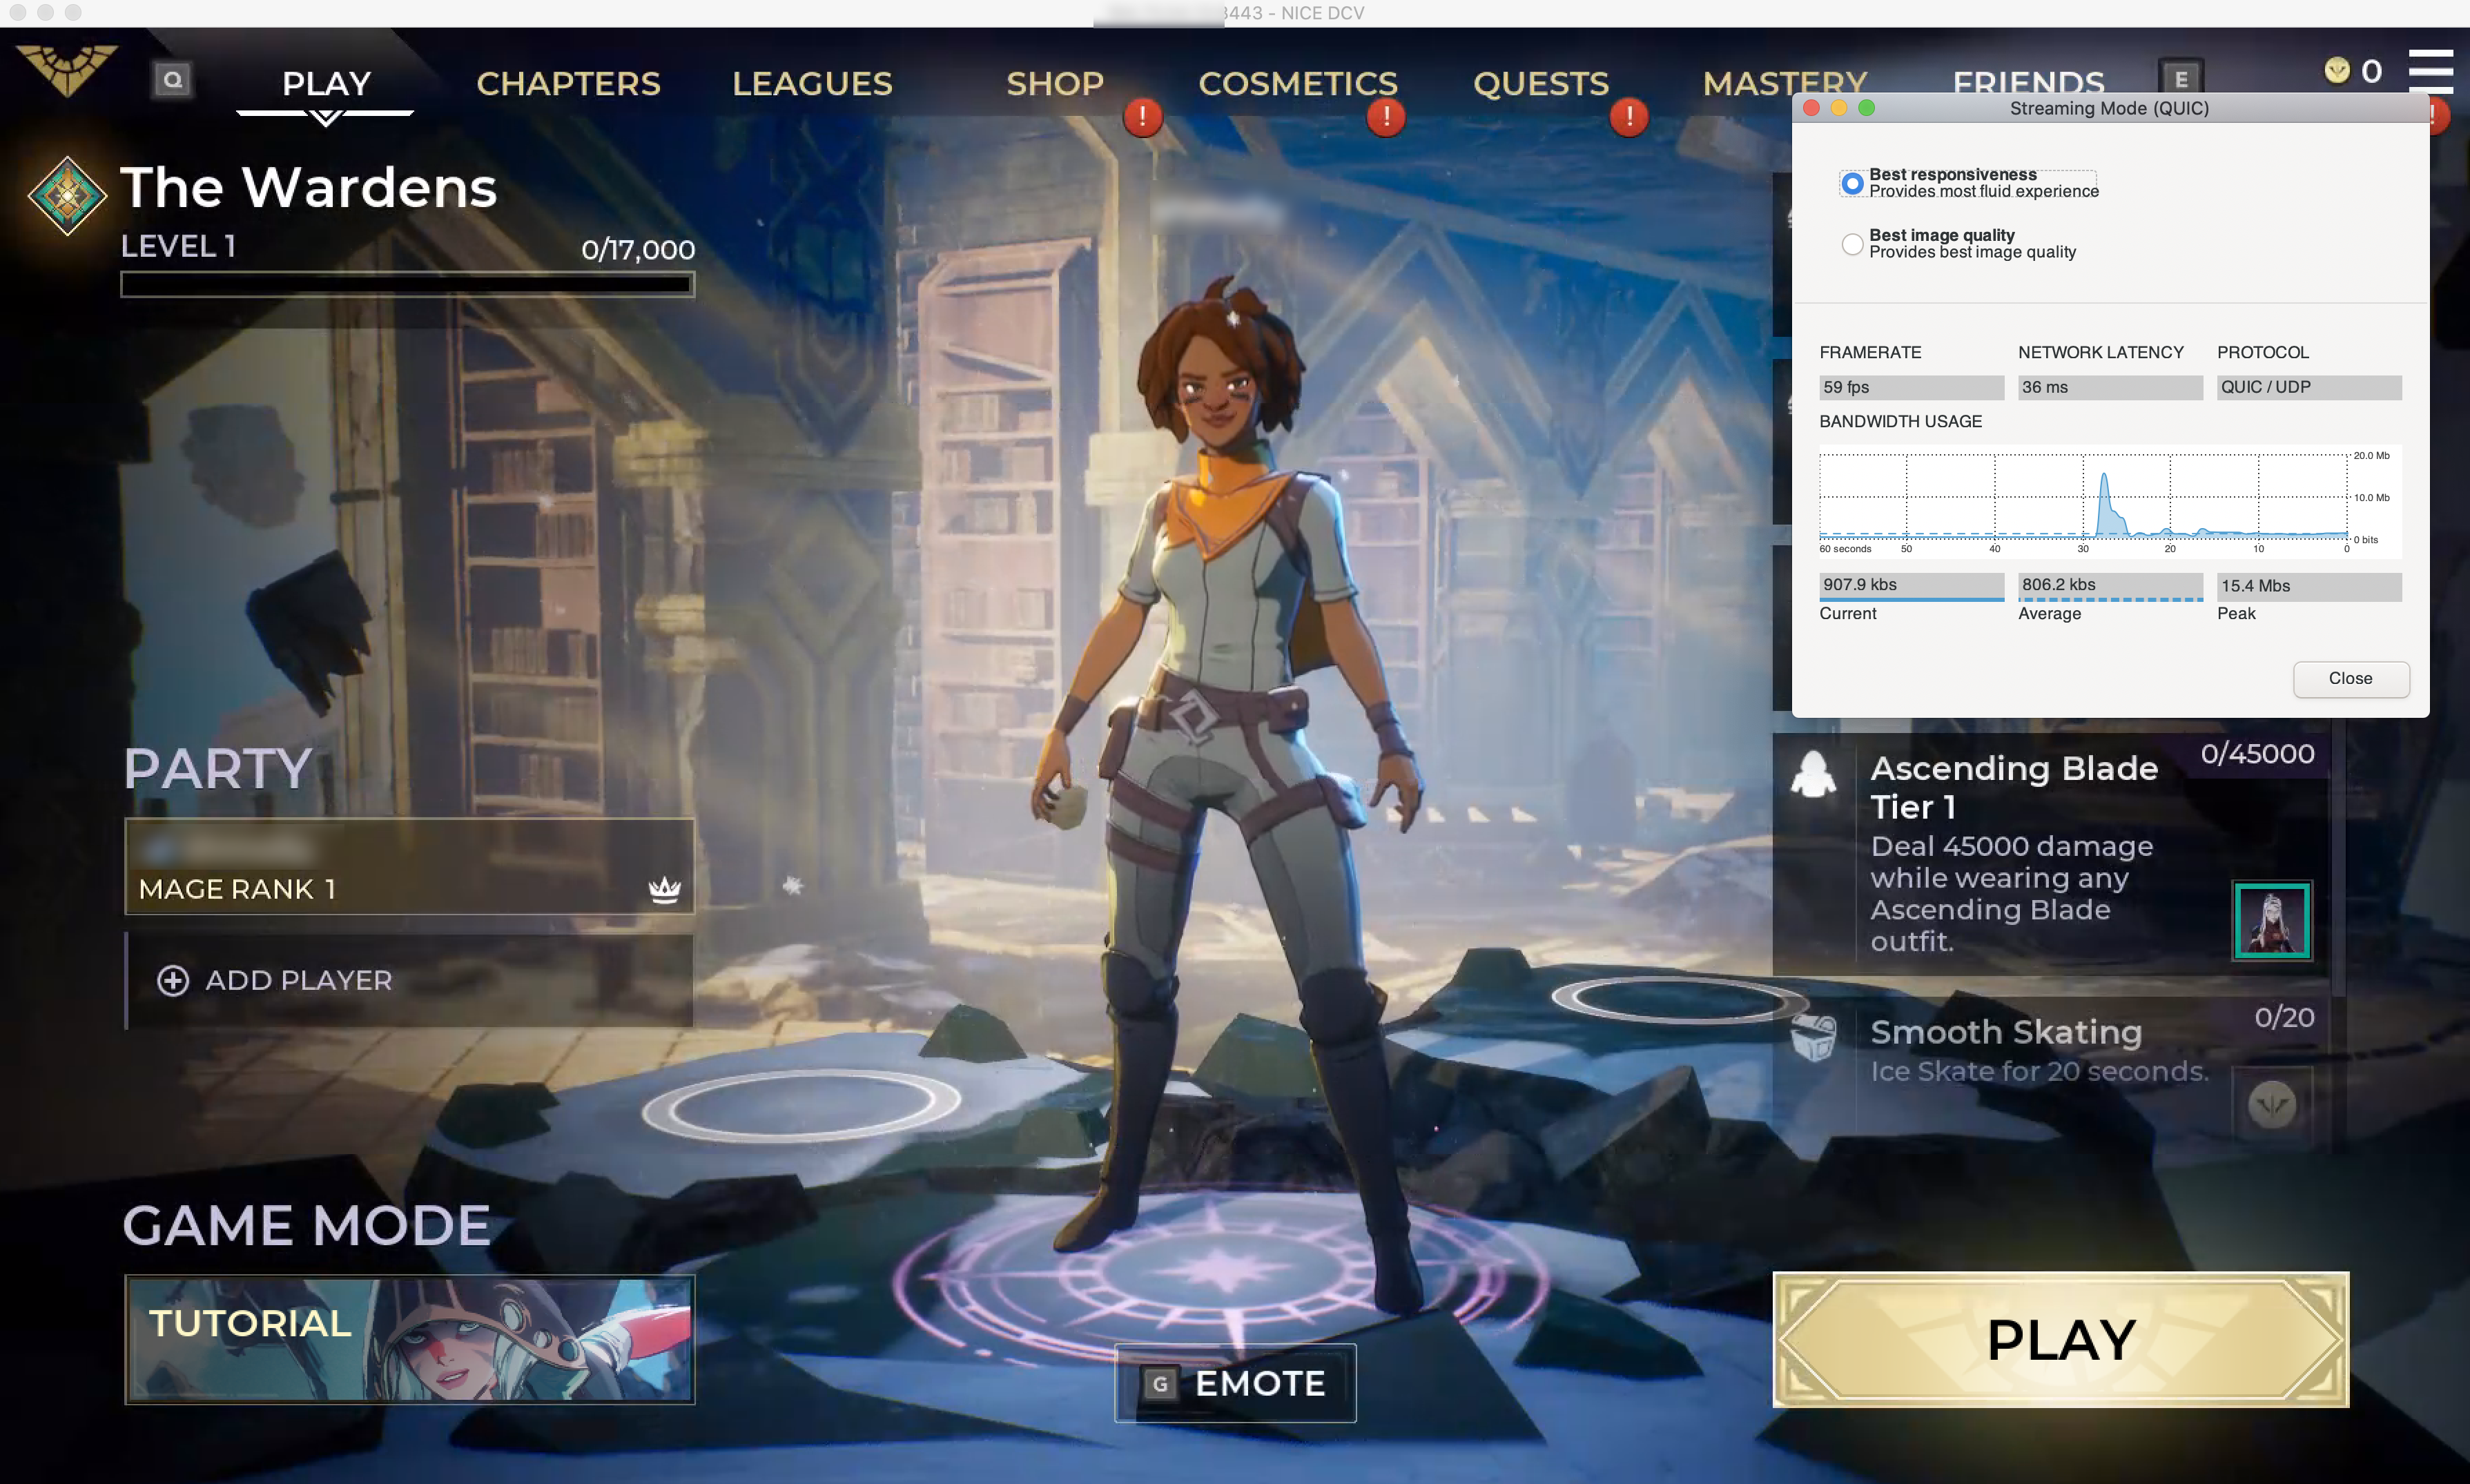

Notes about frame rate: Your frame rate will vary depending on your network latency, the variation in pixel density and activity on the screen, your monitor resolution and size, and intensity of the application as NICE DCV codec aims to deliver the best responsiveness possible and balance these variables against bandwidth.
If you are new to NICE DCV, you may find that to support some games and engines you need to enable Relative Mouse Position for the camera. This can be done by going to Connection > Relative Mouse Position or pressing Shift + Command + F8 on a Mac.
Final thoughts
The blog aims to encourage exploration of streaming use cases for games including remote workstations, as well as end-user games testing for QA, and press demos using NICE DCV over QUIC UDP. Once you have installed and tested your software you can bake an AMI to scale your solution.
If you need fleets of workstations, take a look at Amazon Nimble Studio, which empowers creative studios to produce VFX, animation, and interactive content, as well as Amazon AppStream 2.0, a fully managed non-persistent application and desktop streaming service. Both support integrations with Amazon FSx for Windows File Server for persistent scalable file storage. Both Amazon Nimble Studio and Amazon AppStream 2.0 are built on top of the NICE DCV codec and decrease the management needed to support workstations at scale. Developers should also reference the following engine agnostic architectures for remote workstations and build farms when looking to build fleet solutions. To find the right workstation solution for large-scale enterprise fleets reach out to your AWS account team.
While many are still using TCP connections today for streaming use cases, QUIC UDP’s performance implications show the direction of streaming. As 3D development, games, and 3D applications consolidate into immersive experiences that extend beyond local PCs, low-latency delivery over UDP for streaming is a critical foundation to the future of applications in immersive environments, such as streamed games inside of VR or XR headsets where storage and compute is restricted to what the headset can hold. Check out the NICE DCV for Windows (g4dn with NVIDIA gaming driver) AMI today and watch this space.