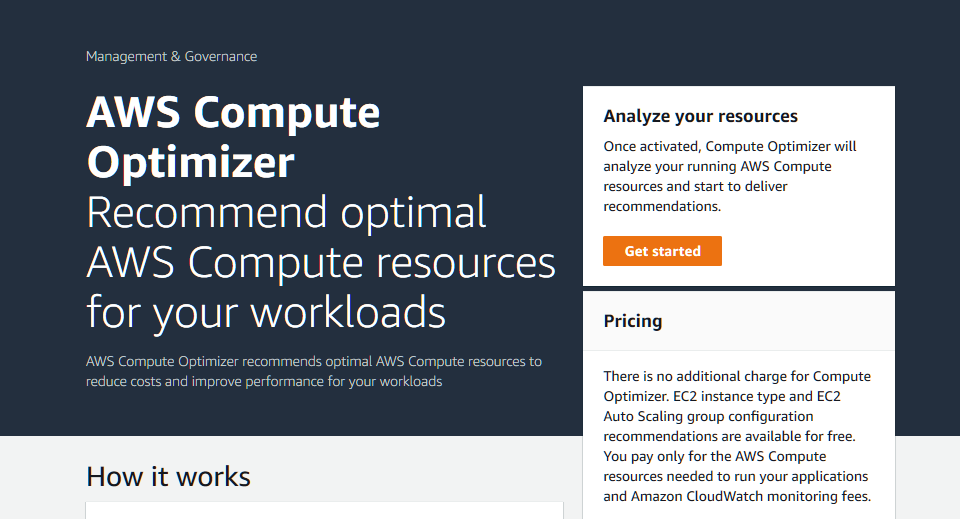
Compute Optimizer delivers intuitive and actionable recommendations to help you choose the optimal AWS resources for your workloads.
Choose Compute Optimizer in the AWS Management Console
Sign in to the AWS Management Console and click on [Compute Optimizer]. Click on “Get started.”
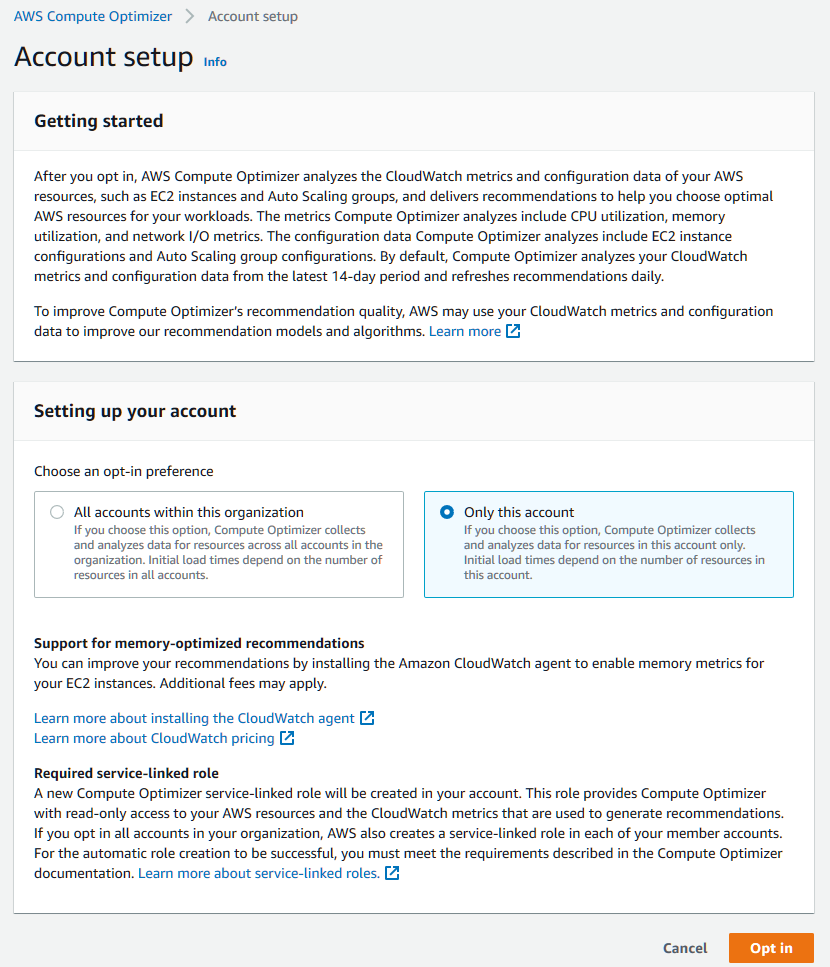
Opt in for Compute Optimizer
On the account setup page, review the default data settings and click “opt in.” Once you opt in, a service-linked role will be created automatically in your account.
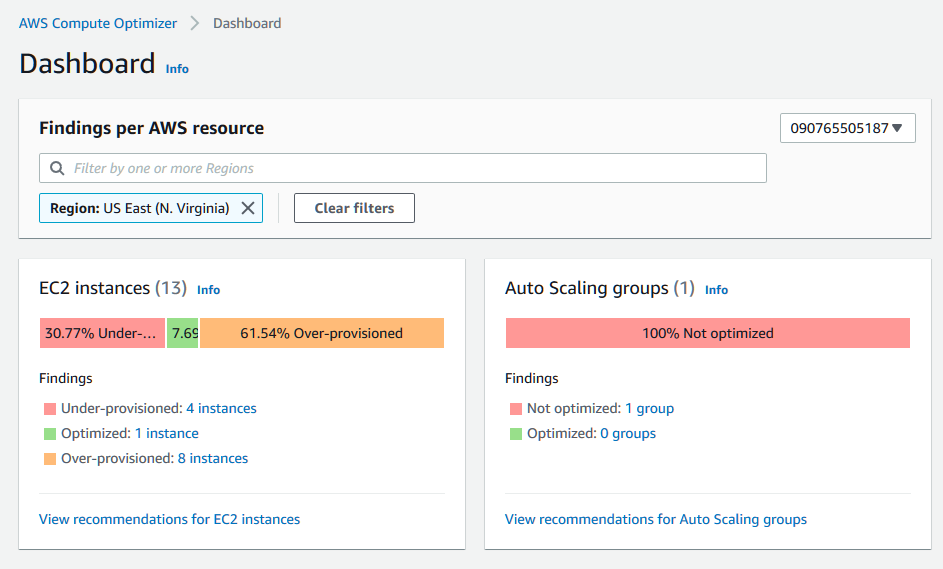
Automatically generate recommendations
After you opt in, Compute Optimizer starts to scan your AWS infrastructure and generates recommendations. It may take up to 12 hours for Compute Optimizer to deliver recommendations for all supported AWS resources.
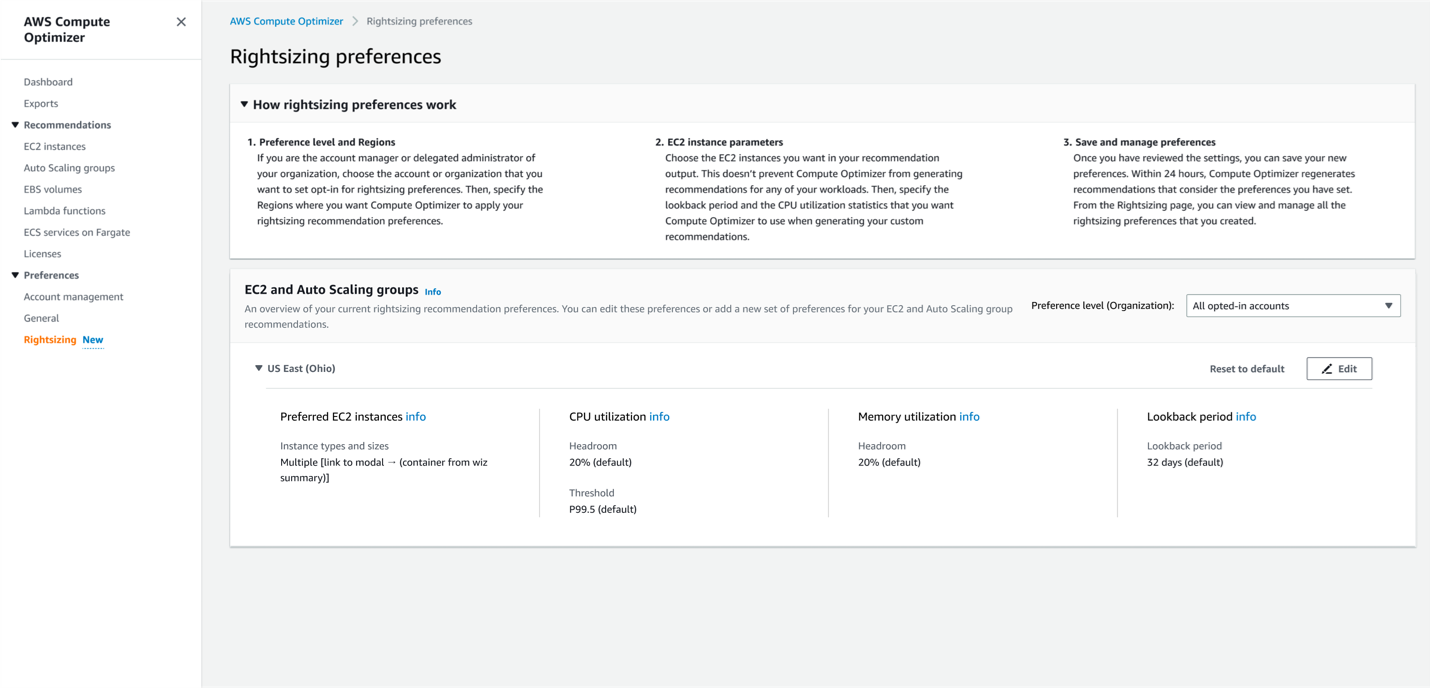
Define your recommendation preferences
Click on 'General' or 'Rightsizing' under Preferences on the left navigation bar to define and enable recommendation preferences, such as External Metrics Ingestion or Rightsizing recommendation preferences, based on your workloads' requirements.
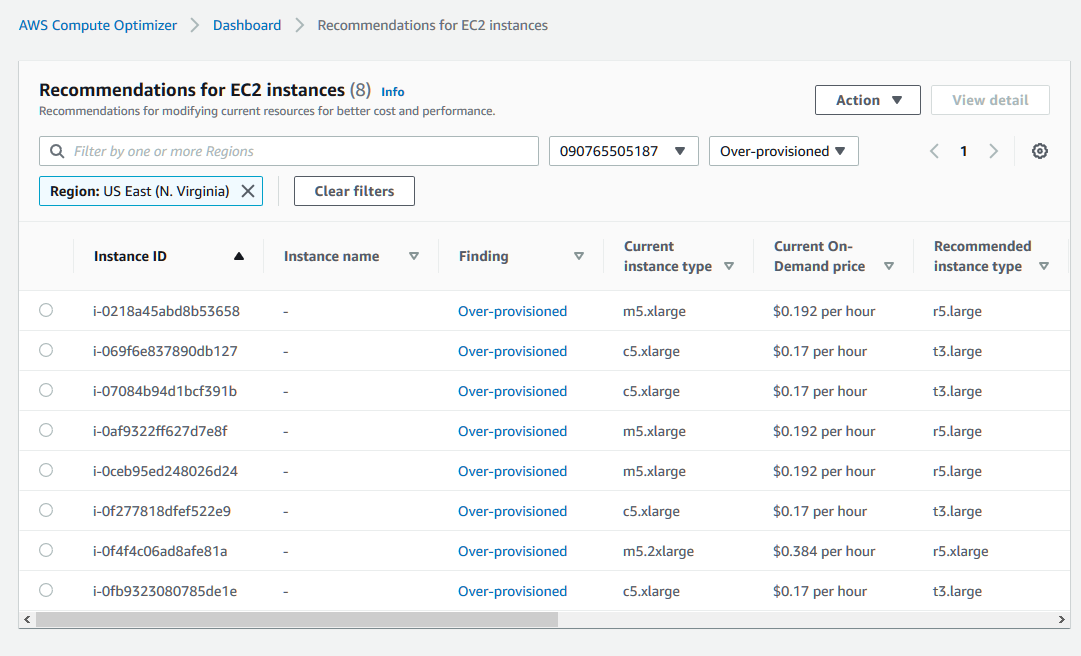
Review recommendations
Click on “EC2 instances,” “Auto Scaling groups,” “EBS volumes,” “ECS services on Fargate ,” or “Lambda functions” on the left side to see all your Amazon EC2 instance, Amazon EC2 Auto Scaling group, Amazon EBS volume, Amazon ECS services on AWS Fargate, and Lambda function recommendations.
Visualize a what-if scenario
Click “view detail” to visualize a what-if scenario. This helps you understand how the recommended instance would have performed on the recommended instance type.
.75746ac2b5c8aa5535ca4e911c816d2d4785755c.png)
Get started building with AWS Compute Optimizer in the AWS Management Console.