AWS Big Data Blog
Federated authentication to Amazon Redshift using AWS Single Sign-On
July 2023: This post was reviewed for accuracy.
Managing database users through identity federation allows you to manage authentication and authorization procedures centrally. Amazon Redshift, a fast, fully managed cloud data warehouse, provides browser-based plugins for JDBC/ODBC drivers, which helps you easily implement identity federation capabilities added with multi-factor authentication (MFA) to secure your data warehouse, and also helps automation and enforcement of data access policies across the organization.
AWS Single Sign-On (AWS SSO) provides tools to federate access to users to the AWS environment. AWS SSO integrates with AWS Organizations to manage access to all the AWS accounts under the organization. In our previous post, we explained how you can integrate the Amazon Redshift browser-based Security Assertion Markup Language (SAML) plugin to add SSO and MFA capability with your federation identity provider (IdP). We expand on that in this post to show how you can set up this federated authentication to connect users to Amazon Redshift through AWS SSO integrated with a supported identity source directory of your choice, such as the native AWS SSO identity store, AWS managed or self-managed or on-premises Microsoft Active Directory (AD), or an external IdP such as Okta, Azure AD, or Ping.
Solution overview
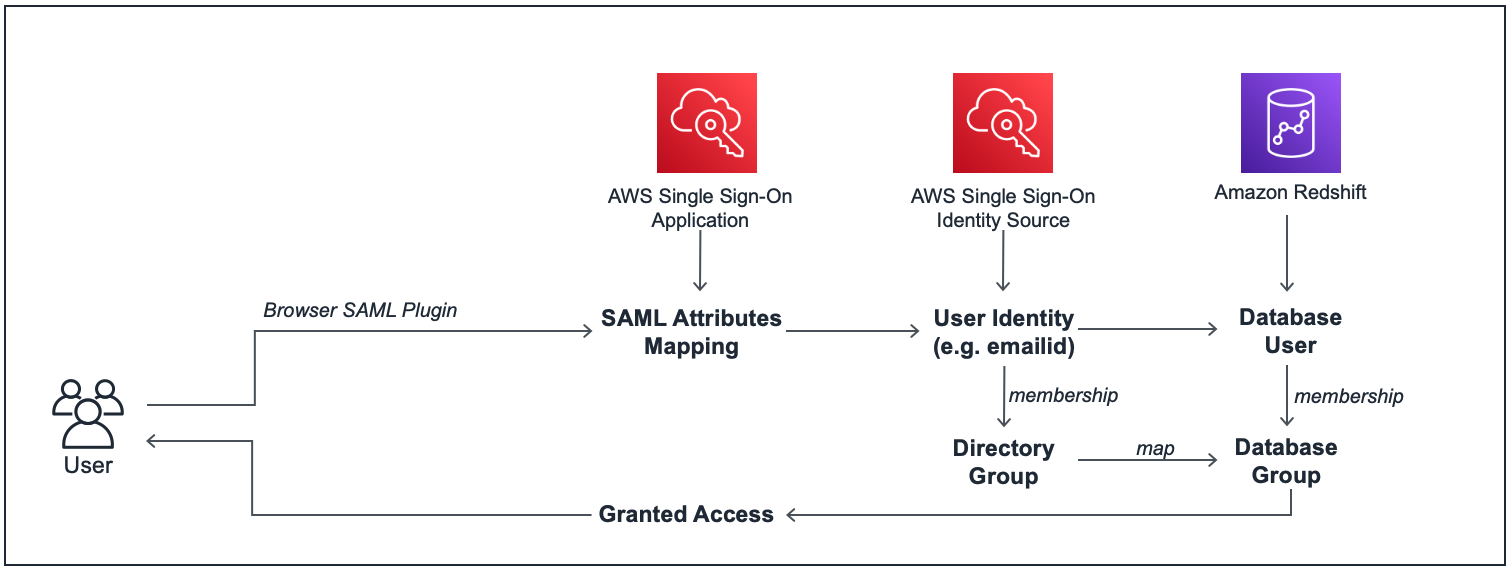
When you connect to Amazon Redshift using a JDBC/ODBC client, you can use the Amazon Redshift browser SAML plugin to launch a custom AWS SSO SAML application, which provides the SAML attributes required to connect to Amazon Redshift, after authenticating the user identity against the identity source directory that you have integrated with AWS SSO. The SAML application uses the user’s identity source credentials to get their user and group attributes, and grants the appropriate Amazon Redshift database access privileges to the user. The following diagram illustrates this workflow.
The following are the high-level steps for this setup:
- Enable AWS SSO (linked with your preferred identity source directory) and set up custom SAML applications in AWS SSO with the appropriate user or group association and attribute mappings.
- Set up a SAML IdP for AWS SSO and link it to an AWS Identity and Access Management (IAM) role with appropriate permissions to access Amazon Redshift.
- Set up the Amazon Redshift cluster and database groups that correspond to your AWS SSO directory groups.
- Configure the JDBC/ODBC client to authenticate with your AWS SSO SAML application and obtain federated IAM credentials to access the Amazon Redshift cluster.
Prerequisites
You need the following prerequisites to set up this solution:
- An AWS account with AWS SSO enabled, and linked to your identity source directory.
- An Amazon Redshift cluster.
- The Amazon Redshift JDBC driver (version 2.0+) downloaded and installed on your workstation.
- A SQL client of your preference. We use the SQL Workbench/J client in this post.
Use case
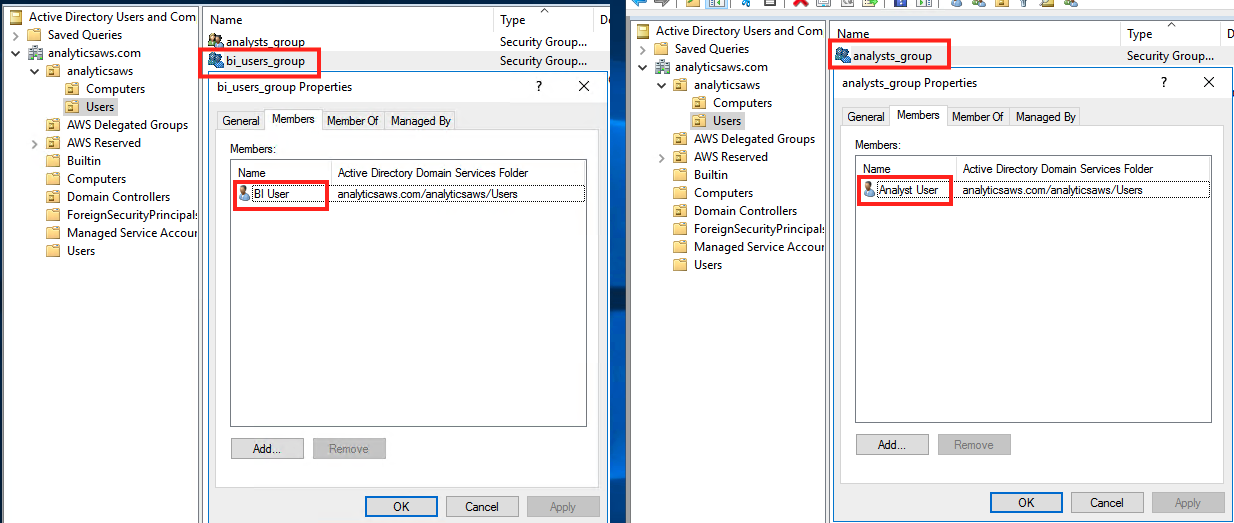
In this example use case, we use AWS SSO integrated with AWS Managed Microsoft AD as the identity source to connect to an Amazon Redshift cluster as users from two different AD groups: BI users and analysts. We create two SAML applications in AWS SSO to map these two groups with their respective users and then connect to Amazon Redshift using SQL Workbench/J client via AWS SSO using their Microsoft AD user credentials.
As a prerequisite step, we have already set up an AWS Managed Microsoft AD directory with sample directory groups and user mappings, and attached it to AWS SSO as the identity source.
The following screenshots show our AD groups and user mappings.
The following screenshot shows our AWS SSO identity source mapping.

Configure AWS SSO
As mentioned in the prerequisites section, you need to enable AWS SSO in your account, and map it with a supported identity source. If AWS SSO isn’t configured in your account, follow the steps in Getting Started.
In this step, you create two custom SAML applications in AWS SSO.
- On the AWS SSO console, choose Applications in the navigation pane.
- Choose Add a new application.

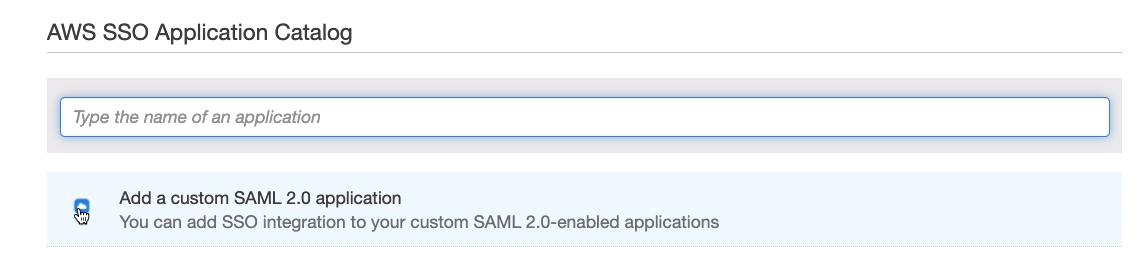
- Choose Add a custom SAML 2.0 application.
- For Display name, enter an appropriate name for the SAML application (for this post, because we create two applications, we first enter
Redshift-SAML-BI-User).

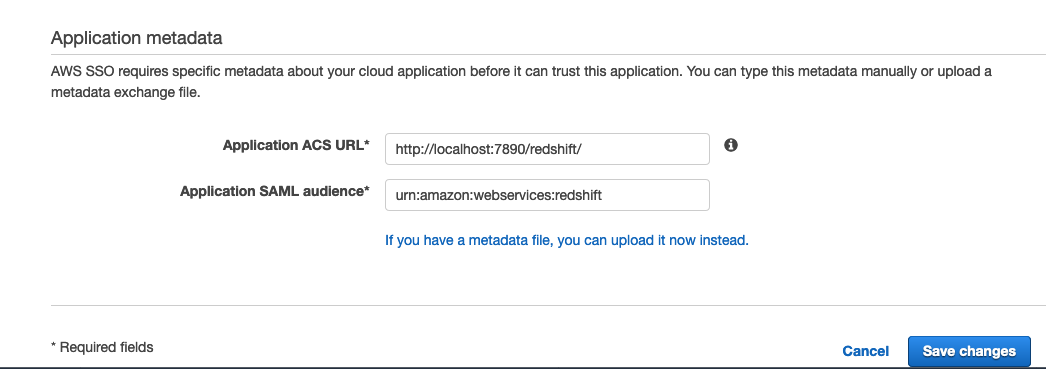
- In the Application metadata section, choose the option to manually enter the metadata values.

- For Application ACS URL, enter
http://localhost:7890/redshift/. - For Application SAML audience, enter
urn:amazon:webservices:redshift.
- On the Configuration tab, choose Download to download the AWS SSO SAML metadata file.
We use this file later to create the IdP.

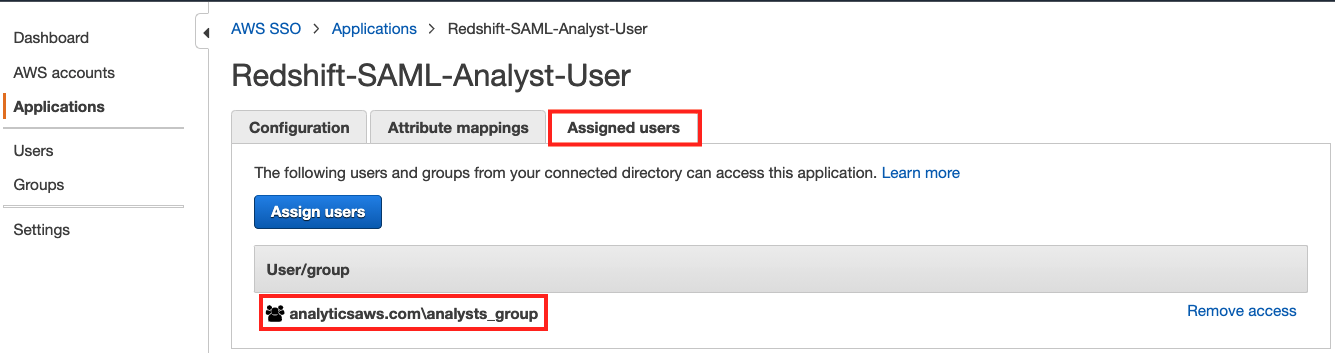
- On the Assigned users tab, choose Assign users to add
bi_users_groupto this application. - On the Attribute mappings tab, add the custom attribute mappings from the following table.
| User attribute in the application | Maps to this string value or user attribute in AWS SSO | Description |
Subject |
${user:email} |
User identity |
https://aws.amazon.com/SAML/Attributes/RoleSessionName |
${user:email} |
Identification for the user session, which in most cases is the email_id of the user |
https://redshift.amazon.com/SAML/Attributes/AutoCreate |
True |
If this parameter is set, new users authenticated by the IdP are automatically created in Amazon Redshift |
https://aws.amazon.com/SAML/Attributes/Role |
arn:aws:iam::<yourAWSAccountID>:role/redshift-federation-role,arn:aws:iam:: <yourAWSAccountID>:saml-provider/redshift-federation-saml-provider |
aws_idp_iam_role_arn, aws_identity_provider_arn |
https://redshift.amazon.com/SAML/Attributes/DbUser |
${user:email} |
Identification for the user session, which in most cases is the email_id of the user |
https://redshift.amazon.com/SAML/Attributes/DbGroups |
bi_users_group |
Amazon Redshift database group names for the user, which in most cases is the same as the directory groups the user belongs to |

The IAM role and IdP names and ARN strings entered for the https://aws.amazon.com/SAML/Attributes/Role attribute mapping must match the names given while creating those IAM resources for the BI user group during the IAM role setup in the next section.
- Choose Dashboard in the navigation pane and choose the User portal URL link to launch the user portal’s login page in a new browser window.

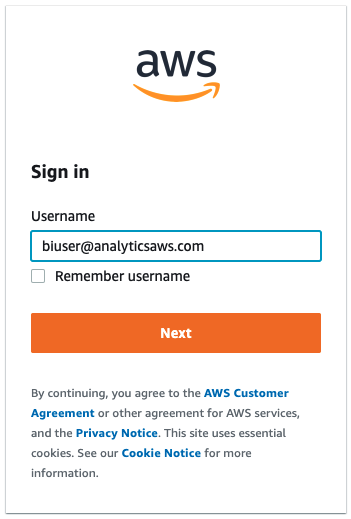
- Log in to the AWS SSO user portal using your Microsoft AD user credentials for the BI user.

After logging in, you can see the new SAML application we created.
- Choose the application (right-click) and copy the link address.
We need this application login URL in a later step to connect to Amazon Redshift using AWS SSO federation.

- Similar to the preceding steps, create another SAML application called
Redshift-SAML-Analyst-Userand assign the analyst group to this application.
- On the application’s Attribute mappings tab, add all the attribute mappings similar to the previous application, but with different mapping values for the
RoleandDbGroupsattributes:- The
DbGroupsparameter should be mapped toanalysts_group. - The Role parameter value entered should match the names of IAM resources created for the analyst user group in the next section.

- The
- Log in to the AWS SSO user portal using your Microsoft AD user credentials for the analyst user.

- Copy the application link address, which you need in a later step to connect to Amazon Redshift using AWS SSO federation.


Set up IAM roles and SAML IdPs
In this step, you set up two SAML IdPs and two IAM roles with appropriate permissions for the two AD directory groups to access your Amazon Redshift cluster. You need the SAML Metadata XML files downloaded from your AWS SSO SAML applications from the previous section. As outlined in our earlier post, you may follow the step-by-step process to add the IdPs and IAM roles manually, or use the following AWS CloudFormation template.

Next, you need to confirm or replace the role ARN and the IdP ARN values in the two SAML applications’ attribute mappings. Refer to the following screenshot for the location of the two ARN values on the IAM console.

Set up an Amazon Redshift cluster
If you haven’t set up an Amazon Redshift cluster yet, see Getting started with Amazon Redshift for a step-by-step guide to create a new cluster in your AWS account.
If you already have an Amazon Redshift cluster, note the admin user credentials for that cluster and connect to that cluster using a SQL client like SQL Workbench/J and the latest Amazon Redshift JDBC driver.

After logging in to your Amazon Redshift cluster as an admin user, you can set up database objects and appropriate access permissions for them. In the following code, we set up two schemas for analysts and BI users, and then grant access on them to the relevant groups:
Connect to Amazon Redshift with AWS SSO federation
In this step, you connect to your Amazon Redshift cluster from your SQL Workbench/J client using AWS SSO federation.
- Create a new connection in SQL Workbench/J and choose Amazon Redshift as the driver.
- Enter the following code in the URL section of your connection properties (provide your Amazon Redshift cluster endpoint):
- Choose Extended Properties and add the following three properties:
- login_url – Enter the BI user group’s SAML application’s login URL you copied in an earlier step.
- plugin_name – Enter
com.amazon.redshift.plugin.BrowserSamlCredentialsProvider. - idp_response_timeout – Enter
60.

- Choose OK, and connect to your cluster.
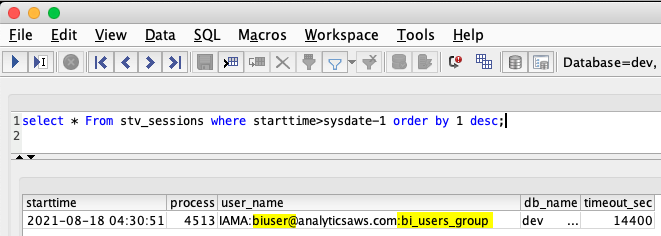
This launches your AWS SSO SAML application’s sign-in page in a browser window. After you successfully authenticate using the BI user’s AD user credentials in the browser, the SQL client connects you to Amazon Redshift as the BI user under the bi_users_group database group. You can verify the user’s database session and group association by running the following SQL:
- Similar to the BI user, you can create a new database connection to test an analyst user login. Instead of adding the extended properties in SQL Workbench, you can also use an initialization file to add the JDBC connection properties. For that, create a file
rsjdbc.inion your file system with the following contents (provide the analyst group’s SAML application’s login URL you copied earlier):
- Enter the following in the URL section of your connection properties (provide your cluster endpoint and file system path for the
rsjdbc.inifile you created in the previous step):
Your connection profile should look like the following screenshot.

- Choose OK to connect.
After you authenticate using the analyst user’s AD user credentials in the browser, you should be logged in to Amazon Redshift as the analyst user mapped to the analysts_group, as shown in the following screenshot.

Conclusion
In this post, we showed how you can use AWS SSO with AWS Managed Microsoft AD to federate access to Amazon Redshift using identity federation. The same setup instructions can also work with any other supported identity source directory of your choice, such as the native AWS SSO identity store, self-managed or on-premises Active Directory, or an external identity provider (IdP) such as Okta, Azure AD, and Ping.
About the Authors
 Manash Deb is a Software Development Engineer in AWS Redshift team. He has worked on building end-to-end data-driven solutions in different database and data warehousing technologies for over 15 years. He loves to learn new technologies and solving, automating, and simplifying customer problems with easy-to-use cloud data solutions on AWS.
 Manish Vazirani is an Analytics Specialist Solutions Architect at Amazon Web Services.
 Rajesh Mohan is an SDE-II at Amazon Studios where he engineers solutions to build a media supply chain to integrate content vendors with Prime Video. In his free time, he enjoys wandering the streets of New York City, trekking the mountains of California and binging on food videos while chomping away on delicious food from around the world.