AWS Big Data Blog
Query your Amazon Redshift cluster with the new Query Editor
Data warehousing is a critical component for analyzing and extracting actionable insights from your data. Amazon Redshift is a fast, scalable data warehouse that makes it cost-effective to analyze all of your data across your data warehouse and data lake.
The Amazon Redshift console recently launched the Query Editor. The Query Editor is an in-browser interface for running SQL queries on Amazon Redshift clusters directly from the AWS Management Console. Using the Query Editor is the most efficient way to run queries on databases hosted by your Amazon Redshift cluster.
After creating your cluster, you can use the Query Editor immediately to run queries on the Amazon Redshift console. It’s a great alternative to connecting to your database with external JDBC/ODBC clients.
In this post, we show how you can run SQL queries for loading data in clusters and monitoring cluster performance directly from the console.
Using the Query Editor instead of your SQL IDE or tool
The Query Editor provides an in-browser interface for running SQL queries on Amazon Redshift clusters. For queries that are run on compute nodes, you can then view the query results and query execution plan next to your queries.
The ability to visualize queries and results in a convenient user interface lets you accomplish many tasks, both as a database administrator and a database developer. The visual Query Editor helps you do the following:
- Build complex queries.
- Edit and run queries.
- Create and edit data.
- View and export results.
- Generate EXPLAIN plans on your queries.
With the Query Editor, you can also have multiple SQL tabs open at the same time. Colored syntax, query autocomplete, and single-step query formatting are all an added bonus!
Database administrators typically maintain a repository of commonly used SQL statements that they run regularly. If you have this written in a notepad somewhere, the saved queries feature is for you. This feature lets you save and reuse your commonly run SQL statements in one step. This makes it efficient for you to review, rerun, and modify previously run SQL statements. The Query Editor also has an exporter so that you can export the query results into a CSV format.
The Query Editor lets you perform common tasks, such as creating a schema and table on the cluster and loading data in tables. These common tasks are now possible with a few simple SQL statements that you run directly on the console. You can also do day-to-day administrative tasks from the console. These tasks can include finding long-running queries on the cluster, checking for potential deadlocks with long-running updates on a cluster, and checking for how much space is available in the cluster.
The Query Editor is available in 16 AWS Regions. It’s available on the Amazon Redshift console at no extra cost to you. Standard Amazon Redshift rates apply for your cluster usage and for Amazon Redshift Spectrum. To learn more, see Amazon Redshift pricing.
Let’s get started with the Query Editor
The following sections contain the steps for setting up your Amazon Redshift cluster with a sample dataset from an Amazon S3 bucket using the Query Editor directly from the console. For new users, this is an especially handy alternative to setting up JDBC/ODBC clients to establish a connection to your cluster. If you already have a cluster, you can complete these steps in 10 minutes or less.
In the following example, you use the Query Editor to perform these tasks:
- Load a sample dataset in your cluster.
- Run SQL queries on a sample dataset and view results and execution details.
- Run administration queries on system tables and save frequently used queries.
- Run SQL queries to join an internal and external table.
Use the following steps to set up your cluster for querying:
- On the Amazon Redshift console, create a cluster.For detailed steps, see the procedure described in Launch a Sample Amazon Redshift Cluster in the Amazon Redshift Getting Started Guide. Use any of the following currently supported node types: dc1.8xlarge, dc2.large, dc2.8xlarge, or ds2.8xlarge.For this post, we used the Quick launch cluster button on the Amazon Redshift dashboard to create a single-node, dc2.large cluster called demo-cluster in the us-east-1 Region. As you go through the tutorial, replace this cluster name with the name of the cluster that you launched, and the Region where you launched the cluster.

- Add Query Editor-related permissions to the AWS account.To access the Query Editor feature on the console, you need permissions. For detailed steps, see Enabling Access to the Query Editor in the Amazon Redshift Cluster Management Guide.
- To load and run queries on a sample dataset (including permissions to load data from S3 or to use the AWS Glue or Amazon Athena Data Catalogs), follow these steps:a. To load sample data from Amazon S3 using the COPY command, you must provide authentication for your cluster to access Amazon S3 on your behalf. Sample data for this procedure is provided in an Amazon S3 bucket that is owned by Amazon Redshift. The bucket permissions are configured to allow all authenticated AWS users read access to the sample data files.To perform this step:
• Attach the AmazonS3ReadOnlyAccess policy to the IAM role. The AmazonS3ReadOnlyAccess policy grants your cluster read-only access to all Amazon S3 buckets.
b. In step 2 of the example, you run the COPY command to load the sample data. The COPY command includes a placeholder for the IAM role Amazon Resource Name (ARN). To load sample data, add the role ARN in the COPY The following is a sample COPY command:
After you complete these steps, your Amazon Redshift cluster is ready. The following sections describe three steps that demonstrate what you can do with the Query Editor:
- Use the Query Editor for loading data.
- Perform several day-to-day administration tasks.
- Run a query on data stored in the Amazon Redshift cluster and Amazon S3 data lake, with no need for loading or other data preparation.
Step 1: Connect to your cluster in the Query Editor
To connect to your cluster:
- Using the left navigation pane on the Amazon Redshift console, navigate to the Query Editor.
- In the Credentials dialog box, in the Cluster drop-down list, choose the cluster name (demo-cluster). Choose the database and the database user for this cluster.
- If you created the cluster by using the service-provided default values, choose dev as your Database selection, and enter awsuser in the Database user box.
- Enter the password for the cluster. Commonly, Amazon Redshift database users log on by providing a database user name and password. As an alternative, if you don’t remember your password, you can retrieve it in an encrypted format by choosing Create a temporary password, as shown in the following example. For more information, see Using IAM Authentication to Generate Database User Credentials.

This connects to the cluster if you have Query Editor-related permissions for the AWS account. For more information, see the step to add the Query Editor-related permissions to the AWS account in the previous section.
Step 2: Prepare the cluster with a sample dataset
To prepare the cluster with a sample dataset:
- Run the following SQL in the Query Editor. This creates the schema myinternalschema in the Amazon Redshift cluster demo-cluster.

- Run the following SQL statement in the Query Editor to create a table for schema myinternalschema.
- Run the following SQL statement with the COPY command to copy the sample dataset from Amazon S3 to your Amazon Redshift cluster, demo-cluster, in the us-east-1 The Amazon S3 path for the sample dataset is s3://aws-redshift-spectrum-sample-data-us-east-1/spectrum/event/allevents_pipe.txt.
Before choosing Run Query, remember to replace the placeholder in the example with the ARN for the IAM role that is associated with this AWS account. If your cluster is in another AWS Region, replace the Region in the region parameter and the Amazon S3 path, as shown in the following SQL command:
- To ensure access to the public dataset in Amazon S3, make sure that this AWS account has the correct permissions to access Amazon S3, AWS Glue, and Athena. For more information, see the step to load and run queries on the sample dataset (Amazon S3 and AWS Glue/Amazon Athena Data Catalog permissions) earlier in this post.
- To verify the data in the previously created table in the Query Editor, browse through the tables in the schema viewer on the left. Choose the preview icon next to the table name to see the first 10 records from the event table. Choosing this option runs the following query for a preview of the table, displaying 10 rows from the table:
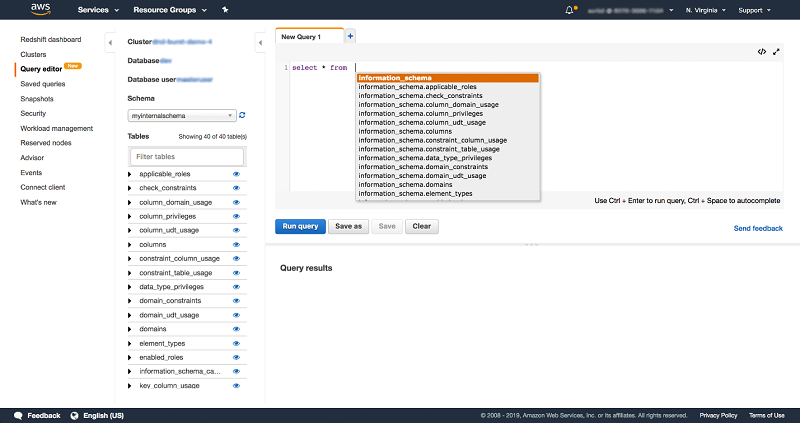
You can also enter your own SQL statements. Use Ctrl + Space to autocomplete queries in the Query Editor, to verify the data in the table that you created.
Step 3: Helpful cluster management queries
You are all set to try Amazon Redshift! In day-to-day cluster management and monitoring, you can run the following SQL queries in the Query Editor. These frequently used queries let you find and shut down long-running queries, uncover deadlock situations, and check for available disk space on your Amazon Redshift cluster. Save these queries and get convenient access to them by choosing Saved queries in the left navigation on the console, as shown in the following example:

Kill malfunctioning or long-running queries on a cluster
If there is a malfunctioning query that must be shut down, locating the query can often be a multi-step process. Run the following SQL in the Query Editor to find all queries that are running on an Amazon Redshift cluster with a SQL statement:
After locating the malfunctioning queries from the query result set, use the cancel <pid> <msg> command to kill a query. Be sure to use the process ID—pid in the previous SQL—and not the query ID. You can supply an optional message that is returned to the issuer of the query and logged.
Monitor disk space being used on a cluster
One of the most frequently used console functions is monitoring the percentage of disk space used by a cluster. Queries fail if there is limited space in the cluster to create temp tables used while the query is running. Vacuums can also fail if the cluster does not have free space to store intermediate data in the cluster restore process. Monitoring this metric is important for planning ahead before the cluster gets full and you have to resize or add more clusters.
If you suspect that you are experiencing high or full disk usage with Amazon Redshift, run the following SQL in the Query Editor to find disk space available and see individual table sizes on the cluster:
From here, you can either drop the unnecessary tables or resize your cluster to have more capacity. For more information, see Resizing Clusters in Amazon Redshift.
Watch for deadlock situations with suspiciously long-running updates on the cluster
If a cluster has a suspiciously long-running update, it might be in a deadlocked transaction. The stv_locks table indicates any transactions that have locks, along with the process ID of the relevant sessions. This pid can be passed to pg_terminate_backend(pid) to kill the offending session.
Run a SQL statement in the Query Editor to inspect the locks:
To shut down the session, run select pg_terminate_backend(lock_owner_pid), using the value from stl_locks.
See the rows affected by the most recent vacuums of the cluster
By running a vacuum command on tables in the cluster, any free space because of delete and update operations is reclaimed. At the same time, the data of the table gets sorted. The result is a compact and sorted table, which improves the cluster performance.
Run the following SQL statement to see a count of rows that were deleted or resorted from the most recent vacuums from the svv_vacuum_summary table:
Debug connection issues for Amazon Redshift clusters
Joining stv_sessions and stl_connection_log tables returns a list of all sessions (all connects, authenticates, and disconnects on the cluster) and the respective remote host and port information.
To list all connections, run the following SQL statement in the Query Editor:
Use the saved queries feature to save these commonly used SQL statements in your account and run them in the Query Editor with one click.
Bonus step 4: Query with Amazon Redshift Spectrum
With Amazon Redshift Spectrum, you can query data in Amazon S3 without the need to first load it into Amazon Redshift. Amazon Redshift Spectrum queries employ massive parallelism to quickly process large datasets in S3, without ingesting that data into Amazon Redshift. Much of the processing occurs in the Amazon Redshift Spectrum layer. Multiple clusters can concurrently query the same dataset in Amazon S3 without needing to make copies of the data for each cluster.
To get set up with Amazon Redshift Spectrum, run the following SQL statements in the Query Editor for demo-cluster. If your cluster is in another AWS Region, be sure to replace the Region in the region parameter and the Amazon S3 path in the following SQL statement.
If you’re using the AWS Glue Data Catalog, attach the AWSGlueConsoleFullAccess policy to the IAM role. If you’re using the Athena Data Catalog, attach the AmazonAthenaFullAccess policy to the IAM role.
To create a new schema from a data catalog to use with Amazon Redshift Spectrum:
To create a table for the Amazon Redshift Spectrum S3 sample dataset:
Start querying!
This section provides an example scenario to start querying data from the external (Amazon S3) sales table and the internal (Amazon Redshift) event table. The join query in this scenario looks for all events (from the sales dataset loaded on the demo-cluster) with the sale price paid > 50 (from the Amazon Redshift Spectrum dataset in Amazon S3, s3://aws-redshift-spectrum-sample-data-us-east-1/spectrum/sales/).
In the Query results section, choose View execution to see the detailed execution plan. The query plan is available for all queries executed on compute nodes.
Note: Queries that do not reference user tables, such as administration queries that only use catalog tables, do not have an available query plan.
Optionally, download the query results to your local disk for offline use. Queries run for up to three minutes in the Query Editor. After a query is completed, the Query Editor provides two minutes to fetch results. Rerun the query and try again if you hit the two-minute threshold.

Load additional tables from the Amazon Redshift sample dataset by using the following SQL statements and get creative with your queries. Before choosing Run query in the Query Editor, remember to add the ARN for the IAM role that is associated with this AWS account in the placeholder in the following SQL statement. If your cluster is in another AWS Region, replace the Region in the region parameter and the Amazon S3 path in the following SQL statement.
Summary
In this post, we introduced the Query Editor, an in-browser interface for running SQL queries on Amazon Redshift clusters. We showed how you can use it to run SQL queries for loading data in clusters and monitoring cluster performance directly on the console. To learn more about Amazon Redshift and start with Query Editor, visit the Amazon Redshift webpage.
If you like this feature, share your feedback by using the Send feedback link on the console, as shown following.

If you have any questions or suggestions, please leave a comment below.
Happy querying!
About the Authors
 Surbhi Dangi is a senior product/design manager at AWS. Her work includes building user experiences for Database, Analytics & AI AWS consoles, launching new database and analytics products, working on new feature launches for existing products, and building broadly adopted internal tools for AWS teams. She enjoys traveling to new destinations to discover new cultures, trying new cuisines, and teaches product management 101 to aspiring PMs.
 Raja Bhogi is an engineering manager at AWS. He is responsible for building delightful and easy-to-use web experiences for analytics and blockchain products. His work includes launching web experiences for new analytics products, and working on new feature launches for existing products. He is passionate about web technologies, performance insights, and tuning. He is a thrill seeker and enjoys everything from roller coasters to bungy jumping.