AWS Compute Blog
Using serverless backends to iterate quickly on web apps – part 1
For many organizations, building applications is an iterative process where requirements change quickly. Traditional software architectures can be challenging to adapt to these changes. Often, early architectural decisions may limit the developers’ ability to deliver new features. Serverless architectural patterns are often much more adaptable, and can help developers keep pace with an evolving list of end-user requirements.
This blog series explores how to structure and build a serverless web app backend to enable the most flexibility for changing product requirements. It covers how to use serverless services in your architecture, and how to separate parts of the backend to make maintenance easier. I also show how you can use AWS Step Functions to encapsulate complex workflows and minimize the amount the custom code in your applications.
In this series:
- Part 1: Deploy the application, test the upload process, and review the architecture.
- Part 2: Understand how to use Step Functions, and deploy a custom workflow.
- Part 3: Advanced workflows with custom branching and image moderation.
The code uses the AWS Serverless Application Model (AWS SAM), enabling you to deploy the application easily in your own AWS account. This walkthrough creates resources covered in the AWS Free Tier but you may incur cost for usage beyond development and testing.
To set up the example, visit the GitHub repo and follow the instructions in the README.md file.
Introducing the “Happy Path” web application
In this scenario, a startup creates a web application called Happy Path. This app is designed to help state parks and nonprofit organizations replace printed materials, such as flyers and maps, with user-generated content. It allows visitors to capture images of park notices and photos of hiking trails. They can share these with other users to reduce printed waste.
The frontend displays and captures images of different locations, and the backend processes this data according to a set of business rules. This web application is designed for smartphones so it’s used while visitors are at the locations. Here is the typical user flow:

- When park visitors first navigate to the site’s URL, it shows their current location with parks highlighted in the vicinity.
- The visitor selects a park. It shows thumbnails of any maps, photos, and images already uploaded by other users.
- If the visitor is logged in, they can upload their own images directly from their smartphone.
The first production version of this application provides a simple way for users to upload photos. It does little more than provide an uploading and sharing process.
However, the developer team quickly realizes that they must make some improvements. The developers need a way to implement complex, changing workflows on the backend without refactoring the code that is running in production. The architecture must also scale for an expected 100,000 monthly active users.
First, they want to optimize the large uploaded images to improve the speed of downloads. Next, they must also determine the suitability of images to ensure that the app only shows appropriate photos. There is also a rapidly growing list of feature requirements from organizations using the app.
In this series, I show how the development team can design the app to provide this level of flexibility. This way, they can implement new features and even pivot the core application if needed.
Deploying the application
In the GitHub repo, there are detailed deployment instructions in the README. The repo contains separate directories for the frontend, backend, and workflows. You must deploy the backend first. Once you have completed the deployment, you can run the frontend code on your local machine.
To launch the frontend application:
- Change to the frontend directory.
- Run npm run serve to start the development server. After building the modules in the project, the terminal shows the local URL where the application is running:

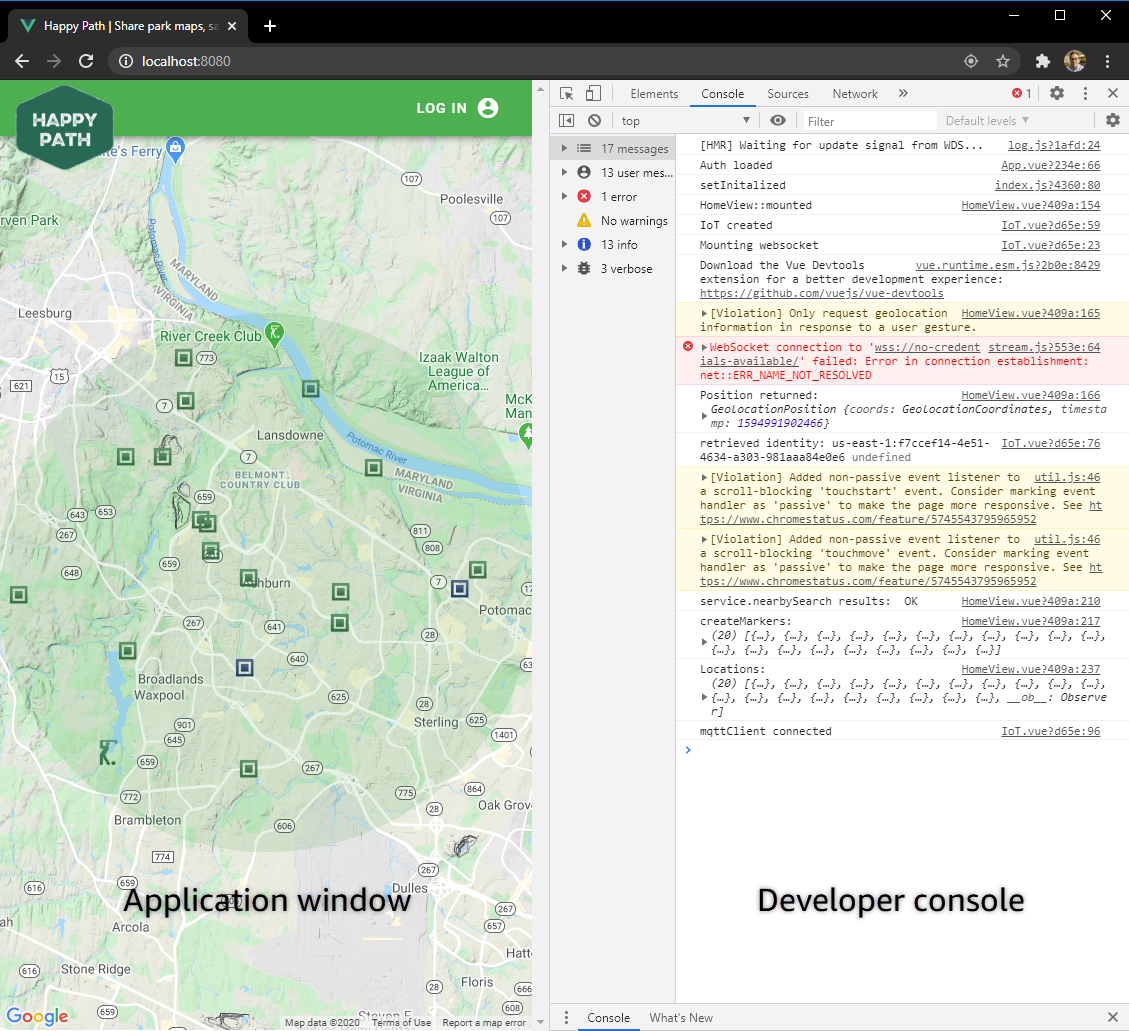
- Open a web browser and navigate to http://localhost:8080 to see the application.
- Open the developer console in your browser (for Google Chrome, Mozilla Firefox and Microsoft Edge, press F12 on the keyboard). This displays the application in a responsive layout and shows console logging. This can help you understand the flow of execution in the application.
Testing the application
Now you have deployed the backend to your AWS account, and you are running the front end locally, you can test the application.
To upload an image for a location:
- Choose Log In and sign into the application, creating a new account if necessary.
- Select a location on the map to open the information window.

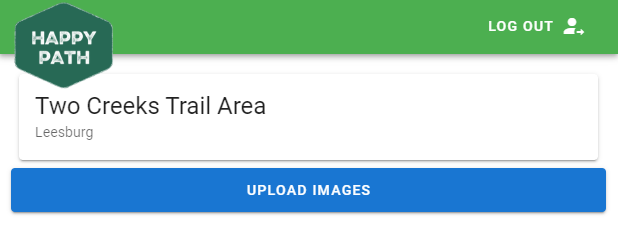
- Choose Show Details, then choose Upload Images.
- In the file picker dialog, select any one of the images from the sample photos dataset.
At this stage, the image is now uploaded to the S3 Uploads bucket on the backend. To verify this:
- Navigate to the Amazon S3 console.
- Choose the application’s upload bucket, then choose the folder name to open its contents. This shows the uploaded image.

- Navigate to the Amazon DynamoDB console.
- Select the hp-application table, then select the Items tab.


There are two records shown:
- The place listing: this item contains details about the selected park, such as the name and address.
- The file metadata: this stores information about who uploaded the file, the timestamp, and the state of the upload.
At this stage, you have successfully tested that the frontend can upload images to the backend.
Architecture overview
After deploying the application using the repo’s README instructions, the backend architecture looks like this:
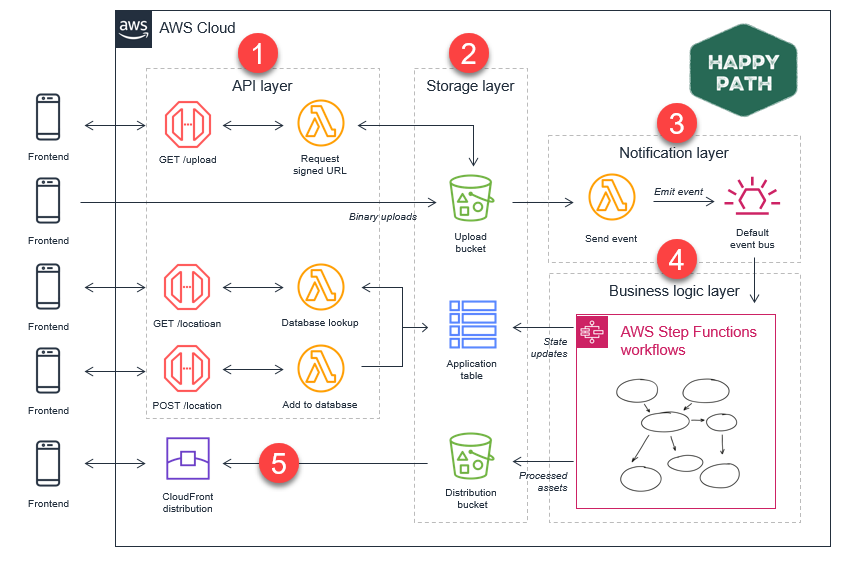
There are five distinct functional areas for the backend application:
- API layer: when users interact with one of the API endpoints, this is processed by the API layer. Each API route invokes a Lambda function to complete its task, storing and fetching data from the storage layer.
- Storage layer: information about user uploads is persisted durably here. The application uses Amazon S3 buckets to store the binary objects, and a DynamoDB table for associated metadata.
- Notification layer: when images are uploaded, the PUT event triggers a Lambda function. This publishes the event to the Amazon EventBridge default event bus.
- Business logic layer: the customized business logic is encapsulated in AWS Step Functions workflows.
- Content distribution: the processed images are served via an Amazon CloudFront distribution to reduce latency and optimize delivery cost.
For future requirements, you can implement increasingly complex customized logic entirely within the business logic layer. All new workflow features are implemented here, without needing to modify other parts of the application
Conclusion
This series is about using serverless backends to allow you to iterate quickly on web application functionality.
In this post, I introduce the Happy Path example web application. I show the main features of the application, enabling end-users to upload maps and photos to the backend application. I walk through the deployment of the backend and frontend applications. Finally, you test with a sample image upload.
In part 2, you deploy the image processing and workflow part of the application. This series explores progressively more complicated workflows, and how to manage their deployment. I will discuss some architectural choices which help to build in flexibility and scalability when designing backend applications
To learn more about building serverless web applications, see the Ask Around Me series.