AWS Database Blog
Create an AWS DMS endpoint to a trusted third-party account via AWS Secrets Manager integration
When configuring AWS Database Migration Service (AWS DMS) endpoints, you previously had to maintain the source and target credentials, including auditing, updating, and rotating the database credentials themselves. On December 22, 2020, we announced the integration of AWS DMS and AWS Secrets Manager, which now allows you to manage and automatically rotate the source and target database credentials. This allows you to take advantage of the built-in credential management capability in Secrets Manager.
Many customers have taken advantage of this feature. Some customers have requested the ability to integrate AWS DMS with Secrets Manager for endpoints that reside in a third-party account, in order to centrally manage AWS DMS replication instances and host databases and respective secrets in their business unit accounts. We’re excited to announce that this feature is now available to all customers.
This post provides an end-to-end overview of configuring your accounts to allow this pattern. Most of the pre-configuration is automated via the provided AWS CloudFormation template.
Prerequisites
Before you get started, make sure you have the following prerequisites:
- Two AWS accounts with sufficient access to create the necessary resources:
- Account A – Where Secrets Manager and the database are configured
- Account B – Where AWS DMS is configured
- Account IDs of the respective accounts.
- An AWS Identity and Access Management (IAM) role in Account B that has sufficient permissions to pass the cross-account role, which is created automatically. If you have administrator access to the account, no action is necessary. Otherwise, configure your role to allow
GetRole,PassRole, andDescribeSecretactions. For instructions, see the section To provide and verify required user permissions in Security in AWS Database Migration Service.
Solution overview
To configure your accounts to integrate Secrets Manager and AWS DMS, we complete the following high-level steps:
- Create an Amazon Relational Database Service (Amazon RDS) instance, secret, and necessary infrastructure.
- Create an AWS DMS instance and necessary infrastructure.
- Allow inbound access to the RDS instance.
- Add a route to allow traffic to and from the AWS DMS account.
- Add a certificate to allow SSL connectivity.
- Create an AWS DMS endpoint.
Create an RDS instance, secret, and necessary infrastructure
In this step, we create the Secrets Manager secret that stores the credentials to access the database instance, Amazon Aurora MySQL-Compatible Edition database cluster, and the infrastructure required to privately access the RDS instance and the secrets. This also creates the necessary Secrets Manager resource policies and AWS Key Management Service (AWS KMS) key policies to allow AWS DMS from the other account to securely access the database credentials.
- Launch the CloudFormation stack in Account A.

- For DMSAccountId, specify the account ID of Account B.
- You can enter non-overlapping CIDR ranges for the VPC and subnets or use the defaults as long as it doesn’t conflict with your existing VPC CIDRs.

- Choose Next.
- On the Review page, select I acknowledge that AWS CloudFormation might create IAM resources.
- Choose Create stack.

After you create the stack, take note of the resource information on the Outputs tab. You need this in the next step.
Create an AWS DMS replication instance and necessary infrastructure
In this step, we create the AWS DMS instance, set up a VPC endpoint to securely retrieve secrets, and establish a peering connection with the third-party account VPC.
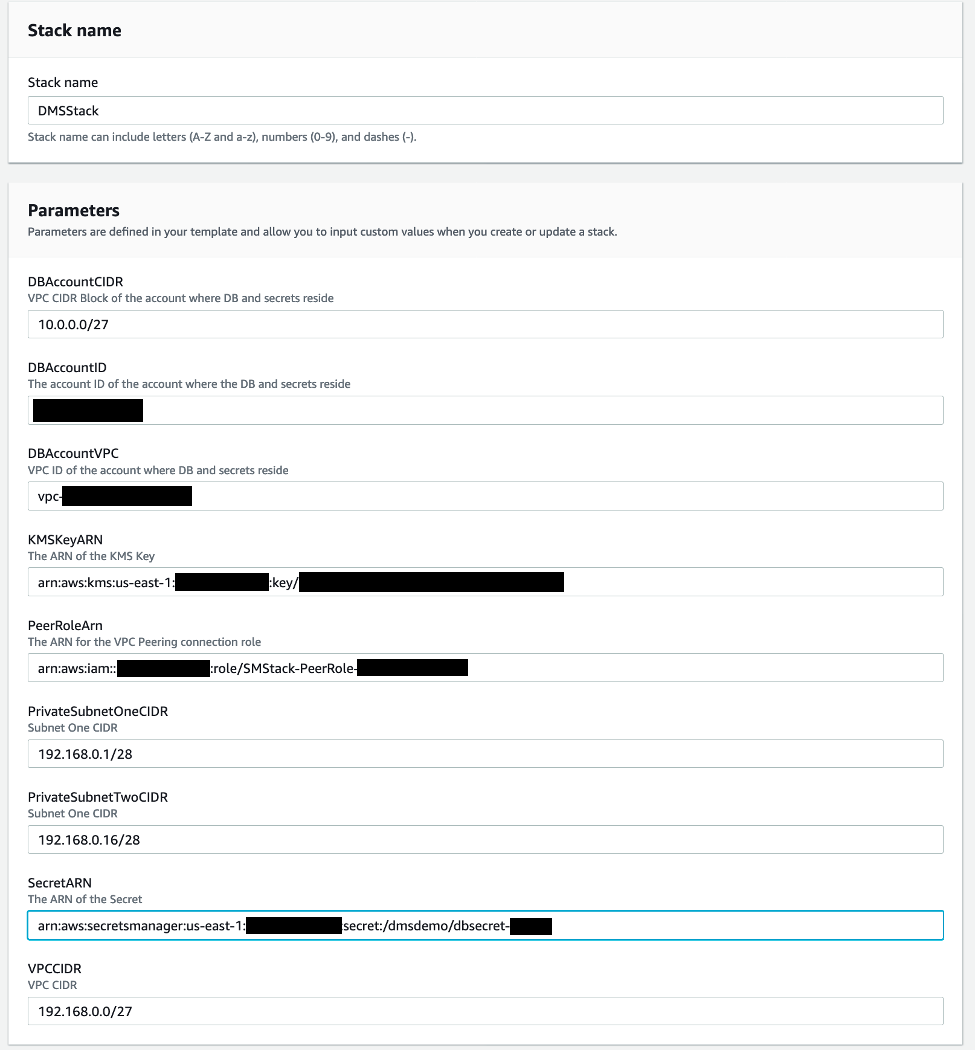
- Switch to Account B and launch the CloudFormation stack.
- In the Parameters section, enter the information gathered from the previous stack’s output.
- For DBAccountId, use the account ID of the account where you ran your stack in the previous step.
- You can enter non-overlapping CIDR ranges for the VPC and subnets or use the defaults as long as it doesn’t conflict with your existing VPC CIDRs.
- Choose Next.
- On the Review page, select I acknowledge that AWS CloudFormation might create IAM resources.
- Choose Create stack.

After you create the stack, take note of the resource information on the Outputs tab to use in subsequent steps.
Allow inbound access into the RDS instance
In this step, you allow the traffic originating from the AWS DMS replication instance security group to communicate with the RDS instance.
- Switch to Account A.
- On the Amazon Elastic Compute Cloud (Amazon EC2) console, choose Security groups.
- Edit the security group
SecretsManagerRDSStack-PrivateSecurityGroup-<Random String>.

- Edit the inbound rule and add a rule that allows TCP port 3306 from the Account B security group (the
SecurityGroupvalue in the second stack’s outputs).

Add a route to allow traffic to and from the AWS DMS account
In this step, we create a route in Account A that allows communication between VPCs in Accounts A and B.
- On the Amazon VPC console, choose Route tables.
- Select the table named
RDS Route Table. - Choose Edit routes.

- Choose Add route.
- For the destination, choose the VPC CIDR of Account B (DMSVPCCIDR).
- For the target, enter the
PeeringConnectionIDvalue from the second stack’s outputs. - Choose Save changes.

Add a certificate to allow SSL connectivity
To add a certificate to allow SSL connectivity, complete the following steps:
- Switch to Account B.
- Download the RDS certificate.
- On the AWS DMS console, choose Certificates.
- Choose Import certificate.
- Enter an appropriate name for the certificate identifier and upload the file
rds-combined-ca-bundle.pem.
Create an AWS DMS endpoint
To create your AWS DMS endpoint, complete the following steps:
- On the AWS DMS console, choose Endpoints.
- Choose Create endpoint.
- For Endpoint identifier, enter
DMSEndpoint. - For Source engine, choose Amazon Aurora MySQL.
- Leave Choose AWS Secrets Manager selected.
- For Secret ID, enter the
SecretArnvalue from the first stack’s outputs. - For IAM role, enter the
DMSRoleArnvalue from the second stack’s outputs. - For Secure Socket Layer (SSL) mode, choose verify-full.
- For CA certificate, choose the certificate you imported earlier.

- In the Test endpoint connection section, for VPC, choose the AWS DMS VPC.
- For Replication instance, choose the instance
cross-account-dms-instance. - Choose Run test.

- When the test is successful, choose Create endpoint.
Now you have successfully established connection to a third-party Aurora MySQL instance, with secrets managed in the third-party account.
Clean up
To avoid incurring ongoing charges, clean up your infrastructure.
- On the AWS DMS console, choose Endpoints.
- Select the endpoint
DMSEndpoint. - On the Actions menu, choose Delete.
- Confirm the deletion.
Deletion may take a few minutes to complete.
- Choose Certificates in the navigation pane.
- Delete the certificate you created.
- On the AWS CloudFormation console, select the stack
DMSStackand choose Delete. - Switch to Account A and on the AWS CloudFormation console, delete the
SecretsManagerRDSStack.
Conclusion
In this post, we demonstrated cross-account connectivity between VPCs in two accounts via VPC peering, which allows secure communication between AWS DMS and databases hosted in different accounts. We were also able to access third-party secrets via VPC endpoints. We used the credentials to successfully establish AWS DMS endpoint connectivity to the third-party RDS instance.
This pattern lets you centrally manage your AWS DMS replication instances and take advantage of the built-in credential management capability provided by Secrets Manager, including auditing, updating, and rotating the database credentials. Test this solution and let me know what you think in the comments section.
About the Author
 Kishore Dhamodaran is a Senior Cloud Consultant with Amazon Web Services Professional Services. Kishore helps customers with their Cloud Enterprise Strategy and migration journey, leveraging his years of industry and cloud experience.