Networking & Content Delivery
Authenticate AWS Client VPN users with SAML
Introduction
Authenticating users to applications and services on the web and at scale can be challenging. Having a separate set of credentials for each application is not an efficient approach. It is difficult to manage for IT departments and doesn’t provide a good experience for users.
A common way to solve this challenge is to use Security Assertion Markup Language (SAML) 2.0. It is an open standard that allows organizations to have a centralized store to manage their identities. With SAML, users can connect to multiple services with a single set of credentials. This significantly improves their authentication experience and makes management of multiple applications simpler for the organization.
SAML 2.0 specification defines names for each of the components. The centralized identity store is known as identity provider (IdP) and applications that integrate with it are referred to as service providers (SPs).
AWS Client VPN enables your remote users to securely connect to services on AWS and beyond. With the launch of Federated Authentication via SAML 2.0, Client VPN can now be configured a service provider in your existing IdP. SAML-based federated authentication becomes a third authentication option for Client VPN — in addition to Active Directory and certificate-based mutual authentication, which are already supported.
In this blog post, I show how to integrate AWS Client VPN with Okta, a popular identity provider. Remote users connecting to Client VPN can authenticate with the same credentials they are using for any other service already integrated with Okta.
Solution overview
My architecture includes a target Amazon VPC hosting a single EC2 instance. I created a Client VPN endpoint and associated it with my VPC. Users connecting to Client VPN are authenticated against my SAML IdP. Once successfully authenticated, they can connect to the EC2 instance.
The flow diagram below shows what the SAML authentication process looks like for Client VPN.
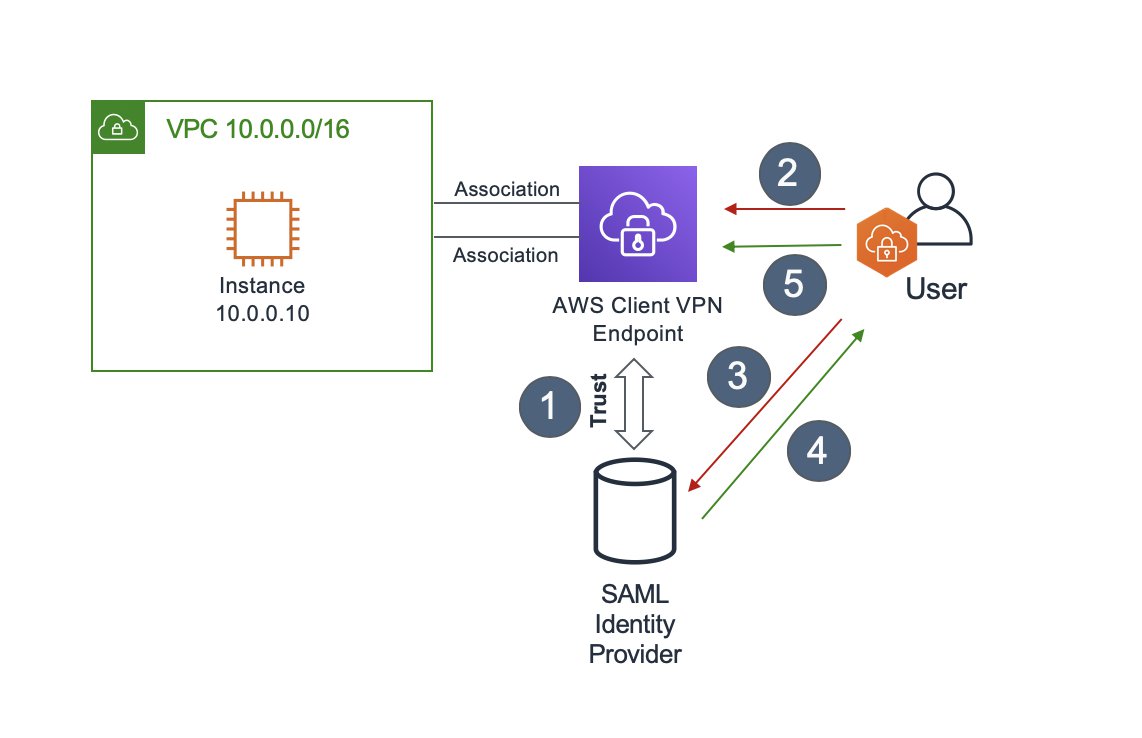
Figure 1: Client VPN SAML authentication flow
- If you are setting up SAML integration for the first time, you must establish trust between the IdP and the service provider (AWS Client VPN, in this case).
- User attempts to create a VPN connection to the Client VPN endpoint using AWS Client VPN software. If that user hasn’t authenticated before, they are redirected to the IdP in their default browser.
- User authenticates to the IdP in their browser by providing their credentials and, if enabled, a second authentication factor.
- On successful authentication the IdP generates a signed SAML response. This is also called a SAML assertion and includes details about the user like their email and group membership.
- Client VPN software forwards the SAML assertion to the Client VPN endpoint. Because Client VPN trusts the IdP, this is accepted as proof that the user is authenticated and the session can be established. At that point, the group membership information can be used to authorize access to specific resources.
I’ve set up Client VPN to provide network access only to the target VPC but you can expand it to other resources. You can configure routing rules to decide what your remote users can connect to. You can give them access to other AWS services, on-premises networks, and even the internet. To learn more about how to architect Client VPN connectivity see this blog post.
In my walk through, I set up Client VPN split-tunneling to forward only traffic destined to the target VPC over my VPN. Any traffic going to destinations outside of the VPC IP range bypasses the VPN. For example, heavy internet video streaming traffic would go out directly to the internet across the users own network.
For more granular access control, I can configure SAML group-specific authorization rules. Client VPN has visibility into the group membership of authenticated users. This information can be used in creating IP based access permissions. In this scenario, I am only allowing users that belong to the “Engineering“ group to connect to the EC2 instance.
If you require multi-factor authentication support for your remote users, it can be enabled at the identity provider level.
Prerequisites
Here is what’s required to run thorough the setup:
- AWS Account
- An Amazon VPC with an EC2 instance.
- Setting up a VPC.
- Launching an EC2 instance. In the instance Security Group allow ICMP traffic from the VPC CIDR range – this is needed for testing.
- A private certificate imported into AWS Certificate Manager (ACM).
- SAML IdP hosting user and group information.
- AWS Client VPN app has been tested with Okta. Support for other identity providers is coming in the future.
- Desktop (Windows or macOS) running the latest AWS Client VPN software.
- You can download the software here.
Walk through
Establish Trust with Identity Provider
To integrate Client VPN with SAML, you must establish trust between the service and your IdP. This is done through exporting application-specific metadata information from the IdP and uploading it into your AWS account. As mentioned in pre-requisites, I am using Okta as the example IdP in this walk through.
Create AWS Client VPN App in Okta
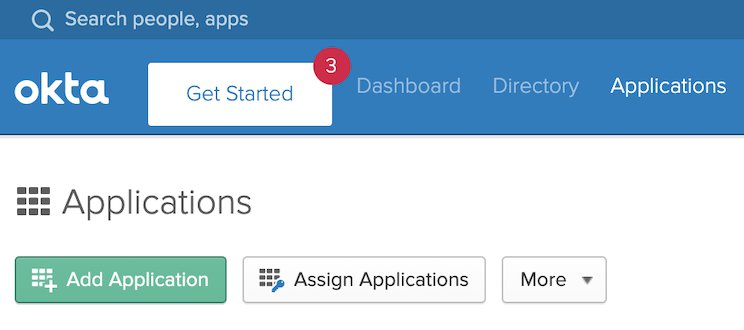
- In the Okta administrator console, in the Applications tab select Add Application
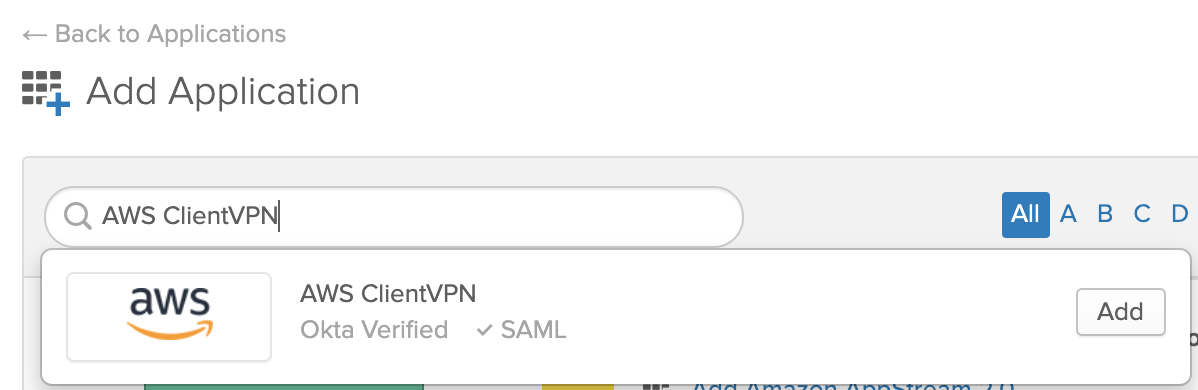
- Search for and select AWS ClientVPN and press Add next to the App.
- Provide the Application Label, and complete the process by pressing Done.
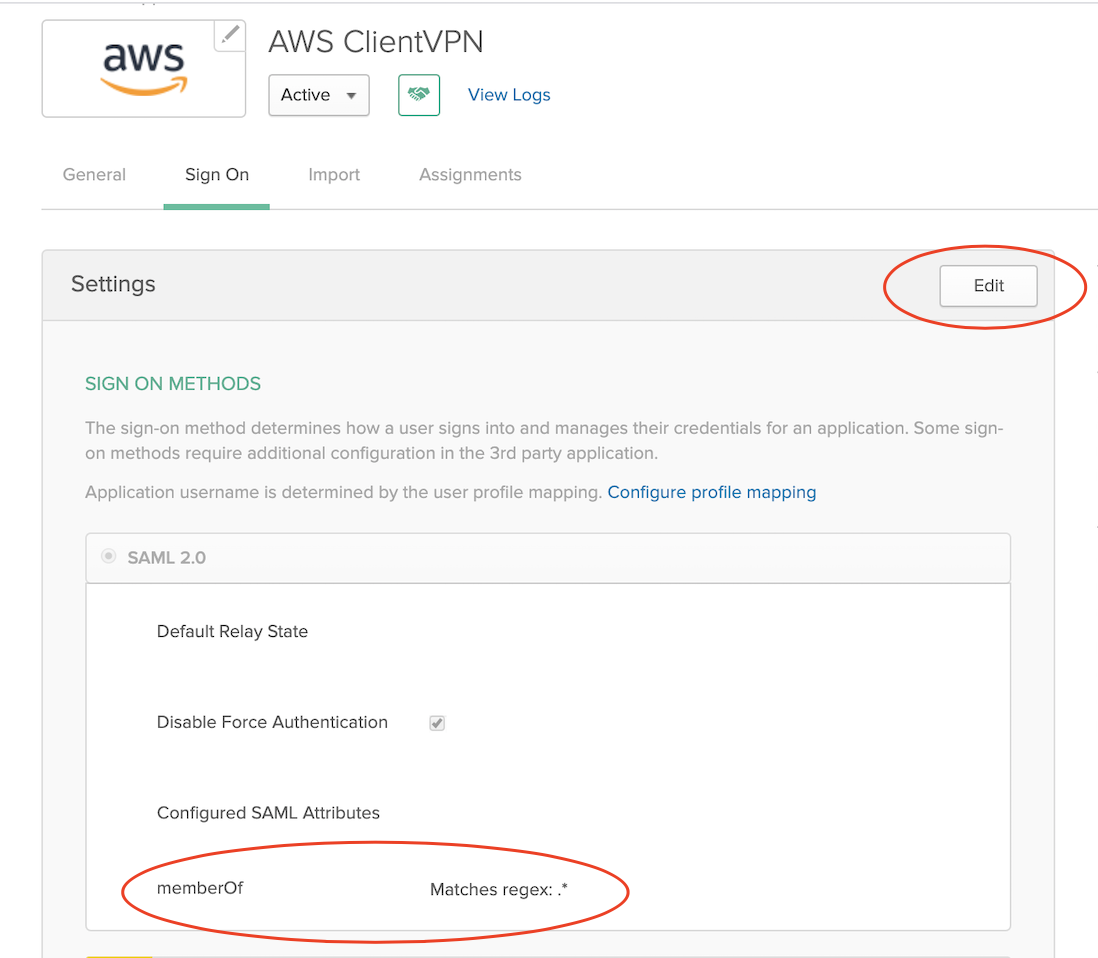
- Go into the newly created AWS Client VPN App Sign On tab and select Edit. To enable Okta to forward SAML group membership information, you can use the drop-down next to memberOf. To forward all the groups, I’ve set it to Matches regex: .* (notice the dot in front of *).
- Under ADVANCED SIGN-ON SETTINGS specify the default port 35001 and press Save. This is the port that Client VPN software is expecting to receive authentication response on.
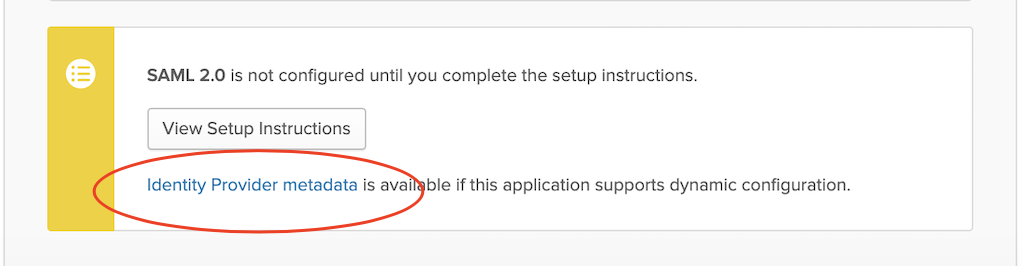
- To download the Okta metadata required later, you can select Identity Provider metadata. Then you can right-click on it and select Save Link As… to download it to your local machine.
Add Okta as your Identity Provider in AWS Management Console
You may already be using Okta, or another SAML IdP, to authenticate access to AWS Management Console. AWS Client VPN is a separate app and it requires a unique identity provider definition in AWS. You cannot reuse the identity providers already defined for other apps, even if they’re from the same vendor.
- Open IAM console and select Identity providers from the navigation bar.
- Press Create a Provider
- Specify SAML for Provider Type, add a unique name for this provider, and upload the metadata document — the same file you downloaded from Okta in the previous section.

- Go to Next Step to verify the details and press Create.
Create AWS Client VPN Endpoint
The steps below outline the options required to create a Client VPN that will use the newly added identity provider. For detailed steps of setting up a Client VPN endpoint with other authentication options, you can also refer to the previous blog post.
To Create Client VPN Endpoint
- Open Amazon VPC console in an AWS Region of your choice
- In the navigation pane, under Virtual Private Network (VPN), choose Client VPN Endpoints.
- Press Create Client VPN Endpoint
- Fill the Name Tag and Description, with any details you want
- Enter
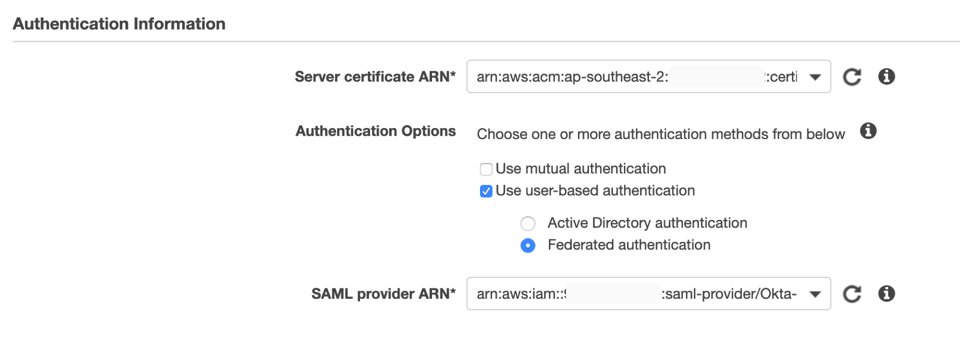
10.200.0.0/22for Client IPv4 CIDR. This is the IP range that will be allocated to your remote users. - For Server certificate ARN, choose the certificate you created as a prerequisite.
- For Authentication Options, select Use user-based authentication and then Federated authentication.
- From the SAML provider ARN dropdown, select the identity provider you configured earlier.
- Under Connection Logging, specify if you want the connections logged in Amazon CloudWatch. Because this is a sample walk through, you can choose No. In a production environment, you can log all your connection to Amazon CloudWatch.
- Under Other optional parameters, select Enable split-tunnel and leave everything else unchanged. Enabling split-tunnel option ensures that only traffic to the VPC IP range is forwarded via the VPN.
- Press Create Client VPN Endpoint to complete the setup.
Configure AWS Client VPN Endpoint Options
Before a Client VPN endpoint becomes active, you must associate it with a target VPC. You can also configure other options that define routing and authorization rules. In my example I am only permitting users in the Engineering SAML group to connect to my EC2 instance.
To Associate Client VPN with Target VPC
- Select the Client VPN endpoint you just created. It should be in Pending state.
- Choose Associations tab in the options and press Associate.
- From the drop-down select the target VPC and subnet you want to associate your endpoint with.
- (Optional) Repeat the previous steps to associate your Client VPN endpoint to another subnet for high availability.
To Set Up SAML Group-Specific Authorization
- Choose Authorization tab in your Client VPN options and press Authorize Ingress.
- For Destination network to enable, specify the IP address of your EC2 instance created in the prerequisites. For me it’s
10.0.0.10/32. - Under Grant access to, select Allow access to users in a specific access group.
- In the Access group ID field enter the name of the group you want to allow access to the EC2 instance. For me it’s
Engineering. - Provide an optional description and press Add authorization rule.

Connect to Client VPN and Test Connectivity
To connect to the target VPC you will need to download the configuration profile for the Endpoint you’ve just configured. This profile can be added to the AWS Client VPN software running on your desktop.
To Connect to Client VPN
- Select the Client VPN endpoint you just created. It should now be in Available state.
- Press Download Client Configuration to download the configuration profile to your desktop.
- Open the AWS Client VPN desktop app on your machine.
- In the top menu select File and Manage Profiles.
- Press Add Profile and point to the recently downloaded file. You can give it a Display Name of your choice.
- You should now see the profile in the list on the AWS Client VPN software. Select it and click Connect.

During the connection process you will be redirected to your IdP for authentication. AWS Client VPN is using the default browser configured on your device. This allows you to continue using tools already integrated with your browser, like password managers.
You must provide credentials for a user that is a member of the group permitted to access your EC2 instance. In my example, it’s the Engineering group. You also must ensure your device’s TCP port 35001 is not in use. This port is used by the Client VPN software to receive SAML assertion from the IdP.
After successful authentication you should be able to reach the EC2 instance in the target VPC. You can test it by sending an ICMP ping to the IP of the instance from your command line terminal. Below is the command that should generate successful responses.
ping 10.0.0.10
Troubleshooting
If you can’t reach the target VPC EC2 instance here are some things to investigate:
- Confirm that the Client VPN connection has successfully established. It should be in Connected state. To troubleshoot connection issues, you can follow this guide.
- If the connection is not establishing, make sure that your machine has TCP port 35001 available. This is the port used for receiving SAML assertion.
- Check if the Security Group associated with your instance permits the traffic you’re testing with (for example ICMP).
- Validate if the user you’re testing with is a member of the correct SAML group on your IdP.
- Confirm if the correct SAML group is allowed to access your EC2 instance in Client VPN authorization rules.
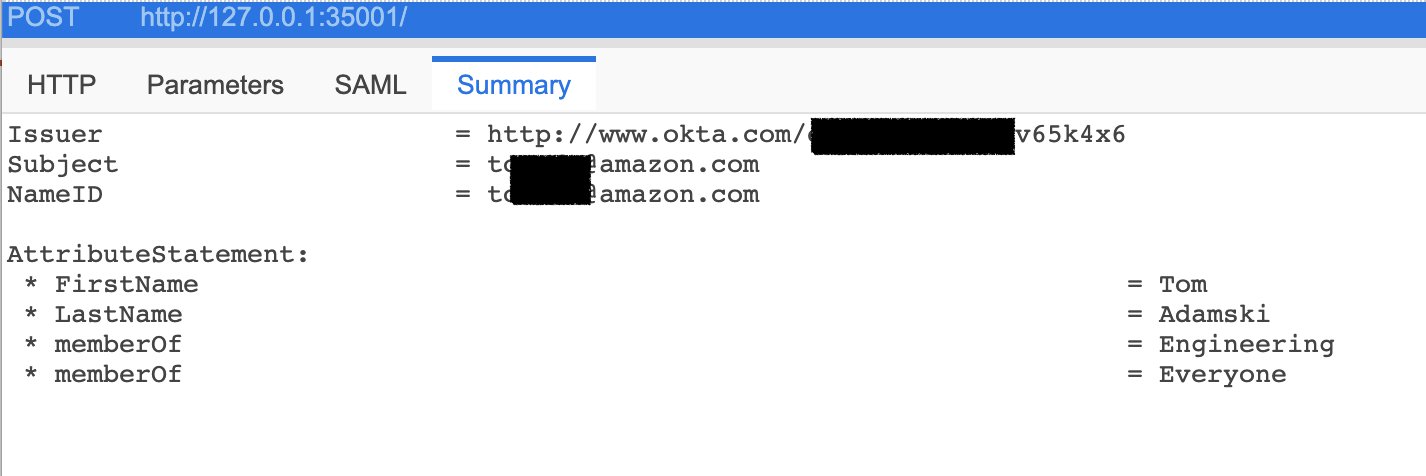
- Confirm if the IdP is sending the right details in the SAML assertion. You can use browser plugins to inspect the information received in the SAML assertion. The graphic below shows my authentication attributes returned by Okta. I’ve used SAML Tracer to get the capture.
Cleanup
Follow these steps to remove any components added in the walk through. Leaving AWS services enabled can incur costs.
- Remove Client VPN Endpoint.
- Disassociate the endpoint from the VPC.
- Delete the Client VPN Endpoint.
- Terminate the EC2 instance used for testing.
- Delete the target VPC.
- Remove the test identity provider from IAM.
Conclusion
In this blog post I’ve shown how AWS Client VPN can be integrated with a SAML IdP. This simple integration allows Client VPN users to authenticate to the service using the same credentials as for other, SAML-based, web applications. It also enables you to apply granular, IP-based authorization rules for specific SAML groups.

Tom Adamski
Tom is a Specialist Solutions Engineer focusing on Networking. He helps customers design and move their network environments to AWS. He has over 10 years of experience building and securing networks for Enterprises and ISPs. In his spare time, he’s an avid surfer who’s always on the lookout for cold water surf breaks.
| Blog: Using AWS Client VPN to securely access AWS and on-premises resources | ||
| Learn about AWS VPN services | ||
 |
Watch re:Invent 2019: Connectivity to AWS and hybrid AWS network architectures |