Deploy a Web Application on AWS Amplify
GETTING STARTED GUIDE


Module 1: Create a new Amplify Project
In this module, you will create a new web application and configure Amplify
Introduction
In this module, you will create a new web application using React, a JavaScript library for building user interfaces, and learn how to configure AWS Amplify for your first project.
What You Will Learn
- Create a new web application
- Set up Amplify on your project
Time to Complete
5 minutes
Module Prereqs
- AWS Account with administrator-level access**
- Recommended browser: The latest version of Chrome or Firefox
[**]Accounts created within the past 24 hours might not yet have access to the services required for this tutorial.
Implementation
Check Environment
Verify that you are running at least Node.js version 12.x and npm version 6.x or greater by running node -v and npm -v in a terminal/console window. If not, please visit the nodejs and npm website for more information.
node -v

# Your output may differ based on the version installed.
12.1.1

npm -v

# Your output may differ based on the version installed.
6.14.6The Amplify Command Line Interface (CLI) is a unified toolchain to create AWS Cloud services for your app.
Install the Amplify CLI, by running the following command:
npm install -g @aws-amplify/cliNote: Because we're installing the Amplify CLI globally, you might need to run the command above with sudo depending on your system policies.
Once installation completes, configure Amplify by running the following command:
amplify configureamplify configure will open a browser and ask you to sign into the AWS Console.
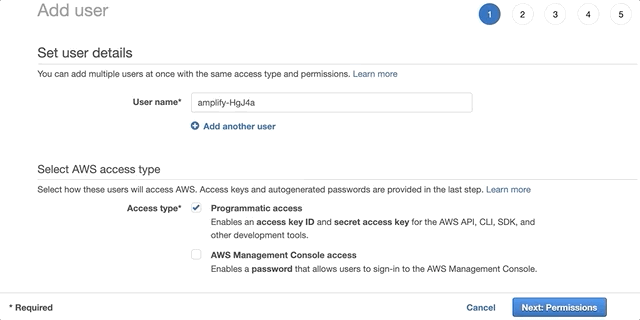
Once you're signed in, Amplify CLI will ask you to create an IAM user.
Specify the AWS Region
? region:  # Your preferred region
Specify the username of the new IAM user:
? user name:  # User name for Amplify IAM user
Complete the user creation using the AWS consoleCreate a user with AdministratorAccess to your account to provision AWS resources for you like AppSync, Cognito etc.
Once the user is created, Amplify CLI will ask you to provide the accessKeyId and the secretAccessKey to connect Amplify CLI with your newly created IAM user.
Enter the access key of the newly created user:
? accessKeyId:  # YOUR_ACCESS_KEY_ID
? secretAccessKey:  # YOUR_SECRET_ACCESS_KEY
This would update/create the AWS Profile in your local machine
? Profile Name:  # (default)

Successfully set up the new user.Create React App
To create a new React application, you will use create-react-app, a toolchain that helps you get started with no configuration required.
Create an application called amplify-app, and then initialize it with amplify init -y:
# note npx is installed with npm
npx create-react-app amplify-app
cd amplify-app
amplify init -yProject information
| Name: newapp
| Environment: dev
| Default editor: Visual Studio Code
| App type: javascript
| Javascript framework: none
| Source Directory Path: src
| Distribution Directory Path: dist
| Build Command: npm run-script build
| Start Command: npm run-script startCREATE_IN_PROGRESS amplify-amplifyapp-dev-163654 AWS::CloudFormation::Stack Tue Jun 14 2022 16:36:56 GMT-0700 (Pacific Daylight Time) User Initiated
CREATE_IN_PROGRESS UnauthRole AWS::IAM::Role Tue Jun 14 2022 16:37:00 GMT-0700 (Pacific Daylight Time)
CREATE_IN_PROGRESS DeploymentBucketBlockHTTP AWS::S3::BucketPolicy Tue Jun 14 2022 16:37:00 GMT-0700 (Pacific Daylight Time)
CREATE_IN_PROGRESS DeploymentBucket AWS::S3::Bucket Tue Jun 14 2022 16:37:01 GMT-0700 (Pacific Daylight Time)
CREATE_IN_PROGRESS AuthRole AWS::IAM::Role Tue Jun 14 2022 16:37:01 GMT-0700 (Pacific Daylight Time)
CREATE_COMPLETE UnauthRole AWS::IAM::Role Tue Jun 14 2022 16:37:17 GMT-0700 (Pacific Daylight Time)
CREATE_COMPLETE AuthRole AWS::IAM::Role Tue Jun 14 2022 16:37:17 GMT-0700 (Pacific Daylight Time)
CREATE_COMPLETE DeploymentBucket AWS::S3::Bucket Tue Jun 14 2022 16:37:24 GMT-0700 (Pacific Daylight Time)
CREATE_COMPLETE amplify-amplifyapp-dev-163654 AWS::CloudFormation::Stack Tue Jun 14 2022 16:37:26 GMT-0700 (Pacific Daylight Time)
✔ Successfully created initial AWS cloud resources for deployments.
✔ Initialized provider successfully.
✅ Initialized your environment successfully.
Your project has been successfully initialized and connected to the cloud!
Some next steps:
"amplify status" will show you what you've added already and if it's locally configured or deployed
"amplify add <category>" will allow you to add features like user login or a backend API
"amplify push" will build all your local backend resources and provision it in the cloud
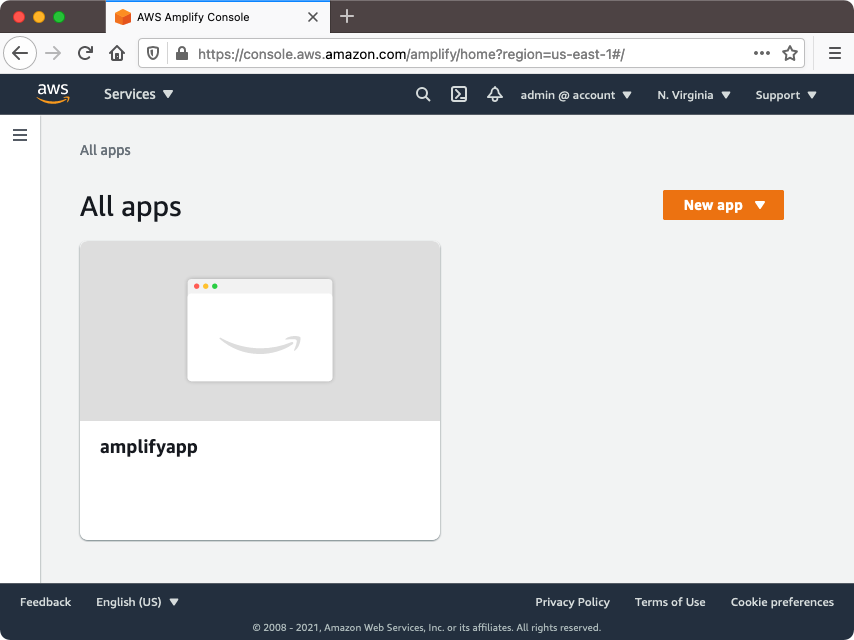
"amplify console" to open the Amplify Console and view your project status
"amplify publish" will build all your local backend and frontend resources (if you have hosting category added) and provision it in the cloudWhat did you just create?
When you run amplify init to initialize a new project, Amplify will:
- Analyze your project and confirm the project settings above, including which AWS profile will be used to provision the cloud resources required for your application.
- Create a folder called amplify inside your project's directory. This folder contains the back-end configuration of your application.
- Create a file called src/aws-exports.js inside your project's directory. This file contains the configuration for the services that Amplify provisions as you add more functionality to your application.
- Create a cloud project for your application in the AWS Amplify Console, where you can view and manage your Amplify projects.
Conclusion
In this module, you learned how to create a React frontend application, and initialize it with Amplify in preparation to deploy it to your AWS account. In the next module, you will learn how to add an API to your front-end application using GraphQL.
Up Next: Connect API