AWS Big Data Blog
Metadata classification, lineage, and discovery using Apache Atlas on Amazon EMR
This blog post was last reviewed and updated April, 2022. The code repositories used in this blog have been reviewed and updated to fix the solution
With the ever-evolving and growing role of data in today’s world, data governance is an essential aspect of effective data management. Many organizations use a data lake as a single repository to store data that is in various formats and belongs to a business entity of the organization. The use of metadata, cataloging, and data lineage is key for effective use of the lake.
This post walks you through how Apache Atlas installed on Amazon EMR can provide capability for doing this. You can use this setup to dynamically classify data and view the lineage of data as it moves through various processes. As part of this, you can use a domain-specific language (DSL) in Atlas to search the metadata.
Introduction to Amazon EMR and Apache Atlas
Amazon EMR is a managed service that simplifies the implementation of big data frameworks such as Apache Hadoop and Spark. If you use Amazon EMR, you can choose from a defined set of applications or choose your own from a list.
Apache Atlas is an enterprise-scale data governance and metadata framework for Hadoop. Atlas provides open metadata management and governance capabilities for organizations to build a catalog of their data assets. Atlas supports classification of data, including storage lineage, which depicts how data has evolved. It also provides features to search for key elements and their business definition.
Among all the features that Apache Atlas offers, the core feature of our interest in this post is the Apache Hive metadata management and data lineage. After you successfully set up Atlas, it uses a native tool to import Hive tables and analyze the data to present data lineage intuitively to the end users. To read more about Atlas and its features, see the Atlas website.
AWS Glue Data Catalog vs. Apache Atlas
The AWS Glue Data Catalog provides a unified metadata repository across a variety of data sources and data formats. AWS Glue Data Catalog integrates with Amazon EMR, and also Amazon RDS, Amazon Redshift, Redshift Spectrum, and Amazon Athena. The Data Catalog can work with any application compatible with the Hive metastore.
The scope of installation of Apache Atlas on Amazon EMR is merely what’s needed for the Hive metastore on Amazon EMR to provide capability for lineage, discovery, and classification. Also, you can use this solution for cataloging for AWS Regions that don’t have AWS Glue.
Architecture
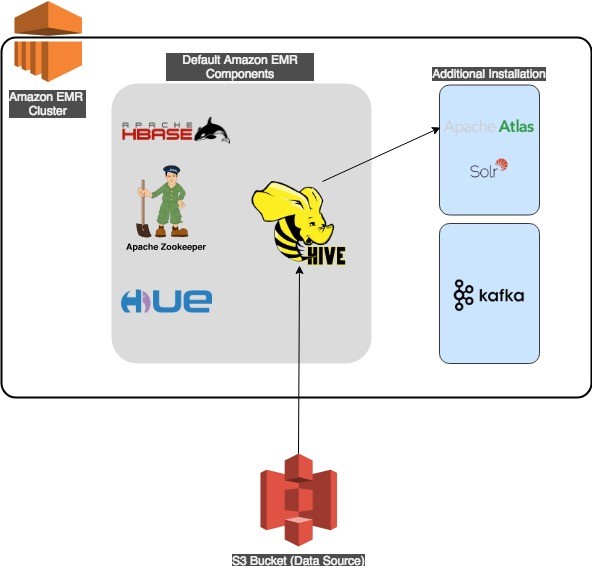
Apache Atlas requires that you launch an Amazon EMR cluster with prerequisite applications such as Apache Hadoop, HBase, Hue, and Hive. Apache Atlas uses Apache Solr for search functions and Apache HBase for storage. Both Solr and HBase are installed on the persistent Amazon EMR cluster as part of the Atlas installation.
This solution’s architecture supports both internal and external Hive tables. For the Hive metastore to persist across multiple Amazon EMR clusters, you should use an external Amazon RDS or Amazon Aurora database to contain the metastore. A sample configuration file for the Hive service to reference an external RDS Hive metastore can be found in the Amazon EMR documentation.
The following diagram illustrates the architecture of our solution.
Amazon EMR–Apache Atlas workflow
To demonstrate the functionality of Apache Atlas, we do the following in this post:
- Launch an Amazon EMR cluster using the AWS CLI or AWS CloudFormation
- Using Hue, populate external Hive tables
- View the data lineage of a Hive table
- Create a classification
- Discover metadata using the Atlas domain-specific language
1a. Launch an Amazon EMR cluster with Apache Atlas using the AWS CLI
The steps following guide you through the installation of Atlas on Amazon EMR by using the AWS CLI. This installation creates an Amazon EMR cluster with Hadoop, HBase, Hive, and Zookeeper. It also executes a step in which a script located in an Amazon S3 bucket runs to install Apache Atlas under the /apache/atlas folder.
The automation shell script assumes the following:
- You have a working local copy of the AWS CLI package configured, with access and secret keys.
- You have a default key pair, VPC, and subnet in the AWS Region where you plan to deploy your cluster.
- You have sufficient permissions to create S3 buckets and Amazon EMR clusters in the default AWS Region configured in the AWS CLI.
On successful execution of the command, output containing a cluster ID is displayed:
Use the following command to list the names of active clusters (your cluster shows on the list after it is ready):
In the output of the previous command, look for the server name EMR-Atlas (unless you changed the default name in the script). If you have the jq command line utility available, you can run the following command to filter everything but the name and its cluster ID:
After your cluster shows up on the active list, Amazon EMR and Atlas are ready for operation.
1b. Launch an Amazon EMR cluster with Apache Atlas using AWS CloudFormation
You can also launch your cluster with CloudFormation. Use the emr-atlas.template to set up your Amazon EMR cluster, or launch directly from the AWS Management Console by using this button:

To launch, provide values for the following parameters:
| VPC | <VPC> |
| Subnet | <Subnet> |
| EMRLogDir | < Amazon EMR logging directory, for example s3://xxx > |
| KeyName | < EC2 key pair name > |
Provisioning an Amazon EMR cluster by using the CloudFormation template achieves the same result as the CLI commands outlined previously.
Before proceeding, wait until the CloudFormation stack events show that the status of the stack has reached “CREATE_COMPLETE”.
2. Use Hue to create Hive tables
Next, you log in to Apache Atlas and Hue and use Hue to create Hive tables.
To log in to Atlas, first find the master public DNS name in the cluster installation by using the Amazon EMR Management Console. Then, use the following command to create a Secure Shell (SSH) tunnel to the Atlas web browser.
If the command preceding doesn’t work, make sure that your key file (*.pem) has appropriate permissions. You also might have to add an inbound rule for SSH (port 22) to the master’s security group.
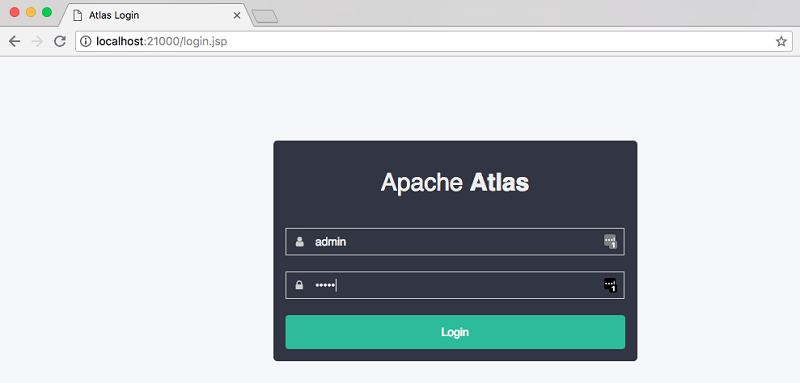
After successfully creating an SSH tunnel, use following URL to access the Apache Atlas UI.
You should see a screen like that shown following. The default login details are username admin and password admin.
To set up a web interface for Hue, follow the steps in the Amazon EMR documentation. As you did for Apache Atlas, create an SSH tunnel on remote port 8888 for the console access:
After the tunnel is up, use following URL for Hue console access.
At first login, you are asked to create a Hue superuser, as shown following. Do not lose the superuser credentials.
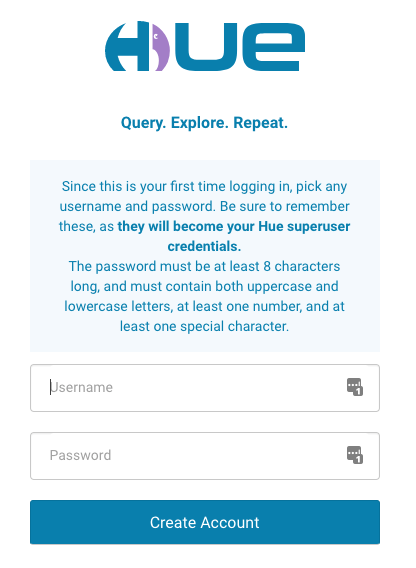
After creating the Hue superuser, you can use the Hue console to run hive queries.
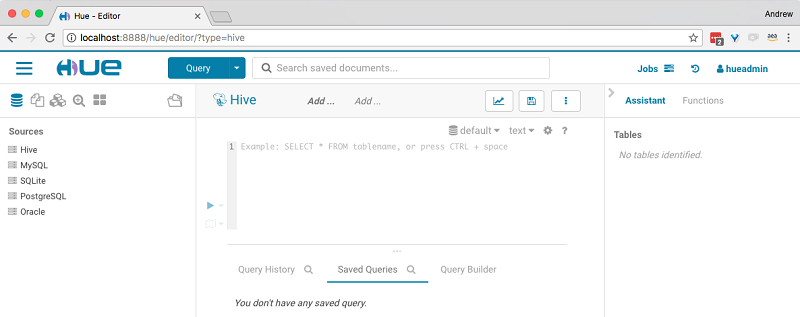
After you log in to Hue, take the following steps and run the following Hive queries:
-
- Run the HQL to create a new database:
-
- Create a new external table called trip_details with data stored on S3. Change the S3 location to a bucket you own.
-
- Create a new lookup external table called trip_zone_lookup with data stored on S3.
-
- Create an intersect table of trip_details and trip_zone_lookup by joining these tables:
Next, you perform the Hive import. For metadata to be imported in Atlas, the Atlas Hive import tool is only available by using the command line on the Amazon EMR server (there’s no web UI.) To start, log in to the Amazon EMR master by using SSH:
Then execute the following command. The script asks for your user name and password for Atlas. The default user name is admin and password is admin.
A successful import looks like the following:
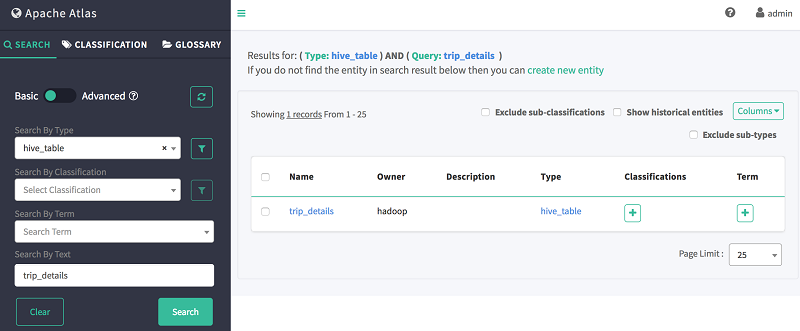
After a successful Hive import, you can return to the Atlas Web UI to search the Hive database or the tables that were imported. On the left pane of the Atlas UI, ensure Search is selected, and enter the following information in the two fields listed following:
-
-
- Search By Type: hive_table
- Search By Text: trip_details
-
The output of the preceding query should look like this:
3. View the data lineage of your Hive tables using Atlas
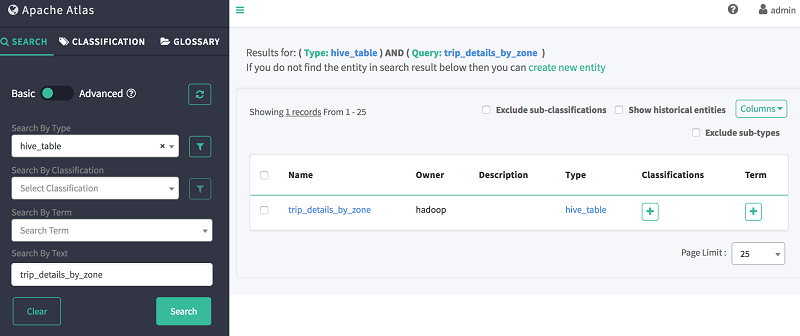
To view the lineage of the created tables, you can use the Atlas web search. For example, to see the lineage of the intersect table trip_details_by_zone created earlier, enter the following information:
-
-
- Search By Type: hive_table
- Search By Text: trip_details_by_zone
-
The output of the preceding query should look like this:
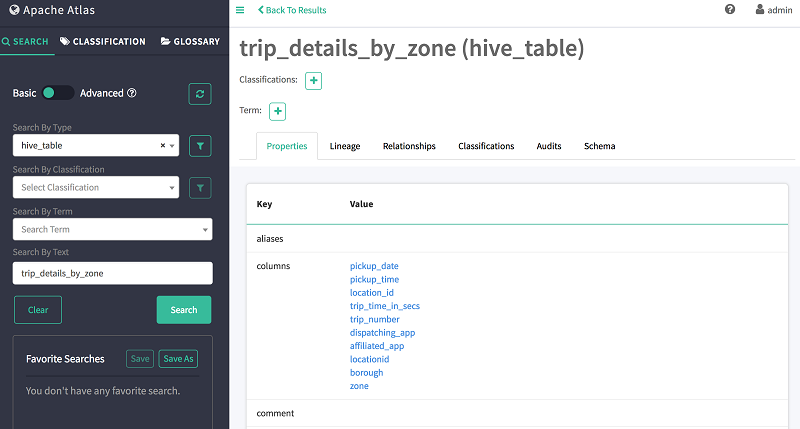
Now choose the table name trip_details_by_zone to view the details of the table as shown following.
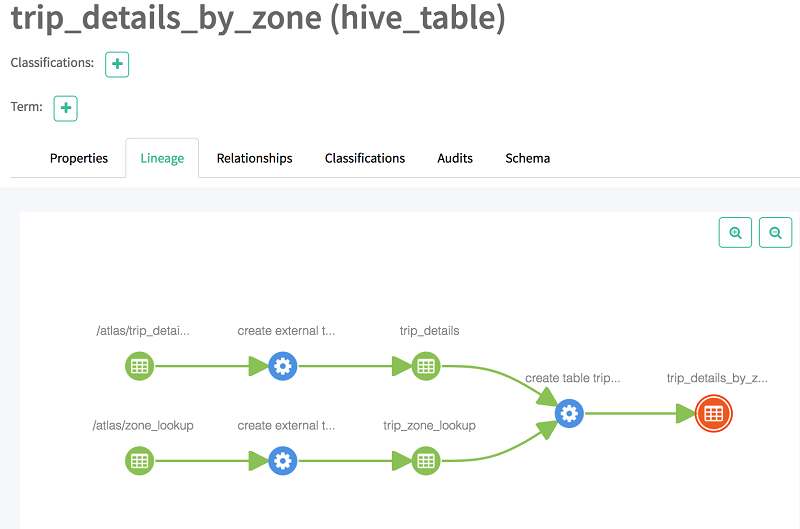
Now when you choose Lineage, you should see the lineage of the table. As shown following, the lineage provides information about its base tables and is an intersect table of two tables.
4. Create a classification for metadata management
Atlas can help you to classify your metadata to comply with data governance requirements specific to your organization. We create an example classification next.
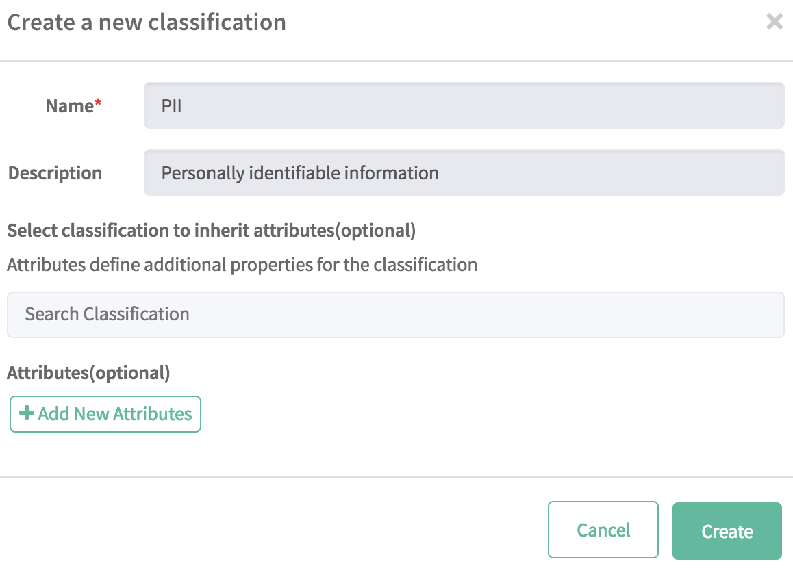
To create a classification, take the following steps
-
-
- Choose Classification from the left pane, and choose the +
- Type PII in the Name field, and Personally Identifiable Information in the Description
- Choose Create.
-
Next, classify the table as PII:
-
-
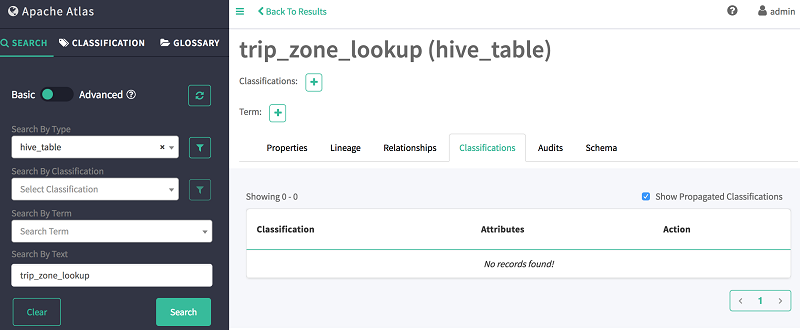
- Return to the Search tab on the left pane.
- In the Search By Text field, type: trip_zone_lookup
-
-
-
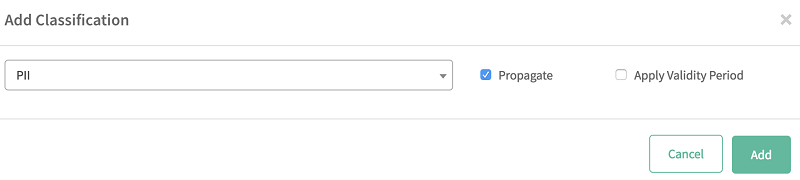
- Choose the Classification tab and choose the add icon (+).
- Choose the classification that you created (PII) from the list.
-
-
-
- Choose Add.
-
You can classify columns and databases in a similar manner.
Next, view all the entities belonging to this classification.
-
-
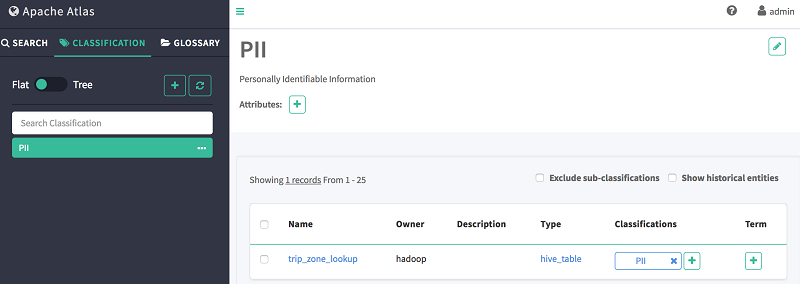
- Choose the Classification tab.
- Choose the PII classification that you created.
- View all the entities belonging to this classification, displayed on the main pane.
-
5. Discover metadata using the Atlas domain-specific language (DSL)
Next, you can search Atlas for entities using the Atlas domain-specific language (DSL), which is a SQL-like query language. This language has simple constructs that help users navigate Atlas data repositories. The syntax loosely emulates the popular SQL from the relational database world.
To search a table using DSL:
-
-
- Choose Search.
- Choose Advanced Search.
- In Search By Type, choose hive_table.
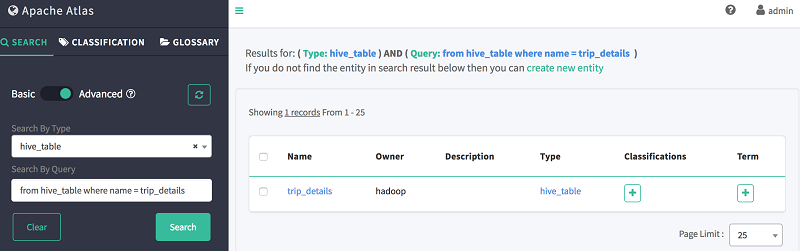
- In Search By Query, search for the table trip_details using the following DSL snippet:
-
As shown following, Atlas shows the table’s schema, lineage, and classification information.
Next, search a column using DSL:
-
-
- Choose Search.
- Choose Advanced Search.
- In Search By Type, choose hive_column.
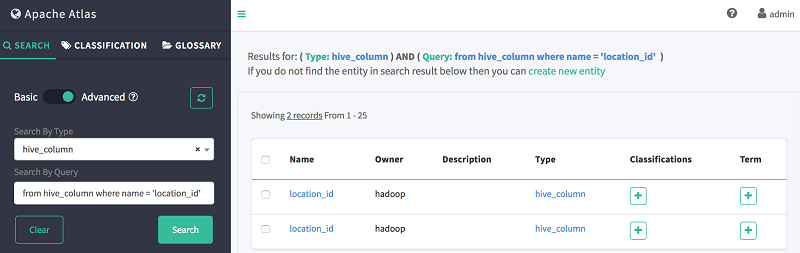
- In Search By Query, search for column location_id using the following DSL snippet:
-
As shown following, Atlas shows the existence of column location_id in both of the tables created previously:
You can also count tables using DSL:
-
-
- Choose Search.
- Choose Advanced Search.
- In Search By Type, choose hive_table.
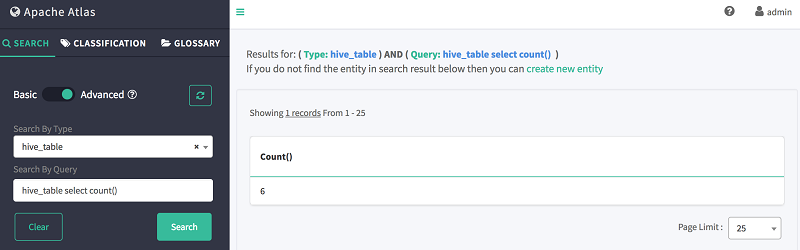
- In Search By Query, search for table store using the following DSL command:
-
As shown following, Atlas shows the total number of tables.
The final step is to clean up. To avoid unnecessary charges, you should remove your Amazon EMR cluster after you’re done experimenting with it.
The simplest way to do so, if you used CloudFormation, is to remove the CloudFormation stack that you created earlier. By default, the cluster is created with termination protection enabled. To remove the cluster, you first need to turn termination protection off, which you can do by using the Amazon EMR console.
Conclusion
In this post, we outline the steps required to install and configure an Amazon EMR cluster with Apache Atlas by using the AWS CLI or CloudFormation. We also explore how you can import data into Atlas and use the Atlas console to perform queries and view the lineage of our data artifacts.
For more information about Amazon EMR or any other big data topics on AWS, see the EMR blog posts on the AWS Big Data blog.
About the Authors
 Nikita Jaggi is a senior big data consultant with AWS.
 Andrew Park is a cloud infrastructure architect at AWS. In addition to being operationally focused in customer engagements, he often works directly with customers to build and to deliver custom AWS solutions. Having been a Linux solutions engineer for a long time, Andrew loves deep dives into Linux-related challenges. He is an open source advocate, loves baseball, is a recent winner of the “Happy Camper” award in local AWS practice, and loves being helpful in all contexts.