Containers
Introducing AWS Copilot
The first official command line tool for Amazon Elastic Container Service (Amazon ECS) was created in 2015. In December 2019, we shared the preview release of a new command line experience, redesigned from the ground up to make it easier for you to deploy your applications on Amazon ECS. Today, we are sharing some of our progress on this command line tool, as well as its new official name: AWS Copilot.
AWS Copilot is designed for both existing ECS users, and new ECS users who want to move beyond manual management of lower-level infrastructure, and instead just start thinking about their application and its lifecycle. Copilot creates modern application deployments by default, based on production-ready patterns that include best practices designed by ECS engineers and customers over the years.
If you are designing a new application, you probably start with a whiteboard or mental diagram that has boxes for each service and lines for how they will talk to each other. But later when it’s time to create this architecture, there are a lot more cloud components to think about: VPC subnets, load balancers, deployment pipelines, and durable storage for your application’s stateful data. Copilot handles all these underlying details for you. You just provide your container and then let Copilot handle high availability deployments and load balancer creation and configuration. You can even have Copilot create a deployment pipeline that will automatically redeploy the latest version of your application every time you push a new commit to your code repository.
To summarize, if you use Copilot, you can go from idea to implementation much faster, with the confidence that the infrastructure you have deployed has production-ready configuration.
How to install Copilot
You can install Copilot onto your development machine using Brew:
brew install aws/tap/copilot-cli
Or if you don’t use Brew and prefer to install directly you can download and install from the releases on Github:
curl -Lo /usr/local/bin/copilot https://github.com/aws/copilot-cli/releases/latest/download/copilot-darwin && chmod +x /usr/local/bin/copilot && copilot --helpYou can also find the full list of install instructions for macOS, Linux, and Windows systems in the Copilot documentation.
Copilot uses the same credentials as the AWS CLI, so if you have already been utilizing the AWS CLI on your development machine, you are ready to go. If you have not yet installed or configured the AWS CLI, you can do so by following these instructions. Make sure to run aws configure after you install the AWS CLI.
Last but not least, you will need to make sure that Docker is installed on your development machine. Docker will be used by AWS Copilot to build and package your application.
Introduction to Copilot concepts
First, let’s take a quick look at the high-level commands available in Copilot:
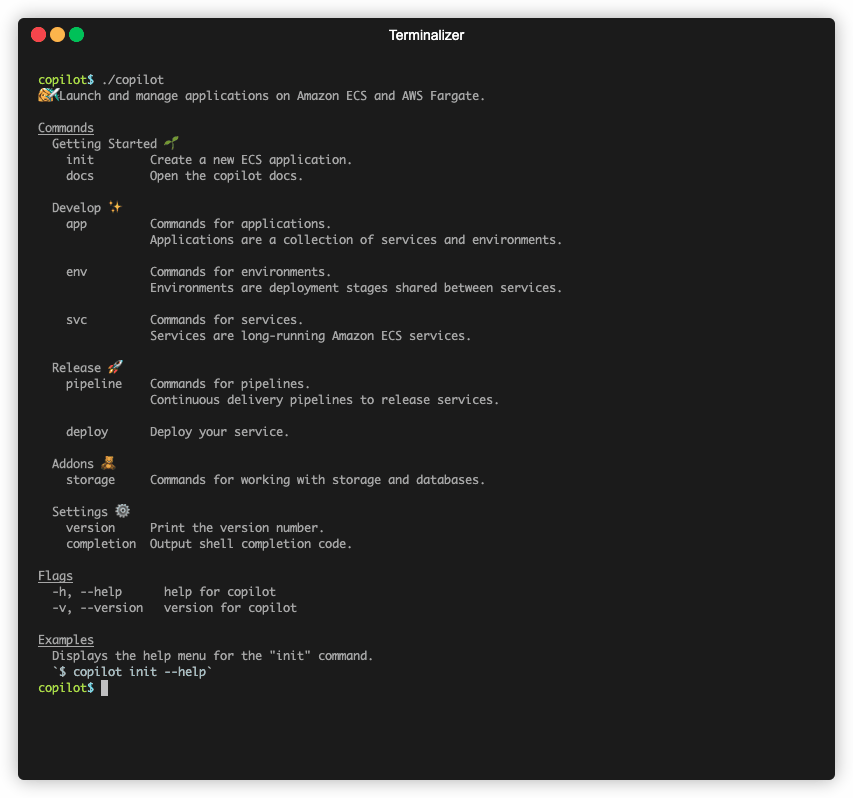
Copilot has three main concepts:
- Application – An application is a grouping mechanism for the pieces of your system. Following Conway’s Law you would split up your components into Copilot applications that correspond to the different teams in your organization. For example, if you still have a small organization with a unified development team that works on a bit of everything then you can probably organize things as a single application made up out of one or more services. But if you have multiple teams, each responsible for a single group of components, and very little cross team work, then each team should have their own Copilot application.
- Environment – An environment is one stage of deployment of an application. For example, you might deploy an application to a “QA” environment first so that it can be tested without impacting your customers. Once it has been verified to work as intended, you deploy that version of the application to the “Production” environment so your customers can access it.
- Service – A service is a single long running code process inside a container. An application consists of one or more services. If you are using a monolithic architecture, then it’s likely each application will have just a single service. A more distributed architecture will utilize multiple services for each application. For example, you might have a “website” service with an internet facing load balancer, an internal “API” service that is only accessible via service discovery, and a “background worker” service that works on jobs off a queue. Together these services make up the components of a single application.
Getting started with your first containerized application
The first step to any containerized application is its Dockerfile. The Dockerfile is a small file that describes what dependencies and files your application needs, as well as what program to run in the container. For this example case, I’m going to use a simple static NGINX web server as a demo application so my Dockerfile looks like this:
FROM nginx:alpine
EXPOSE 80
COPY . /usr/share/nginx/html
This Dockerfile tells Docker to start with a prebuilt container that already has NGINX inside of it, and then add some local HTML files to the container. I also included an EXPOSE statement for Copilot to know what application port needs to be exposed to the world via a load balancer.
Next I run copilot init in my application directory:
Copilot automatically finds the Dockerfile I wrote. It asks me a few questions such as what I want to name the application. Then it creates an environment for deploying the service into. It builds and pushes the container to the cloud. Last but not least, it gives me a URL where I can access the application.
Now that the application is up and running, I can load it’s URL in my browser and send some requests:

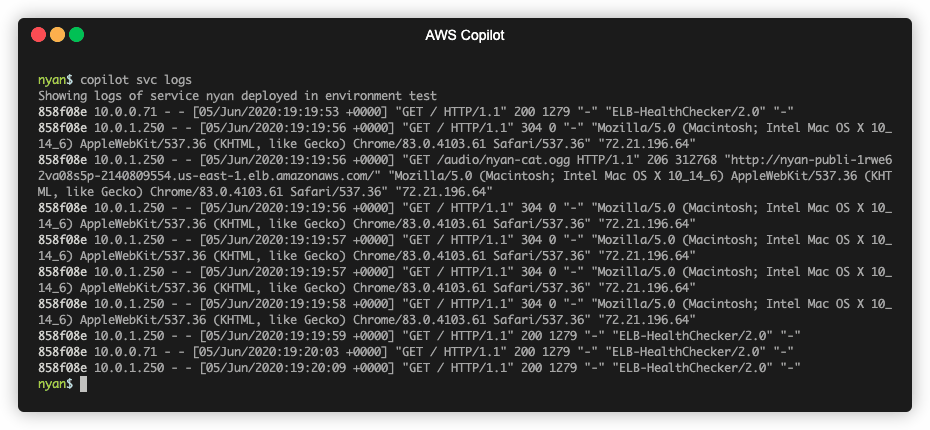
After making a few web requests to my containerized NGINX services, I can use Copilot to see the logs for my application by running:
copilot svc logs --follow
In this case, my service logs are just NGINX access logs, but if I was running an application, any debug output that I printed to the stdout stream would show up here.
Deploying a production environment
The first application you deploy in Copilot will start out using the default configuration, which only deploys a single small container to Fargate. This setup is optimized for low cost and is ideal for development purposes, but it is not yet ready for production traffic.
To get ready for production traffic, I need to set up a new environment:
copilot env init
Now before I deploy my service to this production environment I need to make a few changes to the configuration for this production environment. I can find the configuration manifest for my service at nyan/manifest.yml
This manifest file contains all the default settings for my application, such as its port, how much CPU and memory it requires, and how many copies of the application to run. In particular, I want to override these settings for the production environment, so I add the following statements to the manifest file:
environments:
  production:
    count: 2
    cpu: 1024
    memory: 2048
This tells Copilot that when I deploy my application to production I want to run two copies of the application, each with 1 CPU and 2 GB of memory.
Now I can deploy the service to production using the command:
copilot svc deploy --env production
This time, Copilot deploys my application to the production environment as a highly available replica set distributed across Availability Zones, and each container has more CPU and memory. I can run a simple load test using ApacheBench to get an idea of how much traffic this deployment can handle:
ab -n 5000 -c 25 http://nyan-Publi-WI97060DJP1B-2041999651.us-east-1.elb.amazonaws.com
This command tells ApacheBench to make 5000 requests to my service, with a concurrency of 25 requests at a time.
The final results show a very acceptable 353 requests per second, p99 of only 165 ms, and an average time per request of 70ms.
If I decide that I need to serve higher traffic than this, I can easily modify my application manifest to scale out by incrementing the production count, or scale up by adding more CPU to my service, then run copilot svc deploy again.
Conclusion
As you can see, Copilot is designed to help you deploy a production ready containerized service with only a few commands. You provide your Dockerfile, and let Copilot build, push, and launch your container on AWS.
But this is just the beginning of Copilot’s powerful features. By using Copilot, you also get an easy way to:
- Set up a CI/CD pipeline automatically so you can deploy by simply pushing to a Git repository
- (Coming soon) Provision storage for your services, including S3 buckets, NoSQL, and SQL databases
In a future article, we will dig deeper into these powerful features. In the meantime, please give us any feedback or feature requests on the project’s official GitHub repository. Pull requests are also welcome!