Getting Started with AWS
Create Continuous Delivery Pipeline
Set up a Git repo, deploy a sample web app, and create a continuous delivery pipeline


Module 2: Deploy Web App
In this module, you will create and deploy a web application using AWS Elastic Beanstalk
Overview
In this module, you will use the AWS Elastic Beanstalk console to create and deploy a web application. AWS Elastic Beanstalk is a compute service that makes it easy to deploy and manage applications on AWS without having to worry about the infrastructure that runs them. You will use the Create web app wizard to create an application and launch an environment with the AWS resources needed to run your application. In subsequent modules, you will be using this environment and your continuous delivery pipeline to deploy the Hello World! web app created in Module 1.
What you will accomplish
- Configure and create an AWS Elastic Beanstalk environment
- Deploy a sample web app to AWS Elastic Beanstalk
- Test the sample web app
Key concepts
AWS Elastic Beanstalk - A service that makes it easy to deploy your application on AWS. You simply upload your code and Elastic Beanstalk deploys, manages, and scales your application.
Environment - Collection of AWS resources provisioned by Elastic Beanstalk that are used to run your application.
EC2 instance - Virtual server in the cloud. Elastic Beanstalk will provision one or more Amazon EC2 instances when creating an environment.
Web server - Software that uses the HTTP protocol to serve content over the Internet. It is used to store, process, and deliver web pages.
Platform—Combination of operating system, programming language runtime, web server, application server, and Elastic Beanstalk components. Your application runs using the components provided by a platform.
Time to complete
10 minutes
Services used
Implementation
-
Configure an AWS Elastic Beanstalk app
- In a new browser tab, open the AWS Elastic Beanstalk console.
- Choose the orange Create Application button.
- Choose Web server environment under the Configure environment heading.
- In the text box under the heading Application name, enter DevOpsGettingStarted.
- In the Platform dropdown menu, under the Platform heading, select Node.js . Platform branch and Platform version will automatically populate with default selections.
- Confirm that the radio button next to Sample application under the Application code heading is selected.
- Confirm that the radio button next to Single instance (free tier eligible) under the Presets heading is selected.
- Select Next.

7. On the Configure service access screen, choose Use an existing service role for Service Role.
8. For EC2 instance profile dropdown list, the values displayed in this dropdown list may vary, depending on whether you account has previously created a new environment.
9. Choose one of the following, based on the values displayed in your list.
- If aws-elasticbeanstalk-ec2-role displays in the dropdown list, select it from the EC2 instance profile dropdown list.
- If another value displays in the list, and it’s the default EC2 instance profile intended for your environments, select it from the EC2 instance profile dropdown list.
- If the EC2 instance profile dropdown list doesn't list any values to choose from, expand the procedure that follows, Create IAM Role for EC2 instance profile.
- Complete the steps in Create IAM Role for EC2 instance profile to create an IAM Role that you can subsequently select for the EC2 instance profile. Then, return back to this step.
- Now that you've created an IAM Role, and refreshed the list, it displays as a choice in the dropdown list. Select the IAM Role you just created from the EC2 instance profile dropdown list.
10. Choose Skip to Review on the Configure service access page.
This will select the default values for this step and skip the optional steps.

11. The Review page displays a summary of all your choices.
12. Choose Submit at the bottom of the page to initialize the creation of your new environment.

While waiting for deployment, you should see:
- A screen that will display status messages for your environment.
- After a few minutes have passed, you will see a green banner with a checkmark at the top of the environment screen.
Once you see the banner, you have successfully created an AWS Elastic Beanstalk application and deployed it to an environment.

-
Test your web app
- To test your sample web app, select the link under the name of your environment.

2. Once the test has completed, a new browser tab should open with a webpage congratulating you!

- To test your sample web app, select the link under the name of your environment.
Application architecture
Now that we are done with this module, our architecture will look like this:
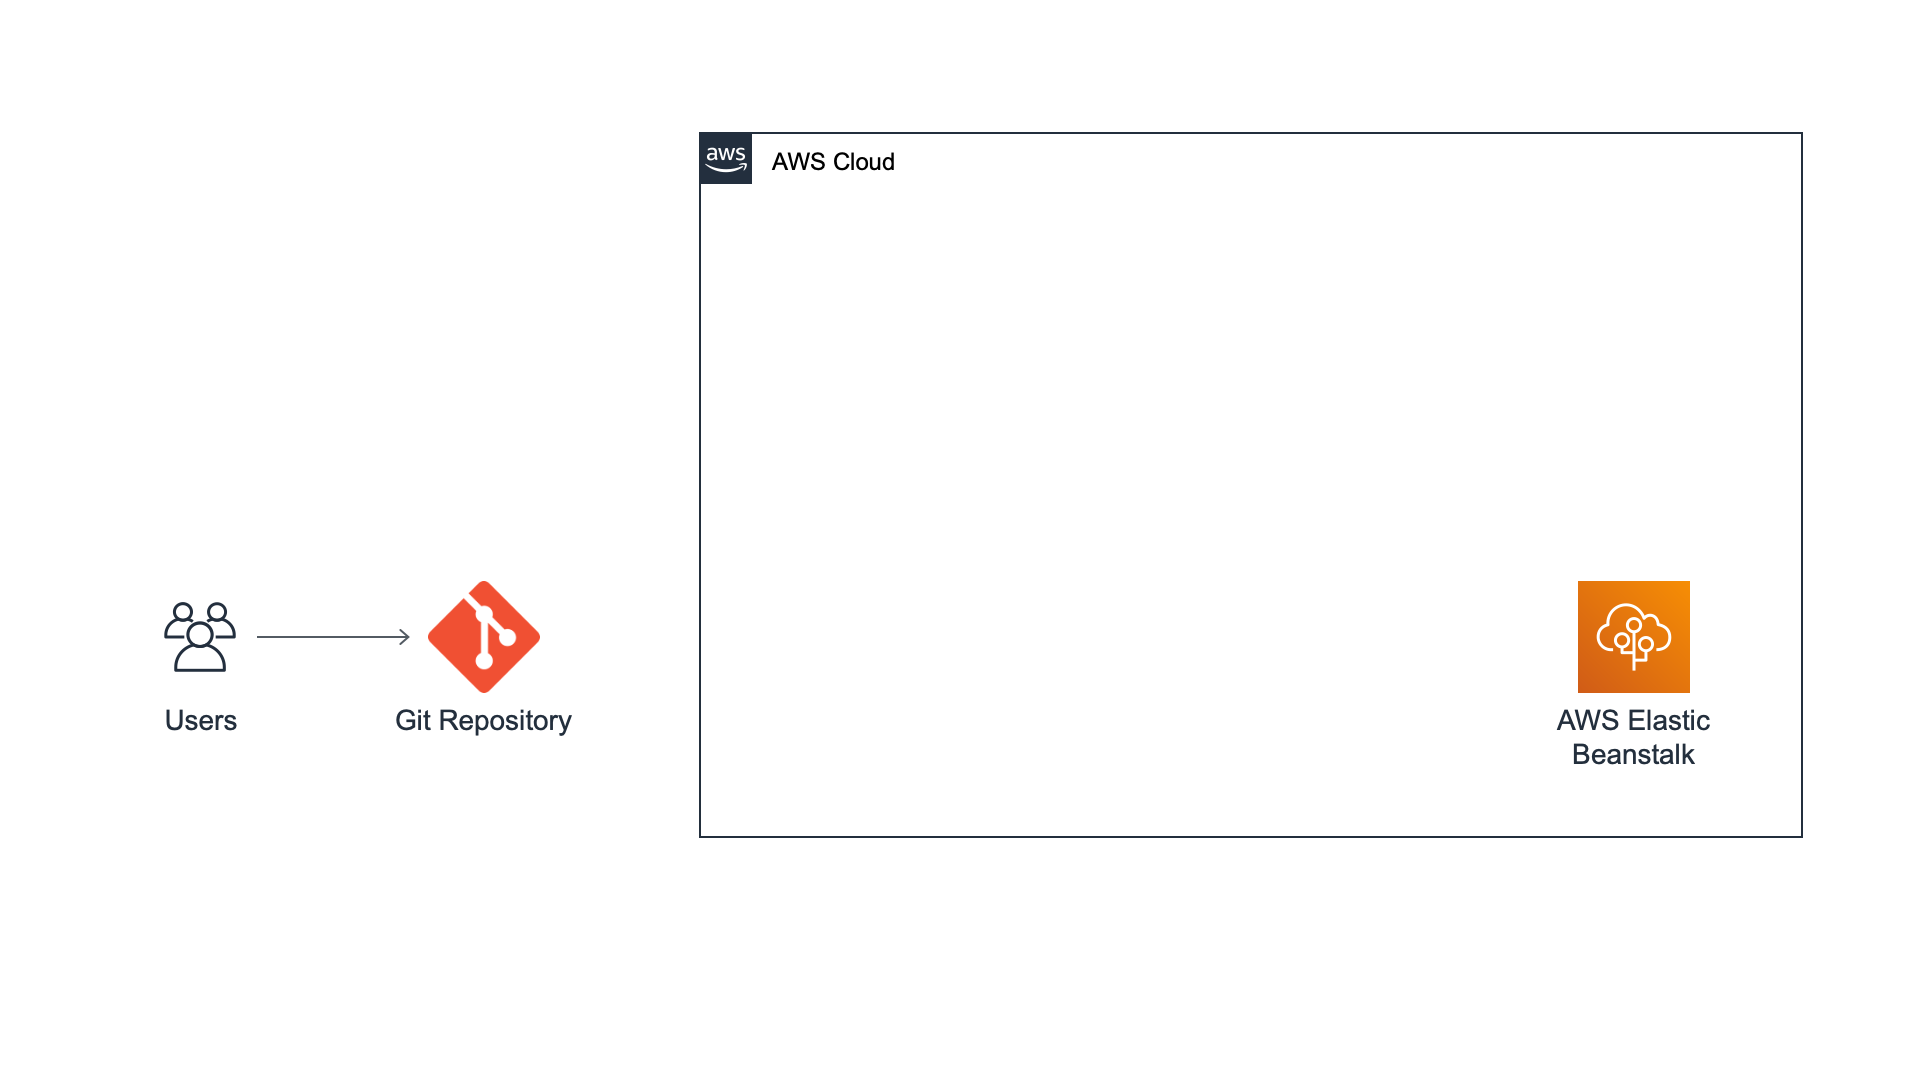
We have created an AWS Elastic Beanstalk environment and sample application. We will be using this environment and our continuous delivery pipeline to deploy the Hello World! web app we created in the previous module.