In this tutorial, you will learn how to configure an Amazon Aurora cluster to create a high-availability database. A high-availability database consists of compute nodes replicated across multiple availability zones to gain increased read scalability and failover protection.
Amazon Aurora is a relational database service with MySQL and PostgreSQL-compatible editions, which offers the performance and availability of enterprise databases at a fraction of the cost. For most production workloads, you will want to set up your database with high availability.
By default, an Amazon Aurora cluster has only one primary compute instance performing read/write operations. By adding one or more Aurora Replicas to the cluster, you gain read scalability and high availability for your database cluster. If the primary instance in the cluster fails, Aurora automatically promotes an existing Replica to be the new primary instance.
Generally, you’ll want to create Aurora replicas in a different Availability Zone (AZ) than the primary instance. This way, your database can quickly fail over to the Replica in the other AZ in the event of infrastructure problems in the primary AZ.
At the storage layer, Aurora always protects your data by replicating it six ways across three AZs. However, if you did not add Aurora Replicas to the cluster, you will have to wait for Aurora to create a new replacement primary instance for you when a failure is detected, which may take longer.
This tutorial will use Amazon Aurora with MySQL compatibility, but you can follow a similar process for the PostgreSQL edition. You will create an Aurora Cluster via the Amazon RDS Management Console, add an Aurora Replica, test a failover scenario, and then terminate the tutorial environment.
This tutorial is not within the free tier and will cost less than $1 provided you follow the steps in the tutorial and terminate resources at the end of the tutorial.
| About this Tutorial | |
|---|---|
| Time | 10 minutes |
| Cost | Less than $1 |
| Use Case | Databases |
| Products | Amazon Aurora, Amazon RDS |
| Audience | Database administrators, Developers |
| Level | Intermediate |
| Last Updated | June 16, 2020 |
1. Sign up for AWS
You need an AWS account to follow this tutorial. Sign up for an account by selecting 'Sign-up for AWS.'
Already have an account? Log in to your account
Step 2 - Enter the Amazon RDS Console
Amazon Aurora is a MySQL and PostgreSQL-compatible relational database built for the cloud. It is an engine of Amazon Relational Database Service (Amazon RDS). In this step, you will enter the Amazon RDS console.
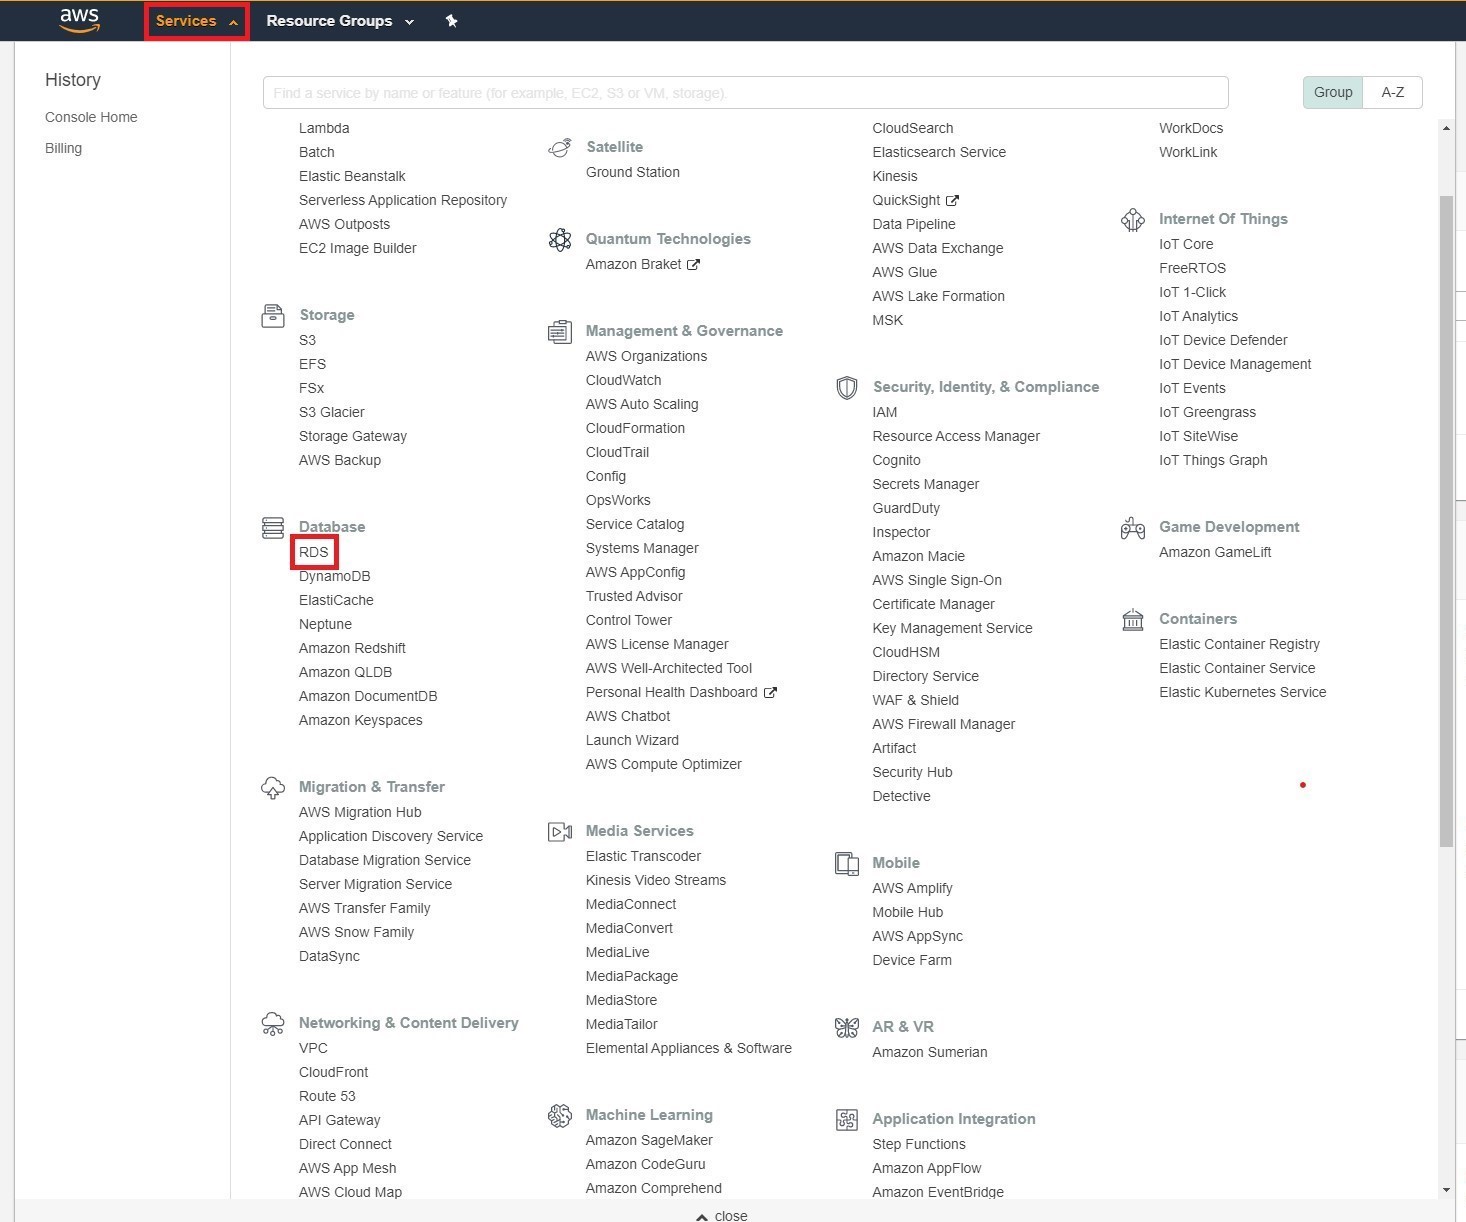
Open the AWS Management Console, so you can keep this step-by-step guide open. When the screen loads, enter your user name and password to get started. Select Services > RDS to enter the RDS Management console.
Step 3 - Create an Amazon Aurora cluster
In this step, you will create an Amazon Aurora cluster comprised of one Aurora database instance.
a. In the top right corner of the Amazon RDS console, select the Region in which you want to create the DB instance, then select Create database.

b. On the Select engine page, select Standard Create. For engine type, select Amazon Aurora. Then select the Edition you want.

c. Enter a name for your DB cluster identifier, Master username, and password.
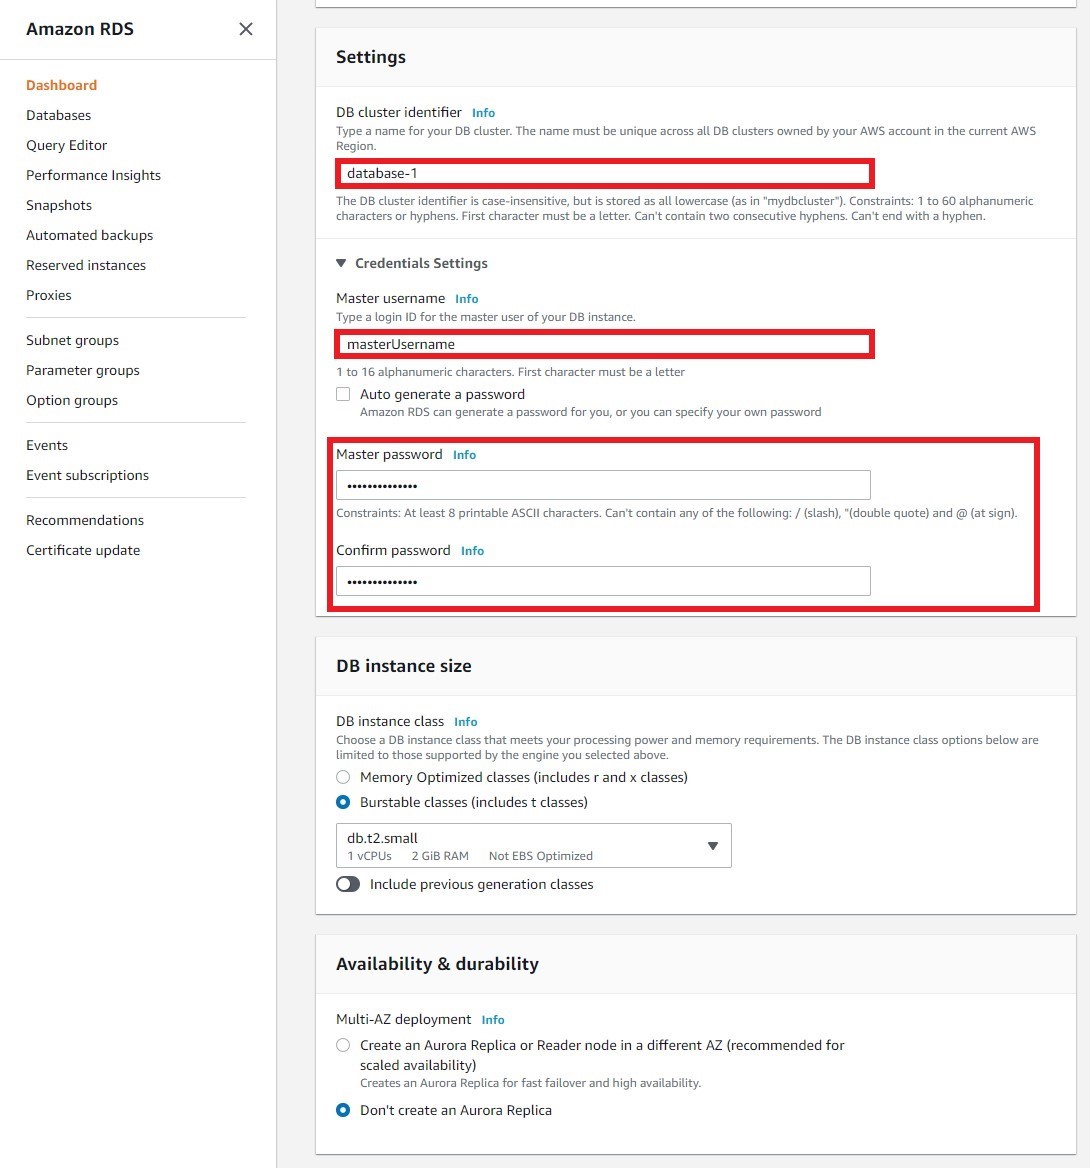
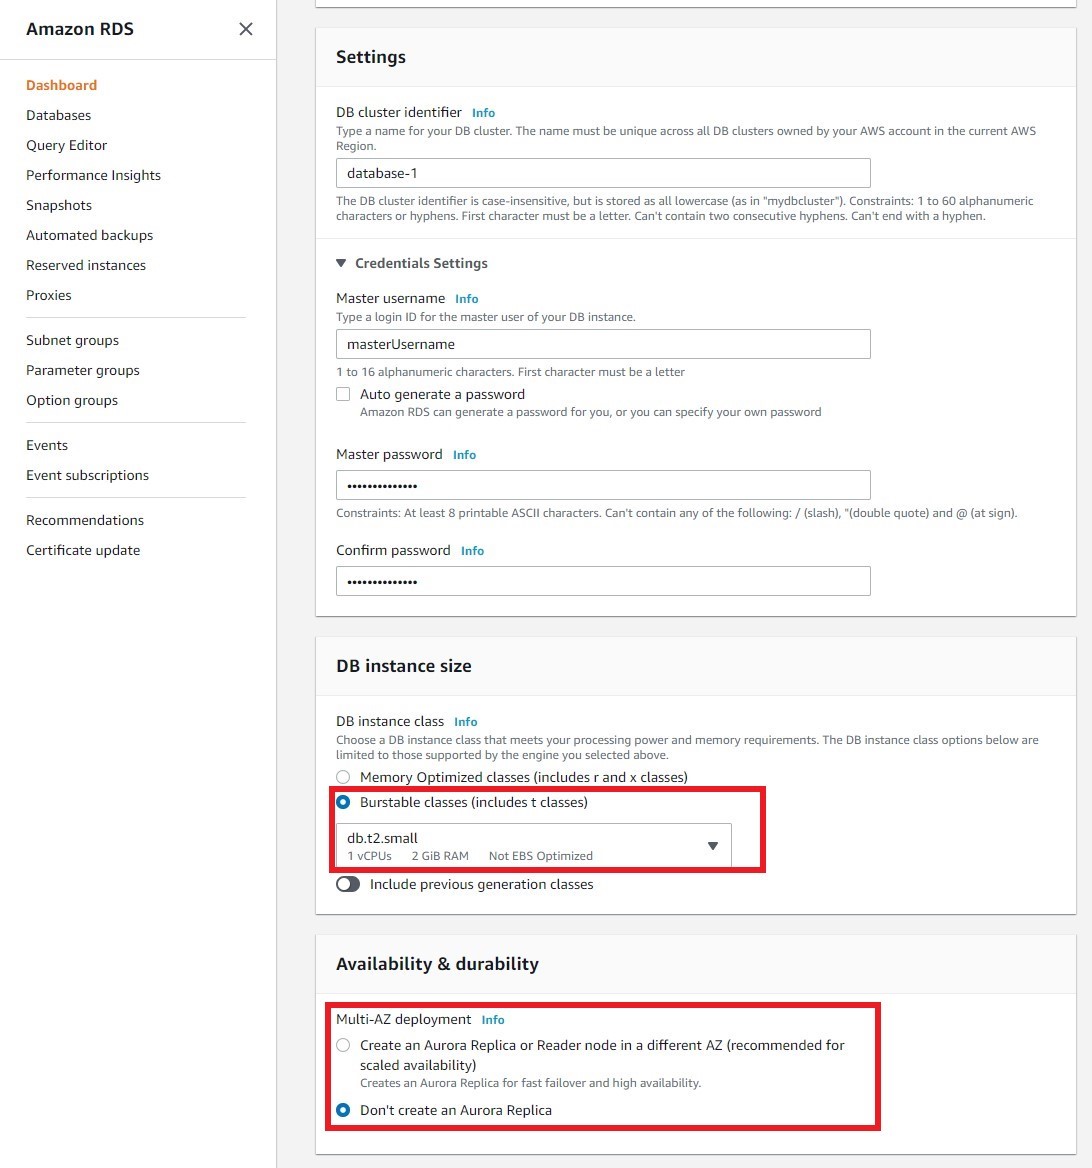
d. You will now configure your DB. Leave the default settings for Capacity type and DB engine version. On DB instance class, you will select the compute and memory capacity of the DB instance. Amazon Aurora is charged per hour by instance type - for the purposes of this tutorial, select db.t2.small (1 vCPU, 2 GiB RAM) to keep your costs low.
Under Multi-AZ deployment, select No. While Amazon Aurora offers Multi-AZ deployment as a default option, this tutorial will walk you through creating replicas across the Availability Zone of your choice.
e. There are many advanced configuration options for Amazon RDS. For the purposes of this tutorial, simply disable the "Delete Protection" option and leave the rest of the default configurations. Finally, select Create database.
Depending on the DB instance class, it can take up to several minutes for the DB instance to become available.

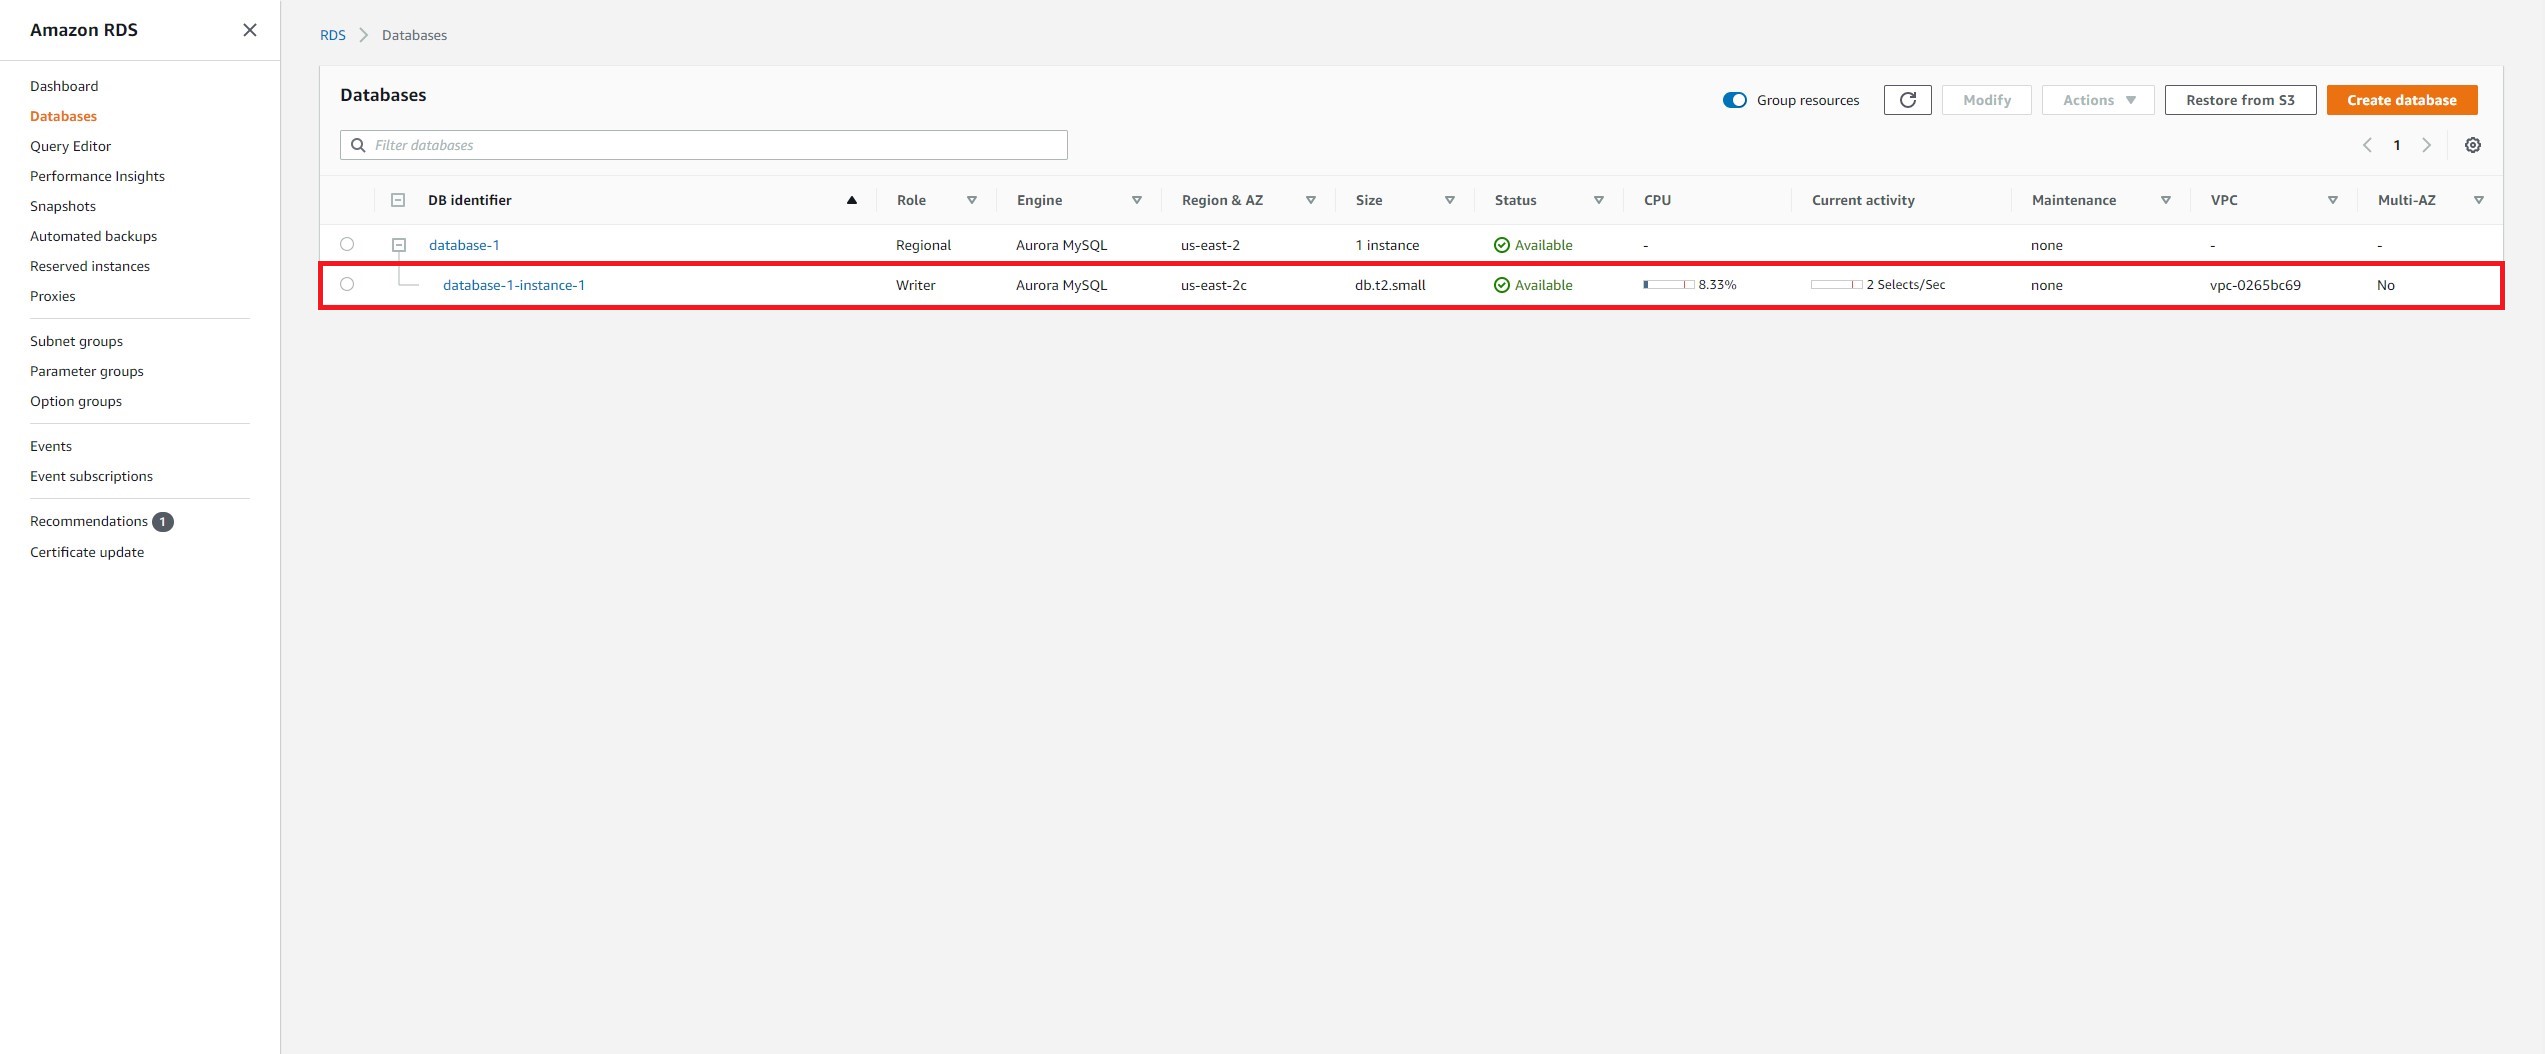
f. The new Aurora DB instance appears in the list of Databases on the RDS console. The DB instance will have a status of creating until the instance is ready for use and the status changes to available. If the status doesn't change within a few minutes, refresh the page.
Step 4 - Create an Aurora Replica for High Availability
Every Amazon Aurora instance comes with strong data protection by default. You can increase compute availability by adding Read Replicas in different Availability Zones (AZs) within an AWS region. Up to 15 Aurora Replicas can be distributed across the AZs that a DB cluster spans within a region.
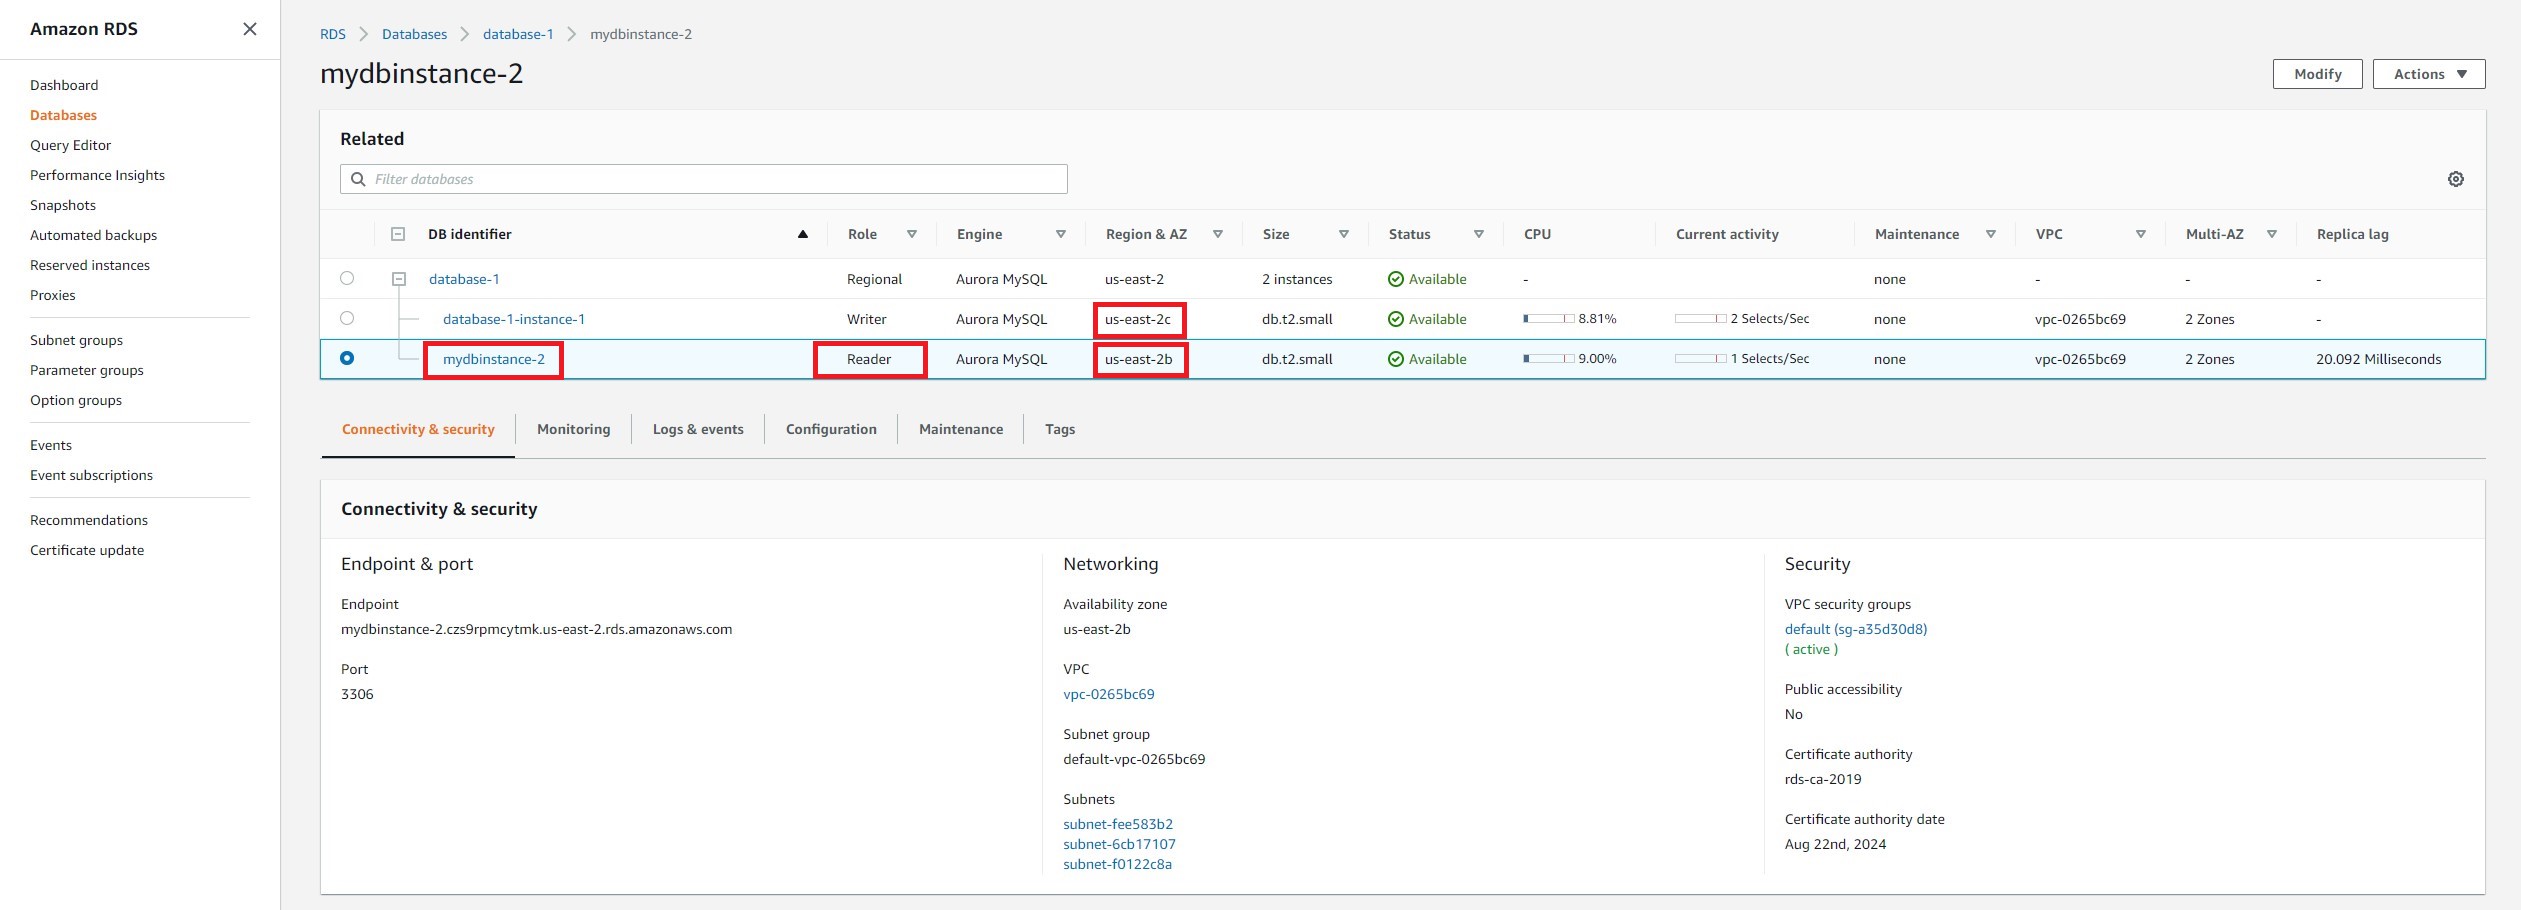
a. In the Amazon RDS console, the primary (writer) instance in our Aurora cluster will be listed in Databases. Select the instance name and take note of the availability zone under Networking.

b. Select the radio button for the cluster and create an Aurora Replica by selecting Actions > Add reader.

c. Select a different Availability zone from the primary or master db instance. For Instance specifications, select a similar instance class as the primary instance (in this example, db.t2.small), so we will not see any change in database performance in case of a failover. Under Settings, enter a unique name for the Aurora read replica db instance.
Select Add reader.

d. In the database list, we see that the new replica is being created with the role of Reader. Scroll to right until you see the Multi-AZ property, and you will now see 2 Zones, indicating that the cluster is distributed across two Availability Zones (at the compute layer).
You have successfully achieved high availability on the compute layer. We will next test the db failover process.
Step 5 - Set up the database cluster for failover
To increase high availability, you can use Aurora Replicas as failover targets. If the primary instance fails, an Aurora Replica is promoted to the primary instance. Replicas are used for both read scalability and availability. In this step, you will set up the priority order of Aurora Replicas to be used for failover.
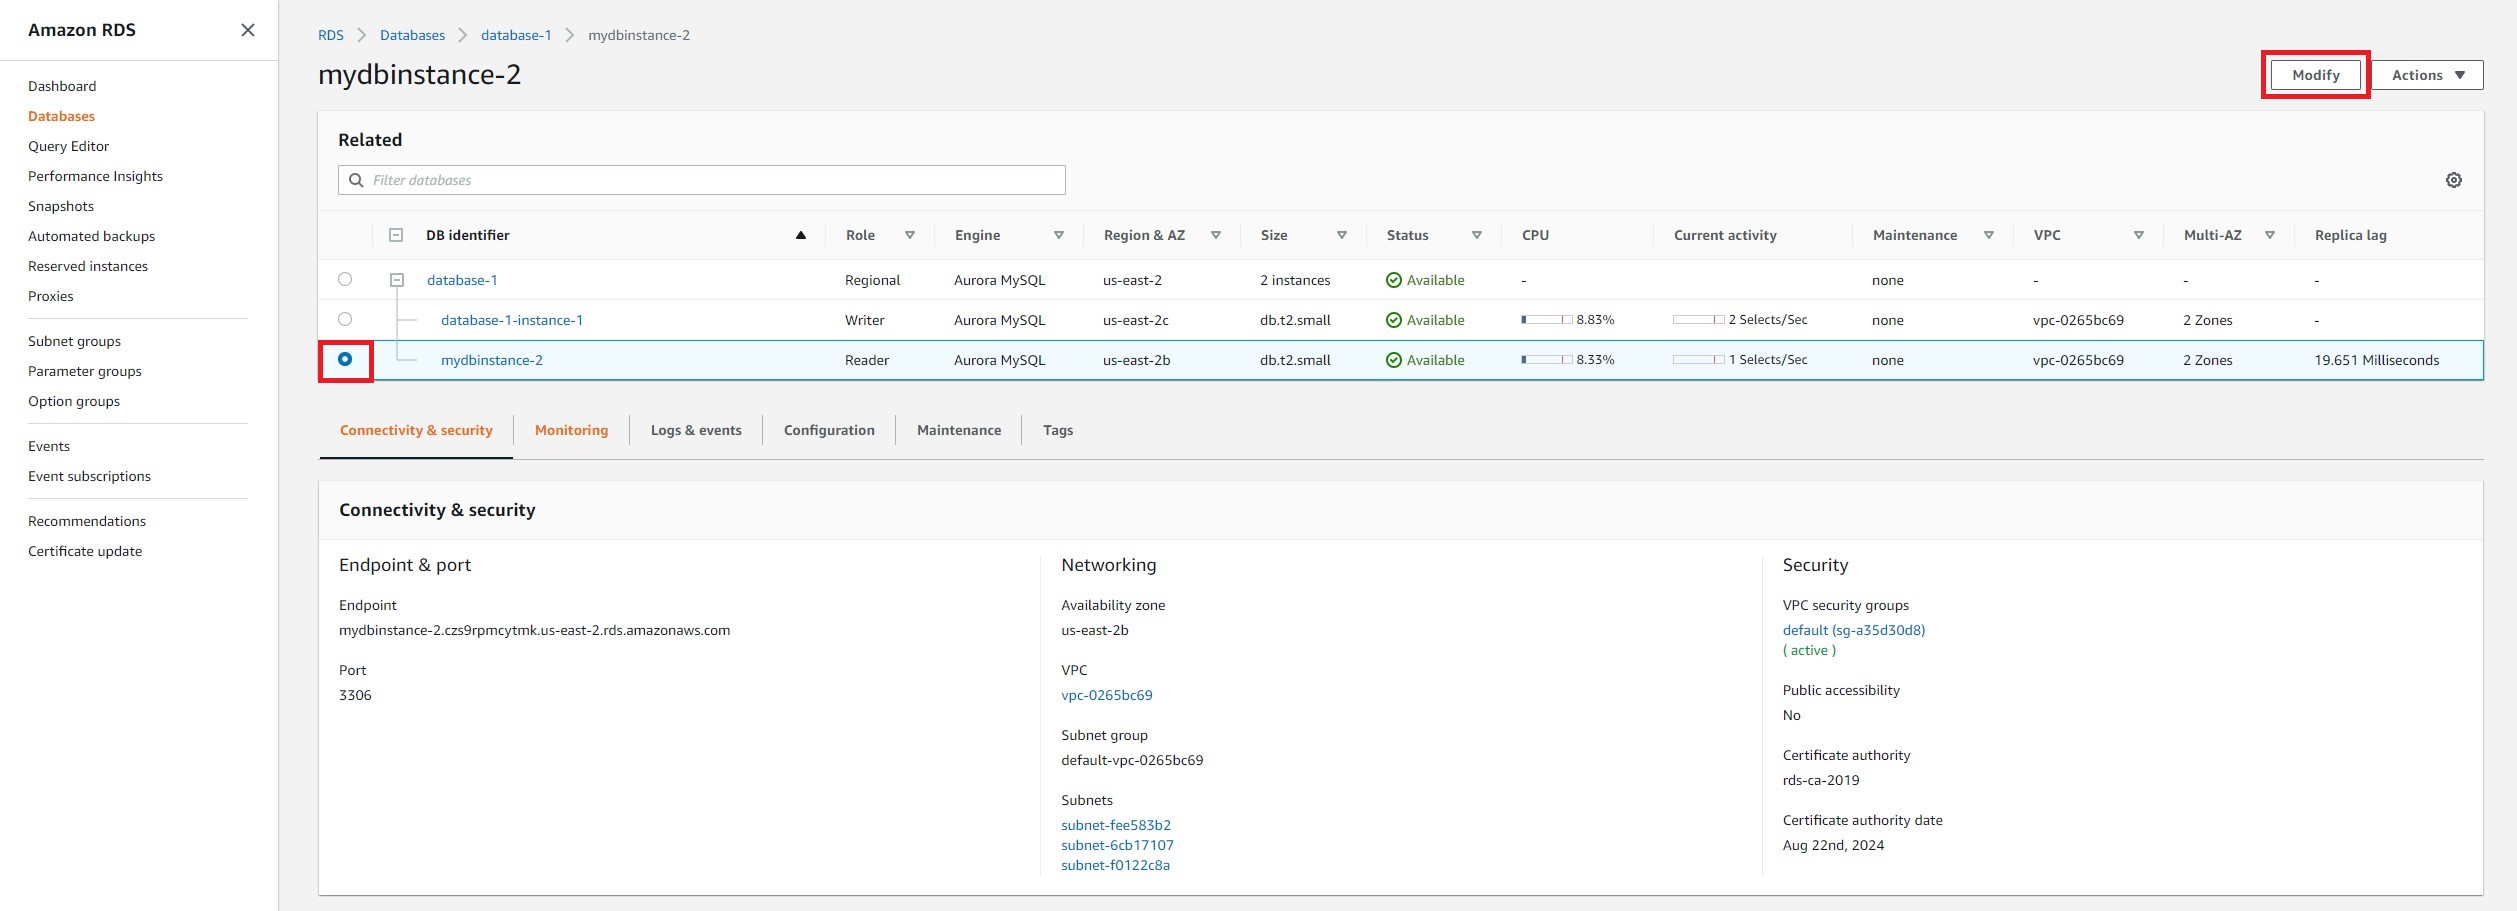
a. Select the radio button next to your Reader DB instance and select Modify.
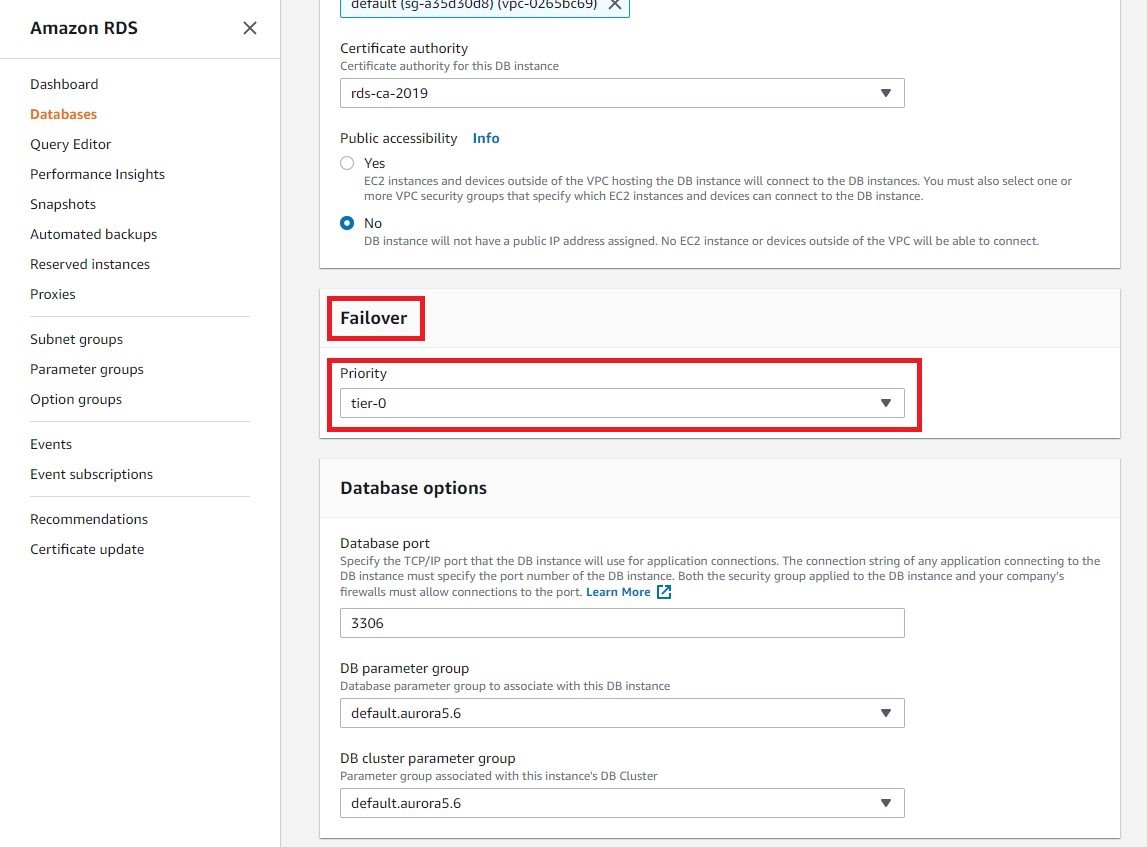
b. During a failover, Amazon RDS will promote the replica with the highest priority (starting with tier 0) to become the new primary instance. In this example, we do not have any existing replicas, so we will set the replica as the highest priority. Under Failover, select Tier-0.
If there is contention between two or more replicas in the same priority tier, Amazon RDS will promote the replica that is the same size as the primary instance.
Select Continue, then Modify DB instance.
Step 6 - Test database failover
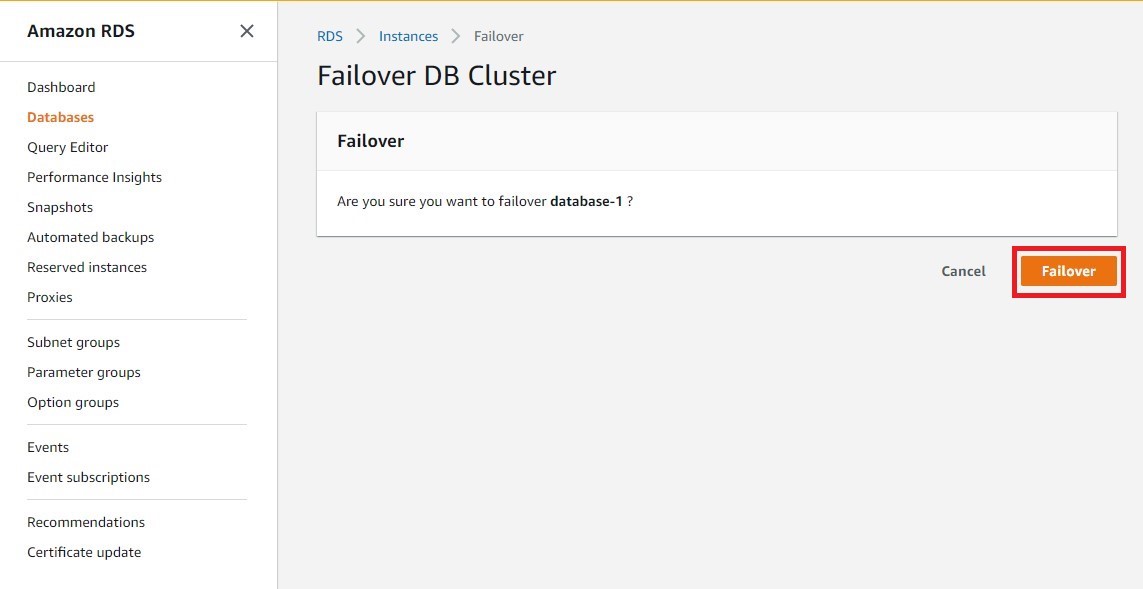
a. Select the radio button on the target instance. Then select Actions > Failover. This will cause the replica to be promoted as the new primary (or writer) instance and old primary (or writer) instance becomes a new read replica.
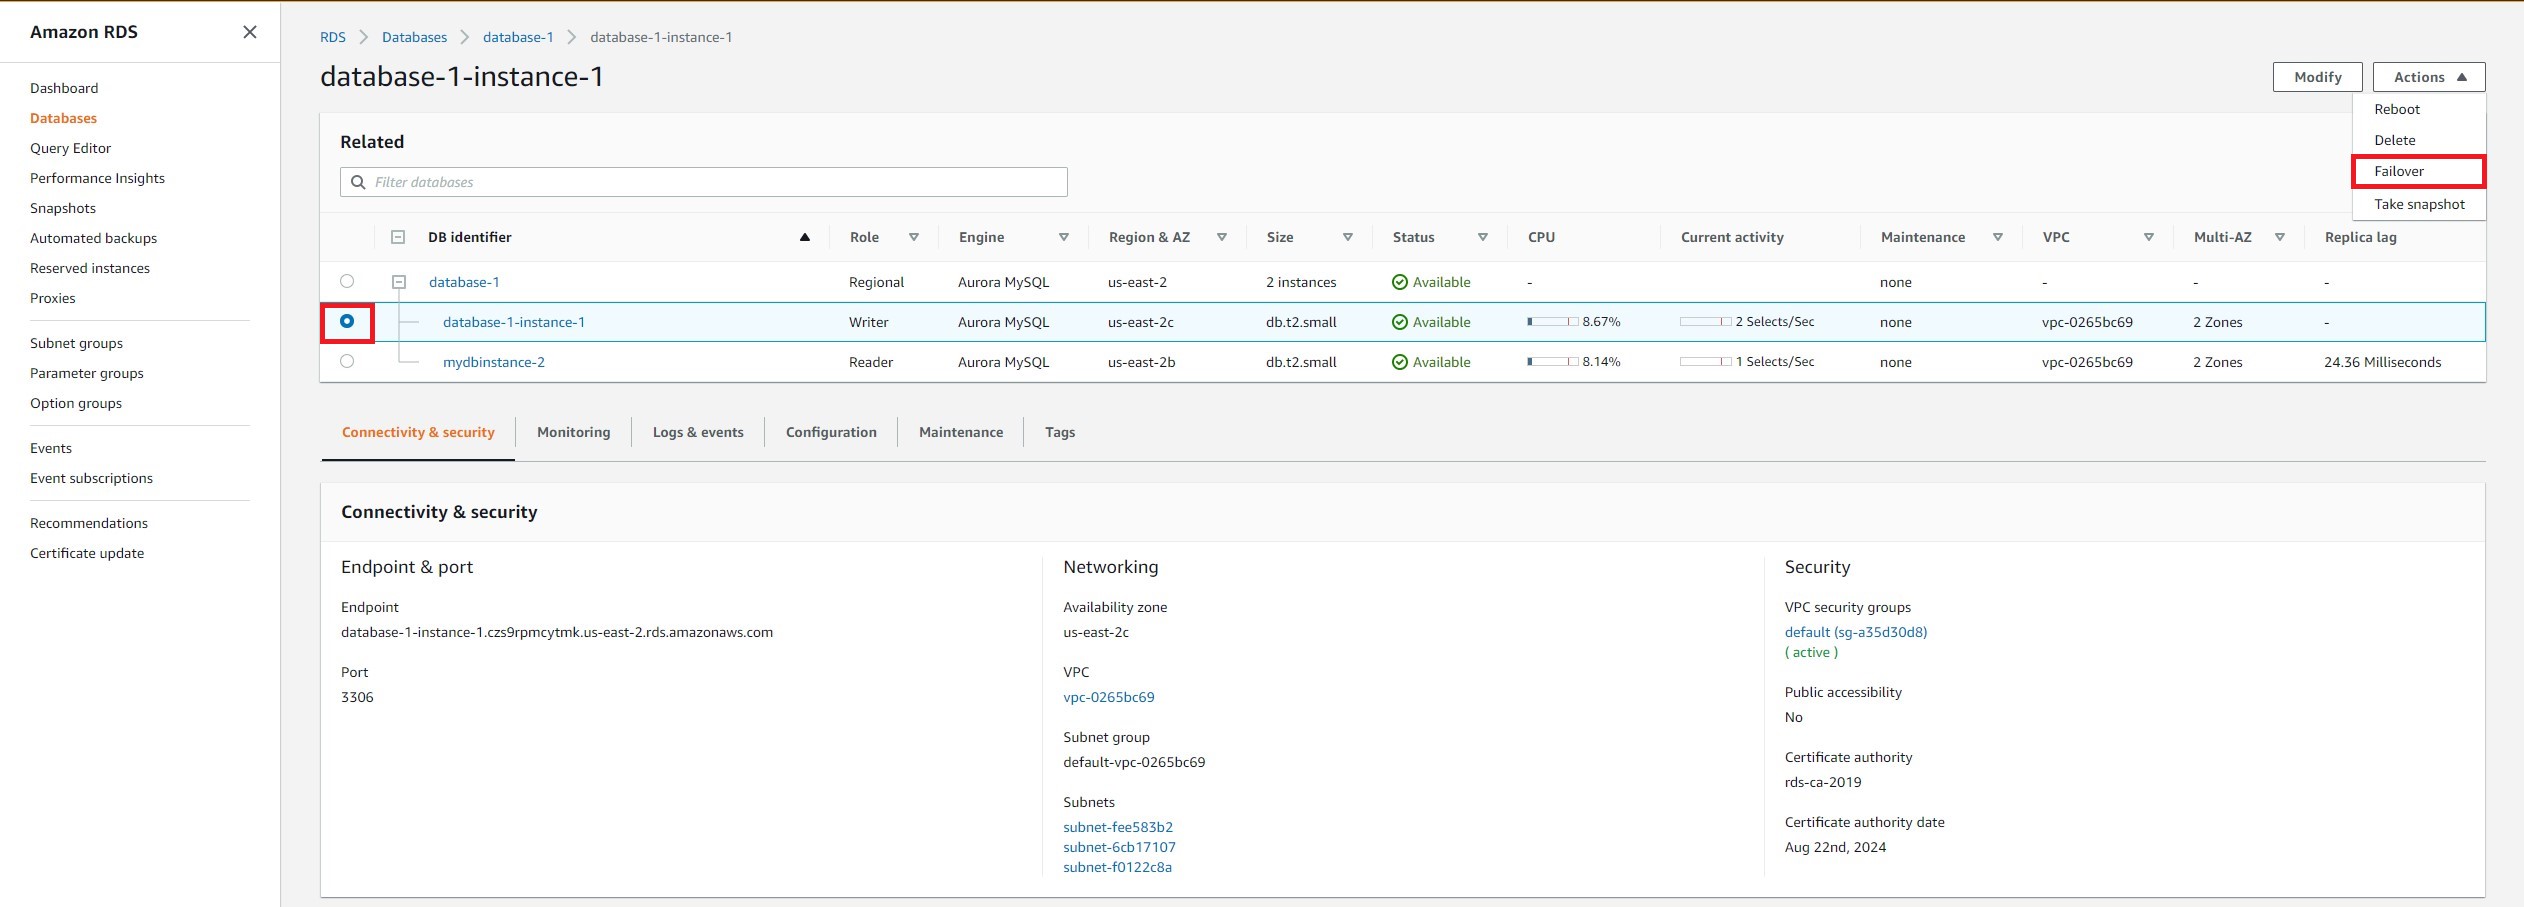
b. Select Failover.
c. The time it takes for the failover to complete depends on the amount of database activity at the time of failover but is typically under 60 seconds. You can monitor failover process under Log & events > Recent events.
The failover is transparent to the application by using endpoints. While the cluster and reader endpoints are used as DNS for the database, the instance connection will remain the same and automatically use the new db instance.

7. Terminate Resources
In this step you will terminate your Aurora DB cluster environment.
Important: Terminating resources that are not actively being used reduces costs and is a best practice.
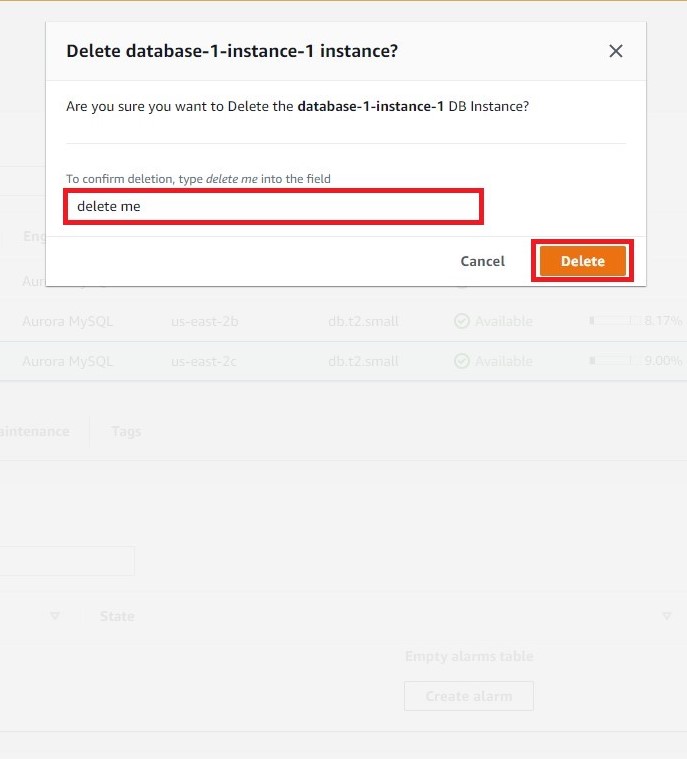
a. Select your Amazon Aurora cluster name for termination and click on cluster name to display a list of all cluster instances. Select the radio button on the reader role db instance and select Actions > Delete.

b. Enter delete me and select Delete to confirm. You will see the status now change to Deleting.
c. Repeat steps 7a-b with the writer db instance. For this tutorial, do not create a final snapshot and select the acknowledgement. Enter delete me and select Delete. This step will delete the Aurora cluster, including storage and all automated db backups.

Congratulations
You have learned how to set up an Amazon Aurora database cluster with high availability using the AWS Management Console. You can now leverage Amazon Aurora’s high availability, performance, and durability for your critical applications.