AWS News Blog
AWS Elastic Beanstalk From The AWS Management Console
 The AWS Management Console includes support for AWS Elastic Beanstalk. If you already have a Java WAR file that you want to use to try out Elastic Beanstalk, you can do so through its browser-based interface. If you don’t happen to have an application of your own handy, you can use the sample application provided with Elastic Beanstalk to start learning more without writing any code.
Let’s take a tour!
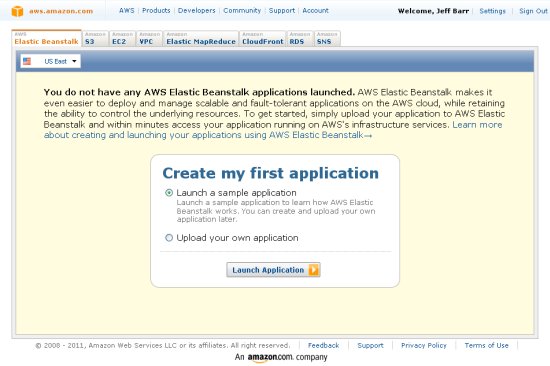
Here is the new Elastic Beanstalk tab on the Console. You can launch a sample application and use it to learn more about Elastic Beanstalk or you can upload your own application’s WAR file.
If you choose to launch the sample application, it will be launched with a default environment. This should take a few minutes at most. Here’s what the console looks like during the launch process:
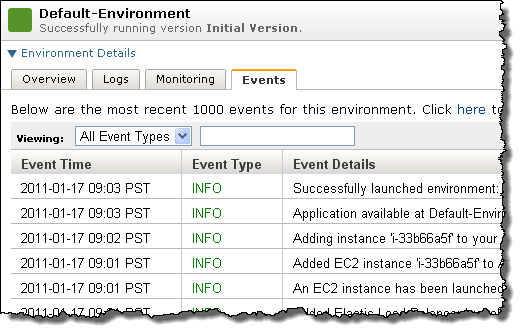
You can check the event list at any time to see how things are progressing:
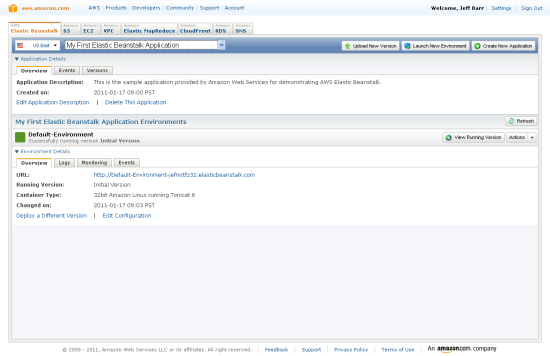
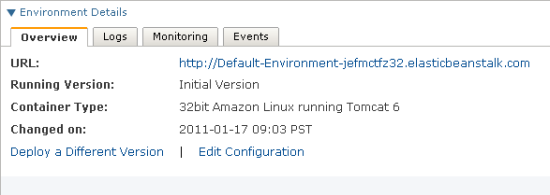
The environment’s status will change to Ready as soon as the Elastic Load Balancer and Auto Scaling are set up, the EC2 instance(s) are launched, and Apache and Tomcat are up and running:
The console displays the URL of the application so you can access it with just a click (you can also click on the View Running Version Button):

or
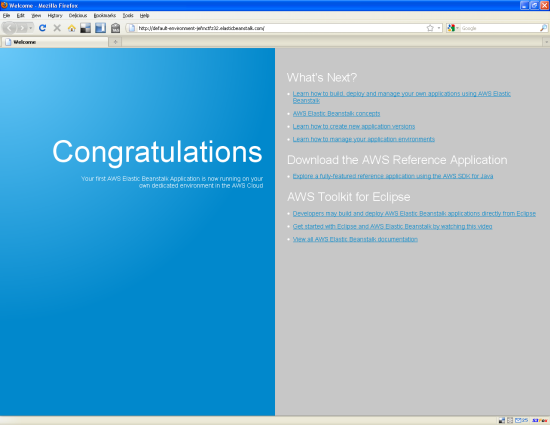
The sample application provides you with links to additional Elastic Beanstalk resources:
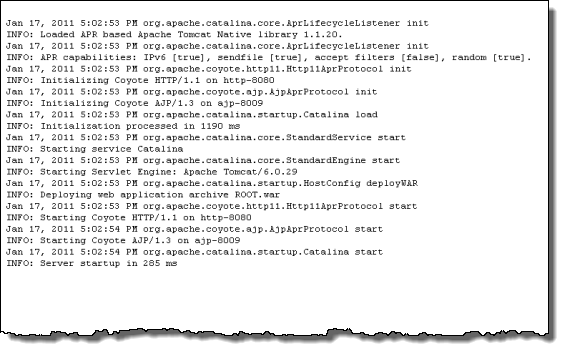
In case you want to diagnose any issues, you can ask for a snapshot of the server’s log files at any time.

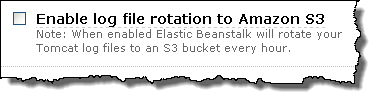
You can also arrange for the application server logs to be sent to Amazon S3 every hour (these will be Tomcat logs if you are using the default container type):
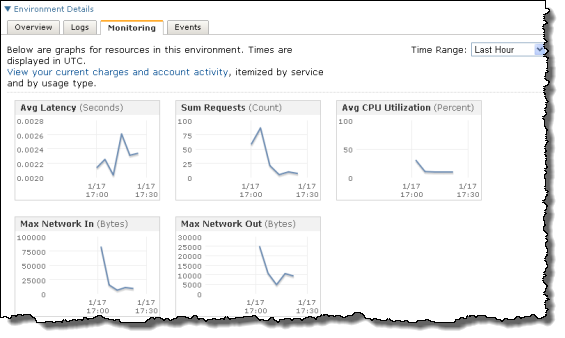
Amazon CloudWatch monitoring is automatically enabled for the application and is visible in the Console:
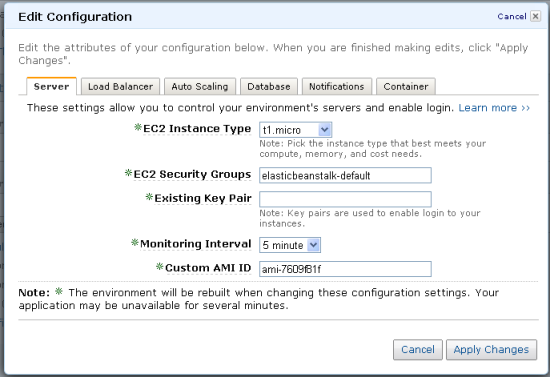
You can also view and edit all of the configuration settings for each of your environments. The default settings will work well under a wide variety of conditions and are a good place to start if you are not very familiar with AWS. Let’s take a look at each of tabs.
The Server tab lets you control the type of EC2 instance used to run your Elastic Beanstalk application. You can also associate one or more Security Groups to the instance and you can enable administrative shell access to the EC2 instances by designating a Key Pair.
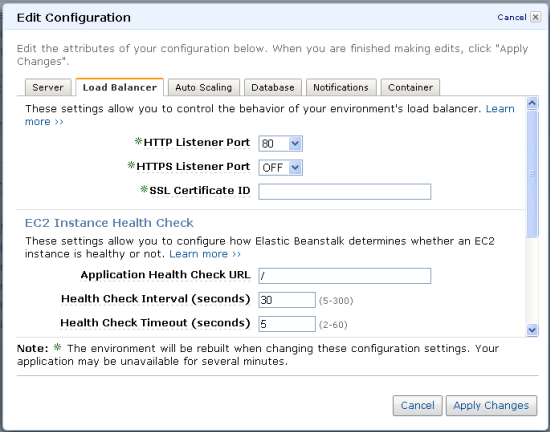
The Load Balancer tab gives you control of ports, health checks, and session cookies.
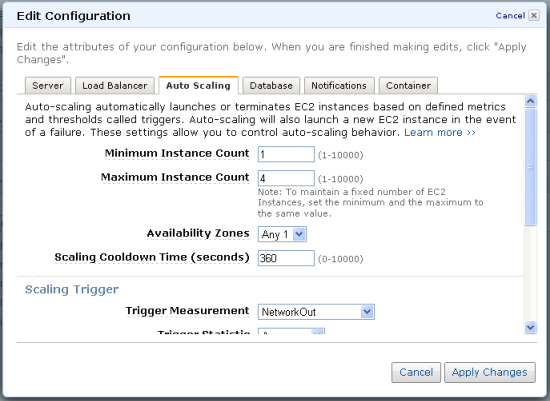
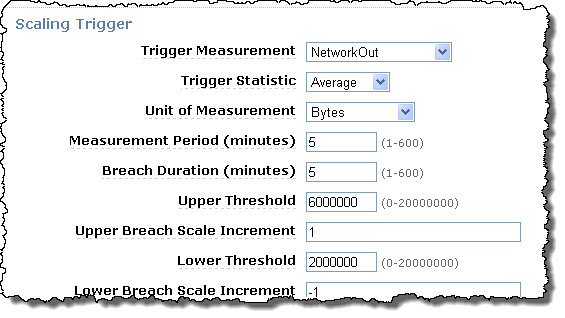
The Auto Scaling tab lets you control scaling behavior. You can control the minimum and maximum number of EC2 instances and you can set up the Scaling Trigger as desired.
The Database tab provides information about the database options available to your Elastic Beanstalk application.

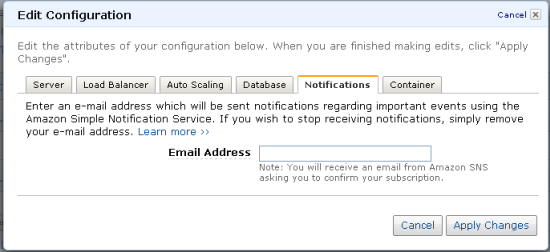
The Notifications tab lets you sign up to be notified when significant application events take place. The Amazon Simple Notification Service is used to deliver the notifications.
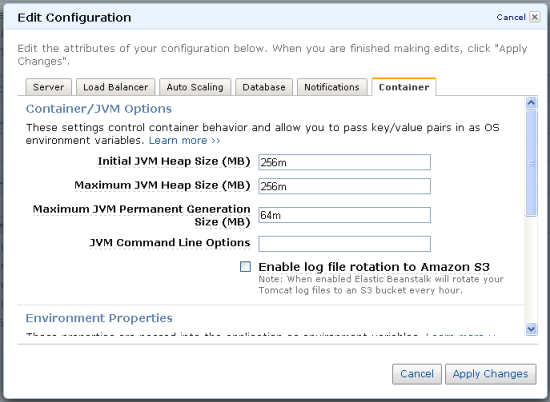
The Container tab lets you control very detailed aspects of the Tomcat configuration including memory allocation and log file rotation. You can also opt to pass your AWS credentials and a JDBC connection string to each instance.
When you do need to make changes to your configuration settings, the console gives you complete control. For example, here are the configurable parameters for the scaling triggers that drive the scale-up and scale-down activities:
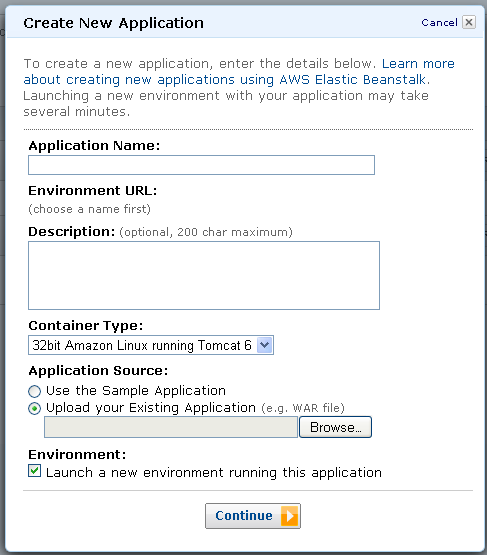
As noted previously, you can create a new application by uploading a WAR file like this:
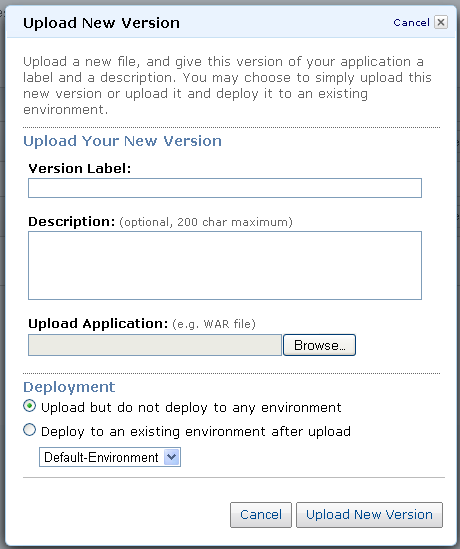
You can also upload a new version of an existing application:
As you can see from the screen shots above, the Elastic Beanstalk tab of the AWS Management Console gives you a lot of information, control, and power. For more information, please see the Elastic Beanstalk User Guide.
Keep Reading: AWS Elastic Beanstalk and Eclipse.
— Jeff;