AWS News Blog
AWS Elastic Beanstalk for Docker
 AWS Elastic Beanstalk makes it easy for you to deploy and manage applications in the AWS cloud. After you upload your application, Elastic Beanstalk will provision, monitor, and scale capacity (Amazon EC2 instances), while also load balancing incoming requests across all of the healthy instances.
![]() Docker automates the deployment of applications in the form of lightweight, portable, self-sufficient containers that can run in a variety of environments. Containers can be populated from pre-built Docker images or from a simple recipe known as a Dockerfile.
Docker automates the deployment of applications in the form of lightweight, portable, self-sufficient containers that can run in a variety of environments. Containers can be populated from pre-built Docker images or from a simple recipe known as a Dockerfile.
Docker’s container-based model is very flexible. You can, for example, build and test a container locally and then upload it to the AWS Cloud for deployment and scalability. Docker’s automated deployment model ensures that the runtime environment for your application is always properly installed and configured, regardless of where you decide to host the application.
Today we are enhancing Elastic Beanstalk with the ability to launch applications contained in Docker images or described in Dockerfiles. You can think of Docker as an exciting and powerful new runtime environment for Elastic Beanstalk, joining the existing Node.JS, PHP, Python, .NET, Java, and Ruby environments.
Beanstalk, Meet Docker
With today’s launch, you now have the ability to build and test your applications on your local desktop and then deploy them to the AWS Cloud via Elastic Beanstalk.
You can use any desired version of the programming language, web server, and application server. You can configure them as you see fit, and you can install extra packages and libraries as needed.
You can launch existing public and private Docker images. Each image contains a snapshot of your application and its dependencies, and can be created locally using a few simple Docker commands.To use an image with Elastic Beanstalk, you will create a file called Dockerrun.aws.json. This file specifies the image to be used and can also set up a port to be exposed and volumes to be mapped in to the container from the host environment. If you are using a private Docker image, you will also need to create a .dockercfg file, store it in Amazon S3, and reference it from the Authentication section of Dockerrun.aws.json.
You can also use a Dockerfile. The Docker commands contained in such a file will be processed and executed as part of the Auto Scaling configuration established by Elastic Beanstalk. In other words, each freshly created EC2 instance used to host an Elastic Beanstalk application will be configured as directed by your Dockerfile.
Regardless of which option you choose, you always upload a single file to Elastic Beanstalk. This upload can be:
- A plain Dockerfile.
- A plain Docker.aws.json file.
- A Zip file that contains either Dockerfile or Docker.aws.json, along with other application assets.
The third option can be useful for applications that require a number of “moving parts” to be present on the instance. If you are using a Dockerfile, you could also choose to fetch these parts using shell commands embedded in the file.
Docker in Action
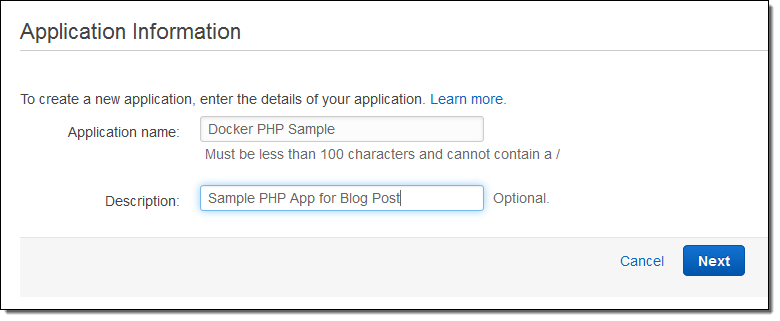
Let’s create a simple PHP application using Elastic Beanstalk for Docker! The first step is the same for every Elastic Beanstalk application — I simply fill in the name and the description:
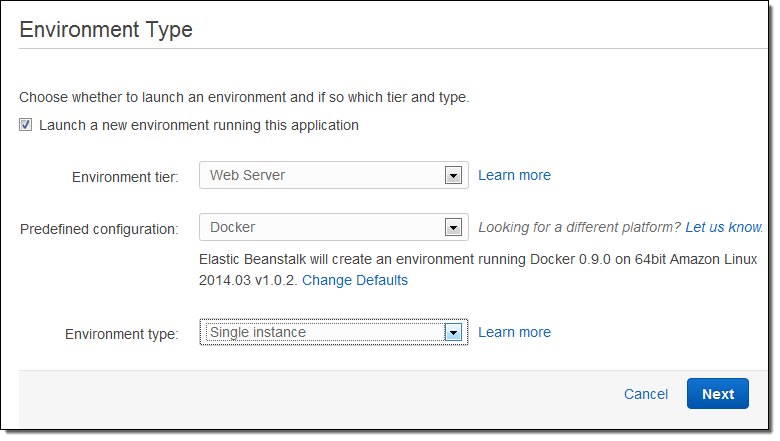
Then I choose Docker as the Predefined Configuration. This application will not need to scale very high, so a single instance environment is fine:
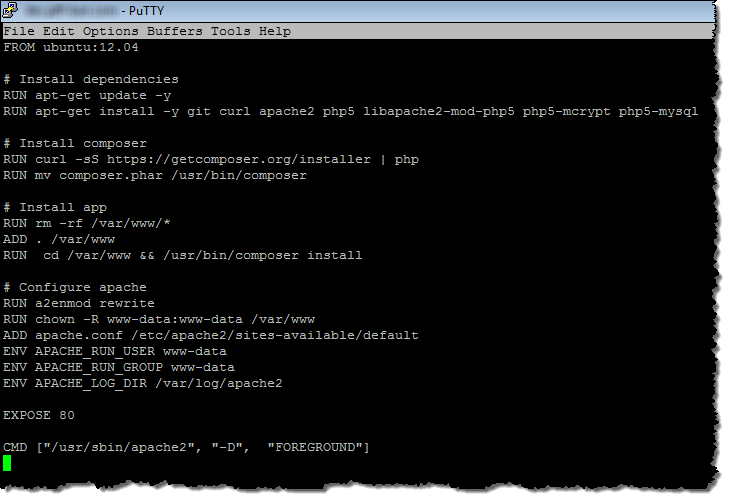
The moving parts are in a single directory, with src and web subdirectories and a Dockerfile at the root:
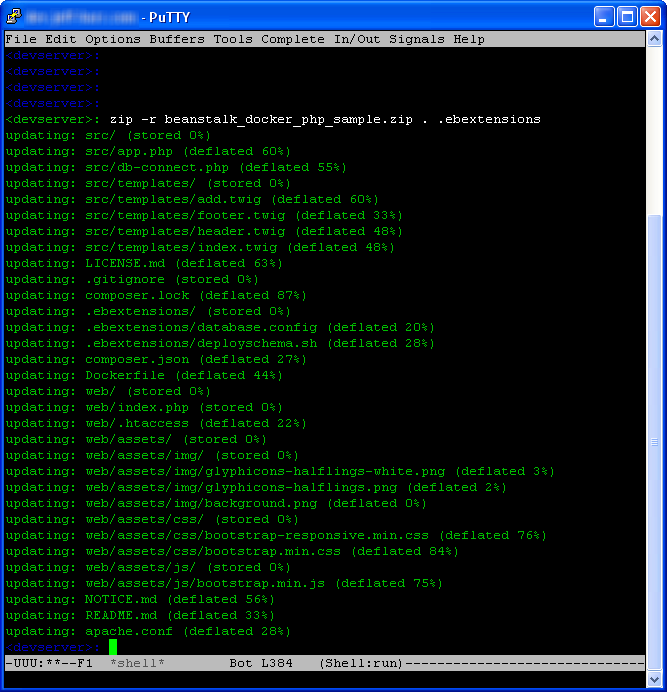
I zipped them up into a single file like this (note that I had to to explicity mention the .ebextensions directory)
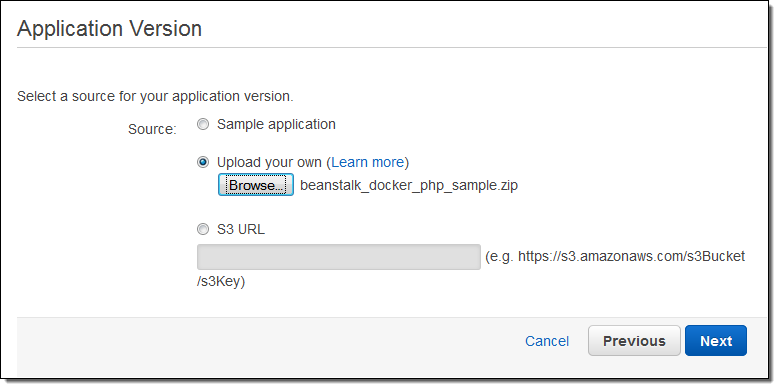
Then I upload the file to Elastic Beanstalk:
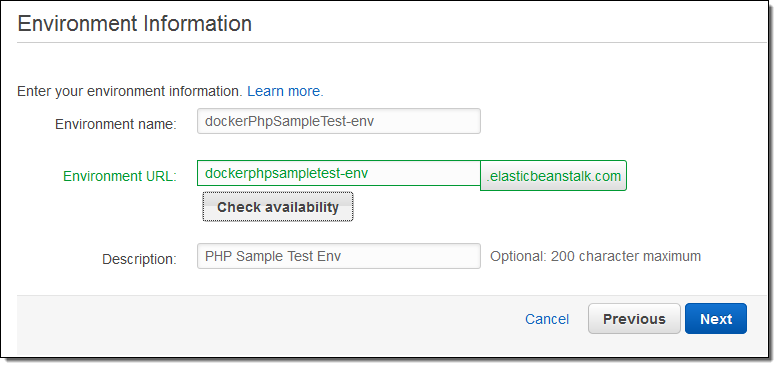
With the file uploaded, I can now create an Elastic Beanstalk environment. This will be my testing environment; later I could create a separate environment for production. Elastic Beanstalk lets me configure each environment independently. I can also choose to run distinct versions of my application code in each environment:
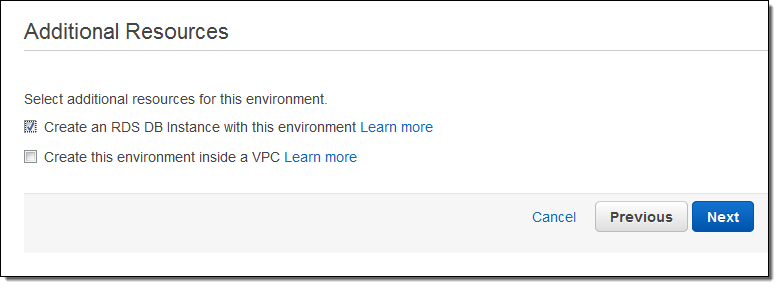
The PHP application makes use of a MySQL database so I will ask Elastic Beanstalk to create it for me (I’ll configure it in a step or two):
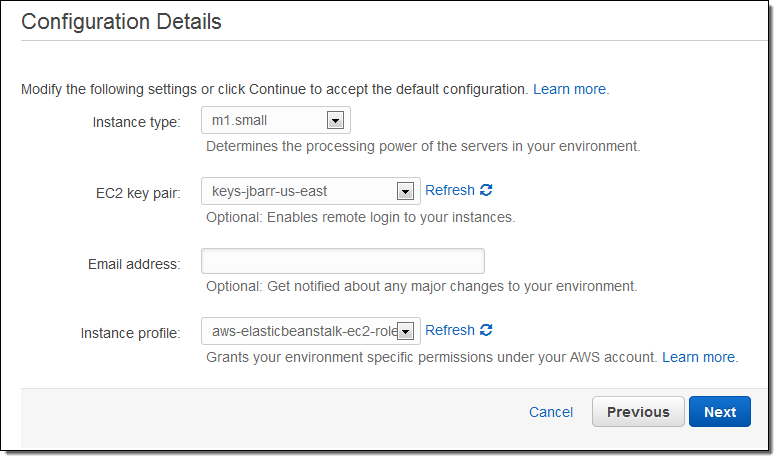
Now I choose my instance type. I can also specify an EC2 keypair; this will allow me to connect to the application’s EC2 instances via SSH and can be useful for debugging:
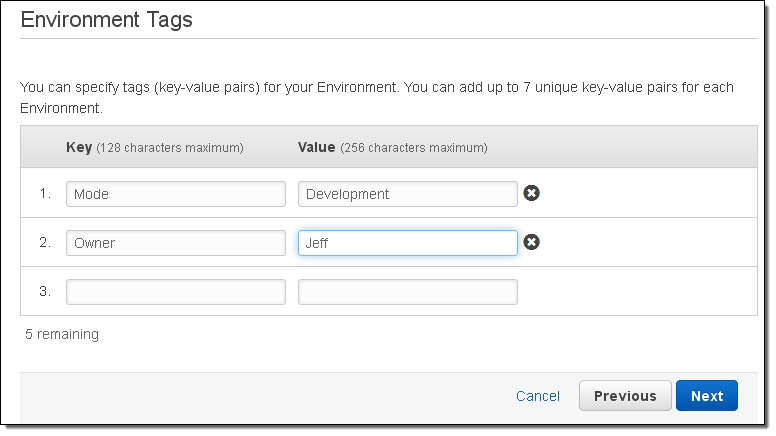
I can also tag my Elastic Beanstalk application and the AWS resources that it creates (this is a new feature that was launched earlier this week):
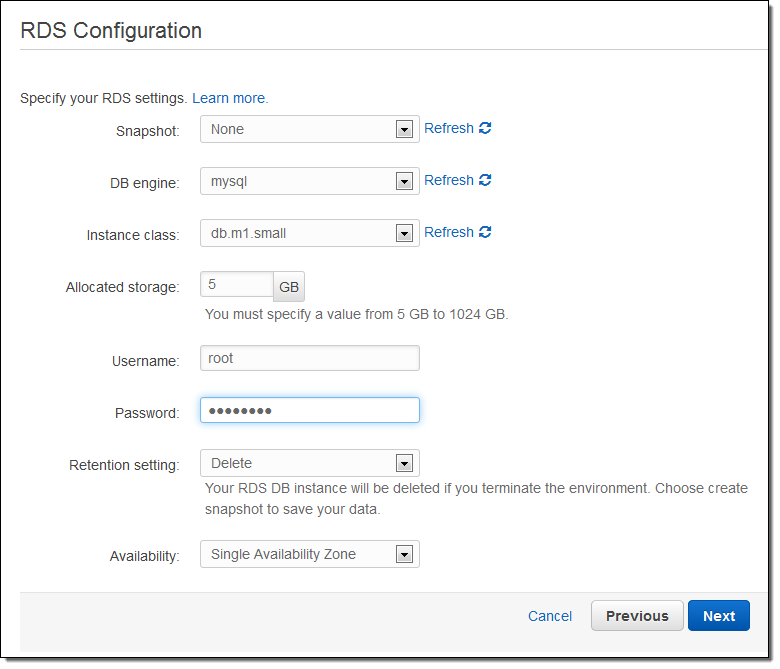
Now I can configure my RDS instance. The user name and the password will be made available to the EC2 instance in the form of environment variables.
The following PHP code retrieves the user name and the password:
<?php
  define('DB_NAME', getenv('RDS_DB_NAME'));
  define('DB_USER', getenv('RDS_USERNAME'));
  define('DB_PASSWORD', getenv('RDS_PASSWORD'));
  define('DB_HOST', getenv('RDS_HOSTNAME'));
  define('DB_TABLE', 'urler');
?>
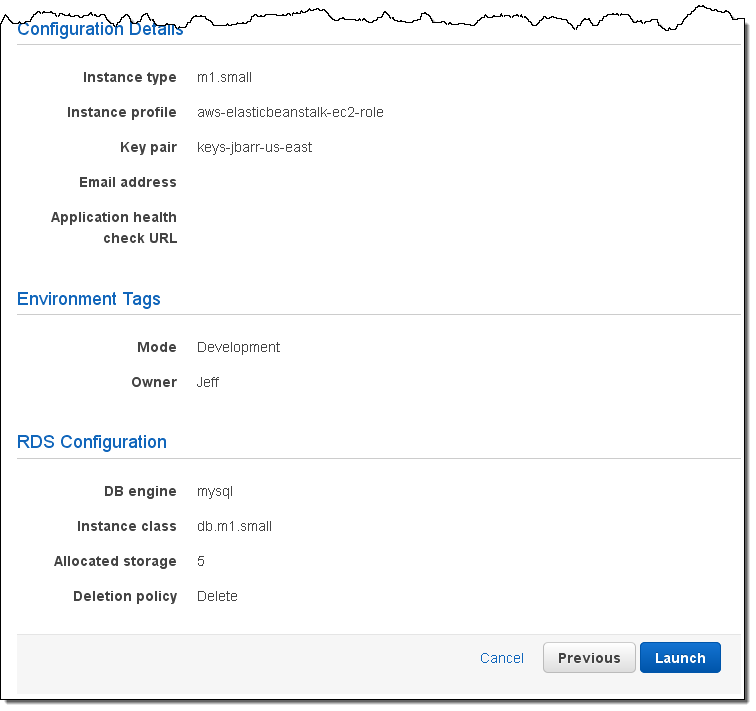
The last step before launching is to confirm all of the settings:
Elastic Beanstalk shows me the status of the application and the environment, with dynamic updates along the way:
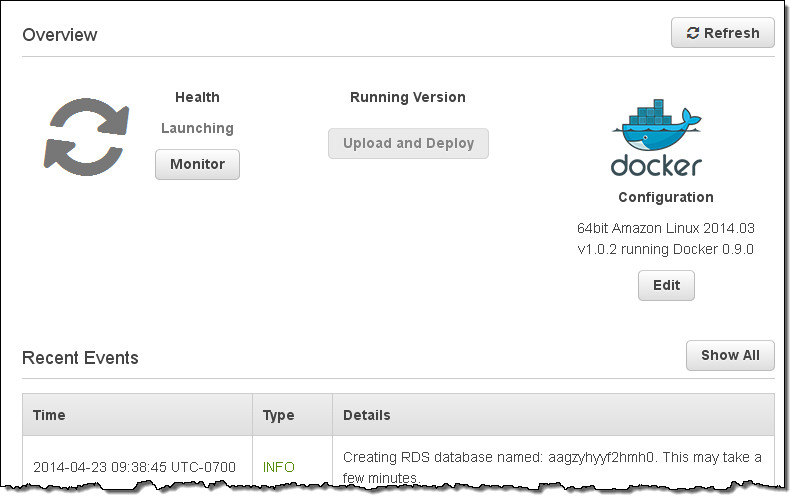
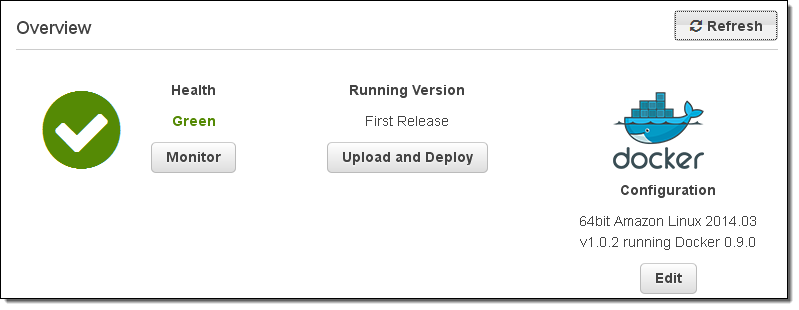
After a few minutes the environment will be up and running:
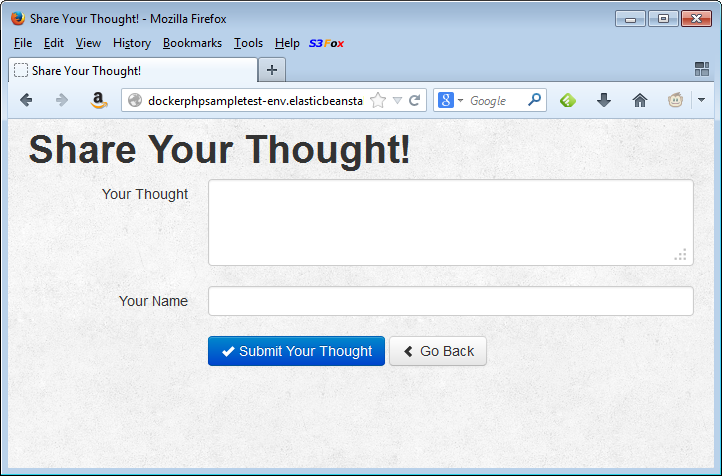
The application is just a click away:
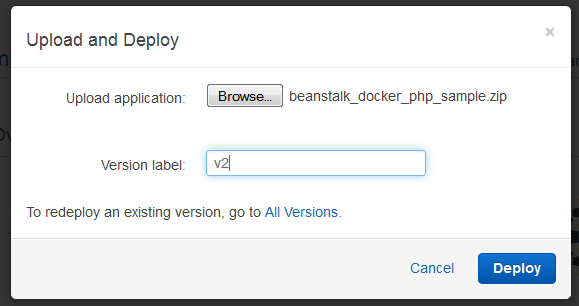
After I have created an environment, I can update the source code, create a new ZIP file, and deploy it to the environment in a matter of seconds.
AWS Elastic Beanstalk for Docker is available in all AWS Regions and you can start using it today!
— Jeff;
PS – The Elastic Beanstalk team holds office hours every Thursday morning. Join them this coming week for Part 3 of a continuing series and learn how to Develop, Deploy, and Manage for Scale with Elastic Beanstalk and CloudFormation.