Migration & Modernization
Introducing the AWS Transform discovery tool
The AWS Transform discovery tool is an Open Virtual Appliance (OVA) that you deploy in your VMware infrastructure. This tool replaces the Application Discovery Service Agentless Collector.
The discovery tool operates as a self-contained application that can be deployed on-premises without requiring cloud connectivity or external dependencies. This architecture makes it suitable for highly regulated industries and organizations with strict data governance requirements. Comprehensive discovery is critical for migration planning, accurate cost estimates, and reduced migration risk. The discovery tool collects both performance and network connection data from your workloads. Collecting performance data ensures that AWS Transform recommends the most cost-effective instance type for your workloads. Collecting network connection data ensures that all related virtual machines migrate at the same time, preventing you from accidentally leaving a dependency on-prem.
The collector exports the AWS Migration Portfolio Assessment (MPA) format that AWS Transform assessment ingests and processes for generating total cost of ownership analysis and business case. The MPA format is used by partners to exchange migration data with AWS. All data is collected and stored locally on the virtual appliance. Any data exported from the tool is downloaded locally to your workstation. No data is transmitted to AWS unless you choose to upload the exported data to us. The tool does not require outbound access to the Internet.
Prerequisites
- You should have permissions to deploy an OVA into your VMware vCenter.
- The appliance requires 4 vCPU, 16GB of RAM, and a 35GB hard disk.
- The appliance IP must have access to vCenter TCP/443 to retrieve inventory.
- The appliance collects data using an agentless approach. VMs that are a part of the assessment scope must allow inbound connectivity from the appliance:
- Linux – SSH TCP/22
- Windows – TCP/5985 for HTTP, TCP/5986 for HTTPS (default ports, custom port configuration is supported)
- SNMP – UDP/161
- For Linux, user accounts that can SSH into the server. For SSH discovery, the tool uses ss -tnap. The SSH user must be able to execute the ss command using sudo. If ss is not available, the tool will fall back to netstat.
- For Windows, see the documentation for account requirements.
Deployment
- Download the appliance.
- Deploy the appliance using the standard OVA deployment process.
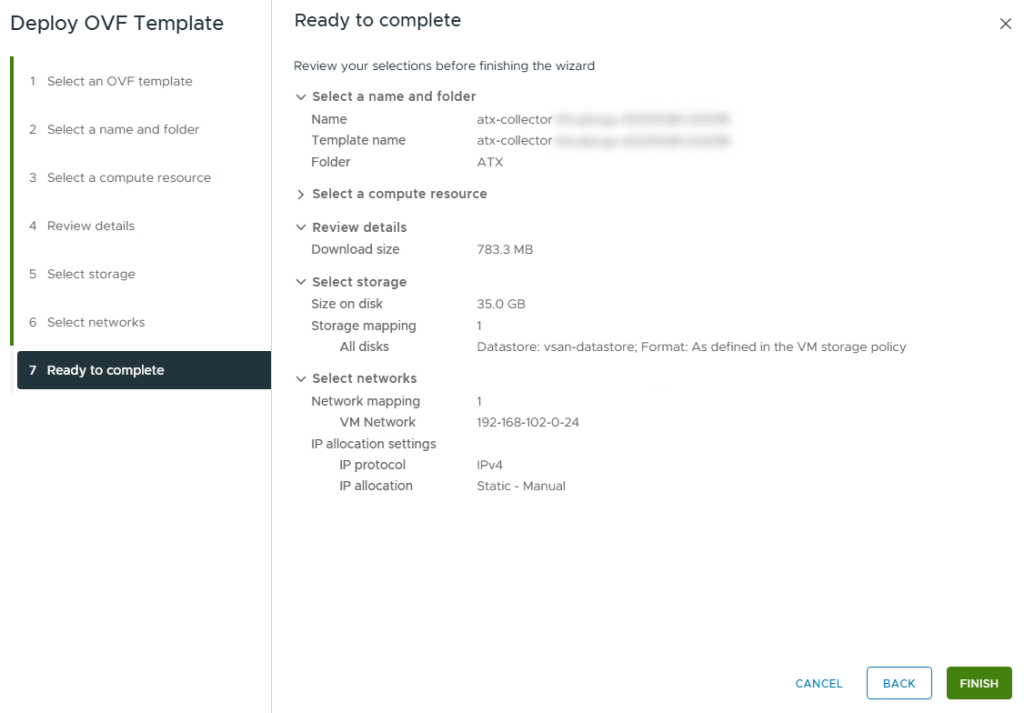
Figure 1. Deploying the discovery tool appliance, showing the final OVF deployment screen.
Initial Setup
- The discovery tool administrative interface runs on port 5000. If the appliance VM has an IP of 10.250.1.20, browse to https://10.250.1.20:5000 to access the administrative interface.
- Create a password the first time you go to the administrative interface.
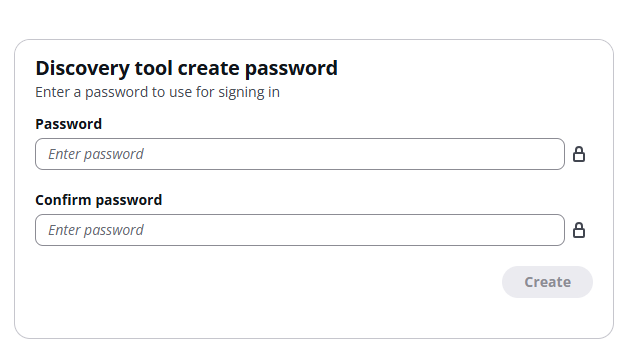
Figure 2. Discovery tool create password.
- After logging into the discovery tool, choose Set up access to connect to your vCenter Server.
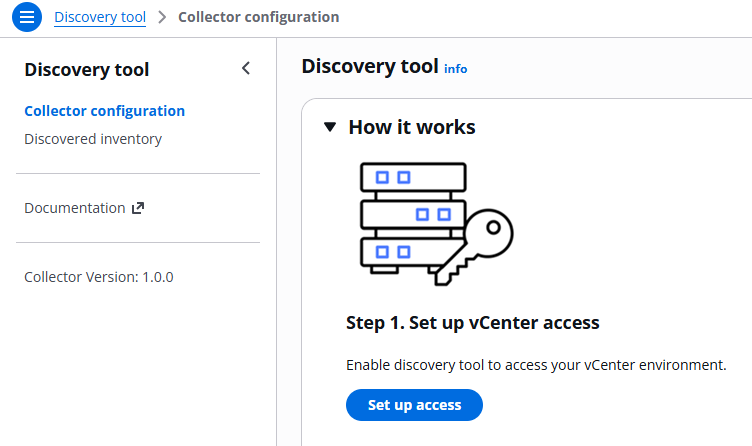
Figure 3. Set up vCenter access button.
- Enter your vCenter FQDN or IP, username, and password. Do not include https:// – enter only the FQDN or IP. If you use Windows authentication, Windows usernames should be in the format DOMAIN\user. You can use a read-only account for vCenter.

Figure 4. Set up vCenter access.
If the discovery tool can access your vCenter Server, you will see the Status turn to Connected, and in a few minutes you will see a Last collection date and time appear.

Figure 5. Successful vCenter connection with the most recent collection date.
The discovery collection runs every hour. If you need to force a collection, you can do this from the Actions menu.

Figure 6. Forcing a discovery collection.
- Discovered inventory is visible from the Discovered inventory page.
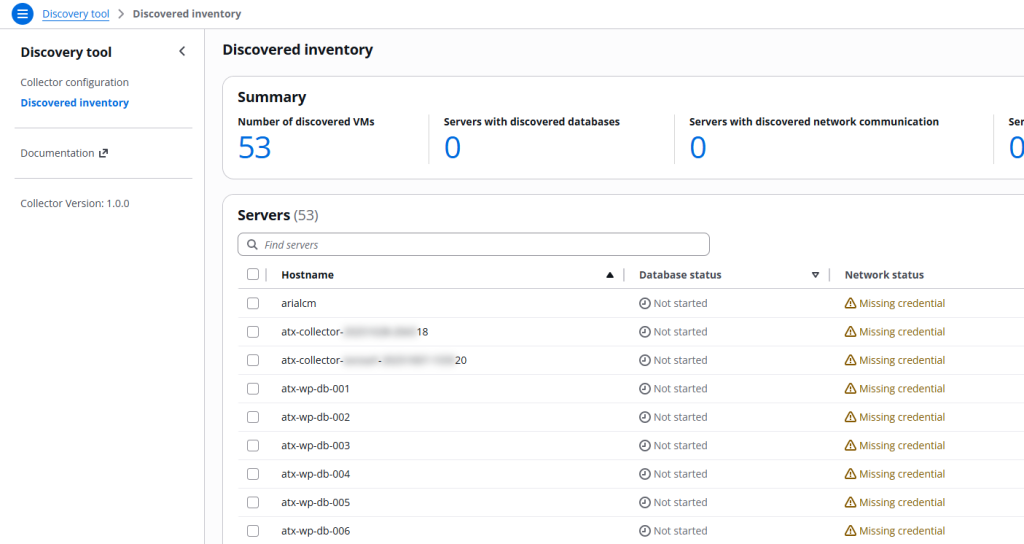
Figure 7. All discovered inventory.
Configuring OS access
-
- For initial configuration, the Set up OS access button is visible. For future configuration, use the Edit OS access button.

Figure 8. The Edit OS access button.
- The credentials screen shows an example of entering both SSH and WinRM credentials. The Windows credentials will be used to remotely inventory SQL Server installations across your Windows servers via WinRM, collecting detailed metadata about all SQL Server components, including version information, edition details, service configurations, instance names, startup settings, service accounts, and clustering status.If you use Kerberos, the username must be in the format username@DOMAIN.TLD – lower case username, upper case domain.If you check the Auto-connect box, the discovery tool will attempt to use that credential for all VMs. If you do not check the box, you need to assign credentials manually.
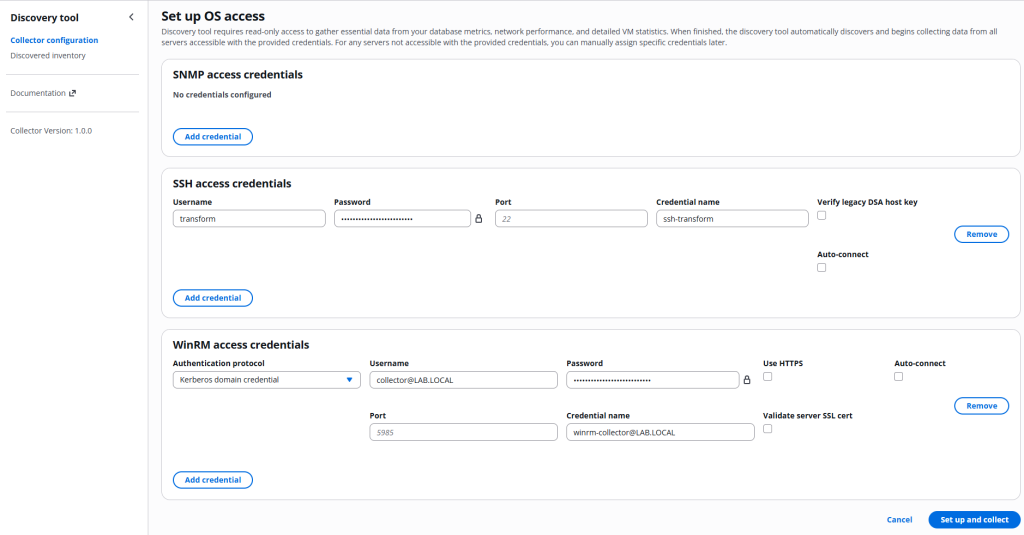
Figure 9. OS Access Credentials.
- To manually assign credentials, go to the Discovered inventory screen. You have an option to enter a filter – in this example, we entered atx-wp for the filter, which will be applied when we press Enter.

Figure 10. Entering an inventory filter.
- The filter selects matching VMs. To assign a credential, check the box next to the Hostname. You can select all as shown below. Then choose Manage access credential.

Figure 11. Selecting servers from a filtered inventory list to assign an access credential.
- Choose a credential from the dropdown and choose Save and collect.

Figure 12. Selecting an access credential for a list of servers.
After approximately 15 seconds, successful credential assignment will result in Success appearing in the Network status column.

Figure 13. Credential success for Linux servers.
- For initial configuration, the Set up OS access button is visible. For future configuration, use the Edit OS access button.
Here is an example for Windows VMs. First, assign a Windows credential.
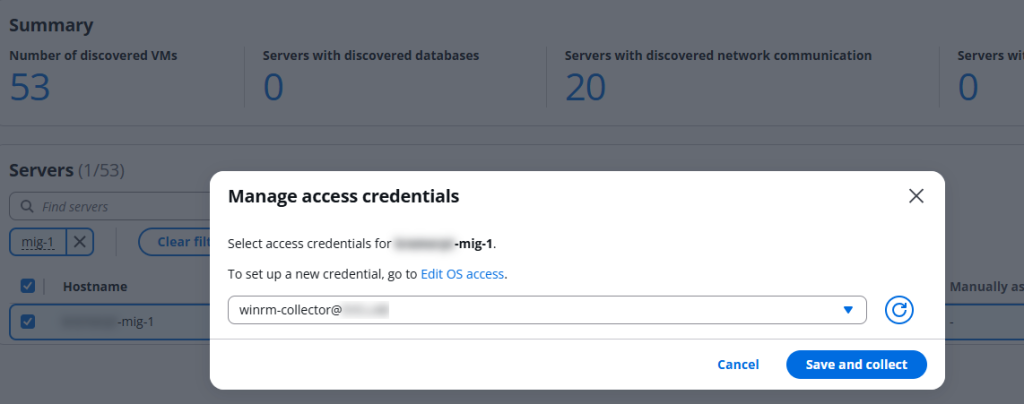
Figure 14. Assigning WinRM credentials to a Windows VM.
If successful, the Network status column will turn to Success. This Windows VM has an instance of SQL Server running, so the Database status column also turned to Success.
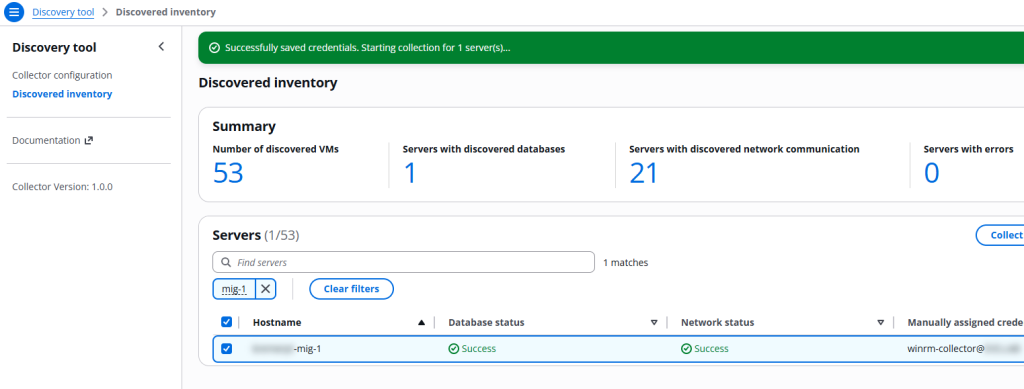
Figure 15. Credential success for Windows.
Downloads
After collecting data, you can download inventory using the Download inventory button.

Figure 16. The Download inventory button.
This is an example of what collected network data would look like on webservers with a MySQL backend.
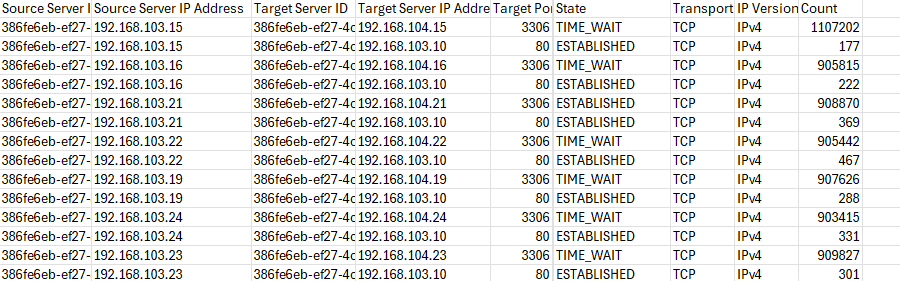
Figure 17. Sample network data with source and target IPs, target ports, and protocols.
If needed, you can download logs for troubleshooting using the Download logs button.

Figure 18. Download logs button.
Cleanup
The only cleanup step is to delete the appliance from vCenter inventory. You might need to deactivate credentials if you created specific OS credentials to use with the discovery tool.
Summary
The AWS Transform discovery tool enables you to automatically discover server inventory, database instances, and network dependencies in your organization in preparation for migration. It operates as a self-contained application without requiring cloud connectivity or external dependencies, making it suitable for even the most security-conscious environments.
By providing comprehensive visibility into your current infrastructure, the discovery tool helps you:
- Accurately size and cost your future AWS environment
- Identify application dependencies that impact migration planning
- Generate data-driven TCO analysis and business cases
- Make informed decisions about migration strategies and priorities
The downloadable output from the discovery tool can be uploaded into AWS Transform assessment, enabling detailed TCO analysis and business case generation for migration planning. This data-driven approach helps reduce migration risk and accelerate your journey to AWS.
Next Steps
You can use output from the discovery tool for an assessment. You do not need to make any changes to the output file; you simply upload it directly to the assessment. To learn more about creating an assessment, check out the AWS Transform Migration assessment product documentation.