AWS Developer Tools Blog
Eclipse Deployment: Part 1 – AWS Java Web Applications
In this three part series, we’ll show how easy it is to deploy a Java web application to AWS Elastic Beanstalk using the AWS Toolkit for Eclipse.
The first post in this series demonstrates how to create an AWS Java Web Project, and explains how that project interacts with the existing web development tools in Eclipse.
The AWS Toolkit for Eclipse builds on top of the standard Eclipse tooling for developing and deploying web applications, the Eclipse Web Tools Platform (WTP). This means you’ll be able to leverage all of the tools provided by WTP with your new AWS Java Web Project, as we’ll see later in this post.
After you’ve installed the AWS Toolkit for Eclipse, open the New AWS Java Web Project wizard.
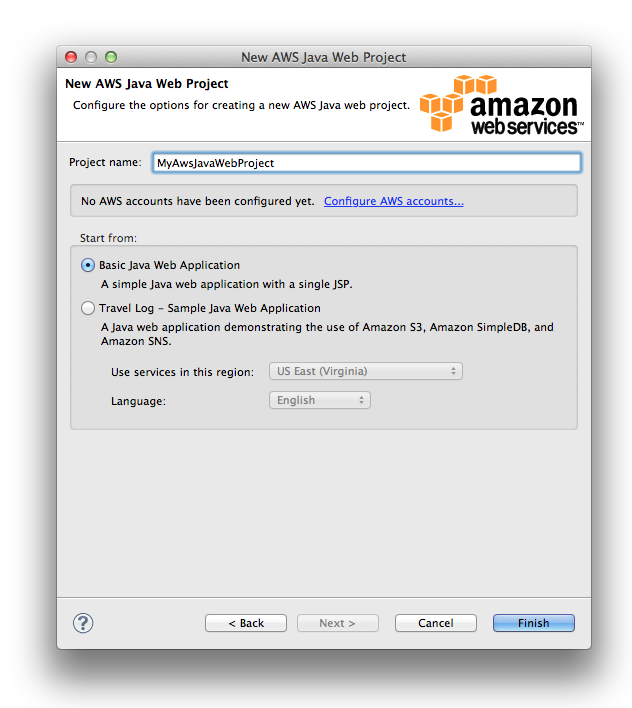
The wizard lets you enter your project name, AWS account, and whether you want to start with a bare bones project, or a more advanced reference application. We recommend starting with the basic Java web application for your first time through. If you haven’t configured an AWS account yet, you’ll want to follow the link in the wizard to add an account. Your account information will be used to configure your project so that your application code can make requests to AWS. Once you’ve got an AWS account selected, go ahead and fill out a project name, and keep the default option to start with a basic Java web application.
After you’ve finished the wizard, you’ll have an AWS Java Web Project, ready for you to start building your application in, or to go ahead and deploy somewhere.
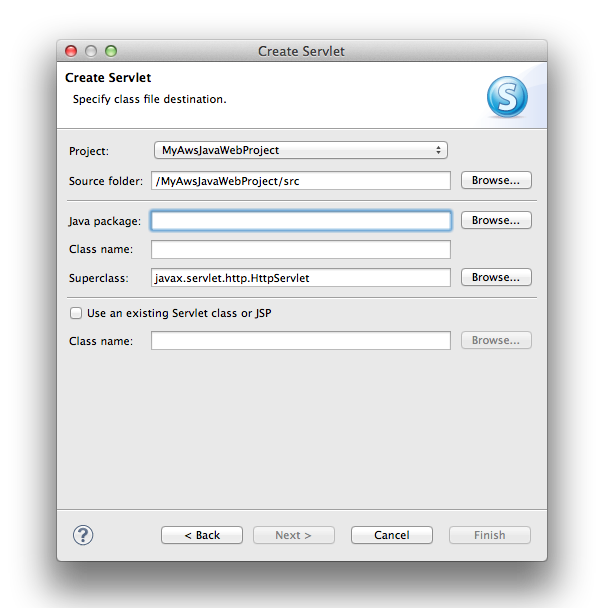
One of the great things about building on top of the Eclipse Web Tools Platform is that your project can use all the great tools provided by WTP for developing and deploying Java web applications. For example, try out the Create Servlet wizard provided by WTP:
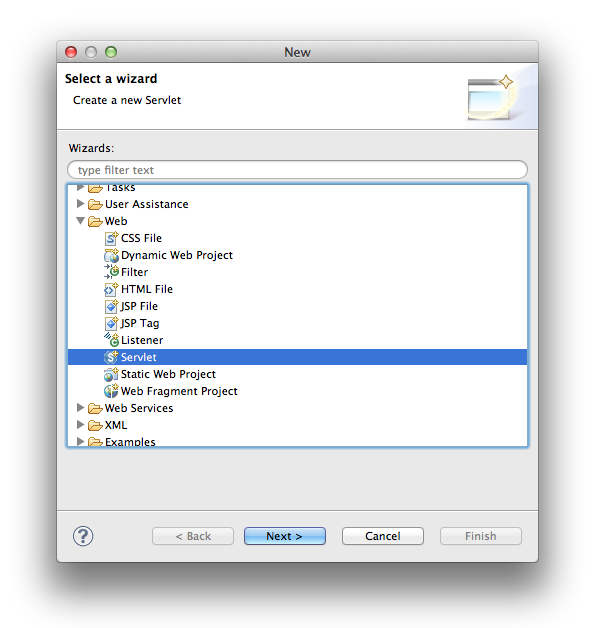
The Create Servlet wizard makes it very easy to create new servlets, and in addition to creating the class template for you, it will also update your project’s web.xml with a mapping for the new servlet.
You’ll be able to use many other tools from WTP like custom editors for JSP and XML files, and tools for building and exporting WAR files.
The coolest benefit, however, of building on top of WTP is that you can use the deployment support in WTP to deploy your AWS Java Web Projects in exactly the same way, whether you’re uploading to a local Tomcat server for quick testing, or to a production Elastic Beanstalk environment, like we’ll see in the next part of this series.
Let’s get our new project deployed to a local Tomcat server so we can see it running. Right-click on your project and select Run As -> Run On Server. You’ll need to configure a new Tomcat server using this wizard, then Eclipse will start the server and deploy your project. When you’re done, you should see something like this:

Stay tuned for the next part of this series, where we’ll show how to use the same tools to deploy our new application to AWS Elastic Beanstalk.