Anthropic 于 2025 年 3 月发布了 Mode Context Protocol(MCP)v2025.03.26 协议,引入 Streamable HTTP Transport 的支持,新的协议重构了 LLM 与外部系统的交互范式。MCP Server 在之前版本提供了Stdio、Service Side Event(SSE)2 种 Transport,其中 SSE 也是通常用来作为访问远程 MCP Server 的重要协议。下面我们先来看一看 Streamable HTTP 和 HTTP SSE 协议的对比。
HTTP SSE
SSE Transport 提供 2 个访问端点,分别是/sse、/message,/sse 用来保持长链接。MCP Client 需要发送 POST /message 来调用 MCP Server 的服务, 通过/sse 来接收 MCP Server 的返回。整个调用期间 MCP Client 需要一直和 MCP Server 保持/sse 端点的长链接不能断开,否则会可能丢失某次调用的数据。
- SSE 要求服务器维护长链接,不适合复杂的网络环境。
- 服务器消息只能通过 SSE 传递,需要/sse 和/message 2 个不同方式的端点,开发较复杂。
Streamable HTTP
新版本 Streamable HTTP Transport 首先移除了 MCP Server 的/sse 端点,只保留/message,并且不再强制要求使用 SSE 长链接(为了向下兼容 SSE,MCP Client 可以发起一个 GET 请求/message 要求在/message 上创建 SSE 连接),除此之外其他请求都是标准的 POST 请求,并且在初始化阶段 MCP Server 可以返回 Mcp-Session-Id 作为整个通信阶段的会话 ID。
- 移除了/sse 端点,默认不需要提供 Service Side Event 端点;
- 所有客户端和服务器消息都可以通过/message(或者类似比如/mcp)端点发送和接收消息;
- 服务器可以选择创建会话 ID 来维持状态。
通过使用 Streamable HTTP 我们可以:
- 支持无状态服务,不需要 SSE 长链接;
- 纯 HTTP 实现,类似于 REST full API,兼容现有的 CDN、Web firewall 等基础设施;
- 向后兼容,允许客户段通过/message 发送空请求来初始化 SSE 流。
在新的协议下 Streamable HTTP MCP Server 可以用配合 Amazon Lambda 实现 MCP Server 的远程部署,该部署方案的优势如下:
- Amazon Lambda 的弹性伸缩能力:天然适配 MCP Server 突发流量(如百名开发者同时触发代码查询);
- 成本与性能平衡:Amazon Lambda 按照调用次数收费,不会造成空闲资源浪费;
- 无缝集成多种服务:远程部署可以充分利用到云上的各类服务,包括 S3、DynamoDB、Bedrock 等;
- 使用 Amazon API Gateway 实现 Steamable HTTP 无状态协议。
接下来我们将具体讲解如何将一个官方 TypeScript 开发的 STDIO/SSE 的 MCP Server 改造成一个 Streamable HTTP MCP Server,并且通过 Amazon Lambda 进行快速部署。项目源代码已经发布到 https://github.com/aws-samples/sample-serverless-mcp-server。
说明: 这里我们没有做 SSE 的向下兼容,所有测试的 MCP Client 需要支持 Streamable HTTP 协议。
1. 参考架构
在项目中我们使用了开源无服务器中间件框架 Middy、Middy-mcp、open serverless framework 以及 Amazon API Gateway、Amazon Lambda 服务 。
Middy 是一个开源的 Node.js 库,它为 AWS Lambda 函数引入了中间件的概念。如果你熟悉 Express.js 或 Koa,那么 Middy 的设计理念会让你倍感亲切。它允许我们将 Lambda 处理流程分解为前置处理、主函数执行和后置处理三个阶段,并在每个阶段插入可重用的中间件,而 Middy-mcp 是一个 Middy 框架的中间件,它提供了 MCP 协议的支持。
2. 项目代码讲解
Streamable HTTP Github MCP Server 的项目仓库在 https://github.com/aws-samples/sample-serverless-mcp-server。接下来我们将讲解如何从现有的一个 Type Script MCP Server 改造为 Streamable HTTP on Amazon Lambda 的版本。
2.1 克隆官方的 github MCP Server(可选)
git clone https://github.com/modelcontextprotocol/servers
cd servers/github
需要注意的是这个 github MCP Server 调用了github API,所以需要设 personal acces token,在环境变量中设置即可。我们先来看看官方项目的代码:
//在官方的index.ts里面我们可以看到它是用了StdioServerTransport,这里就是我们需要改造的部分

import { Server } from "@modelcontextprotocol/sdk/server/index.js";
import { StdioServerTransport } from "@modelcontextprotocol/sdk/server/stdio.js";
2.2 使用下面的 package.json 添加 @middy/httpcore, middy-mcp 等需要的依赖库
{
  "name": "@modelcontextprotocol/server-github",
  "version": "0.6.2",
  "description": "MCP server for using the GitHub API",
  "license": "MIT",
  "author": "Anthropic, PBC (https://anthropic.com)",
  "homepage": "https://modelcontextprotocol.io",
  "bugs": "https://github.com/modelcontextprotocol/servers/issues",
  "type": "module",
  "bin": {
    "mcp-server-github": "dist/index.js"
  },
  "files": [
    "dist"
  ],
  "scripts": {
    "build": "tsc && shx chmod +x dist/*.js",
    "prepare": "npm run build",
    "watch": "tsc --watch"
  },
  "dependencies": {
    "@middy/core": "^6.1.6",
    "@middy/http-cors": "^6.1.6",
    "@middy/http-error-handler": "^6.1.6",
    "@modelcontextprotocol/sdk": "^1.9.0",
    "@types/node": "^22",
    "@types/node-fetch": "^2.6.12",
    "http-errors": "^2.0.0",
    "middy-mcp": "file:../middy-mcp",
    "node-fetch": "^3.3.2",
    "osls": "^3.51.0",
    "universal-user-agent": "^7.0.2",
    "zod": "^3.24.2",
    "zod-to-json-schema": "^3.23.5"
  },
  "devDependencies": {
    "@types/aws-lambda": "^8.10.148",
    "@types/http-errors": "^2.0.4",
    "serverless-offline": "^14.4.0",
    "shx": "^0.3.4",
    "typescript": "^5.6.2"
  }
}
安装需要的依赖库和 osls
npm install
npm install -g osls
2.3 代码改写
首先我们需要修改原来的 tools 添加代码,更换成 middy-mcp 可以使用的方法,以 search_code, search_user, search_issue 为例:
//
server.setRequestHandler(CallToolRequestSchema, async (request) => {
  try {
    if (!request.params.arguments) {
      throw new Error("Arguments are required");
    }

    switch (request.params.name) {

      //.....
      case "search_code": {
        const args = search.SearchCodeSchema.parse(request.params.arguments);
        const results = await search.searchCode(args);
        return {
          content: [{ type: "text", text: JSON.stringify(results, null, 2) }],
        };
      }

      case "search_issues": {
        const args = search.SearchIssuesSchema.parse(request.params.arguments);
        const results = await search.searchIssues(args);
        return {
          content: [{ type: "text", text: JSON.stringify(results, null, 2) }],
        };
      }

      case "search_users": {
        const args = search.SearchUsersSchema.parse(request.params.arguments);
        const results = await search.searchUsers(args);
        return {
          content: [{ type: "text", text: JSON.stringify(results, null, 2) }],
        };
      }
      //....

      default:
        throw new Error(`Unknown tool: ${request.params.name}`);
    }
  } catch (error) {
    if (error instanceof z.ZodError) {
      throw new Error(`Invalid input: ${JSON.stringify(error.errors)}`);
    }
    if (isGitHubError(error)) {
      throw new Error(formatGitHubError(error));
    }
    throw error;
  }
});
我们不再使用 Server 和 StdioServerTransport,我们直接导入 McpServer,然后通过 server.tools 来添加 tools。
import { McpServer } from "@modelcontextprotocol/sdk/server/mcp.js";
const server = new McpServer({
  name: "Lambda hosted github-mcp-server",
  version: "1.0.0",
});

//添加server.tools
server.tool("search_code",SearchCodeSchema.shape, async (args) => {
  const results = await search.searchCode(args);
  return { content: [{ type: "text", text: JSON.stringify(results, null, 2) }] };
});

server.tool("search_issues", SearchIssuesSchema.shape, async (args) => {
  const results = await search.searchIssues(args);
  return { content: [{ type: "text", text: JSON.stringify(results, null, 2) }] };
});

server.tool("search_users", SearchUsersSchema.shape, async (args) => {
  const results = await search.searchUsers(args);
  return { content: [{ type: "text", text: JSON.stringify(results, null, 2) }] };
});
然后我们需要移除 StdioServerTransport,以及 runServer 代码,我们需要通过 Middy、middy-mcp 来实现一个 Amazon Lambda handler。
//移除runServer
/*
async function runServer() {
  const transport = new StdioServerTransport();
  await server.connect(transport);
  console.error("GitHub MCP Server running on stdio");
}

runServer().catch((error) => {
  console.error("Fatal error in main():", error);
  process.exit(1);
})
*/

//根据middy的文档说明,我们需要导出一个handler给Amazon Lambda
export const handler = middy()
    .use(mcpMiddleware({ server }))
    .use(cors())
    .use(httpErrorHandler())
2.4 Python 版本 Http MCP Client 实现
在 Python 中实现 Streamable Http MCP Client,是应用侧与 Streamable MCP Server 进行交互的有效方式。目前,官方尚未发布 Streamable Http MCP 针对 Python 的 SDK,我们可以自行根据 MCP 的交互式协议进行封装,确保我们的 Python 客户端能够正确地构建和解析 MCP Server 端消息,这包括初始化 MCP Server、MCP 服务端 list tools 请求、messages 请求触发服务端 tools call,以及需要的时候通知 Server 端转为普通 SSE 模型等。
以下是一个简单的 Python 示例代码,展示如何实现一个基本的 Streamable Http MCP Client:
import httpx
import json
import asyncio
import aiofiles
import asyncio
import os
from typing import Optional, Dict


class HttpMCPClient:
    def __init__(self, server_url: str, access_key_id='', secret_access_key='', region='us-east-1'):
        self.env = {
            'AWS_ACCESS_KEY_ID': access_key_id or os.environ.get('AWS_ACCESS_KEY_ID'),
            'AWS_SECRET_ACCESS_KEY': secret_access_key or os.environ.get('AWS_SECRET_ACCESS_KEY'),
            'AWS_REGION': region or os.environ.get('AWS_REGION'),
        }
        self.server_url = server_url
        self.session_id = "default"
        self.headers = {
            "Content-Type": "application/json",
            "Accept": "text/event-stream, application/json",
            "jsonrpc":"2.0"
        }

    async def initialize(self):
        """初始化会话。"""
        async with httpx.AsyncClient() as client:
            try:
                response = await client.post(
                    f"{self.server_url}/message",
                    headers=self.headers,
                    json={
                        "jsonrpc": "2.0",
                        "method": "initialize",
                        "params": {
                            "protocolVersion": "2024-11-05",
                            "clientInfo": {"name": "MCP Client", "version": "1.0"},
                            "capabilities": {},
                        },
                    },
                )
                response.raise_for_status()
                self.session_id = response.headers.get("Mcp-Session-Id")
                print(f"Session ID: {self.session_id}")
                return self.session_id
            except Exception as e:
                print(f"Failed to initialize session: {e}")
                return None

    async def list_tools(self):
        """发送请求"""
        async with httpx.AsyncClient() as client:
            try:
                payload = {
                    "jsonrpc": "2.0",
                    "method": "list_tools",
                    "id": 1
                }

                response = await client.post(
                    f"{self.server_url}/message",
                    headers=self.headers,
                    json=payload
                )
                response.raise_for_status()
                return response.json()
            except Exception as e:
                print(f"请求失败: {e}")
                if hasattr(e, 'response'):
                    print(f"响应内容: {e.response.text}")
                return None

    async def call_tool(self, method: str, params: dict = None):
        """发送消息。"""
        if not self.session_id:
            await self.initialize()

        async with httpx.AsyncClient() as client:
            try:
                response = await client.post(
                    f"{self.server_url}/message",
                    headers={"Mcp-Session-Id": self.session_id, **self.headers},
                    json={
                        "jsonrpc": "2.0",
                        "id": 1,
                        "method": "tools/call",
                        {
                          "method":method,
                          "arguments": params
                        }
                    },
                )
                response.raise_for_status()
                return response.json()
            except Exception as e:
                print(f"Failed to send message: {e}")
                return None

    async def listen_sse(self):
        if not self.session_id:
            await self.initialize()

        async with httpx.AsyncClient(timeout=None) as client:
            try:
                async with client.stream(
                        "GET",
                        f"{self.server_url}/message",
                        headers={"Mcp-Session-Id": self.session_id, **self.headers},
                ) as response:
                    async for line in response.aiter_lines():
                        if line.strip():
                            print(f"SSE Message: {line}")
            except Exception as e:
                print(f"Failed to listen SSE: {e}")
                await self.reconnect()

    async def reconnect(self):
        """断线重连。"""
        print("Attempting to reconnect...")
        await asyncio.sleep(5)  # 等待5秒后重试
        await self.initialize()
        await self.listen_sse()

async def main():
    #client = HttpMCPClient("https://fux8ccy7cg.execute-api.us-east-1.amazonaws.com/dev/mcp"),
    #response = await client.call_tool("add", {"a": "5","b":"10"})
    client = HttpMCPClient("http://ec2-35-93-77-218.us-west-2.compute.amazonaws.com:8080")
    await client.initialize()
    response = await client.list_tools()
    print((str(response['result'])))

    response = await client.call_tool("search_codes", params={
                          "search_term": "Swish",
                          "repo_url":"https://github.com/qingyuan18/ComfyUI-AnyText.git"})
    print(f"Response: {response}")
    await client.listen_sse()
在这个示例中,我们创建了一个 MCPClient 类,这个类使用 httpx 库与 Streamable Http MCP Server 进行异步 HTTP 请求,并且支持转为 Server-Sent Events (SSE) 的监听,详细解释如下:
- 会话初始化:async def initialize(self),向 MCP Server 发送初始化请求报文(”method”: “initialize”),获取会话 ID,并将其存储在 session_id。
- 列出 MCP Server 工具:async def list_tools(self),通过 MCP 协议{self.server_url}/message 请求以列出可用的工具,并返回服务端 tools 的 JSON 响应。
- 调用工具:async def call_tool(self, method: str, params: dict = None),用于调用特定的工具,需要提供方法名和参数。
- 监听 SSE:async def listen_sse(self),同样通过{self.server_url}/message 请求服务端转为 SSE 模式(注意此时是 Http 的 GET 请求),建立连接后监听服务器发送的 SSE 消息。如果会话 ID 不存在,则先初始化会话(SSE 模式需要保持会话 mcp-session-id)。
使用该 HttpMCPClient 示例,我们可以方便地与 LLM 侧交互,如通过 Function Calling 集成 MCP server,从而实现 Agent/ChatBot 等复杂应用场景。
以下是在 Bedrock Converse API 中使用 HttpMCPClient 客户端与 MCP Server 交互的示例代码片段:
if mcp_clients is not None:
            for mcp_server_id in mcp_server_ids:
                mcp_server_type = _get_mcp_server_type(mcp_server_id)
                ### stdio mcp server
                if mcp_server_type != "http":
                    server_configs = mcp_clients[mcp_server_id]._get_stdio_mcp_server_config("./config.json")['mcpServers'][mcp_server_id]
                    mcp_clients[mcp_server_id].connect_to_server(server_script_path=server_configs['scirpt_path'],
                                                                 command=config["command"],
                                                                 server_script_args=config.get("args", []),
                                                                 server_script_envs=config.get("env", {}))
                    tool_config_response = await mcp_clients[mcp_server_id].get_tool_config(server_id=mcp_server_id)
                    tool_config['tools'].extend(tool_config_response['tools'])
                ### streamabel http server
                else:
                    tool_config_response = await mcp_clients[mcp_server_id].list_tools()
                    tool_config_response=tool_config_response['result']
                    print("tool_config_response:",str(tool_config_response))
                    tool_config['tools'].extend(tool_config_response['tools'])
...省略
if stop_reason == 'end_turn':
            # normal chat finished
            yield output_message
elif stop_reason == 'tool_use' and mcp_clients is not None:
            mcp_client = mcp_clients.get(server_id)
            result = await mcp_client.call_tool(tool_name, tool_args)
            #print("http mcp client call result",result)
            return  [{
                "toolUseId": tool['toolUseId'],
                "content": [{"text":str(result)}]
            }]
...省略
tool_result_message = {
                    "role": "user",
                    "content": tool_results_content
                }
                messages.append(tool_result_message)

                # return tool use results
                yield tool_result_message

                # send the tool results to the model.
                response = bedrock_client.converse(
                   **requestParams
                )
                stop_reason = response['stopReason']
                output_message = response['output']['message']
                messages.append(output_message)
3. 测试
我们完成了代码改写后可以通过 oss-serverless 进行本地测试或者远程部署。首先我们需要编写一个 serverless.yml 配置文件,请填写你的 GITHUB_PERSONAL_ACCESS_TOKEN。
frameworkVersion: "3"

provider:
  name: aws
  runtime: nodejs22.x
  timeout: 30

plugins:
  - serverless-offline

package:
  excludeDevDependencies: true

functions:
  mcpServer:
    handler: dist/index.handler
    environment:
      GITHUB_PERSONAL_ACCESS_TOKEN: <你的GITHUB PERSONAL ACCESS TOKEN>
    events:
      - http:
          path: mcp
          method: post
          cors: true
3.1 本地测试
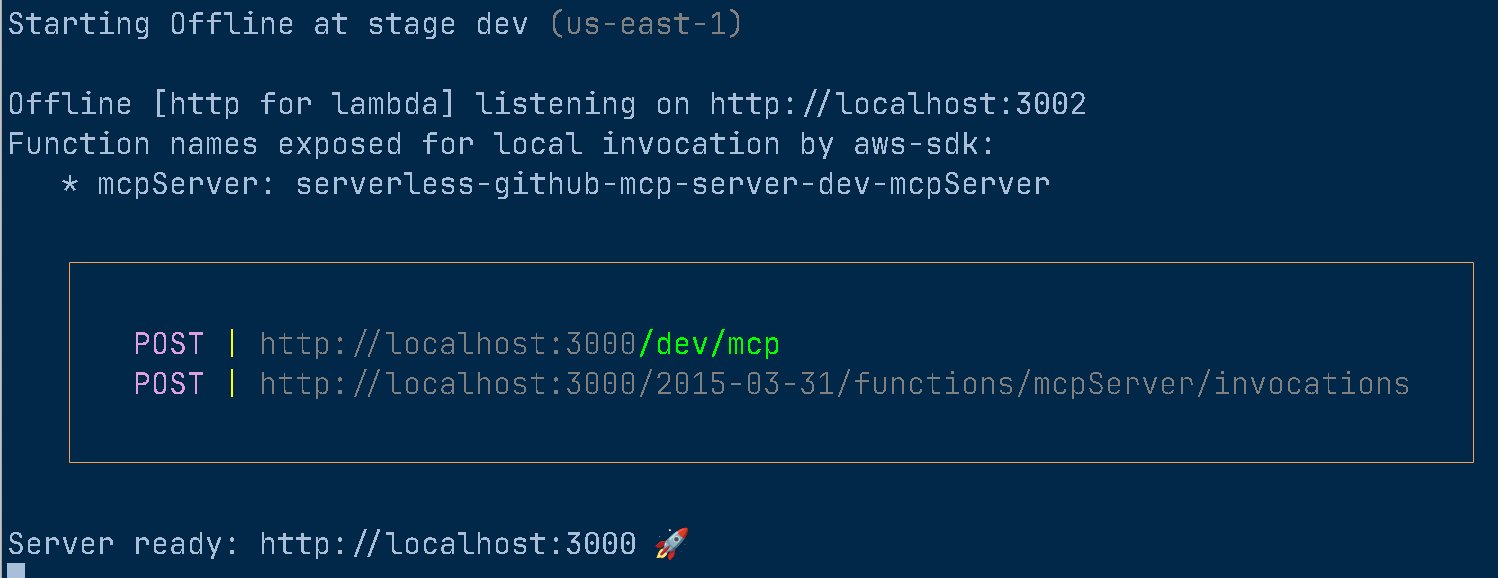
启动 oss-serverless,运行本地 MCP Server。
然后我们启动 mcp-debug
打开 http://127.0.0.1:5173,选择 Streamable HTTP,并且点击 Direct connections(no proxy)。在 URL 中输入 http://localhost:3000/dev/mcp,点击 connect,如果顺利的话就可以看到返回列表的返回。
我们选择 search_repositories,输入 aws golang v2,点击 Run Tools
MCP Server 通过查询 github.com 返回结果参考如下,可以看到 tools 正确搜索到 https://github.com/aws/aws-sdk-go-v2。
3.2 部署到 Amazon Lambda
我们通过本地测试调试好了程序,接下来我们就可以通过 oss-serverlss 部署到 Amazon Lambda,部署的过程非常简单。
#注意,环境需要提前正确配置了亚马逊云服务账号的权限
npm sls deploy
部署完成后会产生一个 API Gateway 地址,在 mcp-debug 中填入这个新的地址访问即可。
4. 总结
随着 MCP 最新协议 v2025.03.26 的发布,官方各种 SDK 纷纷开始更新支持 Streamable HTTP,我们可以通过结合开源项目 Middy、middy-mcp、Amazon Gateway、Amazon Lamba,快速实现 Stdio、SSE 的 MCP Server 改造,实现一个高效可扩展的 Streamable HTTP MCP Server。
附录
- 源代码
- Github MCP Server
- Middy
- middy-mcp
- oss-serverless
*前述特定亚马逊云科技生成式人工智能相关的服务仅在亚马逊云科技海外区域可用,亚马逊云科技中国仅为帮助您了解行业前沿技术和发展海外业务选择推介该服务。
本篇作者