Front-End Web & Mobile

Building an Android app with AWS Amplify – Part 1

This post has been deprecated. Instead, please see the new Amplify Android Getting Started tutorial to learn how to build Android mobile applications using AWS Amplify.

This walkthrough is part 1 of a two-part series on how to build an AWS cloud-enabled Android mobile app with the AWS Amplify toolchain.

Suppose that you want to build a native Android app to display a list of pets. You want to set up APIs to enable listing, creating, and storing pet data—but you don’t want to manage the backend infrastructure. You want to focus on building an Android app. You also want to enable user authentication so that each user can add their own pet. In this post, we go through detailed step-by-step instructions to build this Android app.

We cover how to do the following:

  • Add a GraphQL API that’s backed by AWS AppSync.
  • Add a user authentication mechanism through Amazon Cognito.
  • Enable querying and displaying the list of pets in a RecyclerView.
  • Enable adding new pet data and persisting data in the backend.

Getting started – Setting up a new Android project

Prerequisites

To get started, you need to have Java JDK installed on your work station. Download and install Android Studio, and download the Android 6.0 SDK (API Level 23 or above) in the Android SDK Manager .

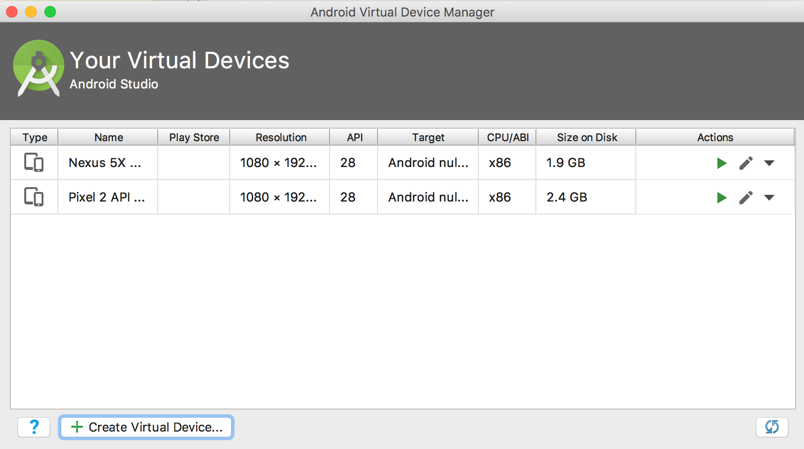
Also, download an emulator image. To do so, choose AVD Manager  in Android Studio. Choose + Create Virtual Device, and then follow instructions to complete setup.

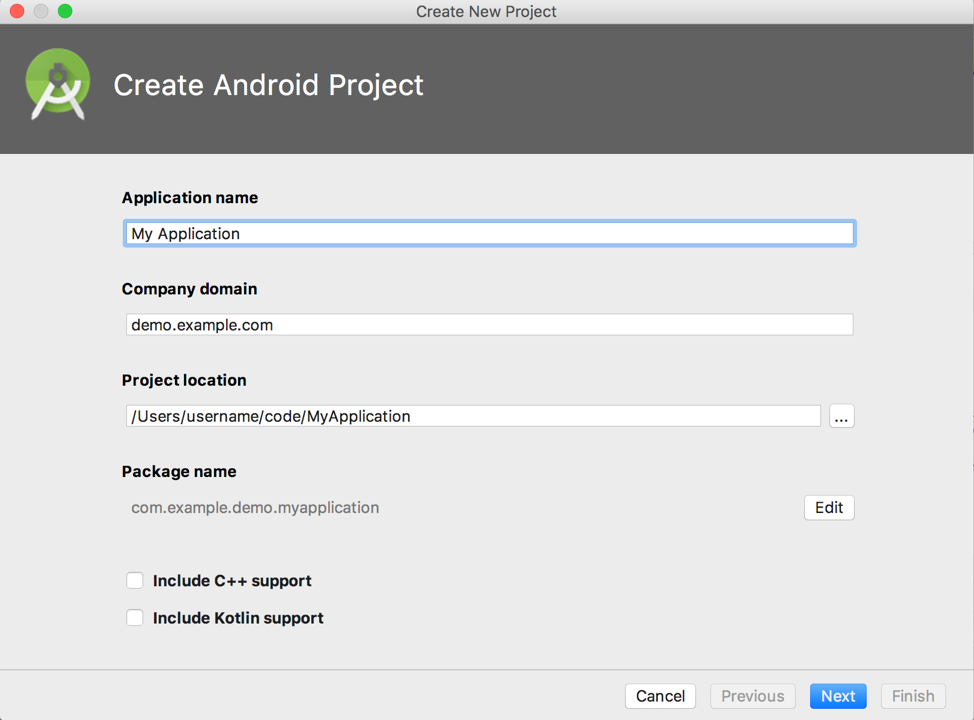
Create a new Android project

To get started, we first need to create a new Android . Go ahead and create a new Android project as shown in the following :

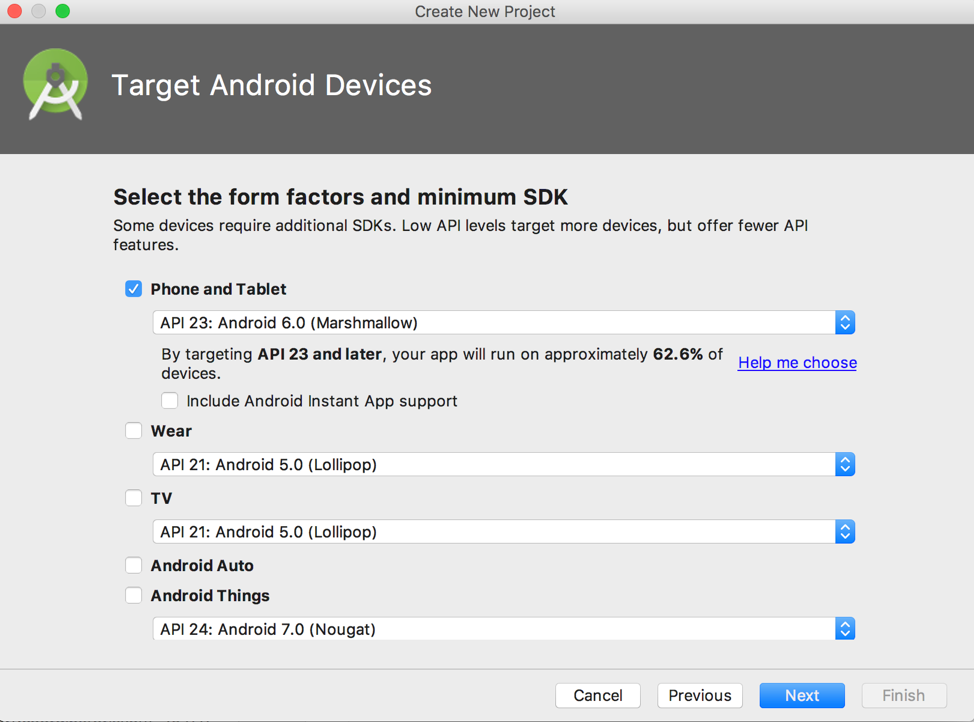
Select Phone and Tablet, choose API 23: Android 6.0 (Marshmallow), and click Next.

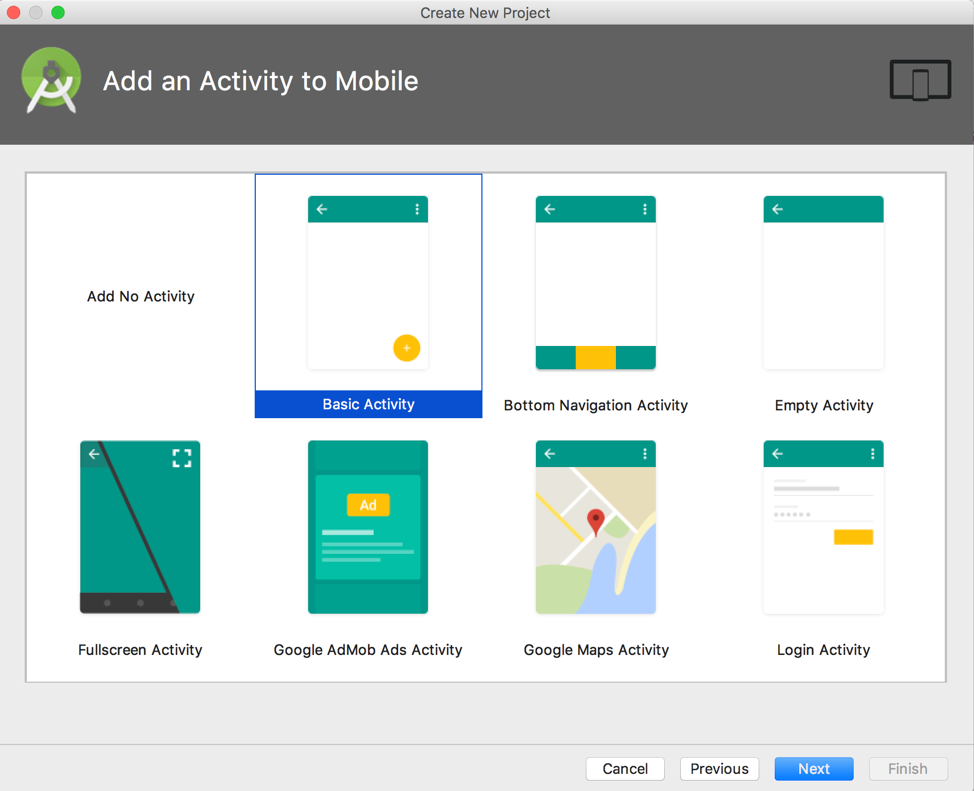
On the Add an Activity to Mobile screen, choose Basic Activity. Choose Next, keep the default values, and choose Finish to finish project setup.

Import the AWS AppSync SDK and configure the app

To use AWS AppSync in our new Android project, modify the project‘s build.gradle file, and add the following dependency in the build script:

classpath 'com.amazonaws:aws-android-sdk-appsync-gradle-plugin:2.6.+'

Next, in the app‘s build.gradle, add in a plugin of apply plugin: 'com.amazonaws.appsync' and dependencies for AWS AppSync and MqttServices.

As a result, your build.gradle should look like this:

apply plugin: 'com.android.application'
apply plugin: 'com.amazonaws.appsync'
android {
    // ... typical items
}
dependencies {
    // ... typical dependencies

    implementation 'com.amazonaws:aws-android-sdk-appsync:2.6.+'
    implementation 'org.eclipse.paho:org.eclipse.paho.client.mqttv3:1.2.0'
    implementation 'org.eclipse.paho:org.eclipse.paho.android.service:1.1.1'
}

Finally, update your AndroidManifest.xml with updates to <uses-permissions> for network calls and offline states. Also, add a <service> entry under <application> for MqttService so we can use subscriptions:

<uses-permission android:name="android.permission.INTERNET"/>
<uses-permission android:name="android.permission.ACCESS_NETWORK_STATE"/>
<uses-permission android:name="android.permission.WAKE_LOCK" />
<uses-permission android:name="android.permission.READ_PHONE_STATE" />
<uses-permission android:name="android.permission.WRITE_EXTERNAL_STORAGE"/>
<uses-permission android:name="android.permission.READ_EXTERNAL_STORAGE"/>

        <!--other code-->

    <application
        android:allowBackup="true"
        android:icon="@mipmap/ic_launcher"
        android:label="@string/app_name"
        android:roundIcon="@mipmap/ic_launcher_round"
        android:supportsRtl="true"
        android:theme="@style/AppTheme">

        <service android:name="org.eclipse.paho.android.service.MqttService" />

        <!--other code-->
    </application>

Build your project and ensure that there are no issues.

Installing the AWS Amplify CLI and initializing a new AWS Amplify project

Now let’s install the AWS Amplify CLI and integrate it with our Android project so we can take full advantage of the Amplify CLI toolchain.

Install the AWS Amplify CLI

Open your terminal, and run the following at the command line. If you already have it installed, run the command again to get the latest updates.

npm install -g @aws-amplify/cli -update

Initialize the AWS Amplify project

Next, let’s initialize a new AWS Amplify project for your Android app.

cd into your Android Studio project root in a terminal window, and run the following:

amplify init

Enter the following for each item:

  • Choose your default editor: Visual Studio Code (or your favorite editor)
  • Please choose the type of app that you’re building: android
  • Where is your Res directory: (app/src/main/res): Press Enter to accept the default.
  • Do you want to use an AWS profile? Y
  • Please choose the profile you want to use: default

AWS CloudFormation the initial infrastructure to support your app. After it’s done, the AWS Amplify CLI toolchain has initialized a new project, and you see a couple of new files and folders in your app’s project directory: amplify and .amplifyrc. These files hold your project’s configuration.

Adding a GraphQL API, adding authentication, and generating client code

The AWS Amplify toolchain provides us with a streamlined process for creating an API, adding authentication, and generating client code. Let’s start by running the following command in your app’s root directory:

amplify add api

Enter the following for each item:

  • Please select from one of the above mentioned services: GraphQL
  • Provide API name: AmplifyAndroid
  • Choose an authorization type for the API: Amazon Cognito User Pool
  • Do you want to use the default authentication and security configuration? Yes, use the default configuration.
  • Do you have an annotated GraphQL schema? N
  • Do you want a guided schema creation? Y
  • What best describes your project: (e.g. “Todo” with ID, name, description)
  • Do you want to edit the schema now? (Y/n) Y

When prompted, update the schema to the following:

type Pet @model {
  id: ID!
  name: String!
  description: String
}

Go back to the terminal, and press Enter to continue.

Next, let’s push the configuration to your AWS account by running:

amplify push

You’re prompted with your added changes:

| Category | Resource name          | Operation | Provider plugin   |
| -------- | ---------------------- | --------- | ----------------- |
| Auth     | cognito12345678        | Create    | awscloudformation |
| Api      | AmplifyAndroidWorkshop | Create    | awscloudformation |
  • Are you sure you want to continue? (Y/n) Y

Now you’re prompted to generate code for your brand new API:

  • Do you want to generate code for your newly created GraphQL API (Y/n) Y
  • Enter the file name pattern of queries, mutations and subscriptions (app/src/main/graphql/**/*.graphql): Press Enter to accept the default.
  • Do you want to generate/update all possible GraphQL operations – queries, mutations and subscriptions (Y/n) Y

AWS CloudFormation runs again to update the newly created API and authentication mechanism to your AWS account. This process might take a few minutes.

To view the new AWS AppSync API at any time after its creation, go to the dashboard at https://console.aws.amazon.com/appsync. Also, be sure that your AWS Region is set correctly.

To view the new Amazon Cognito user authentication at any time after its creation, go to the dashboard at https://console.aws.amazon.com/cognito/. Also, be sure that your AWS Region is set correctly.

After AWS CloudFormation completes updating resources in the cloud, you’re given a GraphQL API endpoint, and generated GraphQL statements are available in your project.

Although it’s transparent to you and we can start consuming the API right away, you can always examine the newly generated GraphQL queries, mutations, and subscriptions in Android Studio under app/src/main/graphql/com/amazonaws/amplify/generated/graphql.

Building the Android app

Our backend is ready. Now let’s start using it in our Android app!

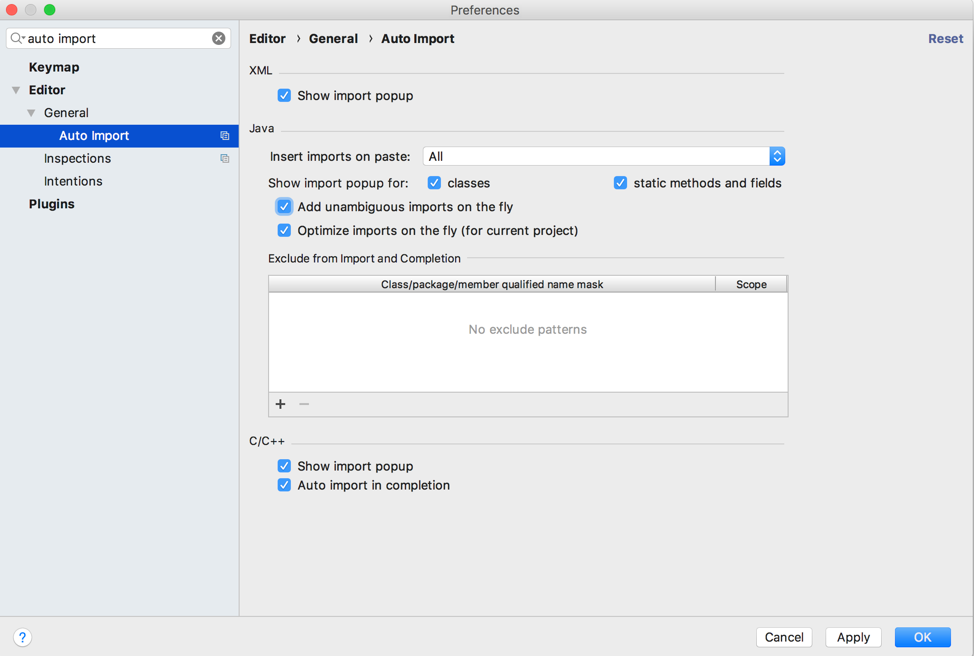
Before you start, if you haven’t already, you should turn on auto import. We’re using a lot of libraries! To do so, open Preferences -> Editor -> General -> Auto import. Then, select Add unambiguous imports on the fly.

Build and run your project to kick off the client code generation process. This gradle build process creates all the native object types, which you can use right away. You should be able to see a blank app as shown in the following screenshot:

If you’re curious, you can switch to the Project view, and browse to app/build/generated/source/appsync/com/amazonaws/amplify/generated/graphql/ to examine all the generated object types, queries, mutations, and subscriptions Java classes.

Add authentication

Because we earlier configured the app to use an Amazon Cognito user pool for authentication, we need to integrate authentication to our app. For simplicity, we’re going to leverage the AWS Mobile library’s built-in sign-in UI for Amazon Cognito authentication.

Open your app’s build.gradle and add the following dependencies:

// Mobile Client for initializing the SDK   
implementation('com.amazonaws:aws-android-sdk-mobile-client:2.8.+@aar') { transitive = true }     
// Cognito UserPools for SignIn    
implementation('com.amazonaws:aws-android-sdk-auth-userpools:2.8.+@aar') { transitive = true }     
// Sign in UI Library    
implementation('com.amazonaws:aws-android-sdk-auth-ui:2.8.+@aar') { transitive = true }

Right-click your app directory, and choose New -> Activity -> Empty Activity. Name your activity AuthenticationActivity, select the Launcher Activity check box, and click Finish.

In the AuthenticationActivity.java class, modify the class to be the following:

public class AuthenticationActivity extends AppCompatActivity {

    private final String TAG = AuthenticationActivity.class.getSimpleName();
    
    @Override
    protected void onCreate(Bundle savedInstanceState) {
        super.onCreate(savedInstanceState);
        setContentView(R.layout.activity_authentication);

        AWSMobileClient.getInstance().initialize(getApplicationContext(), new Callback<UserStateDetails>() {

            @Override
            public void onResult(UserStateDetails userStateDetails) {
                Log.i(TAG, userStateDetails.getUserState().toString());
                switch (userStateDetails.getUserState()){
                    case SIGNED_IN:
                        Intent i = new Intent(AuthenticationActivity.this, MainActivity.class);
                        startActivity(i);
                        break;
                    case SIGNED_OUT:
                        showSignIn();
                        break;
                    default:
                        AWSMobileClient.getInstance().signOut();
                        showSignIn();
                        break;
                }
            }

            @Override
            public void onError(Exception e) {
                Log.e(TAG, e.toString());
            }
        });
    }

    private void showSignIn() {
        try {
            AWSMobileClient.getInstance().showSignIn(this,
                 SignInUIOptions.builder().nextActivity(MainActivity.class).build());
        } catch (Exception e) {
            Log.e(TAG, e.toString());
        }
    }
}


Now let’s make sure that the AuthenticationActivity is our launcher activity. Open AndroidManifest.xml, and ensure that the <intent-filter> block is specified for the AuthenticationActivity as follows. You must remove the <intent-filter> and android:theme for MainActivity.

<!-- ... Other Code... -->
<activity
    android:name=".MainActivity"
    android:label="@string/app_name">
</activity>
<activity
    android:name=".AuthenticationActivity"
    android:noHistory="true">
    <intent-filter>
        <action android:name="android.intent.action.MAIN" />
        <category android:name="android.intent.category.LAUNCHER" />
    </intent-filter>
</activity>

Lastly, let’s modify activity_main.xml and MainActivity.java, and delete the code related to the AppBarLayout so they look like this:

activity_main.xml:

<?xml version="1.0" encoding="utf-8"?>
<android.support.design.widget.CoordinatorLayout xmlns:android="http://schemas.android.com/apk/res/android"
    xmlns:app="http://schemas.android.com/apk/res-auto"
    xmlns:tools="http://schemas.android.com/tools"
    android:layout_width="match_parent"
    android:layout_height="match_parent"
    tools:context=".MainActivity">

    <include layout="@layout/content_main" />

    <android.support.design.widget.FloatingActionButton
        android:id="@+id/fab"
        android:layout_width="wrap_content"
        android:layout_height="wrap_content"
        android:layout_gravity="bottom|end"
        android:layout_margin="@dimen/fab_margin"
        app:srcCompat="@android:drawable/ic_dialog_email" />

</android.support.design.widget.CoordinatorLayout>

MainActivity.java:

public class MainActivity extends AppCompatActivity {
    @Override
     protected void onCreate(Bundle savedInstanceState) {
        super.onCreate(savedInstanceState);
        setContentView(R.layout.activity_main);
     }
}

Build and start your app in your emulator. The sign-in UI should show up as follows:

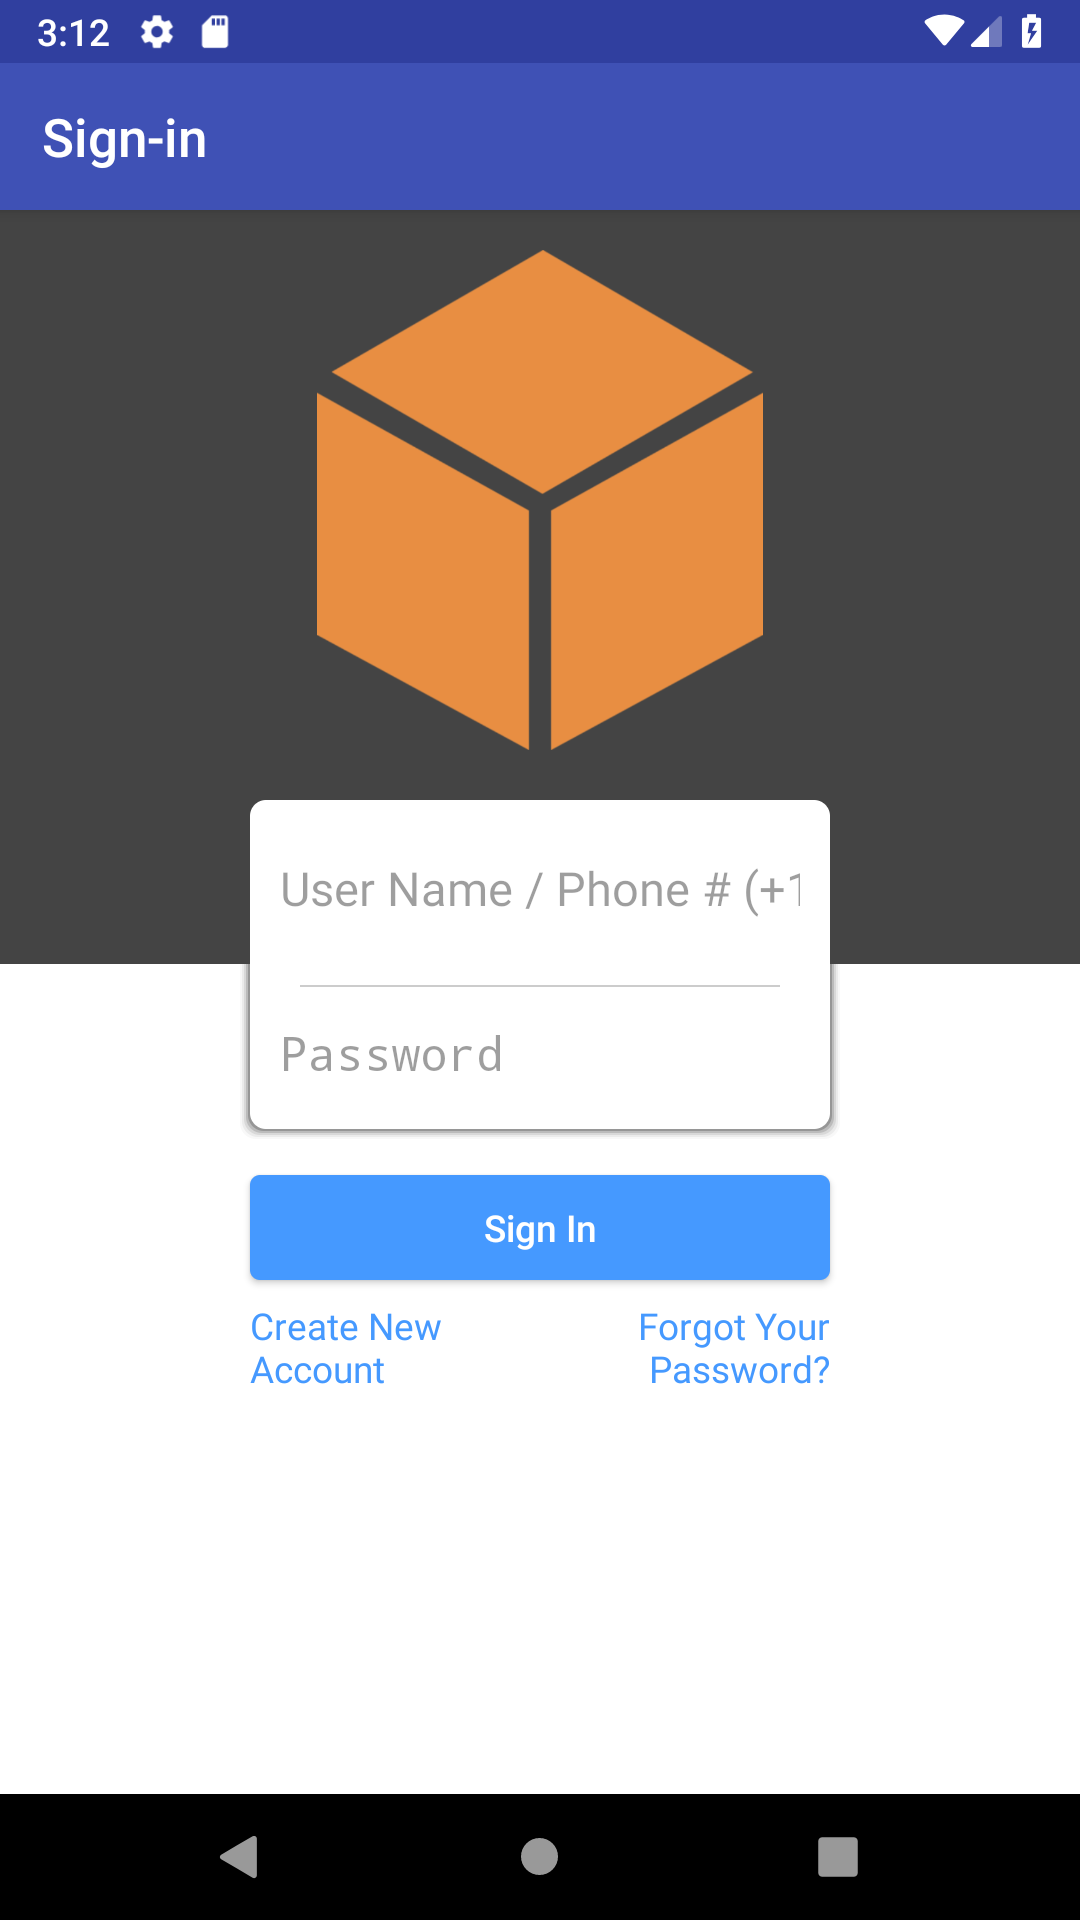
Now let’s add a user. In your emulator, choose Create New Account. Enter the user name, and choose a complex password. The password needs to be at least 8 characters long, and can include uppercase letters, lowercase letters, special characters, and numbers. Enter a valid email so you can receive the verification code.
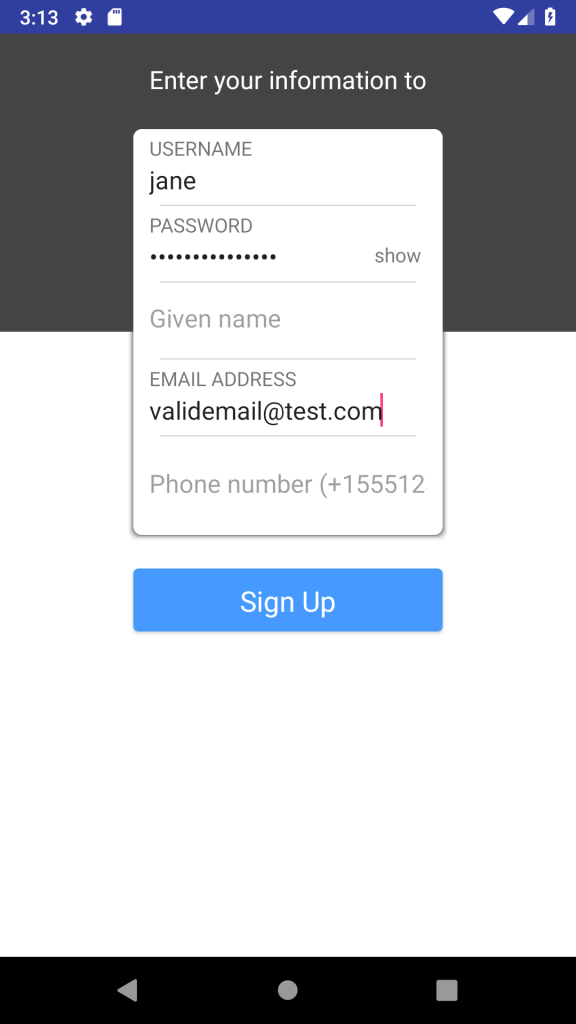
Choose Sign Up.

If you see an error such as Unable to resolve host "cognito-idp.us-east-1.amazonaws.com", double check that your emulator has internet connectivity. Restart the emulator if needed.

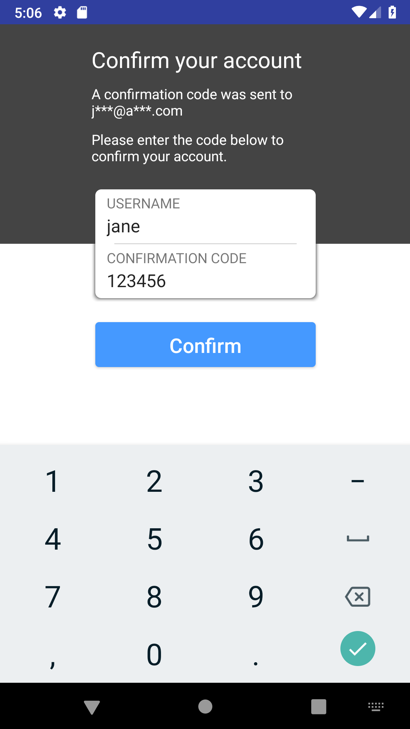
Your confirmation code should arrive shortly in your specified email inbox. Enter that code into the next screen, and choose Confirm to complete the sign-up process:

After you successfully sign in, you should see a successful message, and then be directed back to the same blank screen, which is our MainActivity.


To view the new user that was created in the Amazon Cognito user pool, go back to the dashboard at https://console.aws.amazon.com/cognito/. Also, be sure that your AWS Region is set correctly.

Create the AWS AppSync client

We now need to create an AWSAppSyncClient to perform API calls. Add a new ClientFactory.java class in your package:

public class ClientFactory {
    private static volatile AWSAppSyncClient client;

    public static synchronized void init(final Context context) {
        if (client == null) {
            final AWSConfiguration awsConfiguration = new AWSConfiguration(context);
            client = AWSAppSyncClient.builder()
                     .context(context)
                     .awsConfiguration(awsConfiguration)
                     .cognitoUserPoolsAuthProvider(new CognitoUserPoolsAuthProvider() {
                        @Override
                        public String getLatestAuthToken() {
                            try {
                                return AWSMobileClient.getInstance().getTokens().getIdToken().getTokenString();
                            } catch (Exception e){
                                Log.e("APPSYNC_ERROR", e.getLocalizedMessage());
                                return e.getLocalizedMessage();
                            }
                         }
                     }).build();
         }
    }

    public static synchronized AWSAppSyncClient appSyncClient() {
        return client;
    }
}

This ClientFactory class supplies an AppSync client, which we can leverage to perform data access activities.

Query for data

We don’t have any data in our list yet, but let’s build the capacity to display them when we do have data.

Add a RecyclerView to display a list of items

Now let’s start building our app to enable the display of items.

We’re using RecyclerView to display data. Open src/res/layout/content_main.xml, switch to Text view, and replace the <TextView> with the following:

<android.support.v7.widget.RecyclerView
            android:id="@+id/recycler_view"
            android:layout_width="match_parent"
            android:layout_height="wrap_content" />

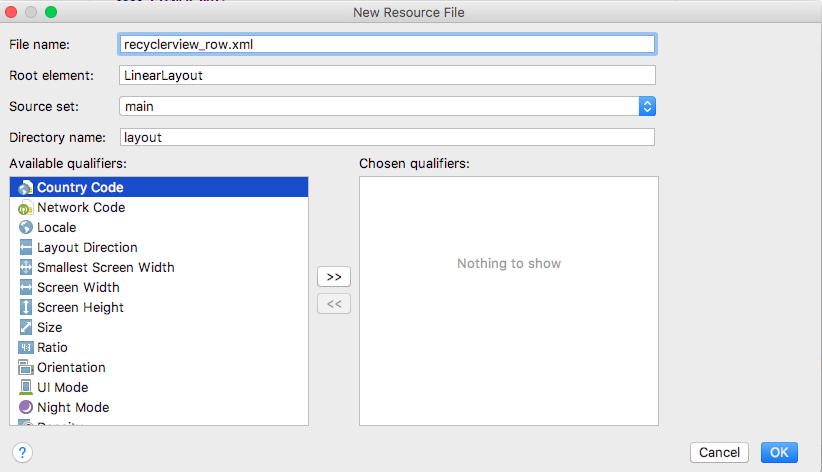
Now let’s define what each item in our list looks like. Right-click your res/layout folder, add a new Layout resource file. Let’s call it recyclerview_row.xml. Change the Root element to LinearLayout, keep the rest as default, and choose OK.

Switch to the Text view of recyclerview_row.xml, and modify the layout as follows:

<?xml version="1.0" encoding="utf-8"?>
<LinearLayout
    xmlns:android="http://schemas.android.com/apk/res/android"
    android:layout_width="match_parent"
    android:layout_height="wrap_content"
    android:orientation="vertical"
    android:padding="10dp">

    <TextView
        android:layout_width="match_parent"
        android:layout_height="wrap_content"
        android:layout_marginTop="10dp"
        android:paddingLeft="10dp"
        android:textSize="15dp"
        android:id="@+id/txt_name"
        />
    <TextView
        android:layout_width="match_parent"
        android:layout_height="wrap_content"
        android:layout_marginTop="10dp"
        android:paddingLeft="10dp"
        android:textSize="15dp"
        android:id="@+id/txt_description"
        />

</LinearLayout>

Because we’re using a RecyclerView, we need to provide an adapter for it. Add a new Java class MyAdapter.java, which extends RecyclerView.Adapter:

public class MyAdapter extends RecyclerView.Adapter<MyAdapter.ViewHolder> {

    private List<ListPetsQuery.Item> mData = new ArrayList<>();;
    private LayoutInflater mInflater;


    // data is passed into the constructor
    MyAdapter(Context context) {
        this.mInflater = LayoutInflater.from(context);
    }

    // inflates the row layout from xml when needed
    @Override
    public ViewHolder onCreateViewHolder(ViewGroup parent, int viewType) {
        View view = mInflater.inflate(R.layout.recyclerview_row, parent, false);
        return new ViewHolder(view);
    }

    // binds the data to the TextView in each row
    @Override
    public void onBindViewHolder(ViewHolder holder, int position) {
        holder.bindData(mData.get(position));
    }

    // total number of rows
    @Override
    public int getItemCount() {
        return mData.size();
    }

    // resets the list with a new set of data
    public void setItems(List<ListPetsQuery.Item> items) {
        mData = items;
    }

    // stores and recycles views as they are scrolled off screen
    class ViewHolder extends RecyclerView.ViewHolder {
        TextView txt_name;
        TextView txt_description;

        ViewHolder(View itemView) {
            super(itemView);
            txt_name = itemView.findViewById(R.id.txt_name);
            txt_description = itemView.findViewById(R.id.txt_description);
        }

        void bindData(ListPetsQuery.Item item) {
            txt_name.setText(item.name());
            txt_description.setText(item.description());
        }
    }
}

Note the class-level variable mData. It’s a list of type ListPetsQuery.Item, which is a generated GraphQL type that’s based on our schema.

We have also exposed a setItems method, to allow outside resetting of our dataset.

Build the screen to populate the RecyclerView

Open MainActivity.java, modify the class to implement a query method, and populate the RecyclerView:

public class MainActivity extends AppCompatActivity {

    RecyclerView mRecyclerView;
    MyAdapter mAdapter;

    private ArrayList<ListPetsQuery.Item> mPets;
    private final String TAG = MainActivity.class.getSimpleName();

    protected void onCreate(Bundle savedInstanceState) {
        super.onCreate(savedInstanceState);
        setContentView(R.layout.activity_main);

        mRecyclerView = findViewById(R.id.recycler_view);

        // use a linear layout manager
        mRecyclerView.setLayoutManager(new LinearLayoutManager(this));

        // specify an adapter (see also next example)
        mAdapter = new MyAdapter(this);
        mRecyclerView.setAdapter(mAdapter);

        ClientFactory.init(this);
    }

    @Override
    public void onResume() {
        super.onResume();

        // Query list data when we return to the screen
        query();
    }

    public void query(){
        ClientFactory.appSyncClient().query(ListPetsQuery.builder().build())
                .responseFetcher(AppSyncResponseFetchers.CACHE_AND_NETWORK)
                .enqueue(queryCallback);
    }

    private GraphQLCall.Callback<ListPetsQuery.Data> queryCallback = new GraphQLCall.Callback<ListPetsQuery.Data>() {
        @Override
        public void onResponse(@Nonnull Response<ListPetsQuery.Data> response) {

            mPets = new ArrayList<>(response.data().listPets().items());

            Log.i(TAG, "Retrieved list items: " + mPets.toString());

            runOnUiThread(new Runnable() {
                @Override
                public void run() {
                    mAdapter.setItems(mPets);
                    mAdapter.notifyDataSetChanged();
                }
            });
        }

        @Override
        public void onFailure(@Nonnull ApolloException e) {
            Log.e(TAG, e.toString());
        }
    };
}

The appSyncClient is responsible for querying the AWS AppSync GraphQL endpoint. We chose to use the CACHE_AND_NETWORK mode because it retrieves the data in the local cache first, while reaching out to the network for latest data. After the fetch is complete, queryCallback is invoked again, and our dataset is updated with the latest data. There are other cache or network-only/first modes that you can use, depending on your app data fetching needs.

Build your app again to ensure that there are no errors. A blank screen still displays, but you should be able to see the log in the Logcat window. This indicates that a query has finished successfully, similar to the following:

09-28 10:32:16.789 11605-11699/com.example.demo.mypetapp I/MainActivity: Retrieved list items: []

Add a pet

Now let’s add the ability to add a pet.

Add a new Empty Activity by choosing New -> Activity -> Empty Activity. Name the activity AddPetActivity, and choose Finish.

Open the layout file activity_add_pet.xml, and add the following layout inside of your existing <android.support.constraint.ConstraintLayout>:

<LinearLayout xmlns:android="http://schemas.android.com/apk/res/android"
        android:layout_width="match_parent"
        android:layout_height="match_parent"
        android:orientation="vertical"
        android:layout_margin="15dp">

    <TextView
        android:layout_width="wrap_content"
        android:layout_height="wrap_content"
        android:text="Name"
        android:textSize="15sp"
        />
    <EditText
        android:id="@+id/editTxt_name"
        android:layout_width="match_parent"
        android:layout_height="wrap_content" />
    <TextView
        android:layout_width="wrap_content"
        android:layout_height="wrap_content"
        android:text="Description"
        android:textSize="15sp" />
    <EditText
        android:id="@+id/editText_description"
        android:layout_width="match_parent"
        android:layout_height="wrap_content" />
    <Button
        android:layout_width="wrap_content"
        android:layout_height="wrap_content"
        android:id="@+id/btn_save"
        android:layout_marginTop="15dp"
        android:text="Save"/>
</LinearLayout>

This gives us basic input fields for the names and descriptions of our pets.

Open AddPetActivity.java, and add the following code to read the text inputs. Create a new mutation, which adds a new pet.

public class AddPetActivity extends AppCompatActivity {
    private static final String TAG = AddPetActivity.class.getSimpleName();

    @Override
    protected void onCreate(Bundle savedInstanceState) {
        super.onCreate(savedInstanceState);
        setContentView(R.layout.activity_add_pet);

        Button btnAddItem = findViewById(R.id.btn_save);
        btnAddItem.setOnClickListener(new View.OnClickListener() {

            @Override
            public void onClick(View view) {
                save();
            }
        });
    }

    private void save() {
        final String name = ((EditText) findViewById(R.id.editTxt_name)).getText().toString();
        final String description = ((EditText) findViewById(R.id.editText_description)).getText().toString();

        CreatePetInput input = CreatePetInput.builder()
                .name(name)
                .description(description)
                .build();

        CreatePetMutation addPetMutation = CreatePetMutation.builder()
                .input(input)
                .build();
        ClientFactory.appSyncClient().mutate(addPetMutation).enqueue(mutateCallback);
    }

    // Mutation callback code
    private GraphQLCall.Callback<CreatePetMutation.Data> mutateCallback = new GraphQLCall.Callback<CreatePetMutation.Data>() {
        @Override
        public void onResponse(@Nonnull final Response<CreatePetMutation.Data> response) {
            runOnUiThread(new Runnable() {
                @Override
                public void run() {
                    Toast.makeText(AddPetActivity.this, "Added pet", Toast.LENGTH_SHORT).show();
                    AddPetActivity.this.finish();
                }
            });
        }

        @Override
        public void onFailure(@Nonnull final ApolloException e) {
            runOnUiThread(new Runnable() {
                @Override
                public void run() {
                    Log.e("", "Failed to perform AddPetMutation", e);
                    Toast.makeText(AddPetActivity.this, "Failed to add pet", Toast.LENGTH_SHORT).show();
                    AddPetActivity.this.finish();
                }
            });
        }
    };
}

Now let’s connect the AddPetActivity to our MainActivity.

Open the layout file activity_main.xml, and replace the floating button after the RecyclerView with the following:

<android.support.design.widget.FloatingActionButton
        android:id="@+id/btn_addPet"
        android:layout_width="wrap_content"
        android:layout_height="wrap_content"
        android:layout_gravity="bottom|right|end"
        android:layout_margin="16dp"
        android:tint="@android:color/white"
        app:srcCompat="@android:drawable/ic_input_add"/>

Open MainActivity.java again, and modify the existing code in onCreate to start the AddPetActivity when the addPetbutton is pressed:

protected void onCreate(Bundle savedInstanceState) {
    //... Other code....

    FloatingActionButton btnAddPet = findViewById(R.id.btn_addPet);
      btnAddPet.setOnClickListener(new View.OnClickListener() {

          @Override
          public void onClick(View view) {
              Intent addPetIntent = new Intent(MainActivity.this, AddPetActivity.class);
              MainActivity.this.startActivity(addPetIntent);
          }
    });
}

Now let’s build and start the project, and then test out the adding functionality.

Sign in with your previously created user name and password if you’re prompted again. Then, in the empty screen, choose the “+” button:

You should then see the screen that prompts you to enter a name and a description. Enter some test values as below to add our first pet.

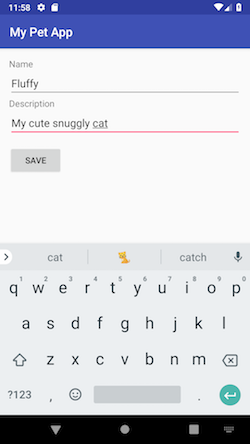
Choose Save to send the mutation along to create a pet. The creation should be successful, and you should see our first created item displayed in the list. This is because we previously specified in onResume() that we do a “re-fetch”, so that we have the most up-to-date data.

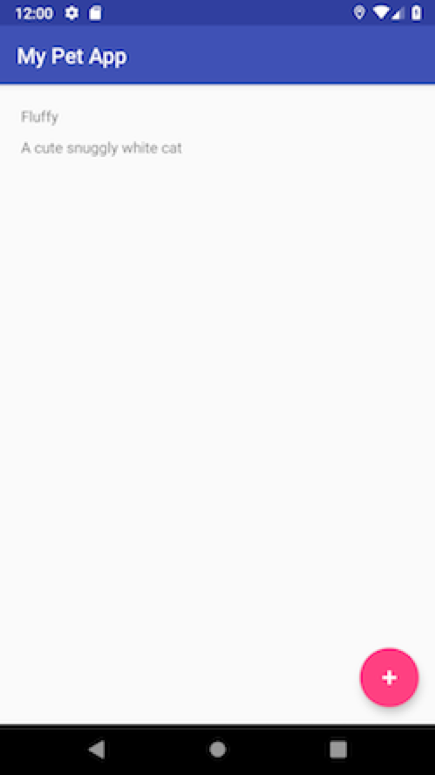
There you go—you’ve created an Android app that shows you a list of pets and lets you add pets!

Give us feedback

We’re excited that you’ve created this Android app. Check out part 2 of this blog series – You’ll be able to add offline support, real-time subscriptions, and object storage to your Android app. As always, let us know how we’re doing, and submit any requests in the AWS Amplify CLI repository. You can read more about AWS Amplify on the AWS Amplify website.


Jane Shen is an AWS Professional Services Application Architect based in Toronto, Canada.