Module 2: Initialize Amplify
In this module, you will install and configure the Amplify CLI
Introduction
Implementation
Install Amplify CLI
1. Install the CLI
To install AWS Amplify CLI, open Terminal, and enter the following command:
curl -sL https://aws-amplify.github.io/amplify-cli/install | bash && $SHELL
2. Configure the CLI
Configure it to connect to your AWS account by running the following command:
amplify configureFollow the steps as instructed. You can find a more detailed guide here .
Initialize an Amplify backend
Initialize an Amplify backend
To create the basic structure of our backend, we first need to initialize the Amplify project directory and create our Cloud backend.
1. Initialize the backend
Open the Terminal , navigate to the root directory of your project and run the following command:
amplify init2. Enter a name
You will be asked to enter a name for the project. Keep the default name , and then validate that the information is correct. The following code is an example.
? Enter a name for the project (GettingStarted)The following configuration will be applied: Project information| Name: GettingStarted| Environment: dev| Default editor: Visual Studio Code| App type: ios3. Follow the prompts
Proceed with the remaining steps:
Initialize the project with the above configuration? (Y/n) Y Select the authentication method you want to use: (Use arrow keys) AWS profile Please choose the profile you want to use default4. Verify initialization
This will provision the resources in the backend and might take a few minutes. Once it's done, you will see the following information:
Deployment state saved successfully.✔ Initialized provider successfully.✅ Initialized your environment successfully.✅ Your project has been successfully initialized and connected Add Amplify libraries to your project
1. Add dependencies
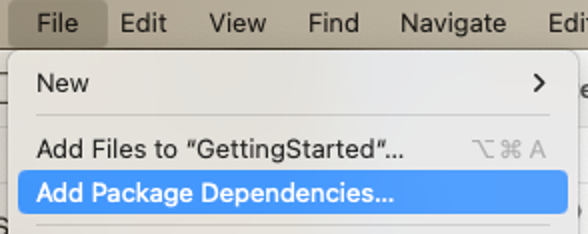
Switch back to Xcode. Select File and choose Add Package Dependencies...
2. Search for the Amplify library
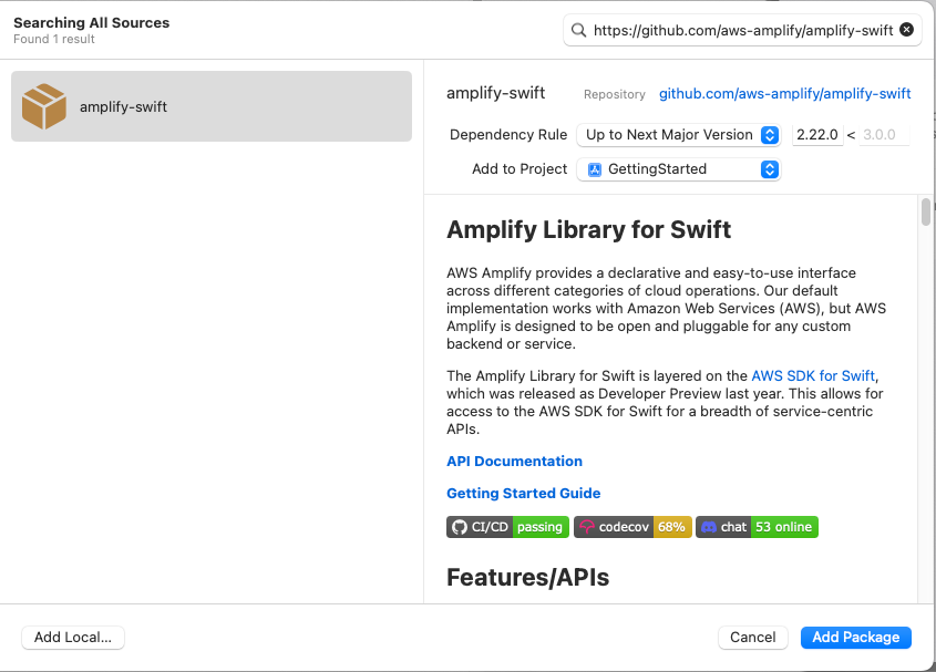
Enter the Amplify Libraries for Swift GitHub repo URL (https://github.com/aws-amplify/amplify-swift ) into the search bar, and press Enter.
Make sure that Up to Next Major Version is selected from the Dependency Rule dropdown, and select Add Package.
3. Select the library
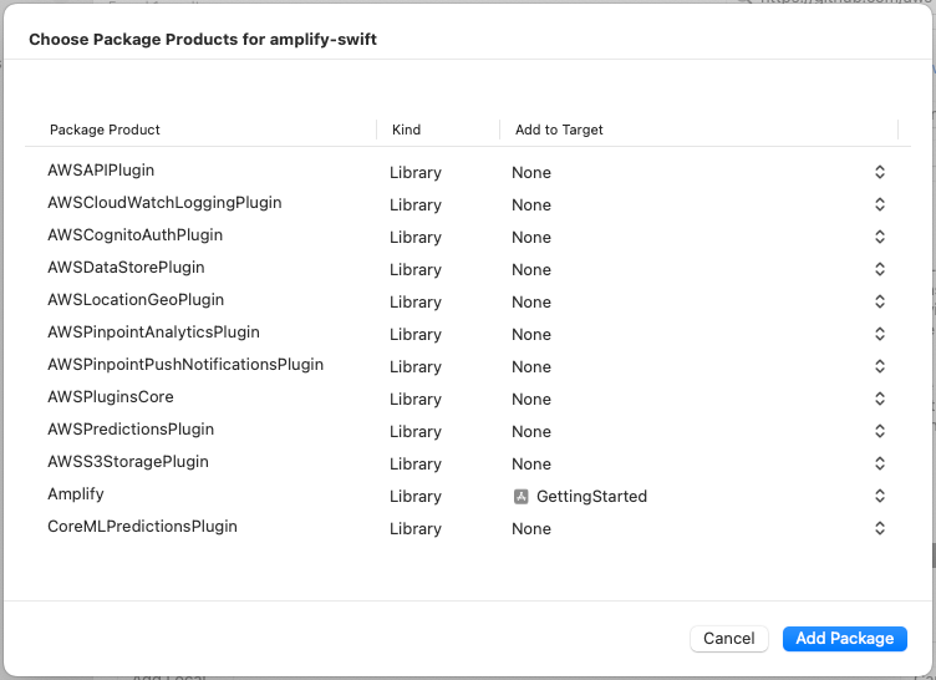
Once the libraries are fetched, you will be asked to select which ones you wish to add to your target.
In the drop down, next to Amplify, choose GettingStarted.
Select None in for the rest of the Package Products in the Add to Target section, and choose Add Package.
Initialize Amplify at runtime
1. Modify the file
Open the GettingStartedApp.swift file and replace its content with the following information:
import Amplifyimport SwiftUI@mainstruct GettingStartedApp: App { init() { do { try Amplify.configure() print("Initialized Amplify"); } catch { print("Could not initialize Amplify: \(error)") } } var body: some Scene { WindowGroup { NotesView() } }}Verify your setup
1. Build the project
To verify everything works as expected, build the project.
Select the Product menu and then select Build , or press Cmd + B .
There should be no error.
Conclusion
Add user authentication
Did you find what you were looking for today?
Let us know so we can improve the quality of the content on our pages