AWS Cloud Financial Management
Introducing Automated Amazon EBS Volume Optimization in AWS Compute Optimizer
Starting today, AWS Compute Optimizer introduces a new automation feature that streamlines how you optimize Amazon Elastic Block Store (EBS) volumes. Instead of dedicating valuable engineering hours to optimization tasks, you can now create automation rules that continuously clean up unattached volumes and upgrade volume types based on Compute Optimizer’s data-driven recommendations, freeing your teams to focus on what matters most.
Review and apply recommendations
Before setting up automation rules, familiarize yourself with the recommendations by testing actions individually. The new “Recommended actions” page lists optimization opportunities you can implement directly through AWS Compute Optimizer. Simply select the actions you want and click to apply them. Two optimization actions are available:
- Snapshot and delete unattached Amazon EBS volumes: Recommended for volumes that have been unattached from an EC2 instance for 32+ days. Compute Optimizer creates a snapshot before deleting the volume. For more information about this recommendation criteria, see Idle criteria per resource.
- Upgrade Amazon EBS volume type: Recommends upgrading gp2 to gp3 and io1 to io2. Upgrading to newer generation volume type provides better performance and cost efficiency, as they offer improved IOPS and throughput capabilities at lower prices compared to their predecessors.
Click any volume ID to review the recommendation in detail. Filter by AWS Regions or resource tags to target specific segments of your fleet that you want to optimize. After reviewing the recommendations, select the actions you want to apply and confirm them on the next page to start implementation (see Figure 1). This hands-on approach is ideal for handling one-time cleanup efforts or learning how the optimization process works where you need to review each action.
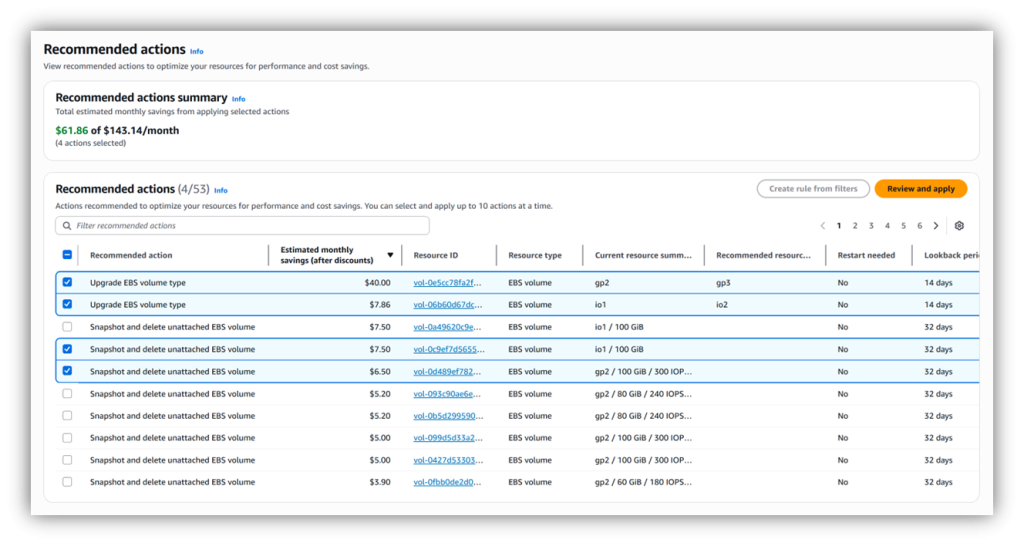
Figure 1: Review and apply recommendations
Streamline optimization with automation rules
Once you’re comfortable with the recommended actions, automation rules help you scale implementation across your resources. Compute Optimizer applies recommendations on a recurring schedule whenever they match your rule criteria.
A single automation rule can operate globally, eliminating the need to create and deploy separate rules for each AWS Region. Management accounts or delegated administrators can establish organization-wide rules that span multiple accounts, while members accounts retain the flexibility to add rules for their specific needs (see Figure 2).
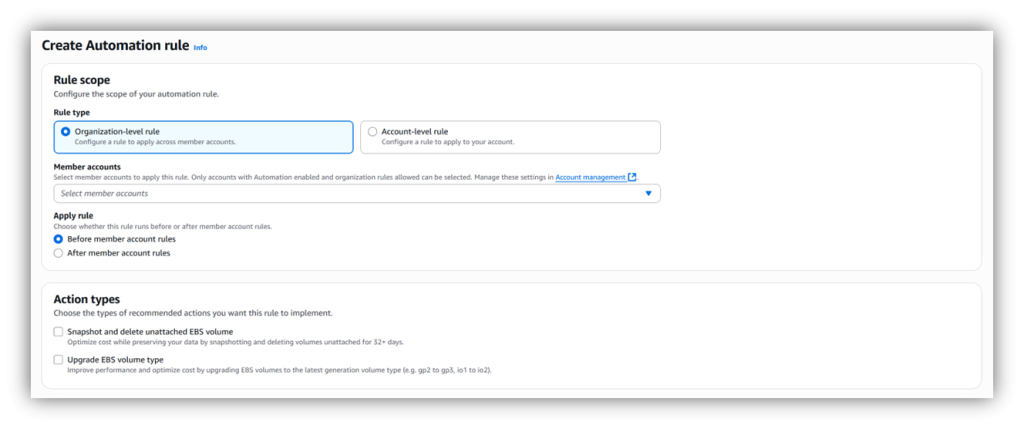
Figure 2: Create automation rules for your organization
You can quickly set up automation rules that fit your specific requirements. You can specify criteria such as regions to target specific geographies, resource tags to distinguish between production and development workloads, and restart needed flags to filter for non-disruptive optimization actions.
After setting your criteria, validate your target selection by previewing matching recommended actions. You can see current recommended actions that match your criteria and a summary of total actions and estimated monthly savings to validate your rule criteria.
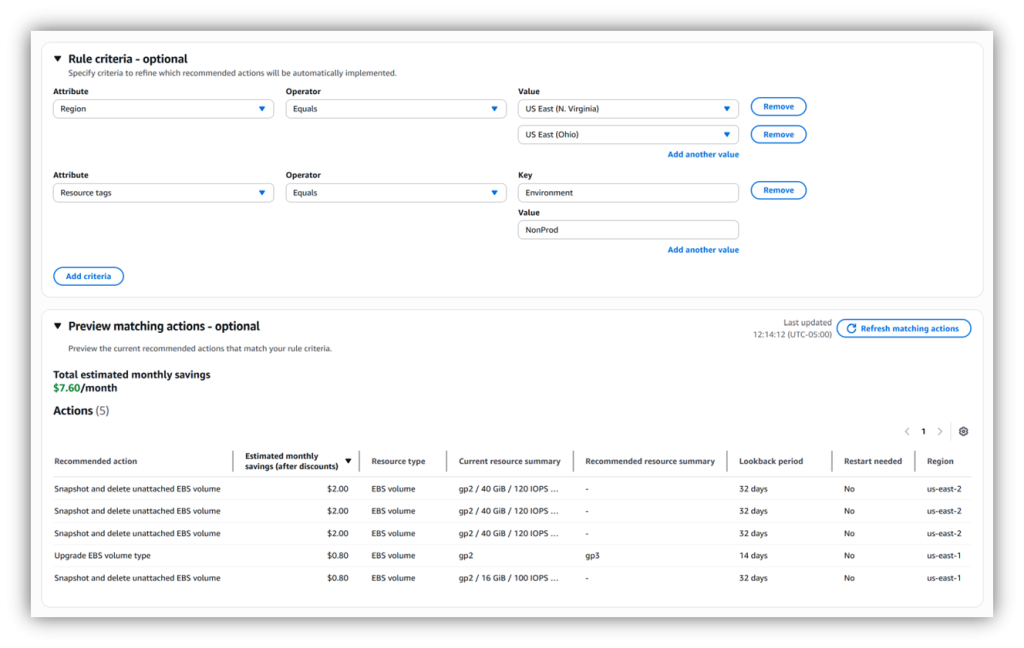
Figure 3: Create automation rules
Configure rules to run daily, weekly, or monthly, and Compute Optimizer will continuously evaluate new recommendations against your criteria. This means newly identified unattached volumes will be snapshotted and deleted and older generation volume types will get upgraded automatically according to your rules – no manual intervention required.
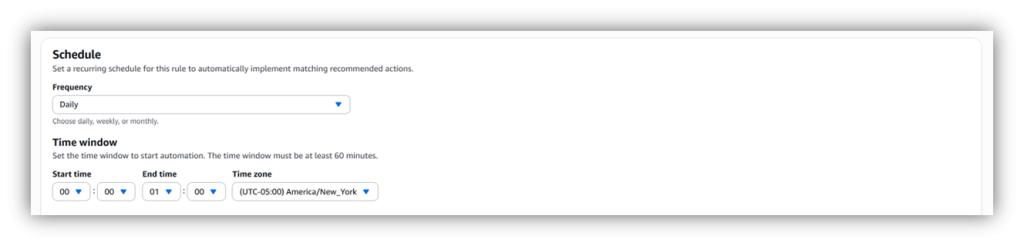
Figure 4: Set a recurring schedule
Monitor automation events
A new dashboard provides visibility into all your automations, summarizing event count and estimated monthly savings by status and month of execution. You can track automation progress over time to help you refine your optimization strategy as needed.
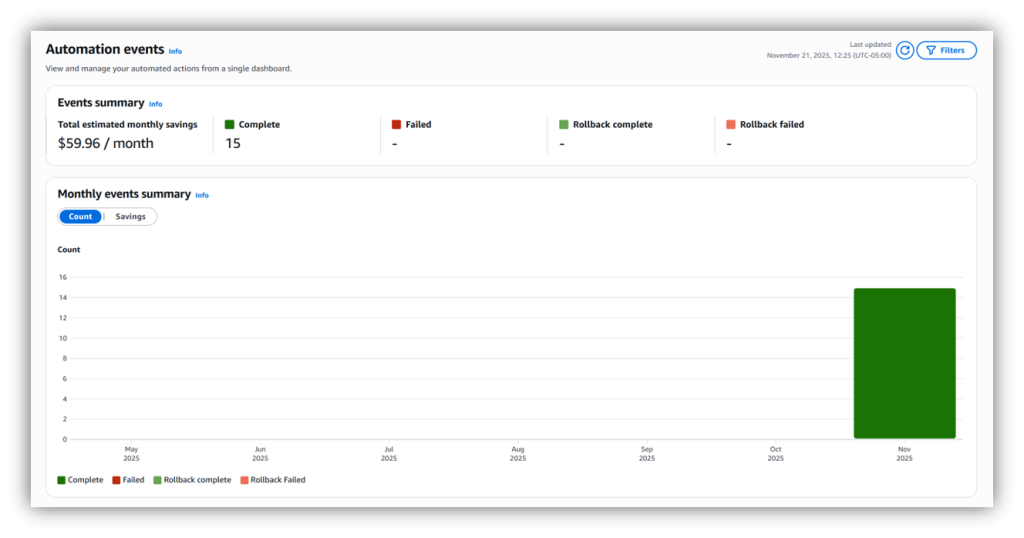
Figure 5: Summarize automation events
In the same dashboard, you can drill down into each automation event to get more details. You can track the status of each optimization, examine the detailed step history for each automation, and quantify the financial impact.

Figure 6: Get details for every automation event
Safety first
Safety mechanisms are built into the feature to provide operational confidence and minimize risk. The automation system conducts checks that verify resource eligibility before taking any action, targeting only the volumes that match your specified criteria. Automated actions taken can also be reversed in Compute Optimizer. For example, snapshots are automatically created before any deletion occurs, so that your data remains fully recoverable and can be restored to a new volume. These multi-layered safety measures work together to provide the operational confidence needed to automate at scale.
If you need to reverse an action, you can do so from the “Automation events” page. For volume deletions, AWS Compute Optimizer restores data from the created snapshot to a new Amazon EBS volume (with a new volume ID). For volume type upgrades, Compute Optimizer reverses the action by initiating a new volume modification to change the volume type to the previous configuration.
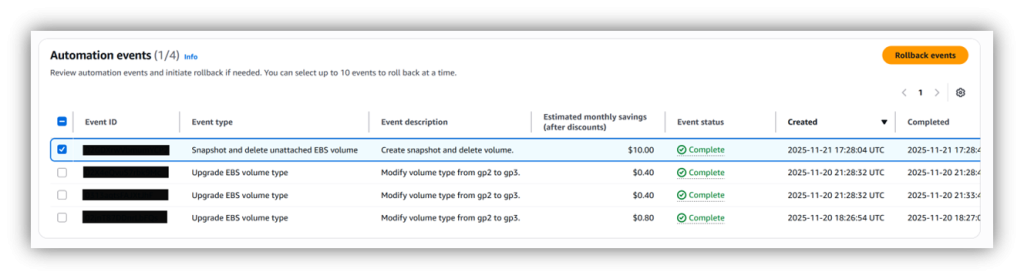
Figure 7: Roll back changes if necessary
Tips to get started
If you’re already using Compute Optimizer, navigate to the new “Automation” section in the console and enable the automation feature for your account. Once you opt-in, AWS will automatically create the required service-linked role. If you are managing an organization from the management account, you can also opt in member accounts. This allows you to create organization-wide rules that apply across multiple accounts. If you are new to Compute Optimizer, enable the service with just a few clicks in the console or through the API.
For your first automation rule, start small and scale strategically. Target non-production environments to build confidence with the process. Create a rule that focuses on cleaning up unattached Amazon EBS volumes in development or testing environments by selecting specific accounts or filtering based on resource tags like “Environment: Development” or “Environment: Test.”
Once you’re comfortable with the automation behavior and have confirmed expected outcomes, gradually expand your rules to include staging environments and eventually production workloads. You can also start with weekly or monthly schedules before moving to daily automation. This approach helps you build operational confidence while fine-tuning your criteria, so when you do scale to your entire fleet, your automation rules are well-tested and aligned with your organization’s business requirements.
Conclusion
With AWS Compute Optimizer’s new automation feature in your optimization toolbox, you can pursue continuous cost savings and performance improvements while your teams spend more time innovating for your customers.
Whether you’re cleaning up development environments or taking advantage of the latest generation technology, automation rules provide the scalability, consistency, and operational safety to streamline your optimization processes. Start with non-production workloads, build confidence through gradual expansion, and scale strategically to unlock continuous cost savings and performance improvements across your entire AWS infrastructure.
Visit the AWS Compute Optimizer console and explore the new Automation section to get started. For more details, see the AWS Compute Optimizer user guide documentation.