AWS for SAP
AWS Single Sign-On integration with SAP Fiori in S/4HANA
April 2021 Update: We are excited to announce that AWS SSO now offers you built-in SSO integrations to SAP, and customer can now select a SAP template directly in step 4.2 of this blog post instead of the custom template. All other steps remain the same.
As part of Amazon Web Services (AWS) professional services in the SAP global specialty practice, I often assist customers in architecting and deploying SAP on AWS. SAP customers can take advantage of fully managed AWS services such as Amazon Elastic File System (Amazon EFS) and AWS Backup to unburden their teams from infrastructure operations and other undifferentiated heavy lifting.
In this blog post, I’ll show you how to use AWS Single Sign-On (AWS SSO) to enable your SAP users to access your SAP Fiori launchpad without having to log in and out each time. This approach will provide a better user experience for your SAP users and ensure the integrity of enterprise security. With just a few clicks, you can enable a highly available AWS SSO service without the upfront investment and on-going maintenance costs of operating your own SSO infrastructure. Moreover, there is no additional cost to enable AWS SSO.
Solution overview
The integration between AWS SSO and an SAP Fiori application is based on the industry standard: Security Assertion Markup Language (SAML) 2.0. It works by transferring the user’s identity from one place (AWS SSO) to the service provider (SAP Fiori) through an exchange of digitally signed XML documents.
To configure and test AWS SSO with SAP, you need to complete following steps:
- Activate the required SAP parameters and web services in the SAP system.
- Create the SAML 2.0 local provider in SAP transaction SAML2.
- Download the SAP local provider SAML 2.0 metadata file.
- Configure AWS SSO and exchange the SAML 2.0 metadata files.
- Configure the attribute mappings.
- Assign users to the application.
- Configure the trusted provider in SAP transaction SAML2.
- Enable the identity provider.
- Configure identity federation.
- Test your SSO.
Step 1. Activate the required SAP parameters and web services in the SAP system
- Log in to the business client of your SAP system. Validate the single sign-on parameters in the SAP S/4HANA system by using SAP transaction RZ10. Here are the profile parameters I used:
login/create_sso2_ticket = 2 login/accept_sso2_ticket = 1 login/ticketcache_entries_max = 1000 login/ticketcache_off = 0 login/ticket_only_by_https = 1 icf/set_HTTPonly_flag_on_cookies = 0 icf/user_recheck = 1 http/security_session_timeout = 1800 http/security_context_cache_size = 2500 rdisp/plugin_auto_logout = 1800 rdisp/autothtime = 60 - Ensure that the HTTPS services are active by using SAP transaction SMICM. In this example, the HTTPS port is 44300 with a keep alive time of 300 seconds and a processing timeout of 7200 seconds.

- Use SAP transaction SICF to activate the following two Internet Communication Framework (ICF) services:
/default_host/sap/public/bc/sec/saml2/default_host/sap/public/bc/sec/cdc_ext_service
Step 2. Create the SAML 2.0 local provider in SAP transaction SAML2
- In the business client of the SAP system, go to transaction code SAML2. It will open a user interface in a browser. In this example, the SAP business client is 100. For Enable SAML 2.0 Support, choose Create SAML 2.0 Local Provider.

You can select any provider name and keep the clock skew tolerance as the default 120 seconds. - Choose Finish. When the wizard finishes, you will see the following screen.

Step 3. Download the SAP local provider SAML 2.0 metadata
Choose the Metadata tab, and download the metadata.

Step 4. Configure AWS SSO
- In the AWS SSO console, in the left navigation pane, choose Applications. Then choose Add a new application.

- In the AWS SSO Application Catalog, choose Add a custom SAML 2.0 application from the list.

- On the Configure Custom SAML 2.0 application page, under Details, type a Display name for the application. In this example, I am calling my application S/4HANA Sales Analytics.

- Under AWS SSO metadata, choose the Download button to download the AWS SSO SAML metadata file.

- Under Application properties, in the Application start URL box, enter the Fiori application URL. The standard Fiori launchpad URL is
https://<hostname>:<https port>/sap/bc/ui5_ui5/ui2/ushell/shells/abap/FioriLaunchpad.html?sap-client=<client number>. I am using the default values for the Relay state and Session duration.

- Under Application metadata, upload the local provider metadata that you downloaded in step 3.

- Choose Save changes.
Step 5. Configure the attribute mappings
In this example, the user mapping will be based on email.
- On the Attribute mappings tab, enter
${user:subject}and use the emailAddress format.

- Choose Save changes.
Step 6. Assign users to the application
On the Assigned users tab, assign any user who requires access to this application. In this example, I am using an existing user in AWS SSO. AWS SSO can be integrated with Microsoft Active Directory (AD) through AWS Directory Service, enabling users to sign in to the AWS SSO user portal by using their AD credentials.

Step 7. Configure the trusted provider in SAP transaction SAML2
- Go to SAP transaction code SAML2 and choose the Trusted Providers tab.

- Upload the AWS SSO SAML metadata file that you downloaded in step 4.
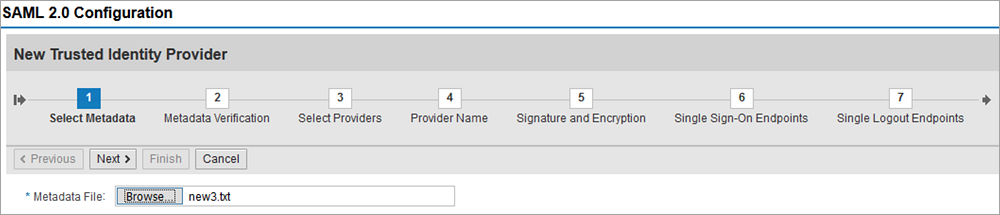
- Choose Next for Metadata Verification and Select Providers.
- For Provider Name, enter any alias as the trusted identity provider.

- For Signature and Encryption, change the Digest Algorithm to SHA-256 and keep the other configurations as default.

SHA-256 is one of the successor hash functions to SHA-1 and is one of the strongest hash functions available. - For Single Sign-On Endpoints, choose HTTP POST.

- For Single Sign-On Logout Endpoints, choose HTTP Redirect.

- For Artifact Endpoints, keep the default.
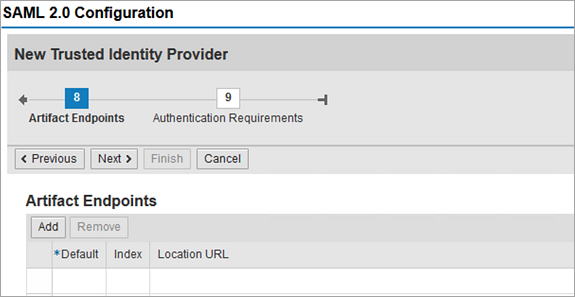
- For Authentication Requirements, leave everything as default and choose Finish.

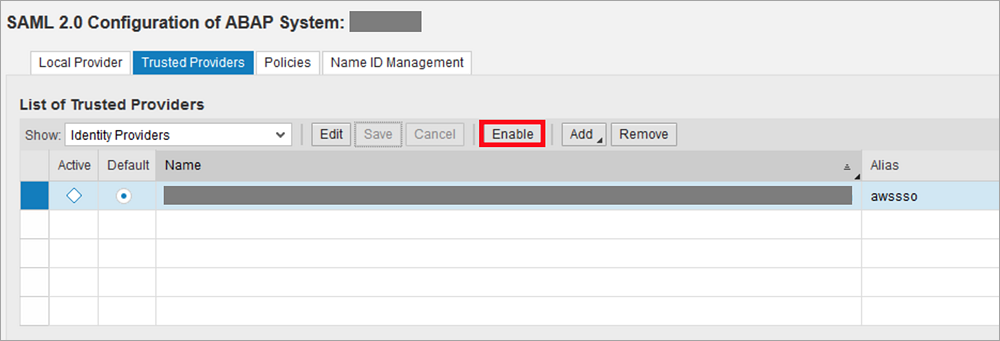
Step 8. Enable the identity provider
- Under List of Trusted Providers, choose the identity provider that you created in step 7.
- Choose Enable to enable the trusted provider.
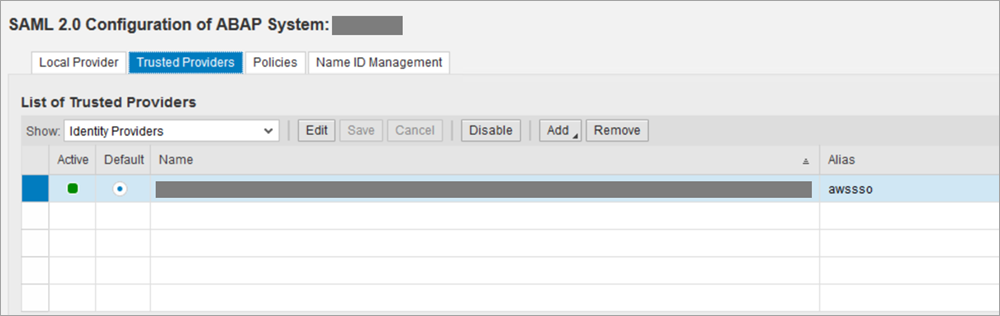
- Confirm that the identity provider is active.
Step 9. Configure identity federation
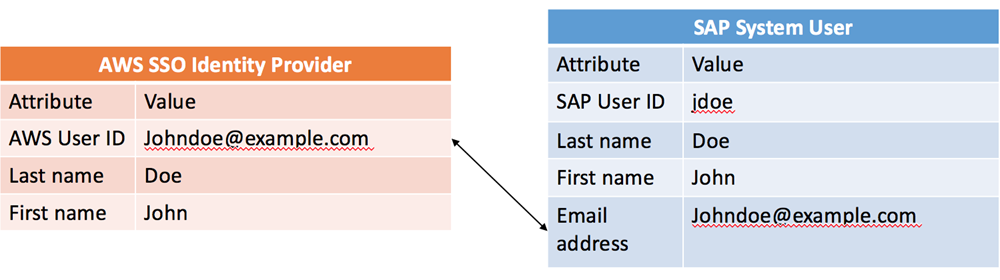
Identity federation provides the means to share identity information between partners. To share information about a user, AWS SSO and SAP must be able to identify the user, even though they may use different identifiers for the same user. The SAML 2.0 standard defines the name identifier (name ID) as the means to establish a common identifier. In this example, I use the email address to establish a federated identity.
- Choose the identity provider that you enabled in step 8, and choose Edit.

- On the Identity Federation tab, under Supported NameID Formats, choose Add.
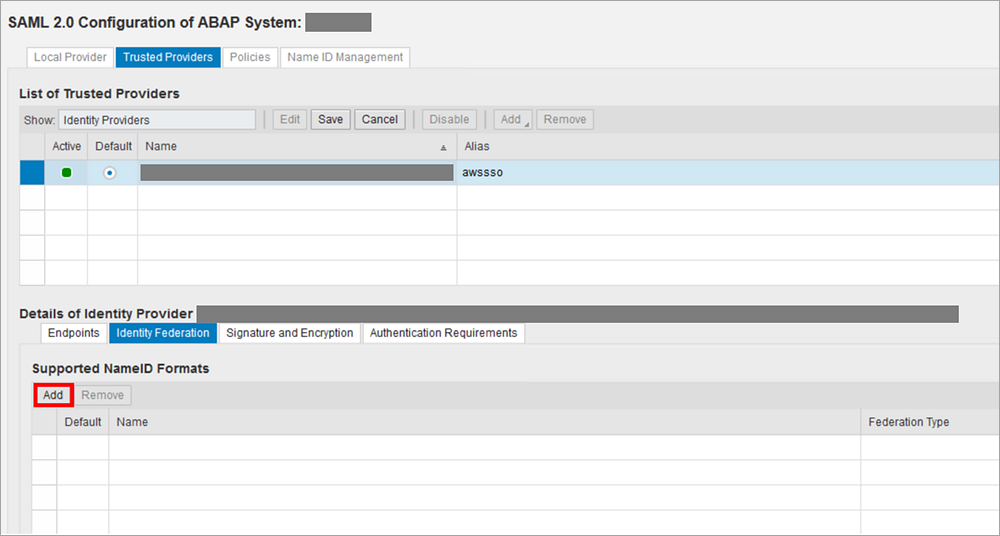
- Select E-mail in the Supported Name ID Formats box.

This automatically sets the User ID source to Assertion Subject Name ID and the User ID Mapping Mode to Email.

- Choose Save.
- In your SAP application, use SAP transaction SU01 to confirm that the user email address matches the one in your AWS SSO directory.
Step 10. Test your SSO
At your AWS SSO start URL, you should see your application. In this example, this is S/4HANA Sales Analytics.

Voilà! Choose the application to open your Fiori launchpad without entering a user name and password.

Conclusion
The beauty of this solution is in its simplicity: The AWS SSO service authenticates you, enabling you to log in to your SAP Fiori applications without having to log in and out each time.
AWS SSO supports any SAML 2.0-compliant identity provider, which means that you can use it as a centralized access point for your enterprise applications. AWS SSO also includes built-in SSO integrations with many business applications, such as Salesforce, ServiceNow, and Office 365. This offers a great way to standardize your enterprise application single sign-on process and reduce total cost of ownership.
Patrick Leung is a Senior Consultant in the AWS SAP Global Specialty Practice.