AWS Compute Blog
Generate Your Own API Gateway Developer Portal

Shiva Krishnamurthy, Sr. Product Manager
Amazon API Gateway helps you quickly build highly scalable, secure, and robust APIs. Developers who want to consume your API to build web, mobile, or other types of apps need a site where they can learn about the API, acquire access, and manage their consumption. You can do this by hosting a developer portal: a web application that lists your APIs in catalog form, displays API documentation to help developers understand your API, and allows them to sign up for access. The application also needs to let developers test your APIs, and provide feedback to grow a successful developer ecosystem. Finally, you may also want to monetize your APIs and grow API product revenue.
Today, we published aws-api-gateway-developer-portal, an open source serverless web application that you can use to get started building your own developer portal. In just a few easy steps, you can generate a serverless web application that lists your APIs on API Gateway in catalog form, and allows for developer signups. The application is built using aws-serverless-express, an open source library that we published recently, that makes it incredibly easy to build serverless web applications using API Gateway and AWS Lambda. The application uses a SAM (Serverless Application Model) template to deploy its serverless resources, and is very easy to deploy and operate.
Walkthrough
In this post, I walk through the steps for creating a sample API and developer portal for third-party developer consumption:
- Create an API or import a Swagger definition
- Deploy the API for developer access
- Document the API for easier developer consumption
- Structure it into a usage plan to set access control policies, and set throttling limits.
- Use aws-api-gateway-developer-portal to generate a developer portal, and then set up and configure the portal
- Log in as a developer and verify the process of consuming an API.
You can also see how to create a AWS Marketplace listing and monetize your API.
Create an API
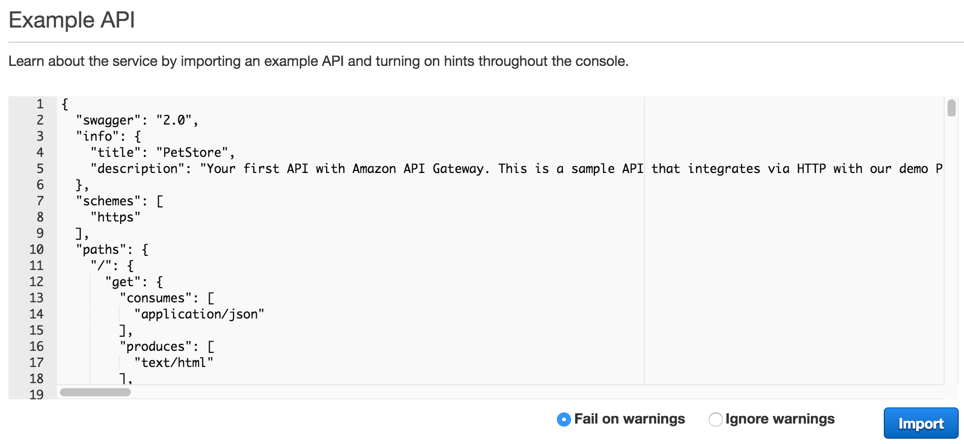
To get started, log in to the Amazon API Gateway console and import the example API (PetStore). You can also create your own APIs using Swagger, the console, or APIs.
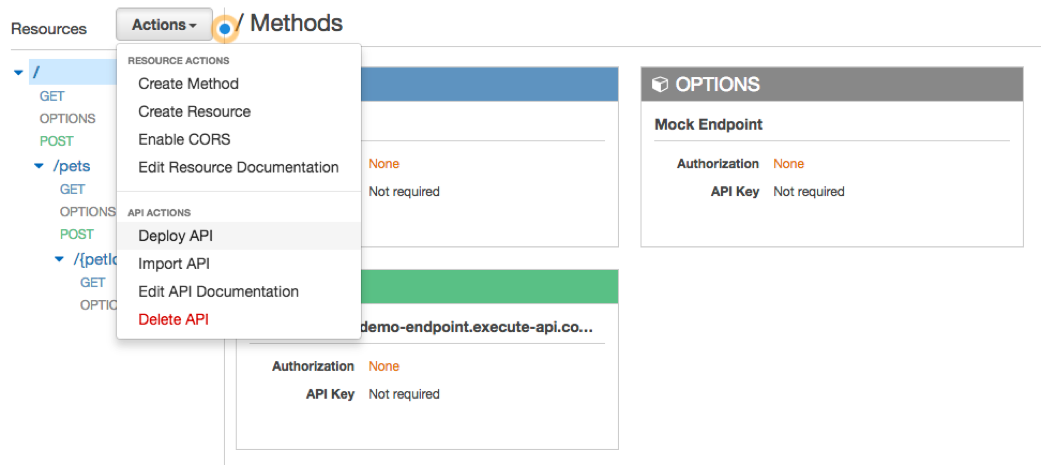
Deploy the API
After creation, deploy the API to a stage to make it accessible to developers, and ready for testing. For this example, use “Marketplace” as the name for the API stage.
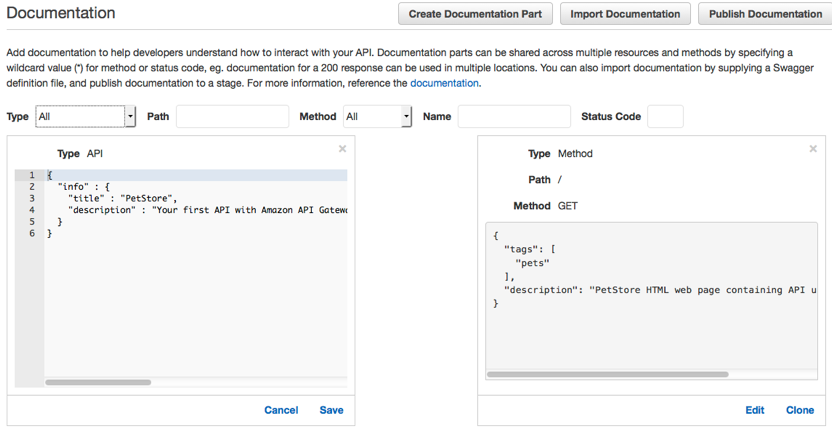
Document the API
API Gateway recently announced support for API documentation. You can now document various parts of your API by either importing Swagger or using the API Gateway console to edit API documentation directly.
Navigate to the Documentation tab to add missing documentation and make it easier for developers to understand your API. After you are satisfied with the new documentation, choose Publish Documentation and choose the Marketplace stage created earlier to update the previously deployed PetStore API with the modified documentation.
Package the API into usage plans
Usage plans in API Gateway help you structure your API for developer access. You can associate API keys to usage plans, and set throttling limits and quotas on a per-API key basis. Choose Usage Plans in the console, create a new usage plan, and set throttling limits and quotas as shown below.
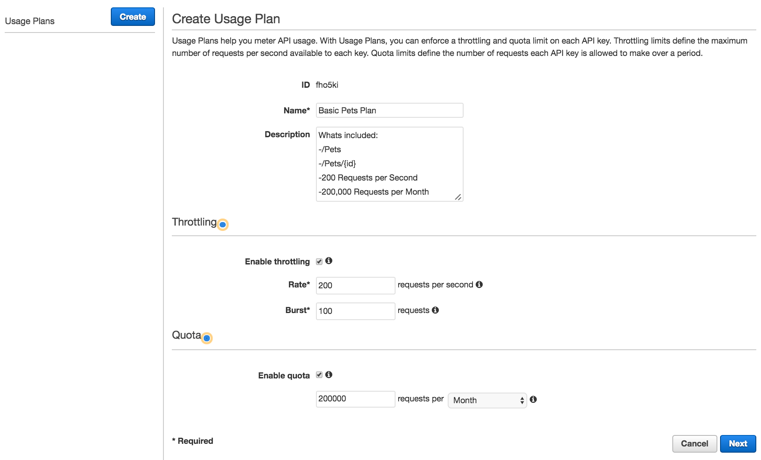
When your customers subscribe to this usage plan, their requests are throttled at 200 RPS, and they can each make only 200,000 requests per month. You can change these limits at any time.
Choose Next to create the usage plan. (Skip the API Key screen, and add the Marketplace stage we created earlier)
Generate and configure a developer portal
Now, generate a developer portal in order to list the usage plan that you created earlier. To do this, clone the aws-api-gateway-developer-portal into a local folder. The README includes instructions on how to get set up, but let’s run through it step-by-step. First, ensure that you have the latest version of Node.js installed. For this walkthrough, you use the latest version of the AWS CLI, so make sure that you have your AWS credentials handy. and that you have configured the AWS CLI with the access-key and secret-key using the `aws –configure’ command.
Set up the developer portal
Then, open up a terminal window and run `npm run setup’. This step modifies several project files in-line with the information that you supply—choose a name for the S3 bucket that store webpages for the developer portal, as well as a name for the Lambda function that wraps the Express.js web application. The S3 bucket names that you specify in this step must be region-unique, so use a prefix (eg. ‘my-org-dev-portal-artifacts’).

After entering those details, it then creates the artifacts bucket on S3 (if the S3 bucket name you provided in the previous step doesn’t already exist). It also runs “package and deploy” on the SAM template using the new
command. It takes several minutes for CloudFormation to create the stack.
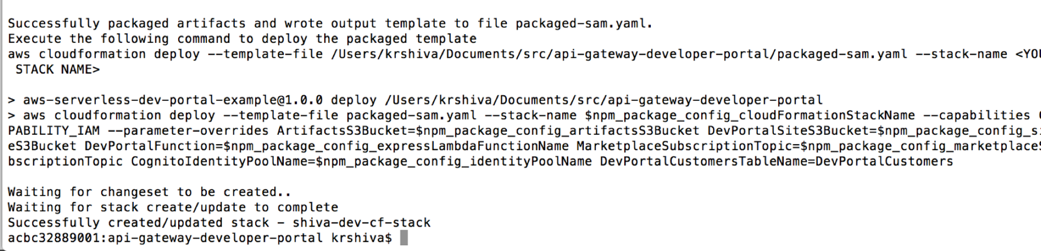
This step creates all the resources that you need for the developer portal, after setting up the IAM roles that are needed for the operation of this application. Navigate to the AWS CloudFormation console, and choose the Resources tab to see the full list of resources that have been created.
The core components that were created for your portal are listed below:
- API Gateway API: Proxies HTTP requests to the back-end Lambda function (Express.js web server that serves website content)
- Developer portal S3 website URL: Runs the developer portal site (publically accessible bucket)
- Lambda function: Acts as the primary back end or API server
- Cognito user and identity pools: Creates Cognito user pool and identity pool, and links them.
- DynamoDB table – Stores a map of API key IDs to customer IDs, which lets you track the API key and customer association.
- Lambda function Acts as a listener that subscribes to a particular SNS topic, which is useful when customers cancel or subscribe to an API.

Configure the developer portal post-setup
Additional files are then modified with values from your new resources, such as Cognito pool IDs, etc., and your web app is then uploaded to Amazon S3. After this step completes, it opens up your developer portal website in your default browser.
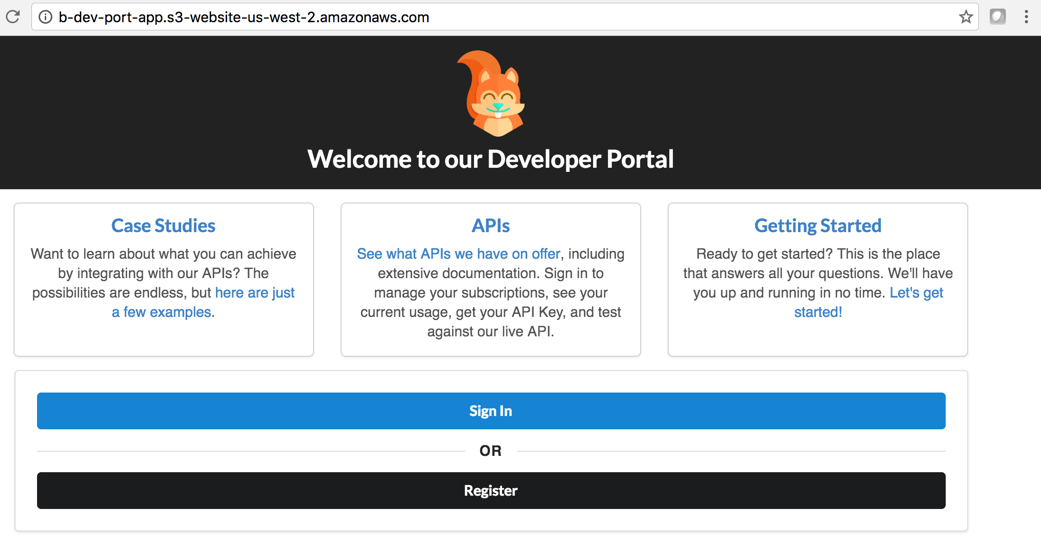
At this point, you have a complete serverless website ready. The application has been integrated with Cognito User Pools, which makes it easy for you to sign up developers and manage their access. For more information, see the Amazon Cognito Your User Pools – Now Generally Available post.
Edit the dev-portal/src/catalog.json file to list your APIs that appear in the developer portal. This can be a subset of all the APIs you have in API Gateway. Replace the contents of this file with your API definitions. For accuracy, export your APIs from API Gateway as Swagger, and copy them into the catalog.json file. Then, run `npm run upload-site’ to make these APIs available in the developer portal.
Verify the process
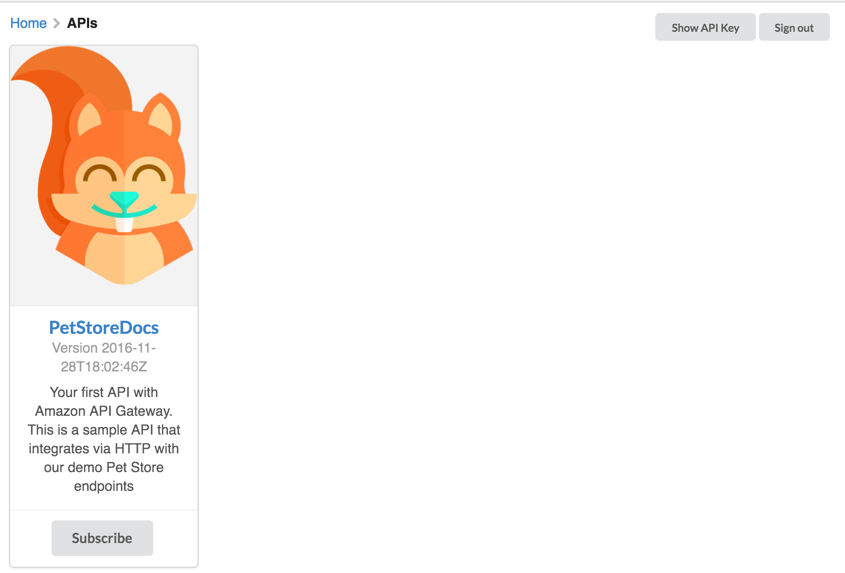
Test the end-user flow by signing up for access.

After you sign in as a developer, you can subscribe to an API, to receive an API key that you as a developer would use in your API requests.
You can also browse the API documentation that the API owner published (you, as of 5 minutes ago…), and learn more about the API.
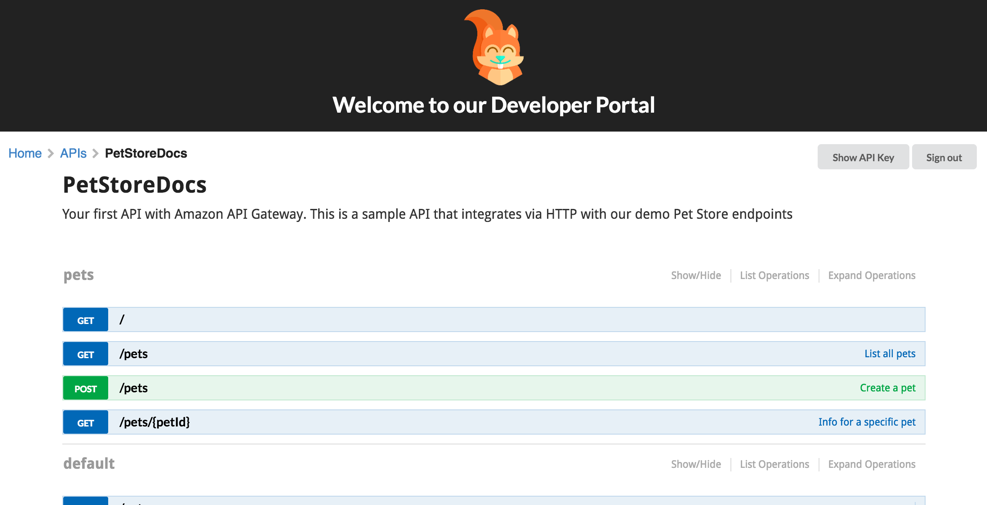
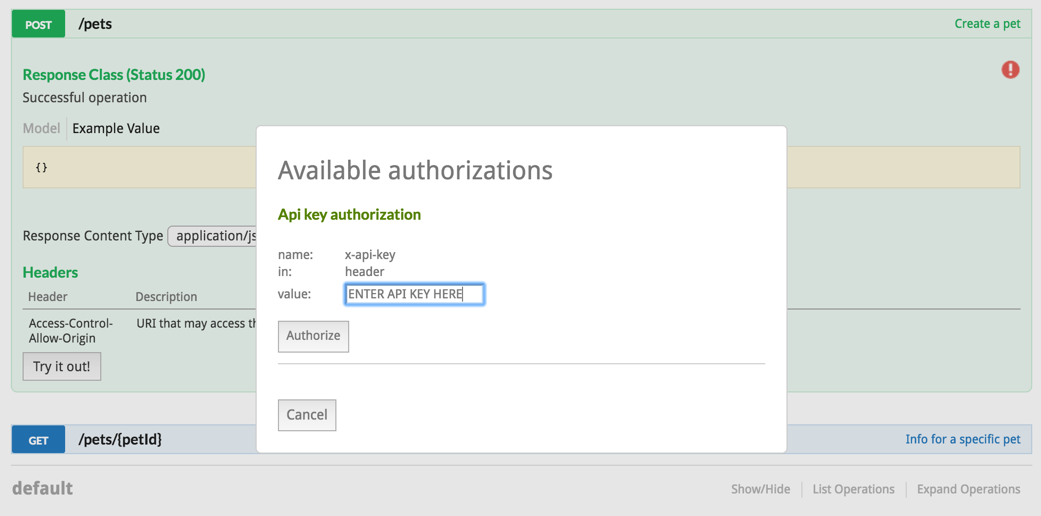
You can even test an API with your API Key. Click the “Show API Key” button on the top right corner of the page, and copy your API Key. Next click the red alert icon, enter your API Key, and click Authorize. Finally, click the “Try it out!” button on any of your resources to make a request to your live API.
Your static content for the site is packaged into the folder ‘/dev-portal’. Modify the case studies, and getting started content in this folder; when you’re satisfied, run ‘npm run upload-site’ to push the changes to your portal.
Monetize your APIs
Amazon API Gateway now integrates with the AWS Marketplace to help API owners monetize their API and meter usage for their API products, without writing any code. Now, any API built using API Gateway can easily be published on the AWS Marketplace using the API Gateway console, AWS CLI, or AWS SDK.
API Gateway automatically and accurately meters API consumption for any such API published to the AWS Marketplace and send it to the AWS Marketplace Metering Service, enabling sellers to focus on adding value to their API products rather than building integrations with AWS Marketplace. For more information, see the Monetize your APIs in AWS Marketplace using API Gateway post.
To leverage this feature, you must offer a developer portal that accepts signups from AWS customers. You can use this developer portal implementation to either build your own from scratch, or use it to add functionality to your existing site.
Conclusion
To summarize, you started with an API on API Gateway and structured it for developer consumption. Then in just a few easy steps, you used aws-api-gateway-developer-portal, to spin up a developer portal on serverless architecture, ready to accept developer signups. This application needs no infrastructure management, scales out-of-the-box, and directly integrates with AWS Marketplace to help you monetize your APIs.
If you have any questions or suggestions, please comment below.