- AWS Builder Center›
- builders.flash
Spring Boot アプリケーションをお手軽に本番運用 ~ AWS App Runner と AWS CDK の活用 ~ 第二回
2023-05-02 | Author : 林 政利
はじめに
こんにちは、ソリューションアーキテクトの林です。普段は、コンテナという技術にフォーカスして、さまざまな業種、業態のお客様を支援させていただいています。
本シリーズは、 AWS App Runner と Spring Boot をテーマに、 簡単なアプリケーションをデプロイするところから始めて、データベースやキャッシュサーバーとの接続、秘匿情報の管理、Spring Boot Actuator によるメトリクスの取得とその活用、カナリアリリースなど、本番環境で実施したい諸々の方法を皆様にご紹介していくものです。
前回 は、簡単な Spring Boot のアプリケーションを構築し、それを App Runner のサービスとしてデプロイするところまでをご紹介しました。
しかし、実際のアプリケーションでは、 AWS の VPC を構築し、その中の AWS サービスにアクセスするケースも多いかと思います。今回は、Redis 互換のインメモリデータストアである Amazon ElastiCache for Redis で VPC にキャッシュサーバーを構築し、そこに Spring Data Redis を使って App Runner にデプロイされたアプリケーションからアクセスしてみましょう。
ご注意
本記事で紹介する AWS サービスを起動する際には、料金がかかります。builders.flash メールメンバー特典の、クラウドレシピ向けクレジットコードプレゼントの入手をお勧めします。
builders.flash メールメンバー登録
builders.flash メールメンバー登録で、毎月の最新アップデート情報とともに、AWS を無料でお試しいただけるクレジットコードを受け取ることができます。
VPC と ElastiCache for Redis のセットアップ
ここからは、アプリケーションだけではなく、さまざまな AWS サービスと連携するようになりますので、コンソールから操作していると面倒ですし、オペミスにもつながりかねません。そこで、AWS が開発している IaC ツールである、 AWS CDK を利用します。
AWS CDK では、 TypeScript や Java など、使い慣れたプログラミング言語で EC2 を立ち上げたり VPC を構築したり、環境構築を行うことができます。
AWS CDK 自体のインストール、設定方法はドキュメントをご参照いただければと思いますが、充実したハンズオンもあり、とても簡単に使い始めることができます。
AWS CDK 自体のインストール、設定方法は ドキュメント をご参照いただければと思いますが、充実したハンズオンもあり、とても簡単に使い始めることができます。
まず、CDK を使って、 VPC と ElastiCache を構築してみましょう。
CDKプロジェクトの初期化
CDKプロジェクトを初期化するためのコマンド
$ cd expt-apprunner-springboot // 前回作成したディレクトリに移動
$ mkdir cdk // CDK プロジェクトを格納するディレクトリの作成
$ npx cdk init --language typescript
CDKプロジェクトのディレクトリ構造

lib ディレクトリにファイルを作成
lib/infra-stack.ts
コード
import * as cdk from 'aws-cdk-lib';
import { StackProps } from 'aws-cdk-lib';
import { Construct } from 'constructs';
import * as ec2 from 'aws-cdk-lib/aws-ec2';
import * as elasticache from 'aws-cdk-lib/aws-elasticache';

/**
* ElastiCache へ接続するための情報
*/
export type CacheConnection = {
  /** Redis に付与された SecurityGroup ID */
  readonly securityGroupId: string;
  /** Redis のホスト名 */
  readonly host: string;
  /** Redis のポート */
  readonly port: string;
}

/**
* Redis などのインフラを構築するスタック
*/
export class InfraStack extends cdk.Stack {

  /** 構築した VPC */
  readonly vpc: ec2.IVpc;
  /** 構築した Redis への接続情報 */
  readonly cacheConnection: CacheConnection;

  constructor(scope: Construct, id: string, props?: StackProps) {
    super(scope, id, props);

    // VPC を構築
    this.vpc = new ec2.Vpc(this, 'Vpc', {
      natGateways: 1
    });

    // Redis を構築し、そこに接続するための情報を保存する
    this.cacheConnection = this.cache();
  }

  /**
   * Redis を構築
   * @returns 構築した Redis へ接続するための情報
   */
  private cache(): CacheConnection {
    // Redis に付与されるセキュリティグループ
    const cacheSecurityGroup = new ec2.SecurityGroup(this, "CacheSecurityGroup", { vpc: this.vpc });

    // Redis を構築する VPC のサブネット
    const subnetGroup = new elasticache.CfnSubnetGroup(this, "CacheSubnetGroup", {
      subnetIds: this.vpc.selectSubnets({ subnetType: ec2.SubnetType.PRIVATE_WITH_EGRESS }).subnetIds,
      description: "Group of subnets to place Cache into",
    });

    // Redis 構築
    const cacheCluster = new elasticache.CfnCacheCluster(this, "CacheCluster", {
      engine: "redis",
      cacheNodeType: "cache.t3.micro",
      numCacheNodes: 1,
      cacheSubnetGroupName: subnetGroup.ref,
      vpcSecurityGroupIds: [cacheSecurityGroup.securityGroupId],
    });

    // Redis へ接続するための情報を返り値にする
    return {
      securityGroupId: cacheSecurityGroup.securityGroupId,
      host: cacheCluster.attrRedisEndpointAddress,
      port: cacheCluster.attrRedisEndpointPort,
    }
  }
}
CDK コードについて
いかがでしょうか。TypeScript や CDK にそれほど触ったことがない、という場合でも、上記により何をしようとしているのか、なんとなく理解できるのではないでしょうか。
AWS CDK は、抽象度の高い記述ができることが特徴で、上記の例であれば、以下のように、
VPC作成の例
スクリプト
new ec2.Vpc(this, 'Vpc', {
natGateways: 1
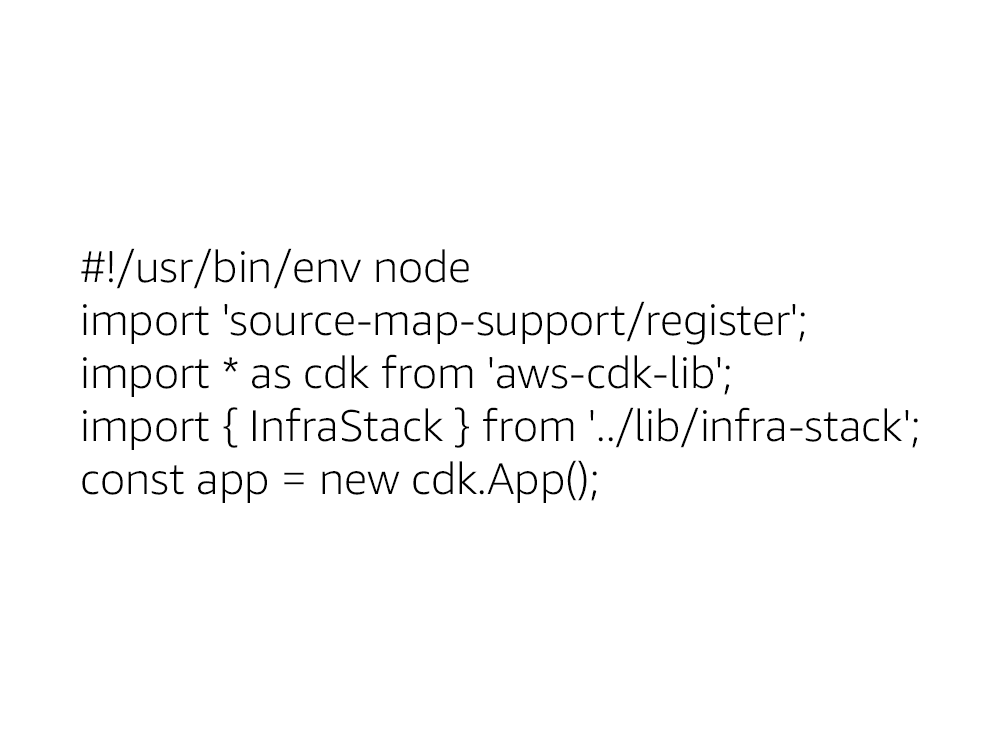
});bin/cdk.ts の修正
と書くだけで、ベストプラクティスに沿ったVPCがつくられ、かつ NAT Gateway を全AZに作成するのではなく一つだけにする、といったカスタマイズが可能です。
抽象度が高い分、短い記述で済むため、コードを読んだときに理解しやすいのです。
では、この IaC コードを呼び出すよう、メインのコード bin/cdk.tsを修正します。もともとあったコードを削除し、このように置き換えます。
CDK の Bootstrap
CDK Bootstrap コマンド
コマンド
$ npx cdk bootstrap
 ⏳  Bootstrapping environment aws://xxxxx/us-west-2...
Trusted accounts for deployment: (none)
Trusted accounts for lookup: (none)
Using default execution policy of 'arn:aws:iam::aws:policy/AdministratorAccess'. Pass '--cloudformation-execution-policies' to customize.
CDKToolkit: creating CloudFormation changeset...
 ✅  Environment aws://xxxxx/us-west-2 bootstrapped.
CDK デプロイ
上記のように bootstrap に成功したら、CDK で AWS リソースをデプロイできます! Deploy コマンドを実行してみましょう。
コマンドが正常に終了すれば、VPC や ElastiCache は無事、作成されています。
CDK Deploy コマンド
コマンド
$ npx cdk deployRedis を参照するようアプリケーションを修正
build.gradle の修正
build.gradle の修正
コード
// build.gradle

...
dependencies {
    implementation('org.springframework.boot:spring-boot-starter-web')
    implementation('org.springframework.boot:spring-boot-starter-data-redis')
    ...
接続先エンドポイントの設定
次に、接続先エンドポイントの設定、ここでは ElastiCache へ繋ぐための設定を行います。後ほど紹介するように、 App Runner では、アプリケーションに環境変数を容易に注入できるため、接続情報は環境変数から取得するといいでしょう。
Spring Data for Redis の場合は、以下のファイルに特定の形式で設定することで、簡単に接続情報を環境変数から取得できます。
接続情報を環境変数から取得
コード
// src/main/resources/application.yaml
spring:
  redis:
    host: ${CACHE_HOST:localhost}
    port: ${CACHE_PORT:6379}
    password: ${CACHE_PASSWORD:}
アプリケーションの修正
Redis とのデータ読み書き
コード
// src/main/java/com/example/exptapprunnerspringboot/Application.java

package com.example.exptapprunnerspringboot;

import org.springframework.boot.SpringApplication;
import org.springframework.boot.autoconfigure.SpringBootApplication;

// 以下の二つのクラスを Import
import org.springframework.data.redis.core.RedisTemplate;
import org.springframework.data.redis.core.ValueOperations;

import org.springframework.web.bind.annotation.GetMapping;
import org.springframework.web.bind.annotation.RestController;

@SpringBootApplication
@RestController
public class Application {

    // RedisTemplate を Inject
    private final RedisTemplate<String, String> redisTemplate;

    Application(final RedisTemplate<String, String> redisTemplate) {
        this.redisTemplate = redisTemplate;
    }

    public static void main(String[] args) {
        SpringApplication.run(Application.class, args);
    }

    @GetMapping("/")
    public String root() {
        return "hello";
    }

    // 以下3つの Mapping を追加

    @GetMapping("/health")
    public String getHealth() {
        ValueOperations<String, String> ops = redisTemplate.opsForValue();
        return "Status: " + ops.get("health");
    }

    @GetMapping("/healthy")
    public String setHealty() {
        ValueOperations<String, String> ops = redisTemplate.opsForValue();
        ops.set("health", "healthy");
        return "Status: " + ops.get("health");
    }

    @GetMapping("/unhealthy")
    public String setUnhealty() {
        ValueOperations<String, String> ops = redisTemplate.opsForValue();
        ops.set("health", "unhealthy");
        return "Status: " + ops.get("health");
    }
}
コードの解説
特に複数ユーザーからの同時アクセスなど考慮されているわけではなく、あくまで Redis に読み書きできていることを確認するためのコードです。
修正が終わったら、アプリケーションコードを git add して、GitHub へ Push します。
GitHub への Push
コマンド
git add src/main/resources/application.yaml
git add src/main/java/com/example/exptapprunnerspringboot/Application.java
git add build.gradle
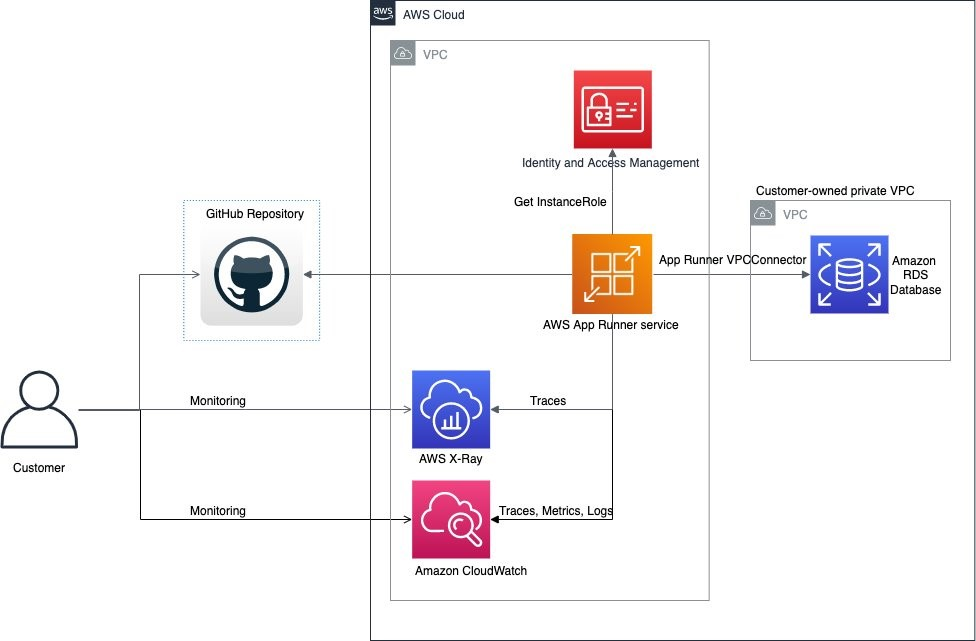
git pushElastiCache for Redis を参照する AWS App Runner の設定
最後に、 ElastiCache へ接続する設定を行いつつ、 App Runner のサービスを CDK でデプロイしてみましょう。
lib/service-stack.ts で以下のファイルを作成します。
lib/service-stack.ts
コード
import * as cdk from 'aws-cdk-lib';
import { StackProps } from 'aws-cdk-lib';
import { Construct } from 'constructs';
import * as ec2 from 'aws-cdk-lib/aws-ec2';
import * as apprunner from 'aws-cdk-lib/aws-apprunner';
import { CacheConnection } from './infra-stack';

export class ServiceStack extends cdk.Stack {
  constructor(scope: Construct, id: string, vpc: ec2.IVpc, cacheConnection: CacheConnection, props?: StackProps) {
    super(scope, id, props);

    // VPC での App Runner サービスのセキュリティグループ
    const vpcConnectionSecurityGroup = new ec2.SecurityGroup(this, "SecurityGroup", { vpc });

    // App Runner サービスが、ElastiCache へ接続できるようセキュリティグループを設定
    const cacheSecurityGroup = ec2.SecurityGroup.fromSecurityGroupId(
      this, "CacheSecurityGroup", cacheConnection.securityGroupId, {
    });
    cacheSecurityGroup.addIngressRule(
      vpcConnectionSecurityGroup, ec2.Port.tcp(6379), "Ingress to the cache");

    // App Runner サービスと VPC の接続 (VPC Connector) を作成
    const connector = new apprunner.CfnVpcConnector(this, 'VpcConnector', {
      subnets: vpc.selectSubnets({ subnetType: ec2.SubnetType.PRIVATE_WITH_EGRESS }).subnetIds,
      securityGroups: [ vpcConnectionSecurityGroup.securityGroupId ],
    });

    // App Runner サービスを作成
    const service = new apprunner.CfnService(this, 'Service', {
      sourceConfiguration: {
        authenticationConfiguration: {
          // ソースコード取得用の CodeStar Connection ARN を設定
          connectionArn: this.node.tryGetContext('connectionArn'),
        },
        codeRepository: {
          // ソースコードのリポジトリ URL やブランチを設定
          repositoryUrl: this.node.tryGetContext('repositoryUrl'),
          sourceCodeVersion: {
            type: "BRANCH",
            value: "main",
          },
          codeConfiguration: {
            configurationSource: "API",
            codeConfigurationValues: {
              // Java のマネージドランタイムを設定
              runtime: "CORRETTO_11",
              // アプリケーションのビルドコマンド
              buildCommand: "./gradlew bootJar && cp build/libs/*.jar ./",
              // アプリケーションの実行コマンド
              startCommand: "java -jar ./expt-apprunner-springboot.jar",
              // アプリケーションに設定する環境変数
              runtimeEnvironmentVariables: [
               {
                  name: "CACHE_HOST",
                  // InfraStack から渡された ElastiCache のホスト名
                  value: cacheConnection.host,
                },
                {
                  name: "CACHE_PORT",
                  // InfraStack から渡された ElastiCache のポート番号
                  value: cacheConnection.port,
                },
              ],
            }
          },
        },
      },
      networkConfiguration: {
        egressConfiguration: {
          egressType: "VPC",
          vpcConnectorArn: connector.attrVpcConnectorArn,
        },
      },
    });
    new cdk.CfnOutput(this, 'AppRunnerServiceURL', {
      value: service.attrServiceUrl,
    });
  }
}
bin/cdk.ts の修正
上記のコードも、前回、App Runner をコンソールからデプロイしてきた皆様なら、どのようなことが指定されているかすぐに把握できるでしょう。
重要な点として、アプリケーションの環境変数を、ElastiCache を定義しているコードから参照している点です。これにより、定義ミスの際、ビルドのエラーなどで用意に検出することができ、オペミスの削減に繋がります。
さて、このコードを利用できるよう、メインのコードに追加しましょう。 bin/cdk.ts をこのように修正します。
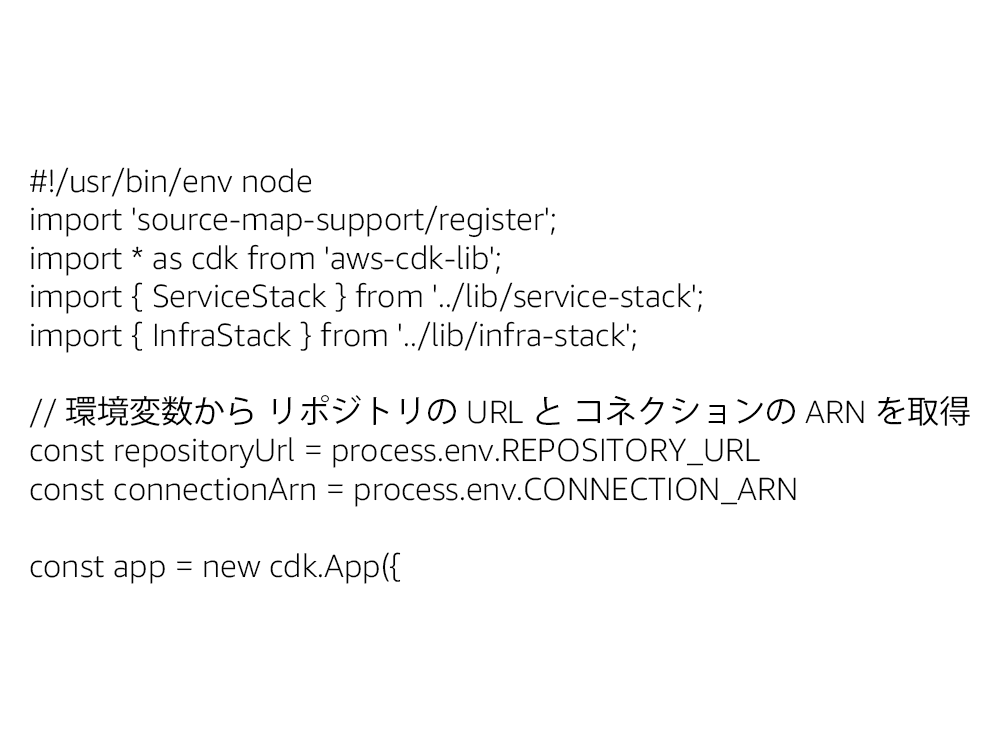
環境変数の設定
ここで、環境変数 REPOSITORY_URL および CONNECTION_ARNからソースコードのリポジトリと コネクションの ARN を取得していることに注目してください。このような情報は、なるべくハードコードしたくないため、外部で設定できるようにしています。
リポジトリの URL は、前回の記事で使用したものを使用します。コネクションの ARN は、やはり前回の記事で作成した「GitHub への接続情報」の ARN で、以下 コンソール ( https://console.aws.amazon.com/apprunner/home?#/connections ) から取得できます。
ServiceStack のデプロイ
ServiceStack のデプロイ
コマンド
export REPOSITORY_URL=xxx
export CONNECTION_ARN=xxx

npx cdk deploy ServiceStack

...
Outputs:
ServiceStack.AppRunnerServiceURL = xxxxx.xxx.awsapprunner.com
動作確認
App Runnerサービスの動作確認
コマンド
curl https://xxx-xxx.awsapprunner.com/healthy # Redis の値を書き換え
healthy

curl https://xxx-xxx.awsapprunner.com/health # Redis の値を確認
healthy

curl https://xxx-xxx.awsapprunner.com/unhealth# Redis の値を書き換え
unhealthy

curl https://xxx-xxx.awsapprunner.com/health # Redis の値を確認
unhealthy
まとめ
無事、App Runner 上の Spring Boot アプリケーション から、 VPC 内の ElastiCache へアクセスできましたね! App Runner で VPC 内のリソースを活用できる他、AWS CDK を活用することで、多数の AWS リソースを組み合わせてサービスを構築する場合であっても、見通しの良いコードで開発できることを体験できたと思います。
今回は、Redis の接続情報を、直で App Runner サービスの環境変数へ設定していましたが、実際の現場では、 Redis などインフラの構築はインフラ部門が実施し、接続情報を AWS Systems Manager Parameter Store や AWS SecretsManager に格納し、アプリ部門はその ストアの ARN を使ってアプリを構築する、ということも多いのではないでしょうか。
次回の記事では、Redis への接続情報を、SSM Parameter Store から取得してみます。どうぞお楽しみに!
筆者プロフィール
林 政利 (@literalice)
アマゾン ウェブ サービス ジャパン合同会社
コンテナスペシャリスト ソリューションアーキテクト
フリーランスや Web 系企業で業務システムや Web サービスの開発、インフラ運用に従事。近年はベンダーでコンテナ技術の普及に努めており、現在、AWS Japan で Amazon ECS や Amazon EKS でのコンテナ運用や開発プロセス構築を中心にソリューションアーキテクトとして活動中。

Did you find what you were looking for today?
Let us know so we can improve the quality of the content on our pages