Getting Started / Hands-on / ...
Optimizing Amazon EMR clusters for cost and scale
Amazon EMR provides a managed Hadoop framework that makes it easy, fast, and cost-effective to process vast amounts of data across dynamically scalable Amazon EC2 instances. You can also run other popular distributed frameworks such as Apache Spark, HBase, Presto, and Flink in EMR, and interact with data in other AWS data stores such as Amazon S3 and Amazon DynamoDB. EMR Notebooks, based on the popular Jupyter Notebook, provide a development and collaboration environment for ad hoc querying and exploratory analysis. EMR securely and reliably handles a broad set of big data use cases, including log analysis, web indexing, data transformations (ETL), machine learning, financial analysis, scientific simulation, and bioinformatics.
Amazon EC2 Spot Instances offer spare compute capacity available in the AWS Cloud at steep discounts compared to On-Demand prices. EC2 can interrupt Spot Instances with two minutes of notification when EC2 needs the capacity back. You can use Spot Instances for various fault-tolerant and flexible applications. Some examples are analytics, containerized workloads, high-performance computing (HPC), stateless web servers, rendering, CI/CD, and other test and development workloads.
In this tutorial, you will learn how to launch your first Amazon EMR cluster on Amazon EC2 Spot Instances using the Create Cluster wizard. Running Amazon EMR on Spot Instances drastically reduces the cost of big data, allows for significantly higher compute capacity, and reduces the time to process large data sets.
| About this Tutorial | |
|---|---|
| Time | 10-20 minutes |
| Cost | Free |
| Use Case | Compute |
| Products | Amazon EMR, EC2 Spot Instances |
| Level | 200 |
| Last Updated | February 4, 2020 |
Step 1: Create cluster with advanced options
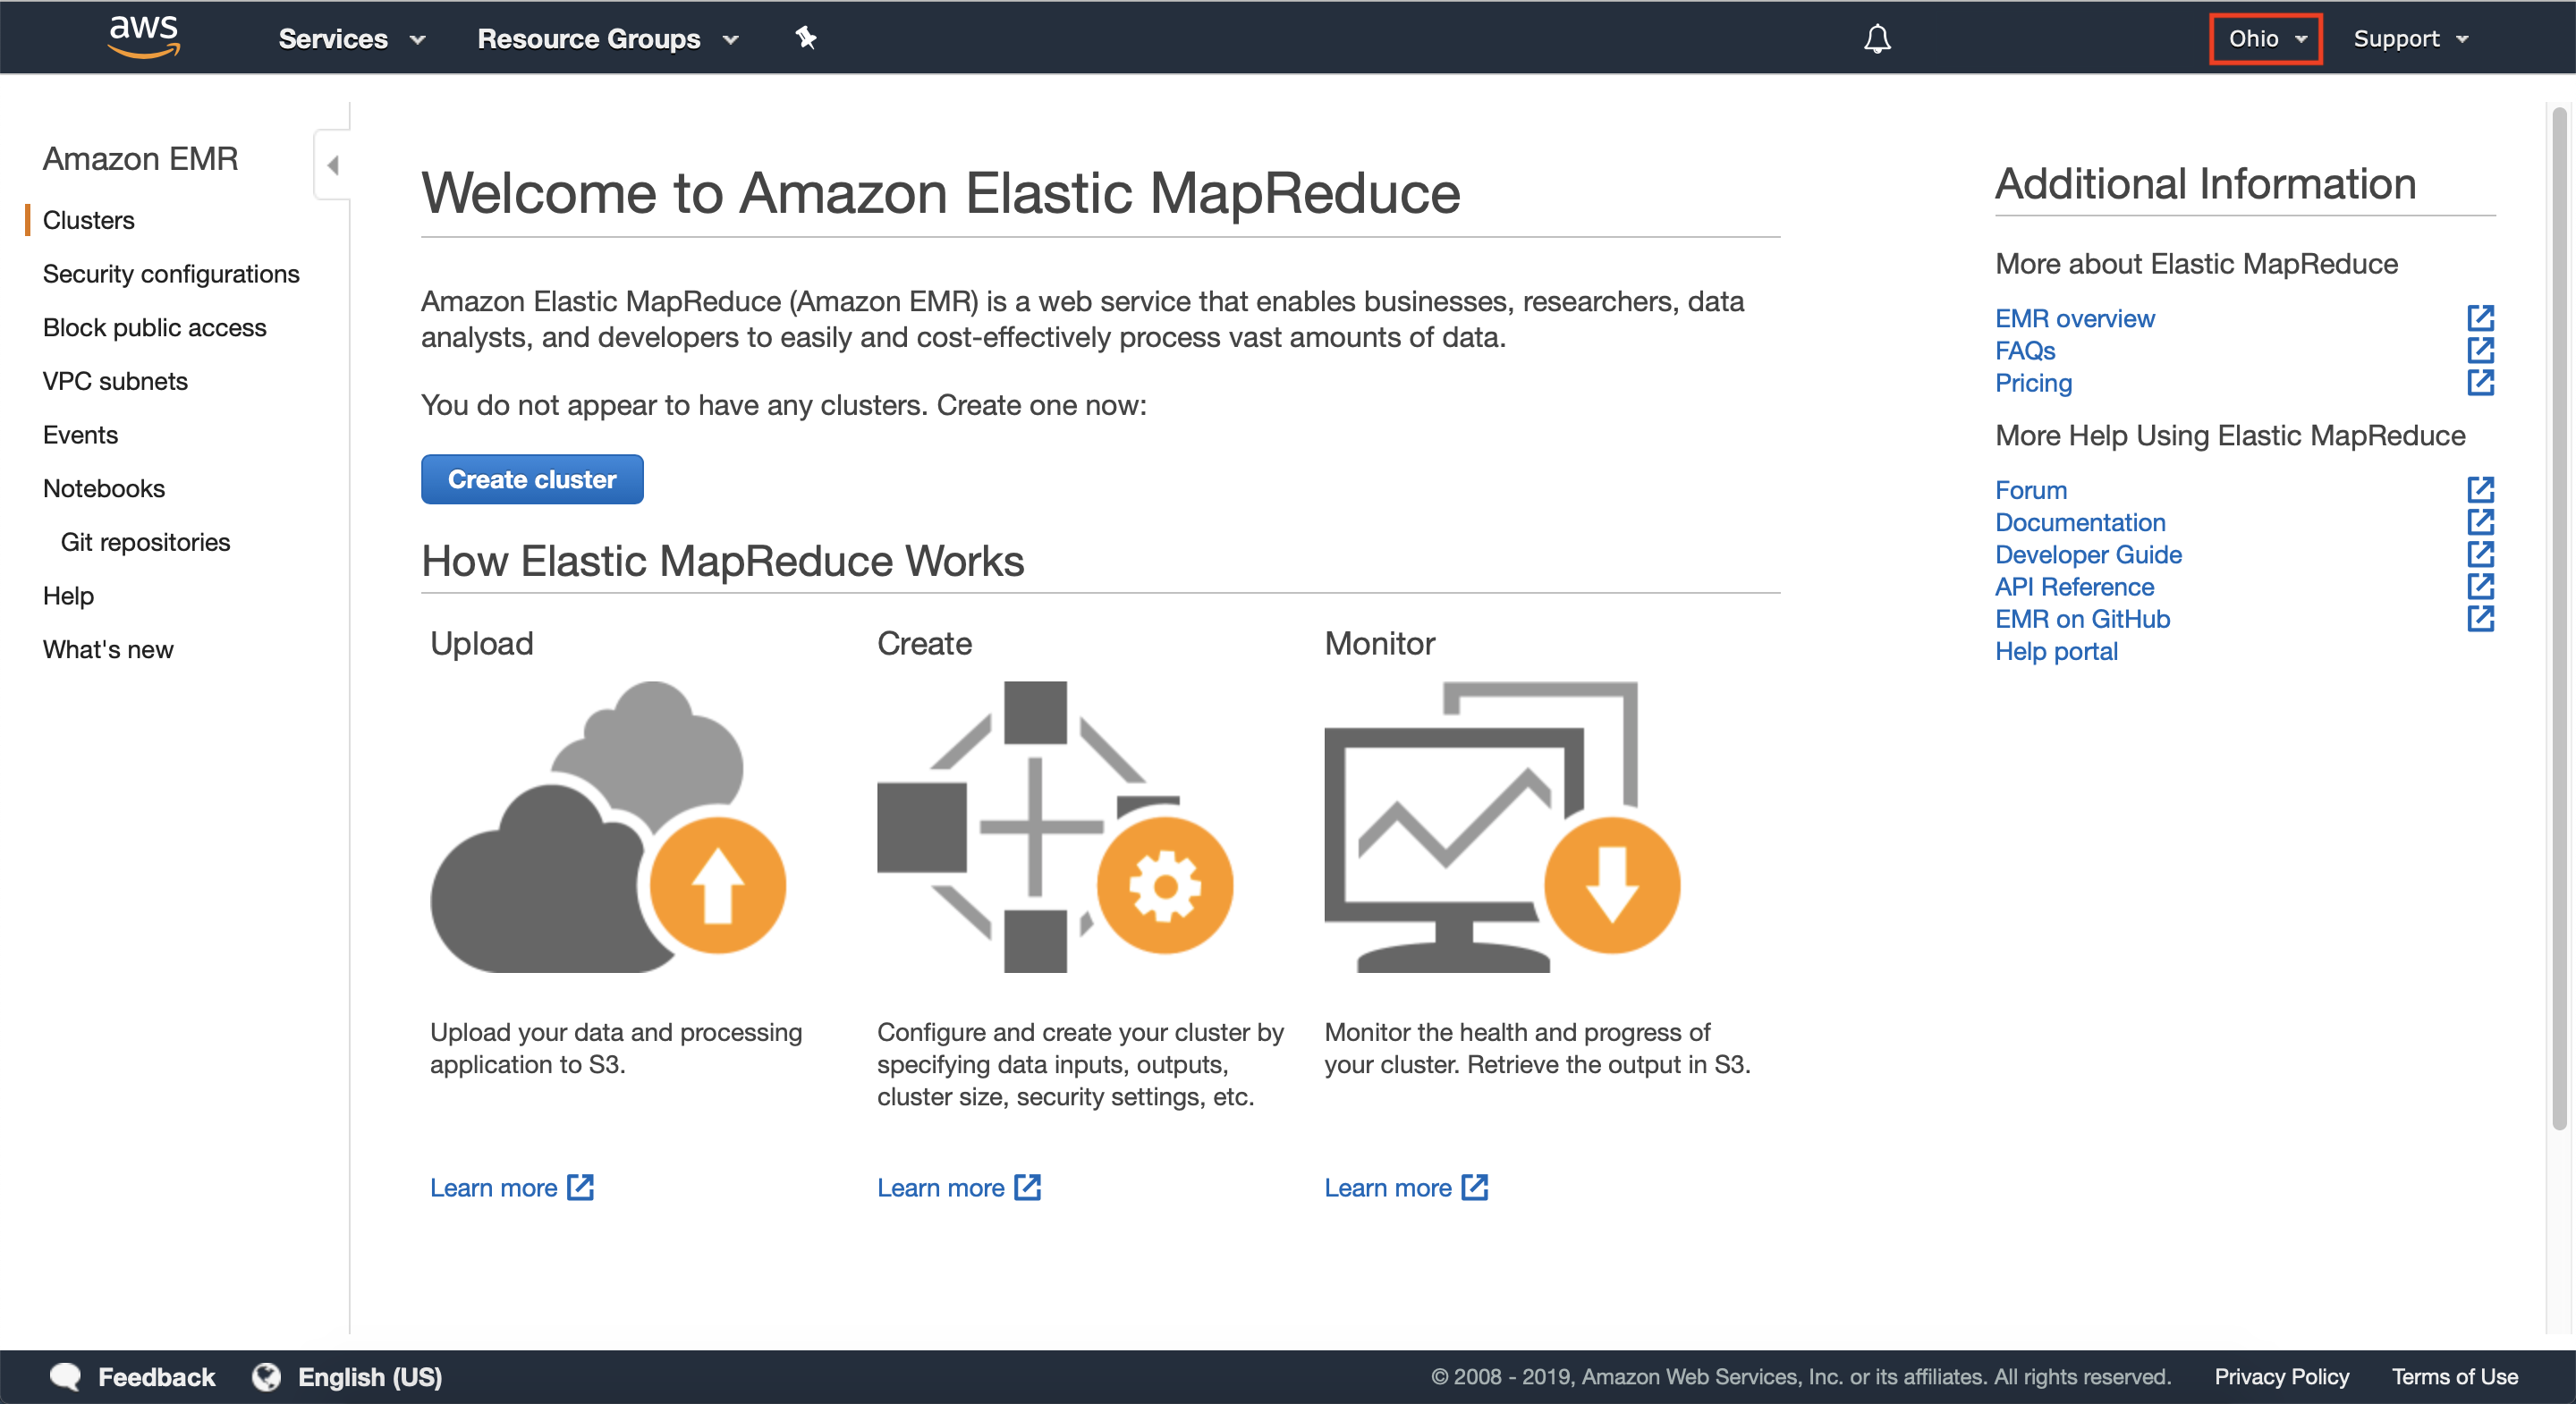
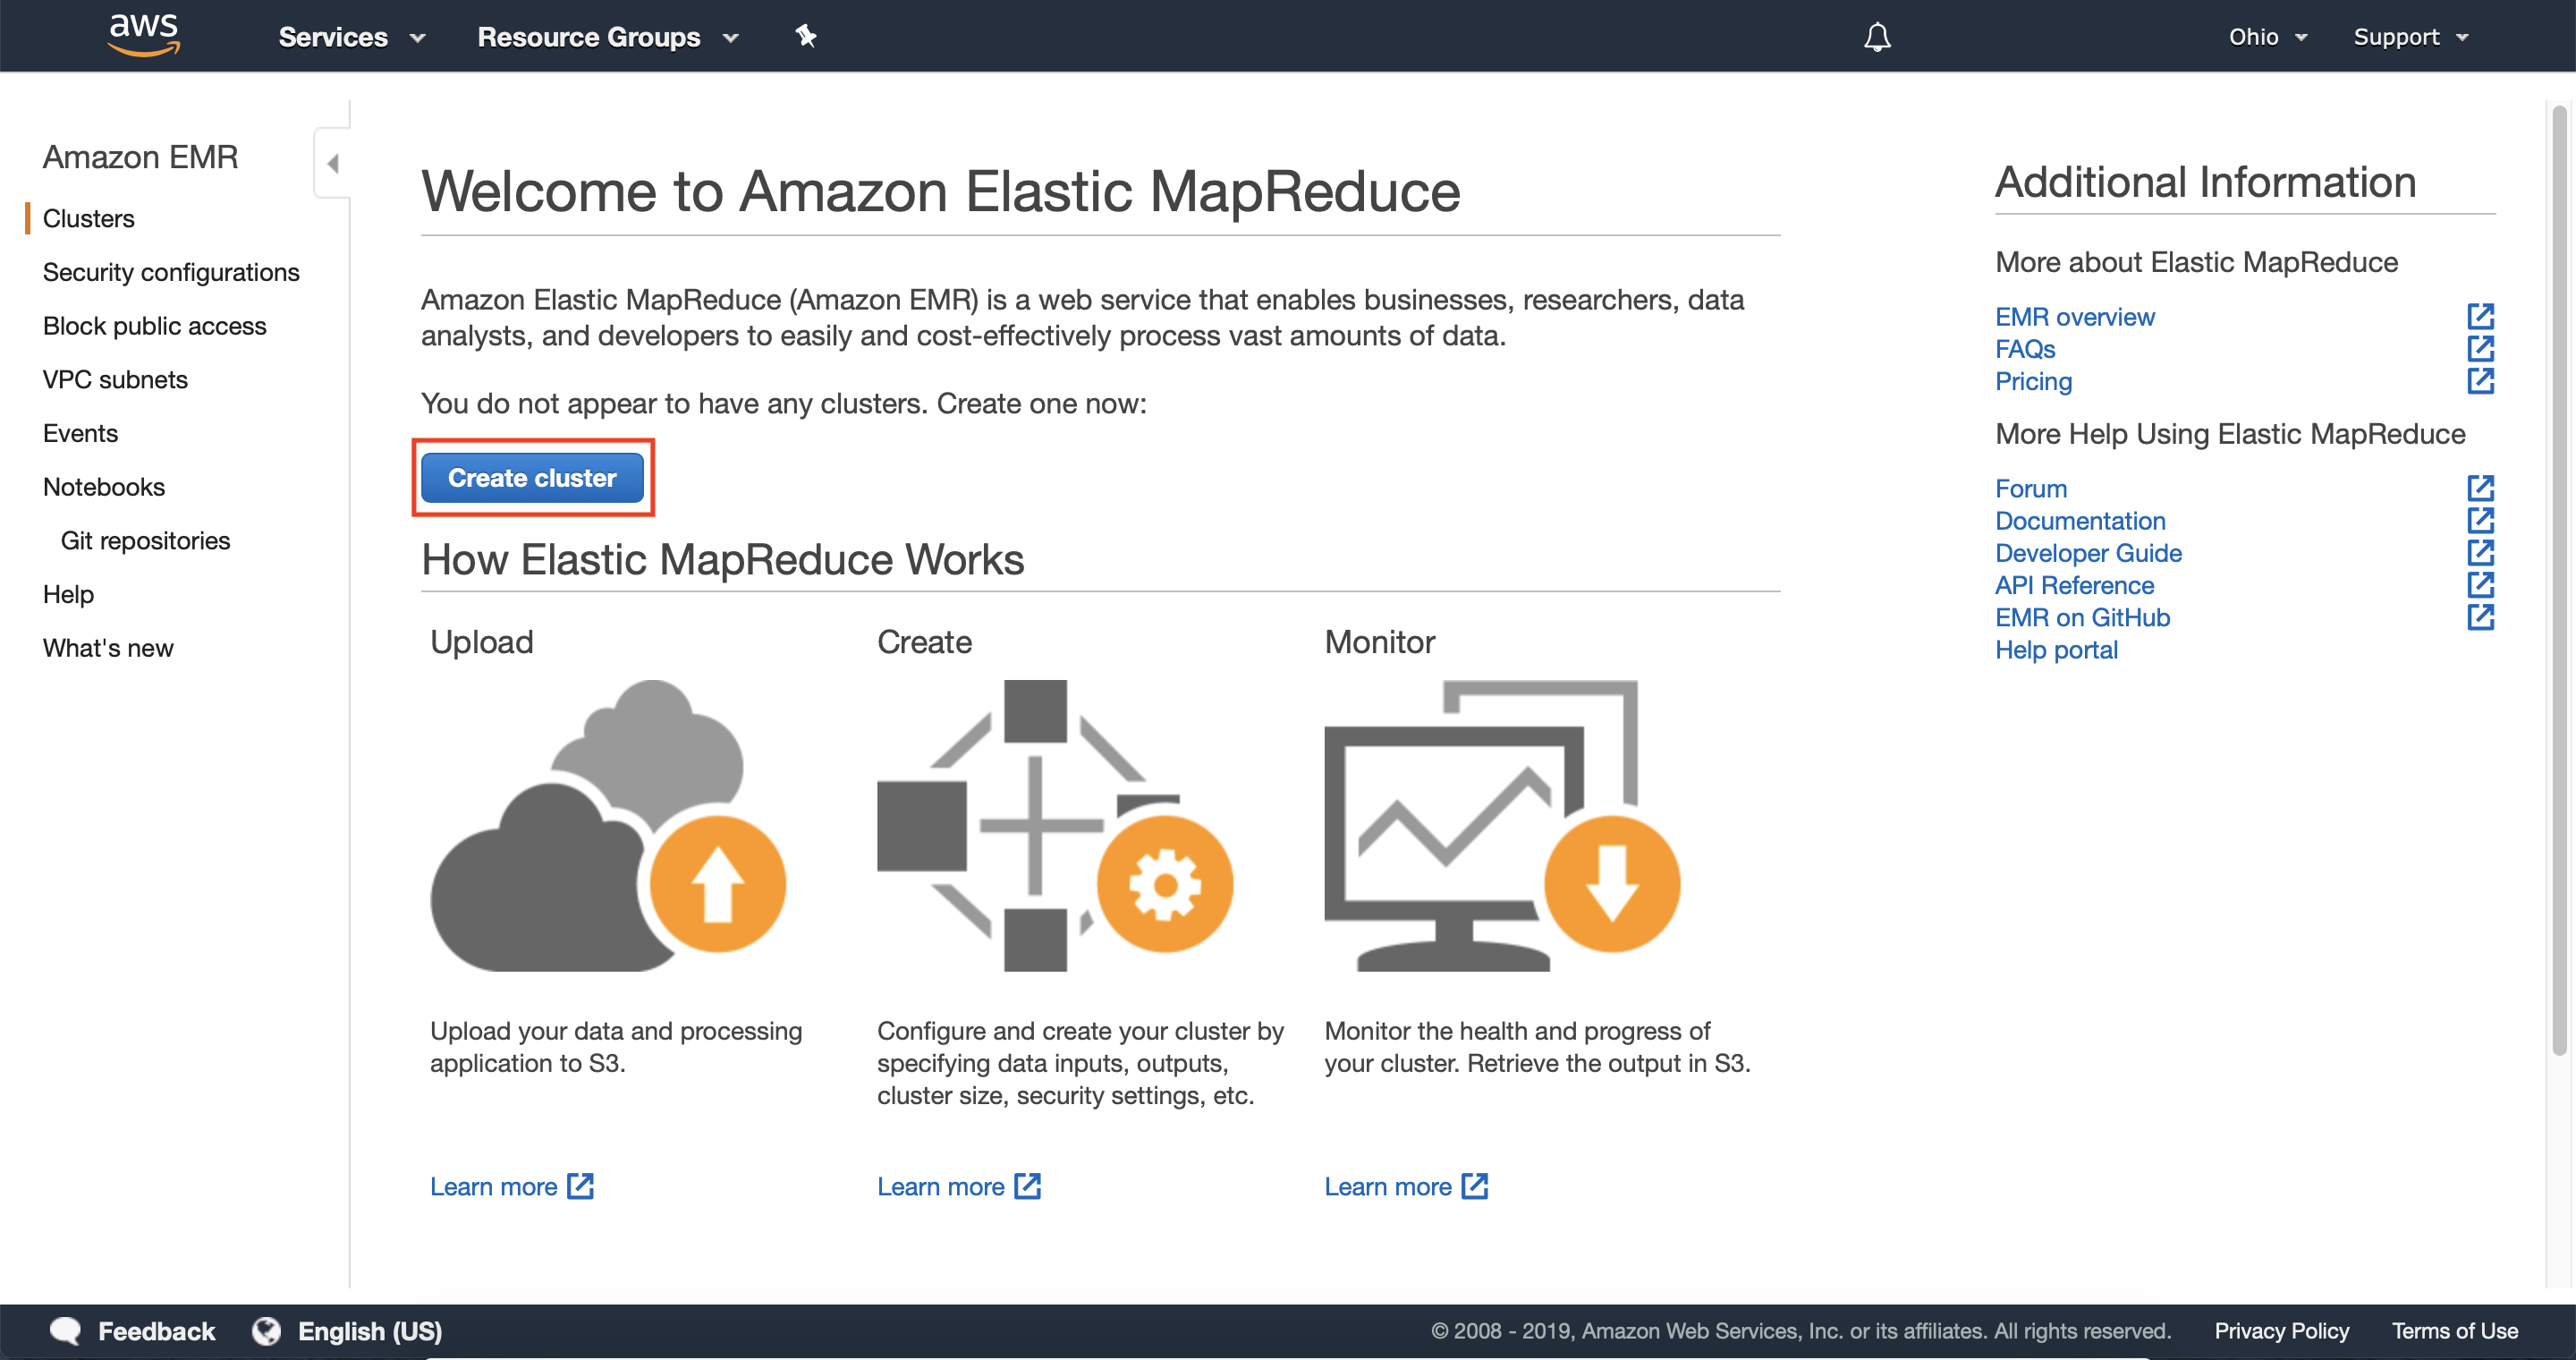
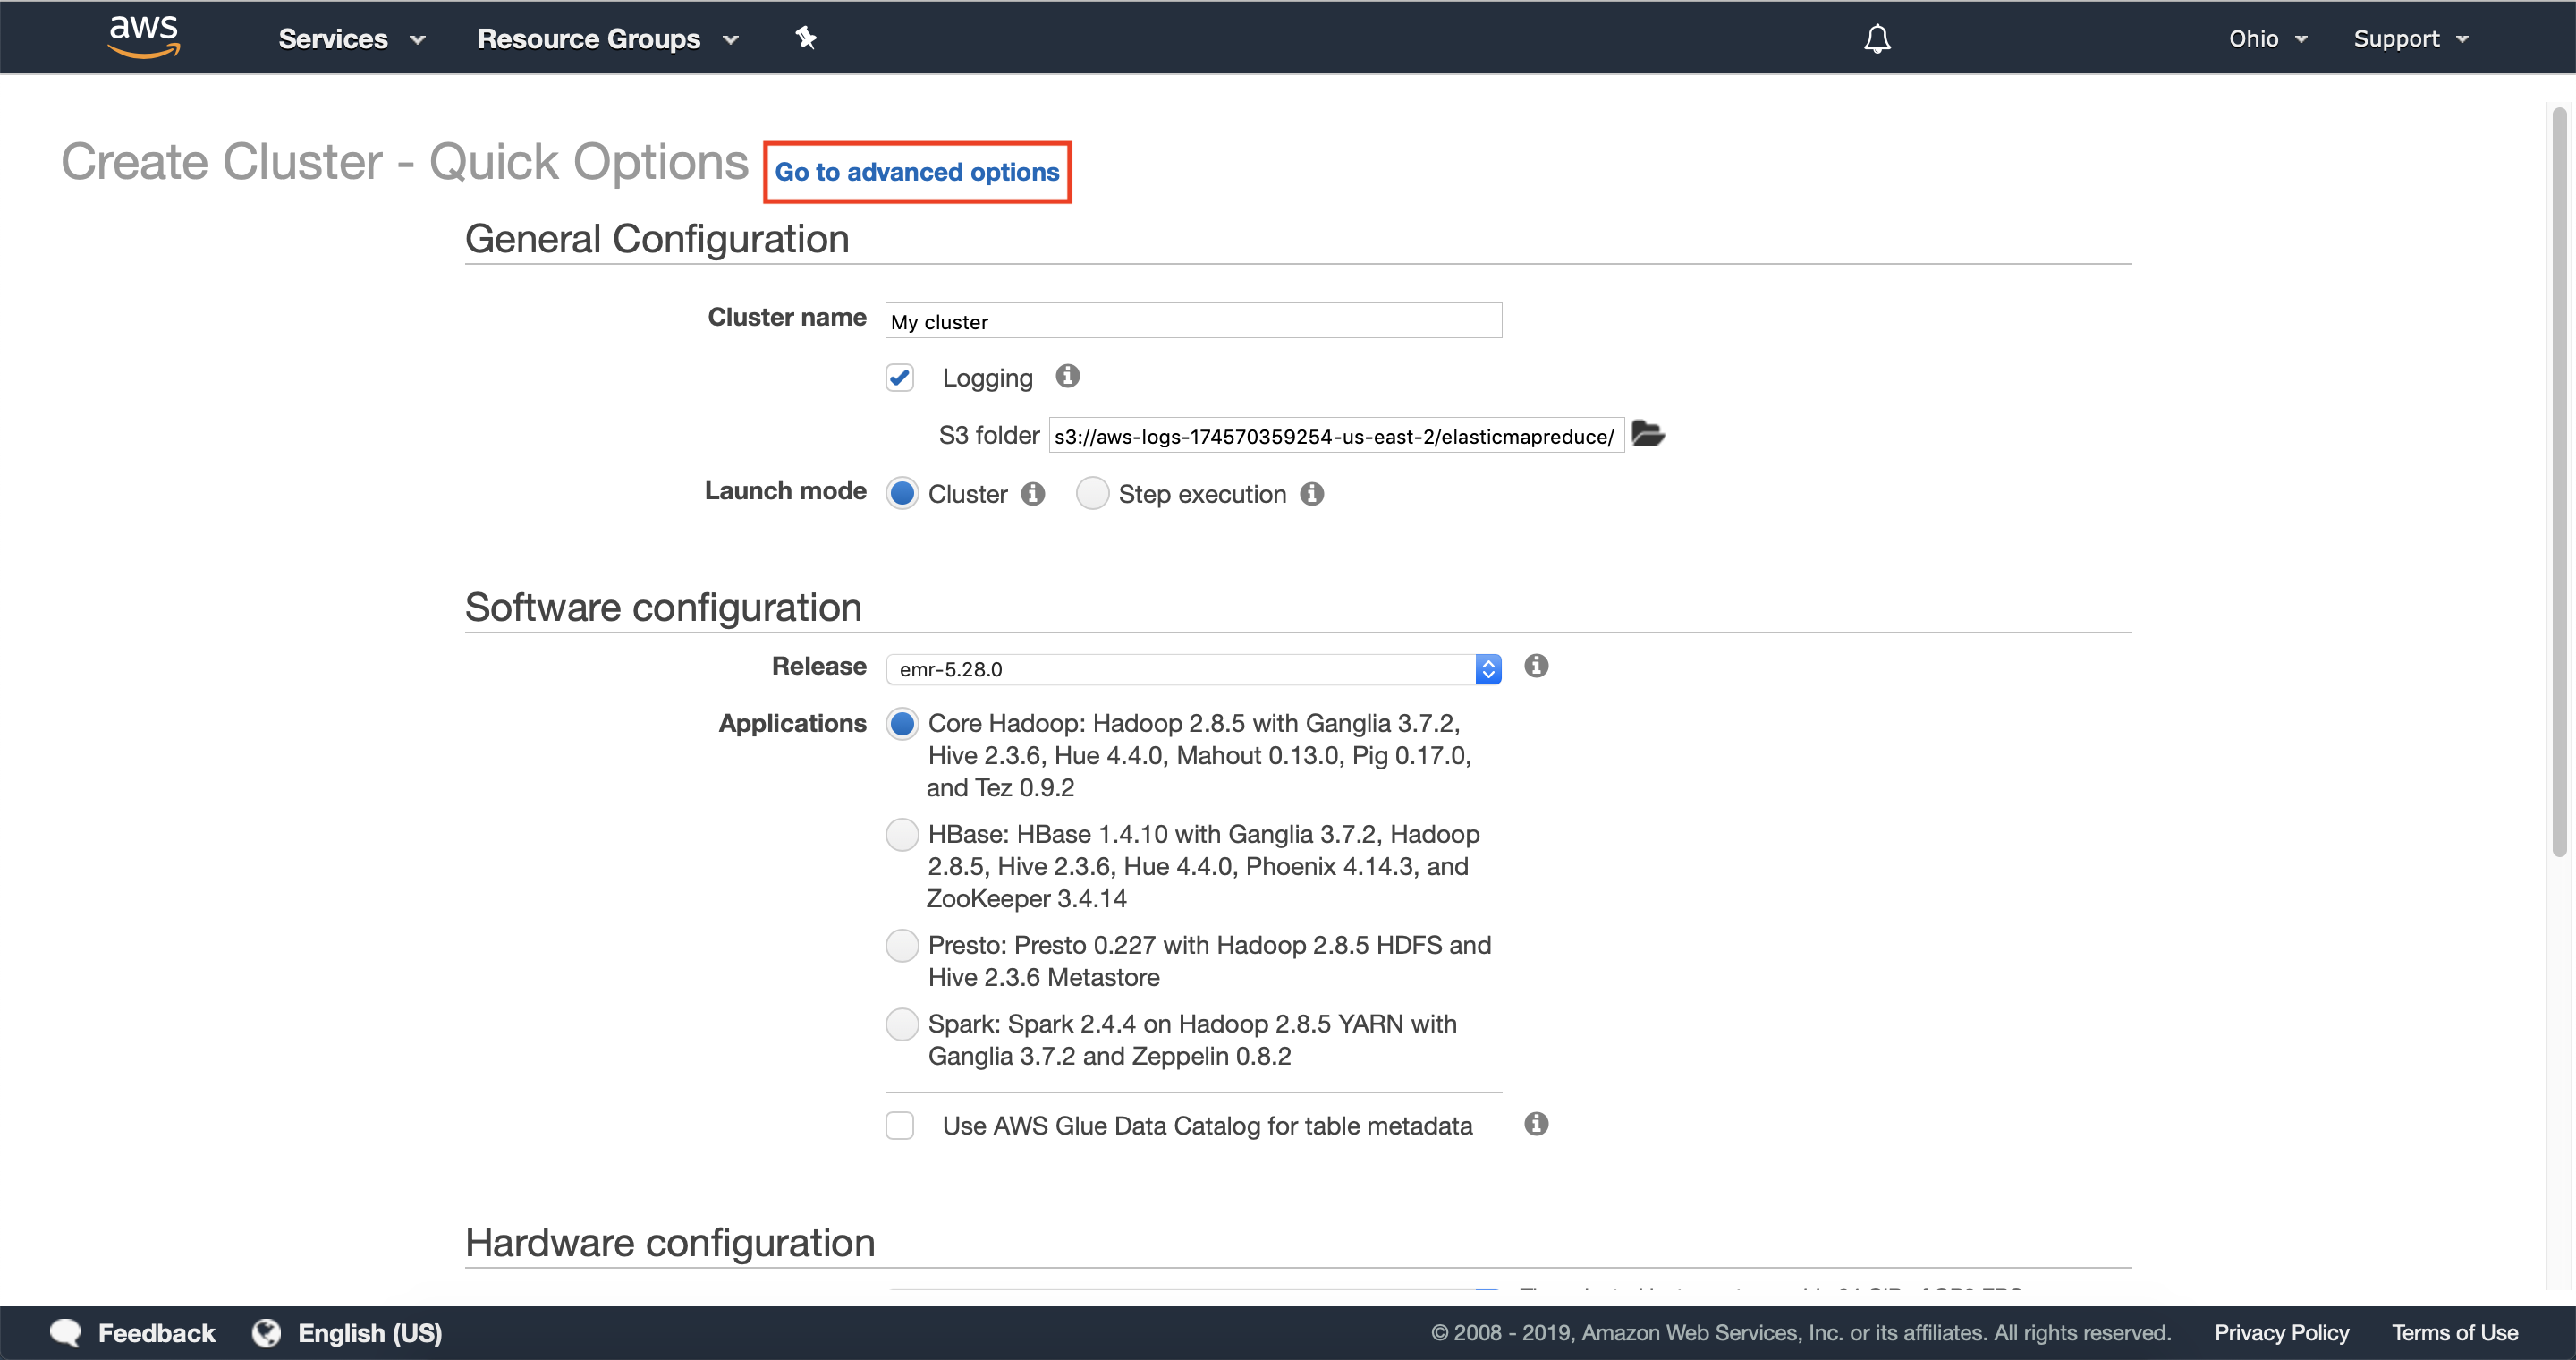
1.1 — Open a browser and navigate to Amazon EMR Console, alternatively you can search for EMR, or locate Amazon EMR under the Analytics section of the console landing page. If you already have an AWS account, login to the console. Otherwise, create a new AWS account to get started.
Already have an account? Log in to your account
Step 2: Configure cluster software & steps
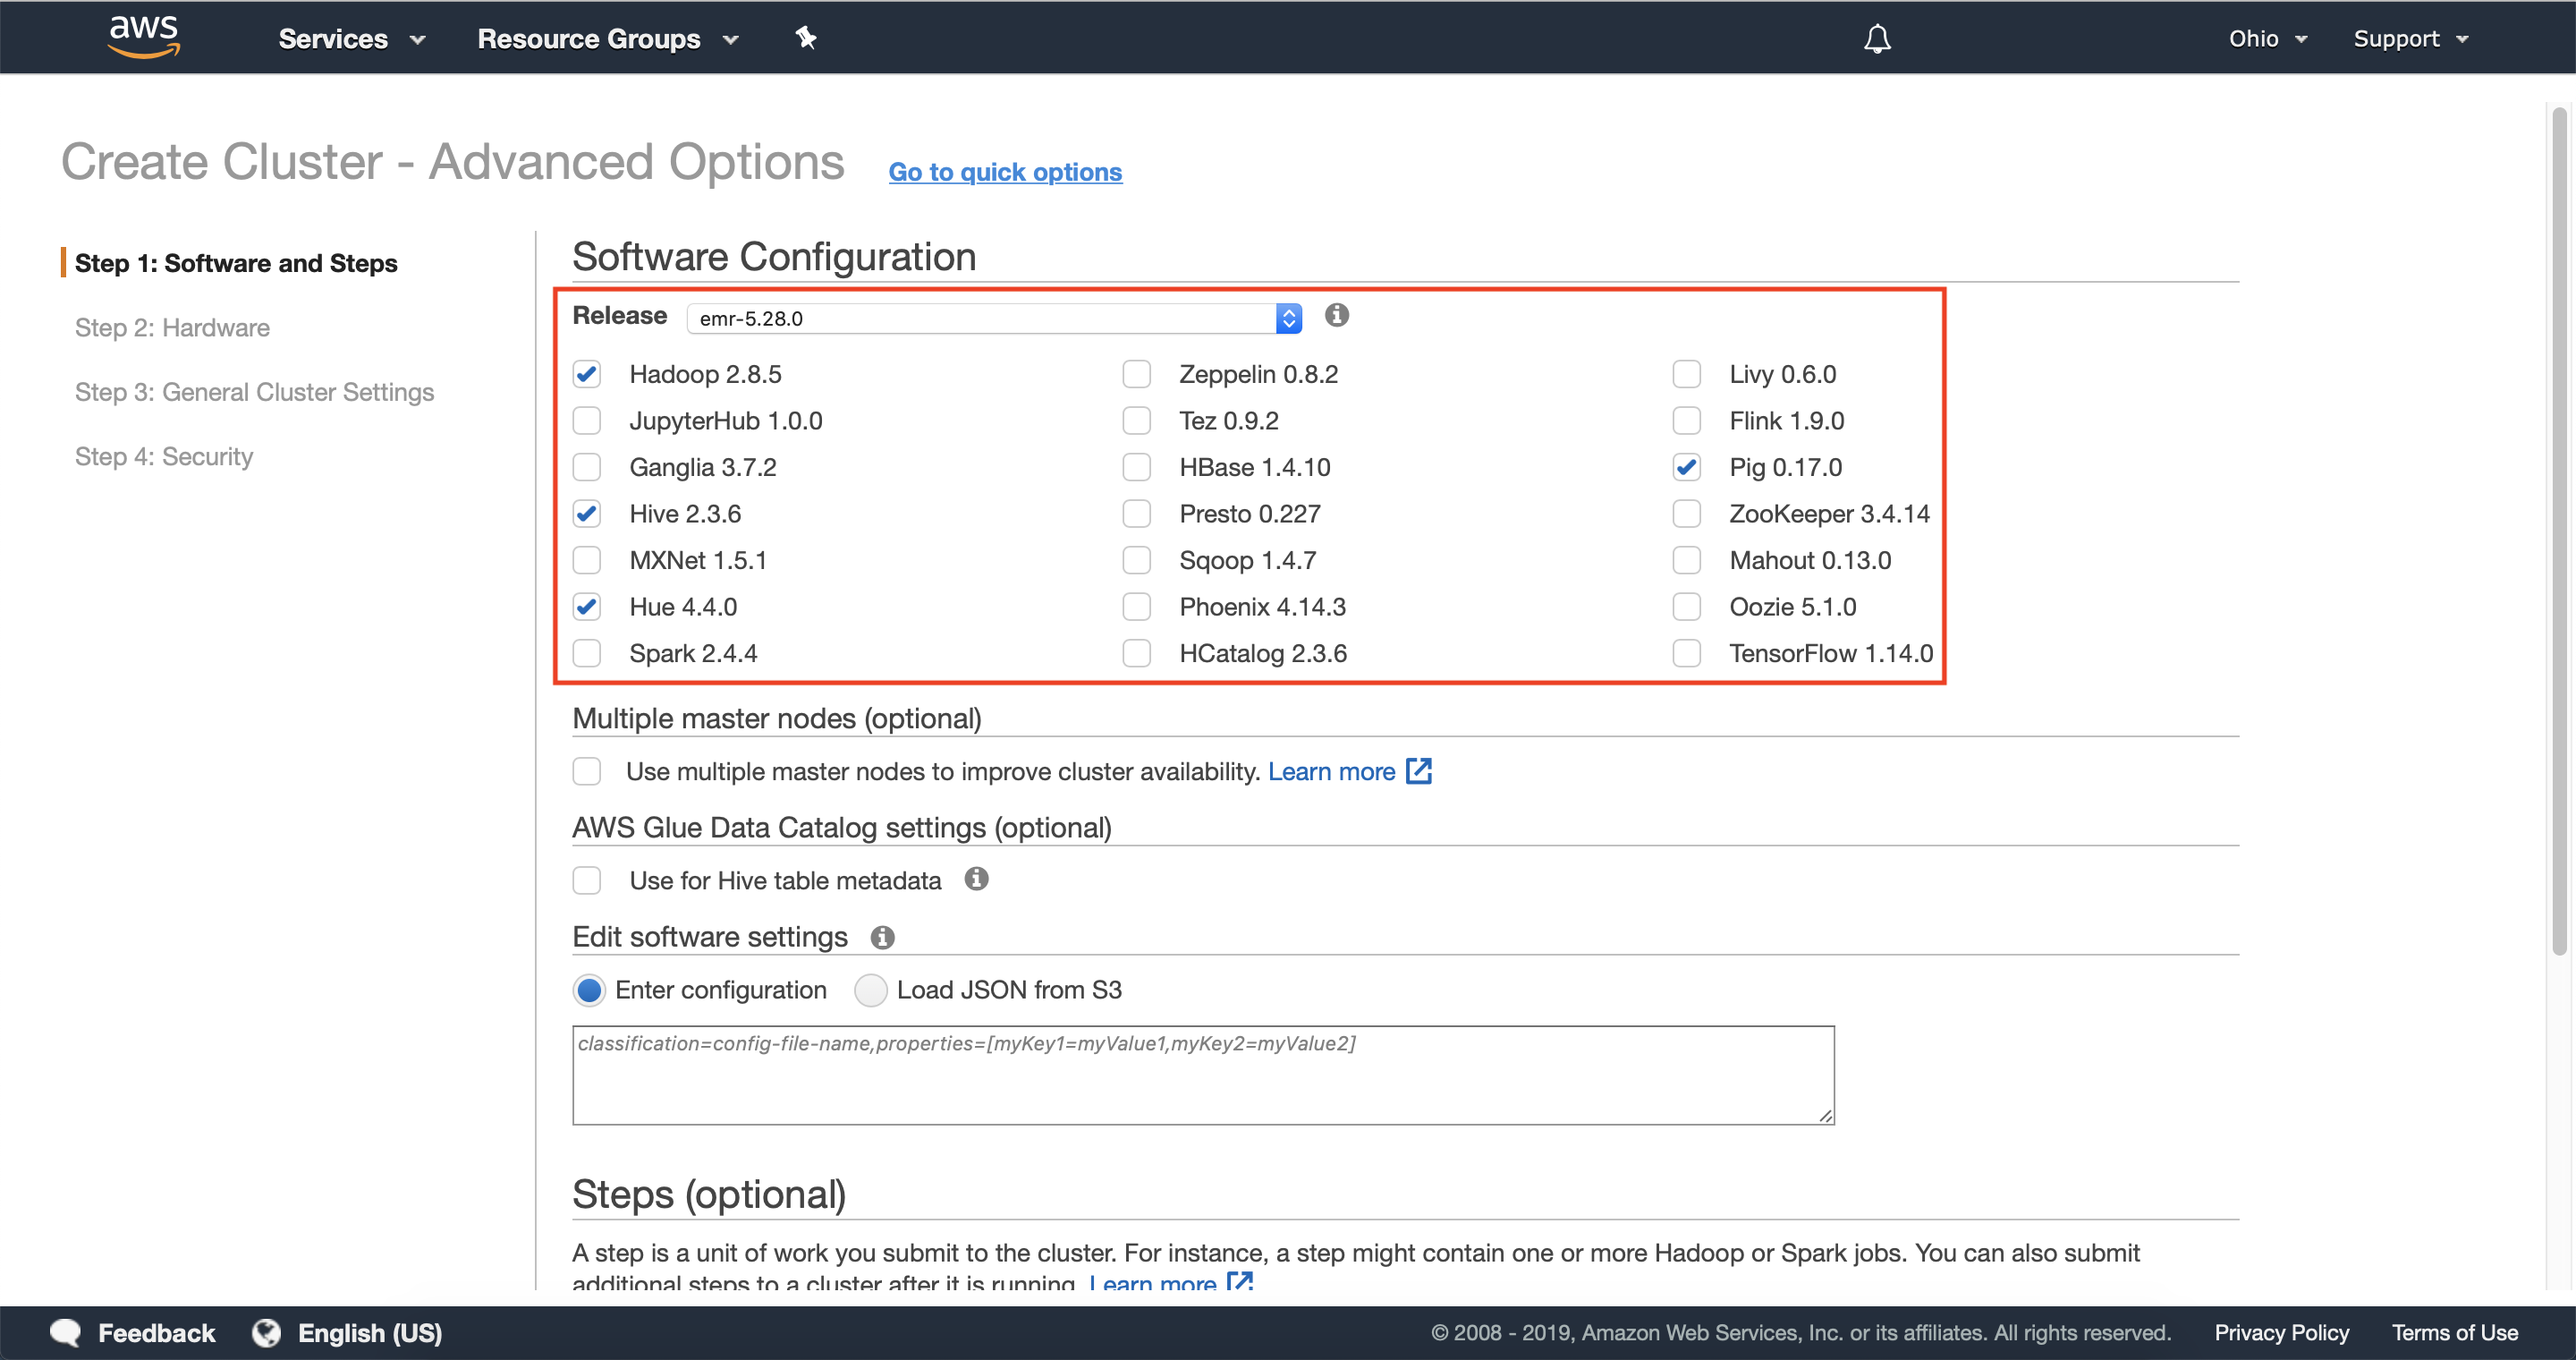
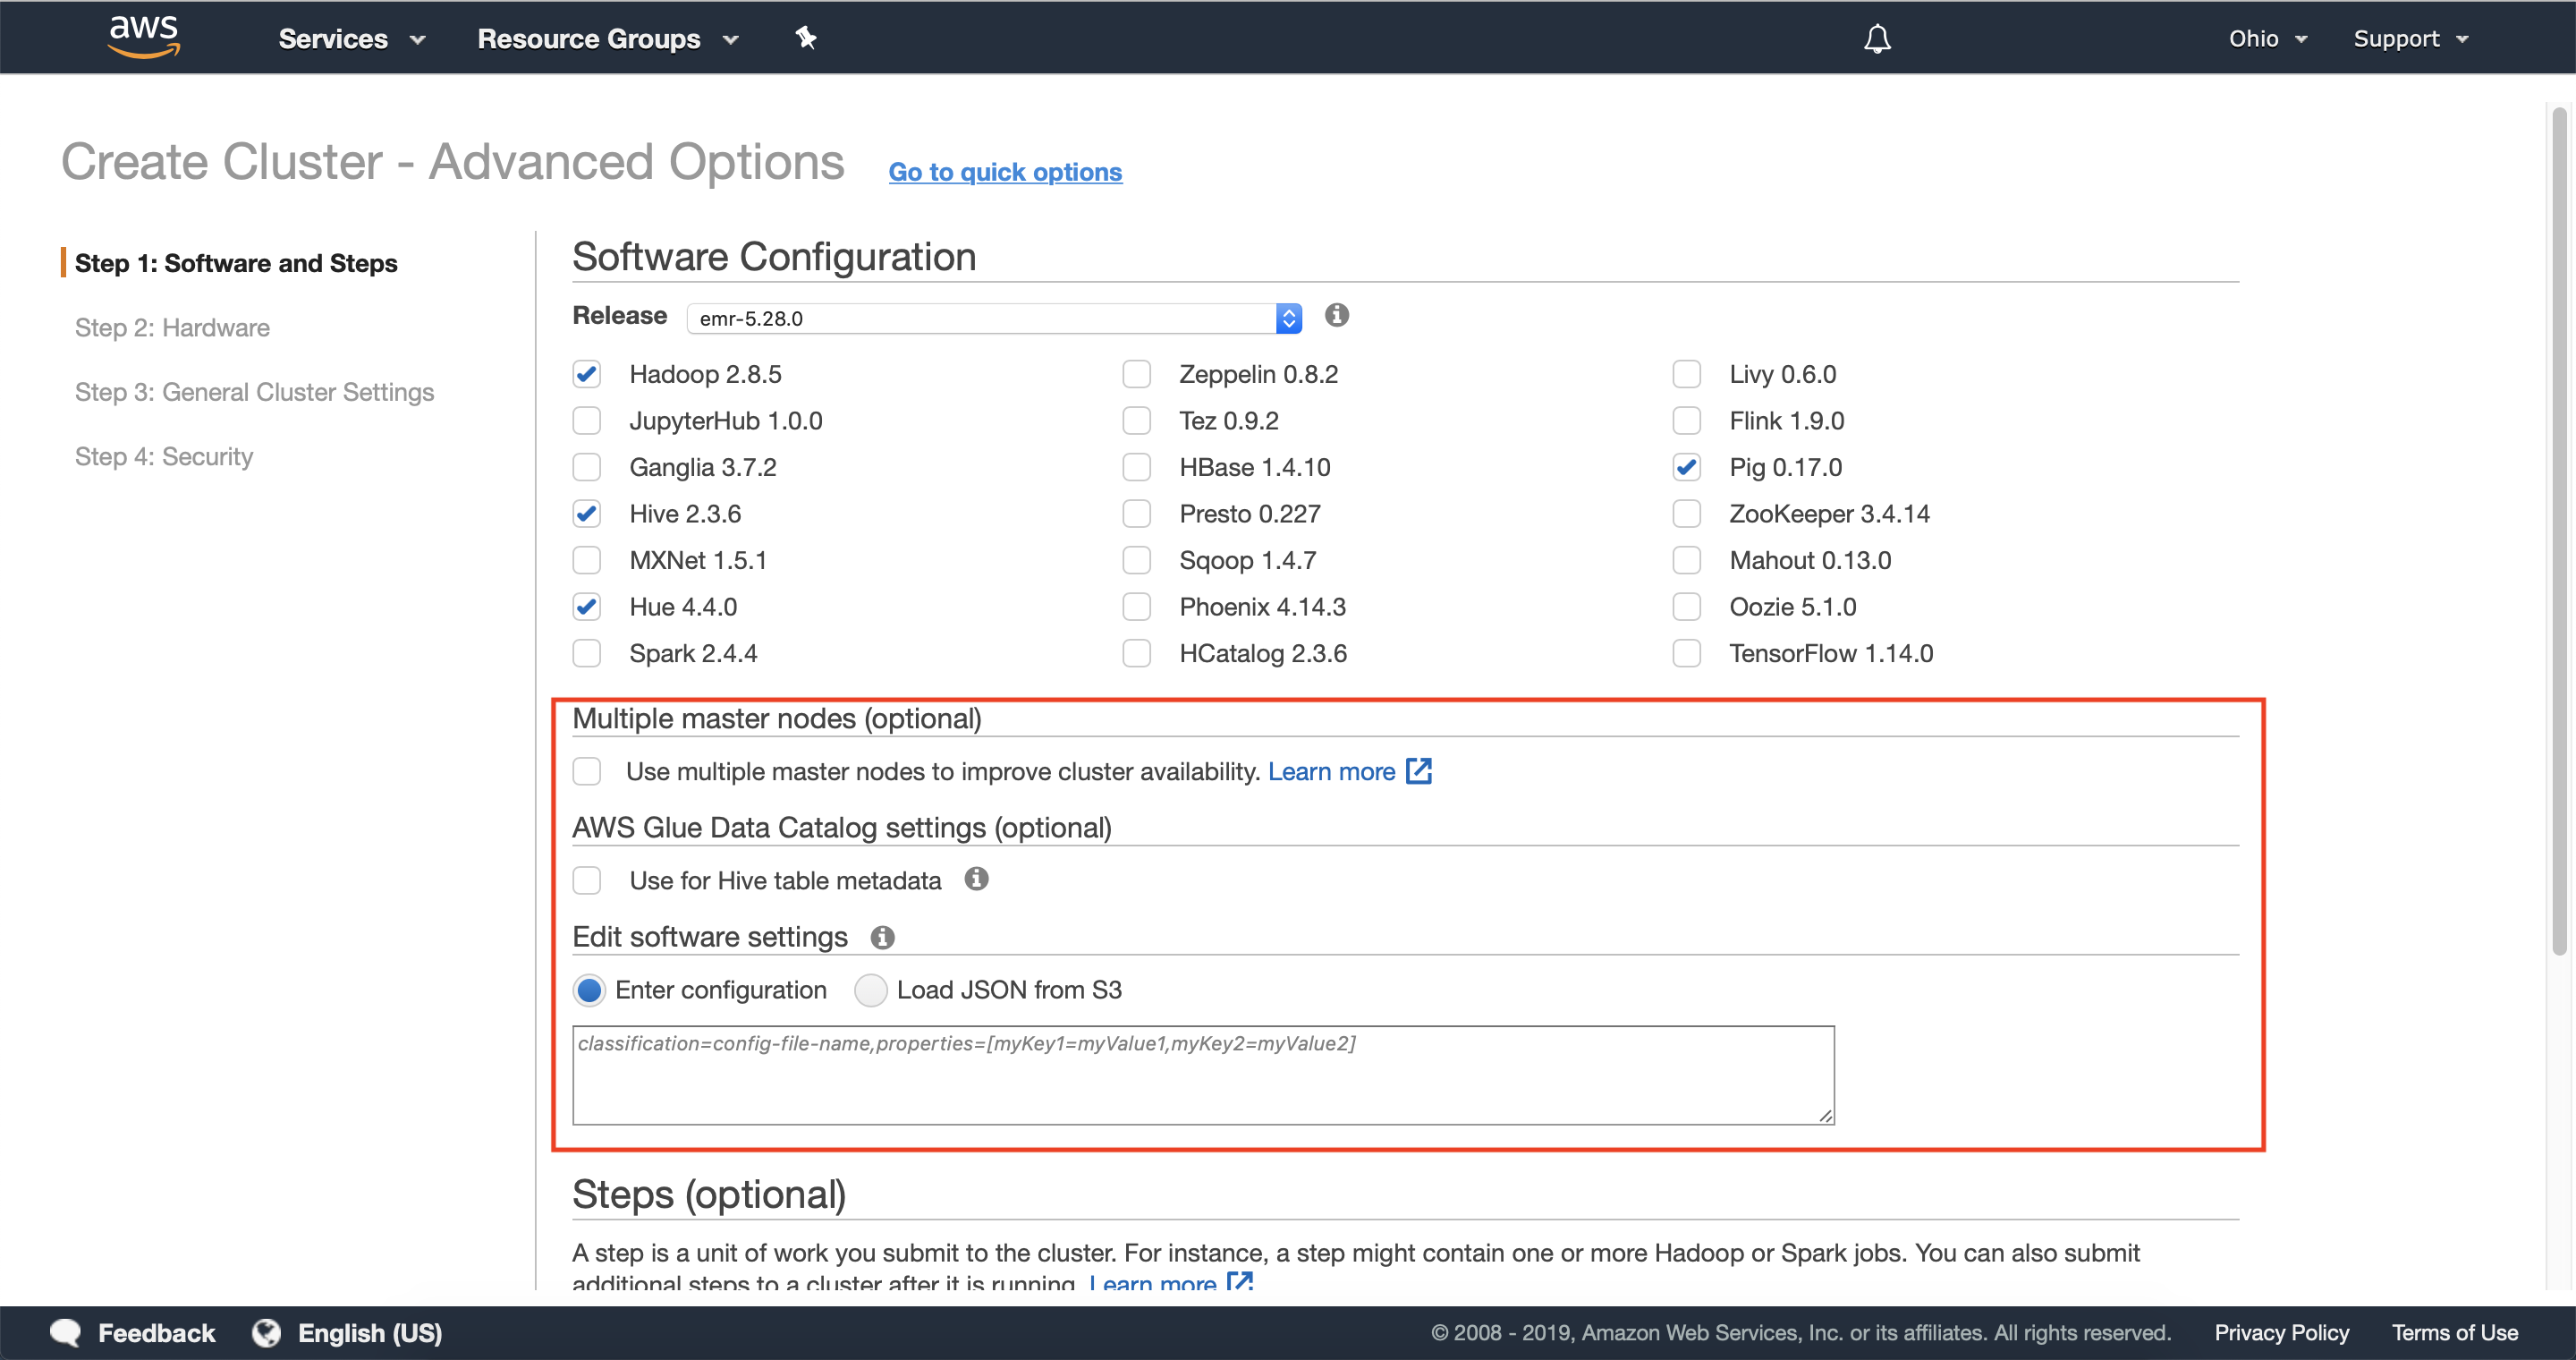
2.1 — In the software configuration section, select the software required for your cluster or leave the default options to get started quickly.
2.2 — Optionally enter any required configuration information to connect with AWS Glue Data Catalog as well as any configuration files you would like to use while configuring your cluster’s software.
Leave the option use multiple master nodes to improve cluster availability disabled, as this option is not compatible with Instance Fleets, which we will configure in the follow steps.
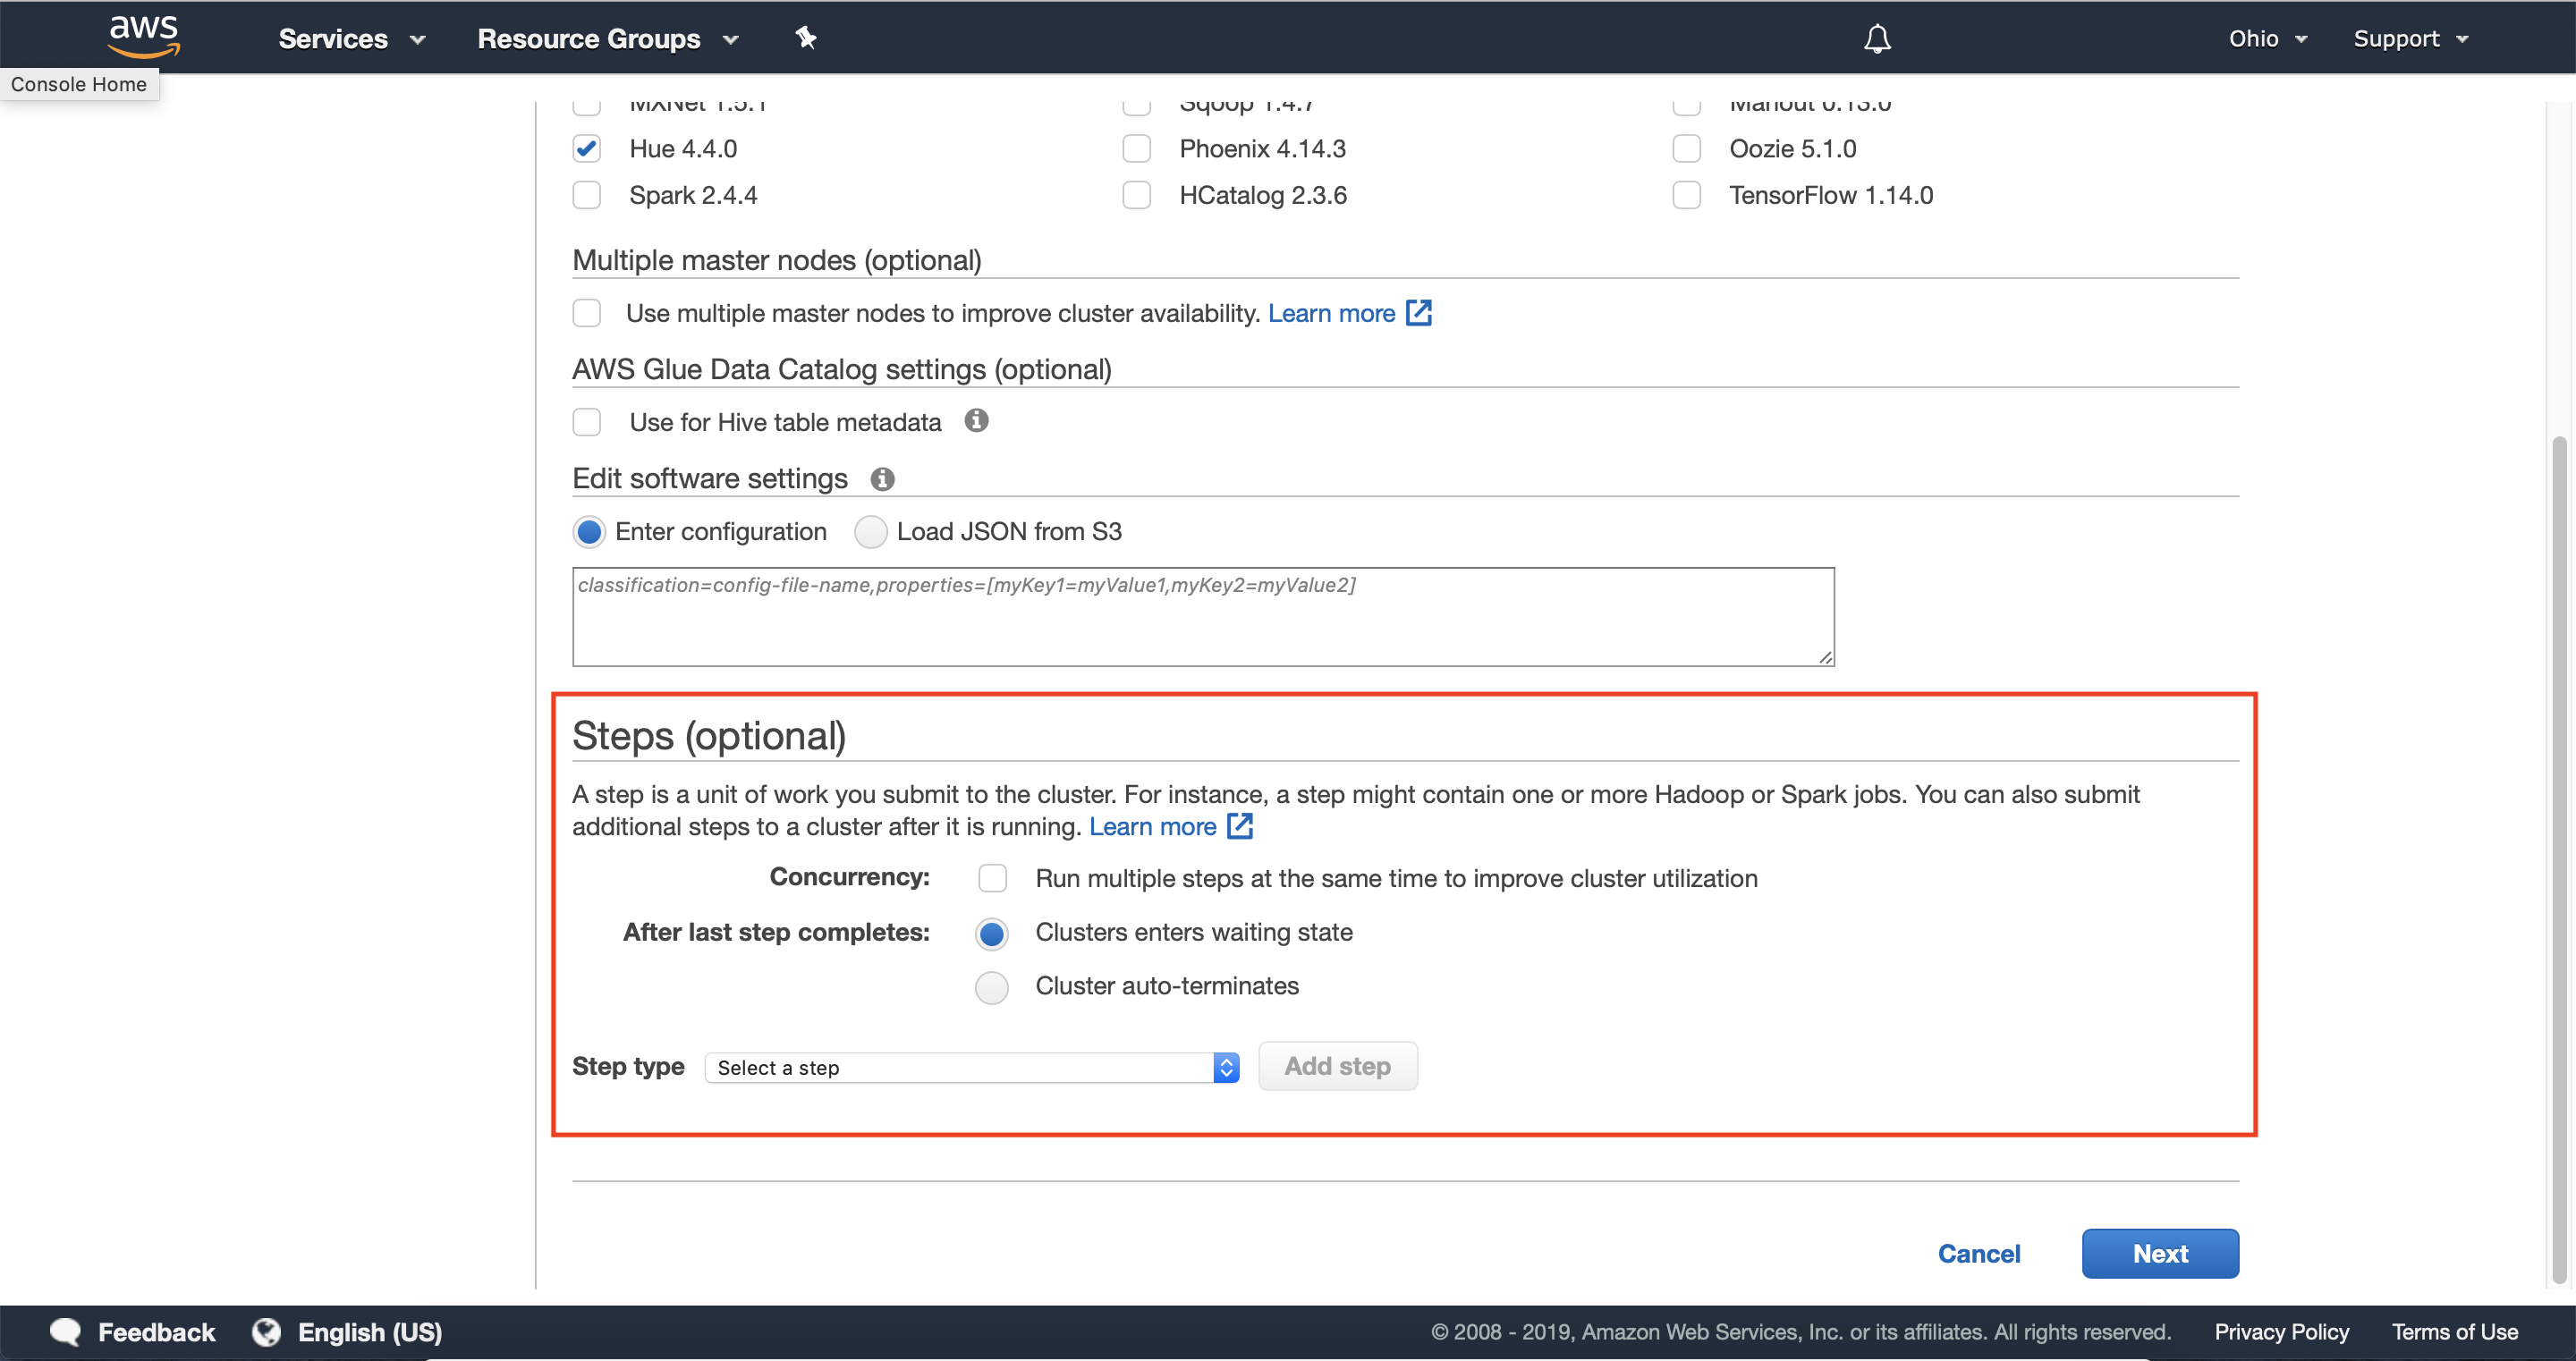
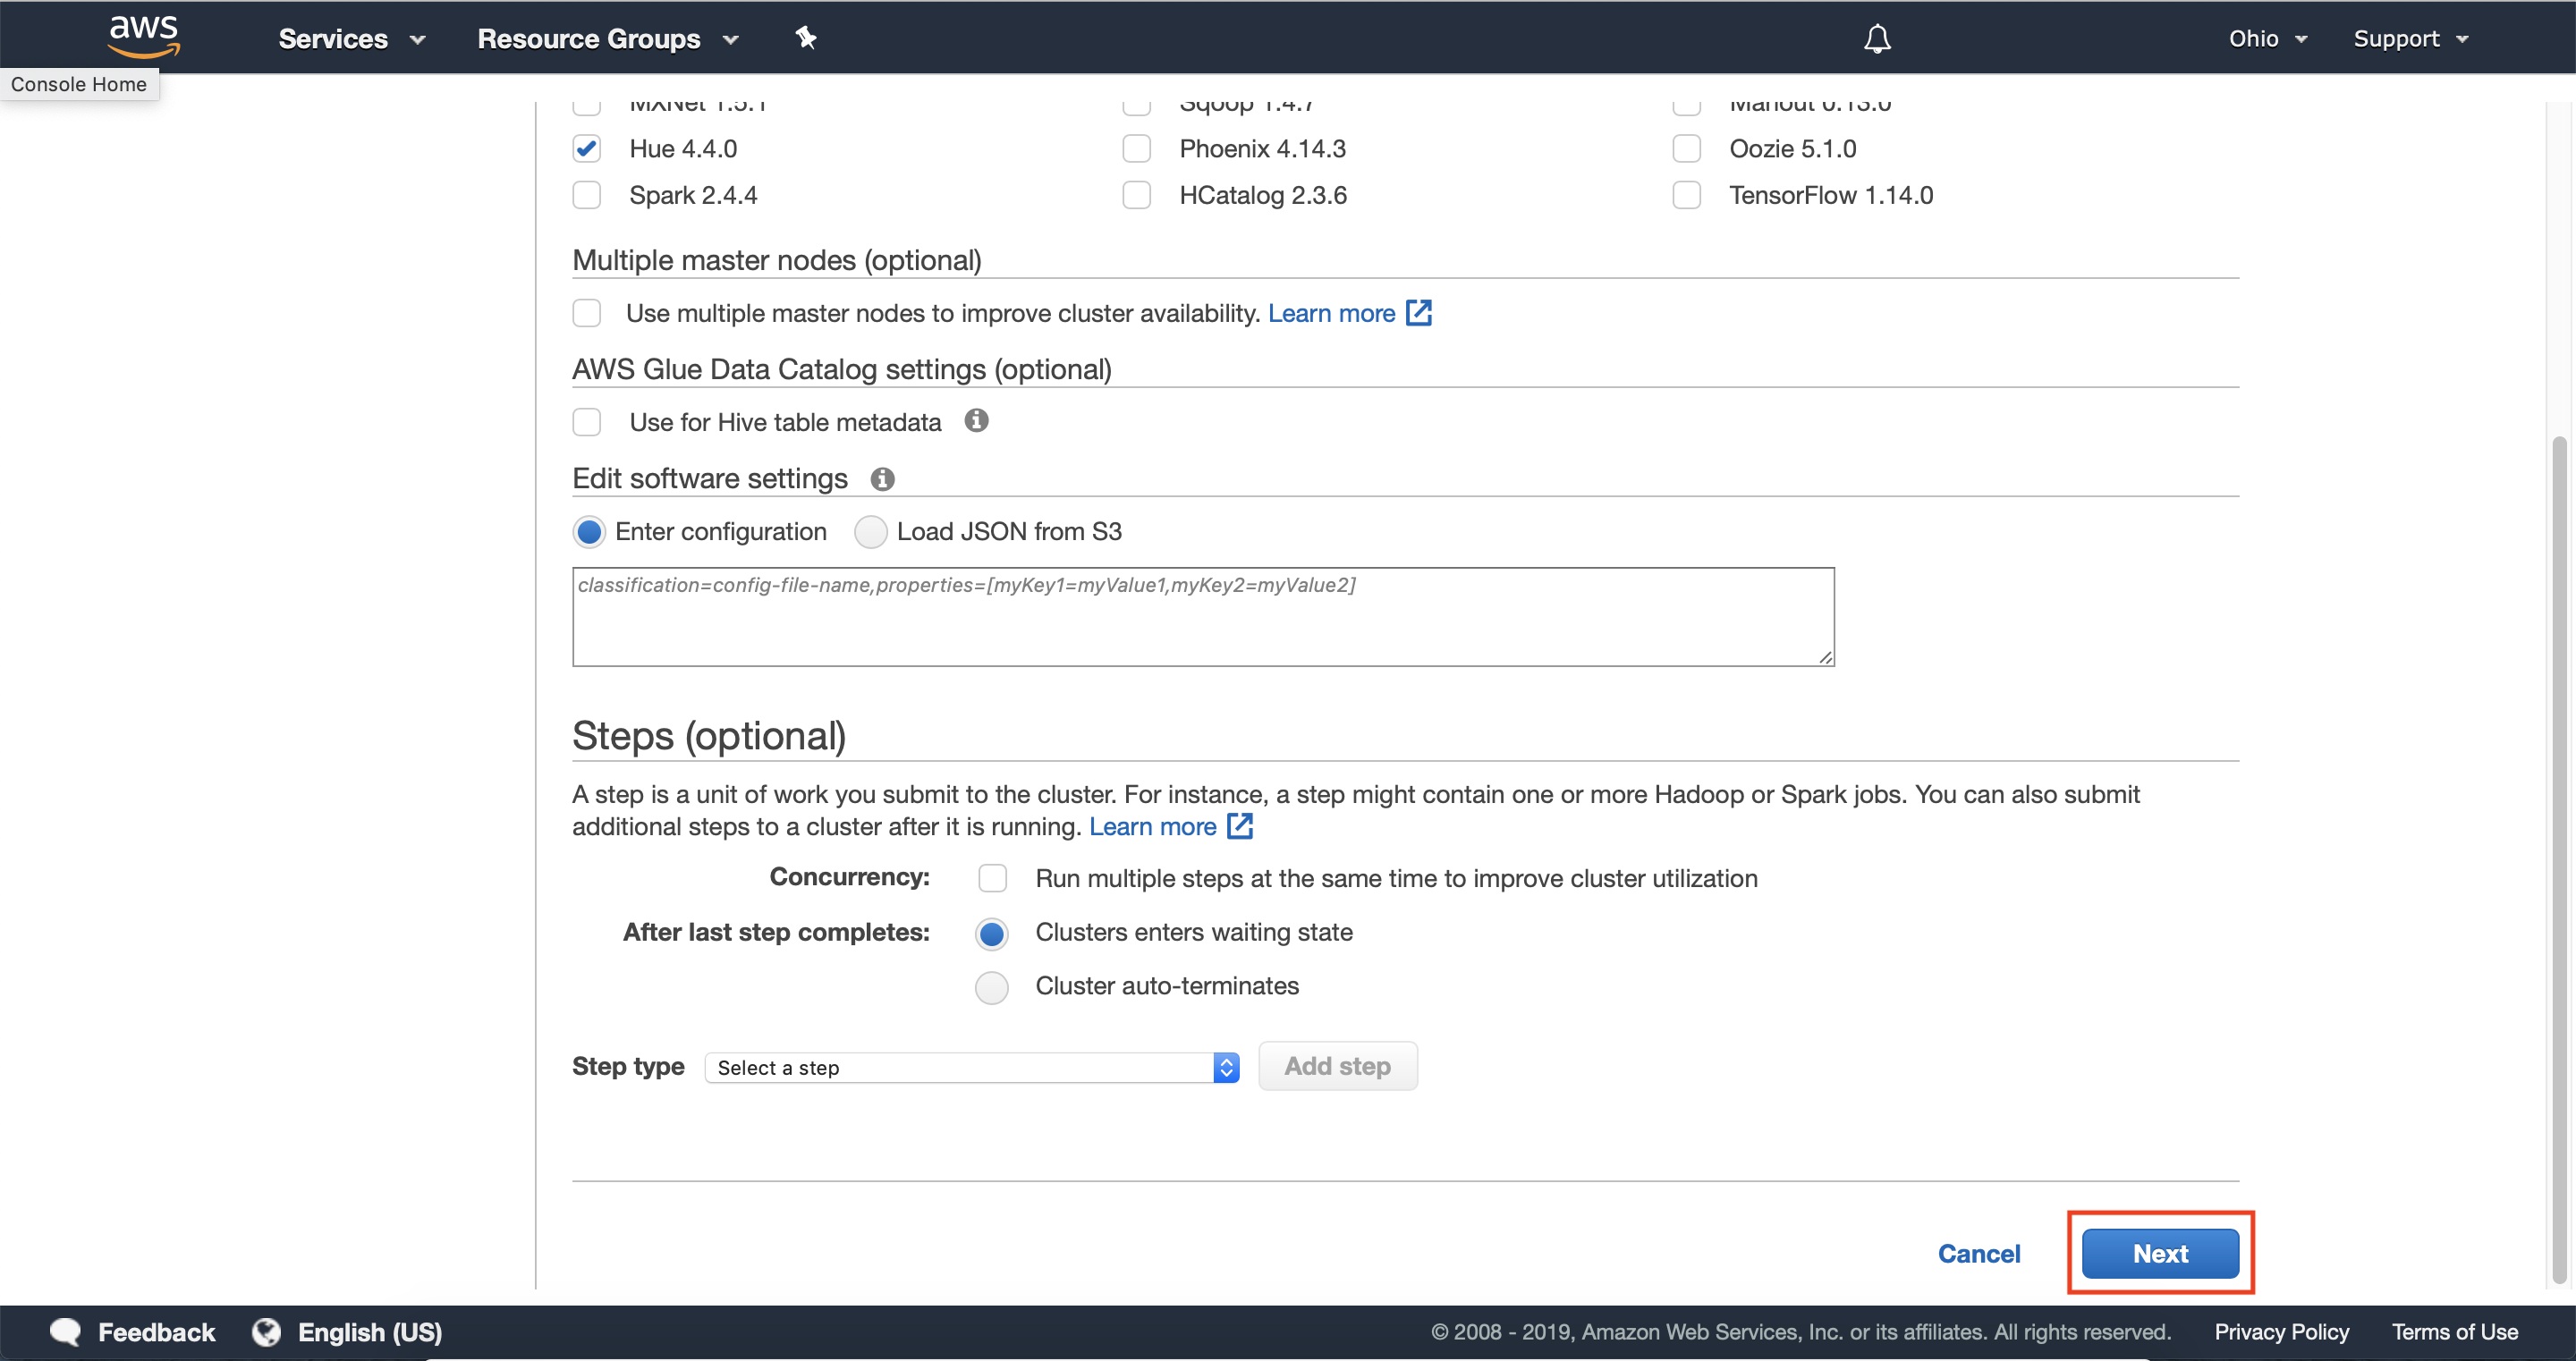
2.3 — Optionally configure any steps you’d like your cluster to execute once provisioned, or skip this step to quickly demonstrate launching your cluster.
You can use Amazon EMR steps to submit work to the Spark framework installed on an EMR cluster. For more information, see steps in the Amazon EMR Management Guide. In the console and CLI, you do this using a Spark application step, which runs the spark-submit script as a step on your behalf. With the API, you use a step to invoke spark-submit using command-runner.jar.
Step 3: Configure instance fleets
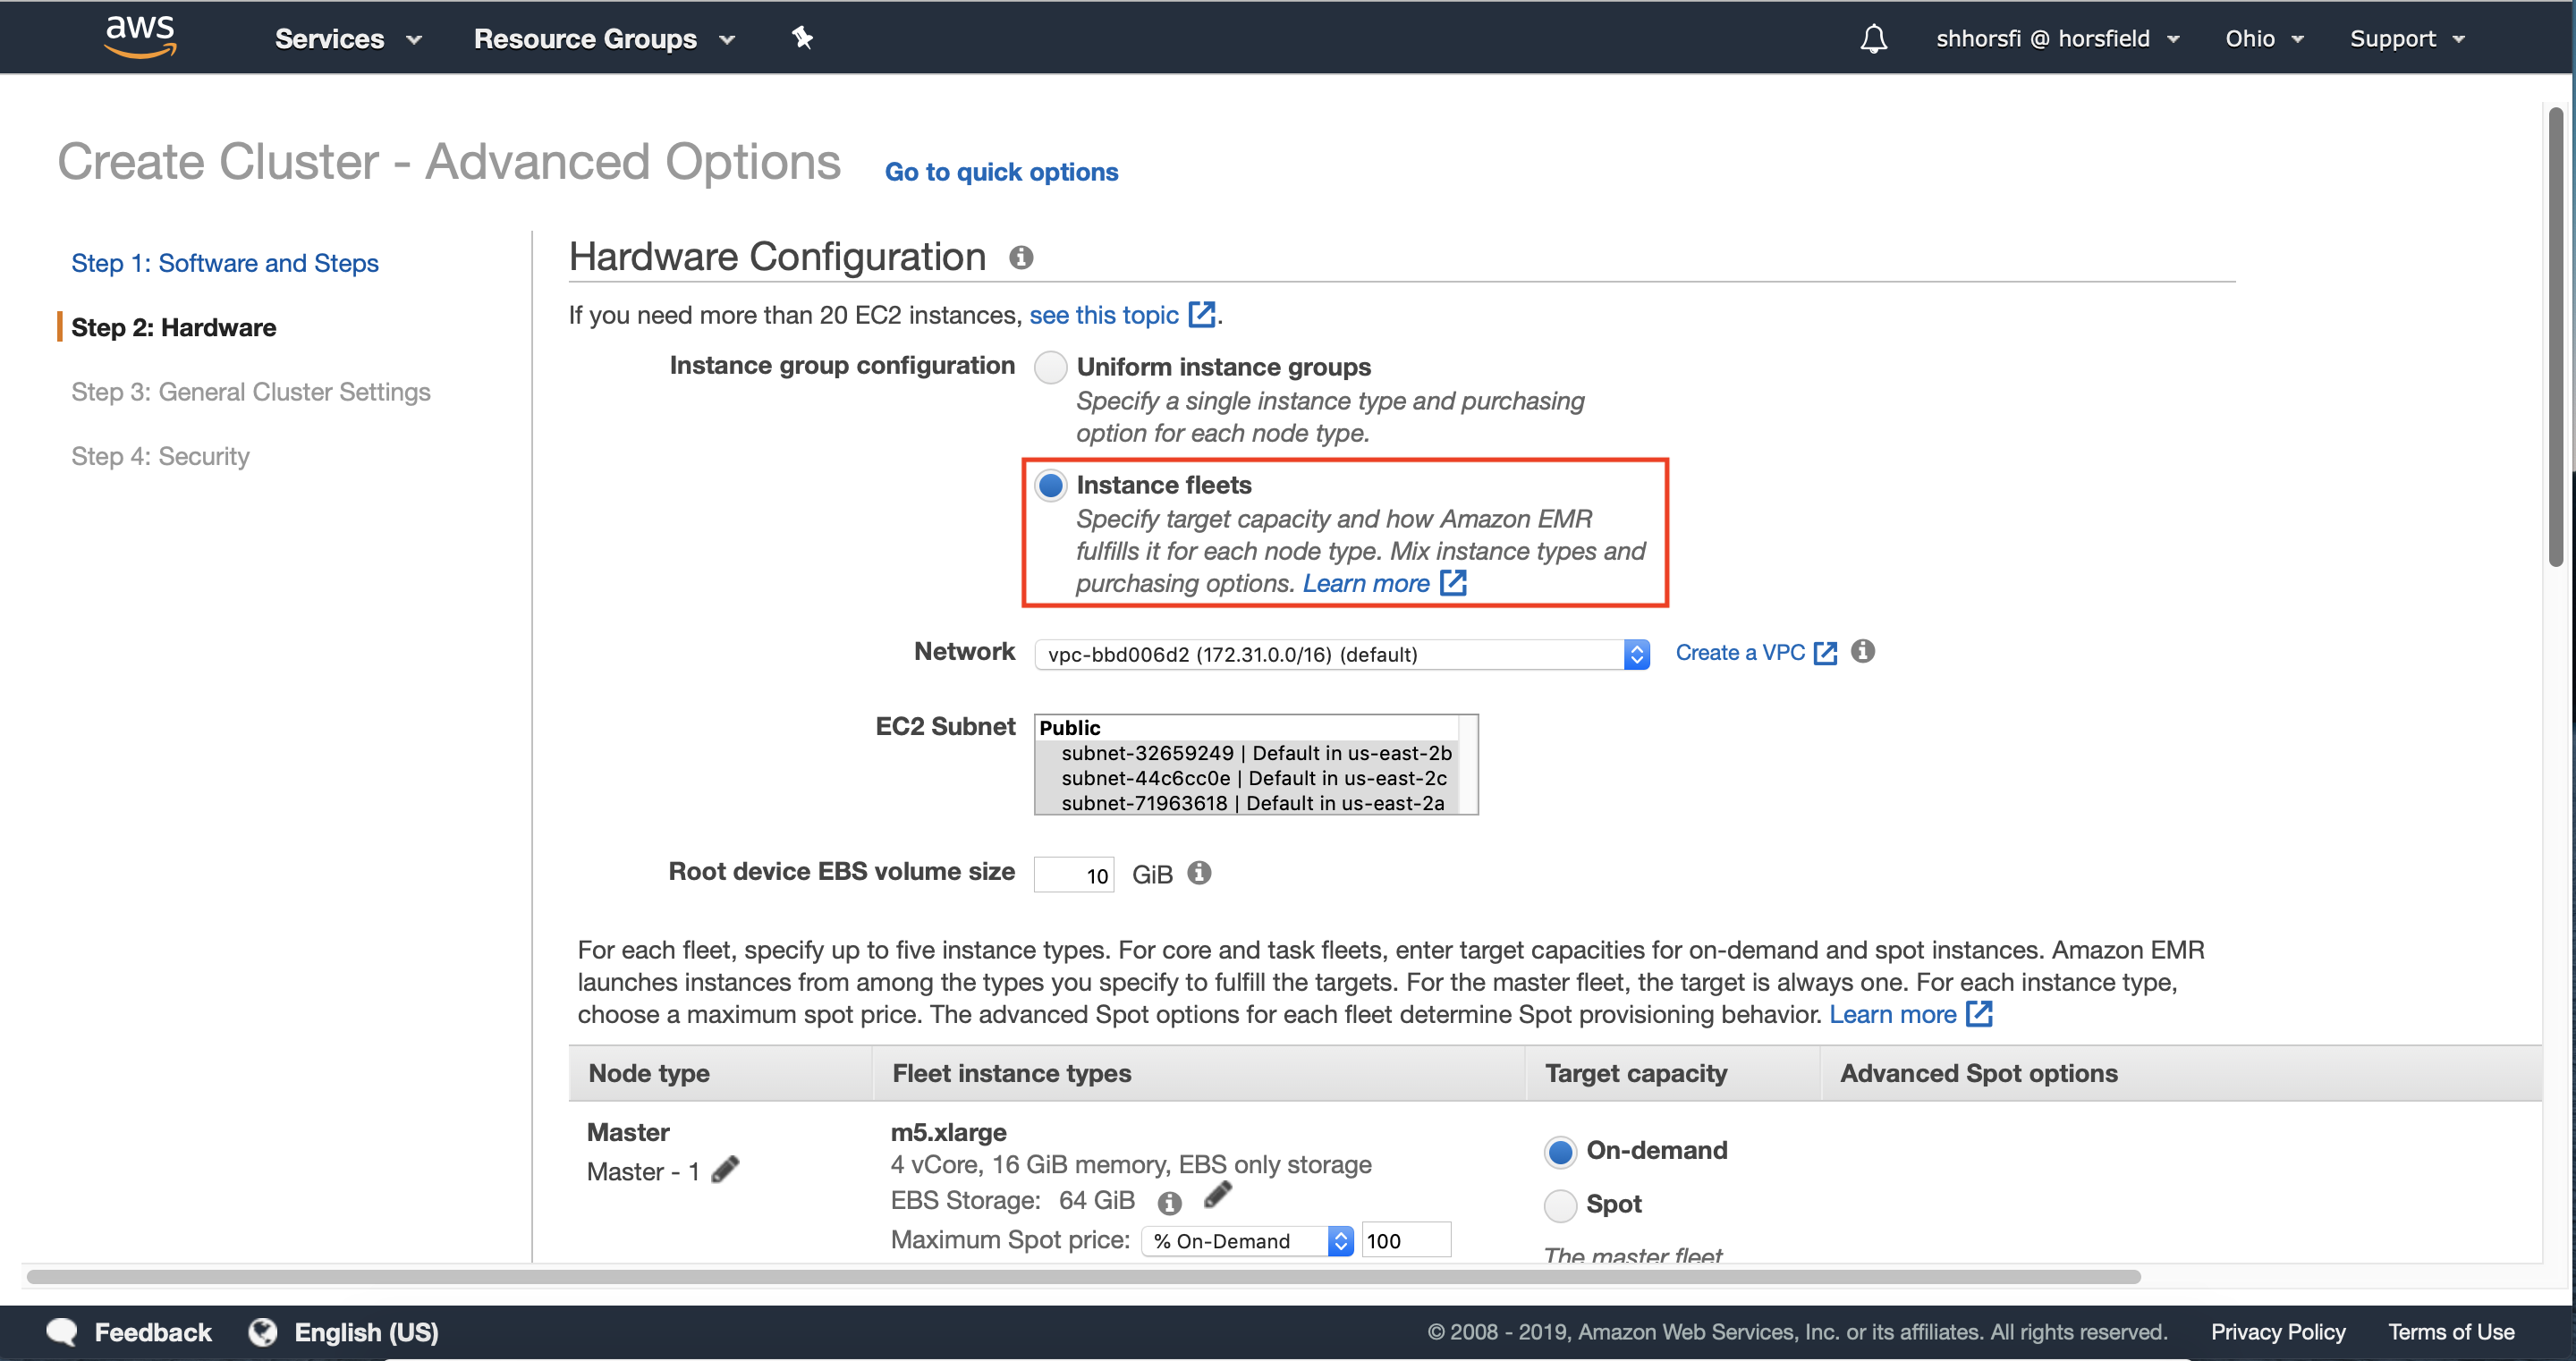
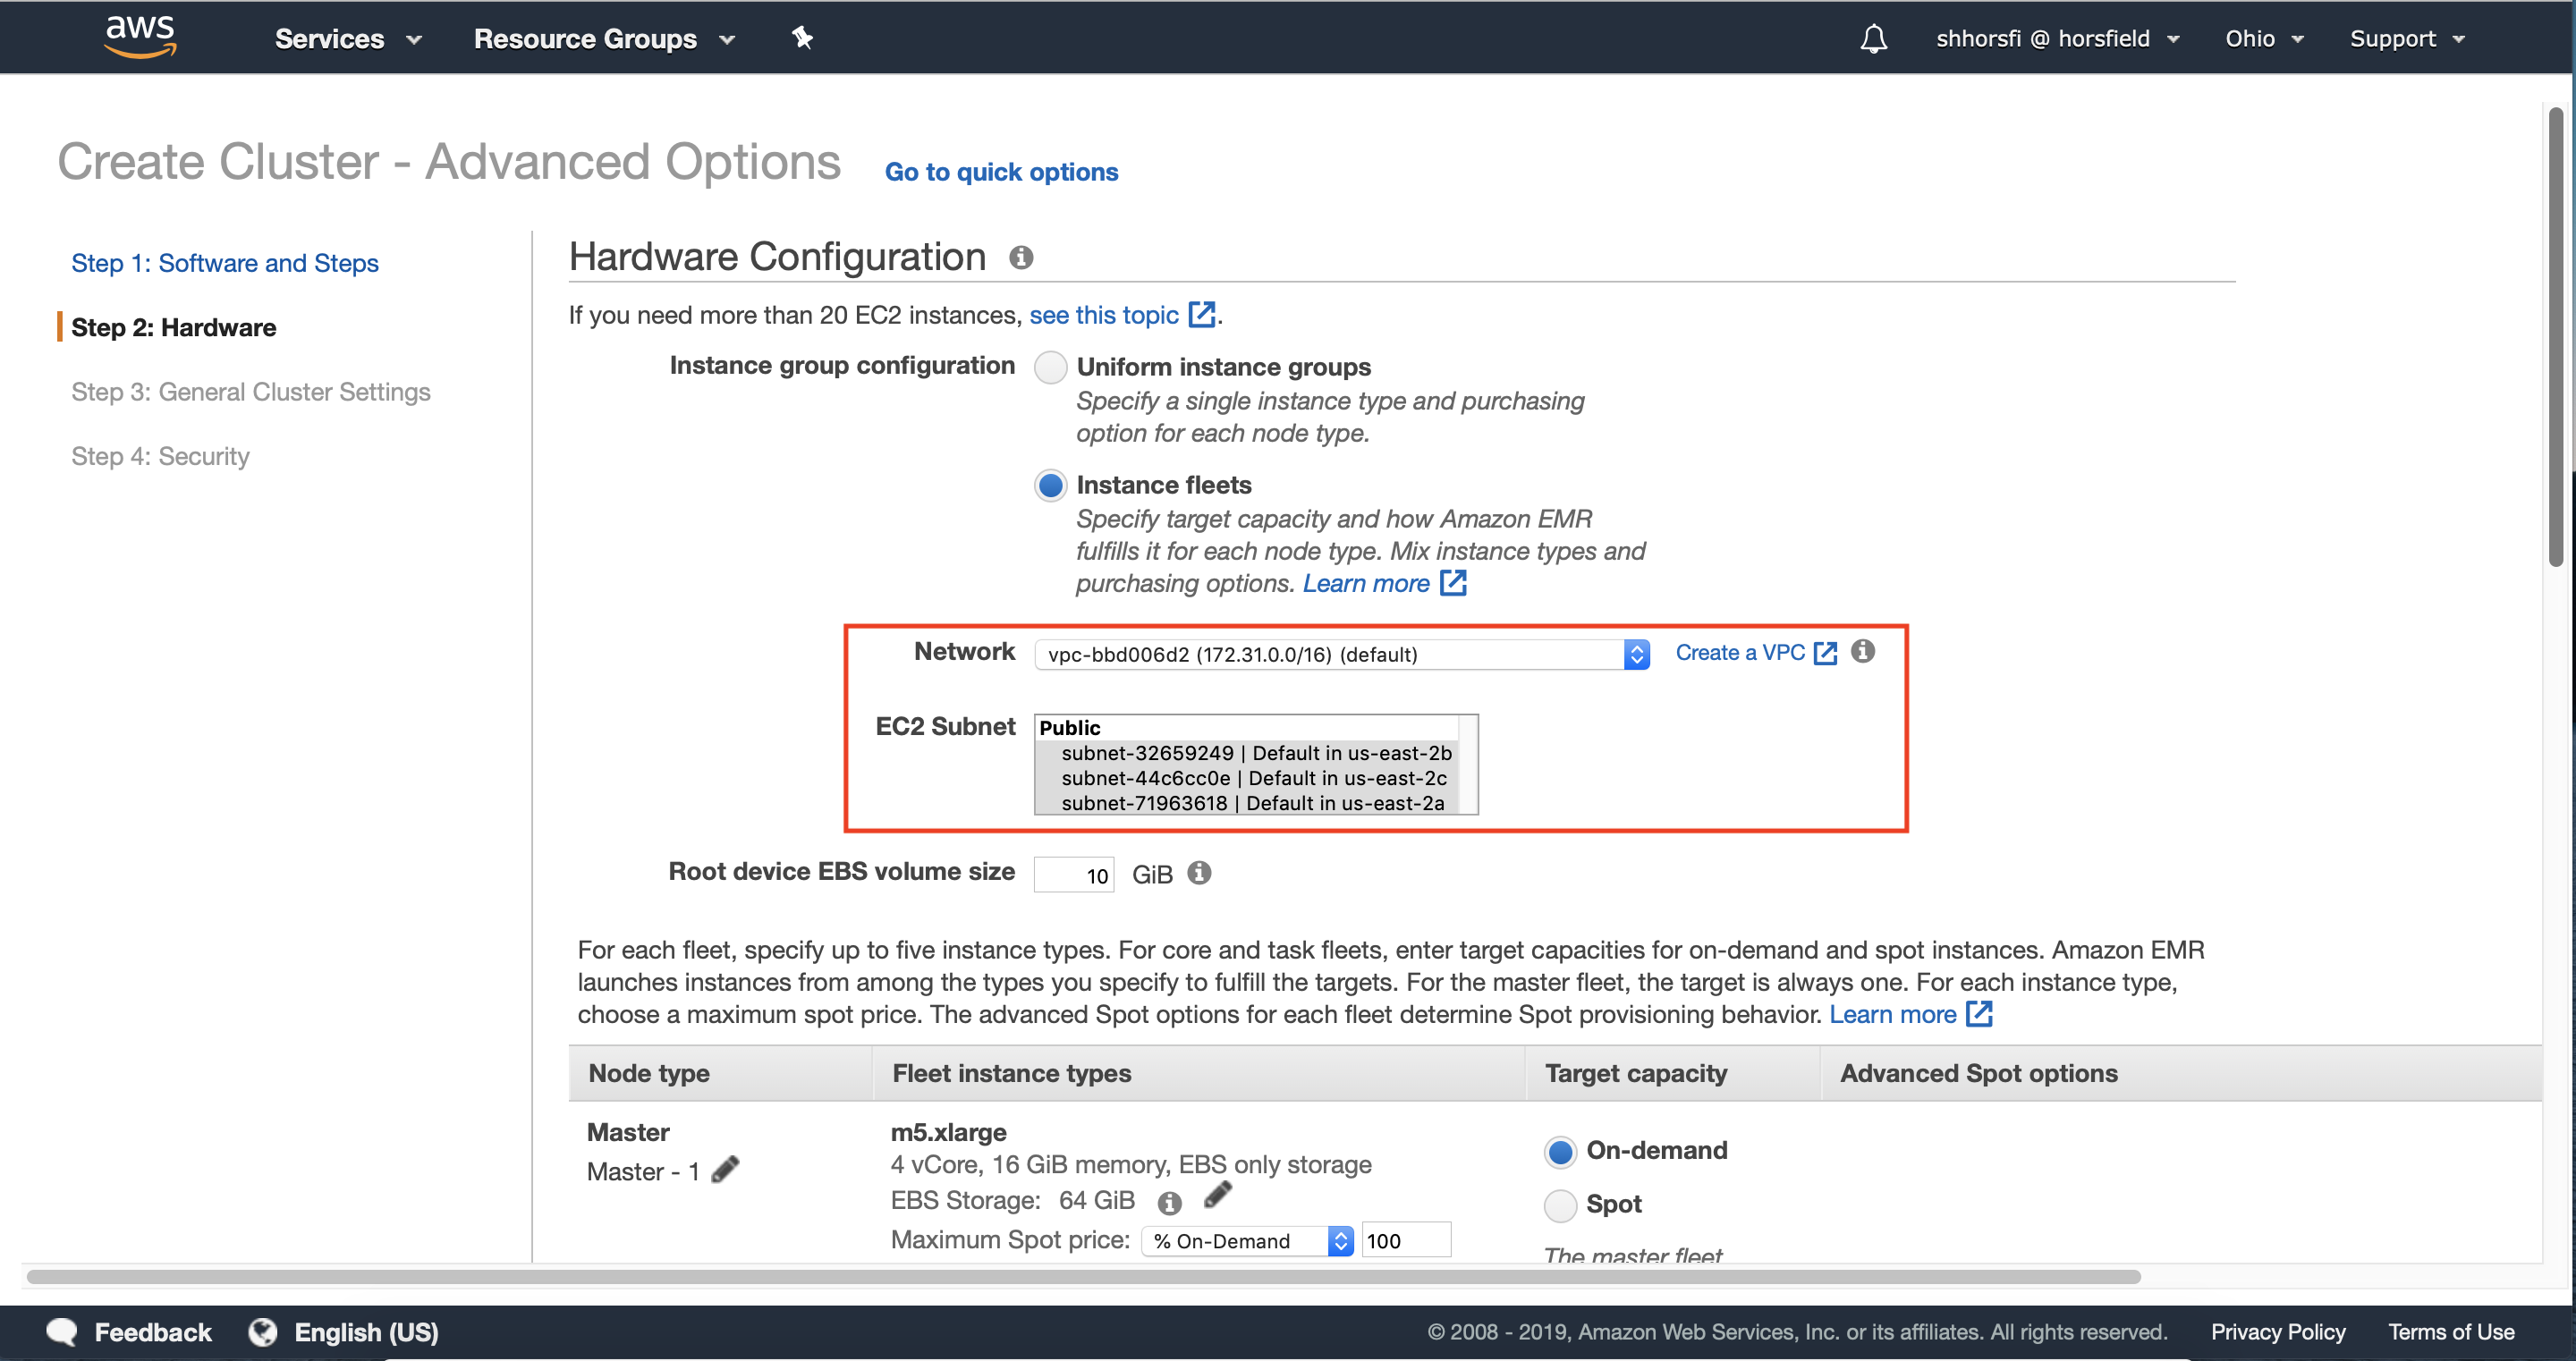
3.1 — Select instance fleets under the instance group configuration section.
Instance Fleets will allow us to implement Instance Diversification, which is a key best-practice when leveraging EC2 Spot Instances. Instance Diversification allows you to use multiple instance types, ensuring that Amazon EMR can allocate all of the capacity needed for your cluster while automatically handling interruptions.
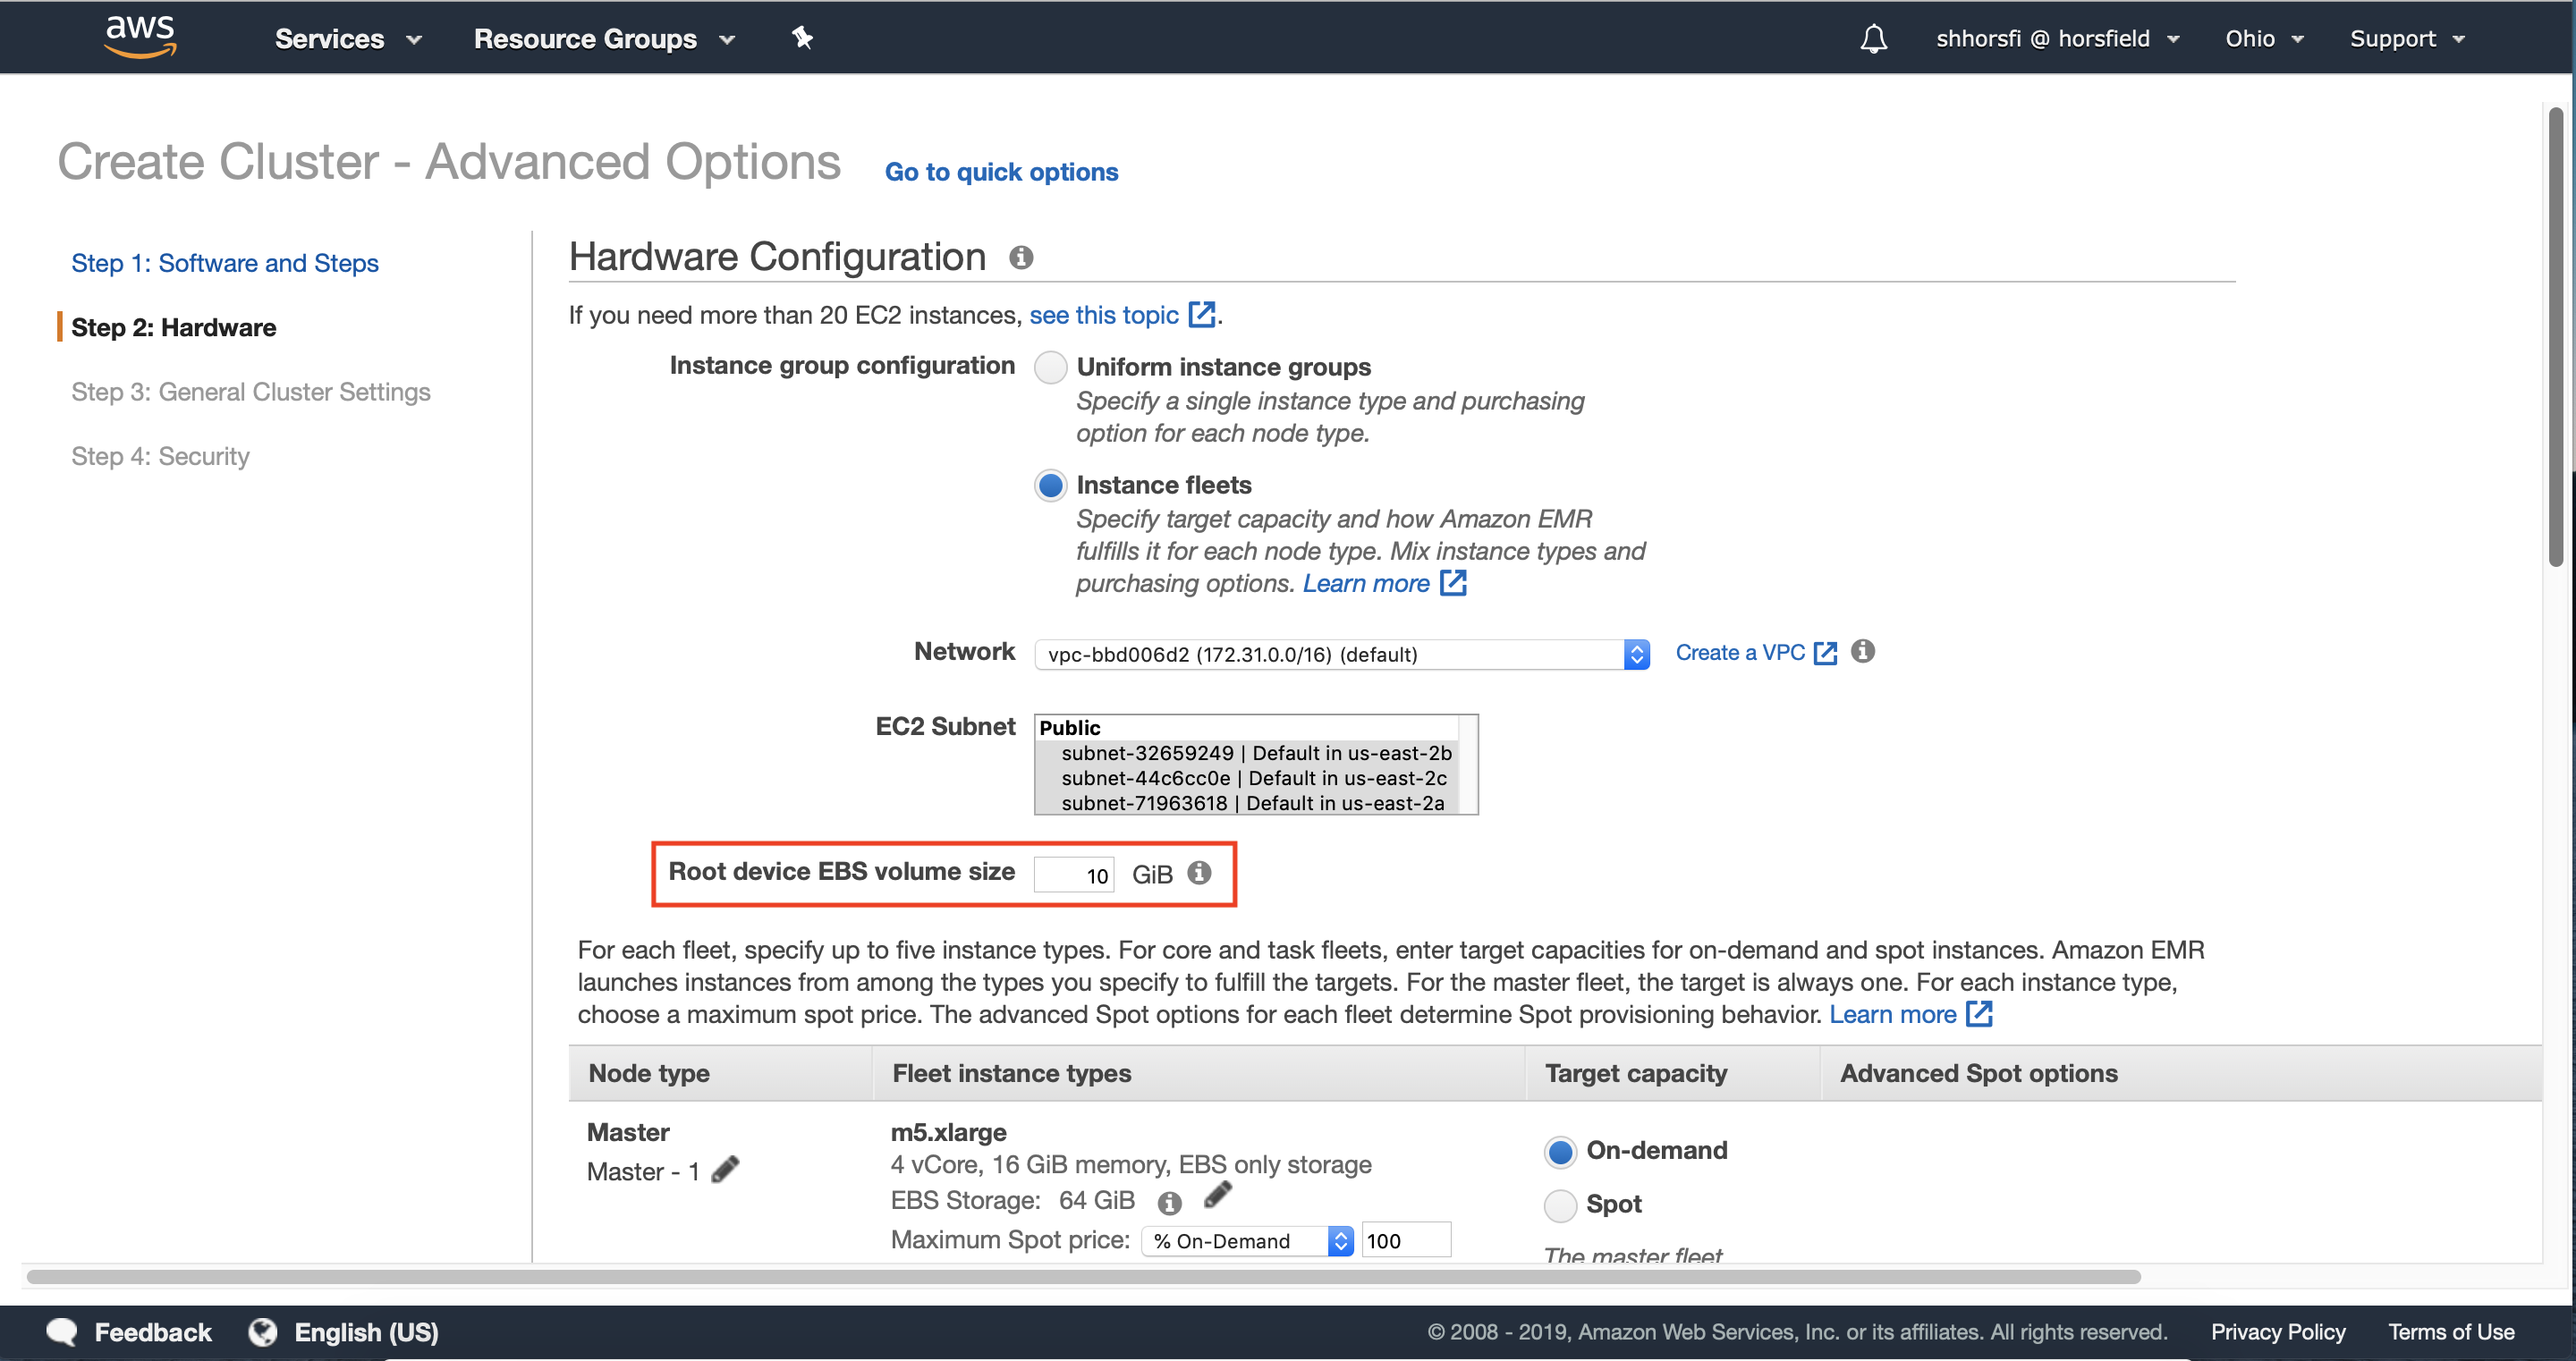
3.2 — Select the VPC and one or more subnets where you would like to deploy your Amazon EMR Cluster.
We recommend choosing more than one Availability Zone. Your cluster will still be deployed in a single Availability Zone, however selecting multiple Availability Zones allows Amazon EMR to look across all selected Availability Zones to deploy your cluster in the Availability Zone with the most EC2 Spot Capacity to run your cluster.
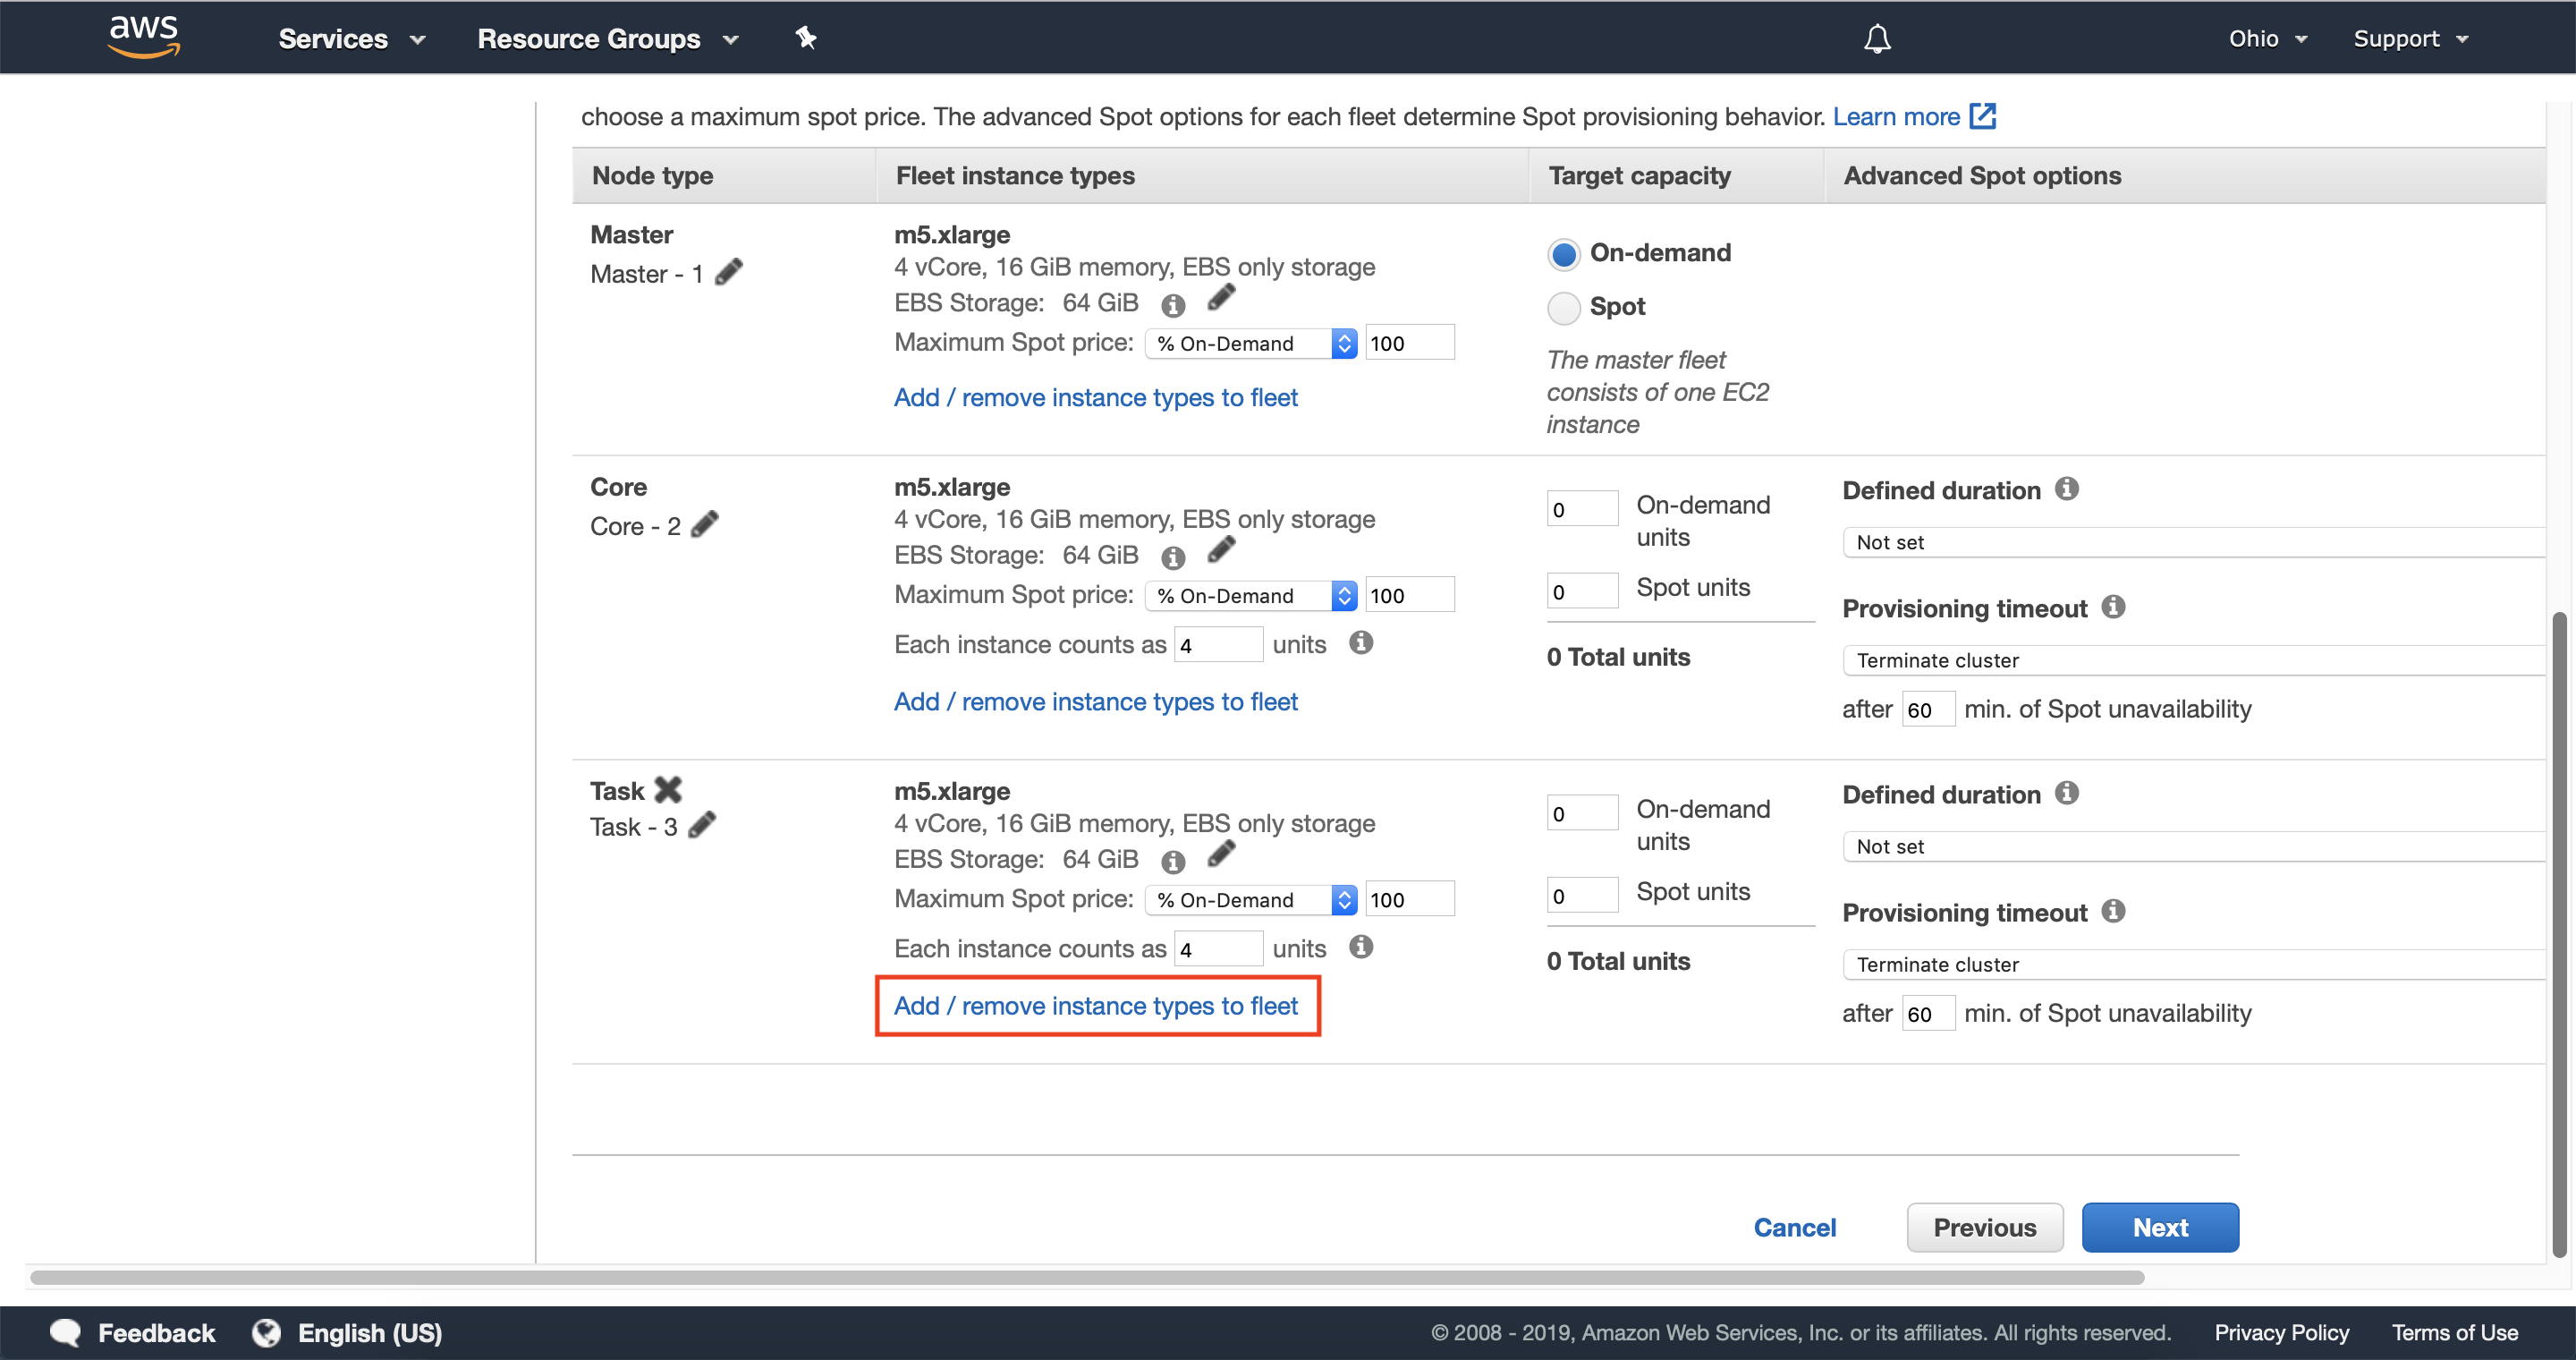
3.4 — Scroll down to the task instance fleet section and select add/remove instance types to fleet.
Instance Fleets allow you to specify up to five instance types per fleet so that Amazon EMR can provision capacity from multiple pools of available EC2 Spot Capacity.
We recommend using On-Demand instances for Master and Core nodes unless you are launching highly ephemeral workloads.
You can learn more about typical use-cases and review recommendations for using EC2 Spot Instances with Amazon EMR here.
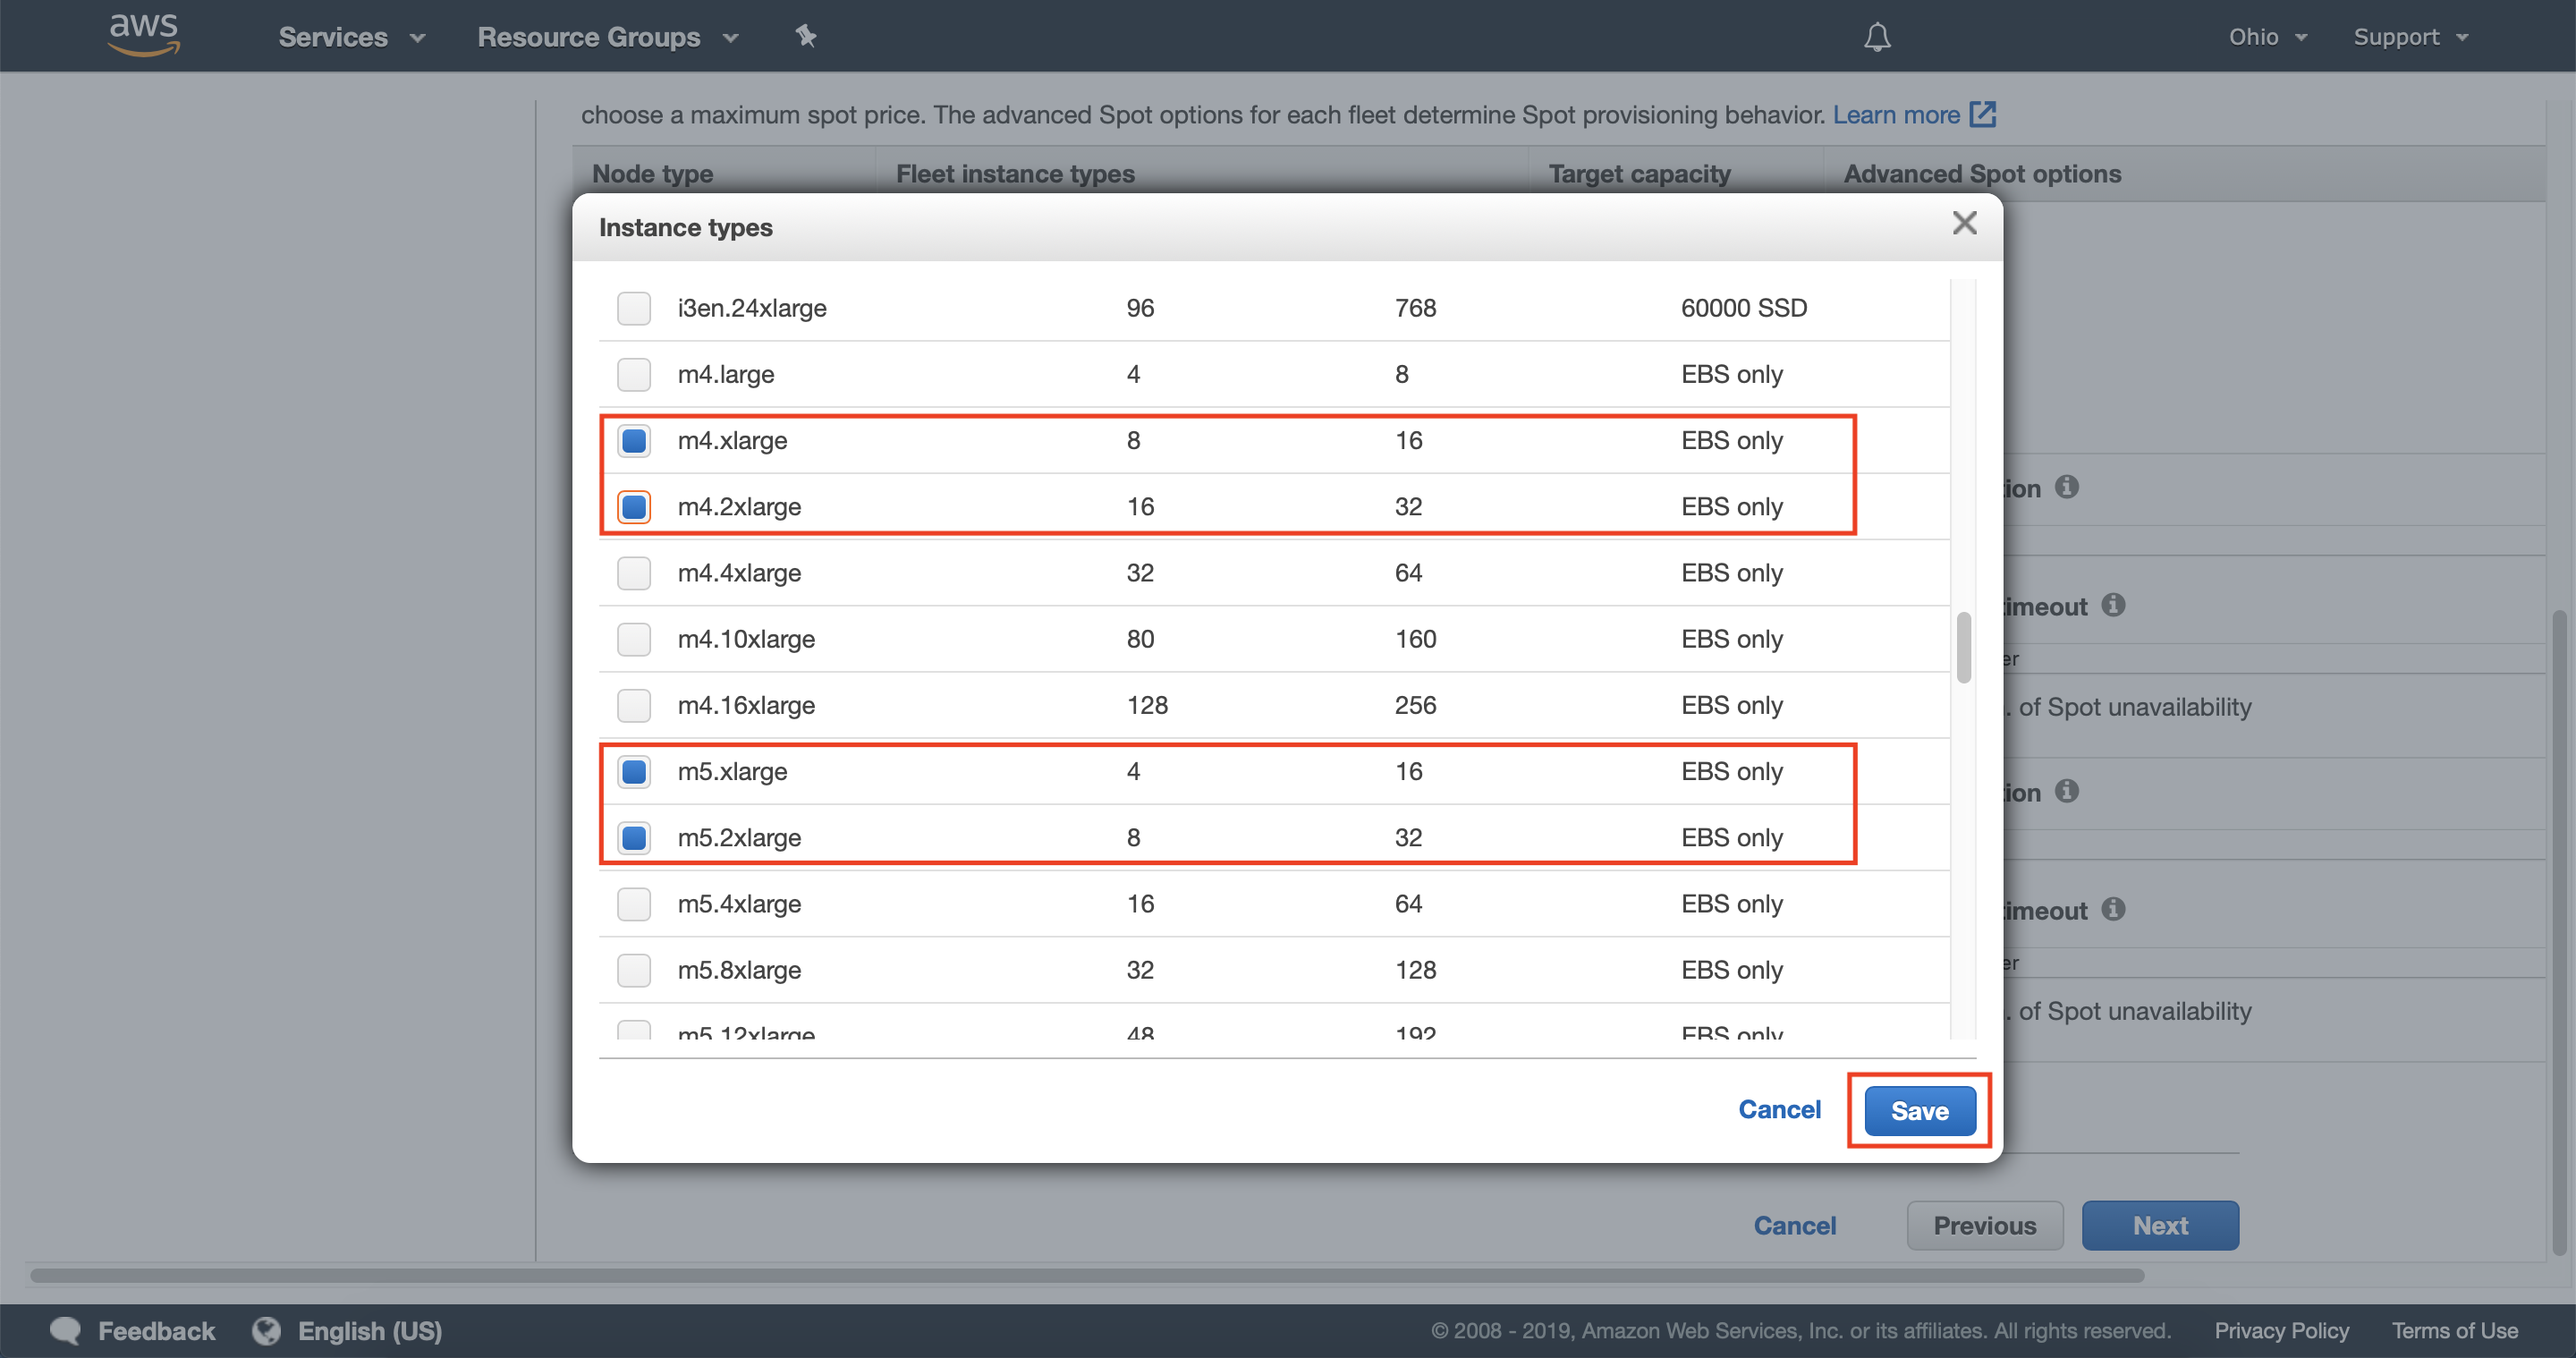
3.5 — Select up to five instance types to use in your task node instance fleet. You should consider instance types with similar vcpu to memory ratios across multiple instance families.
You can use the Spot Instance Advisor to learn more about the average cost savings and interruption rate for EMR compatible instances.
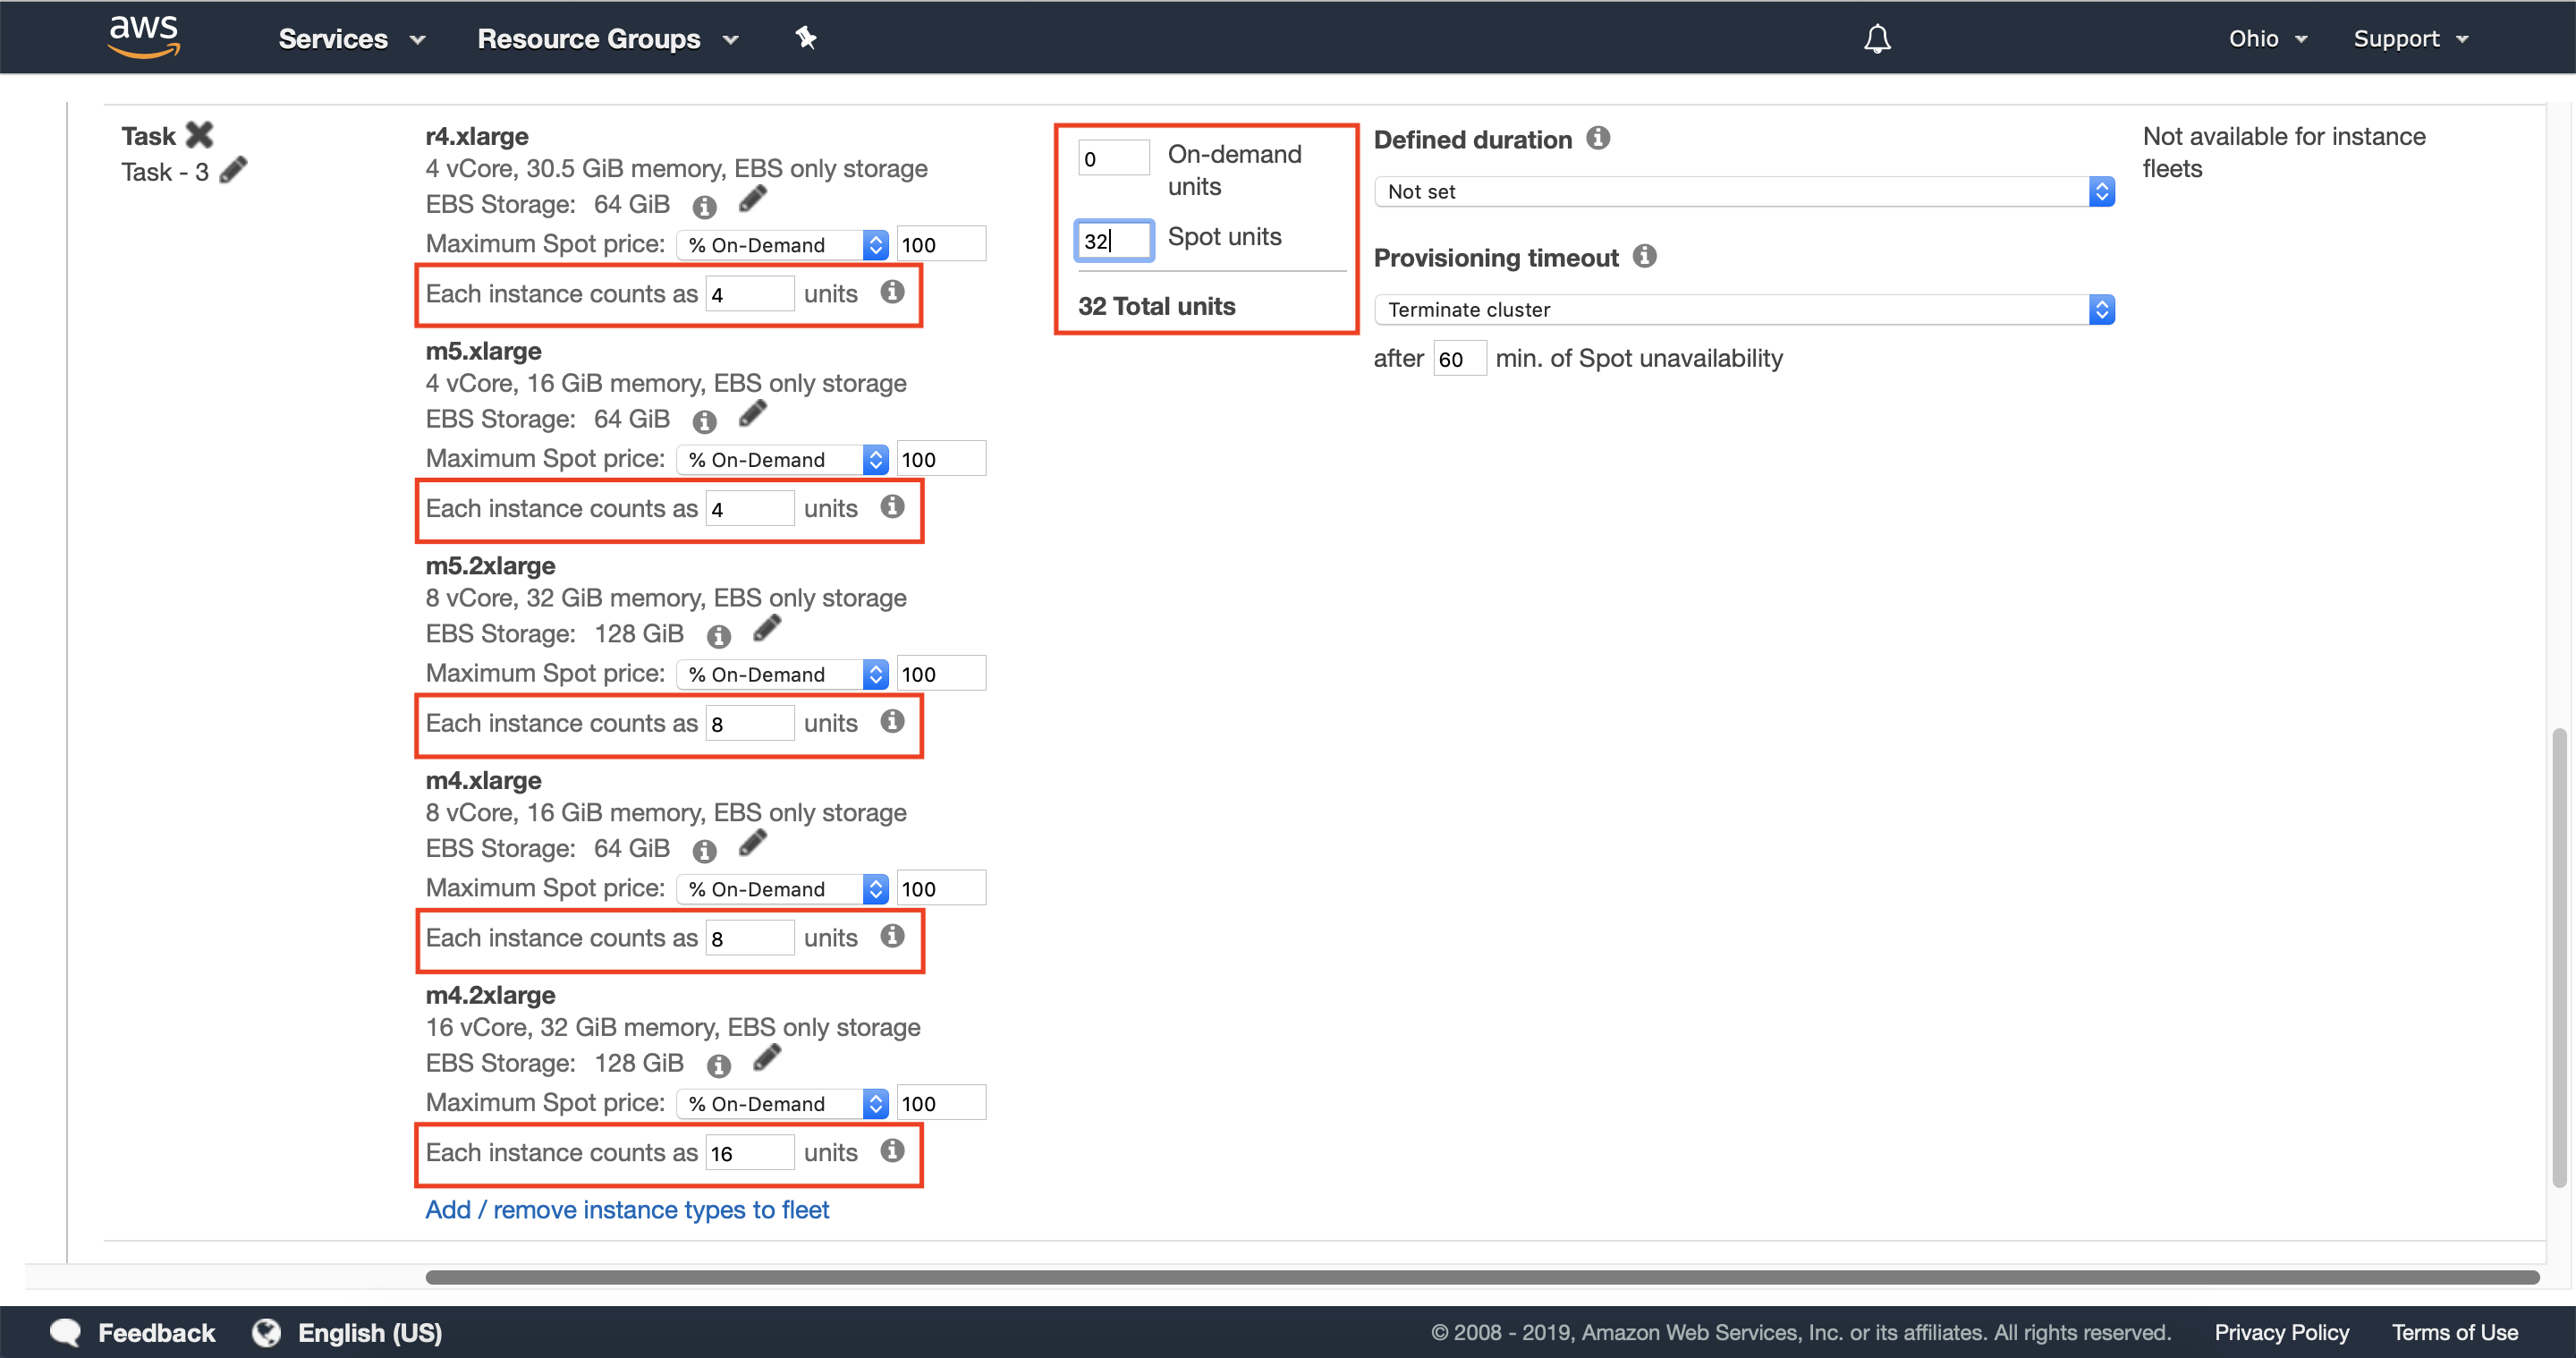
3.6 — Configure your Instance Fleet’s On-demand and Spot units, and optionally configure the units of each instance type.
Increasing the number of On-demand units and Spot units will determine how much capacity is provisioned for your cluster. To get started quickly and reduce the cost of this walkthrough it’s recommended that you only deploy a small number of Spot units (8 for example) and no On-demand units.
By default, the units of each instance type will match the number of vCores for that instance type. You can configure this as needed to give different instance types more weight, which will be taken into account when Amazon EMR fulfills capacity for your instance fleet.
You can also specify the number of units that will be fulfilled from On-demand Instances or EC2 Spot Instances. This allows you to combine multiple instance types and purchase options to achieve Instance Diversification, and the capacity required for your cluster.
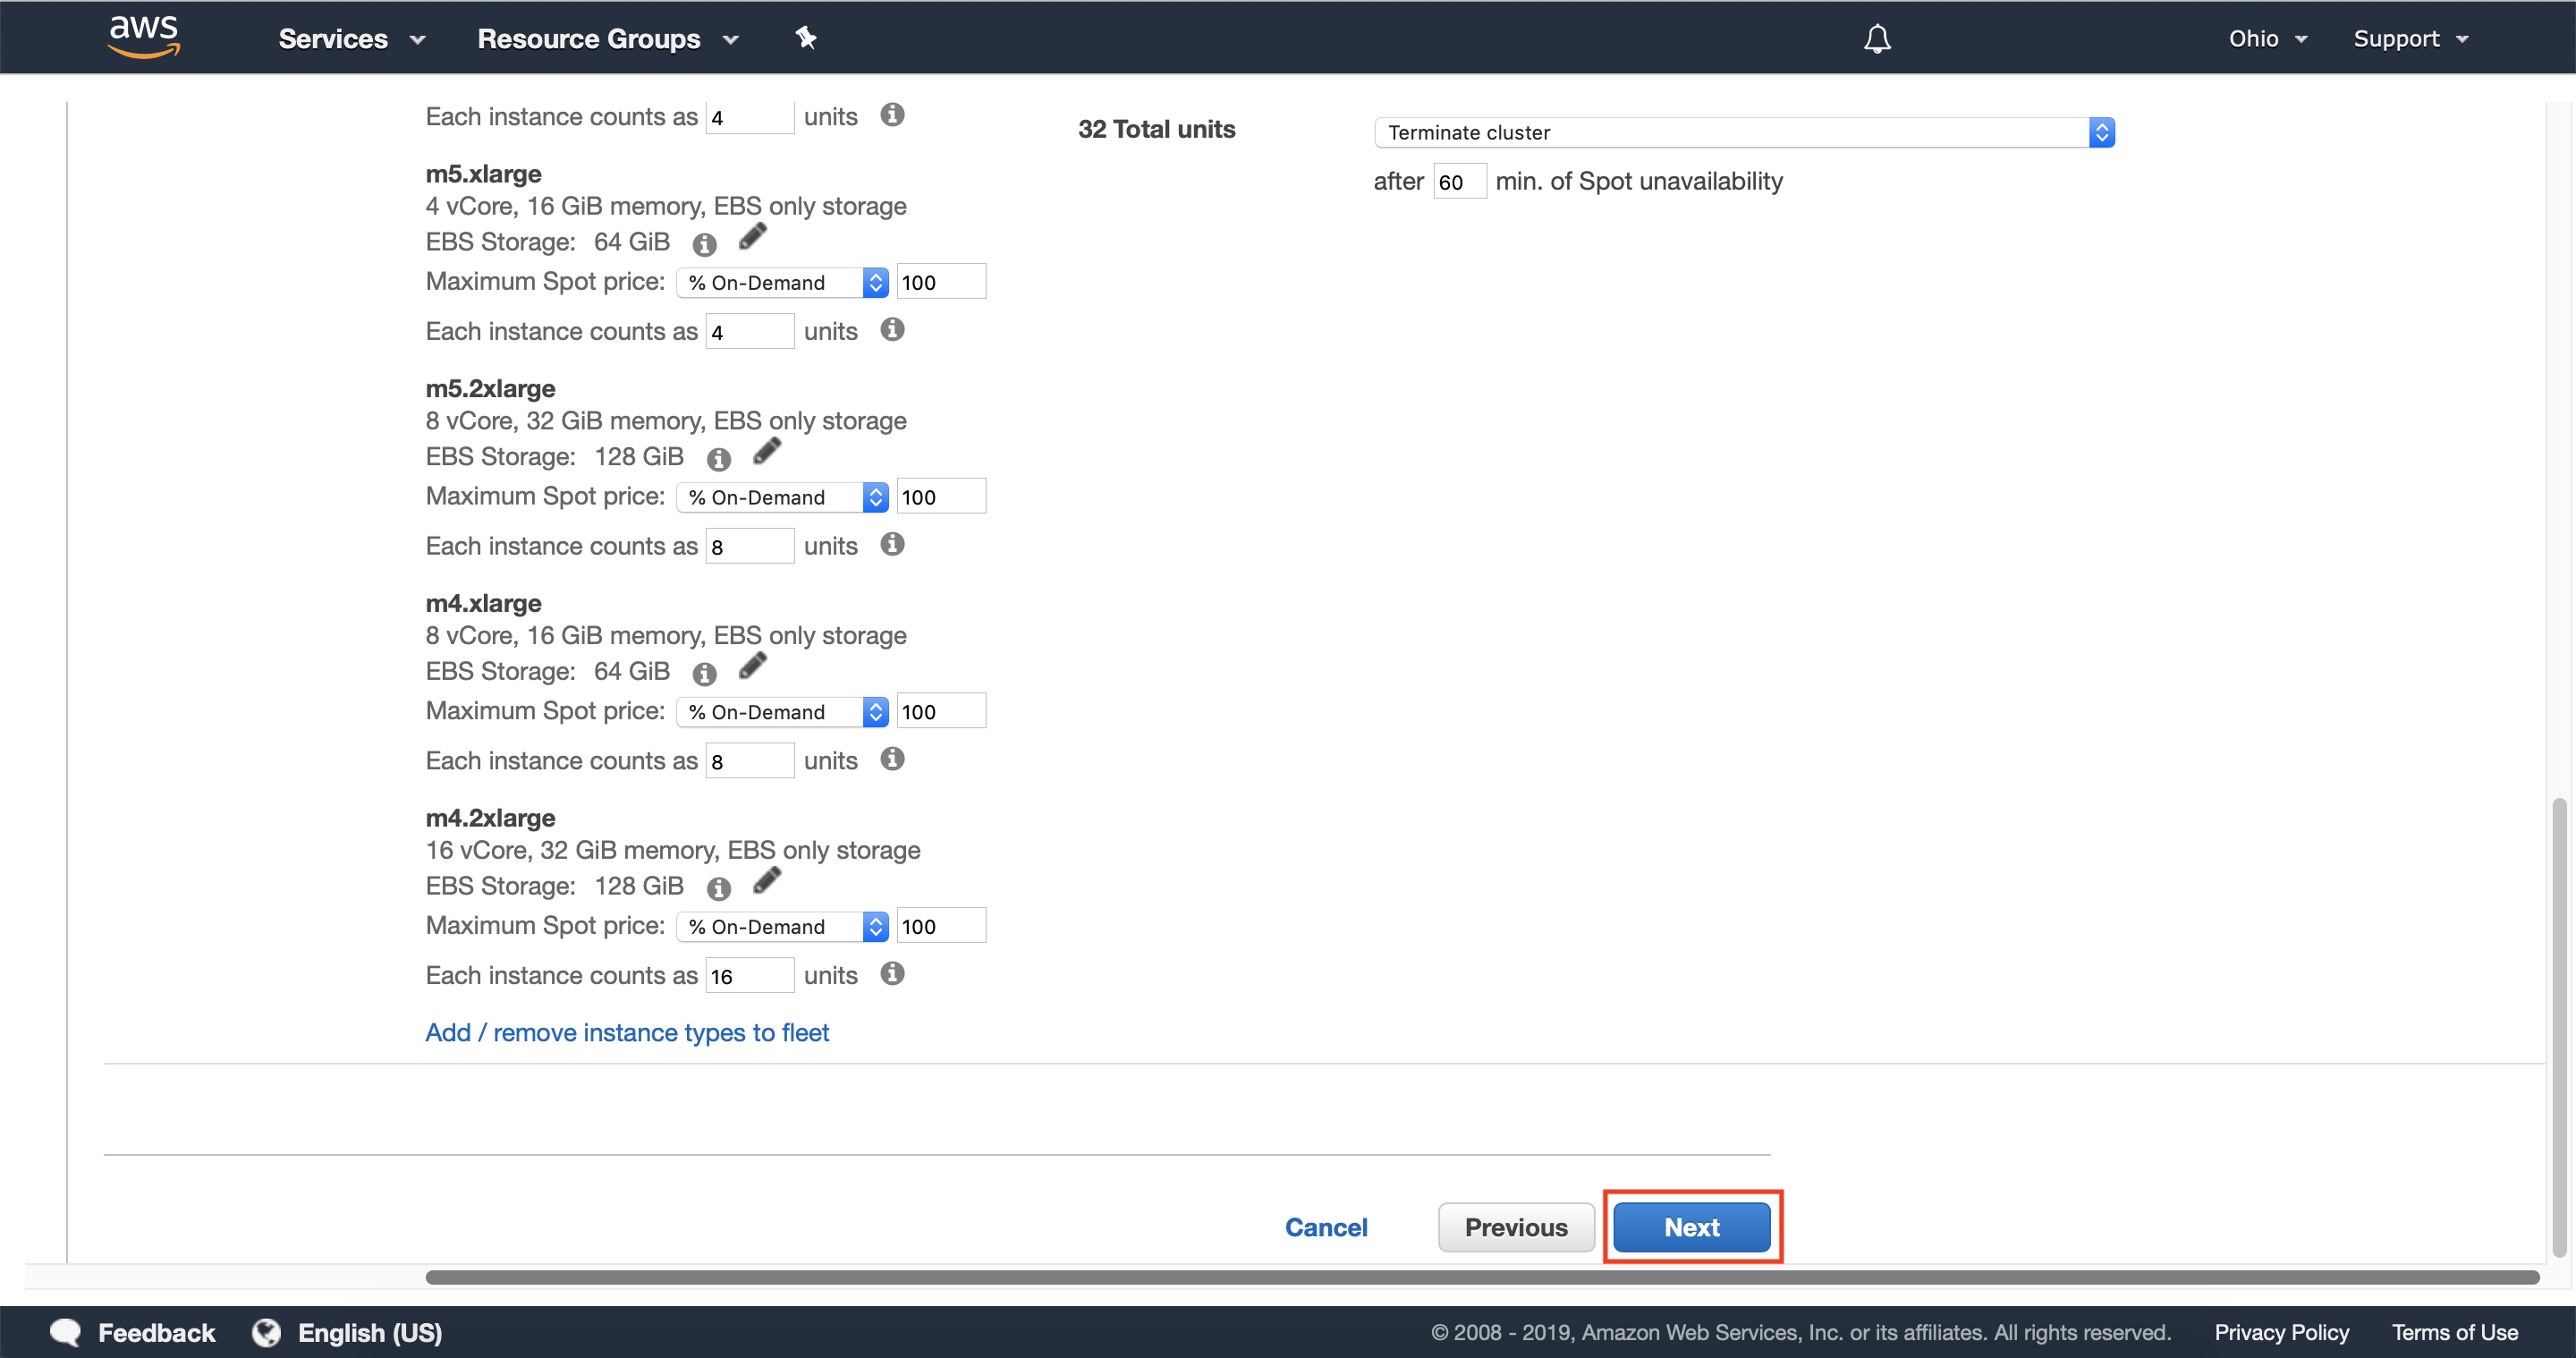
3.7 — Optionally configure the defined duration and provisioning timeout behavior for your cluster.
Provisioning timeout allows you to define the behavior of the cluster if Amazon EMR is unable to provision capacity for your Instance Fleet. The default behavior is Terminate; however, you can optionally have the cluster attempt to provision On-demand instances rather than Spot Instances if the timeout is exceeded.
You can learn more about these options here.
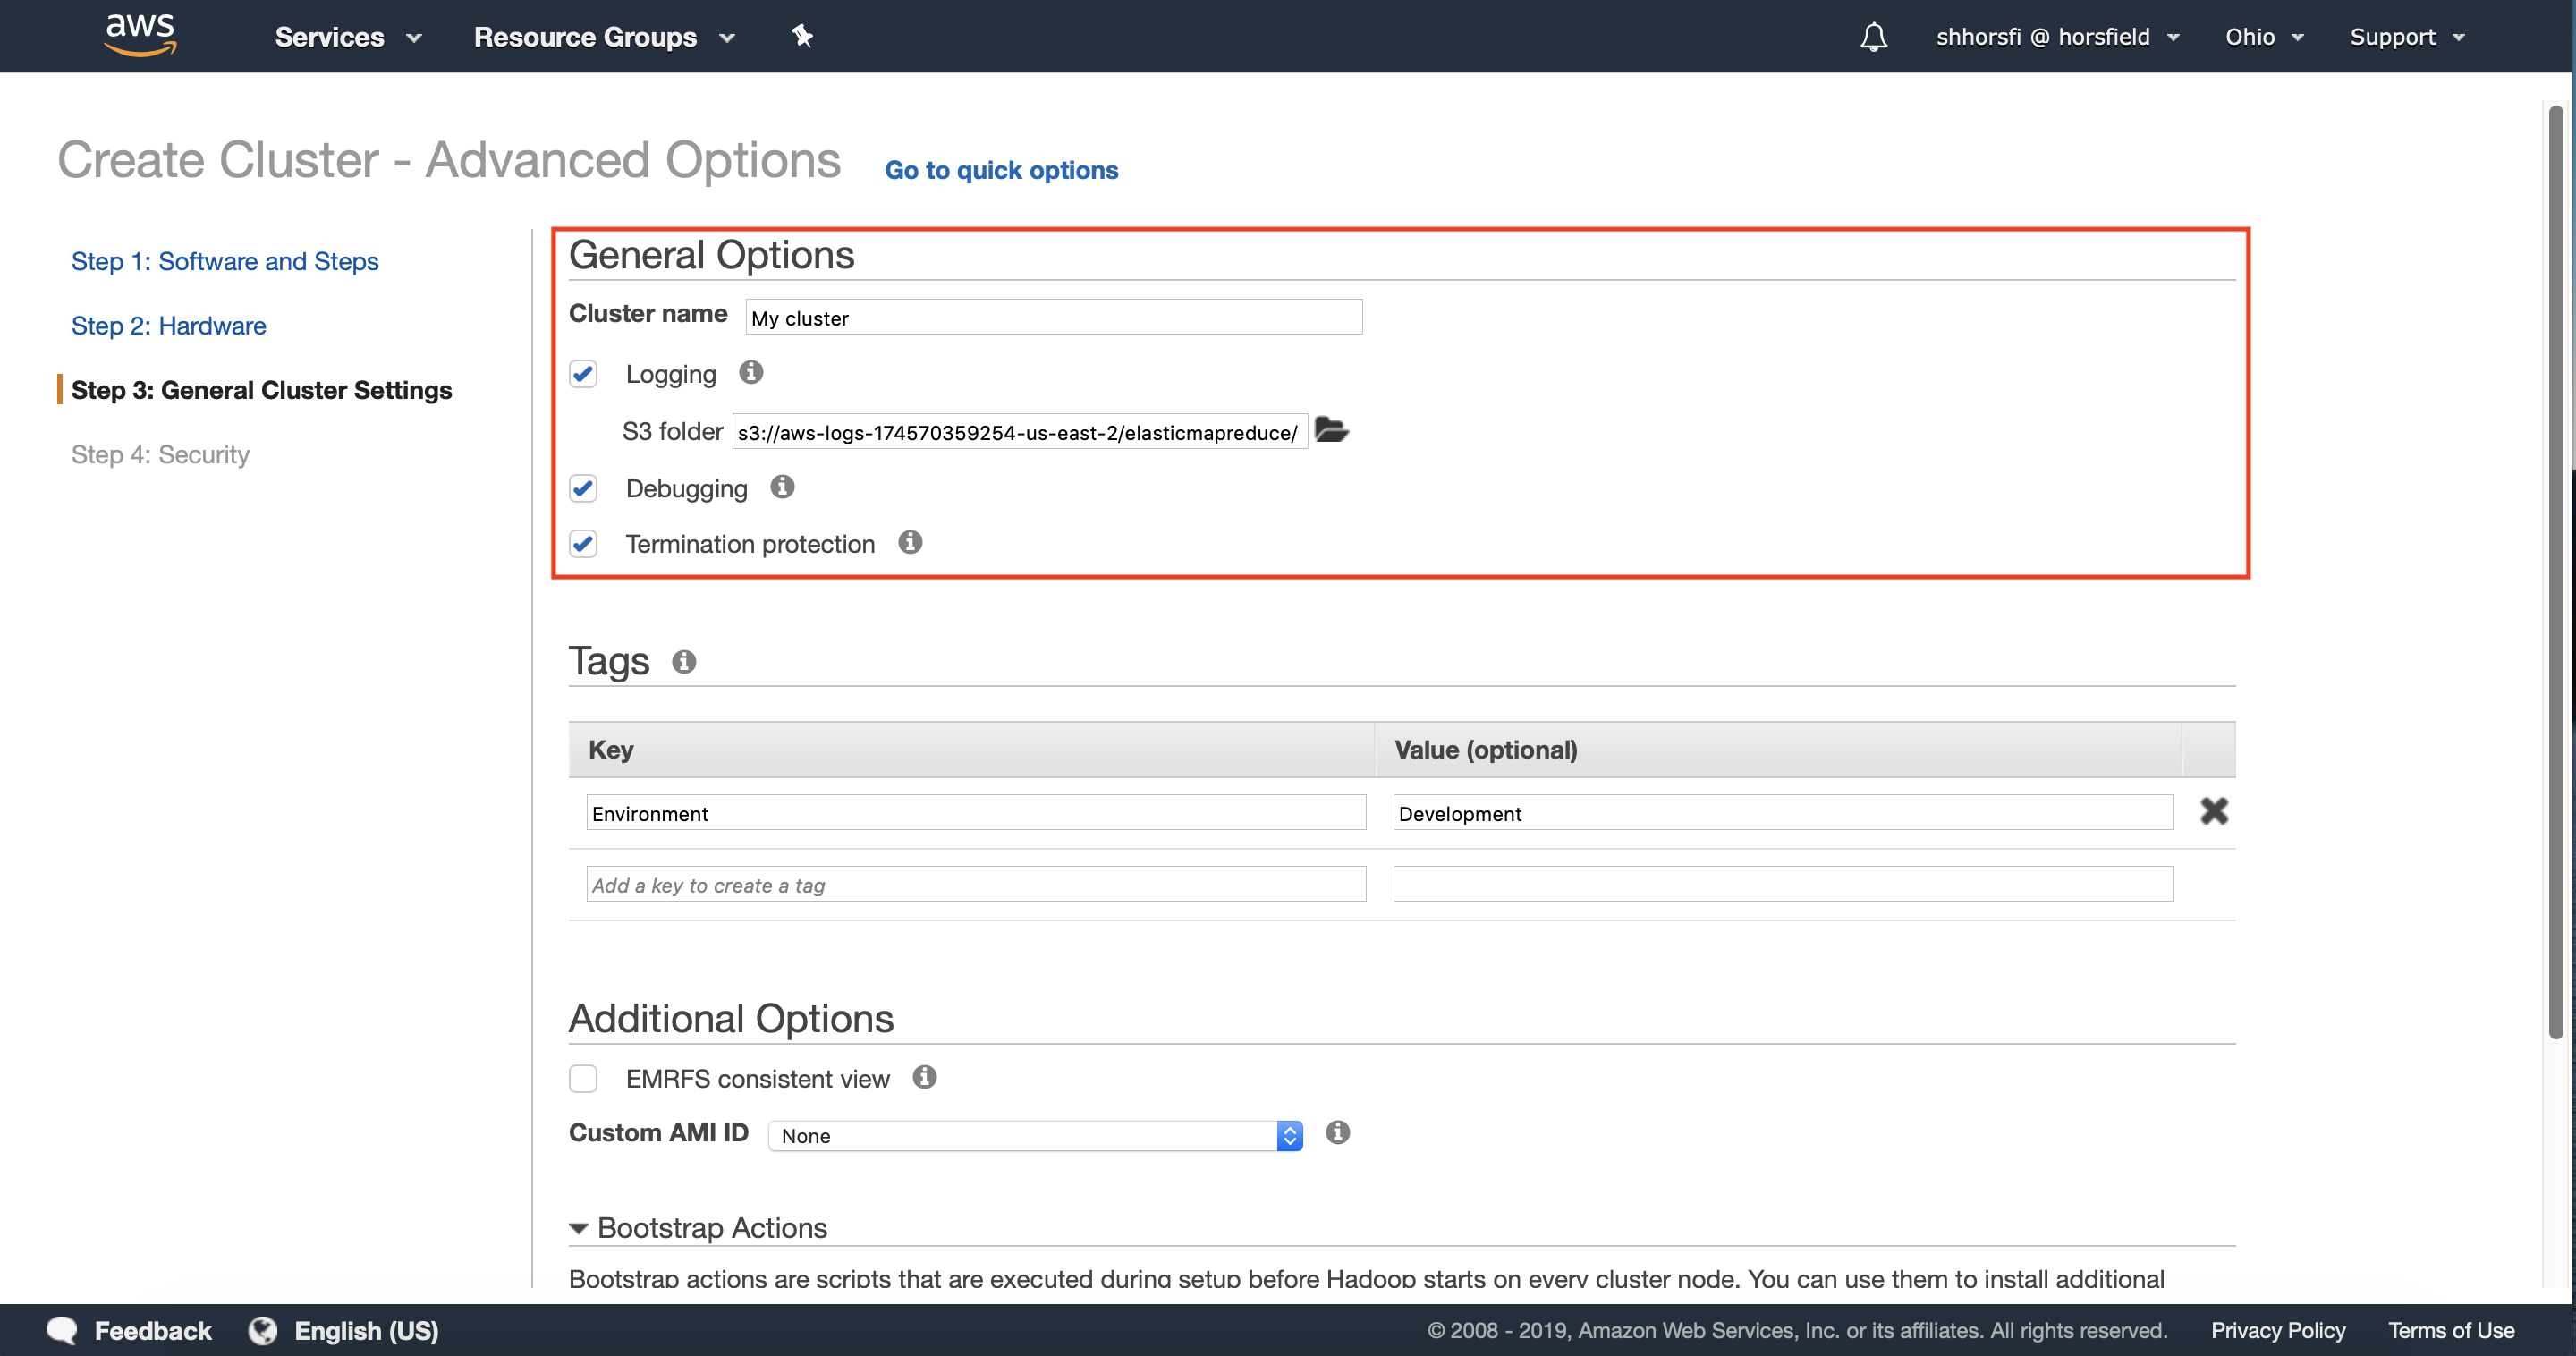
Step 4: General cluster settings
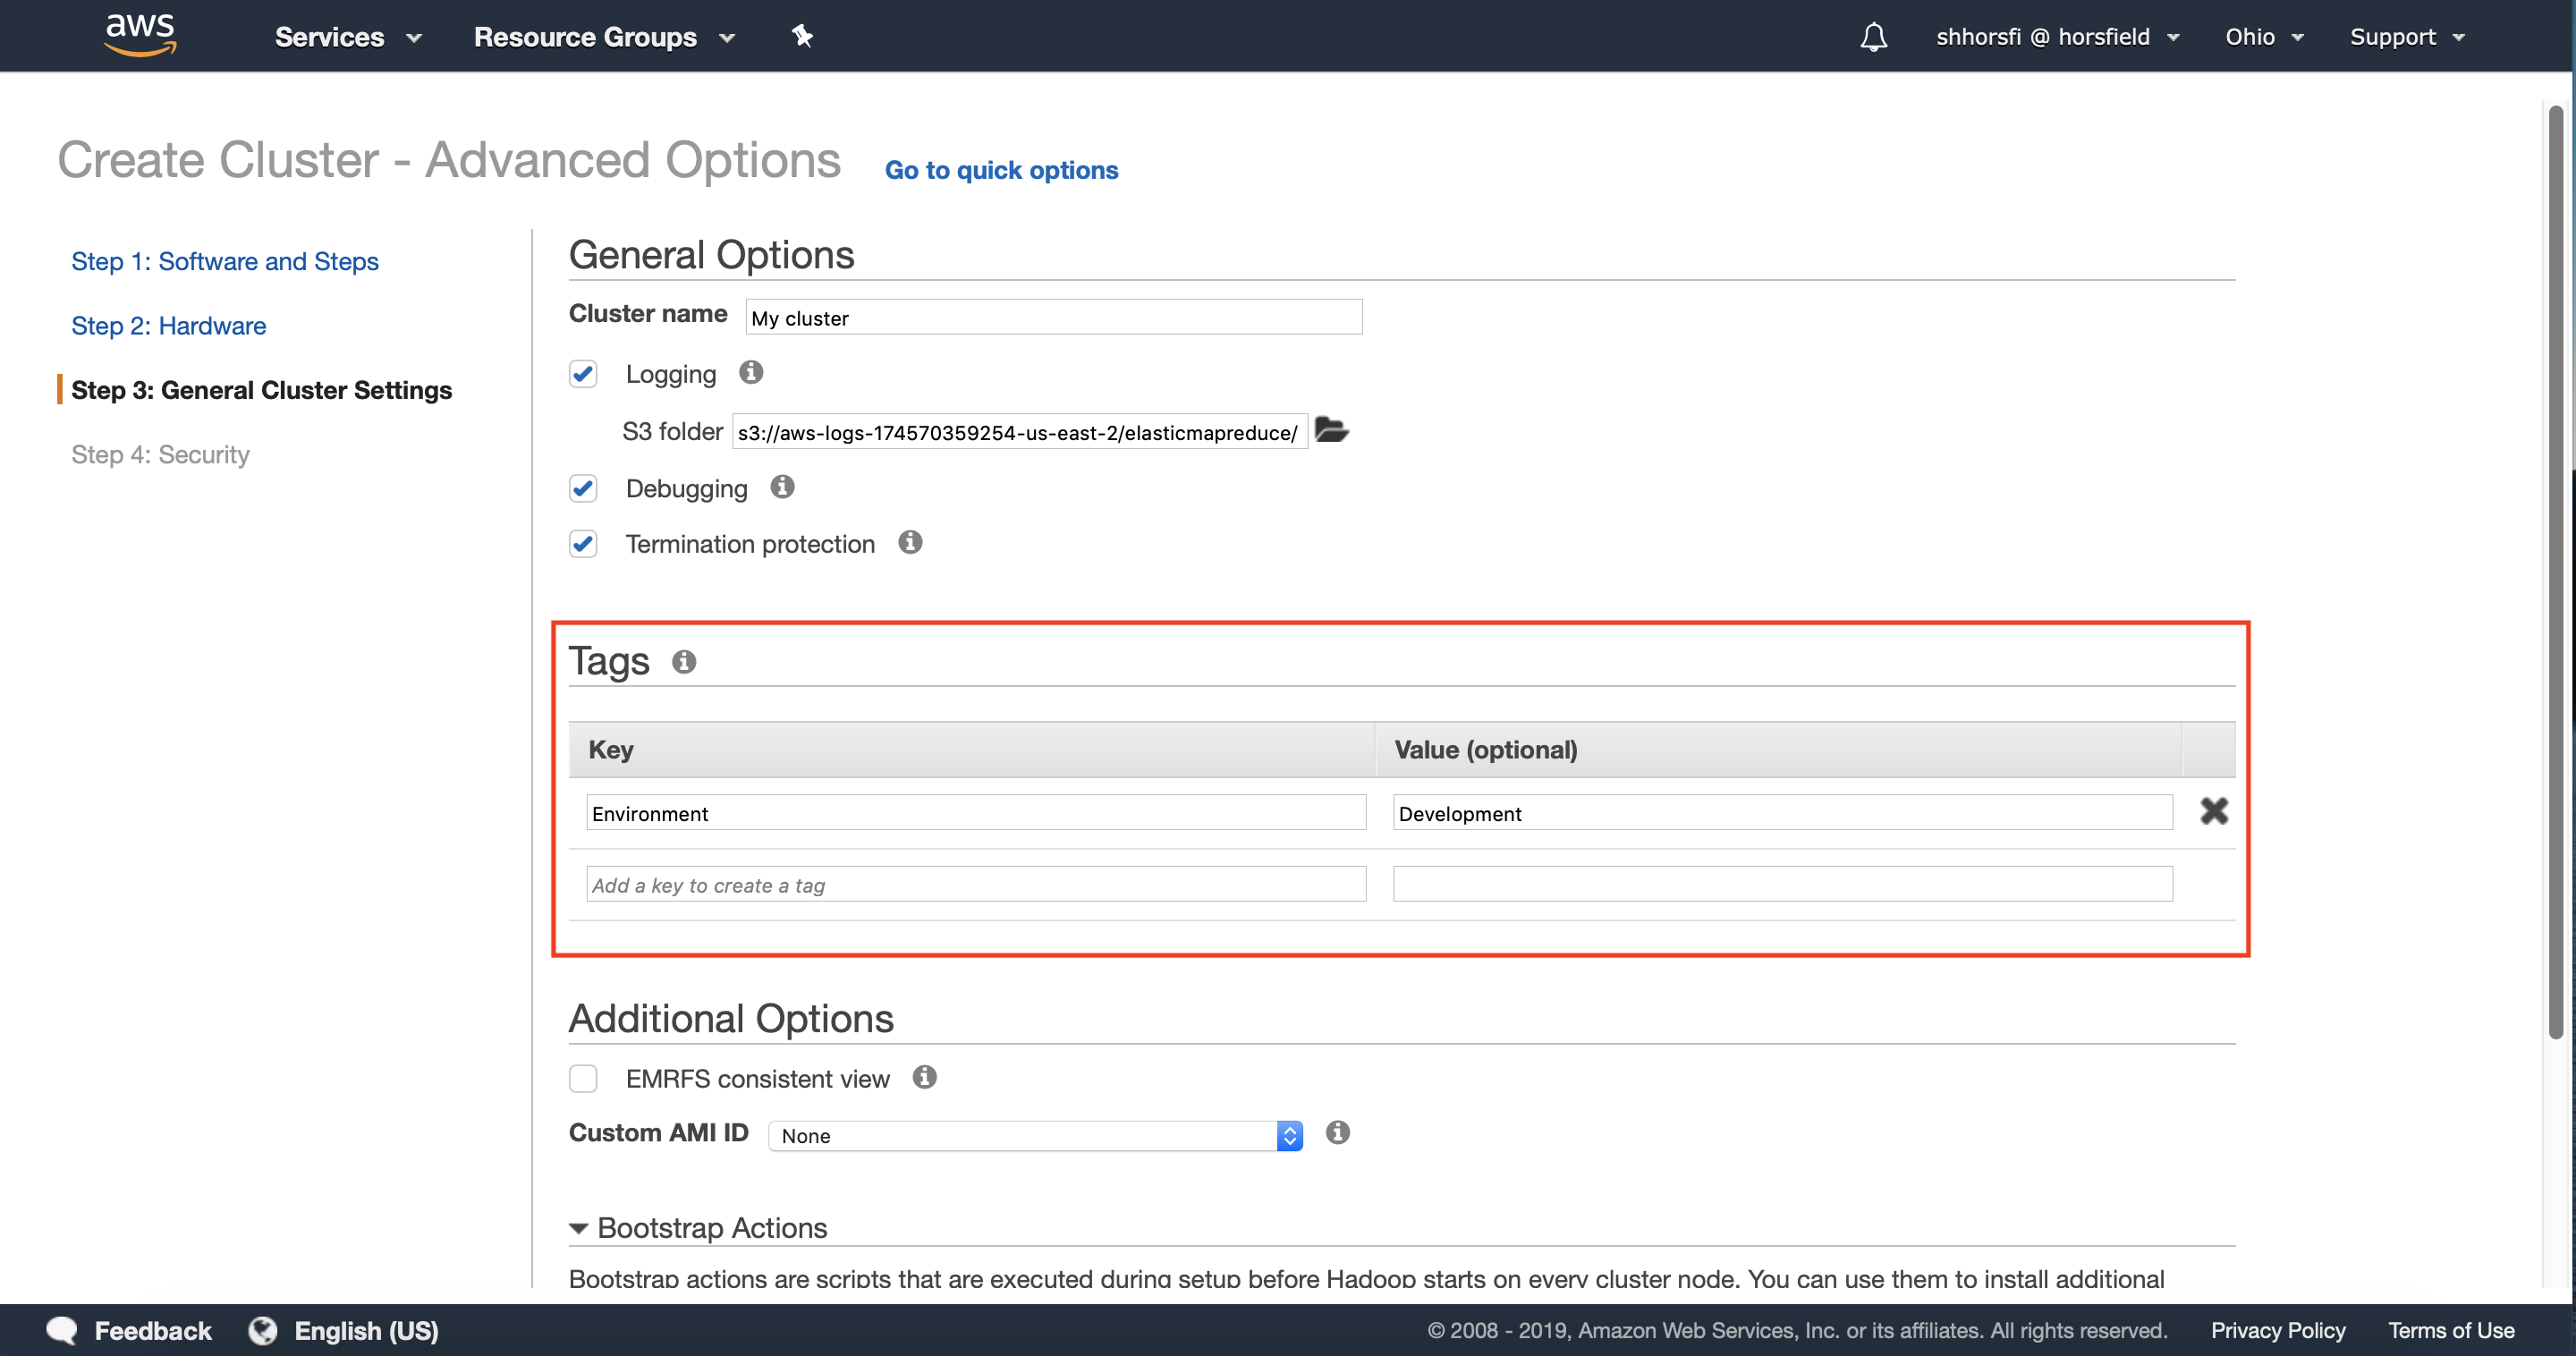
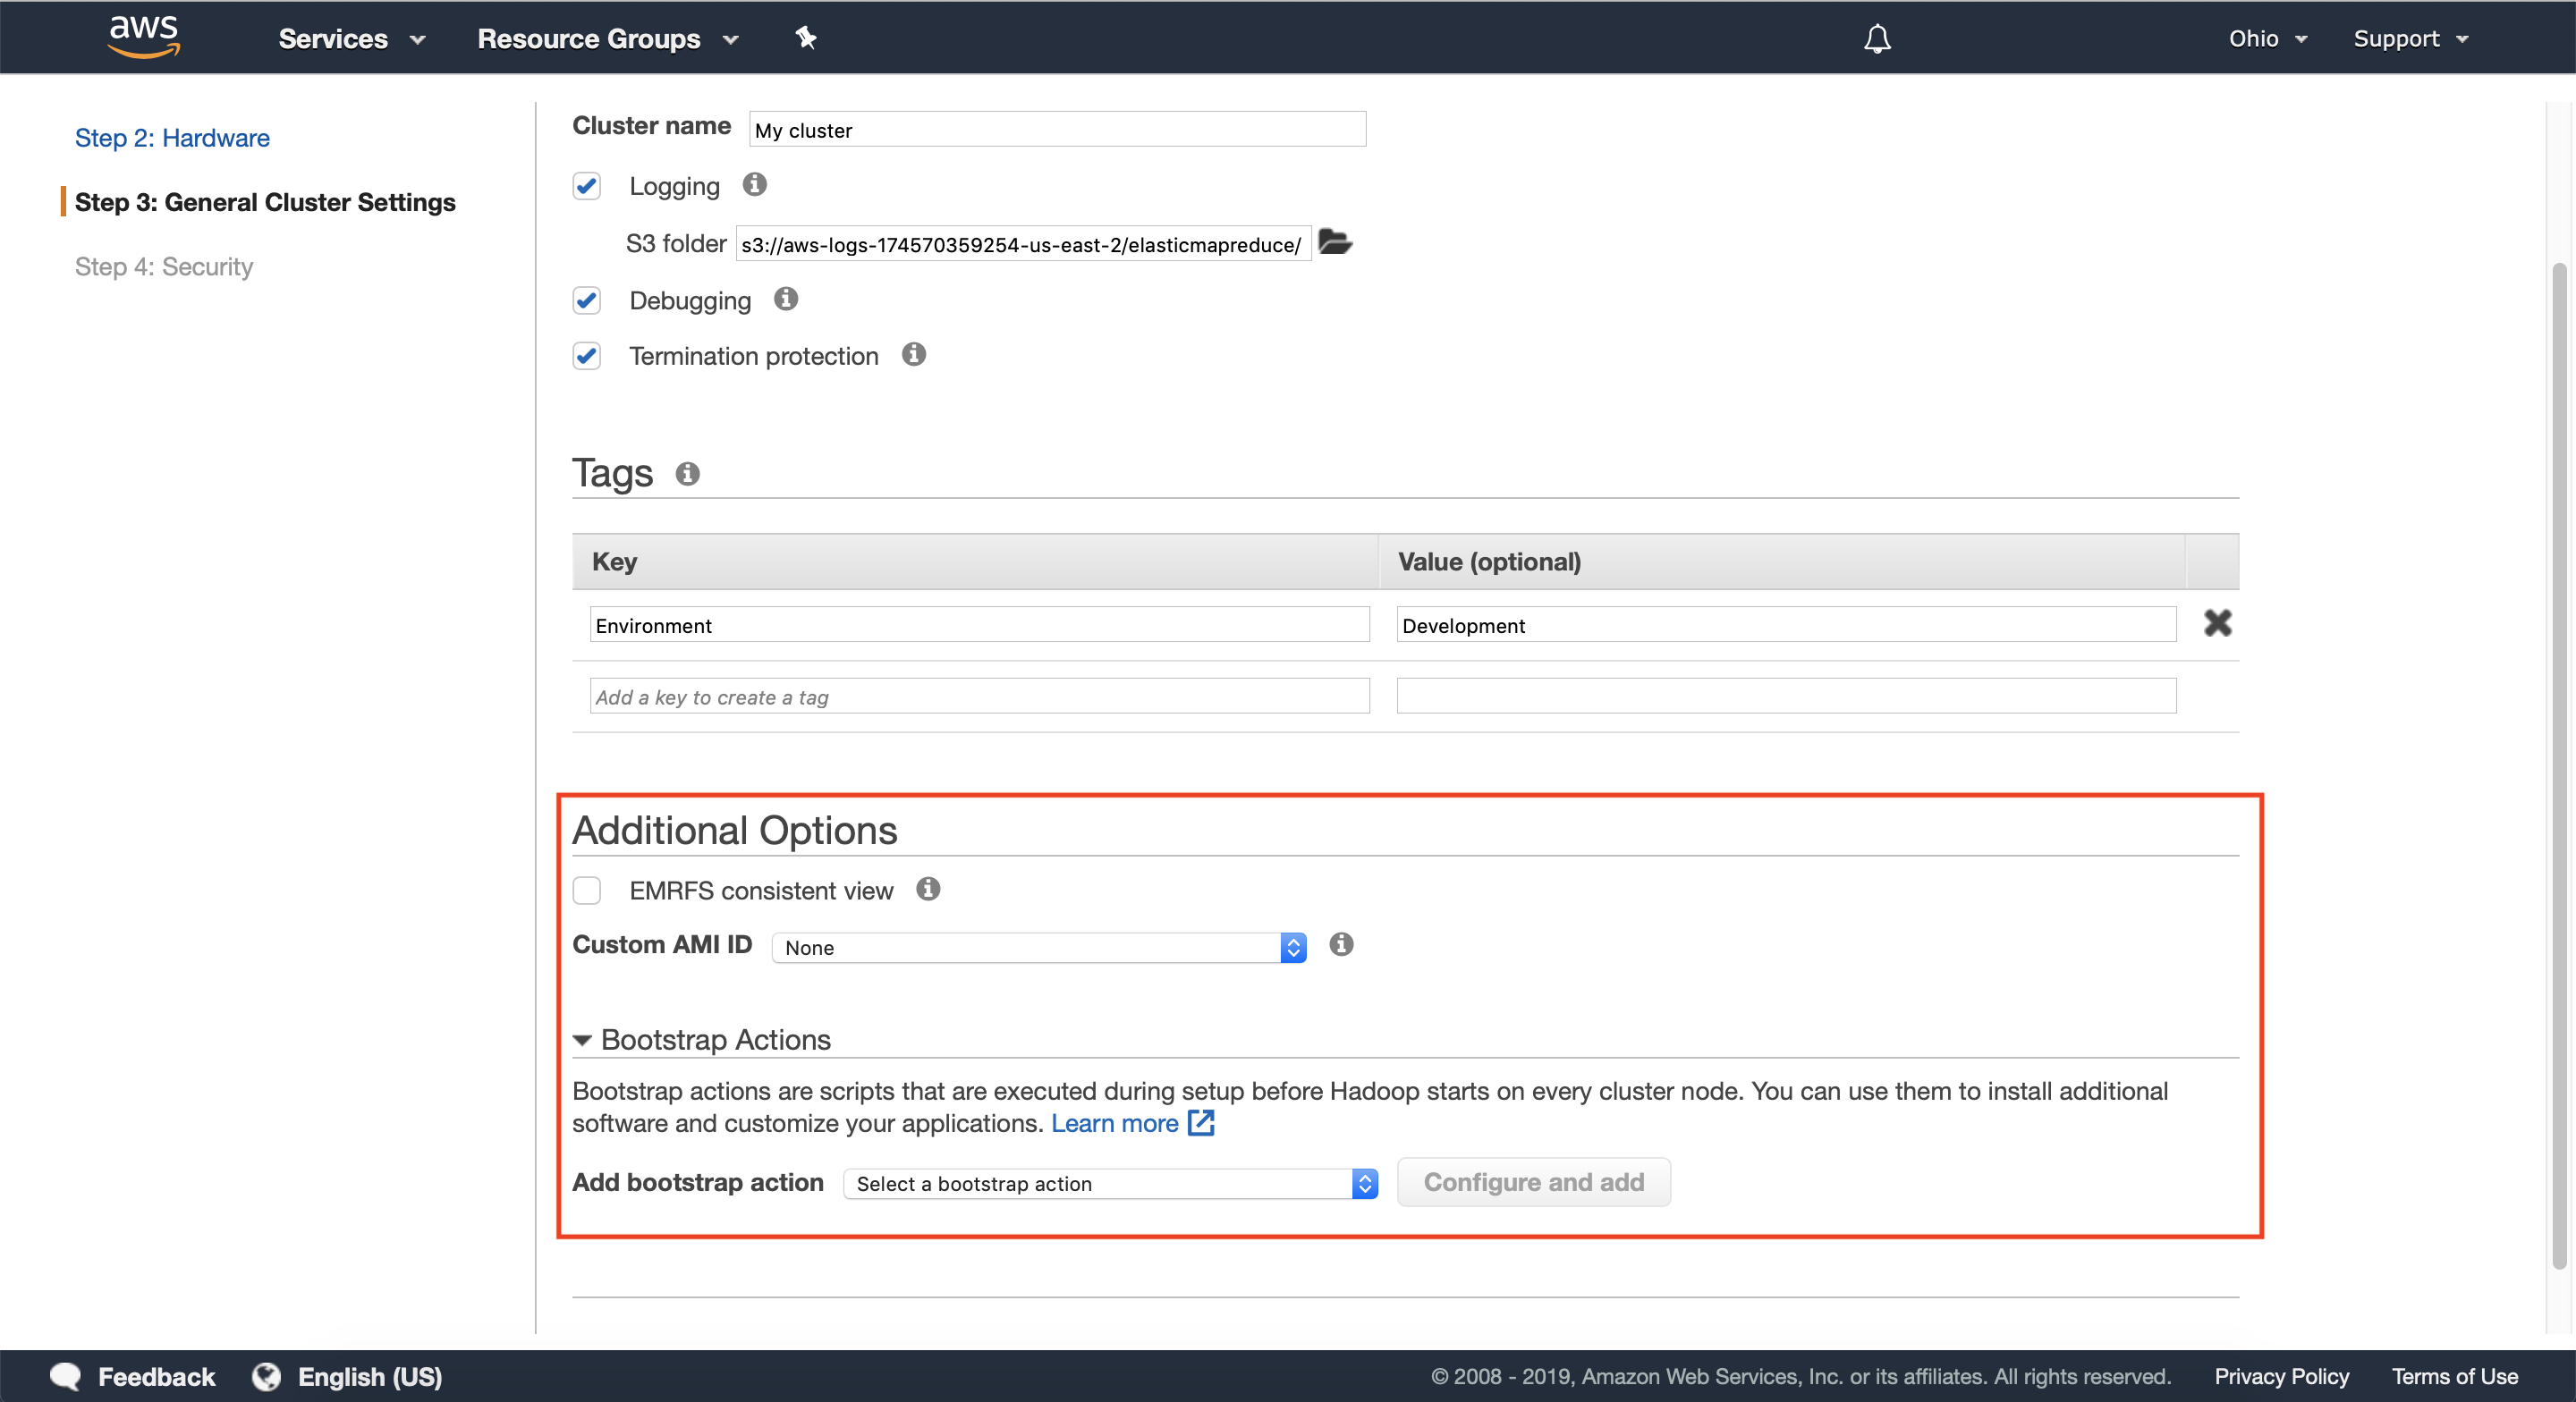
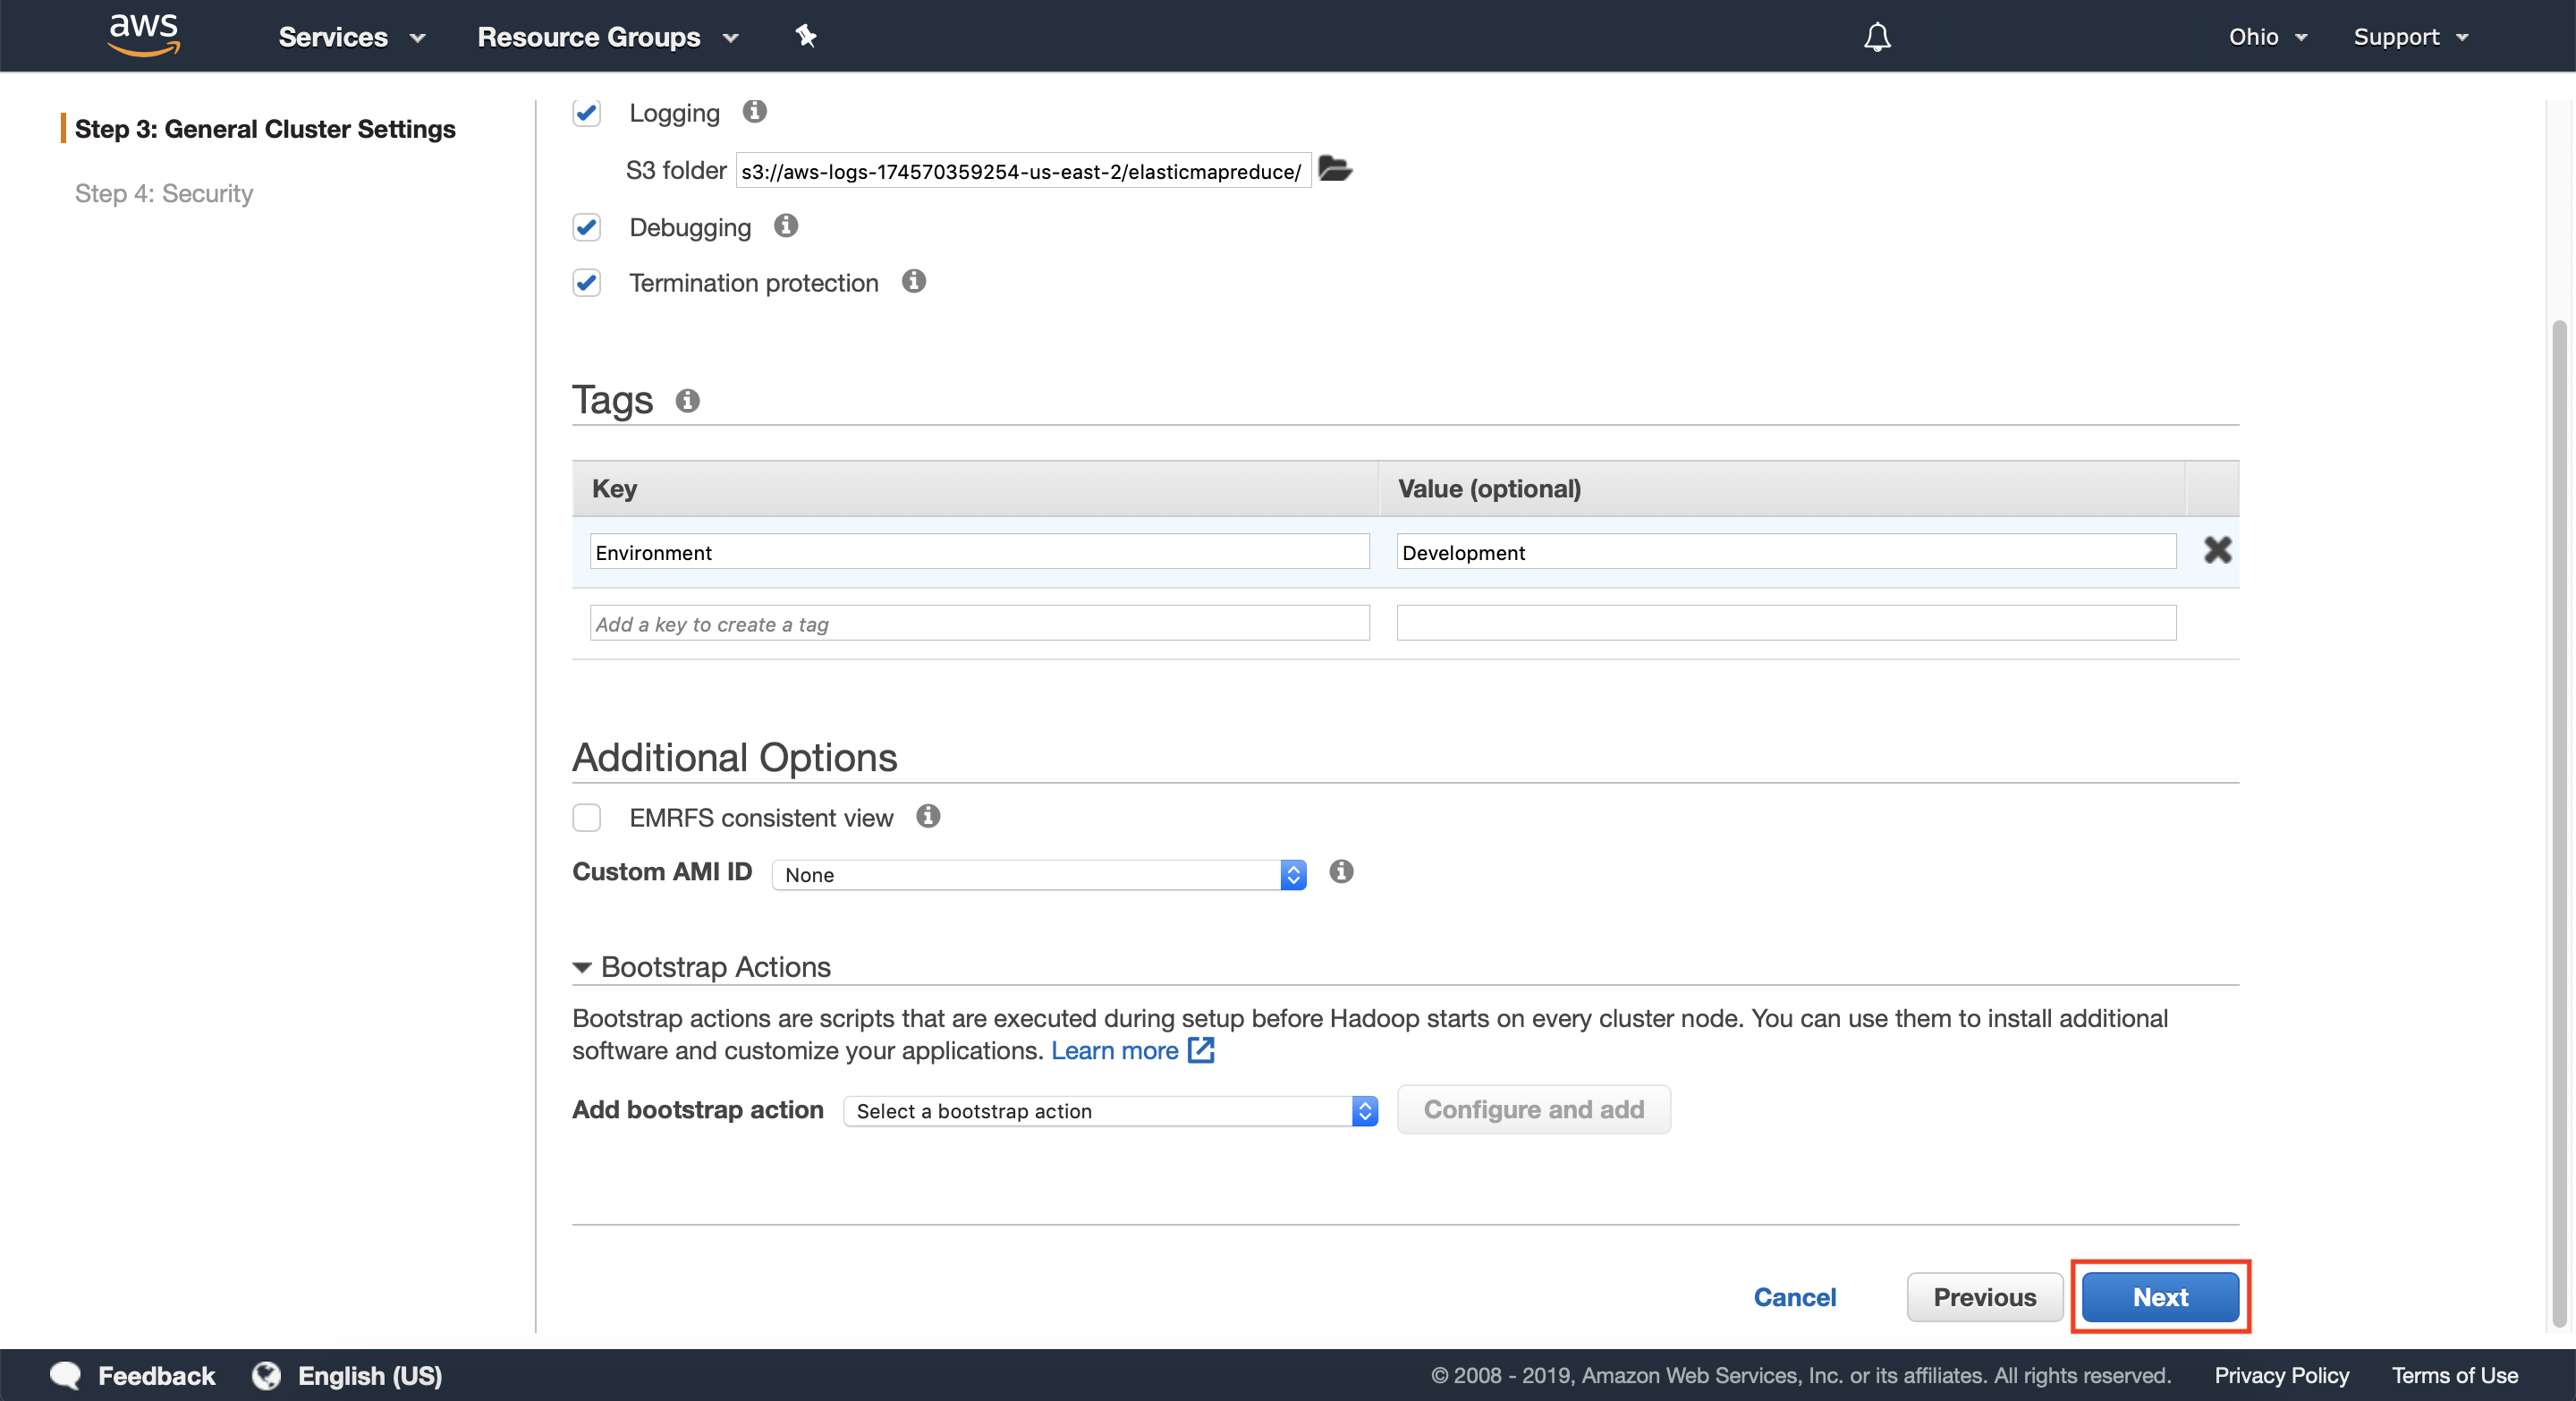
4.2 — Optionally configure any relevant tags for your cluster. Tags are useful for identifying which team owns the cluster you’re creating, or which environment it belongs to.
You can learn more about tagging here.
Step 5: Security
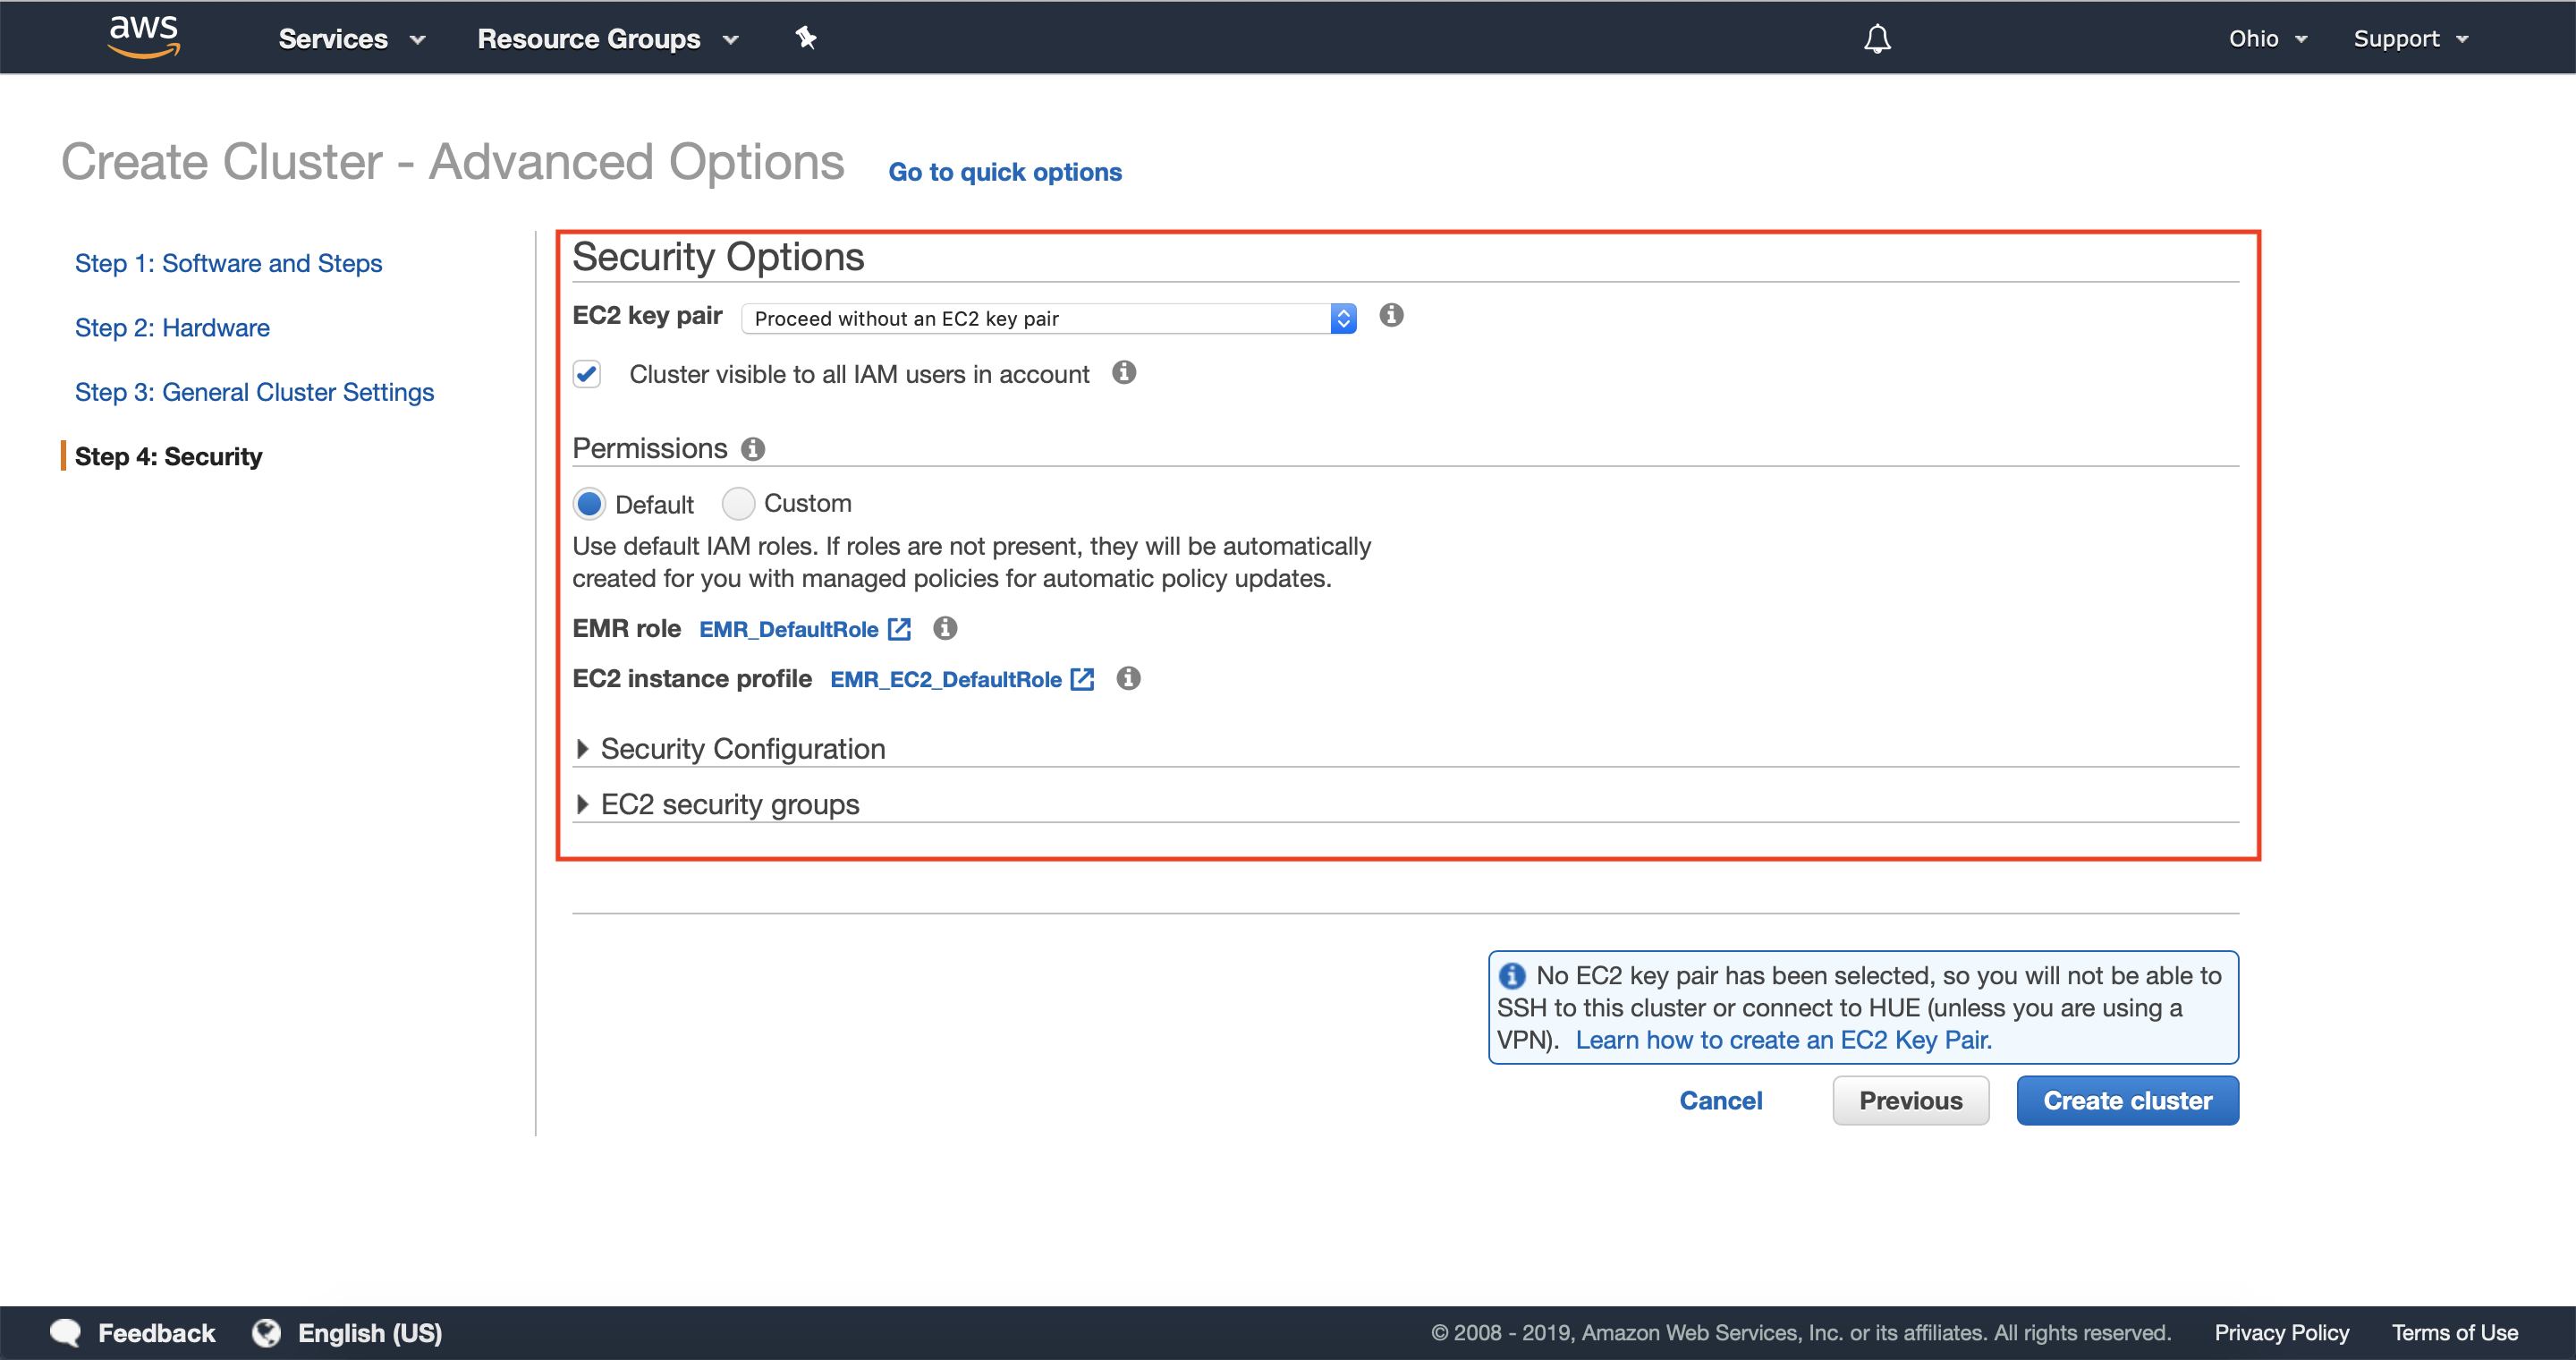
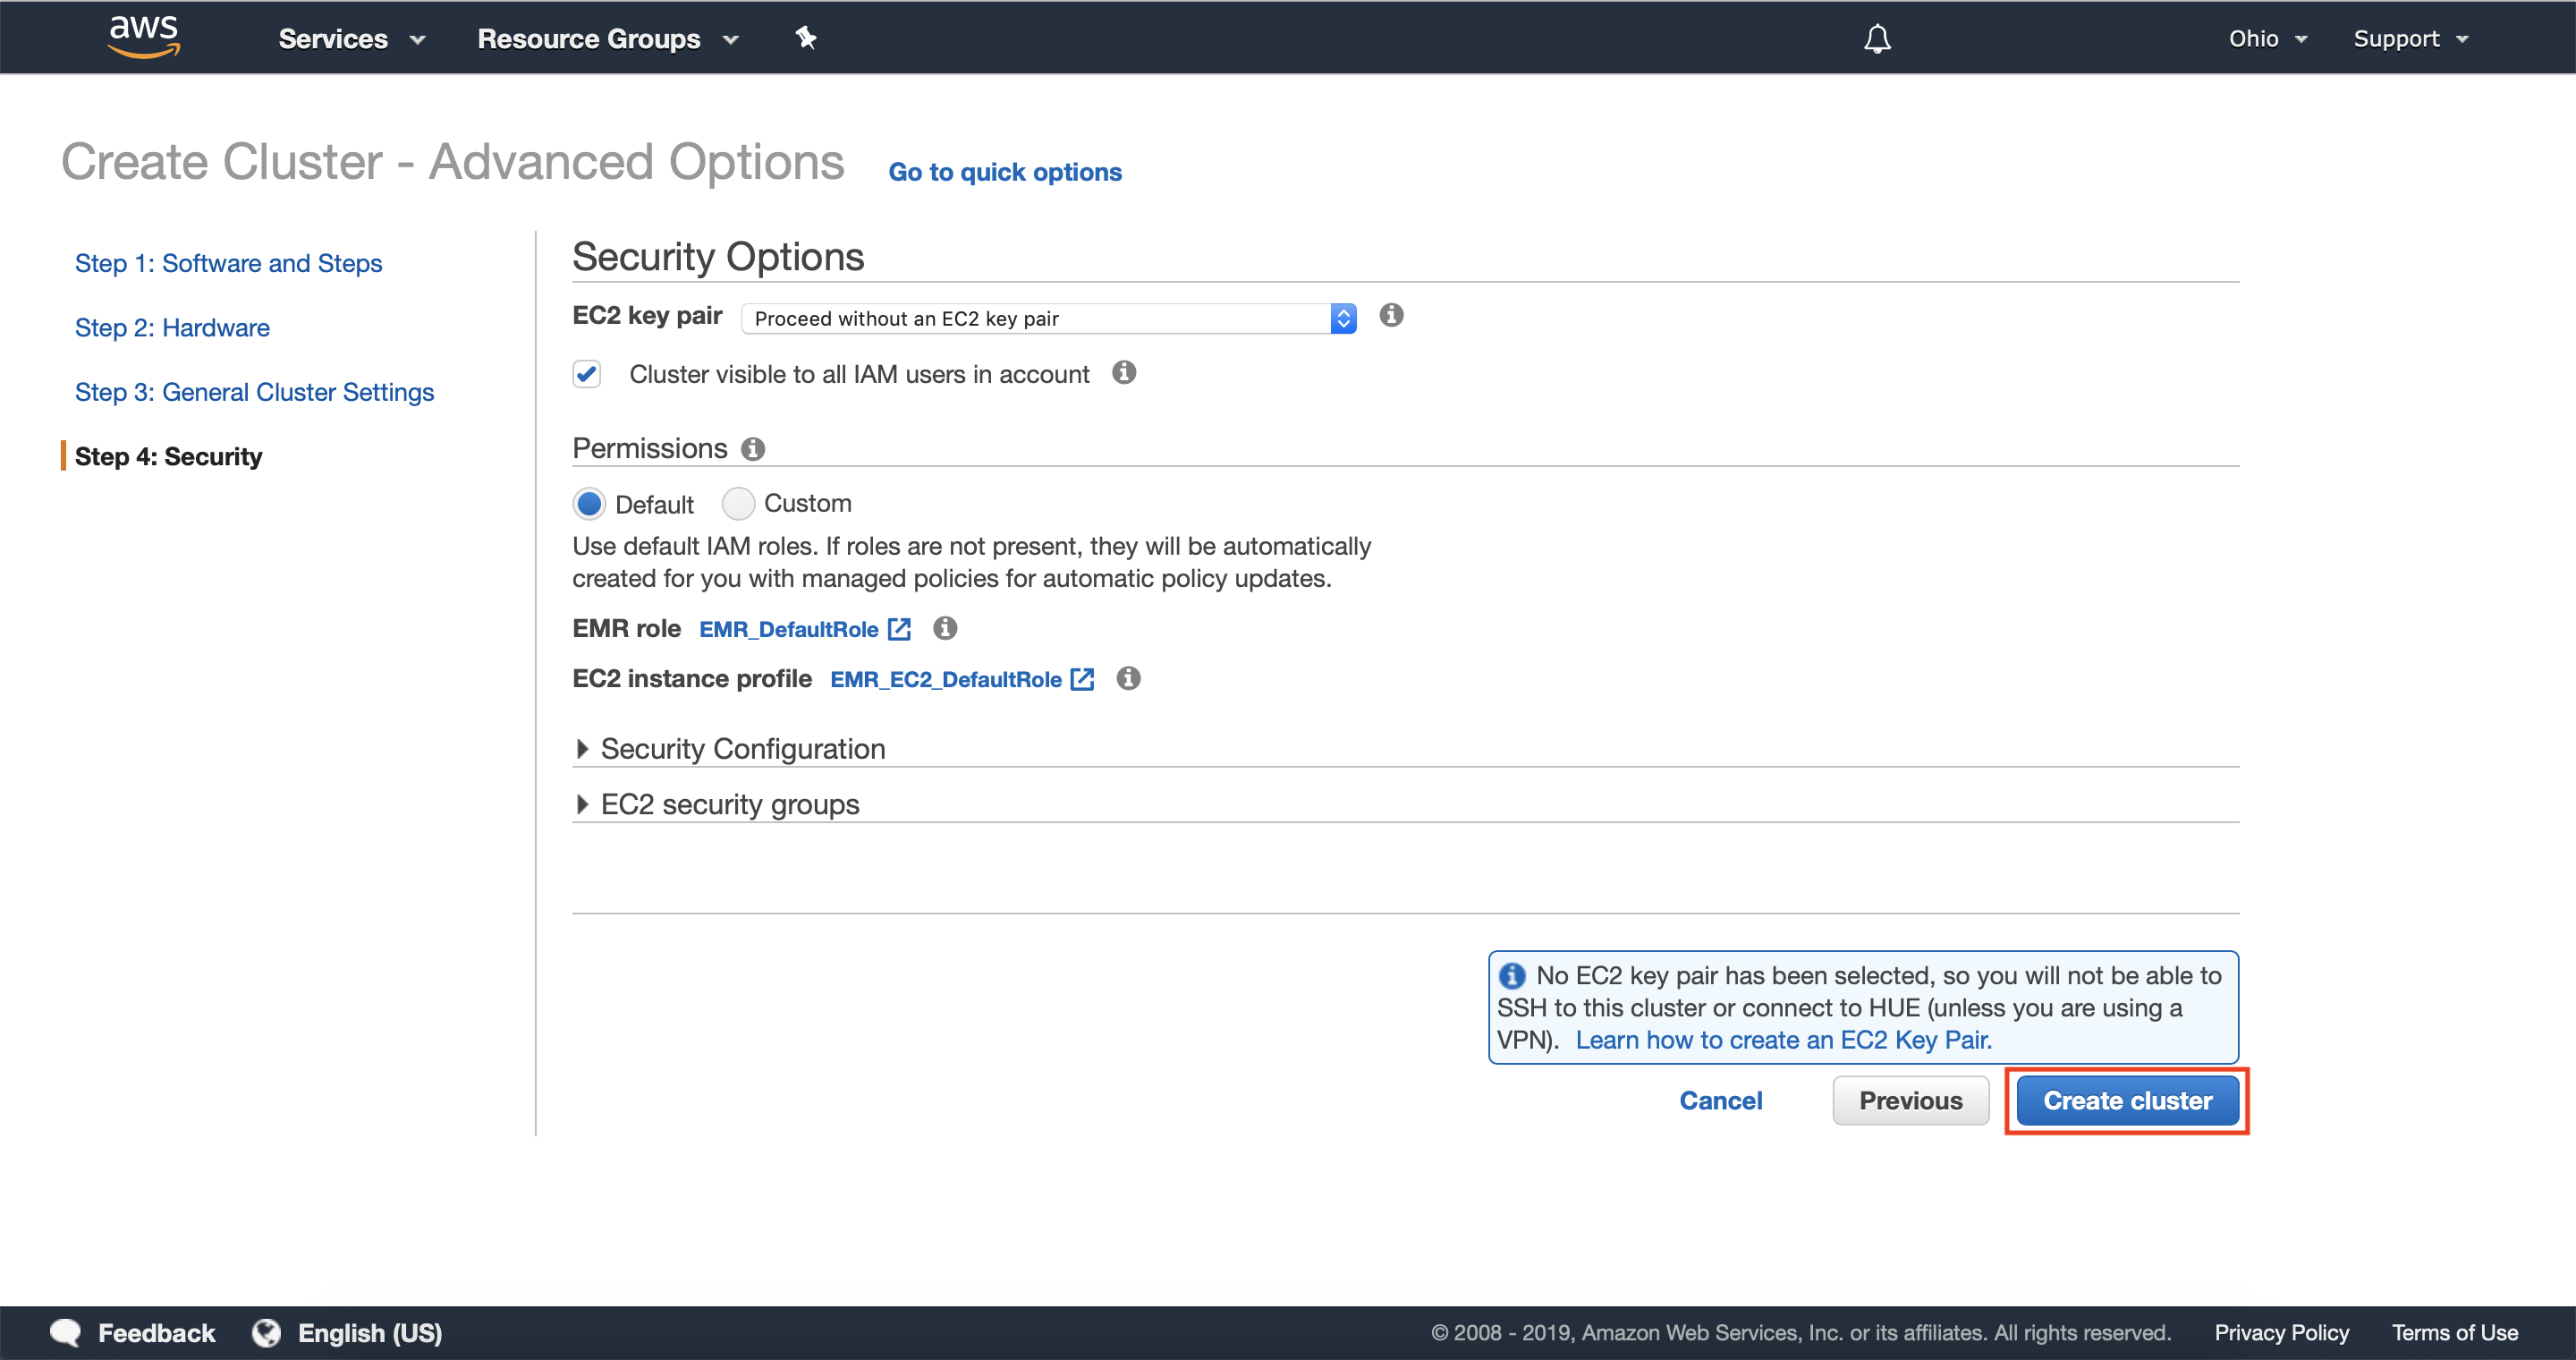
5.1 — Optionally configure any required security configuration for your cluster, including Key Pairs, Instance Roles and Profiles, Security Groups, and Encryption.
Congratulations
You’ve now launched an Amazon EMR Cluster on EC2 Spot Instances. Now you are ready to integrate Spot Instances into your EMR clusters and start optimizing your big data workloads for cost and performance.
Recommended next steps
Running Spark apps with EMR
Now that you have learned how to use EC2 Spot Instances with Amazon EMR you’re ready to implement Instance Fleets, and the other best practices you learned into your own workloads. If you would like to continue your learning, we recommend following the self-paced workshop located here.
Read the documentation
Learn about functionality and capabilities of Amazon EMR by reading the Amazon EMR management guide.
Explore Amazon EC2 Spot Instances
If you want to learn more about Amazon EC2 Spot Instances, visit the Amazon EC2 Spot Instances product page to explore documentation, videos, blogs, and more.
