AWS Business Intelligence Blog
Establishing enterprise governance in Amazon Quick using custom permissions
Amazon QuickSight has evolved to Amazon Quick, expanding from a single BI product to a comprehensive suite that includes AI agents for business insights, research, and automation in one integrated experience. Quick helps users work smarter and faster – all while maintaining security and user access policies. Business users of any skill level can find critical information across relevant data sources in minutes instead of days, analyze data through natural language, create sophisticated visualizations, immediately act on insights without switching tools, and automate any task. At the heart of these enhancements is the unification of structured and unstructured data sources, driving the suite’s powerful new capabilities.
In today’s rapidly evolving Generative AI landscape, enterprises are placing increased emphasis on robust governance and precise control over the features and capabilities available to users within their environments. As Amazon QuickSight evolves into Amazon Quick, introducing a broad set of Agentic AI capabilities, the need for secure, scalable, and flexible access management is more critical than ever.
To address this, Quick introduced additional custom permission controls, accessible through the Manage Quick console. These controls support both coarse-grained and fine-grained access restrictions, enabling administrators to enforce the principle of least privilege by limiting user access to specific capabilities and features – while maintaining a seamless and productive user experience.
Permissions in Quick are structured across three hierarchical levels: account-level, role-level, and user-level. A clear precedence model ensures that user-level permissions override role-level permissions, which in turn take precedence over account-level permissions. This flexible architecture allows administrators to tailor security policies to meet the specific needs of their organization.
This blog provides a comprehensive guide to implementing capability-level and operation-level governance using custom permissions—empowering organizations to confidently adopt the latest innovations in Generative AI, while ensuring enterprise-grade security, compliance, and control.
Benefits of custom permissions
Custom permissions in Amazon Quick offer strategic advantages that strengthen security, enhance governance, and improve the user experience. Understanding these benefits enables administrators to make informed decisions on how to effectively leverage this capability.
Key benefits include:
Security & Control
-
- Principle of Least Privilege: Restrict user access to only necessary features
- Fine-Grained Access Control: Precise control over feature availability
- Multi-Level Management: Control permissions at account, role, and user levels.
- Real-Time Enforcement: Custom permissions take effect immediately upon application. Users do not need to sign out and back in, ensuring seamless security enforcement and access management.
Flexibility & Scalability
-
- Hierarchical Override : User permissions override role permissions, which override account permissions
- Targeted Exceptions: Create specific access rules for individual users without affecting entire groups
- Dynamic Adjustments: Modify permissions as business needs evolve
Enterprise Features
-
- Comprehensive Coverage: Control access to all major capabilities (Flows, Research, Chat Agents, Dashboards, etc.)
- Multiple Implementation Options: Manage through console interface or programmatically via CLI/APIs
Operational Benefits
-
- Balanced Innovation: Enable secure use of advanced features while maintaining appropriate controls
- Consistent Enforcement: Apply security policies uniformly across large organizations
- Maintained Productivity: Restrict access without compromising user experience
These benefits enable organizations to securely leverage Amazon Quick’s capabilities while maintaining proper governance.
Common use cases
Some example use cases for leveraging custom permissions in Quick include:
- Enforcing a global restriction on all new Quick capabilities at the account level.
- Allowing access to new capabilities for a specific set of users, while restricting access for all others. This approach facilitates controlled testing and evaluation of new capabilities by a specific set of users before broader rollout.
- Restricting specific capabilities at the account level, along with controlling a more granular capability such as the ability to create new data sources based at a role level.
Prerequisites for custom permissions management
Amazon Quick Admins do not automatically gain the ability to manage custom permissions. This is a deliberate security measure designed to ensure that custom permission management remains tightly controlled, particularly in enterprise environments where role separation and access control are critical. Without the appropriate IAM permissions, Quick admins will encounter a blocking message indicating that their role lacks the necessary IAM permissions to access custom permission settings.
To effectively manage custom permissions within Amazon Quick, the following prerequisites must be met:
- Amazon Quick Admin Pro or Admin Role: The user must be assigned the Quick Admin or Admin Pro role, although this alone does not grant access to manage custom permissions. Additional permissions (as outlined below) are required for this capability.
- Core IAM Permissions: The IAM user or role must have the following core permissions to manage custom permissions within Quick. These permissions must be explicitly granted and are critical to enable the management of custom permission profiles within Quick.
Note: Although the interface displays Quick, all API operations and IAM permissions continue to use the existing Amazon QuickSight naming conventions. This distinction is important to keep in mind when configuring IAM policies or working with the AWS CLI and API calls.
- IAMFederation or Identity Center (IDC): Depending on your organization’s configuration, AWS Account owners must create necessary core custom permission and assign these permissions to specific groups and users, permissions can be managed via IAM Federation or IAM Identity Center (IDC):
- For IAM Federation, assign specific IAM roles with the necessary core custom permissions to Quick admins. Once authorized, these admins can configure custom permissions at all levels (account, role, and user).
- For IAM Identity Center (IDC), create permission sets with the above permissions and assign them to users or groups with the appropriate permissions for managing custom permissions
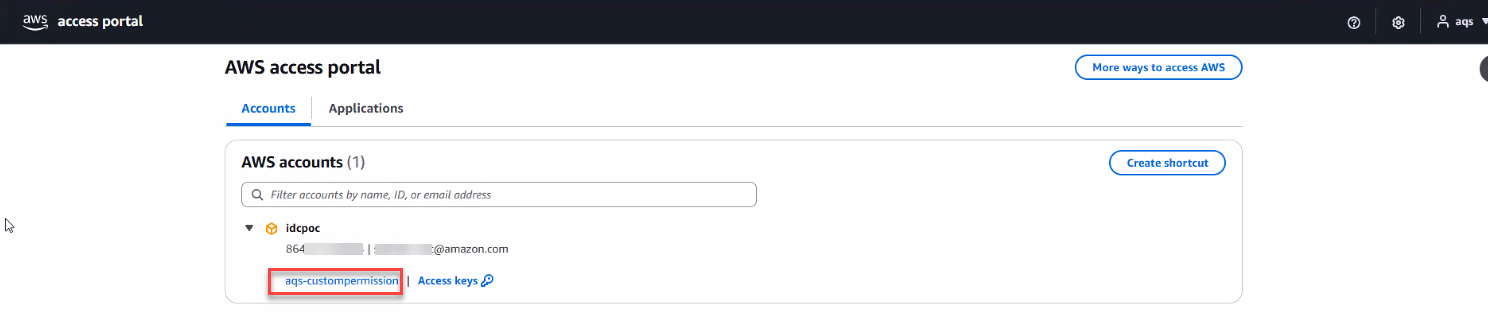
Below is a screenshot of the access portal as seen by a user in an IAM Identity Center (IDC)-enabled account, assigned the aqs-custompermission permission set, which includes the required core custom permissions.
These permission sets appear as available roles in the AWS access portal. Users assigned to multiple permission sets can sign-in to the access portal, choose an account, and select their assigned permission set as shown below. Admin users can then access Quick, navigate to the Quick Console, and configure custom permissions to meet enterprise requirements.
Access to Manage Quick Console: Custom permissions can be managed either through shortcuts or by navigating to the Permissions section in the left panel of the console.
Custom permissions across multiple levels
Admins can manage access to Amazon Quick features by creating and applying custom permission profiles. These permissions can be enforced at both the account level—to govern coarse-grained access to capabilities across Quick—or at the user or role level to control fine-grained access to specific features.
As a best practice, administrators can restrict or disable capabilities such as Chat Agents, Integrations, Flows, Automate , Knowledge Base, Spaces, Research, Dashboards, and Analyses at the account level. At the user or role level, admins can define more granular controls to restrict individual features within Quick.
For the complete list of configurable features, see the Custom Permissions.
Now, let’s explore how custom permissions can be used to govern and restrict features and capabilities, first through the Quick console UI, and then via the APIs.
Flows
Admins can disable Quick Flows for all users at the account level in Amazon Quick.
Restricting Flows in your account
To restrict the use of Flows for all users in your Amazon Quick account, follow these steps:
- Sign in to Amazon Quick as an admin user with the required IAM policies enabled.
- In the left navigation, choose Manage Account, Permissions, Custom permissions.
- Choose New profile.
- Select the Flows checkbox, provide a name for your custom permissions profile (for example,
Restrict-Flows), and then choose Create.
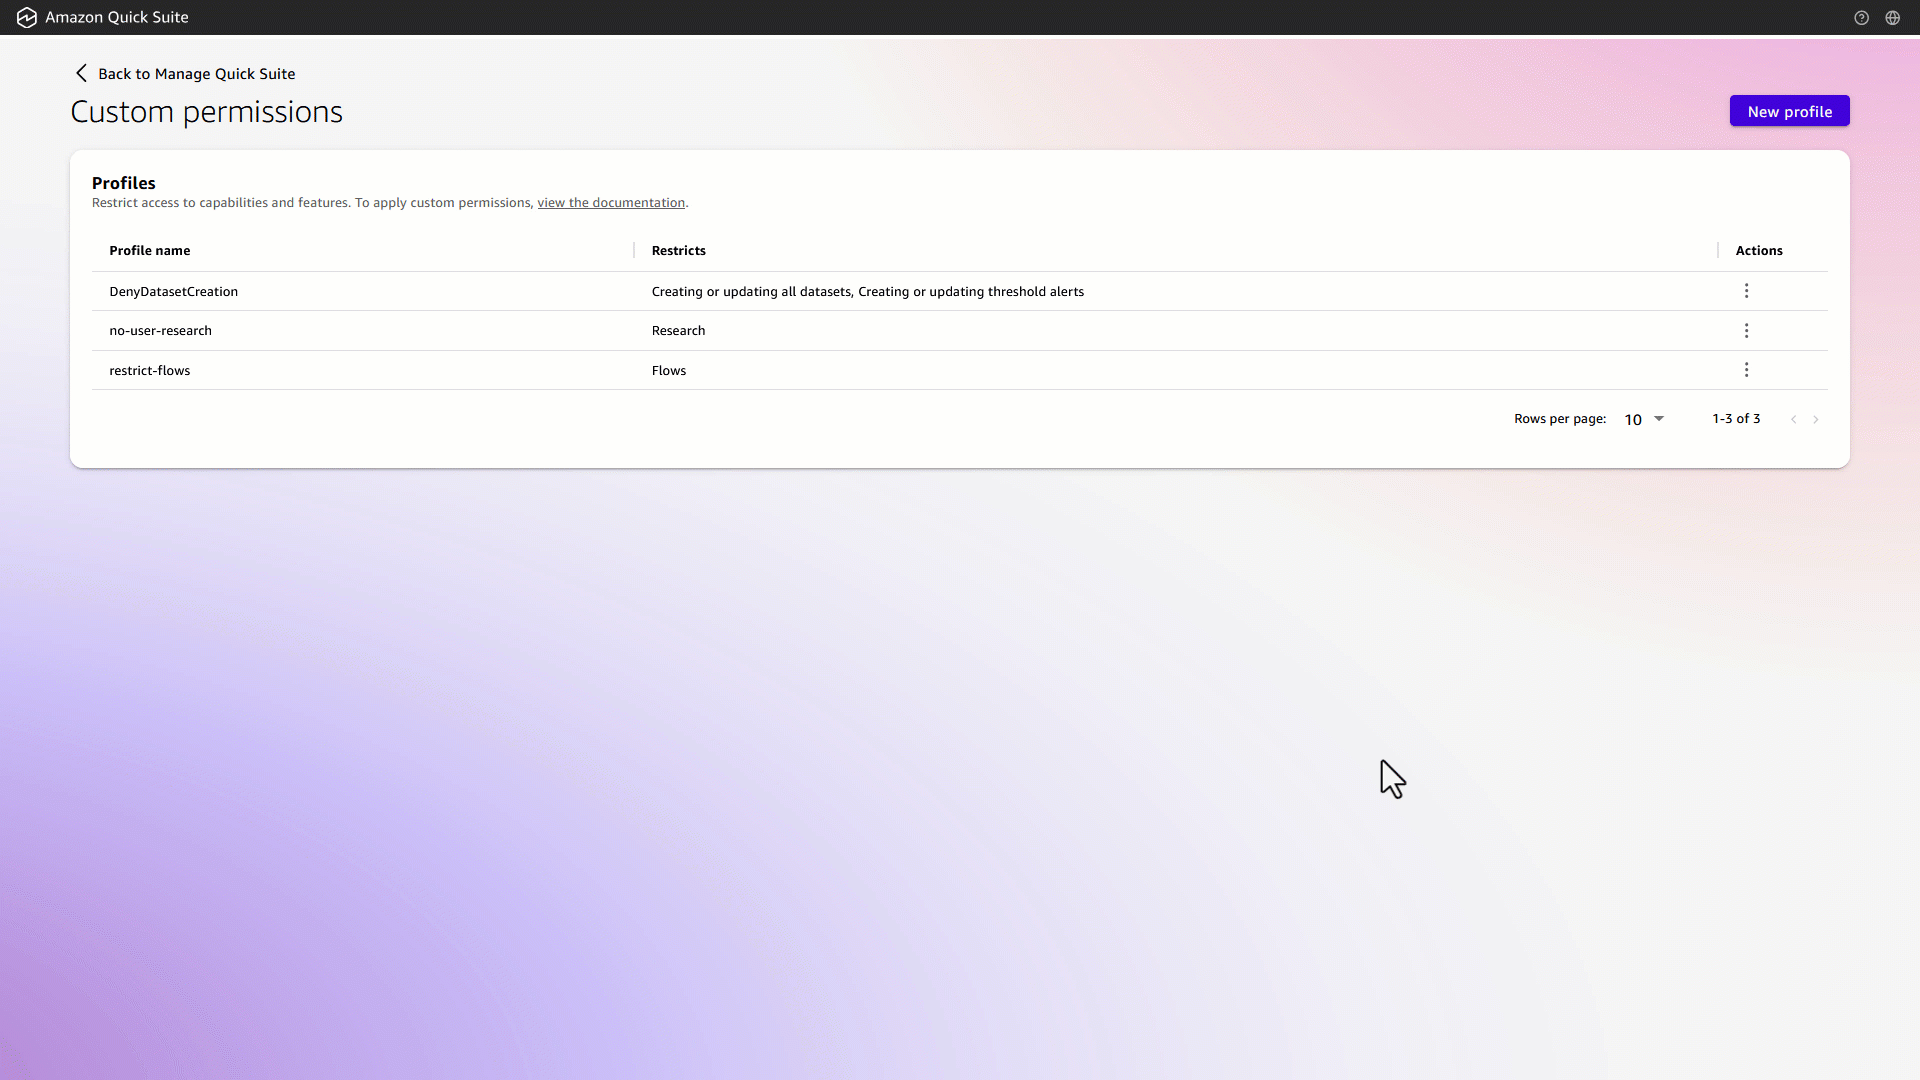
 You will be redirected to the Profiles page.
- Locate the profile you created, select the menu icon (vertical ellipsis), and choose Set as account profile. On the Confirm account profile restrictions dialog, enter
confirmand then click Restrict & Save.
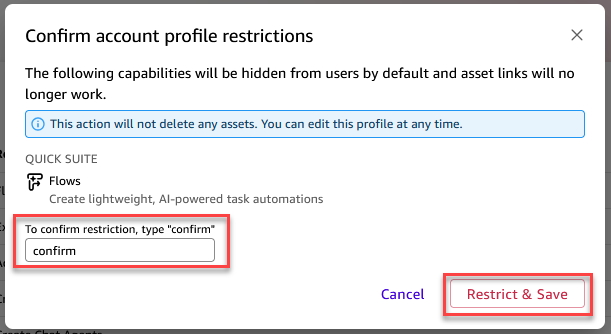
Once applied, Flows will be restricted for all users in your Quick account.
Experience with restricted Flows
The following is the impact when Flows are restricted at the account level:
- User experience impact
- The Flows option will no longer appear in the left navigation menu, removing visibility of the feature for end users.
- Users will not be able to create new Flows to automate repetitive tasks.
- The Flows menu icon in the chat footer will be hidden, eliminating entry points to the feature.
- Users will be unable to access or run any existing Flows, effectively disabling all user-level interactions with Flows.
- Service-wide impact
- When Flows are restricted at the account level, the feature is fully disabled across the account for all users, unless overridden by more specific functions at user or role level.
- All Flows-related functionality—creation, execution, and access—is uniformly restricted for consistent enforcement of the restriction throughout the service.
Automate
Admins can disable Automate for all users at the account level in Amazon Quick.
Restricting Automate in your account
To restrict the use of Automate for all users in your Amazon Quick account, follow these steps:
- Sign in to Amazon Quick as an admin user with the required IAM policies enabled.
- In Quick, click the user profile icon on the top right, then choose Manage Quick.
- In the left navigation, choose Manage Account, Permissions, Custom permissions.
- Choose New profile.
- Select the Automate checkbox, enter a name for your custom permissions profile (for example,
Restrict-Automations), and then choose Create.
You will be redirected to the Profiles page. - Locate the profile you created, select the menu icon (vertical ellipsis), and choose Set as account profile. On the Confirm account profile restrictions dialog, enter
confirmand then click Restrict & Save.
Experience with restricted Automate
The following is the impact when Automate is restricted at the account level:
- User experience impact
- The Automate option will be removed from the left navigation menu, eliminating user access to the automation interface.
- Users will no longer be able to create new automated projects or tasks.
- Access to existing automated tasks or projects will be blocked, preventing users from executing them.
- Users will not be able to modify any previously created automated tasks or projects.
- The ability to monitor automation performance, including reviewing the run status of executed tasks, will be hidden.
- The Automate section in the navigation panel will be fully hidden, removing all entry points to the feature.
- Service-wide impact
- When the Automate capability is restricted at the account level, the feature is completely disabled for all users across the account.
- All functionalities related to automation—creation, modification, execution, and monitoring—are systematically disabled.
- This ensures full compliance with administrative restrictions, preventing any form of interaction with automation-related capabilities across the service.
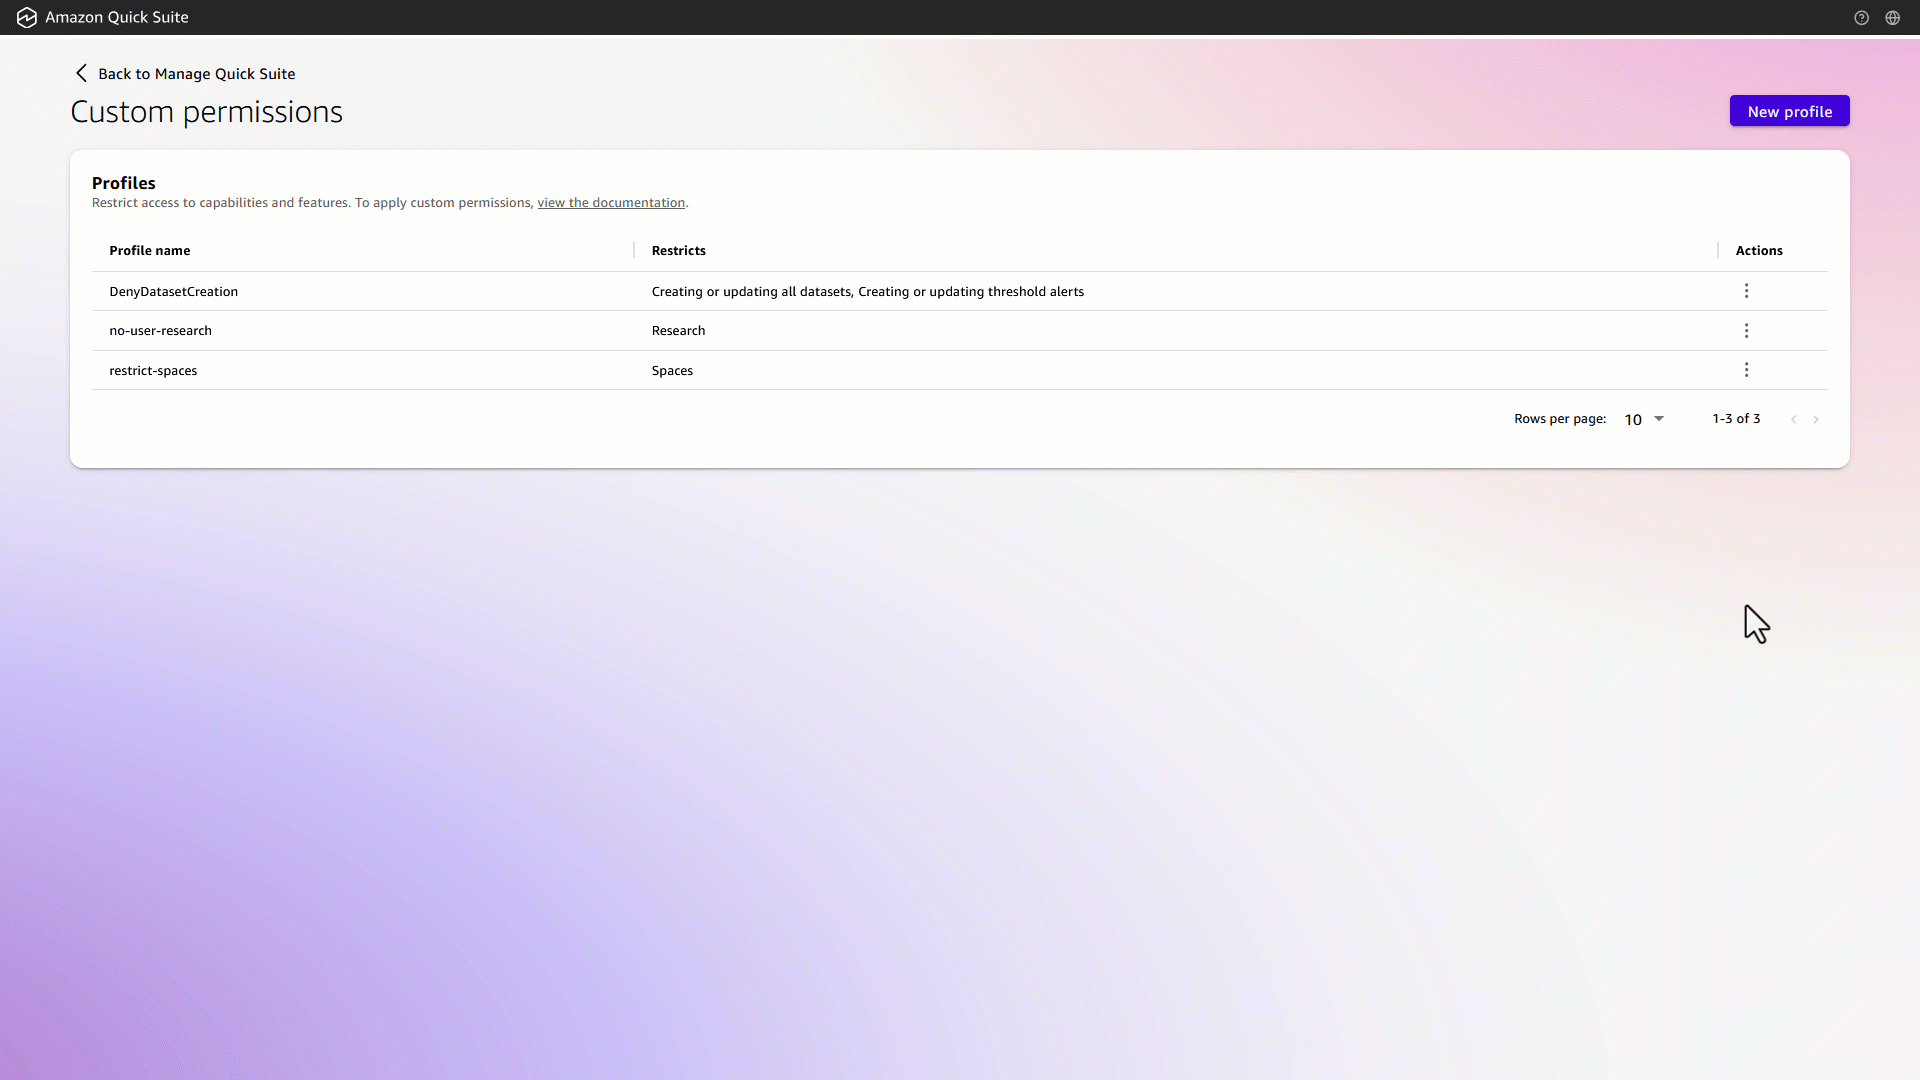
Spaces
Admins can disable Spaces for all users at the account level in Amazon Quick.
Restricting Spaces in your account
- Sign in to Amazon Quick as an admin user with the required IAM policies enabled.
- In Quick, click the user profile icon on the top right, then choose Manage Quick.
- In the left navigation, choose Manage Account, Permissions, Custom permissions.
- Choose New profile.
- Select the Spaces checkbox, provide a name for your custom permissions profile (for example,
restrict-spaces), and then choose Create.
You will be redirected to the Profiles page. - Locate the profile you created, select the menu icon (vertical ellipsis), and choose Set as account profile. On the Confirm account profile restrictions dialog, enter
confirmand then click Restrict & Save.
Experience with restricted Spaces
The following is the impact when Spaces are restricted at the account level:
- User interface impact
- The Spaces option will be removed from the left navigation menus and all interfaces.
- Users will not have the ability to create new spaces or access existing ones.
- Service-wide impact
- Custom knowledge hub organization features within a Space will be unavailable.
- All collaborative workspace access will be restricted.
- Space-sharing capabilities and collaborative features will be hidden.
- Chat agent:
- Space options will not be visible within the chat agent interface.
- The drop-down menu for selecting resources within the chat assistant/agent will not include any Spaces.
- Research agent:
- The option to include Spaces within the research agent will be unavailable.
- The Spaces feature will be completely disabled across the account.
This comprehensive restriction of the Spaces feature at the account level ensures that users cannot interact with or utilize any aspect of Spaces functionality.
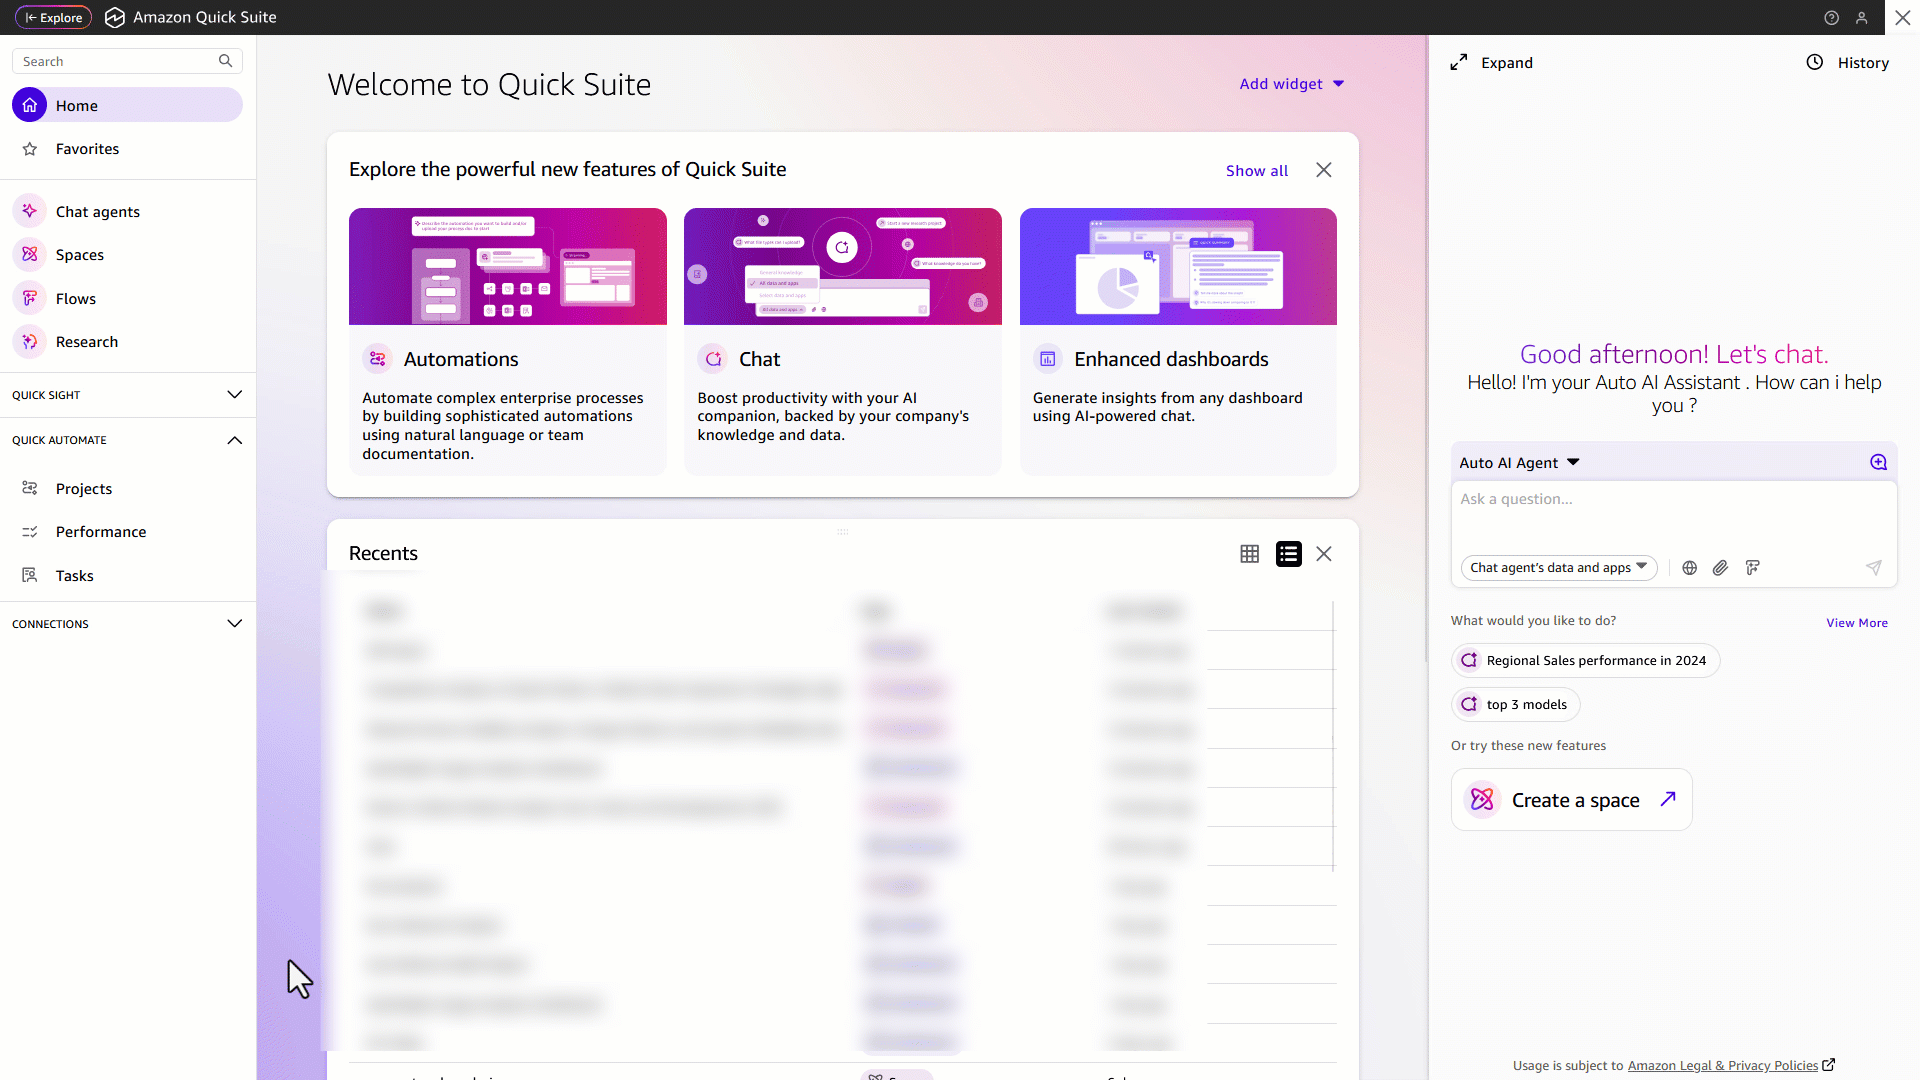
The following GIF shows Spaces functionality before applying account level changes.
The following GIF shows the experience after account-level Spaces restrictions are applied:
Actions
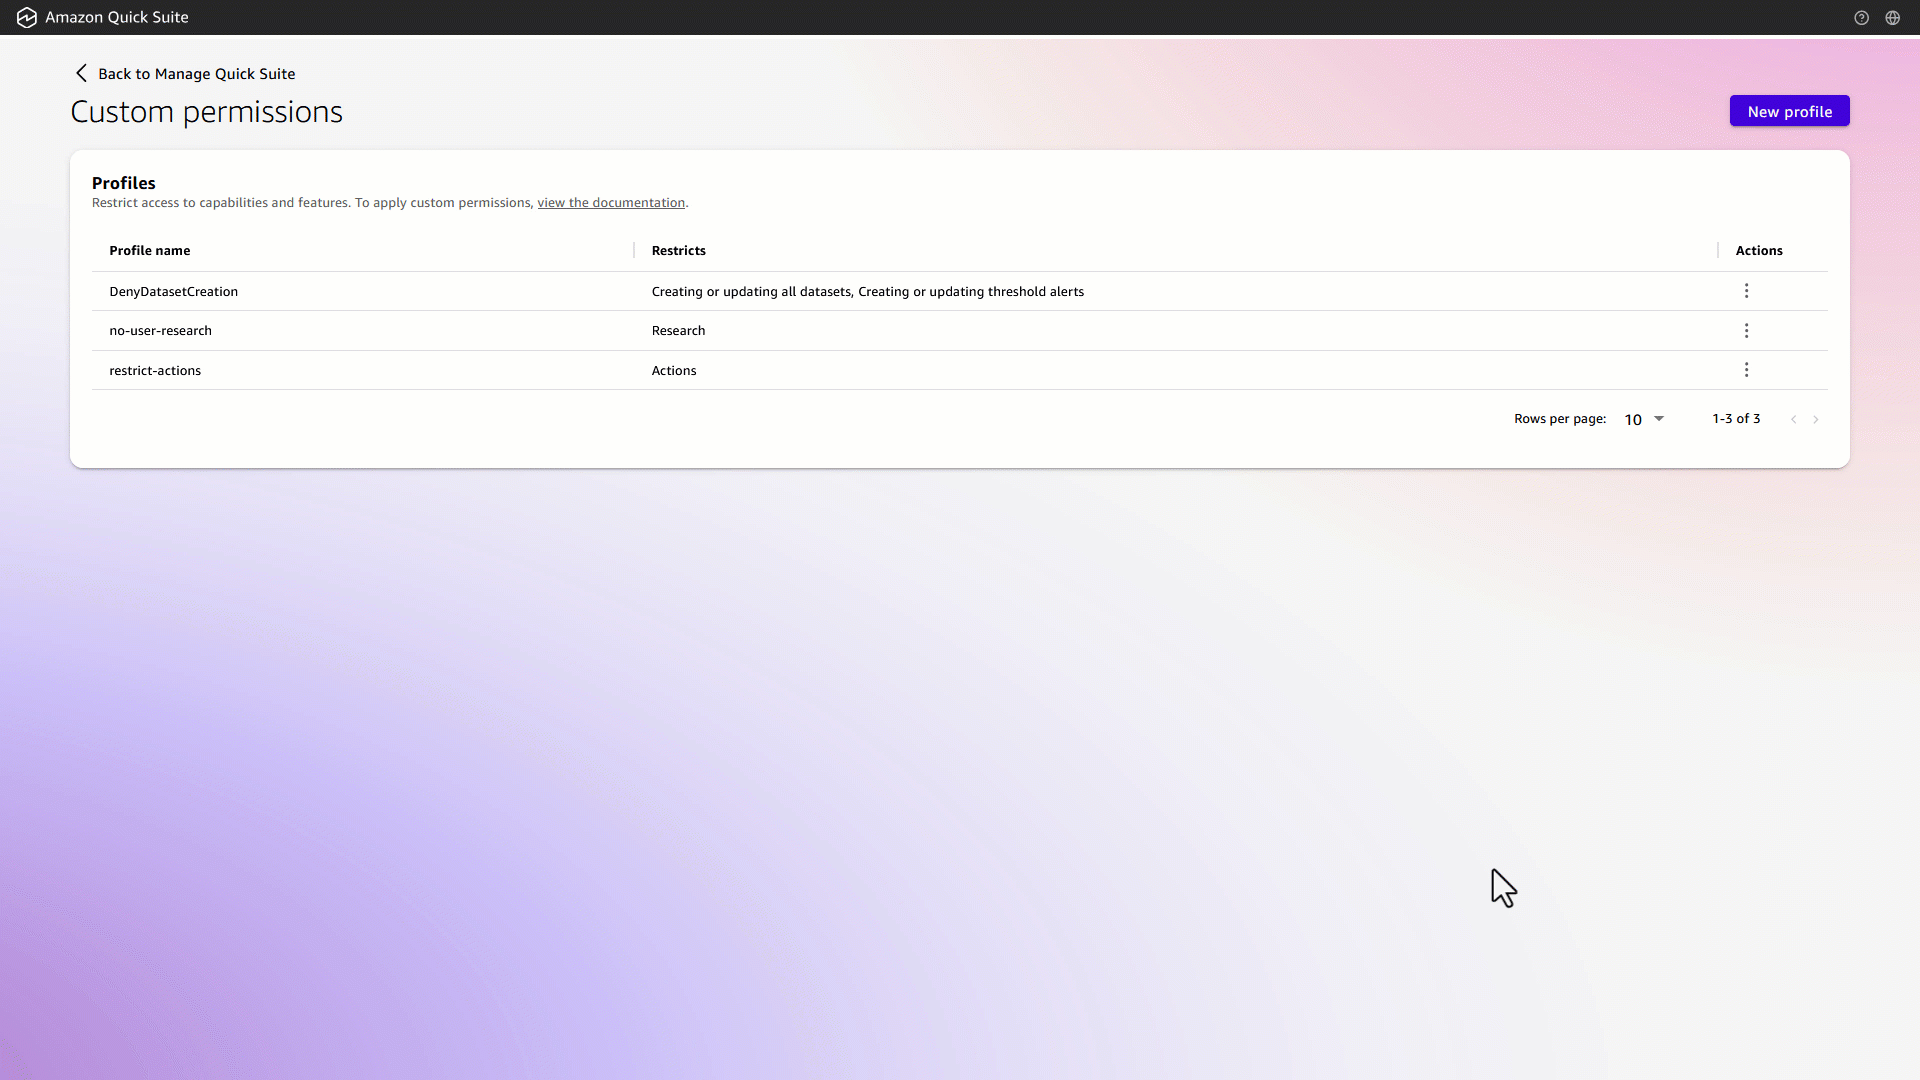
Admins can restrict Quick Actions for all users at the account level in Amazon Quick.
Restricting Actions in your account
- Sign in to Amazon Quick as an admin user with the required IAM policies enabled.
- In Quick, click the user profile icon on the top right, then choose Manage Quick.
- In the left navigation, choose Manage Account, Permissions, Custom permissions.
- Choose New profile.
- Select the Actions checkbox, provide a name for your custom permissions profile (for example,
restrict-actions), and then choose Create.
You will be redirected to the Profiles page. - Locate the profile you created, select the menu icon (vertical ellipsis), and choose Set as account profile. On the Confirm account profile restrictions dialog, enter
confirmand then click Restrict & Save.
Experience with restricted Actions
When Actions are disabled at the account level, the following restrictions take effect across the service:
- User interface impact
- The Actions tab is removed from the Integrations section in the Connections menu.
- All action-related options are hidden from interface menus.
- Creation of new Actions is prevented.
- Access to existing Actions is blocked.
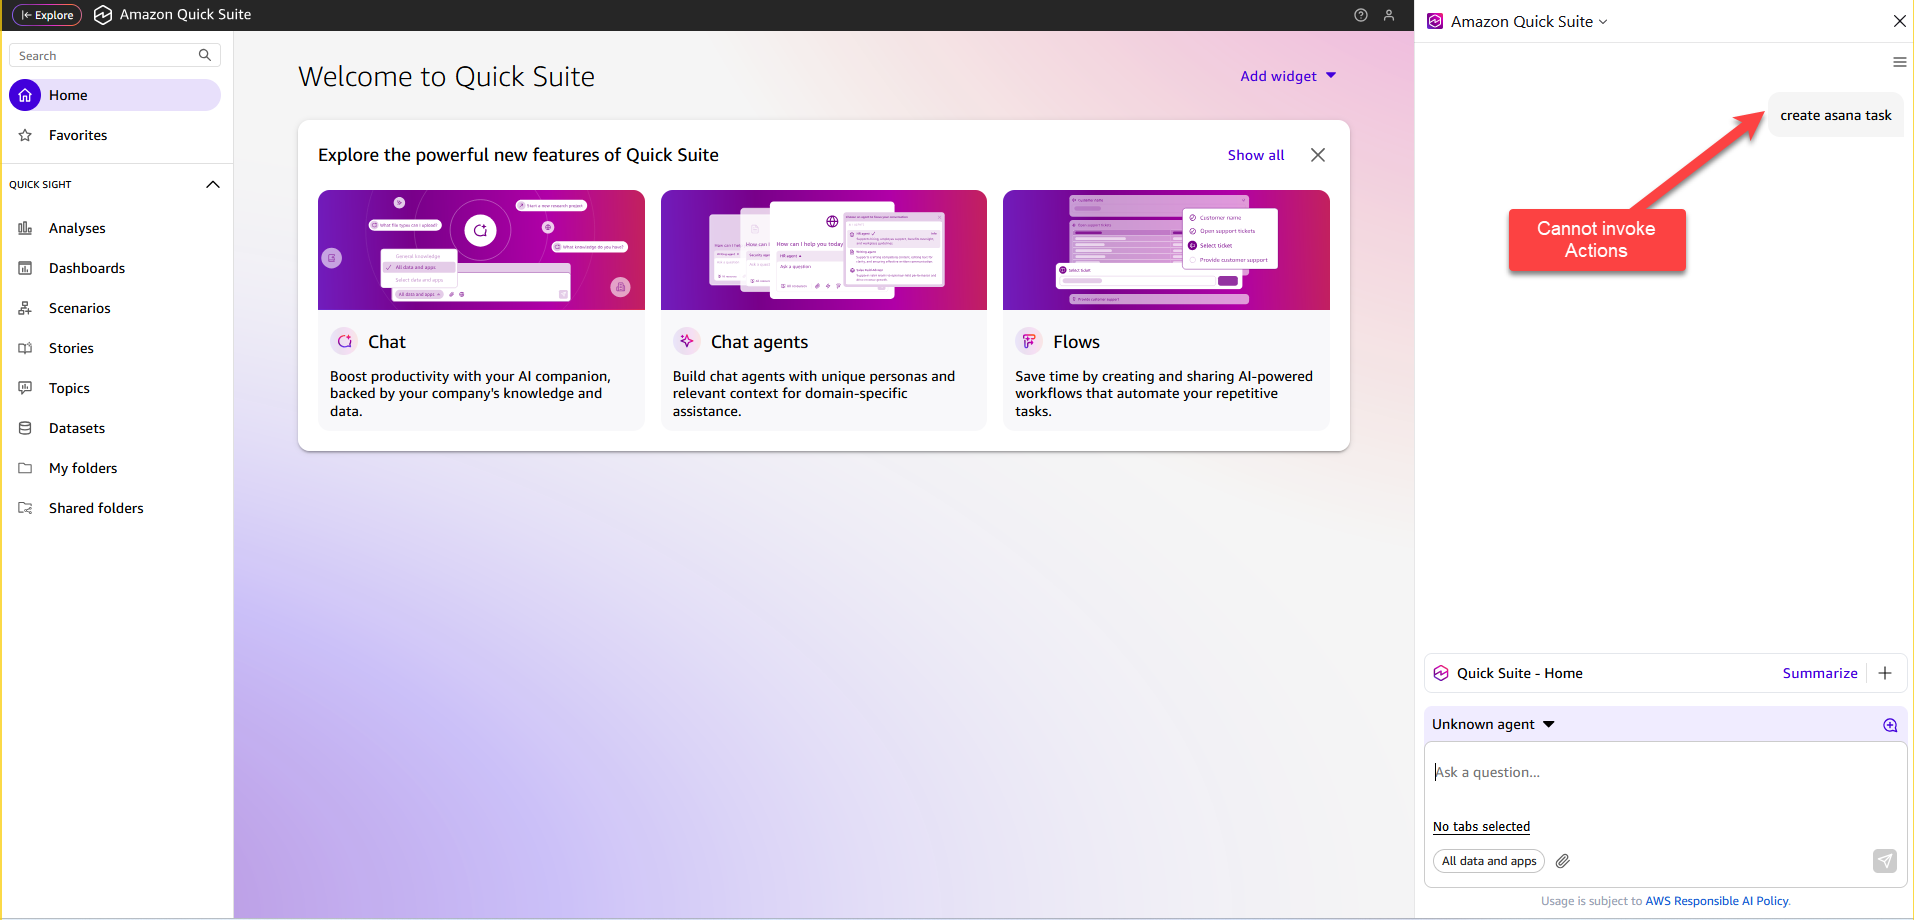
- All actions within Quick browser extension cannot be invoked, as shown in the following screenshot:
- Service-wide impact
- Restriction applies uniformly across all spaces within the account.
- Chat agents cannot invoke Actions.
- Integration capabilities related to Actions are disabled.
- Action are unavailable for Automation tasks.
- Quick Dashboard features:
- Actions will be unavailable from within any Quick Dashboard visuals
- Action-based Alerts cannot be configured in table visuals within a dashboard
- Account-level restrictions ensure comprehensive service control by preventing users from configuring, modifying, or invoking automated actions. This maintains security compliance while preserving system stability.
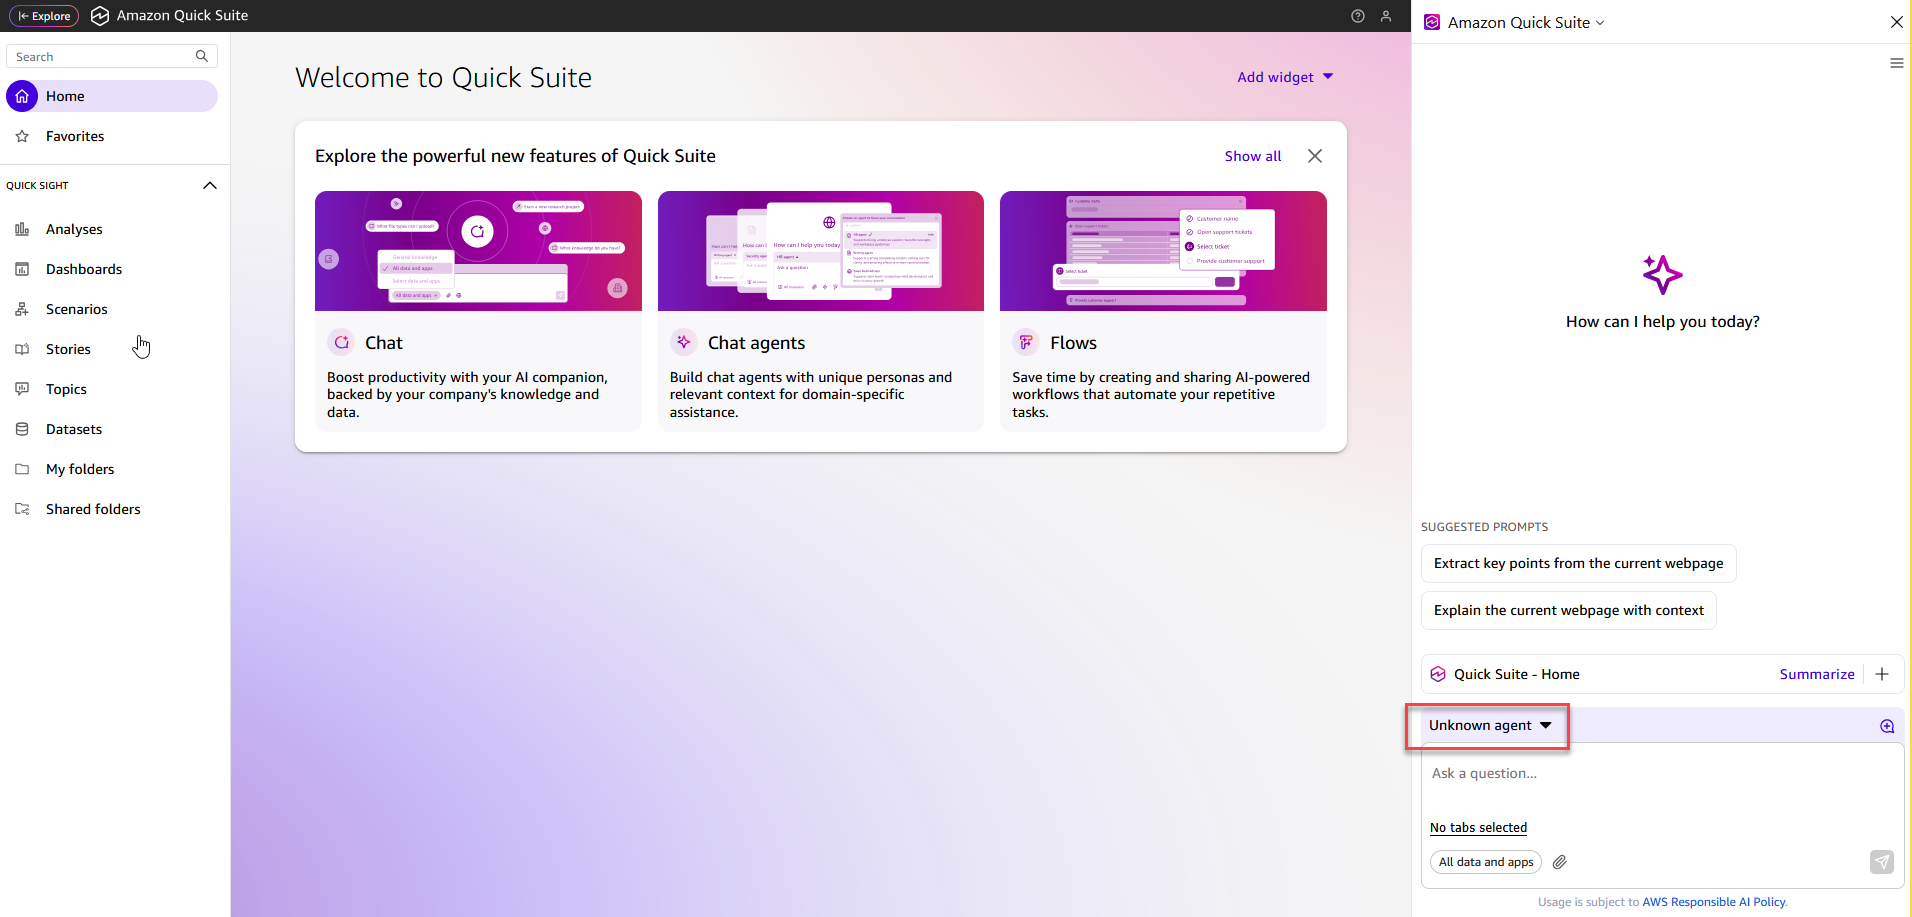
Chat Agents
Admins can disable Chat Agents for all users at the account level in Amazon Quick.
Restricting Chat Agents in your account
- Sign in to Amazon Quick as an admin user with the required IAM policies enabled.
- In Quick, click the user profile icon on the top right, then choose Manage Quick.
- In the left navigation, choose Manage Account, Permissions, Custom permissions.
- Choose New profile.
- Select the Chat Agents checkbox, provide a name for your custom permissions profile (for example,
Restrict-Chat-Agents), and then choose Create.
You will be redirected to the Profiles page. - Locate the profile you created, select the menu icon (vertical ellipsis), and choose Set as account profile. On the Confirm account profile restrictions dialog, enter
confirmand then click Restrict & Save.
Experience with restricted Chat Agents
When Chat Agents are disabled at the account level, the following restrictions take effect across the service:
- User experience impact
- The Chat Agents option will be removed from the left navigation panel.
- My Assistant, the default AI chat assistant within Quick, will be blocked.
- Initiation of new chat conversations will be restricted.
- Access to existing chat histories will be disabled.
- The chat interface will be completely hidden.
- Saved chat preferences will no longer be accessible.
- All custom chat agents within Quick browser extensions are not available.
- My Assistant agent within Quick browser extensions are not available.
- Service-wide impact
- Chat functionality is disabled at the system level, affecting all users and disabling associated components across the service.
Extensions
Admins can disable Extensions for all users at the account level in Amazon Quick.
Restricting Extensions in Your Account
- Sign in to Amazon Quick as an admin user with the required IAM policies enabled
- In Quick, click the user profile icon on the top right, then choose Manage Quick.
- In the left navigation, choose Manage Account, Permissions, Custom permissions.
- Choose New profile.
- Select the Extensions checkbox, provide a name for your custom permissions profile (for example, deny-extension), and then choose Create.
- You will be redirected to the Profiles page. Locate the profile you created, select the three-dot menu, and choose Set as account profile. On the Confirm account profile restrictions dialog, type
confirmand then click Restrict & Save.
User Experience with Restricted Extensions
When Extensions is disabled at the account level, the following restrictions take effect across the service:
- User Experience Impact
- The Extensions option is removed from the left navigation panel for all users.
- Users cannot initiate create new Extensions.
- Users lose access to their previous Extensions.
- The feature is no longer visible or accessible, ensuring a consistent user experience.
- Users will no longer have access to shared Extensions.
- Service-Wide Impact
- The Extensions options is fully disabled at the account level.
- All Extensions are deactivated across the service.
System-level enforcement ensures no user access to the feature.
Research
Admins can disable Research Agent for all users at the account level in Amazon Quick.
Restricting Research Agent in your account
- Sign in to Amazon Quick as an admin user with the required IAM policies enabled.
- In Quick, click the user profile icon on the top right, then choose Manage Quick.
- In the left navigation, choose Manage Account, Permissions, Custom permissions.
- Choose New profile.
- Select the Research checkbox, provide a name for your custom permissions profile (for example,
Restrict-Research), and then choose Create.
You will be redirected to the Profiles page. - Locate the profile you created, select the menu icon (vertical ellipsis), and choose Set as account profile. On the Confirm account profile restrictions dialog, enter
confirmand then click Restrict & Save.
Experience with restricted Research Agent
When Research is disabled at the account level, the following restrictions take effect across the service:
- User experience impact
- The Research option is removed from the left navigation panel for all users.
- Users cannot initiate new research queries.
- Users lose access to their previous research history.
- The feature is no longer visible or accessible, ensuring a consistent user experience.
- Users will no longer have access to shared research reports.
- Service-wide impact
- The Research Agent is fully disabled at the account level.
- All AI-powered research capabilities are deactivated across the service.
- System-level enforcement removes user access to the feature.

Analyses
Admins can disable the Analyses feature for all users at the account level in Amazon Quick.
Restricting Analyses in your account
- Sign in to Amazon Quick as an admin user with the required IAM policies enabled.
- In Quick, click the user profile icon on the top right, then choose Manage Quick.
- In the left navigation, choose Manage Account, Permissions, Custom permissions.
- Choose New profile.
- Select the Analyses checkbox, provide a name for your custom permissions profile (for example,
Restrict-Analyses), and then choose Create.
You will be redirected to the Profiles page. - Locate the profile you created, select the menu icon (vertical ellipsis), and choose Set as account profile. On the Confirm account profile restrictions dialog, enter
confirmand then click Restrict & Save.
Experience with restricted Analyses
When Analyses are disabled at the account level, the following restrictions take effect across the service:
- User interface impact
- The Analyses option becomes unavailable in the left navigation panel under Quick Sight menu.
- The Create Analyses option from datasets is disabled.
- Existing Analyses become unavailable to users.
- Direct URL access to Analyses is blocked.
- The Save as Analyses option on the Dashboard is no longer available.
- Analyses in Shared folders or My Folders are disabled.
- Service-wide impact
- The Analyses feature is completely disabled across the account.
- All analysis creation, editing, and viewing capabilities are blocked.
While dashboards are built from analyses, restricting analyses access does not impact existing dashboard functionality. Users can continue to view and interact with dashboards as normal, even though they cannot access the underlying analyses that were used to create them. This restriction ensures that all analysis-related functionalities become unavailable to users while continued access to published dashboard content.

Dashboards
Admins can disable Dashboard creation and editing features for all users at the account level in Amazon Quick.
Restricting Dashboards in your account
- Sign in to Amazon Quick as an admin user with the required IAM policies enabled.
- In Quick, click the user profile icon on the top right, then choose Manage Quick.
- In the left navigation, choose Manage Account, Permissions, Custom permissions.
- Choose New profile.
- Select the Dashboards checkbox, provide a name for your custom permissions profile (for example,
Restrict-Dashboards), and then choose Create.
You will be redirected to the Profiles page. - Locate the profile you created, select the menu icon (vertical ellipsis), and choose Set as account profile. On the Confirm account profile restrictions dialog, enter
confirmand then click Restrict & Save.
Experience with restricted Dashboards
When Dashboards are disabled at the account level, the following restrictions take effect across the service:
- User interface impact
- The Dashboards option is removed from the left navigation panel under Quick Sight menu.
- Users cannot access existing dashboards or publish new ones.
- Direct URL access to dashboards is blocked.
- Dashboard options are removed from favorites.
- In existing or new analyses, the option to publish dashboard is removed.
- Datasets that were used in building dashboards will not be able to redirect to dashboard from usage tab.
- Service-wide impact
- Restriction applies uniformly across all spaces within the account, existing dashboards become inaccessible from Space.
- Spaces: Dashboards within Spaces are restricted.
- Research: Dashboards cannot be used as sources through Spaces.
- Scenarios: In Data to Insights scenarios, the option to select data from Quick Sight dashboards is available, but when you choose Find data, no dashboards are accessible. In the absence of dashboards, you can continue to use the Upload file option to explore data with Scenarios.
- Stories: When building data stories, no dashboards are accessible. As a result, existing data stories will not show original visuals used during their creation; however, all other content remains unaffected. You can continue to create data stories using saved visuals from pinboards.
The Dashboards feature is completely disabled across the account. This restriction ensures that all dashboard-related functionalities are inaccessible to users, maintaining comprehensive control over dashboard access while preserving alternative data exploration methods through other Quick features.

Feature-level restrictions (role and user levels)
Admins can apply feature-level restrictions at all levels. For demonstration purposes, we will now focus on role and user-level configurations. The following examples illustrate how admins can restrict specific functions within broader features without disabling the entire feature set.
- Create a custom profile and select the Creating or updating all data sources option under Quick Sight feature restrictions to hide features without disabling any other functionality.
- Apply custom profile to an Author role using API.
Currently, permissions can only be assigned at the role or user level using an API and not through the console UI. For API details on applying role-level permissions, please refer to the Update custom permissions for a role section.
- Log in using an Author profile and validate custom permission.
Feature restrictions at the role level
Consider restricting data source creation for the Author role.
When logged in as an Author with this restriction:
- The Create data source option on the data source tab in Datasets menu of the left panel is blocked.
- When you choose Datasets in the menu on left panel in the Data source tab, the Create data source option becomes unavailable, restricting users with an Author role from creating any new data sources.
- Authors can access all existing data sources but do not have permission to create any new data sources from external applications or databases.
Feature restrictions at the user level
This approach is particularly useful when admins need to limit access to a specific capability to a defined set of users. By applying a restriction at the account level and selectively allowing access at the user level, broader access is denied while maintaining exceptions for approved users.
To restrict Chat Agents creation for individual users:
- Create a custom profile and select the “Create Chat Agents” option under Restrict features of Quick to restrict the ability to create a new agent, without preventing users from being able to chat with agents that have been shared with them.
- Apply custom profiles to specific users using an API.
Currently, permissions can only be assigned at the role or user level using an API and not through the console UI. For API details on applying role-level permissions, please refer to the “Update Custom Permission for a User” section below.
- Sign in with the same user profile and validate custom permission
When the user logs in with this restriction:
- Chat Agent appears in the left panel menu and shows up normally.
- Users can see the list of all chat agents and access existing ones, but the Create Chat Agent option becomes unavailable while accessing the chat agent window.
- The user can access all existing Chat Agents but does not have permission to create any new chat agents.
Precedence on how the permissions will be applied
Understanding how different permission levels interact and override each other is key for effectively implementing custom permissions in your Quick account. The permission system follows a clear hierarchical structure that determines which permissions take precedence when multiple custom permission sets might apply to a user.
- User-level custom permissions: Custom permissions applied directly to individual users have the highest priority in the permission hierarchy. These permissions override any role-level permissions or account-level permissions for that specific user, so admins can create exceptions for specific users without changing permissions for an entire role.
- Role-level custom permissions: Custom permissions applied to role (Admin, Admin Pro, Author, Author Pro, Reader, or Reader Pro) take precedence over the default permissions for those roles. When a custom permission profile is assigned to a role, all users with that role will be subject to those restrictions unless they have user-level custom permissions that override them.
- Account-level permissions: The standard permissions associated with each role have the lowest precedence. These permissions apply to all roles in account when no custom permissions (either at user or role level) are specified.
Consider the example of a large enterprise, AnyCompany Inc., implementing custom permissions in Quick to manage access across various organizational levels. The organization aims to establish three distinct layers of permissions to balance security requirements with specific business needs:
At the account level, Flow capabilities have been restricted company-wide as part of AnyCompany Inc.’s governance policy. However, additional restrictions are required for the business analyst team (all assigned the Reader Pro role), specifically limiting access to Research and Chat Agents in alignment with data sensitivity protocols. At the user level, a specific business analyst, John Smith, requires elevated access for a special project—demonstrating how permissions can be configured with granularity.
The resulting custom permission structure highlights how each layer—account, role, and user—can be tailored and overridden as needed:
Resulting access for John Smith (user level):
- ✅ Flows: Accessible (user-level override of account restriction)
- ✅ Research: Accessible (user-level override of role restriction)
- ✅ Chat Agents: Can access existing agents (user-level override of role restriction)
- ❌ Create Chat Agents: Restricted (specific user-level restriction)
- ✅ All other features: Normal access
Users with Reader Pro role (role level):
- ✅ Flows: Accessible (role-level override of account restriction)
- ❌ Research: Restricted (role-level restriction)
- ❌ Chat Agents: Restricted (role-level restriction)
- ✅ All other features: Normal access
All other users (account level):
- ❌ Flows: Restricted (account-level policy applies)
- ✅ All other features: Normal access
After completing the pilot phase, AnyCompany Inc, decides to update John Smith’s custom permission profile. While the original profile only restricted the “Create Chat Agent” capability, the revised profile introduces broader restrictions to align with evolving governance requirements. The updated custom permission profile includes the following restrictions:
- Flow capabilities
- Research capabilities
- Allow Chat Agent – Continues to restrict the “Create Chat Agents” feature, while allowing access to existing agents
Once the modified profile is applied, John Smith loses access to both Flows and Research (which he previously had), remains restricted from creating new Chat Agents, but retains access to existing Chat Agents and all other Quick features. Below is a summary of John’s updated access:
- ❌ Flows: Restricted (loses previous access due to updated user-level restriction)
- ❌ Research: Restricted (loses previous access due to updated user-level restriction)
- ✅ Chat Agents: Can access existing agents (maintained access)
- ❌ Create Chat Agents: Restricted (continues previous restriction)
- ✅ All other features: Normal access
Custom permissions using programmatic approach
Custom permissions can also be implemented using AWS CLI or APIs. The following examples show how you can disable new capabilities like Flow, Actions, or Automate, or existing Quick Sight capabilities using AWS CLI or API.
If you are using CLI, use the following command to get details:
List all custom permission profiles
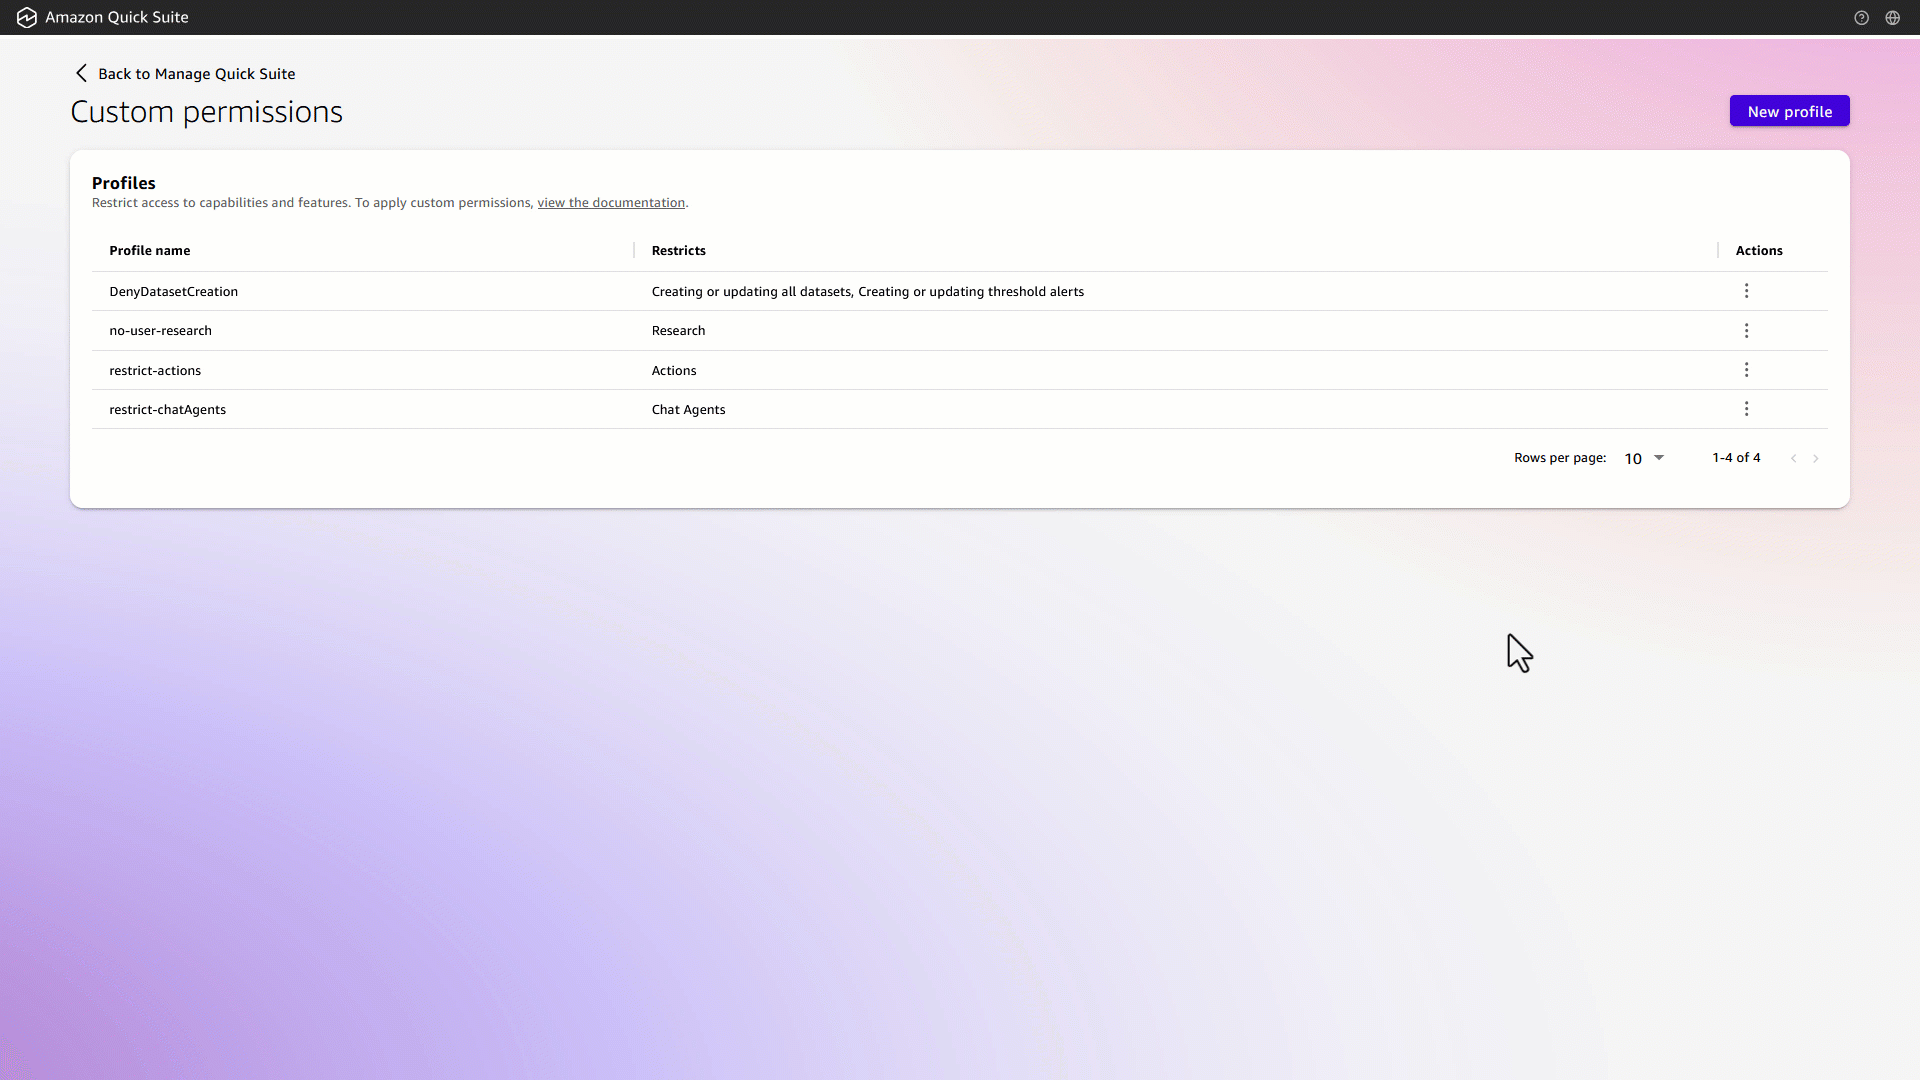
Before configuring any new custom permissions, review the existing custom permission profiles and the permissions already set at various levels within your Quick Account. To list all the custom permission profile in an account programmatically, use the list-custom-permissions API as follows:
Note: In the examples below, replace <<864571xxxxxx>> with your AWS Account ID.
Sample output after running the command in an account that has four different custom permissions:
Restricting access using custom permissions
Use custom permissions profiles in Amazon Quick to control coarse-grained (capabilities) or fine-grained access (features within capabilities):
- Create a custom permission profile.
- Review the custom permission profile.
- Assign the appropriate custom permission (at account or role or user).
- Review the assigned custom permission.
Create custom permission profile
The create-custom-permissions API is used to create custom permission profiles for various scopes, including account, role, or user-level profiles. It supports defining permissions for a single capability, multiple capabilities, or restricting specific features within Quick or Quick Sight.
The following capabilities are supported:
The following features are supported:
Note: New features are added as they are introduced, refer documentation for the complete list of capabilities and features supported using custom permissions.
The following sample create-custom-permissions API call creates a profile that restricts export features:
The following is the content of the customperm.json file:
Upon successful execution of this command, the following output is displayed:
Review custom permissions profile
After creating a custom permissions profile, review and validate it using the appropriate describe-*-custom-permissions API functions. This ensures the permissions are configured as intended and aligned with your governance policies.
Review the newly created custom permission by using the describe-custom-permissions API:
Sample output after running the command:
Assign custom permissions
Now that we have reviewed custom profiles created, we will proceed to assign them at various levels, starting with the account level, followed by the role level, and finally at the user level.
Update custom permission for account
The following example shows the UpdateAccountCustomPermission API to update the custom permissions assigned at the account level:
Sample output after running the command:
Update custom permission for a role
The following example demonstrates the use of UpdateRoleCustomPermission API to update the custom permissions at the Author role, restricting users with this role from creating data sources:
Update custom permission for a user
The following example calls the UpdateUserCustomPermission API to update the custom permissions assigned to a user, denying the ability to create chat agents within the default namespace.
Review assigned custom permission for a role
After successfully assigning custom permissions, it is important to review the permissions configured at each level to ensure accuracy and compliance.
Describe assigned custom permissions profile (account level)
The following example returns the custom permissions profile that is assigned to an account. Note that an account can only have one custom profile assigned at any given time.
After the successful execution of the API, the following output is displayed and the deny-all custom permission profile has been applied at the account level:
Describe assigned custom permissions profile (role level)
The following example retrieves the custom permissions profile assigned to the Author role. Note that a role can have only one custom profile assigned at any given time.
After the command is run successfully, the following output is displayed and the deny-datasource profile has been applied at the role level.
Describe assigned custom permissions profile (user level)
The following example retrieves the custom permissions profile assigned at the user level. Note that a user can only have one custom profile assigned at any given time.
After the command is run successfully, the following output is displayed, and the deny-chat-agents profile has been applied at the user level.
Unassign custom permissions
We recommend regularly cleaning up any unused or unnecessary custom permissions to maintain a secure and well-governed environment. This can be done by using the delete-*-custom-permission APIs, which support unassignment at various levels within Amazon Quick.
- Unassign custom permissions profile (account level) sample API:
- Unassign custom permissions for a role sample API:
- Unassign custom permissions for a user sample API:
- Delete custom permission profile sample API:
Conclusion
Amazon Quick’s enhanced custom permissions represent a significant advancement in enterprise data governance and security management. By providing administrators with granular control over feature access at account, role, and user levels, organizations can now implement sophisticated security frameworks that align with their specific operational requirements and compliance standards.
The hierarchical permission structure—where user-level permissions override role-level permissions, which in turn override account-level permissions—offers the flexibility needed to balance security with productivity. This approach enables organizations to establish broad security policies while maintaining the ability to create targeted exceptions for specific users or teams without compromising overall governance.
Whether implemented through the intuitive Manage Quick console or programmatically via AWS CLI and APIs, custom permissions empower administrators to:
- Enforce the principle of least privilege by restricting access to sensitive features like Research, Automate, and Chat Agents
- Maintain operational flexibility through granular user and role-level overrides
- Scale security policies across large enterprise environments with consistent enforcement
- Adapt to evolving business needs with dynamic permission adjustments
As organizations continue to embrace AI-powered analytics and automation capabilities within Amazon Quick, the robust custom permissions framework ensures that innovation can proceed securely and in alignment with organizational governance requirements. This comprehensive approach to access control positions Amazon Quick as not just a powerful analytics service, but a secure, enterprise-ready solution that grows with your organization’s needs.
The investment in properly configuring custom permissions today will pay dividends in enhanced security posture, regulatory compliance, and operational confidence as your organization scales its use of Amazon Quick’s advanced capabilities. For more details, refer Quick Custom Permissions documentation.
About the authors
 Raji Sivasubramaniam is a Principal Solutions Architect at AWS, focusing on Analytics and AIML. Raji is specialized in architecting end-to-end Enterprise Data Management, Business Intelligence and AIML solutions for Fortune 500 and Fortune 100 companies across the globe. She has in-depth experience in integrated healthcare data and analytics with wide variety of healthcare datasets including managed market, physician targeting and patient analytics.
 Neeraj Kumar is a Senior Worldwide Solutions Architect at AWS, architecting enterprise-scale solutions that transform how organizations leverage data. With over two decades in data and analytics across automotive, manufacturing, and telecom sectors, he guides global customers to unlock breakthrough insights using Amazon Quick and AI-powered analytics, helping them modernize their Unified AI/BI landscape and accelerate their data-driven transformation.
 Salim Khan is a Specialist Solutions Architect for Amazon Quick. Salim has over 16 years of experience implementing enterprise business intelligence (BI) solutions. Prior to AWS, Salim worked as a BI consultant catering to industry verticals like Automotive, Healthcare, Entertainment, Consumer, Publishing and Financial Services. He has delivered business intelligence, data warehousing, data integration and master data management solutions across enterprises.