Containers
Securing Kubernetes applications with AWS App Mesh and cert-manager
NOTICE: October 04, 2024 – This post no longer reflects the best guidance for configuring a service mesh with Amazon EKS and its examples no longer work as shown. Please refer to newer content on Amazon VPC Lattice.
——–
Updated Sept. 24, 2021 – This post has been amended to include a newly available option to integrate cert-manager with AWS Private CA to issue certificates.
While working with customers on their projects, I often hear “I want to secure all my traffic with granular encryption-in-transit, close to application code, but decouple security from it.” That’s where AWS App Mesh can help.
In this blog, I will briefly discuss how to apply some of the Well Architected Framework Security Pillar design principles using App Mesh in a Kubernetes environment. The goal is to present how App Mesh can help improve security of microservices based applications with TLS encryption, certificates used for service identity validation, and detailed logging. I will illustrate this concept with an end-to-end tutorial showing how to implement it on an Amazon EKS cluster with App Mesh and open source cert-manager.
Keep your application simpler and more secure with AWS App Mesh
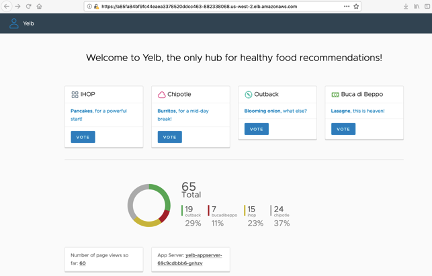
Service meshes help decouple and abstract a complex microservices communication from its application codebase. Application code can be simpler as advanced communication patterns are realized “externally” by the service mesh. One of such advantages is the possibility to add transparently traffic encryption between modules of existing modular application without need to modify it. In my blog, I will use Yelb, a sample containerized application, which I’m going to enhance with data in motion security. The application is straightforward and focused on user experience and not advanced networking. On the other hand, it is excellent example to demonstrate how application simplicity can be paired with App Mesh features for enhanced security.
AWS App Mesh is a managed implementation of a service mesh. It is supported together with broad range of available services: ECS, Kubernetes running on EC2, EKS, Fargate, and Docker running on EC2. It uses a managed control plane, while the data plane is based on Envoy, an open source project and container sidecar proxy concept.
The Well Architected Framework Security Pillar and AWS App Mesh
The Well Architected Framework (WAF) security pillar provides principles and best practices to improve security posture of cloud solution. It can serve as a starting point for architecting and securing workloads on AWS. App Mesh features are applicable to some of the WAF security design principles. Particularly, AWS App Mesh can help addressing areas of:
- Protection of data in transit: App Mesh can provide traffic encryption of data in transit between services.
- Observability: for both service mesh control and data plane operations. CloudTrail tracks all App Mesh API calls, Envoy statistics can be integrated with Amazon CloudWatch Logs, and CloudWatch Metrics and application flows distributed tracing can be visualized with AWS X-Ray service.
- Server identity: each microservice being part of App Mesh can be identified by unique certificate attached to virtual node configuration. Granular settings determine allowed communication paths.
- Security at an additional layer: App Mesh delivers functionality very close to the application code on the EC2 host, ECS task, or EKS pod level before traffic leaves for the network but is independent from it. This is an add-on built on top of other AWS and Kubernetes security mechanisms.
- Automation of security best practices: entire App Mesh configuration is auditable via APIs and metrics, which can be automated and integrated with a CICD framework of choice.
Configuring App Mesh encryption for an EKS cluster
When planning for App Mesh traffic encryption with transport layer security (TLS), you can provide a private certificate to the Envoy proxy using either:
- AWS Certificate Manager when a certificate is issued by AWS Certificate Manager Private Certificate Authority (ACM PCA)
- A certificate stored on the local file system of the envoy proxy of a respective virtual node. It can be managed by your own certificate manager and issued by Certificate Authority (CA) of your choice
- A certificate provided by a Secrets Discovery Service (SDS) endpoint over local Unix Domain Socket.
The following table illustrates different supported options:
| App Mesh method to obtain certificate | Certificate management | Certificate authority |
| AWS Certificate Manager (ACM) hosting | AWS Certificate Manager | AWS Certificate Manager Private Certificate Authority (ACM PCA) |
| Local file hosting |
Many solutions available. For example JetStack cert-manager |
Many integration available. For example:
|
| Envoy Secret Discovery Service (SDS) | SPIFFE/SPIRE |
Many integration available. For example:
|
In the the following step-by-step guide, I’ll use the App Mesh local file hosting method, which is presented in the middle column of the preceding table. As a solution for customer managed certificates in this example, I am using JetStack cert-manager, which is a Kubernetes native implementation for automating certificate management. It is also a CNCF project. It supports integration with ACME (Let’s Encrypt), ACM PCA, HashiCorp Vault, Venafi, as well as self signed and internal certificate authorities. For the purposes of this blog, I’ll demonstrate two options, both managed by cert-manager, to issue certificates:
- internal Kubernetes self signed certificate authority
- integration with AWS Private CA Issuer
I will start my tutorial assuming you already have your EKS cluster with the App Mesh controller configured and the sample Yelb application is deployed. For details how to achieve this, please refer to Getting started with App Mesh (EKS).
Our initial goal is to secure internal communication between services that are part of Yelb (represented with red arrows in the picture below). Later, we will enhance encryption to entire communication path from browser to the application.

Guide to configure App Mesh encryption on EKS using own CA and cert-manager.
In parallel to the step-by-step guide, full configuration files are available in the App Mesh examples repository.
Note: if you already have your own certificate management system running, skip to step 3.
1. Install cert-manager
I will use Helm to deploy cert-manager with the default configuration. For a more advanced setup, refer to the cert-manager docs. We’ll start with creating and deploying a namespace for cert-manager.
kubectl create ns cert-manager

helm repo add jetstack https://charts.jetstack.io (https://charts.jetstack.io/)
helm repo update

helm install \
  cert-manager jetstack/cert-manager \
  --namespace cert-manager \
  --version v1.8.1 \
  --set installCRDs=true
Verify with following command:
kubectl -n cert-manager get podsThe output will be similar to:
NAME                                       READY   STATUS    RESTARTS   AGE
cert-manager-778d8f8b78-shhpm              1/1     Running   0          63s
cert-manager-cainjector-8545fdf87c-jzx2p   1/1     Running   0          63s
cert-manager-webhook-8c5db9fb6-xv49p       1/1     Running   0          63s
2. Create a CA (or reuse an existing one) and issue certificates for microservices
Cert-manager supports issuing certificates from multiple sources both external such as: AWS PCA and internal ones like in-cluster CA. For the purposes of this demo, I will first present how to generate a self-signed Certificate Authority managed by cert-manager as a Kubernetes resource. Then, I’ll show how to integrate existing AWS Private CA with cert-manager.
2.1 Create a new CA
First, we need to provide existing or generate a new signing key pair for our own CA. Openssl or cfssl tools can be used for it. I will create new one and save it locally to the file.
#generate a private key
openssl genrsa -out ca.key 2048

#create a self signed x.509 CA certificate
openssl req -x509 -new -key ca.key -subj "/CN=App Mesh Examples CA" -days 3650 -out ca.crt
Next, I will use the newly generated signing key pair to create a Kubernetes secret and store it in the Yelb namespace. We will need it to create a cert-manager CA issuer in the next step.
kubectl create secret tls ca-key-pair \
   --cert=ca.crt \
   --key=ca.key \
   --namespace=yelb
Now we are ready to instantiate the CA issuer, which can be either a namespace or cluster scope resource. Save manifest as ca-issuer.yaml.
apiVersion: cert-manager.io/v1
kind: Issuer
metadata:
  name: ca-issuer
  namespace: yelb
spec:
  ca:
    secretName: ca-key-pair
You can then apply it with the following command:
kubectl apply -f ca-issuer.yamlThe output confirms CA is ready to issue certificates:
$ kubectl -n yelb get issuer -o wide
NAME        READY   STATUS                AGE
ca-issuer   True    Signing CA verified   32s
Following best practices for CA hierarchy would mean usage of at least two levels of CA structure with root CA and mid level subordinate CA issuing end certificates. For this demo, I will use root CA to directly issue certificates for App Mesh virtual nodes.
Now that have our CA ready, let’s issue certificates needed for App Mesh encryption. In cert-manager certificate resource definition, we need to reference CA issuer and DNS name. Certificate DNS name must be an exact match to the App Mesh service endpoint name (e.g. yelb-db.yelb.svc.cluster.local) or alternatively wild card name (e.g. *.yelb.svc.cluster.local). Cert-manager provides granular management capabilities to issue individual certificates scoped to the virtual nodes. I will apply this approach in my example with the following config saved as yelb-cert-db.yaml:
apiVersion: cert-manager.io/v1
kind: Certificate
metadata:
  name: yelb-cert-db
  namespace: yelb
spec:
  dnsNames:
    - "yelb-db.yelb.svc.cluster.local"
  secretName: yelb-tls-db
  issuerRef:
    name: ca-issuer
You can then provision it with the following command:
kubectl apply -f yelb-cert-db.yamlThe same step is used to create certificate for the remaining Yelb components: ui, app, and redis.
Certificates are ready to use:
$ kubectl -n yelb get cert -o wide
NAME              READY   SECRET           ISSUER      STATUS
yelb-cert-app     True    yelb-tls-app     ca-issuer   Certificate is up to date and has not expired   3m34s
yelb-cert-db      True    yelb-tls-db      ca-issuer   Certificate is up to date and has not expired   3m34s
yelb-cert-redis   True    yelb-tls-redis   ca-issuer   Certificate is up to date and has not expired   3m34s
yelb-cert-ui      True    yelb-tls-ui      ca-issuer   Certificate is up to date and has not expired   3m34s
2.2 Use an existing AWS Private CA
AWS Private CA Issuer is open source project that acts as a bridge between AWS Private CA and cert-manager. It is a plugin which enables cert-manager to signs off certificate requests using AWS PCA.
We will start with AWS Private Issuer deployment:
kubectl create ns aws-pca-issuer

helm repo add awspca https://cert-manager.github.io/aws-privateca-issuer
helm repo update

helm install awspca/aws-pca-issuer --generate-name --namespace aws-pca-issuer
Verify with following command:
kubectl -n aws-pca-issuer get po The output will be similar to:
NAME                                                              READY   STATUS    RESTARTS   AGE
aws-pca-issuer-1627308262-aws-privateca-issuer-7b4b496597-b6dkg   1/1     Running   0          88s
Assuming you have your existing AWS Private CA we are creating a configuration of AWS PCA Cluster Issuer resource. Note: please apply your valid AWS PCA ARN.
apiVersion: awspca.cert-manager.io/v1beta1
 kind: AWSPCAClusterIssuer
 metadata:
          name: demo-test-root-ca
 spec:
          arn: arn:aws:acm-pca:us-west-2:123456789012:certificate-authority/99b7c81c-xxxx-yyyy-zzzz-cb2cd9ca8a8b
          region: us-west-2
Next, we will deploy it:
kubectl apply -f cluster-issuer.yamlThen verify that’s ready by use with cert-manager
kubectl get AWSPCAClusterIssuer
NAME                AGE
demo-test-root-ca   19s
Now we need to issue new certificates leveraging integration between cert-manager and AWS PCA using the following configuration:
cat <<EOF | kubectl apply -f -
apiVersion: cert-manager.io/v1
kind: Certificate
metadata:
  name: yelb-cert-gw
  namespace: yelb
spec:
  commonName: yelb-gw.yelb.svc.cluster.local
  dnsNames:
    - yelb-gw.yelb.svc.cluster.local
  secretName: yelb-tls-gw
  issuerRef:
    group: awspca.cert-manager.io
    kind: AWSPCAClusterIssuer
    name: demo-test-root-ca
EOF
The preceding YAML specification needs to point to our newly created AWS PCA Cluster Issuer. That’s the only difference comparing to previous option when we used internal self signed Certificate Authority.
Let’s confirm that our certificate is issued correctly and ready to use. The same step is used to create certificates for the remaining Yelb components: ui, app, and redis.
kubectl -n yelb get cert -o wide

NAME              READY   SECRET           ISSUER              STATUS                                          AGE
yelb-cert-app     True    yelb-tls-app     demo-test-root-ca   Certificate is up to date and has not expired   4m23s
yelb-cert-db      True    yelb-tls-db      demo-test-root-ca   Certificate is up to date and has not expired   4m23s
yelb-cert-gw      True    yelb-tls-gw      demo-test-root-ca   Certificate is up to date and has not expired   4m23s
yelb-cert-redis   True    yelb-tls-redis   demo-test-root-ca   Certificate is up to date and has not expired   4m23s
yelb-cert-ui      True    yelb-tls-ui      demo-test-root-ca   Certificate is up to date and has not expired   4m23s
These certificates are issued by AWS PCA however they are managed by cert-manager so they will not be visible in the AWS Certificate Manager console.
All the next steps of the blog post are exactly the same no matter how the certificate was issued.
The signed certificate for each microservice will be stored in a unique Kubernetes secret with base64 encoded: CA cert ca.crt, service cert tls.crt, and its private key tls.key. It is important to remember that, by default, all secrets within namespace are available to all pods/deployments. In a production environment, an additional RBAC configuration needs to be added for granular sharing of secrets with specific pods. Additionally, it is possible to use AWS Key Management Service (KMS) and configure envelope encryption of Kubernetes secrets stored in Amazon Elastic Kubernetes Service (EKS).
3. Mount certificate to microservice deployment
At this point, we have all components available and we are ready to start connecting the dots and build an App Mesh encryption solution. At the beginning, certificates files must be mounted to the file system of the Envoy sidecar proxy container for further consumption by the App Mesh virtual node TLS configuration. We need to have ‘magic glue,’ which does this job for us. It can be easily achieved with an additional annotation appmesh.k8s.aws/secretMounts available as part of App Mesh controller implementation.
Here is the JSON format of the patch we need to apply to Kubernetes deployment. It is needed to mount to Envoy file system newly created secret containing certificate.
{
  "spec": {
    "template": {
      "metadata": {
        "annotations": {
          "appmesh.k8s.aws/secretMounts": "yelb-tls-db:/etc/keys/yelb"
        }
      }
    }
  }
}
Let’s apply it:
kubectl -n yelb patch deployment yelb-ui -p '{"spec":{"template":{"metadata":{"annotations":{"appmesh.k8s.aws/secretMounts": "yelb-tls-ui:/etc/keys/yelb"}}}}}'

kubectl -n yelb patch deployment yelb-appserver -p '{"spec":{"template":{"metadata":{"annotations":{"appmesh.k8s.aws/secretMounts": "yelb-tls-app:/etc/keys/yelb"}}}}}'

kubectl -n yelb patch deployment yelb-db -p '{"spec":{"template":{"metadata":{"annotations":{"appmesh.k8s.aws/secretMounts": "yelb-tls-db:/etc/keys/yelb"}}}}}'

kubectl -n yelb patch deployment redis-server -p '{"spec":{"template":{"metadata":{"annotations":{"appmesh.k8s.aws/secretMounts": "yelb-tls-redis:/etc/keys/yelb"}}}}}'
Pods in all Yelb deployments will be recreated:
$ kubectl -n yelb get pods
NAME                             READY   STATUS        RESTARTS   AGE
redis-server-77899d7979-7w2lc    2/2     Running       0          17s
yelb-appserver-f97c48487-kctkn   2/2     Running       0          50s
yelb-db-8c588d586-56rpc          2/2     Running       0          35s
yelb-ui-5499cf5699-b49kh         2/2     Running       0          82s
We can verify that certificate files are properly mounted by executing the following command directly to the Envoy container of our sample pod:
$ YELB_APPSERVER_POD_NAME=$(kubectl -n yelb get pods -l app=yelb-appserver -o jsonpath='{.items[].metadata.name}')

$ kubectl -n yelb exec -it ${YELB_APPSERVER_POD_NAME} -c envoy -- ls /etc/keys/yelb
ca.crt  tls.crt  tls.key
4. Add TLS configuration to the virtual node
After mounting the certificate files in the Envoy file system, we need to tell App Mesh to start using them. This is done by adding TLS configuration to virtual nodes acting as servers and by adding the CA validation policy to clients. We will begin with configuration of TLS server part. We need to setup TLS mode and provide paths to certificate chain and its private key. In my case, ‘Strict’ TLS mode is configured, which means listener only accepts connections with TLS enabled.
The following patch needs to added to an App Mesh virtual node definition at /spec/listener/0/tls hierarchy where 0 specifies the item number in a listener array:
{
  "mode": "STRICT",
  "certificate": {
    "file": {
      "certificateChain": "/etc/keys/yelb/tls.crt",
      "privateKey": "/etc/keys/yelb/tls.key"
    }
  }
}
In the first part of the blog, I focused on an internal App Mesh service to service communication encryption so we apply above settings only to yelb-appserver, yelb-db, and redis-server virtual nodes. For the encryption of ingress traffic coming from outside of App Mesh (e.g. traffic to yelb-ui), we will create an App Mesh Virtual Gateway and apply similar TLS configuration in the next paragraph of the blog.
kubectl -n yelb patch virtualnode yelb-appserver --type='json' -p='[{"op": "add", "path": "/spec/listeners/0/tls", "value": {"mode": "STRICT","certificate": {"file": {"certificateChain": "/etc/keys/yelb/tls.crt", "privateKey": "/etc/keys/yelb/tls.key"} } } }]'

kubectl -n yelb patch virtualnode yelb-db --type='json' -p='[{"op": "add", "path": "/spec/listeners/0/tls", "value": {"mode": "STRICT","certificate": {"file": {"certificateChain": "/etc/keys/yelb/tls.crt", "privateKey": "/etc/keys/yelb/tls.key"} } } }]'

kubectl -n yelb patch virtualnode redis-server --type='json' -p='[{"op": "add", "path": "/spec/listeners/0/tls", "value": {"mode": "STRICT","certificate": {"file": {"certificateChain": "/etc/keys/yelb/tls.crt", "privateKey": "/etc/keys/yelb/tls.key"} } } }]'
Note: in a production environment, updating live Envoy settings to enable (or disable) TLS is not recommended. Due to race conditions in delivering Envoy configuration to both the “client” and “server,” a brief disruption in communication can occur. As a best practice, it is recommended to shift traffic from a virtual node with no TLS to a TLS-enabled virtual node using the App Mesh virtual router.
4.1 Validate TLS encryption
We can now visit the Yelb web page, vote for our favorite restaurant, and verify if our traffic is encrypted with the following command:
$ YELB_APPSERVER_POD_NAME=$(kubectl -n yelb get pods -l app=yelb-appserver -o jsonpath='{.items[].metadata.name}')

$ kubectl -n yelb exec -it ${YELB_APPSERVER_POD_NAME} -c envoy -- curl -s localhost:9901/stats | grep ssl.handshake
After a few visits to web page and a few votes, Envoy output confirms a proper TLS handshake for communication from yelb-ui to yelb-appserver:
listener.0.0.0.0_15000.ssl.handshake: 3 As well as, from yelb-appserver to both yelb-db and redis-server:
cluster.cds_egress_yelb_redis-server-virtual-node_tcp_6379.ssl.handshake: 1
cluster.cds_egress_yelb_yelb-db-virtual-node_tcp_5432.ssl.handshake: 46
4.2 Validate TLS with client policy
So far so good. Traffic is encrypted. Yelb microservices could establish internal TLS communication but none of them verified the identity of CA issuing certificate. This is similar to the situation when a user browses to some web page. The page presents a certificate but the browser cannot confirm its identity because CA is not trusted by operating system and the browser will trigger an alert about invalid certificate issuer. In the case of a browser, there is a prepopulated list of trusted CAs (by operating system or browser vendor) but for internal microservice clients, you need to explicitly configure that list of trusted CAs.
To improve App Mesh security and avoid the behavior of trusting any certificate, we need to configure a backend client policy on the virtual node to establish a chain of trust. This will enforce setting TLS communication only with upstream services, which present a certificate signed by the client’s trusted CA. The procedure will be similar to one described earlier when installing a service specific certificate on a virtual node.
First, we need to mount CA certificate file in Envoy file system. A common CA certificate ca.crt is already part of secret mounted to an Envoy in a previous stage:
$ YELB_APPSERVER_POD_NAME=$(kubectl -n yelb get pods -l app=yelb-appserver -o jsonpath='{.items[].metadata.name}')

$ kubectl -n yelb exec -it ${YELB_APPSERVER_POD_NAME} -c envoy -- ls /etc/keys/yelb
ca.crt  tls.crt  tls.key
The next step is to configure a client policy on App Mesh to validate the trusted CA. It can be set as the default policy for all backends or specified for each backend separately. I will use the default client policy for all backends.
{
  "spec": {
    "backendDefaults": {
      "clientPolicy": {
        "tls": {
          "validation": {
            "trust": {
              "file": {
                "certificateChain": "/etc/keys/yelb/ca.crt"
              }
            }
          }
        }
      }
    }
  }
}
Now we need to patch virtual node definitions with the below config:
kubectl -n yelb patch virtualnode yelb-ui --type='json' -p='[{"op": "add", "path":  "/spec/backendDefaults", "value": {"clientPolicy": {"tls": {"enforce": true, "validation": {"trust": {"file": {"certificateChain": "/etc/keys/yelb/ca.crt"}}}}}} }]'

kubectl -n yelb patch virtualnode yelb-appserver --type='json' -p='[{"op": "add", "path":  "/spec/backendDefaults", "value": {"clientPolicy": {"tls": {{"enforce": true, "validation": {"trust": {"file": {"certificateChain": "/etc/keys/yelb/ca.crt"}}}}}} }]'

kubectl -n yelb patch virtualnode yelb-db --type='json' -p='[{"op": "add", "path":  "/spec/backendDefaults", "value": {"clientPolicy": {"tls": {"enforce": true, "validation": {"trust": {"file": {"certificateChain": "/etc/keys/yelb/ca.crt"}}}}}} }]'

kubectl -n yelb patch virtualnode redis-server --type='json' -p='[{"op": "add", "path":  "/spec/backendDefaults", "value": {"clientPolicy": {"tls": {"enforce": true, "validation": {"trust": {"file": {"certificateChain": "/etc/keys/yelb/ca.crt"}}}}}} }]'
Again, after visiting the Yelb web page and playing with it, we can verify our service is working properly by seeing the increased counters of ssl handshake.
$ YELB_APPSERVER_POD_NAME=$(kubectl -n yelb get pods -l app=yelb-appserver -o jsonpath='{.items[].metadata.name}')

$ kubectl -n yelb exec -it ${YELB_APPSERVER_POD_NAME} -c envoy -- curl -s localhost:9901/stats | grep ssl.handshake
cluster.cds_egress_yelb_redis-server-virtual-node_tcp_6379.ssl.handshake: 3
cluster.cds_egress_yelb_yelb-db-virtual-node_tcp_5432.ssl.handshake: 114
listener.0.0.0.0_15000.ssl.handshake: 9
In case of errors, the following command can provide more insight on potential issues and help with troubleshooting:
kubectl -n yelb exec -it ${YELB_APPSERVER_POD_NAME} -c envoy -- curl -s localhost:9901/stats | grep -e "ssl.*\(fail\|error\)"5. Configure encryption between external LB and App Mesh
In previous configuration steps, we secured, using TLS, all internal communication between App Mesh virtual nodes representing Yelb microservices. This is significant but still a partial improvement of our application security posture. It is desired to apply the same security principle for all hops of an entire communication path from end user to App Mesh enabled application. Traffic from end user to AWS load balancer can be protected by the configuration of HTTPS listener with a valid certificate. The more interesting part is flow between load balancer and App Mesh.
In our simple example, it would be enough to apply additional TLS settings on yelb-ui service and virtual node manifests. However, for the complete illustration of App Mesh capabilities that address more complex use cases, I will add virtual gateway as a bridging component for our solution. For more information on virtual gateways, peruse the App Mesh docs. In our case, App Mesh virtual gateway will terminate TLS flow from the load balancer and initiate a new TLS connection to target virtual node: yelb-ui. In the first part of my post, default classic load balancer was used to expose service externally. For App Mesh virtual gateway, we recommend a network load balancer for its performance capabilities and because App Mesh gateways provide application-layer routing.
Diagram of extended solution architecture is represented below:

The configuration of a virtual gateway is very similar to a virtual node. We need to add TLS settings on the listener part and additionally configure the TLS client policy for a connection from the virtual gateway to yelb-ui. Moreover, there is new construct, gateway route, which steers traffic to an existing virtual service, yelb-ui in our case. The configuration is saved to yelb-gw.yaml file.
---
apiVersion: appmesh.k8s.aws/v1beta2
kind: VirtualGateway
metadata:
  name: yelb-gw
  namespace: yelb
spec:
  backendDefaults:
    clientPolicy:
      tls:
        enforce: true
        validation:
          trust:
            file:
              certificateChain: /etc/keys/yelb/ca.crt
  namespaceSelector:
    matchLabels:
      gateway: yelb-gw
  podSelector:
    matchLabels:
      app: yelb-gw
  listeners:
    - portMapping:
        port: 8443
        protocol: http
      tls:
        certificate:
          file:
            certificateChain: /etc/keys/yelb/tls.crt
            privateKey: /etc/keys/yelb/tls.key
        mode: STRICT
---
apiVersion: appmesh.k8s.aws/v1beta2
kind: GatewayRoute
metadata:
  name: gateway-route
  namespace: yelb
spec:
  httpRoute:
    match:
      prefix: "/"
    action:
      target:
        virtualService:
          virtualServiceRef:
            name: yelb-ui
---
You can then deploy it with the following command:
kubectl apply -f yelb-gw.yamlThe virtual gateway is created:
$ kubectl -n yelb get virtualgateways
NAME         ARN                                                                               AGE
yelb-gw      arn:aws:appmesh:us-west-2:123456789012:mesh/yelb/virtualGateway/yelb-gw_yelb      2m40s
As the next step, we have to label the yelb namespace with information on our newly created virtual gateway:
kubectl label namespaces yelb gateway=yelb-gwFinally create the deployment with an Envoy container, which will be mapped to our virtual gateway. In this step, we are also mounting a secret with the certificate files needed for Envoy configuration. We will create a new certificate and secret unique for the Yelb virtual gateway configuration. Save manifest as yelb-gw-deployment.yaml .
---
apiVersion: cert-manager.io/v1
kind: Certificate
metadata:
  name: yelb-cert-gw
  namespace: yelb
spec:
  dnsNames:
    - "yelb-gw.yelb.svc.cluster.local"
  secretName: yelb-tls-gw
  issuerRef:
    name: ca-issuer
---
apiVersion: apps/v1
kind: Deployment
metadata:
  name: yelb-gw
  namespace: yelb
spec:
  replicas: 1
  selector:
    matchLabels:
      app: yelb-gw
  template:
    metadata:
      labels:
        app: yelb-gw
    spec:
      containers:
        - name: envoy
          image: {{ENVOY_IMAGE}}
          ports:
            - containerPort: 8443
          volumeMounts:
           - mountPath: "/etc/keys/yelb"
             name: yelb-tls-gw
             readOnly: true
      volumes:
        - name: yelb-tls-gw
          secret:
            secretName: yelb-tls-gw
You can then deploy it with the following commands:
# Get the Envoy image URL from https://docs.aws.amazon.com/app-mesh/latest/userguide/envoy.html
ENVOY_IMAGE="<ENVOY-IMAGE-URL>"

sed -e "s|{{ENVOY_IMAGE}}|${ENVOY_IMAGE}|g" yelb-gw-deployment.yaml | \
kubectl apply -f -
As now we want to have traffic encrypted from yelb virtual gateway to yelb-ui we need to configure and enforce TLS on yelb-ui listener:
kubectl -n yelb patch virtualnode yelb-ui --type='json' -p='[{"op": "add", "path": "/spec/listeners/0/tls", "value": {"mode": "STRICT","certificate": {"file": {"certificateChain": "/etc/keys/yelb/tls.crt", "privateKey": "/etc/keys/yelb/tls.key"} } } }]Finally, the last step is exposing our service externally through AWS NLB with the TLS listener and target pointing at yelb-gw. The certificate is configured for NLB by the service annotation. It is external certificate managed by ACM, visible by end user, and should be issued by the trusted CA. It can be either generated by or imported to ACM. It is a different certificate than used internally by App Mesh components, which was created earlier with cert-manager. The configuration is saved to yelb-gw-service.yaml file.
An alternative approach that could be considered is to use NLB solely as a TCP load balancer and terminate TLS directly in App Mesh virtual gateway. In such a scenario, a certificate issued by a trusted public CA would be installed directly in the virtual gateway and managed together with remaining certificates by cert-manager.
apiVersion: v1
kind: Service
metadata:
  name: yelb-gw
  namespace: yelb
  annotations:
    service.beta.kubernetes.io/aws-load-balancer-type: "nlb"
    service.beta.kubernetes.io/aws-load-balancer-ssl-cert: {{LB_CERT_ARN}}
    service.beta.kubernetes.io/aws-load-balancer-backend-protocol: "ssl"
spec:
  type: LoadBalancer
  ports:
    - port: 443
      targetPort: 8443
      name: https
  selector:
    app: yelb-gw
You can then provision it with the following commands:
# Change certificate arn below with your own valid arn.
LB_CERT_ARN="arn:aws:acm:<region>:<account-id>:certificate/<cert-id>"

sed -e "s|{{LB_CERT_ARN}}|${LB_CERT_ARN}|g" yelb-gw-service.yaml | \
kubectl apply -f -
We can verify that our Yelb application is working through https by checking the load balancer url in a browser:
$ kubectl -n yelb get svc yelb-gw
NAME      TYPE           CLUSTER-IP       EXTERNAL-IP                                                              PORT(S)         AGE
yelb-gw   LoadBalancer   172.20.210.108   a85fa84bf9fc44eaea3378520ddcc463-123456789.us-west-2.elb.amazonaws.com   443:32052/TCP   5m3s
Additionally, the output below confirms TLS encrypted communication from NLB to virtual gateway and from virtual gateway to yelb-ui virtual node.
$ YELB_GW_POD_NAME=$(kubectl -n yelb get pods -l app=yelb-gw -o jsonpath='{.items[].metadata.name}')

$ kubectl -n yelb exec -it ${YELB_GW_POD_NAME} -c envoy -- curl -s localhost:9901/stats | grep ssl.handshake
cluster.cds_egress_yelb_yelb-ui-virtual-node_http_80.ssl.handshake: 3
listener.0.0.0.0_8443.ssl.handshake: 648
Summary and final considerations
In this post I provided you with an overview of the steps needed to configure App Mesh encryption with certificates using the Kubernetes-native open source project cert-manager. If you would like to use a different CA or your existing certificate infrastructure integration, the flow for App Mesh encryption will be exactly the same.
When building a production solution, all Well Architected Framework Security Pillar design principles mentioned in the beginning of the blog should be considered. Next steps should include granular RBAC configuration for Kubernetes secrets and setting correct IAM permissions for Envoy side car using IAM roles for service accounts. Integration with logging and monitoring tools needs be applied. You should also consider automating the creation of a configuration and any changes to it.
Operationally, it is important to know that cert-manager will handle the entire process of certificate renewal, and certificate updates are propagated to Envoy file system. However, to start using them, a reload of the Envoy configuration is needed. For more information on this refer to Certificate renewal section in the documentation. Also, there is an App Mesh roadmap feature request on this.