.NET on AWS Blog
Port .NET Framework workloads to Linux with Amazon Q Developer, Part 4: MVC projects
Introduction
This post continues our blog series on modernizing .NET Framework applications to cross-platform .NET using Amazon Q Developer .NET transformation. We’ve already covered porting class libraries in Part 1, test projects in Part 2, and Web API applications in Part 3. In this fourth installment, we’ll focus on migrating ASP.NET MVC applications to ASP.NET Core.
ASP.NET MVC applications, often the backbone of enterprise solutions with complex evolved architectures, require careful migration to ASP.NET Core due to differences in controllers, middleware, dependency injection, views, and authentication frameworks. Amazon Q Developer streamlines this process through AI-powered analysis that automatically identifies Windows-specific dependencies, recommends replacements, adapts code for architectural differences, and transforms configurations—significantly reducing manual effort while enabling applications to run on Linux-based AWS infrastructure, potentially cutting operational costs by 40% and unlocking modern .NET’s performance, security, and support benefits.
Moving ASP.NET MVC apps to ASP.NET Core is complex, but Amazon Q Developer automates the process by identifying Windows-specific dependencies and required changes, suggesting updates, and modifying code—enabling Linux deployment on AWS while reducing costs and accessing modern .NET benefits.
Overview
In this walkthrough, we’ll demonstrate how Amazon Q Developer transforms complex .NET modernization into a streamlined process using ContosoUniversity which is a sample application built on .NET Framework 4.5. This monolithic n-tier application features an ASP.NET MVC front end with Microsoft SQL Server database backend, providing a real-world scenario for showcasing the AI assistant’s capabilities in modernizing legacy applications to cross-platform .NET.
Prerequisites
For this tutorial, you will need:
1. Install Visual Studio 2022
2. Install SQL Server 2019 Express
3. Install and set up AWS Toolkit for Visual Studio
4. Configure IAM Identity Center for Amazon Q
5. Enable and subscribe users to Amazon Q Developer Pro
6. Set up Amazon Q using AWS Toolkit for Visual Studio
7. Download the ConstosoUniversity sample application
Step 1: Set up and understand the sample application
1. Unzip and open ContosoUniversity.sln from ASP.NET MVC Application Using Entity Framework Code First\C# in Visual Studio 2022.
2. You will get a warning that the file was downloaded from the internet. Choose Trust and Continue. You will get another warning offering to upgrade the project:
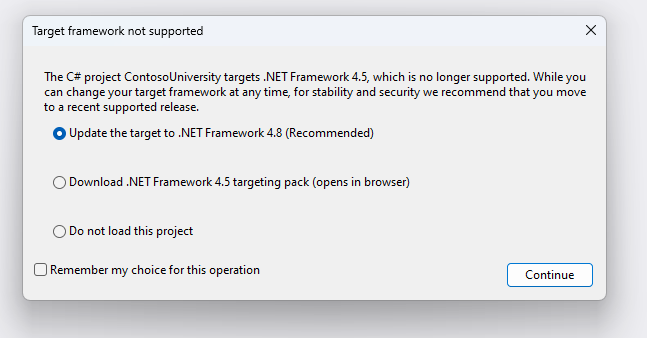
Figure 1: Target framework not supported dialog
Choose Continue to update the target to .NET Framework 4.8 (Recommended).
3. You will get another warning that SQL Server 2012 Express is not installed. Choose OK, which will open the project. Review the structure of the solution in Visual Studio by opening Solution Explorer (View > Solution Explorer from the menu).
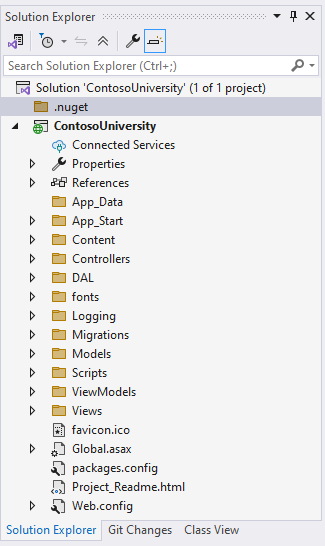
Figure 2: Review structure in Solution Explorer
In Solution Explorer, right click the Migrations folder and choose Delete.
4. Verify the project version is .NET Framework 4.8.
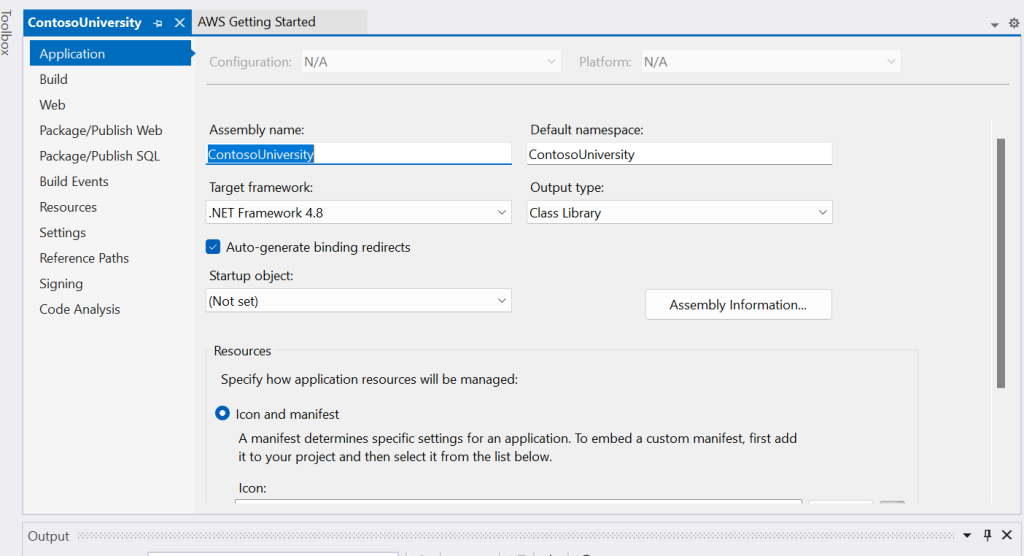
Figure 3: Project properties
5. You can now run the application by pressing F5.
ContosoUniversity is a sample application that demonstrates how to use Entity Framework Core in an ASP.NET Core MVC web application.
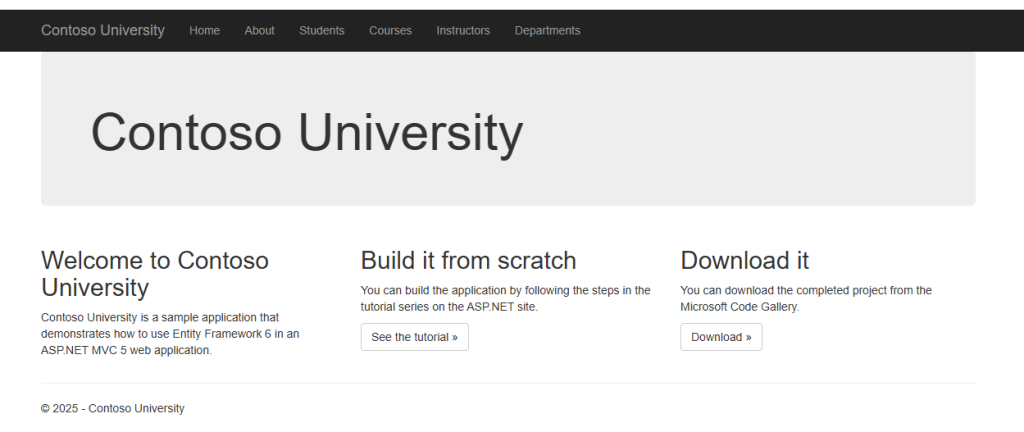
Figure 4: Sample application in browser
The ContosoUniversity solution comprises a SQL Server database for registration data, with Entity Framework managing data access. It utilizes an ASP.NET MVC project, featuring Controllers for handling user requests, Models for defining database entities and business logic, and Views for UI presentation. A Data folder contains the database context and migrations, completing the solution’s core components.
Step 2: Port Solution
The solution contains a project running on .NET framework version 4.8. We’ll use Amazon Q to modernize the project by migrating it to cross-platform .NET.
1. Sign in to IAM Identity Center. The Getting Started screen for the AWS Toolkit should confirm you are connected after you’ve authenticated to Amazon Q and AWS Toolkit.
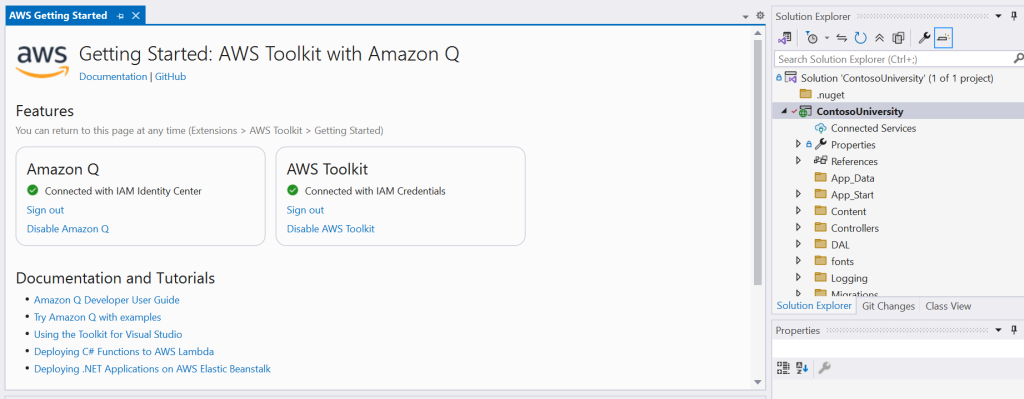
Figure 5: AWS Toolkit Getting Started screen
2. Open a C# code file in the editor, which initializes Amazon Q Developer .NET transformation.
3. Right click on the ContosoUniversity solution in the Solution Explorer. Select Port project with Amazon Q Developer.
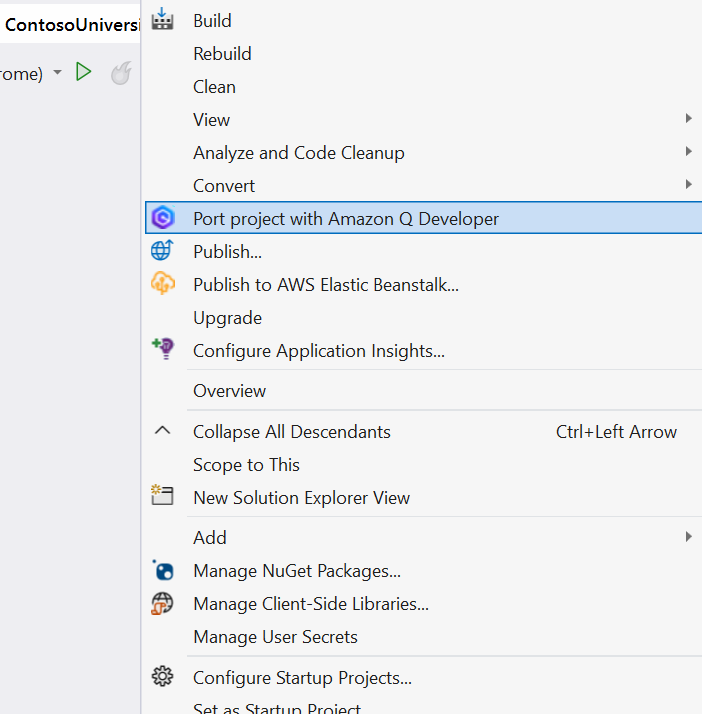
Figure 6: Solution Explorer action to Port project
Note: an error popup will appear if you try porting a project or solution for the first time before opening a code file.
4. On the port project dialog. select your target .NET version and check thePort .NET Standard projects to .NET checkbox . Then choose Start.
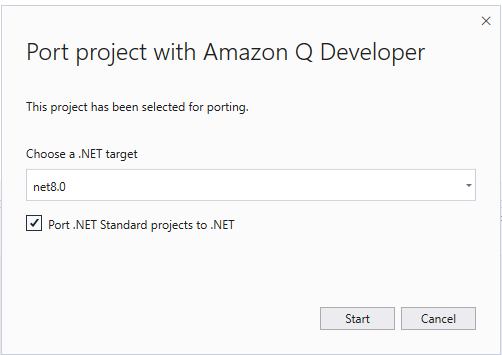
Figure 7: Port project with Amazon Q Developer dialog
5. At the warning choose Yes to proceed
6. You can monitor the transformation job progress under Amazon Q Developer Code Transformation Hub.
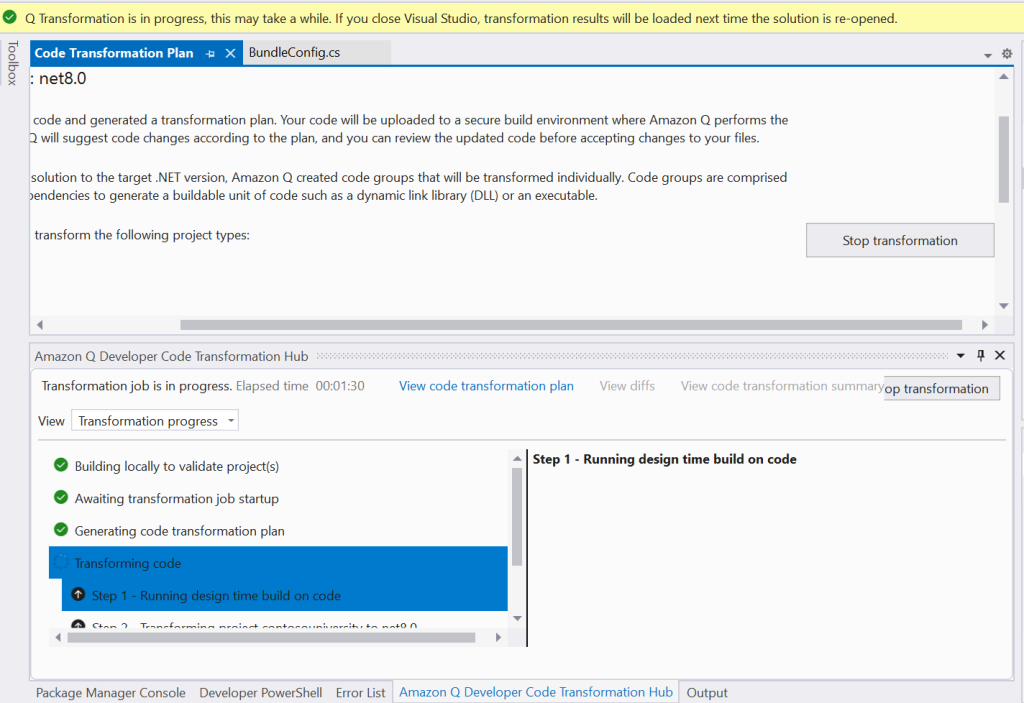
Figure 8: Monitoring transformation progress
Amazon Q validates your code with a local build, then securely analyzes it in AWS, organizing your solution into code groups (projects and their dependencies) and automatically transforming all required components—even those outside your selected projects—to ensure a complete, functional migration.
7. Review the transformation plan. After analyzing your code, Amazon Q generates a transformation plan that outlines the proposed changes that Amazon Q will make, including a list of code groups and their dependencies that will be transformed. The transformation consists of four steps:
- Build locally to validate original projects
- Await transformation job startup
- Generate code transformation plan
- Execute transformation plan
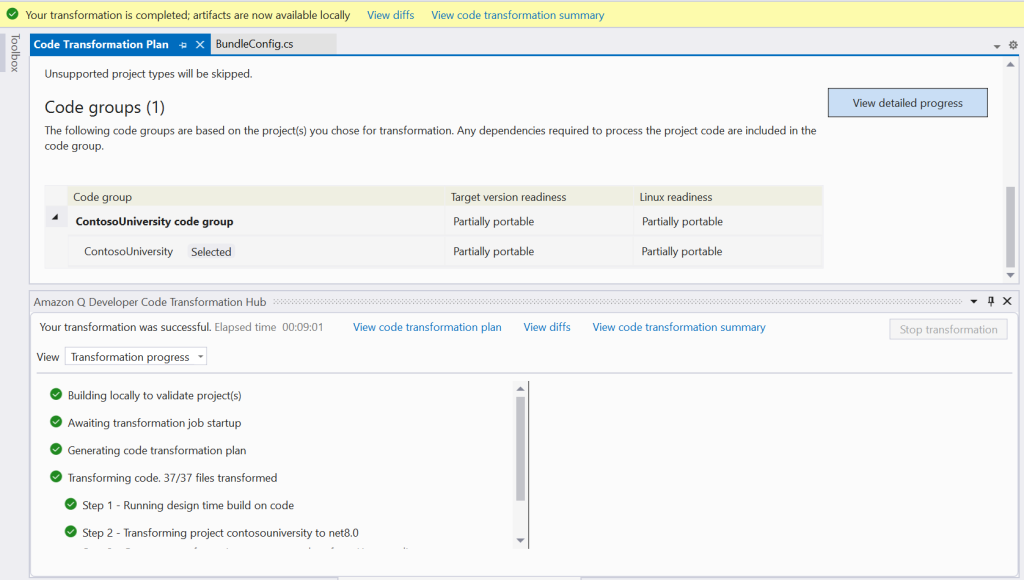
Figure 9: Transformation Plan
8. Wait for the transformation to finish. You’ll see a notification near the top of Visual Studio telling you when transformation is complete.
Step 3: Review transformation Summary
During the transformation process, Amazon Q Developer conducts a thorough review of your selected .NET solution and creates a detailed transformation plan. To protect your working environment, any code modifications are performed within a secure sandbox environment, ensuring your original working directory remains untouched. Upon completion of the transformation job, Q Developer provides a comprehensive code transformation summary.
You can access this summary in two ways:
- Choose the View code transformation summary link located beneath the top navigation bar, or
- Choose the View code transformation summary option within the Amazon Q Developer Code Transformation Hub at the bottom of the screen.
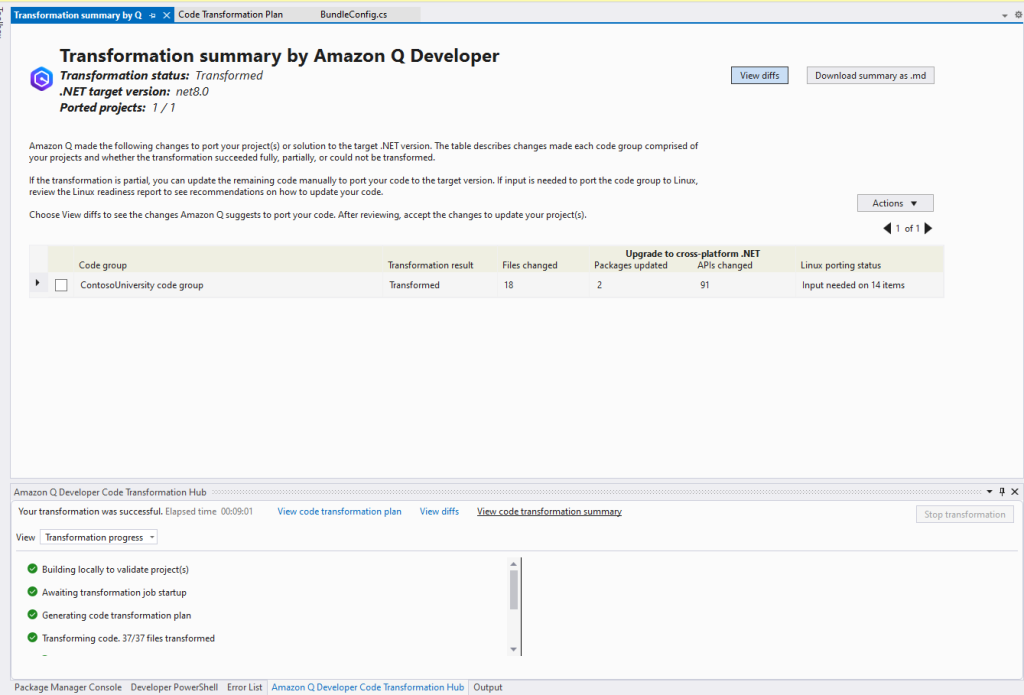
Figure 10: Transformation Summary
Step 4: Review and accept code changes
Amazon Q Developer performs all code modifications in a dedicated sandbox environment to protect your working directory from any interference.
1. To review and accept these changes, you can access the diff view by choosing the View diffs button in the Transformation summary tab. The Amazon Q Developer Code Transformation Hub panel, located at the bottom of the screen, will display all modified files for your review.
2. In this particular transformation, the project file underwent several updates, including a conversion to the new Project format, removal of legacy Reference/Compile Include lines, and an update to the target framework version. Select the .csproj file and choose View Diffs to view the code changes (Figure 11).
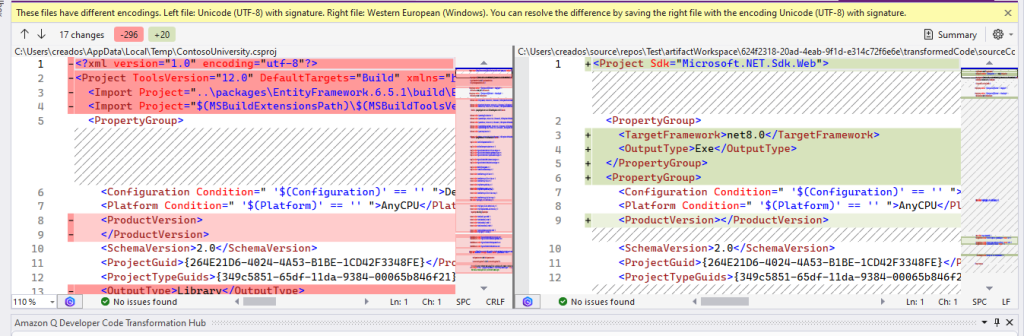
Figure 11: Code differences in project file
3. Next, view a change to a controller C# file (Figure 12). The controllers were updated to use the AspNetCore packages,
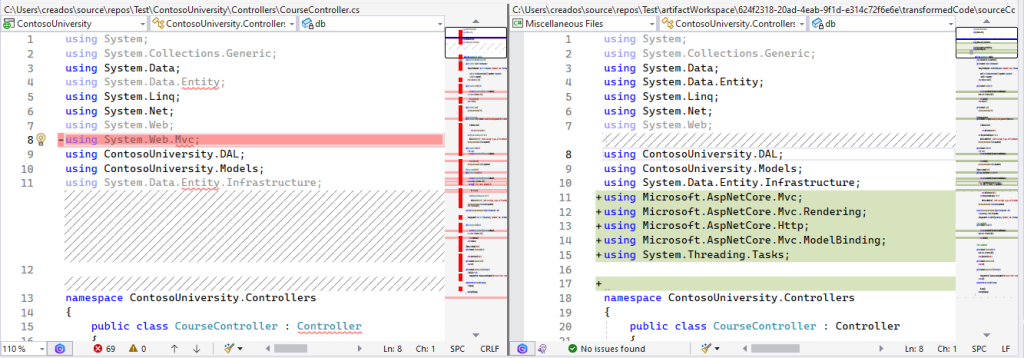
Figure 12: code differences in controller
4. Go back to the View code transformation summary and choose Actions > Apply Suggested Changes.
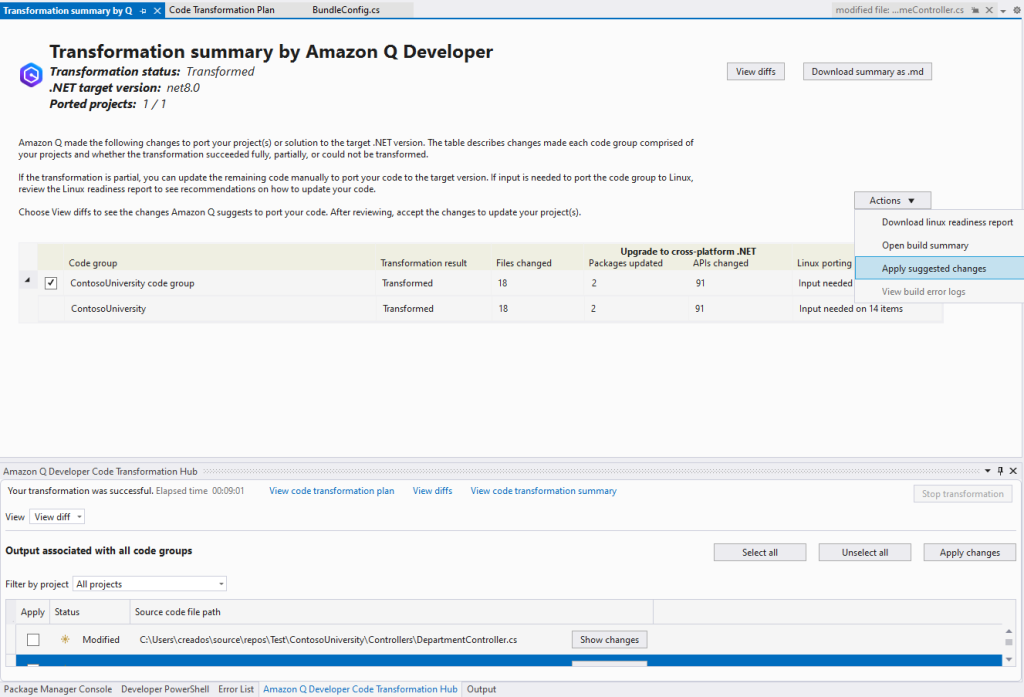
Figure 13: Apply suggested changes
Choose Reload All to load the newly migrated project. You may need to close the solution from File Menu and re-open.
Step 6: Manual updates
Amazon Q Developer .NET transformation does not currently port the UI layer. Before running the solution, we need to make the following changes:
1. Update MVC references
Update the file ContosoUniversity\Views\Student\Index.cshtml lines 1 and 2:
Before:
@model PagedList.IPagedList<ContosoUniversity.Models.Student>
@using PagedList.Mvc;
After:
@model X.PagedList.IPagedList<ContosoUniversity.Models.Student>
@using X.PagedList.Mvc;
@using X.PagedList.Mvc.Core;
@addTagHelper *, X.PagedList.Mvc
2. Update JavaScript
Make the following changes to the files listed below:
ContosoUniversity\Views\Course\Create.cshtmlline 63ContosoUniversity\Views\Department\Create.cshtmlline 63ContosoUniversity\Views\Instructor\Create.cshtmlline 91ContosoUniversity\Views\Student\Create.cshtmlline 55ContosoUniversity\Views\Course\Edit.cshtmlline 64ContosoUniversity\Views\Department\Edit.cshtmlline 66- C
ontosoUniversity\Views\Instructor\Edit.cshtmlline 93 ContosoUniversity\Views\Student\Edit.cshtmlline 57
Before:
@section Scripts {
@Scripts.Render("~/bundles/jqueryval")
}
After:
<script src="~/Scripts/jquery.validate.js"></script>
Make the following changes to ContosoUniversity\Views\Shared\_Layout.cshtml lines 48 and 49
Before:
@Scripts.Render("~/bundles/jquery")
@Scripts.Render("~/bundles/bootstrap")
After:
<script src="~/Scripts/jquery-1.10.2.js"></script>
<script src="~/Scripts/bootstrap.js"></script>
3. Update CSS
Make the following changes to ContosoUniversity\Views\Shared\_Layout.cshtml lines 7 and 8
Before:
@Styles.Render("~/Content/css")
@Scripts.Render("~/bundles/modernizr")
After:
<link href="~/Content/bootstrap.css" rel="stylesheet" />
<link href="~/Content/PagedList.css" rel="stylesheet" />
<link href="~/Content/Site.css" rel="stylesheet" />
<script src="~/Scripts/modernizr-2.6.2.js"></script>
Step 7: Run the application
Your application has now been completely ported over to .NET Core. You can verify that the application runs by pressing F5.

Figure 14: Modernized MVC application running
Conclusion
In this post, we have showed how Amazon Q Developer simplifies the process of migrating legacy ASP.NET MVC applications to modern .NET MVC. Using the ContosoUniversity sample application, we demonstrated the step-by-step transformation process, from analyzing the original .NET Framework 4.8 codebase to successfully modernizing it to the latest .NET version. Transform your legacy applications now with Amazon Q Developer’s migration and modernization capabilities. Amazon Q Developer can explain and update specific lines of code in your integrated development environment (IDE).