AWS Cloud Operations Blog
Announcing evidence finder for AWS Audit Manager
Today, we’re excited to announce a new search feature that allows customers to perform targeted searches by multiple criteria, group the results and send the data to an assessment report. Customers can more easily find the evidence they need and, organize it without the need to add it to a report. Customers can then generate their reports into PDFs for the data resulting from an evidence finder search. Customers can still use the existing reporting patterns in AWS Audit Manager, however using evidence finder removes the heavy lift of adding evidence to the report.
Evidence finder allows customers to designate up to 12 query filters to find the evidence needed. Evidence can be queried with the following filters:
- Compliant
- Non-compliant
- Inconclusive
- Account ID
- Control
- Control domain
- Data source type
- Event name
- Resource ARN
- Resource type
- Service
- Service category
Further, results can optionally be grouped by the following fields:
- Account ID
- Control
- Control domain
- Data source type
- Event name
- Resource ARN
- Resource type
- Service
- Service category
Getting started with evidence finder requires an easy setup process. To get started:
Log on to the Audit Manager console. If you have not previously enabled Audit Manager in your account(s), follow these instructions to get started. Next, navigate to settings and review the information in the evidence finder section and if you agree, select “Enable”:
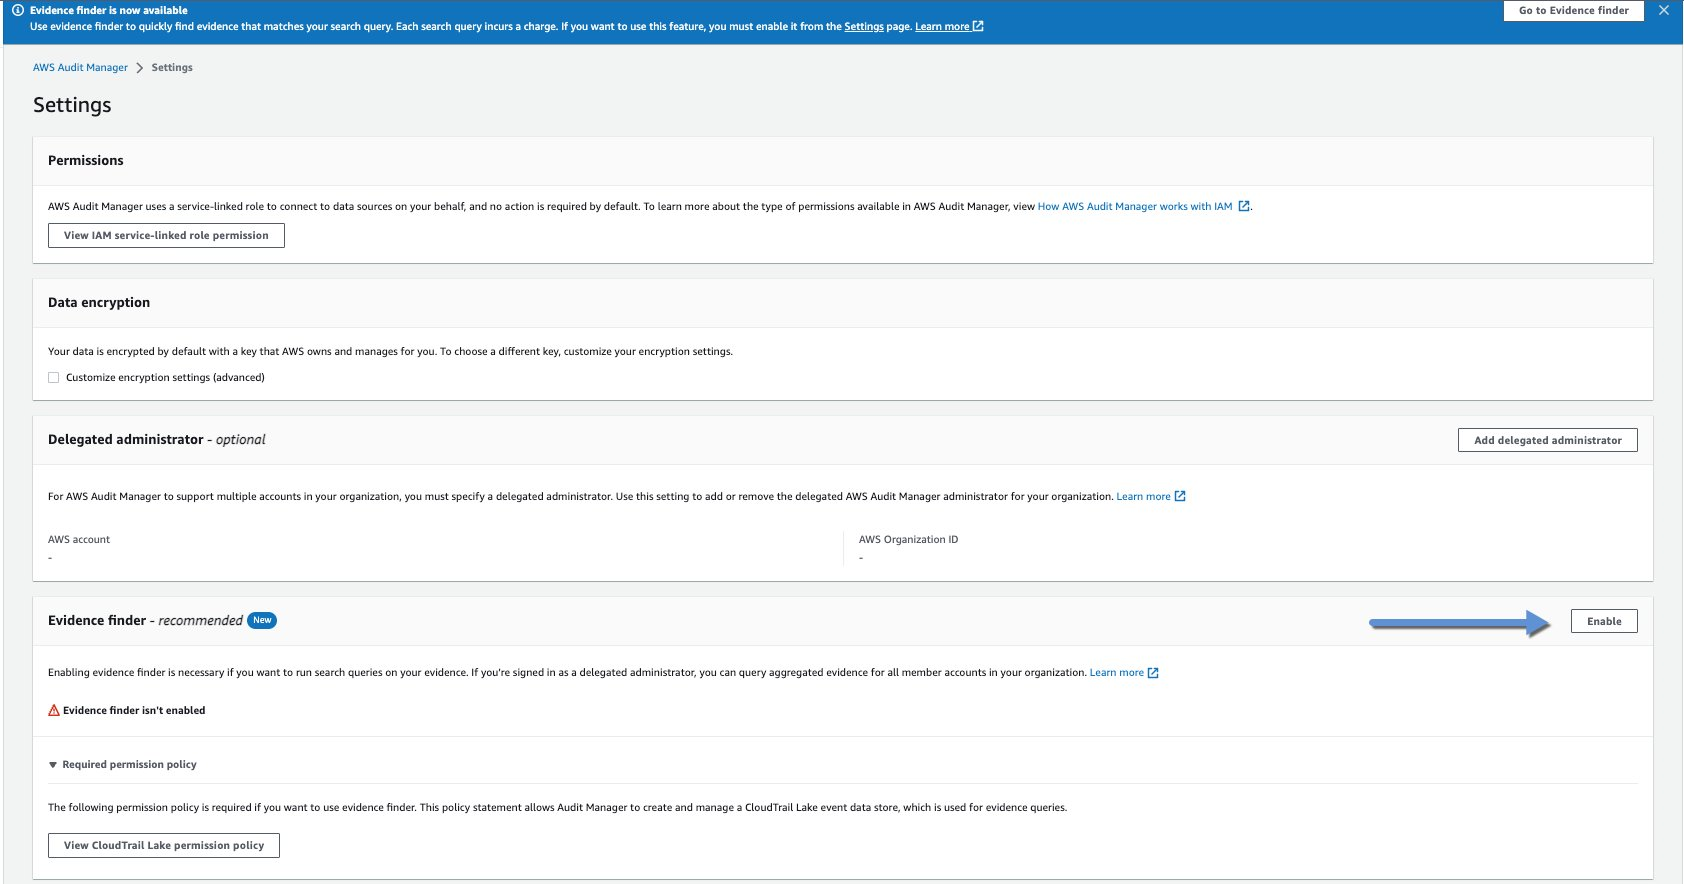
Figure 1. Enable evidence finder in the Audit Manager console / settings.
Evidence finder relies on event data store in AWS CloudTrail Lake to allow the query capability. It will take up to 10 minutes to create the event data store and as long as 7 days or more to backfill the past 2 years of evidence into the event data store, depending on the volume of evidence existing in the account.
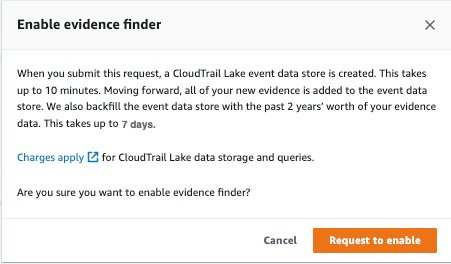
Figure 2. Agree to the creation of a Cloud Trail Lake event data store and the pricing.
You can navigate away from this page while the event data store is created and the data is backfilled.
After the event data store is created, and the evidence data has been backfilled, you can perform detailed searches of the evidence and generate an assessment report containing the results.
To perform an evidence finder search, perform the following steps:
- Navigate to evidence finder
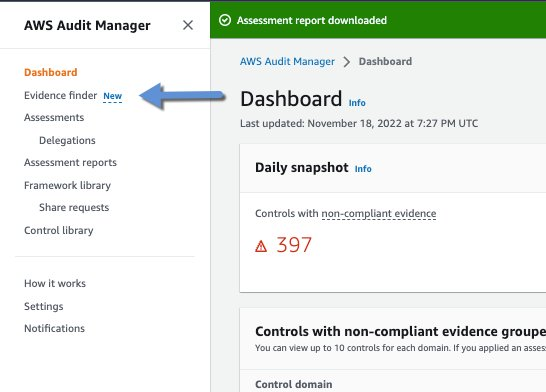
Figure 3. Showing evidence finder link
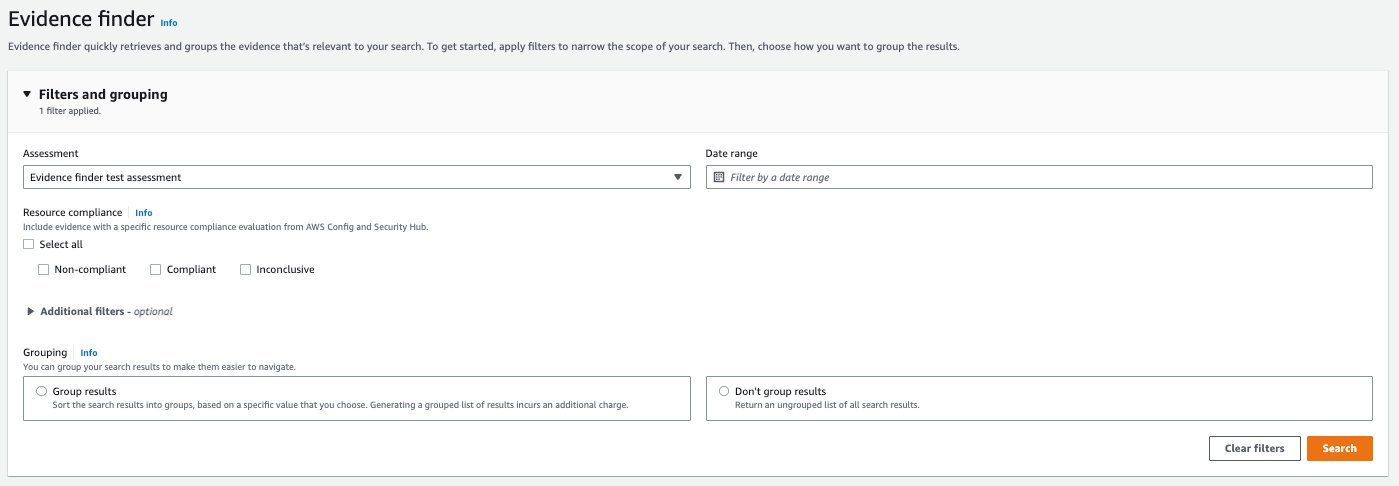
Figure 4. showing how to start an evidence search.
- Select an active assessment and define a basic filter criteria such as a date range and resource compliance types.
- Select a date range. There are two ways to drill down on the date range of the evidence you are interested in: relative and absolute.
For relative range you can select a predetermined range as shown below:
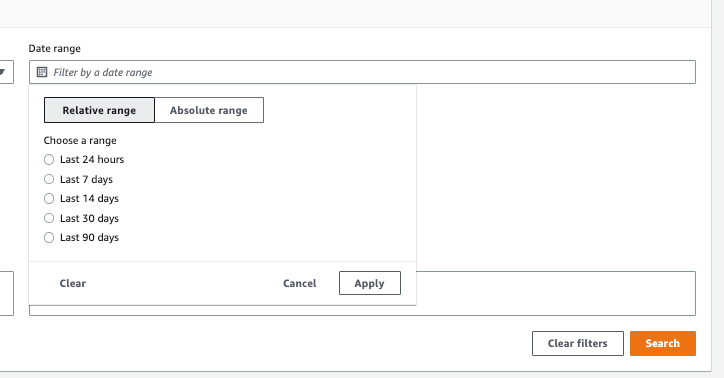
Figure 5. Select a predetermined date range. Values such as Last 24 hours, Last 7 days, etc.
For an absolute date range, start by selecting the ‘Absolute range’ button, then selecting or entering a start and end date.
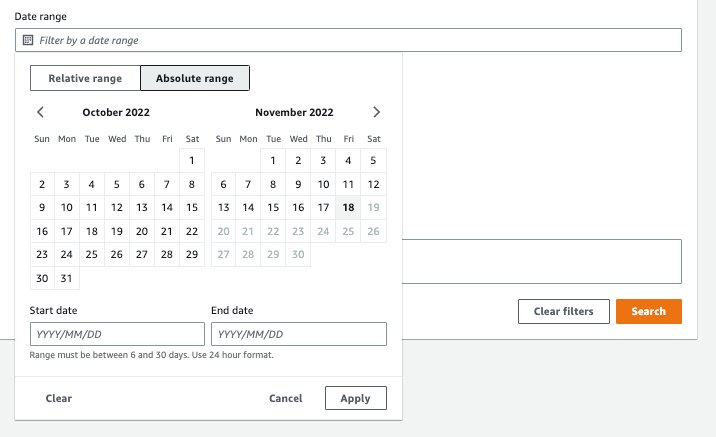
Figure 6. Select an absolute start date and end date and select ‘Apply’.
- Select ‘Apply’ on the date range form to apply the filter.
- Next, define your resource compliance filters.
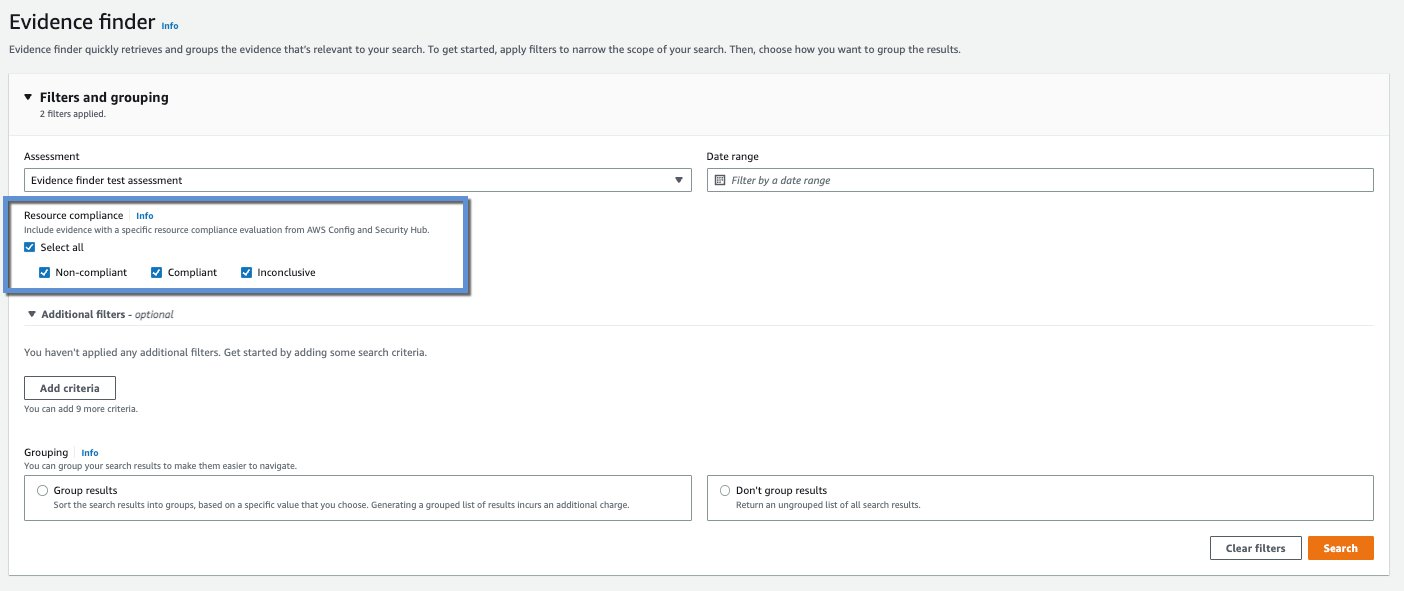
Figure 7. Define the compliance type filters: Non-compliant, Compliant, Inconclusive.
- Evidence finder allows you define up to 9 additional filters for the search. Start by selecting ‘Add criteria’.
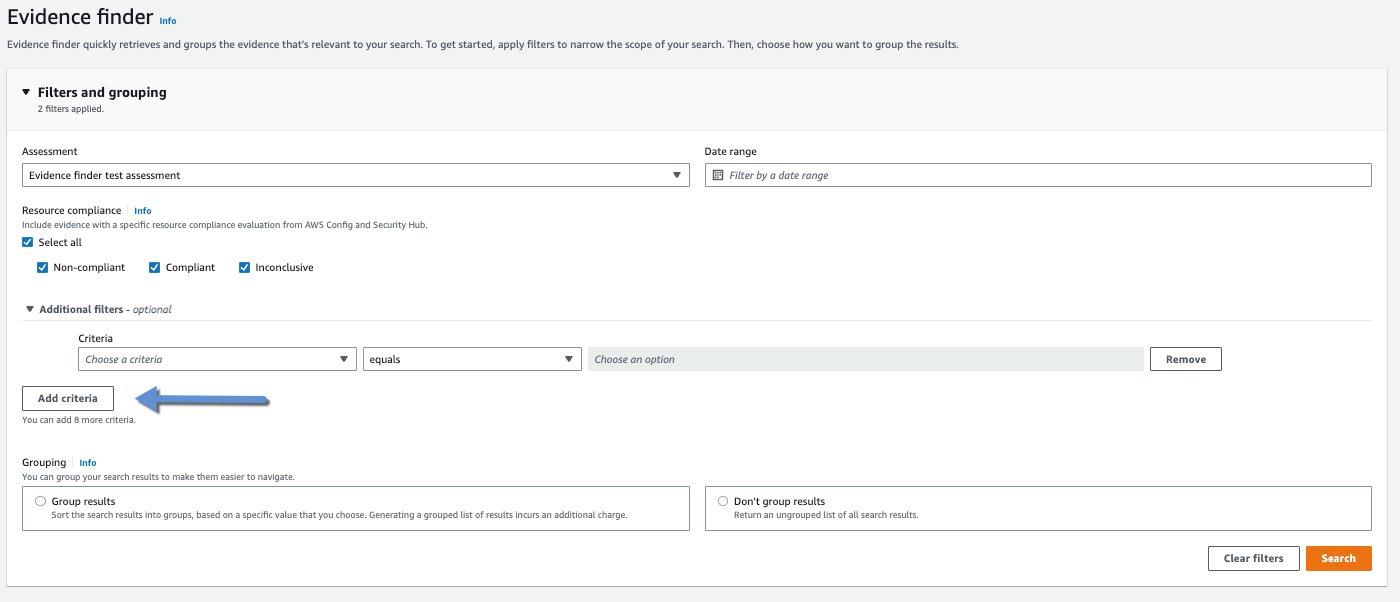
Figure 8. Add up to 9 additional filtering criteria by clicking the ‘Add criteria’ button.
- Next, select the filter criteria, the operator and a value.
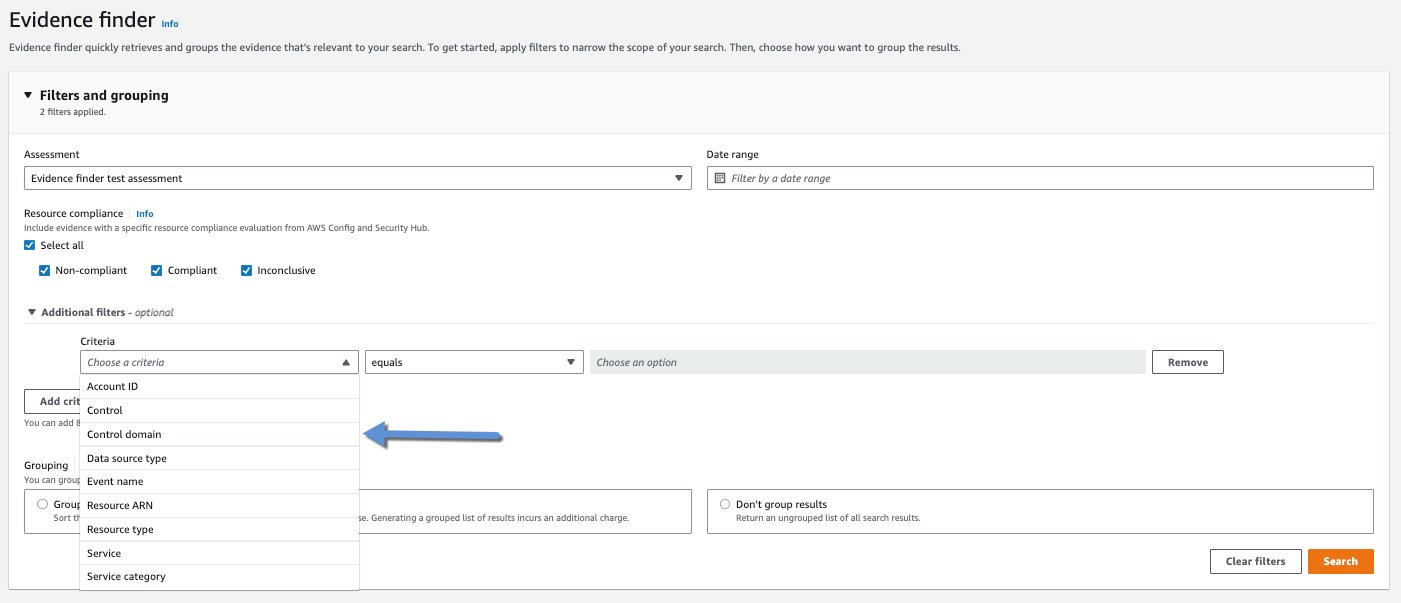
Figure 9. Select the which filter criteria, which operator and a value to add a criteria to filter the search on.
Once you have decided on the search criteria, you can optionally group the results by any of the 9 search criteria to further customize the report.
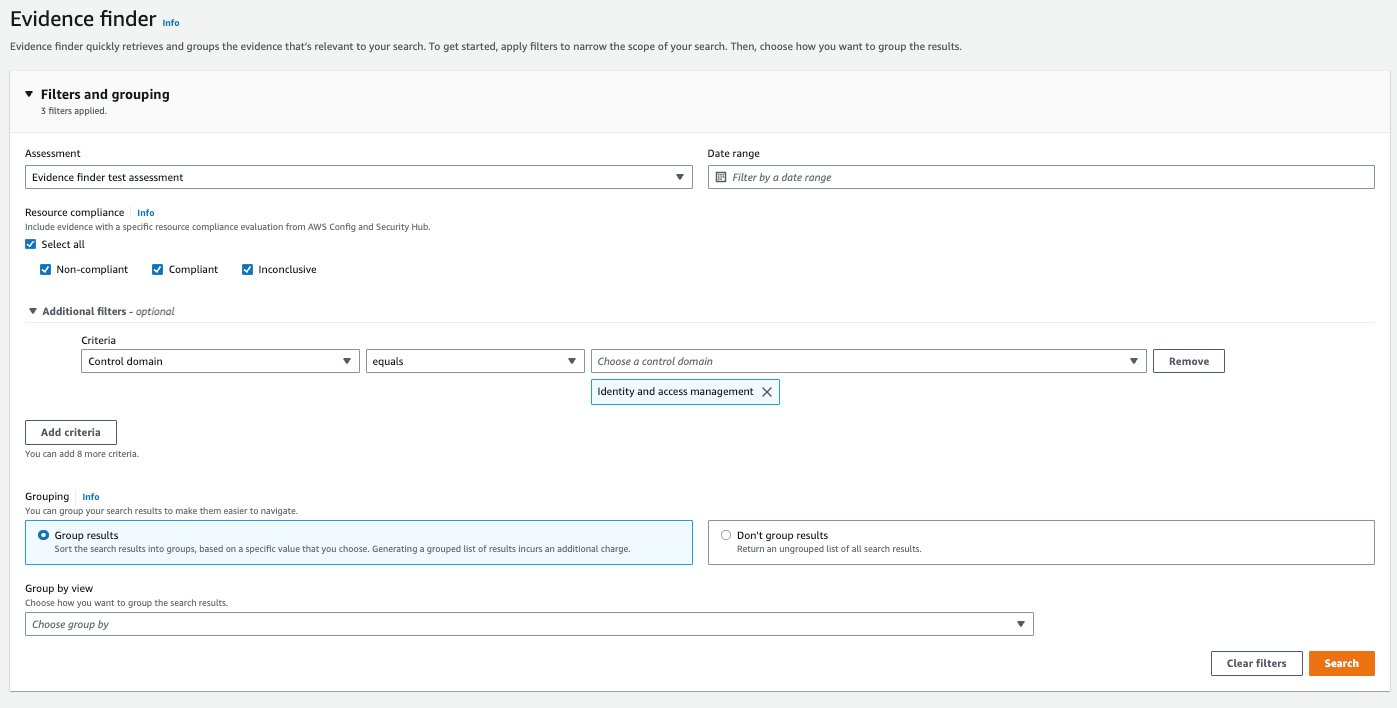
Figure 10. Image shows how to group the results.
If you do not wish to group the results, select ‘Don’t group results’ radio button.
- Finally, select ‘Search’
- If your search was set to group the results, there is an additional step to get the results after reviewing the search results. To do so, select the row in the grouped results and select ‘Get results’.
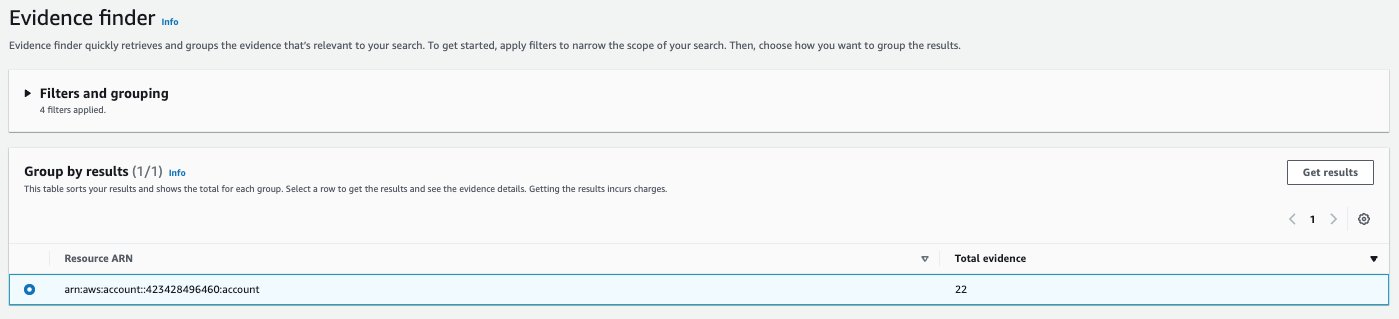
Figure 11. Image shows you must select one of the grouped results to enable the ‘Get results’ button to complete the search.
- Generate the report.
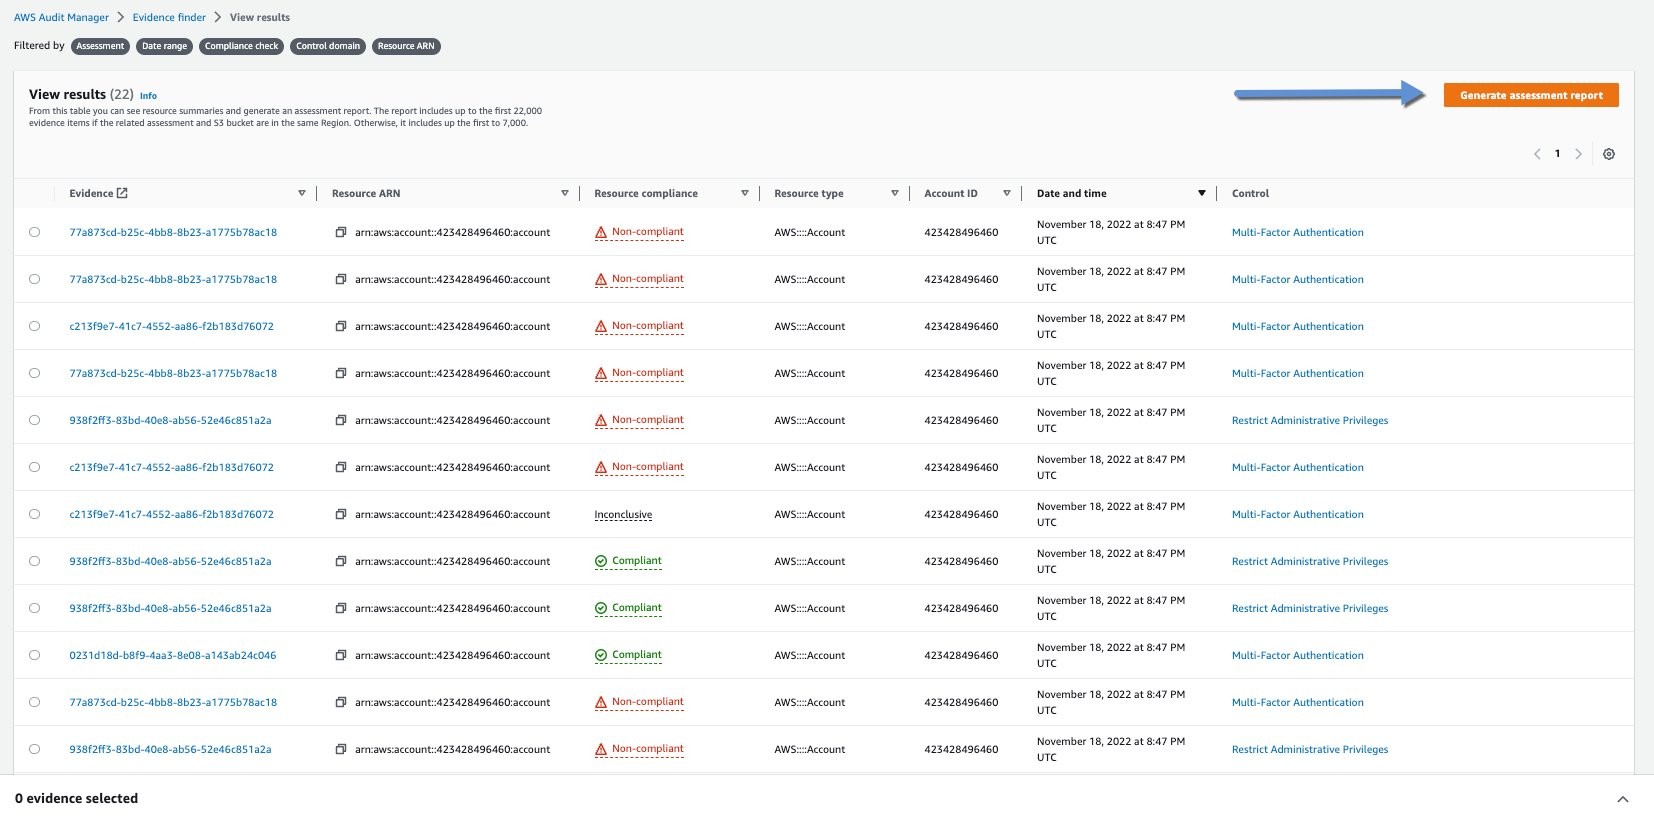
Figure 12. Image shows the completed search and the ‘Generate assessment report’ button.
- Depending on the size, the report could take a few minutes to generate. To locate the report, navigate to ‘Assessment reports’.
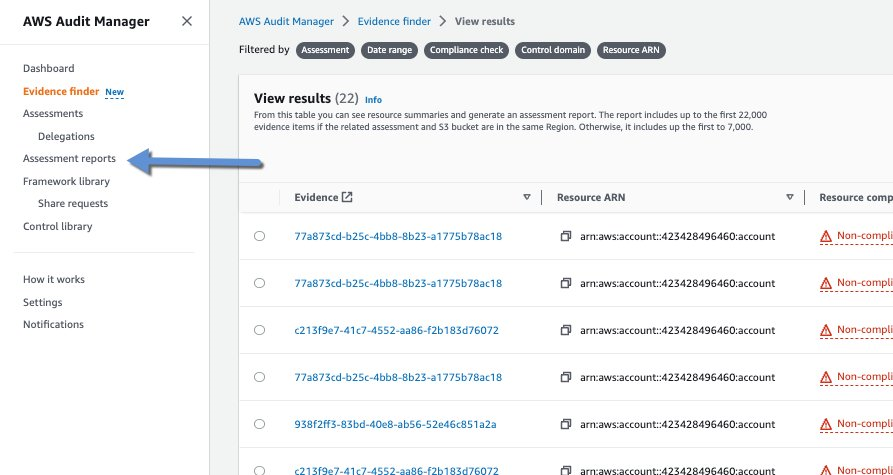
Figure 13. Image shows the ‘Assessment reports’ link in the left side navigation.
- Your report will be at the top of that list by default. To download the report, be sure the status is ‘Generated’, select it, and select ‘Download’.

Figure 14. Image shows the ‘Download’ button which downloads the assessment report to the users local machine.
Conclusion
In the blog post we’ve announced the new evidence finder feature for Audit Manager. We’ve shown you how you can enable it, as well as how to write your own queries. We’re excited to make this new service available for you and can’t wait to see the great things you build with it.
For more information and to get started with AWS Audit Manager, click here.
About the author: