AWS Quantum Technologies Blog
Amazon Braket Notebook Environments Now Support CUDA-Q Natively
Customers can now run CUDA-Q programs directly in Amazon Braket Jupyter notebook instances without additional setup. Braket notebook environments now include the latest compatible packages for Braket, CUDA-Q, PennyLane, and Qiskit. This blog post shows you how to access the Jupyter notebook environment on Amazon Braket to run your CUDA-Q programs.
Creating a new Amazon Braket notebook
When you create a new Amazon Braket notebook instance (NBI), you access the latest Braket kernel. As seen in Figure 1, after opening your Amazon Braket notebook, you will find the new conda_braket tile.
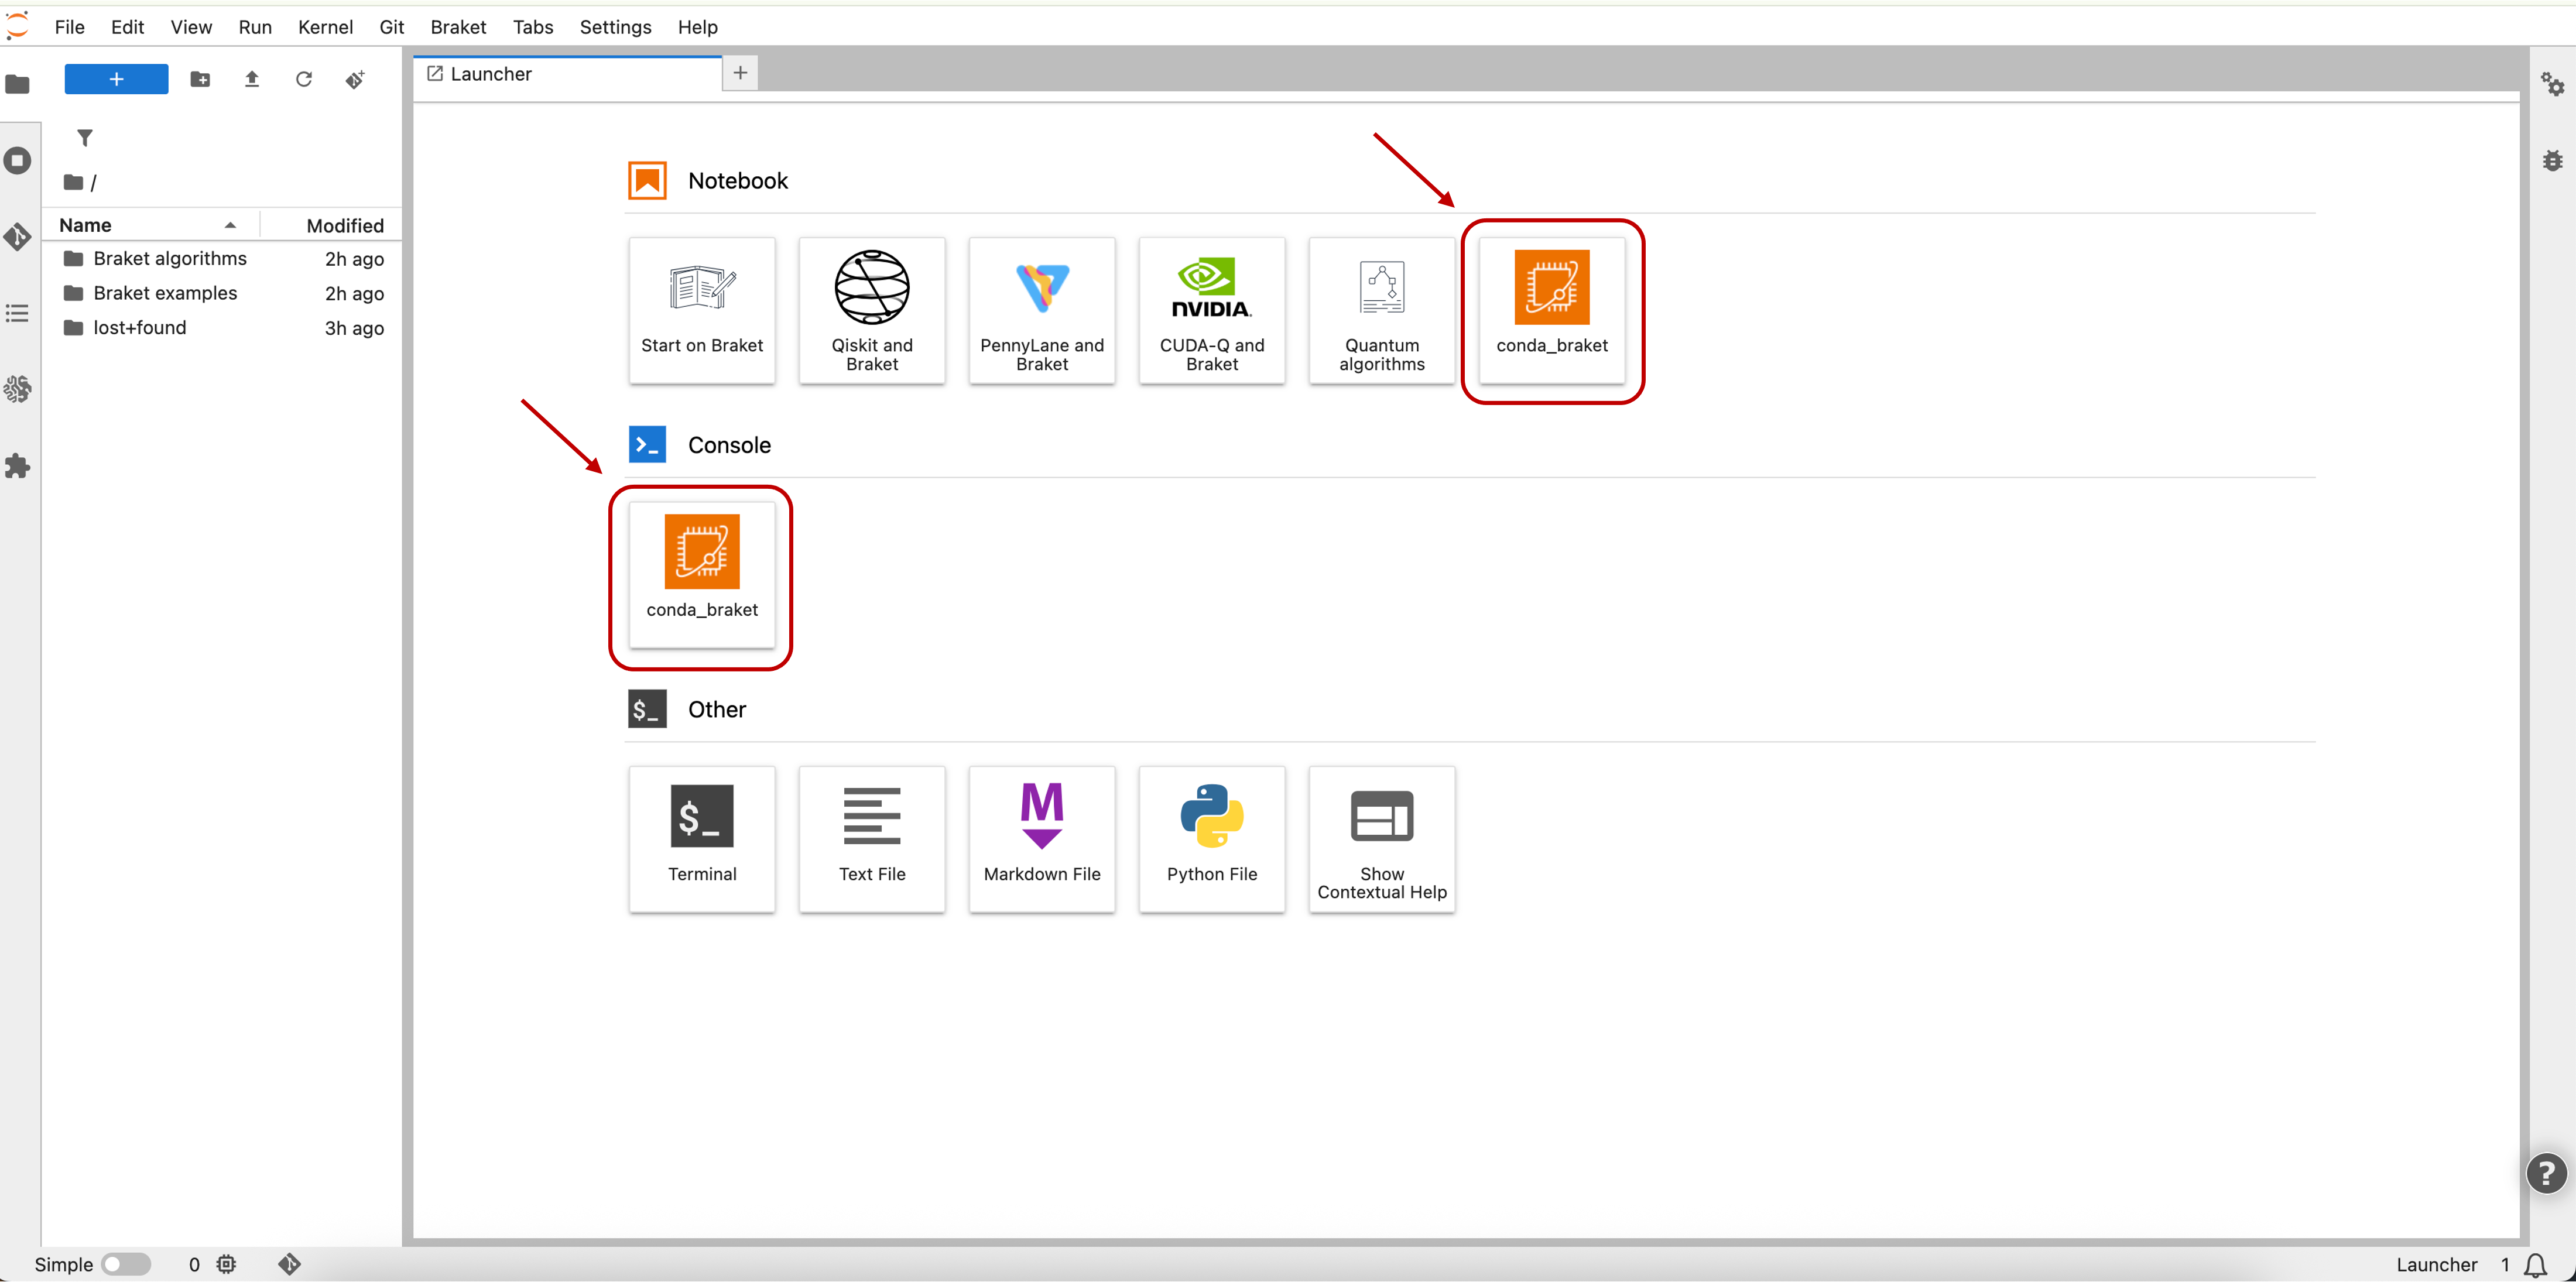
Figure 1: The Braket Notebook Instance displays the conda_braket tile to launch the Braket kernel. Note: The CUDA-Q and Braket tile opened the CUDA-Q example notebooks with the default kernel; starting today, this default kernel is the conda_braket kernel.
Select the conda_braket tile under “Notebook” or “Console” to launch a Jupyter notebook or Python console session with the new conda_braket kernel.
Note: For instructions on how to create your own custom CUDA-Q Python kernel inside an Amazon Braket notebook instance, see the previous blog post, “How to run CUDA-Q programs on Amazon Braket notebook instances”.
Verify the installed packages
To verify the installed packages from Braket, CUDA-Q, PennyLane, and Qiskit, run the following command:
%pip freeze | grep -i -e cudaq -e qiskit -e pennylane -e braketThe output displays the latest package versions:
amazon-braket-algorithm-library==1.6.2
amazon-braket-default-simulator==1.31.4
amazon-braket-pennylane-plugin==1.33.5
amazon-braket-schemas==1.26.1
amazon-braket-sdk==1.102.6
cudaq==0.12.0.post1
cudaq-qec==0.4.0.post1
cudaq-solvers==0.4.0
PennyLane==0.42.3
PennyLane_Lightning==0.42.0
qiskit==1.4.4
qiskit-aer==0.17.2
qiskit-algorithms==0.4.0
qiskit-ionq==0.6.1
qiskit_braket_provider==0.6.0
Running CUDA-Q examples
Amazon Braket notebook instances include pre-installed examples of quantum programs using the Braket, CUDA-Q, PennyLane, and Qiskit libraries. To run a CUDA-Q example notebook, open the Launcher page and click on the “CUDA-Q and Braket” tile. As seen in Figure 2, this opens the example notebook 0_hello_cudaq_jobs.ipynb in the main window and the nvidia_cuda_q/ directory in the left-hand side panel, where you can find more CUDA-Q example notebooks.
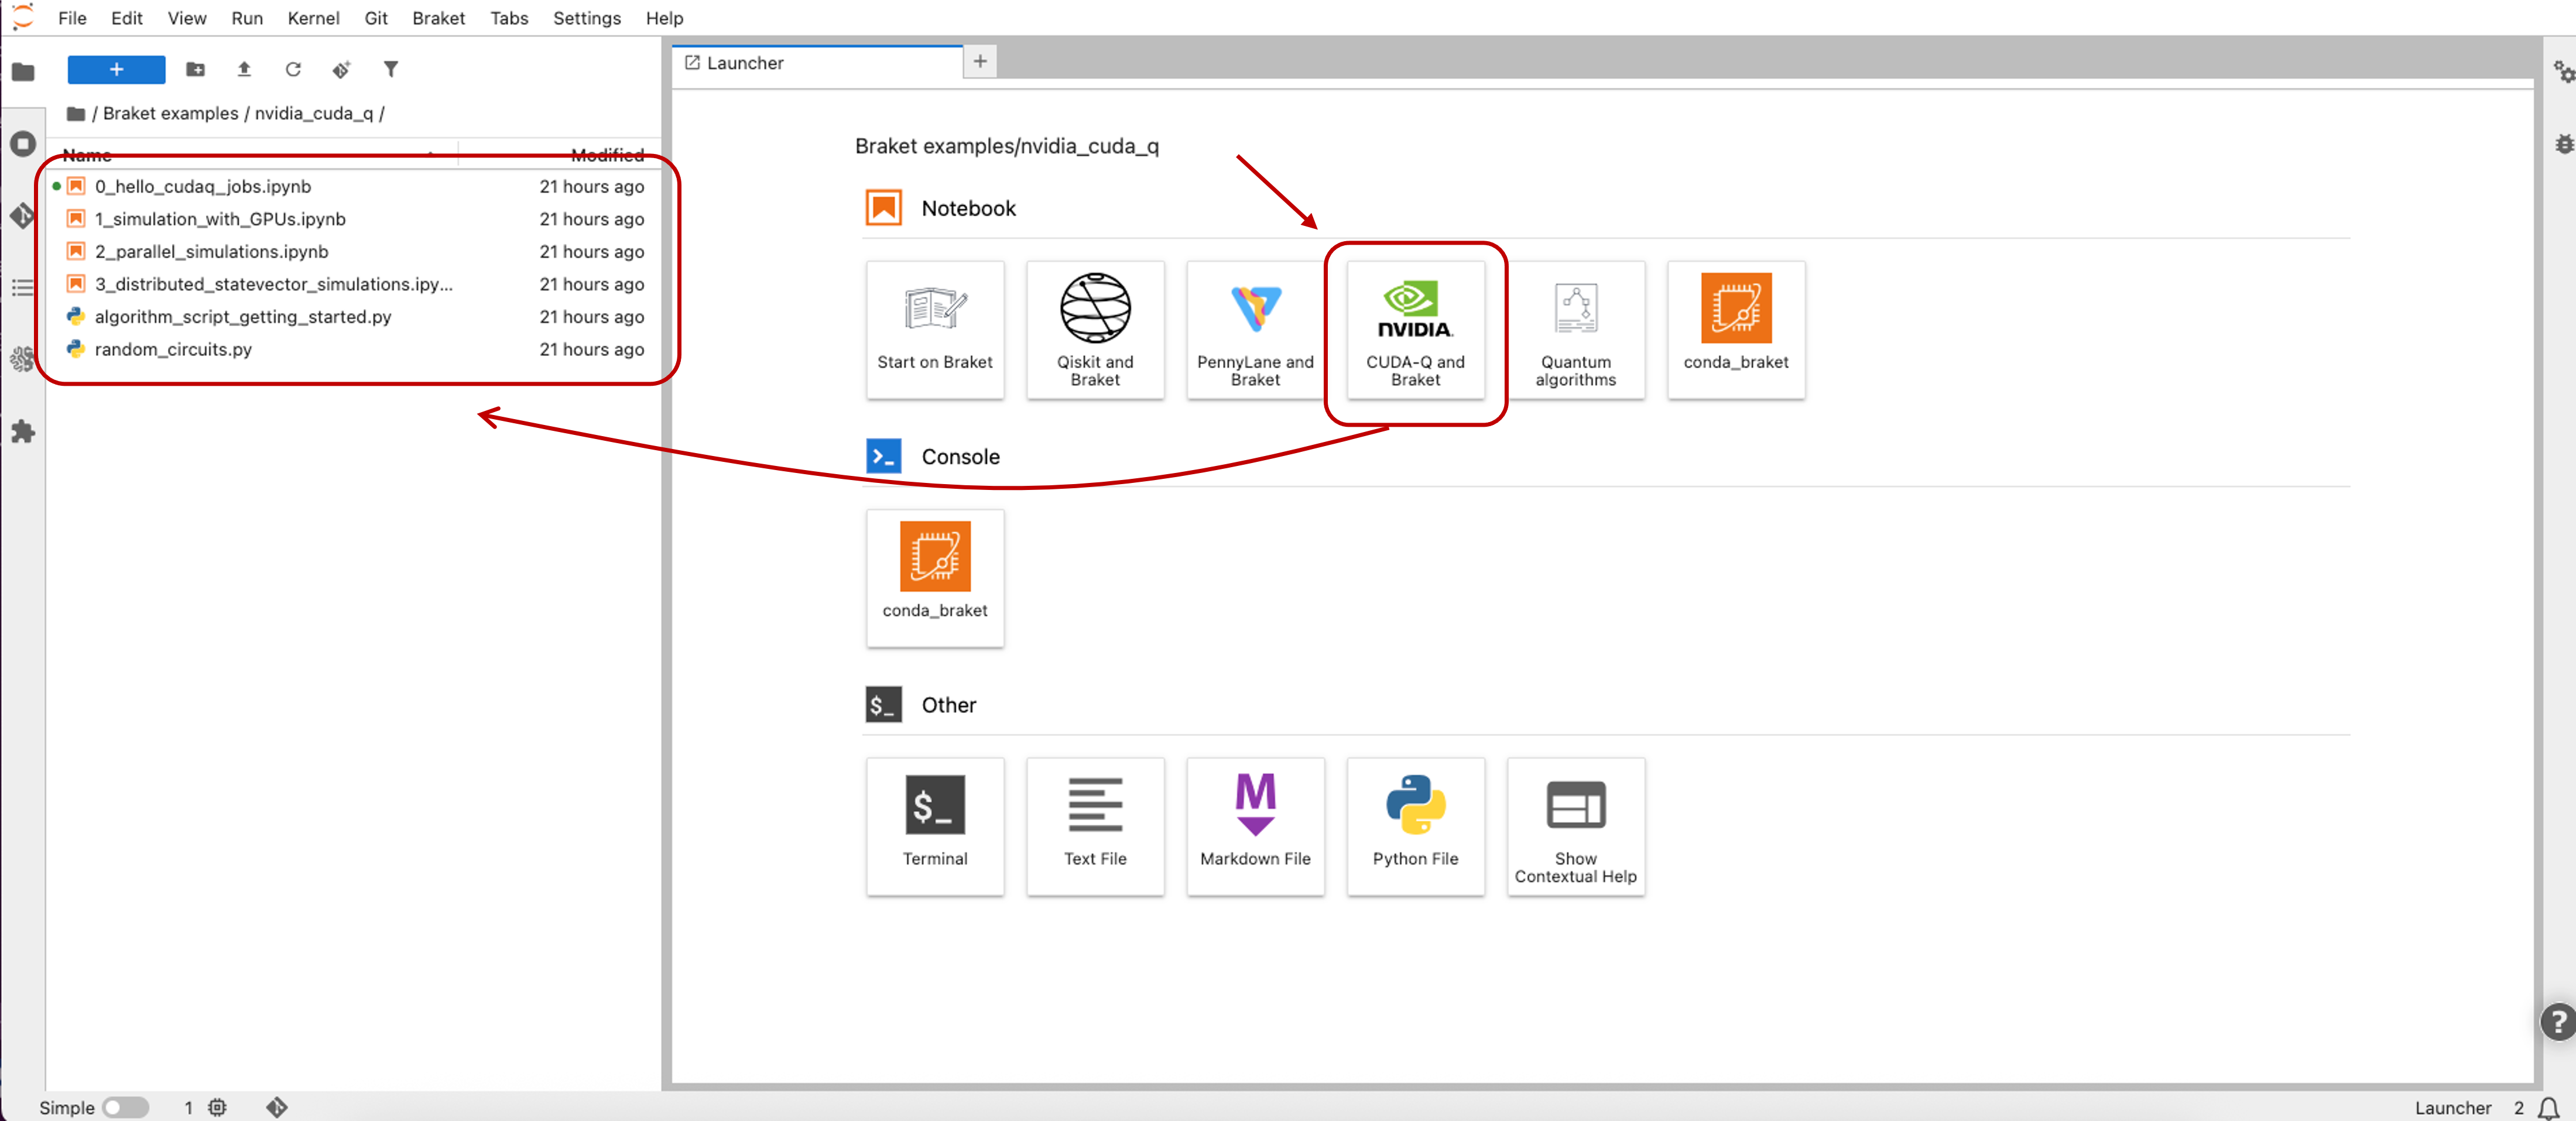
Figure 2: The Launcher page showing Braket, PennyLane, and Qiskit examples with additional CUDA-Q examples in the left-hand side panel.
Note: CUDA-Q programs requiring GPU support can also run as Amazon Braket Hybrid Jobs. We recommend using small, CPU-based instances such as ml.t3.medium for notebook instances and ml.p3.8xlarge for GPU-powered instances via Braket Hybrid Jobs requiring intensive computation. When using Braket Hybrid Jobs, your Amazon Web Services (AWS) account will need to have the Amazon Elastic Compute Cloud (EC2) service quota for the selected GPU-powered instances set higher than or equal to the number of instances you plan to run concurrently on the account. You can find service quotas for your account by searching for “Service Quotas” on the AWS Management Console or follow a step by step guide on the EC2 service quotas page.
Conclusion
New Amazon Braket notebook instances now include the latest pre-installed Braket, CUDA-Q, PennyLane, and Qiskit packages. You can create notebooks and Python console sessions with a few clicks. Get started by creating an Amazon Braket notebook instance and choosing Braket from the Jupyter launcher page. For more information, see the Amazon Braket Developer Guide.