AWS Robotics Blog
Introducing upload configurations for AWS RoboMaker Simulation
Introduction
AWS RoboMaker now supports data upload configurations within simulation jobs.
This capability allows developers to define the type of simulation data they want to upload, choose the upload behavior, and reliably upload the simulation data to their preferred Amazon S3 output location. This functionality makes it easier for developers to review or analyze application output generated during a simulation run or reuse artifacts.
Storing data such as SLAM map files generated during the simulation runs, Gazebo and ROS logs, ROS bag data and artifacts from robot simulation runs aids in developing, analyzing, testing, and debugging robotic applications.
Getting Started
This blog provides a tutorial to setup an upload configuration for your AWS RoboMaker simulation job within the AWS Management Console. To see a use case where robot data is uploaded using upload configuration, visit the “Testing mapping generation with Worldforge” blog.
Prerequisites
To get started, you’ll need an existing simulation job in AWS RoboMaker. If you don’t have one, you can setup a sample simulation job quickly by using our one click sample applications located under “Resources” as shown in Figure 1.
Step 1:
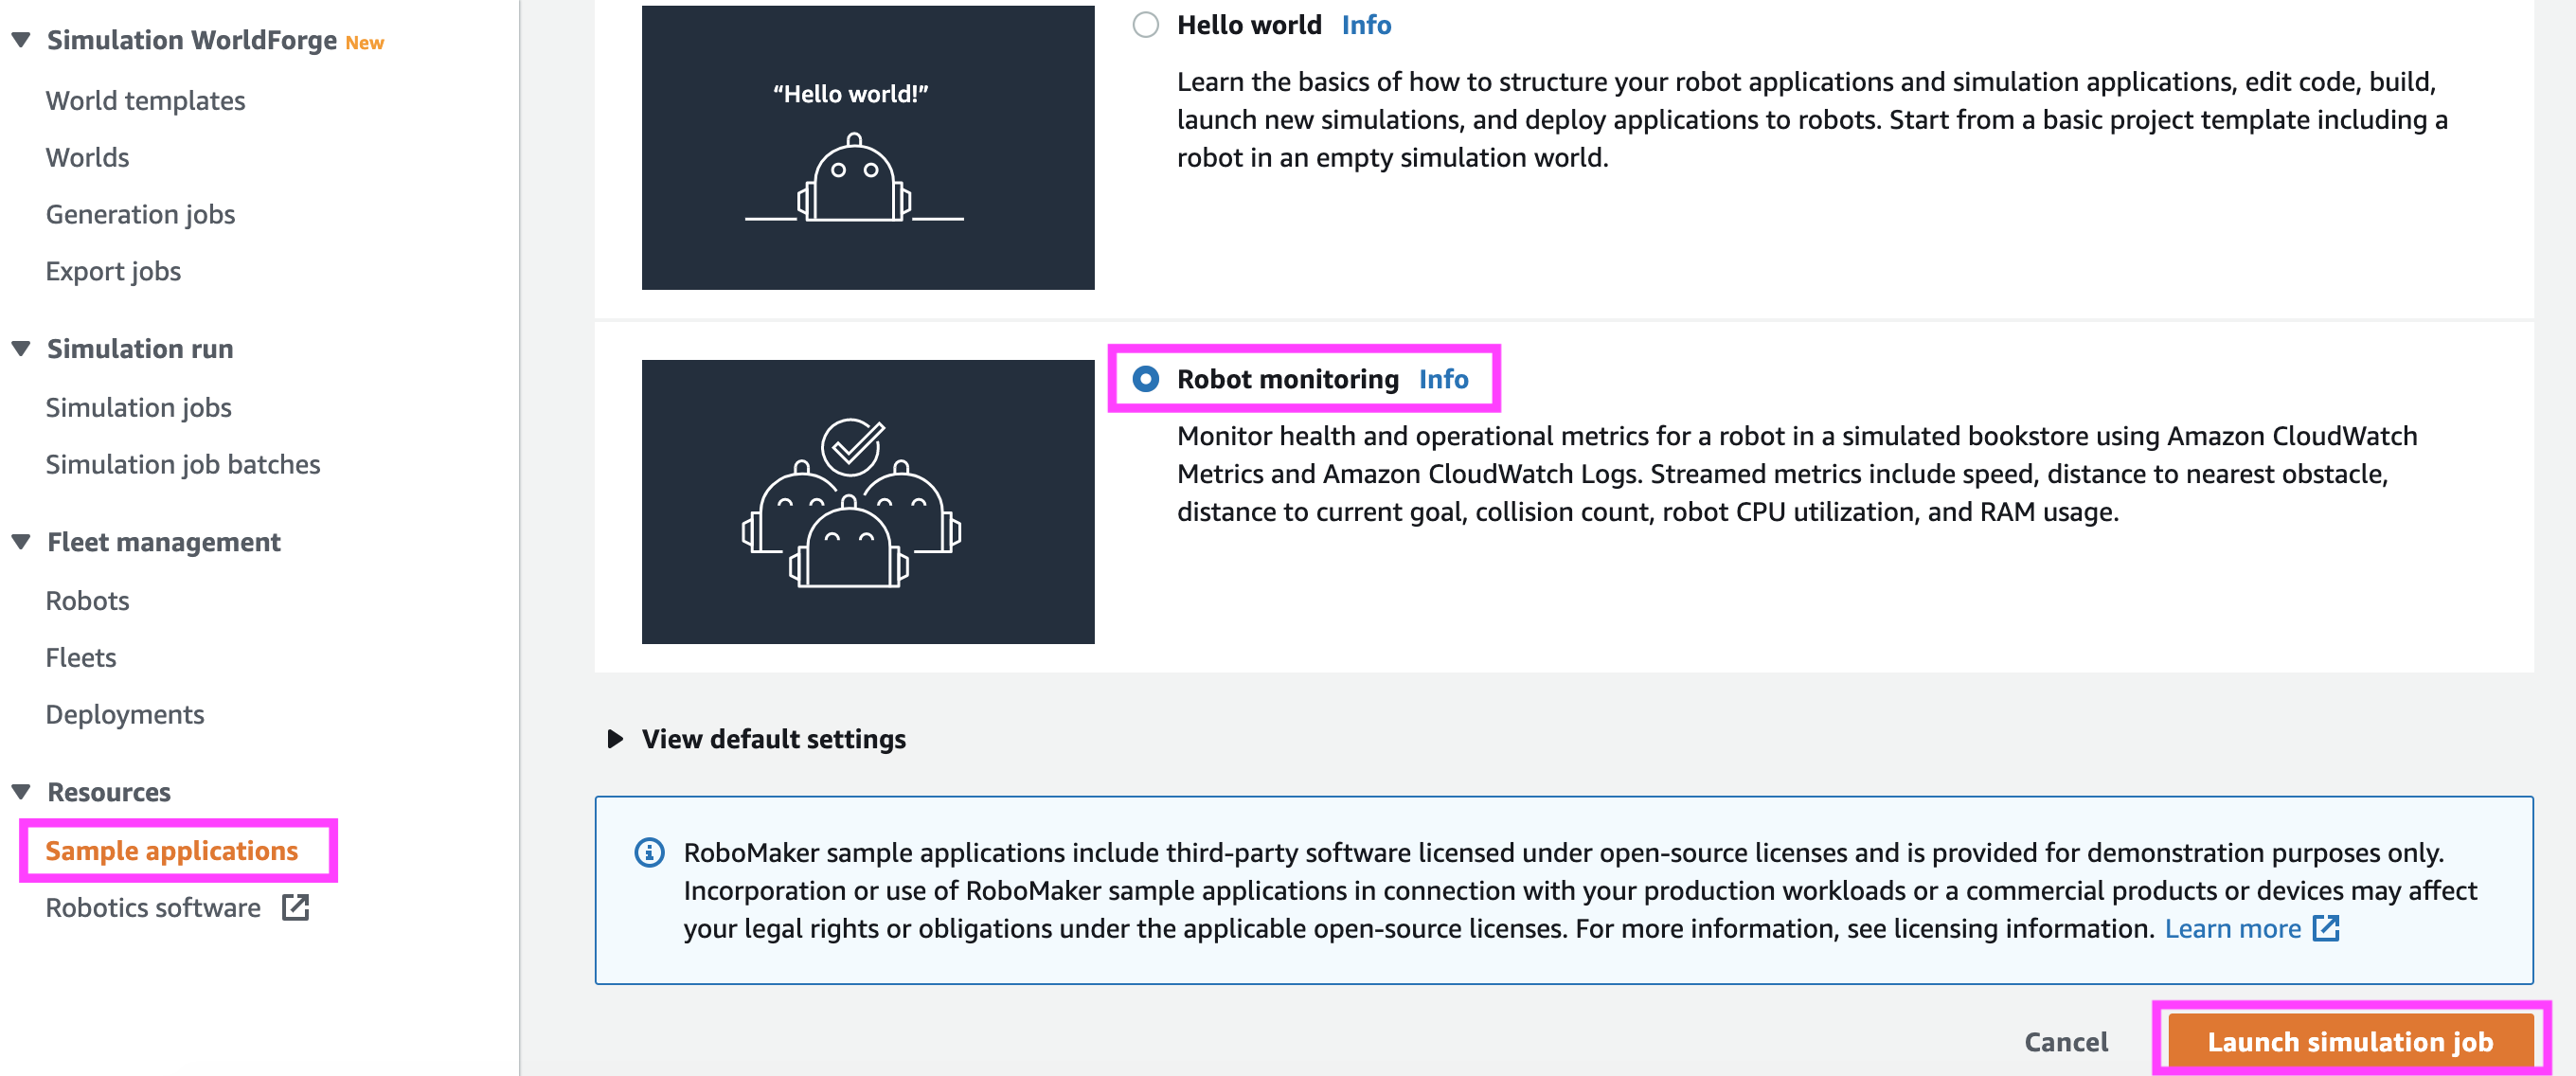
Figure 1
Step 2:
Clone your newly created simulation job, or your existing simulation job by choosing “Simulation job → <Simulation ID> → Actions → Clone” as shown in Figure 2.
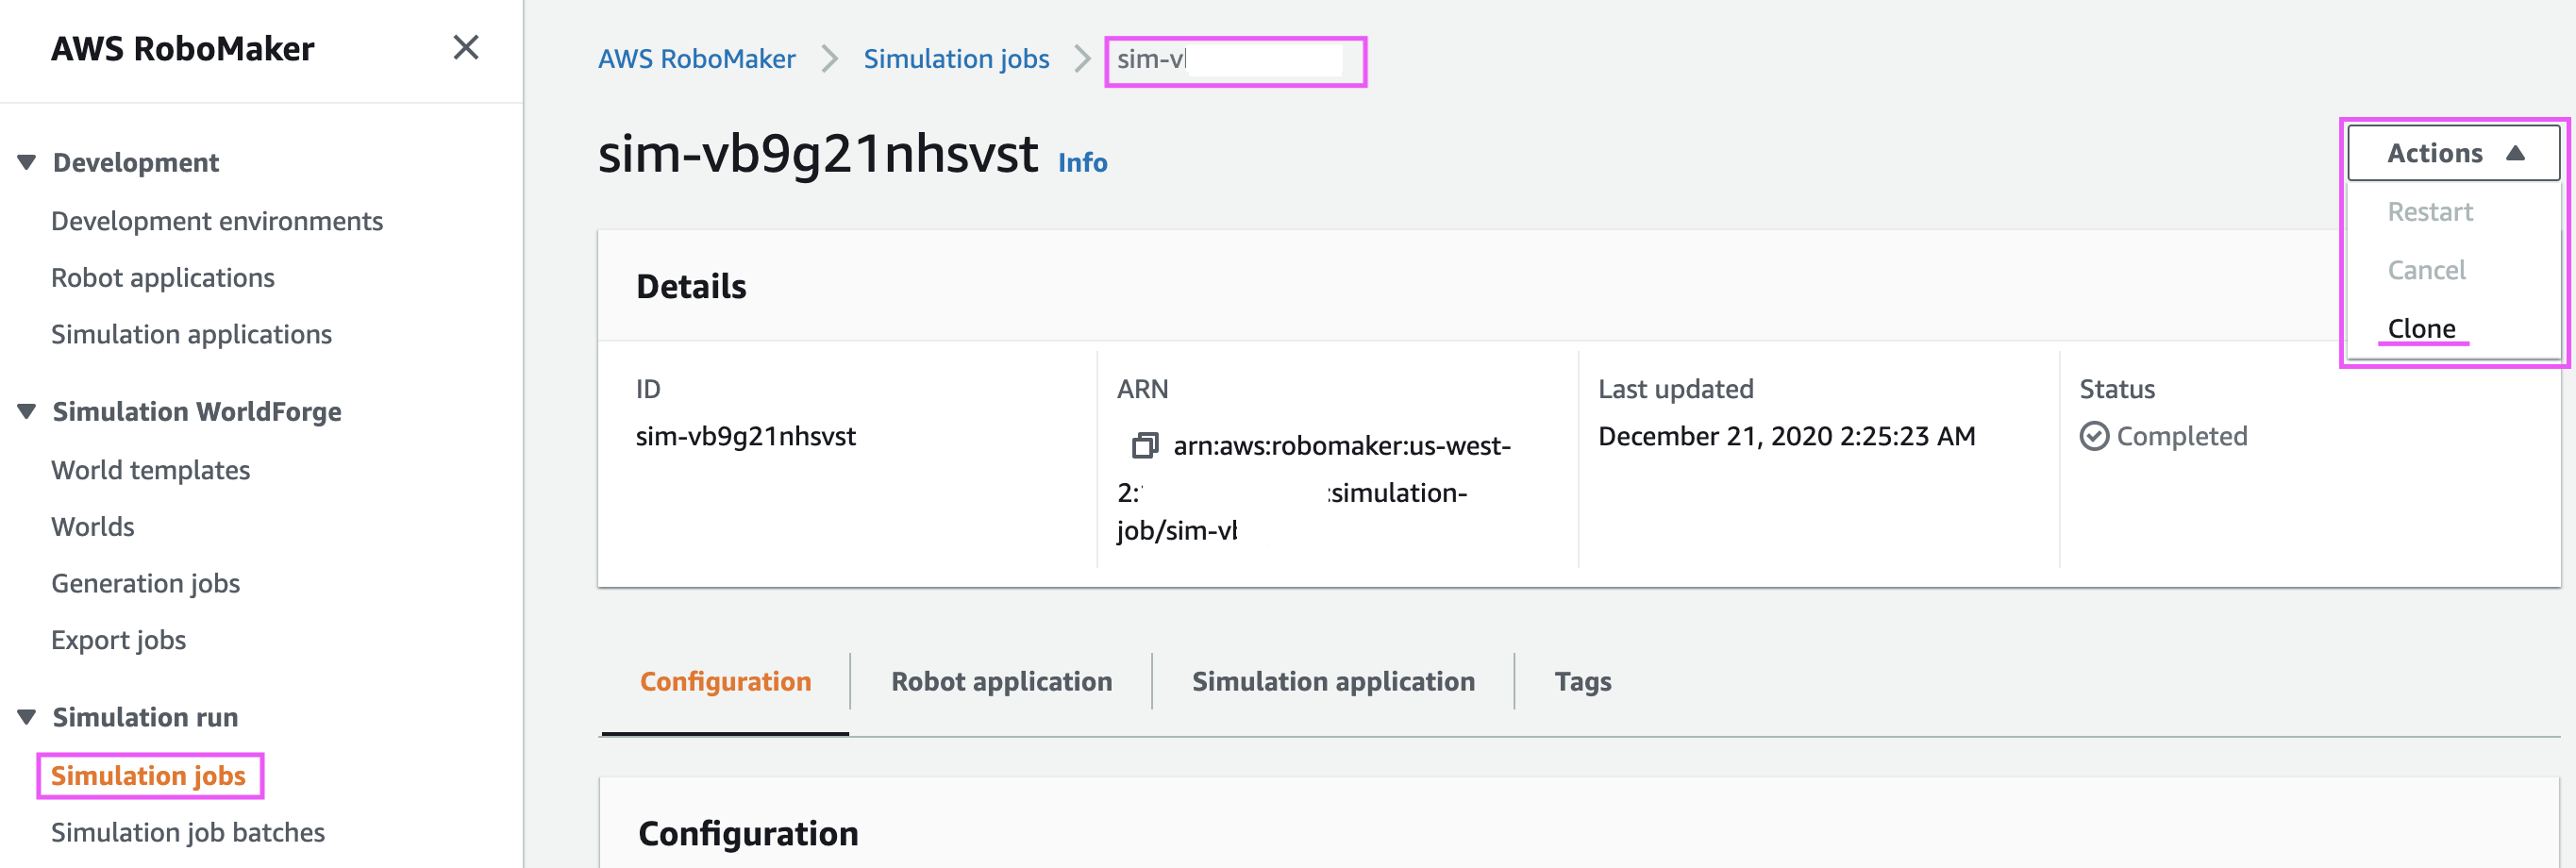
Figure 2
Step 3:
Click the “Edit” button as shown in Figure 3, to view the console with the configuration and parameters that are available for the Simulation. Note the “Steps” section, which will be referred to later in this blog.
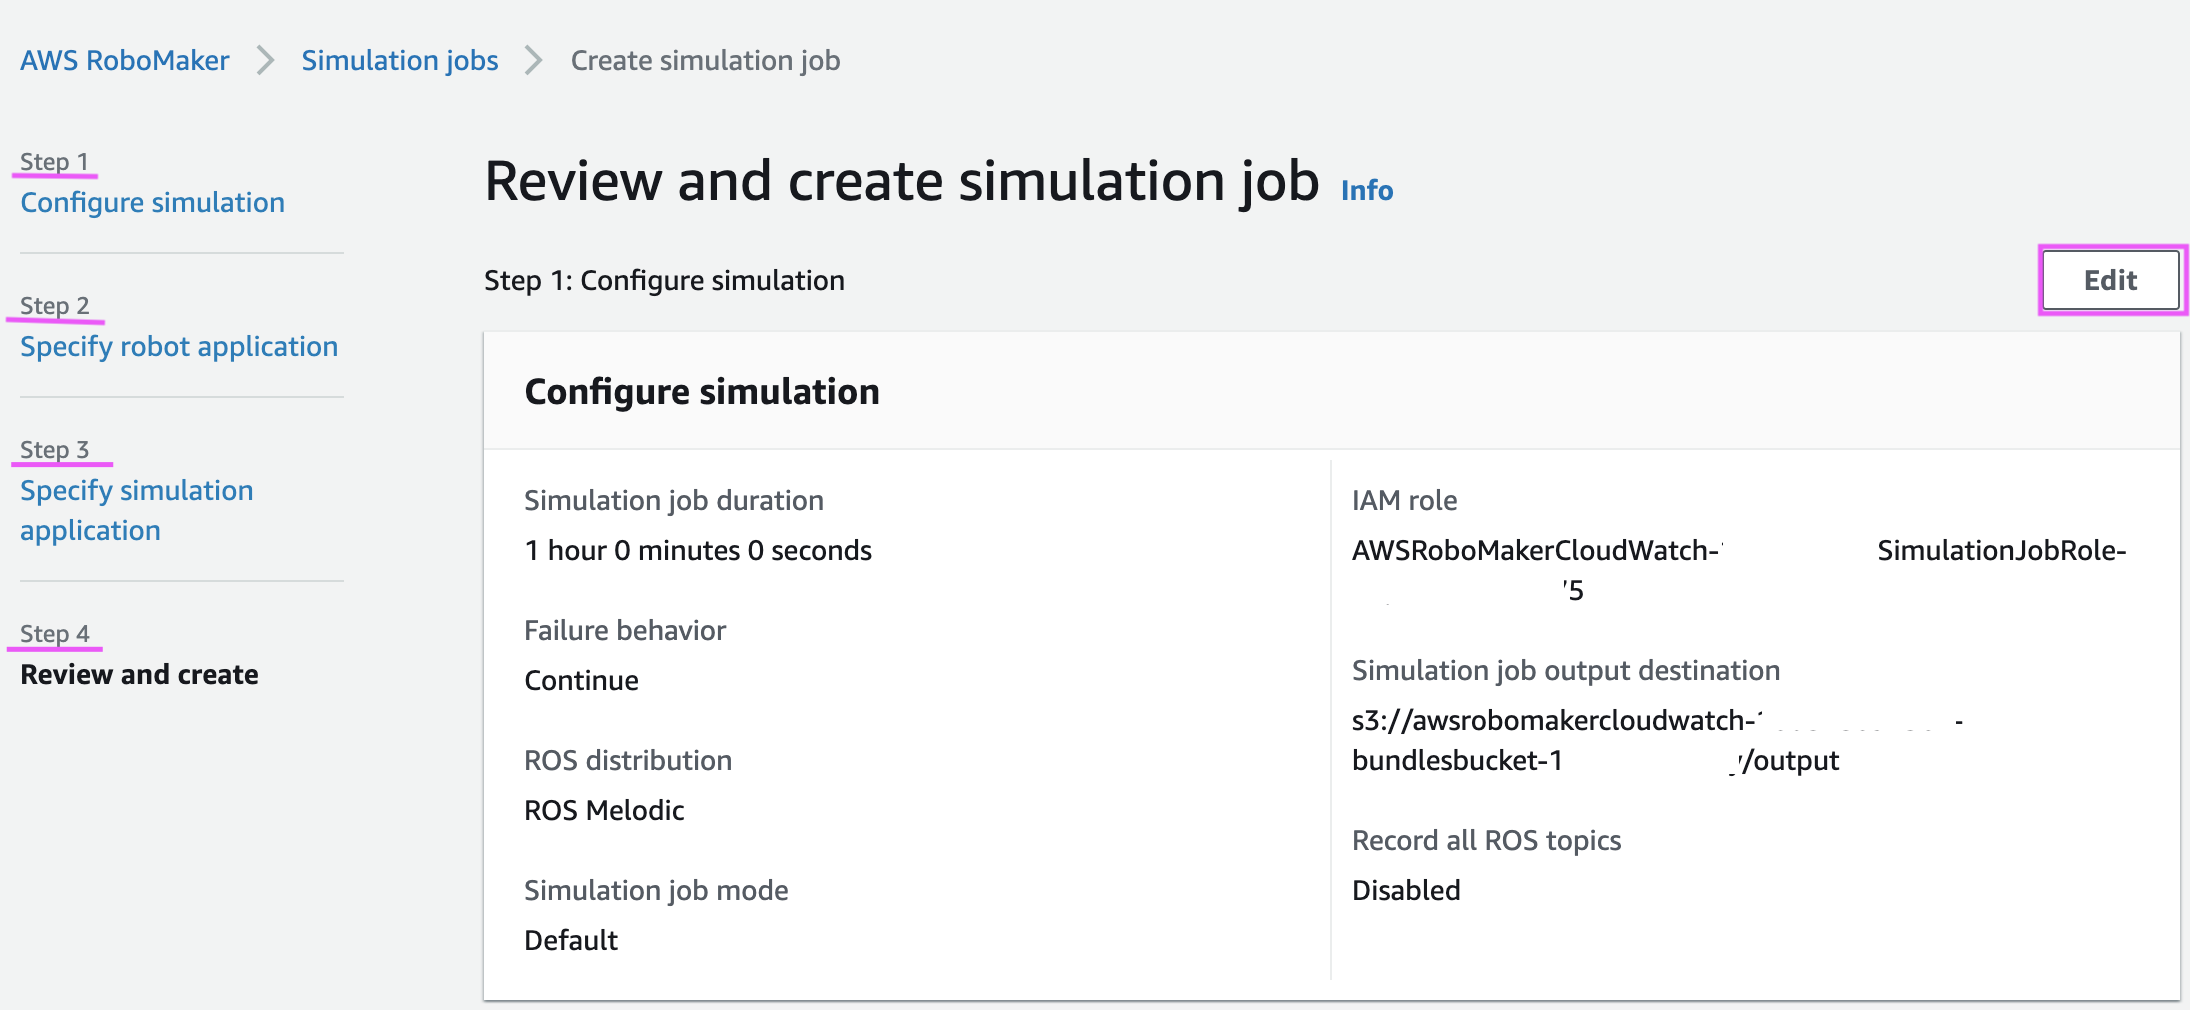
Figure 3
Step 4:
Ensure that you have an Amazon S3 bucket setup in the “Simulation job output destination“ in the ”Configure Simulation“ (Step 1) of the setup. You create a new Amazon S3 destination from here by clicking the ”Create new Amazon S3 destination link“, with the right IAM permissions. The upload configuration will upload the files to this bucket. Figure 4 shows the ”Simulation job output“ on the console.
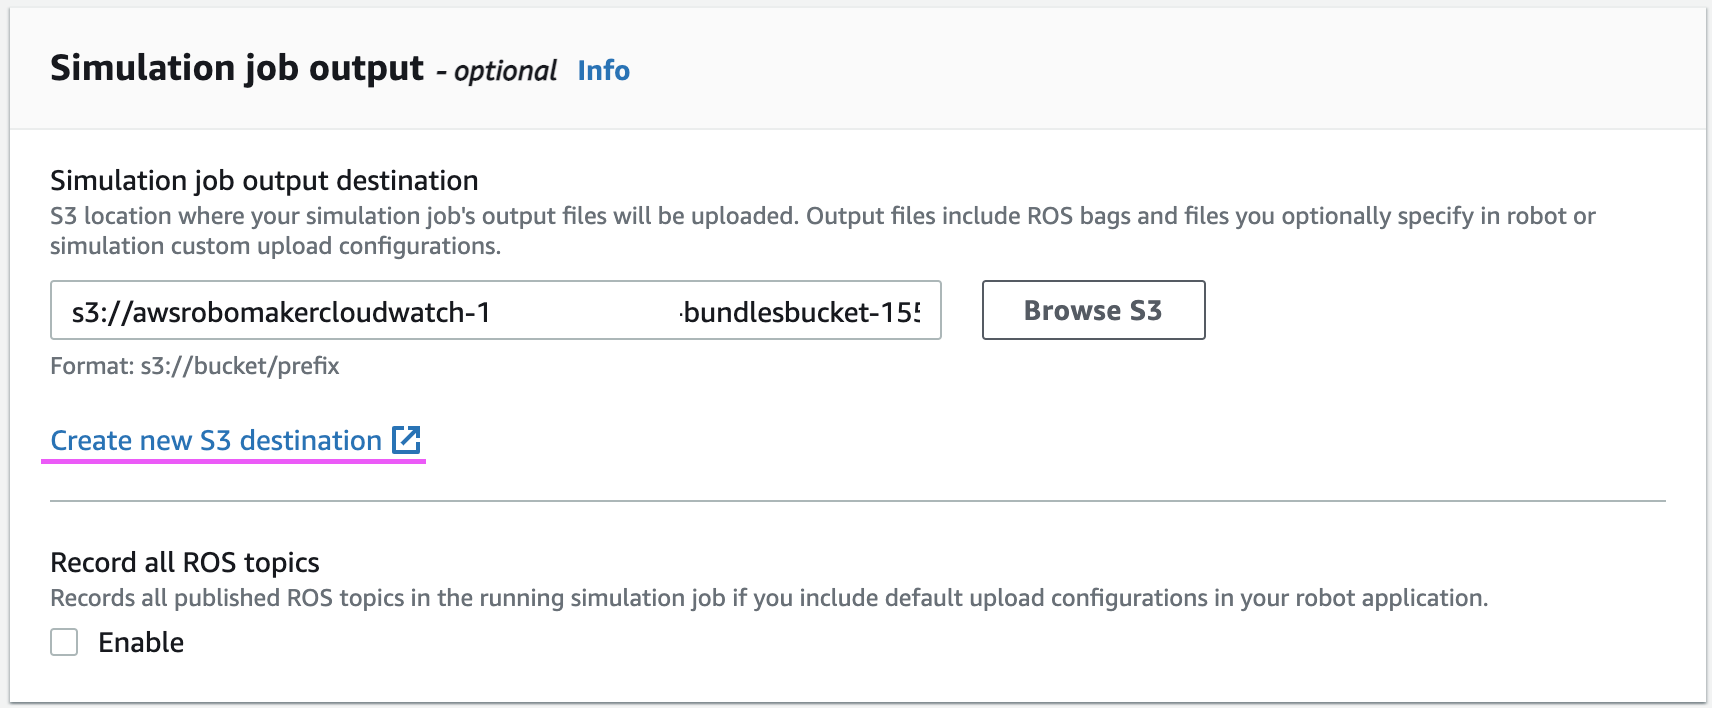
Figure 4
Step 5:
Under “Specify Simulation Application” (Step 3), you will now see the ability to add “Simulation application upload configurations” as shown in Figure 5. You will see a similar section under “Specify Robot Application” (Step 2). For simplicity, only simulation application version is mentioned in this blog. Robot application upload configurations have similar behavior.
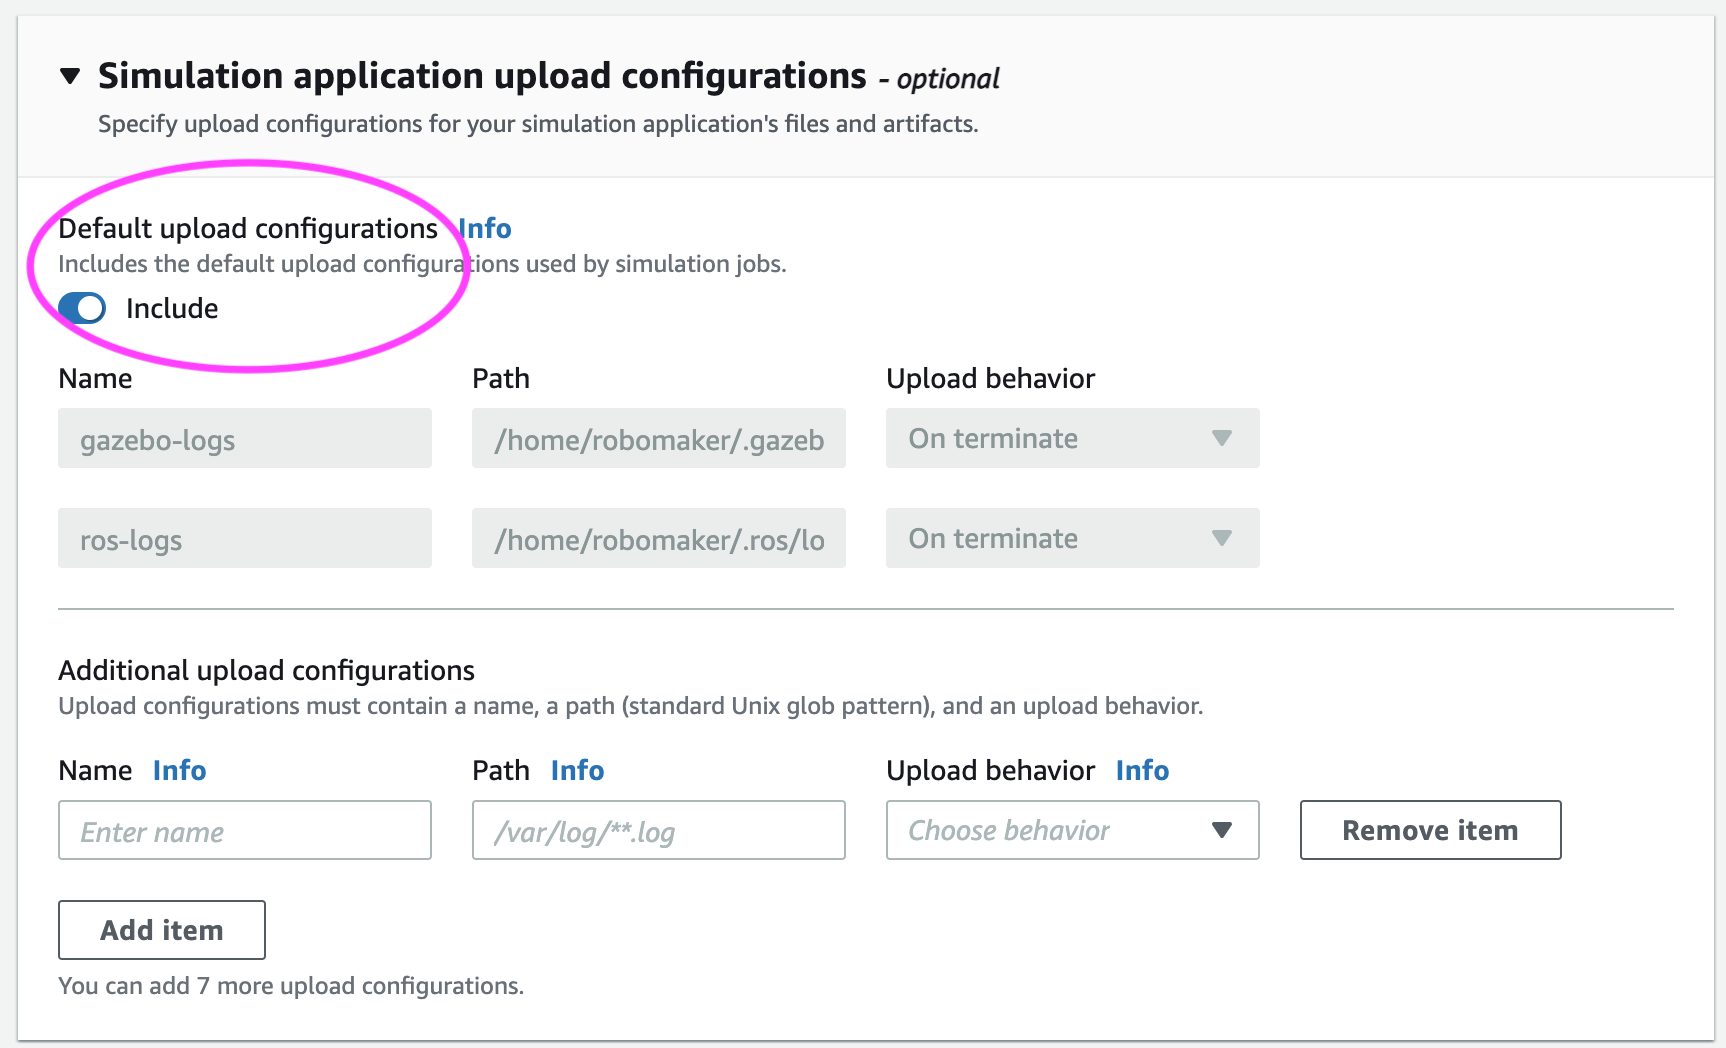
Figure 5
Upload Configuration:
AWS RoboMaker provides the ability to upload the Gazebo and ROS logs by default. You can choose to turn it on or off by checking the “include” button, as highlighted in the image preceding.
To setup an upload configuration, the following steps are required:
Step 1: Name
A prefix that specifies where files will be uploaded in Amazon S3. It is appended to the simulation output location to determine the final path. For example, if your simulation output location is s3://my-bucket and your upload configuration name is robot-test, your files will be uploaded to s3://my-bucket/<AWS_ROBOMAKER_SIMULATION_JOB_ID>/<AWS_ROBOMAKER_SIMULATION_RUN_ID>/robot-test/<files_from_path>
AWS_ROBOMAKER_SIMULATION_RUN_ID and AWS_ROBOMAKER_SIMULATION_JOB_ID are environment variables that are automatically setup by AWS RoboMaker. You can read more about the environment variables here.
Step 2: Path
Upload configuration can only be setup for files that begin with path /home/robomaker/ or /var/log/. You will have to setup your application to write files to the preceding two paths in order to be uploaded to an Amazon S3 bucket. Symbolic links are not followed in these paths. The value is a standard glob, a Unix style pathname pattern expansion and you will be able to use wildcards and super asterisks (**). Eg. /home/robomaker/**.pgm will upload all .pgm files written in that directory.
Step 3: Upload behavior
AWS RoboMaker provides the following upload behaviors:
- Upload on terminate (
UPLOAD_ON_TERMINATE) uploads all files matching the path once the simulation job enters the terminating state. AWS RoboMaker will attempt to upload logs for a maximum of 60 minutes.
AWS RoboMaker does not begin uploading files until all of your application code running in the simulation have stopped. - Upload rolling with auto remove (
UPLOAD_ROLLING_AUTO_REMOVE) uploads all files matching the path as the files are created. Paths are checked every 5 seconds. When the files are uploaded, the source files are deleted. AWS RoboMaker performs a final check for files once all of your tools running in the simulation have stopped.
This setting can help you conserve space in your simulation job. It can also help you access files before your simulation job terminates.
Amazon S3 objects are replaced if they are re-uploaded. Upload rolling with auto remove is useful for uploading rolling logs. Write or stream output to an “active” file which is not covered by the path glob. Once you’re done writing to the active file, roll the file into a location covered by the path glob to be uploaded and removed.
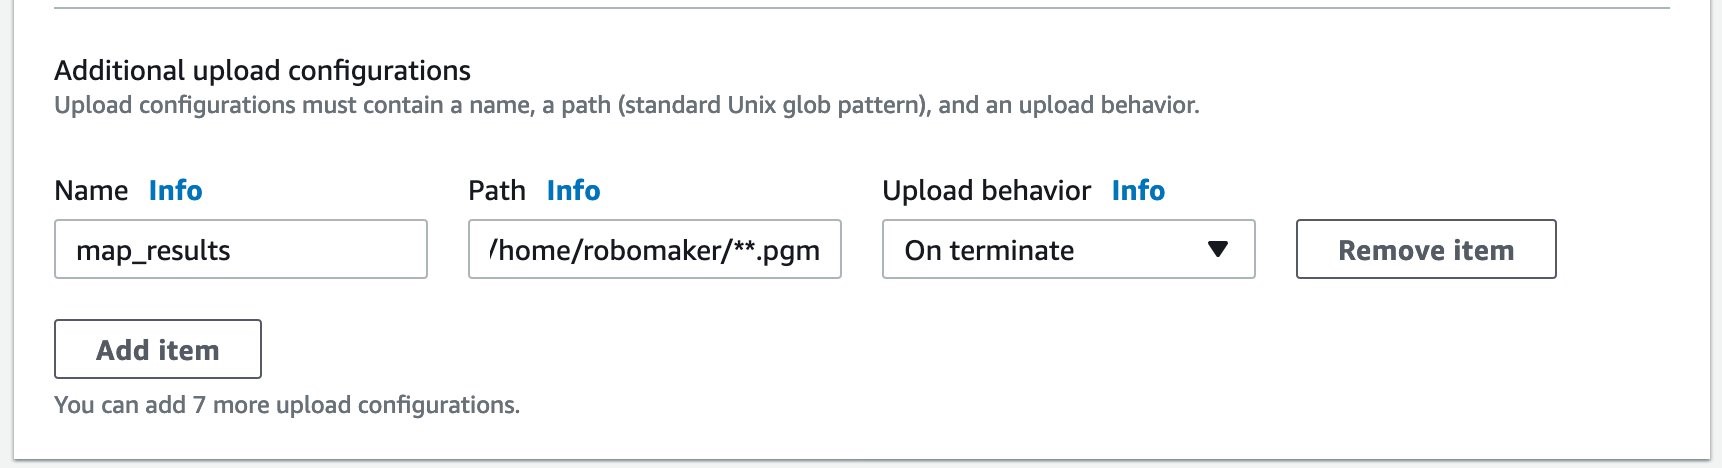
As an example, if you want to map the Gazebo world and upload the .pgm map file to the Amazon S3 bucket location on completion, the configuration can be the following!
Conclusion:
In this blog, you have seen how you can setup configurations to upload any files from the simulation job automatically to Amazon S3 bucket. This enables you to collect data, setup workflows to analyze this data, and setup the upload configuration in the simulation job API. To learn more about this functionality you can read our documentation at this link. You can also see a use case where upload configuration is used at: “Testing mapping generation with Worldforge” blog.
To learn more about AWS RoboMaker, visit aws.amazon.com/robomaker or contact us at aws-robomaker-bd@amazon.com