AWS Compute Blog
Managing multi-tenant APIs using Amazon API Gateway
This post is written by Satish Mane, Solutions Architect.
Many ISVs provide platforms as a service in a multi-tenant environment. You can achieve multi-tenancy by partitioning the platform based on customer identifiers such as customer ID or account ID. The architecture for multi-tenant environments is often composed of authentication, authorization, a service layer, queues, and databases.
The primary focus of these architectures is to simplify the addition of more features. The multi-tenant design pattern has opened up new challenges and opportunities for software vendors thanks to microservice architectures gaining popularity. The challenge in a multi-tenant environment is that excessive load by a single customer, because of many requests to an API, can affect the entire platform.
This blog post looks at how to protect and monetize multi-tenant APIs using Amazon API Gateway. It describes a multi-tenant architecture design pattern based on a custom tenant ID to onboard customers. A tenant in a multi-tenant platform represents the customer having a group of users with common access, but individuals having specific permissions to the platform.
Overview
This example protects multi-tenant platform REST APIs using Amazon Cognito, Amazon API Gateway, and AWS Lambda.
In the following sections, you learn how to use the API Gateway’s usage plans to protect and productize multi-tenant platforms. Usage plans enable throttling of excessive API requests and apply an API usage quota policy. The user authenticates using Amazon Cognito to get a JSON Web Token (JWT) that is passed to API Gateway for authorization.
The multi-tenant platform that exposes REST APIs has clients such as a mobile app, a web application, and API clients that consume the REST APIs. This post focuses on protecting REST APIs with Amazon Cognito as the security layer for authenticating users and issuing tokens using OpenID Connect. The token contains the customer identity information, such as the tenant ID to which the users belong. API Gateway throttles the requests from a tenant only after the limit defined in the usage plans exceeds.

This architecture shows the flow of user requests:
- The client application sends a request to Amazon Cognito using the /oauth/authorize or /login API. Amazon Cognito authenticates the user credentials.
- Amazon Cognito redirects using an authorization code grant and prompts the user to enter credentials. After authentication, it returns the authorization code.
- It then passes the authorization code to obtain a JWT from Amazon Cognito.
- Upon successful authentication, Amazon Cognito returns a JWT, such as acccess_token, id_token, refresh_token. The access/id token stores information about the granted permissions including tenant ID to which this user belongs to.
- The client application invokes the REST API that is deployed in API Gateway. The API request passes the JWT as a bearer token in the API request Authorization header.
- Since the tenant ID is hidden in the encrypted JWT token, the Lambda authorizer function validates and decodes the token, and extracts the tenant ID from the JWT.
- The Lambda token authorizer function returns an IAM policy along with tenant ID from the decoded token to which a user belongs.
- The application’s REST API is configured with usage plans against a custom API key, which is the tenant ID in API Gateway. API Gateway evaluates the IAM policy and looks up the usage policy using the API key. It throttles API requests if the number of requests exceed the throttle or quota limits in the usage policy.
- If the number of API requests is within the limit, then API Gateway sends requests to the downstream application REST API. This could be deployed using containers, Lambda, or an Amazon EC2 instance.
Customer (tenant) onboarding
There are multiple ways to set up multi-tenant applications. You can either create tenant-specific pools or add tenant ID as a custom attribute in each user profile. This blog uses the latter approach. The tenant ID is added to the JWT after successful authentication.
Since, tenant ID is an API key in API Gateway, the length of tenant ID must be a minimum of 20 characters. You can define the structure of tenant ID such as <customer id>-<random string>. As part of tenant onboarding, you can automate configuring the API key and usage plans in API Gateway using CDK APIs. Here, you configure the API key and usage plan as part of the solution deployment itself.
Authentication and authorization
You need a user pool and application client enabled with the authorization code mechanism for authenticating users. API Gateway can verify JWT OAuth tokens against single Amazon Cognito user pools. To get tenant information (tenant ID), use a custom Lambda authorizer function in API Gateway to verify the token, extract the tenant id, and return to API Gateway.
API Gateway usage plans
API Gateway supports the usage plan feature for REST APIs only. This solution uses an integration point as a MOCK integration type. You can use the usage plan to set the throttle and quota limit that are associated with API keys. API keys can be generated or you can use a custom key. To enforce usage plans for each tenant separately, use tenant ID as a prefix to a uniquely generated value to prepare the custom API key.
Configure API Gateway to integrate API key and Usage plan
You need to enable REST API to use the API key and set the source to AUTHORIZER. There are two ways to accept API keys for every incoming request. You can supply it as part of the incoming request HEADER or via a custom authorizer Lambda function. This example uses a custom authorizer Lambda function to retrieve the API key that is extracted from the JWT received through an incoming API request. Customers only pass encrypted JWTs in the request authorization header. These steps are automated using the AWS CDK.
Pre-requisites
- An AWS Account
- An AWS Identity and Access Management (IAM) administrator access
- The AWS Command Line Interface (AWS CLI)
- Install AWS CDK
Deploying the example
The example source code is available on GitHub. To deploy and configure solution:
- Clone the repository to your local machine.
git clone https://github.com/aws-samples/api-gateway-usage-policy-based-api-protection - Prepare the deployment package.
cdk synth npm run build npm install --prefix aws-usage-policy-stack/lambda/src - Configure the user pool in Amazon Cognito.
npx cdk deploy CognitoStack - Open the AWS Management Console and navigate to Amazon Cognito. Choose Manage user pool and select your user pool. Note down the pool ID under general settings.

- Create a user with a tenant ID.
aws cognito-idp admin-create-user --user-pool-id <REPLACE WITH COGNITO POOL ID> --username <REPLACE WITH USERNAME> \ --user-attributes Name="given_name",Value="<REPLACE WITH FIRST NAME>" Name="family_name",Value="<REPLACE WITH LAST NAME>" " Name="custom:tenant_id",Value="<REPLACE WITH CUSTOMER ID>" \ --temporary-password change1t - To simplify testing the OAuth flow, use https://openidconnect.net/. In the configuration, set the JWKS well known URI.
https://cognito-idp.<REPLACE WITH AWS REGION>.amazonaws.com/<REPLACE WITH COGNITO POOL ID>/.well-known/openid-configuration - Test the OAuth flow with https://openidconnect.net/ to fetch the JWT ID token. Save the token in a text editor for later use.
- Open aws-usage-policy-stack/app.ts in an IDE and replace “NOT_DEFINED” with the 20-character long tenant ID from the previous section.
- Configure the user pool in API Gateway and create the Lambda function:
npx cdk deploy ApigatewayStack - After successfully deploying the API Gateway stack, open the AWS Management Console and select API Gateway. Locate ProductRestApi in the name column and note its ID.


Testing the example
Test the example using the following curl command. It throttles the requests to the deployed API based on defined limits and quotas. The following thresholds are preset: API quota limit of 5 requests/day, throttle limit of 10 requests/second, and a burst limit of 2 requests/second.
To simulate the scenario and start throttling requests.
- Open a terminal window.
- Install the curl utility if necessary.
- Run the following command six times after replacing placeholders with the correct values.
curl -H "Authorization: Bearer <REPLACE WITH ID_TOKEN received in step 7 of Deploy Amazon Cognito Resources>" -X GET https://<REPLACE WITH REST API ID noted in step 10 of Deploy Amazon API Gateway resources>.execute-api.eu-west-1.amazonaws.com/dev/products.
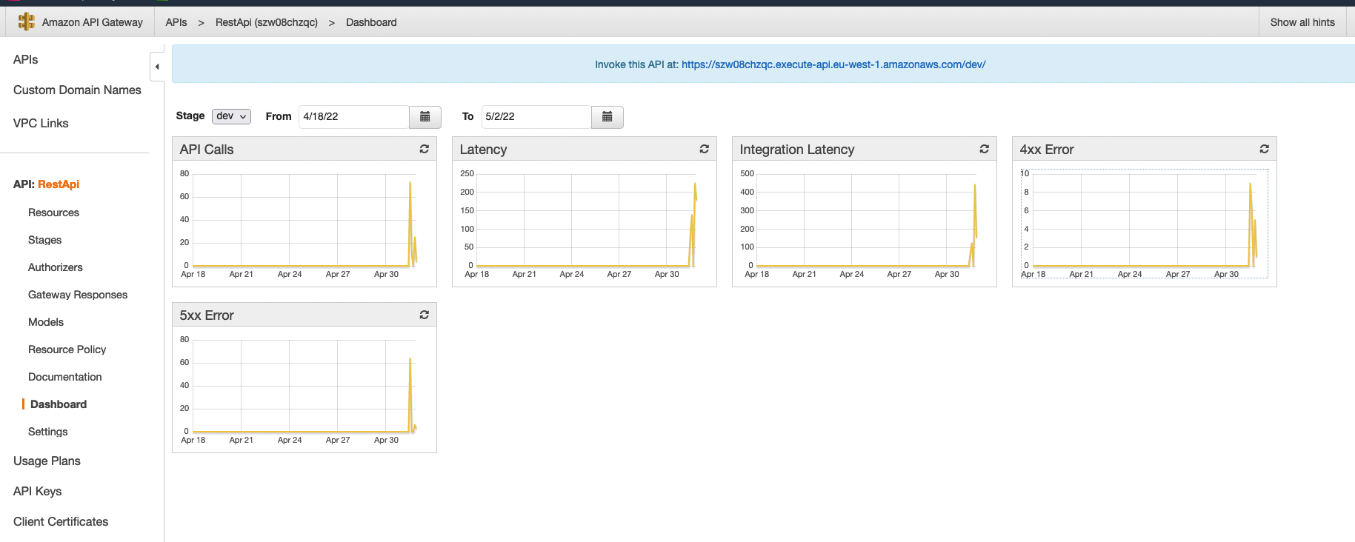
You receive the message {“message”: “Limit Exceeded”} after you run the command for the sixth time. To repeat the tests, navigate to the API Gateway console. Change the quota limits in the usage plan and run the preceding command again. You can monitor HTTP/2 429 exceptions (Limit Exceeded) in API Gateway dashboard.
Any changes to usage plan limits do not need redeployment of the API in API Gateway. You can change limits dynamically. Changes take a few seconds to become effective.
Cleaning up
To avoid incurring future charges, clean up the resources created. To delete the CDK stack, use the following command. Since there are multiple stacks, you must explicitly specify the name of the stacks.
cdk destroy CognitoStack ApigatewayStackConclusion
This post covers the API Gateway usage plan feature to protect multi-tenant APIs from excessive request loads and also as a product offering that enforces customer specific usage quotas.
To learn more about Amazon API Gateway, refer to Amazon API Gateway documentation. For more serverless learning resources, visit Serverless Land.