Module 1: Set Up Git Repo
In this module, you will set up a Git repo for your code so it can be easily accessed over the Internet
Introduction
Implementation
Fork the starter repo
This tutorial assumes you have an existing GitHub account and Git installed on your computer. If you don't have either of these two installed, you can follow these step-by-step instructions.
1. Sign in to GitHub
In a new browser tab, navigate to GitHub and make sure you are logged into your account.
2. Open the repo
In that same tab, open the aws-elastic-beanstalk-express-js-sample repo.
3. Fork the repo
Choose the white Fork button on the top right corner of the screen. Next, you will see a small window asking you where you would like to fork the repo.
4. Create the fork
Verify it is showing your account and choose Create a fork. After a few seconds, your browser will display a copy of the repo in your account under Repositories.
Push a change to your new repo
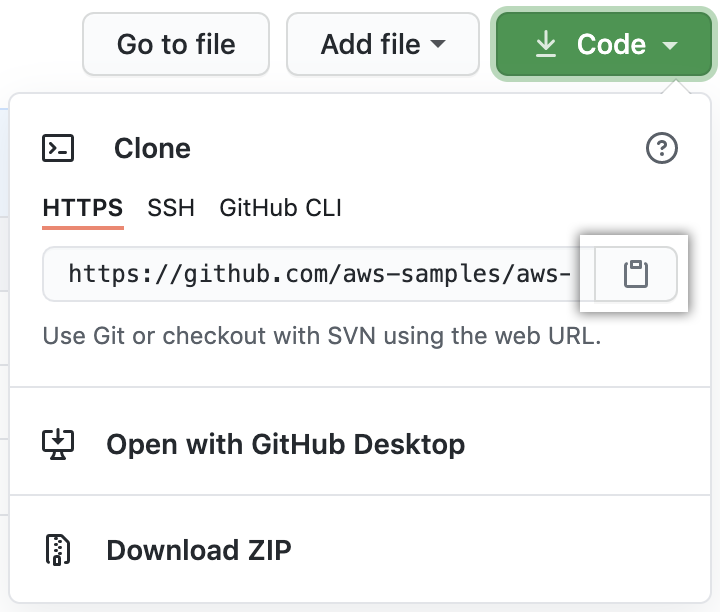
1. Copy the repo URL
Go to the repository and choose the green Code button near the top of the page.
To clone the repository using HTTPS, confirm that the heading says Clone with HTTPS. If not, select the Use HTTPS link.
Choose the white button with a clipboard icon on it (to the right of the URL).
2. Open a terminal
If you're on a Mac or Linux computer, open your terminal. If you're on Windows, launch Git Bash.
3. Clone the repo
In the terminal or Bash platform, whichever you are using, enter the following command and paste the URL you just copied when you clicked the clipboard icon. Be sure to change "YOUR-USERNAME" to your GitHub username. You should see a message in your terminal that starts with Cloning into. This command creates a new folder that has a copy of the files from the GitHub repo.
git clone https://github.com/YOUR-USERNAME/aws-elastic-beanstalk-express-js-sample4. Modify the app.js file
In the new folder there is a file named app.js. Open app.js in your favorite code editor.
Change the message in line 5 to say something other than "Hello World!" and save the file.
5. Commit and push the change
Go to the folder created with the name aws-elastic-beanstalk-express-js-sample/ and Commit the change with the following commands:
git add app.jsgit commit -m "change message"Push the local changes to the remote repo hosted on GitHub with the following command. Note that you need to configure Personal access tokens (classic) under Developer Settings in GitHub for remote authentication.
git pushTest your changes
Verify the repo updated
In your browser window, open GitHub.
In the left navigation panel, under Repositories, select aws-elastic-beanstalk-express-js-sample.
Choose the app.js file. The contents of the file, including your change, should be displayed.
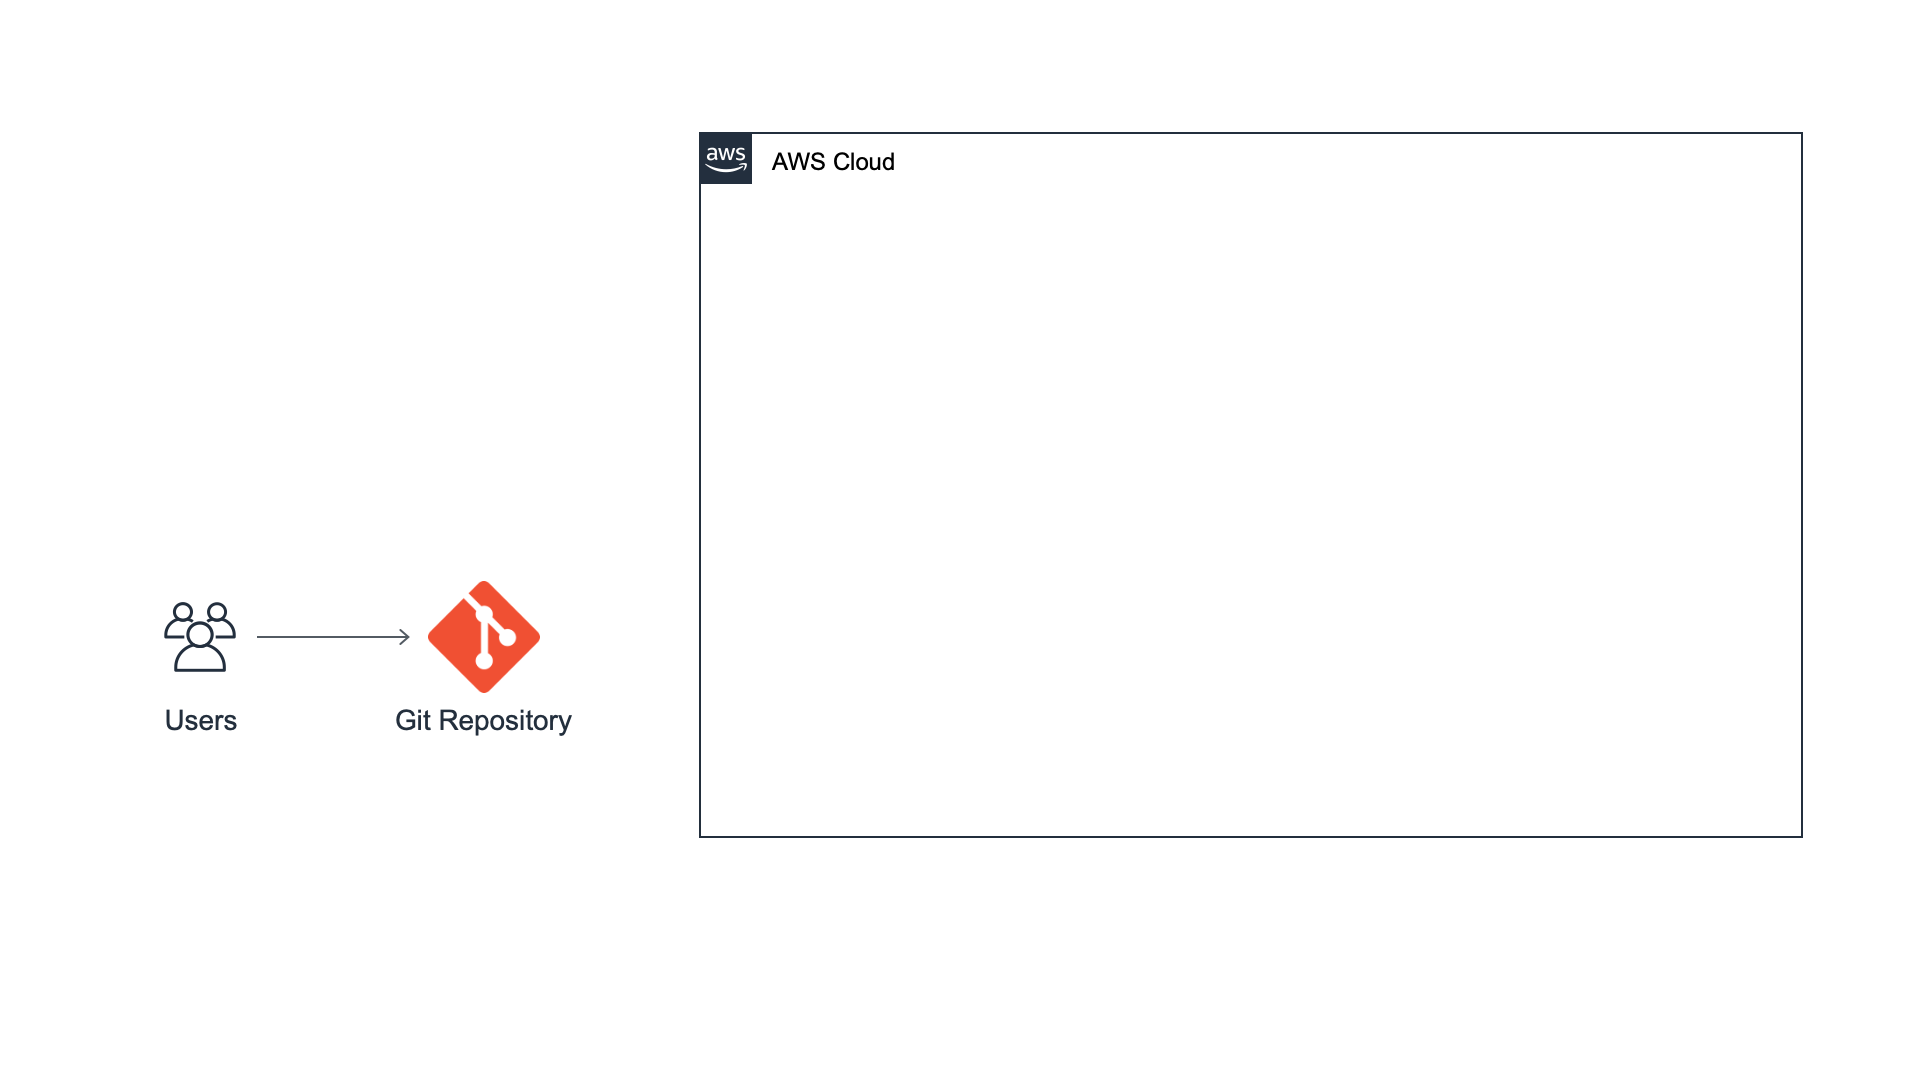
Application architecture
Here is what our architecture looks like right now.
We have created a code repository containing a simple web app. We will be using this repository to start our continuous delivery pipeline. It's important to set it up properly so we push code to it.
Deploy Web App
Did you find what you were looking for today?
Let us know so we can improve the quality of the content on our pages