Module 5: Add the Ability to Store Images
In this module, you will add storage and the ability to associate an image with the notes in your app
Introduction
Implementation
Create the storage service
1. Add storage
Open the Terminal, navigate to your project root directory, and run the following command:
amplify add storage2. Configure options
When prompted, make the following selections:
Select from one of the below mentioned services: ❯ Content (Images, audio, video, etc.) Provide a friendly name for your resource that will be used to label this category in the project image Provide bucket name «default value» Who should have access: ❯ Auth users only What kind of access do you want for Authenticated users? ● create/update ● read ● delete «i.e. select all options» Do you want to add a Lambda Trigger for your S3 Bucket? N3. Deploy the service
Finally, deploy the service by running the following command:
amplify pushAre you sure you want to continue? YAdd the Amplify Storage library to the project
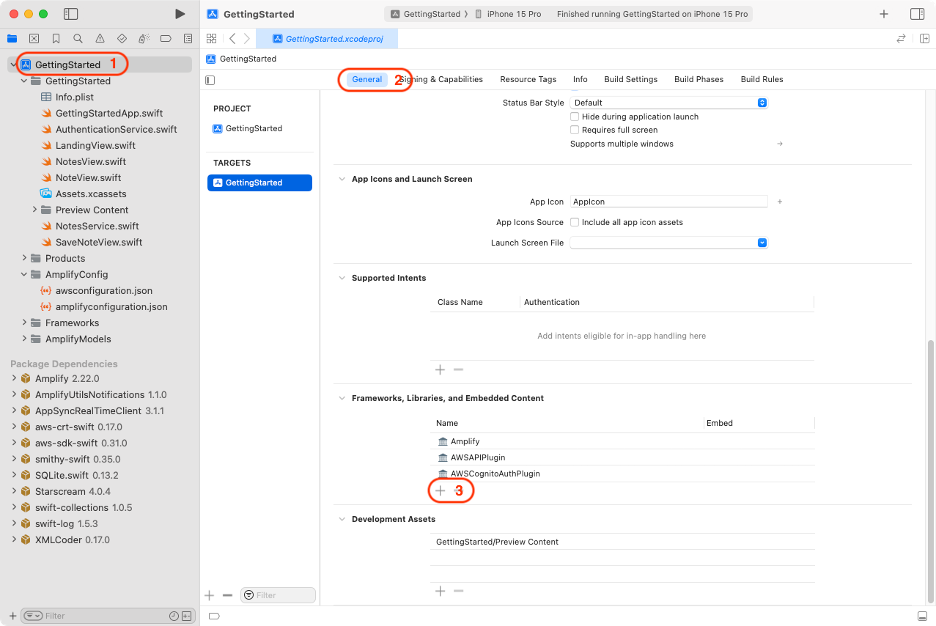
1. Open the general tab
Navigate to the General tab of your Target application (Your Project > Targets > General), and select the plus (+) in the Frameworks, Libraries, and Embedded Content section.
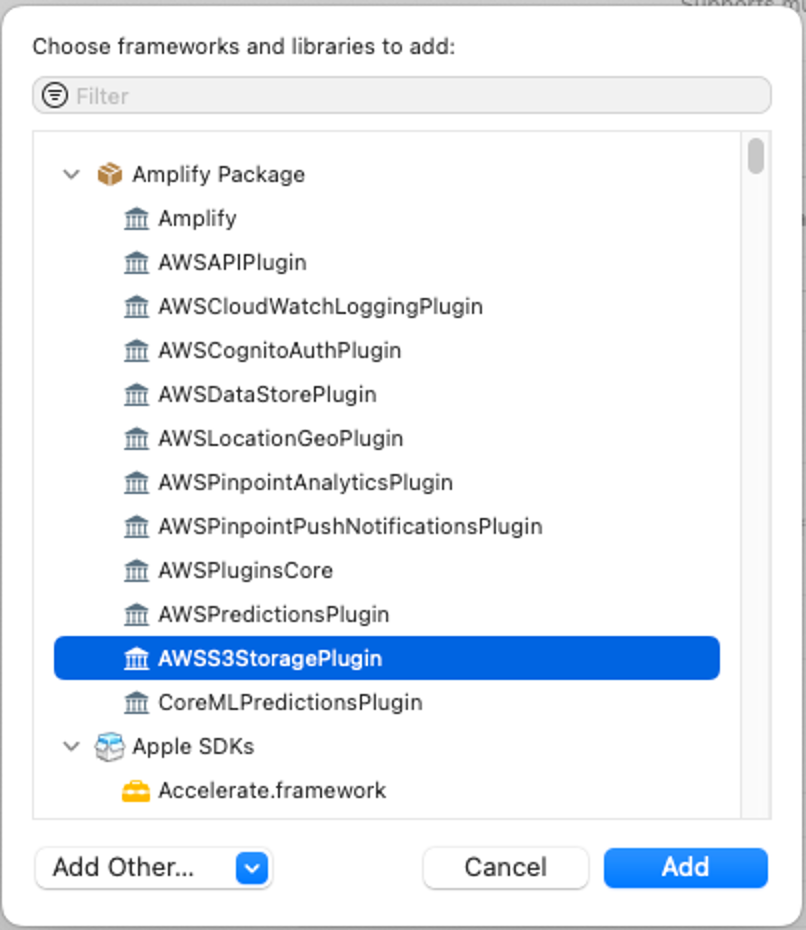
2. Choose the plugin
Choose AWSS3StoragePlugin, and select Add.
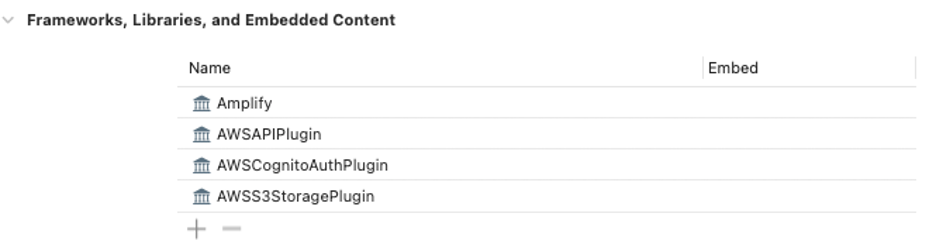
3. Verify dependency
You will see AWSS3StoragePlugin as a dependency for your project.
Configure the Amplify Storage library at runtime
1. Modify the Xcode
Navigate back to Xcode and open the GettingStartedApp.swift file. To configure Amplify API, you will need to:
Add theimport AWSS3StoragePlugin statement.
Create the AWSS3StoragePluginplugin, and register it with Amplify.
Your code should look like the following.
Create a class to support image CRUD operations
1. Create a StorageSwift file
Create a new Swift file named StorageService.swift with the following content:
import Amplifyimport Foundation class StorageService: ObservableObject { func upload(_ data: Data, name: String) async { let task = Amplify.Storage.uploadData( key: name, data: data, options: .init(accessLevel: .private) ) do { let result = try await task.value print("Upload data completed with result: \(result)") } catch { print("Upload data failed with error: \(error)") } } func download(withName name: String) async -> Data? { let task = Amplify.Storage.downloadData( key: name, options: .init(accessLevel: .private) ) do { let result = try await task.value print("Download data completed") return result } catch { print("Download data failed with error: \(error)") return nil } } func remove(withName name: String) async { do { let result = try await Amplify.Storage.remove( key: name, options: .init(accessLevel: .private) ) print("Remove completed with result: \(result)") } catch { print("Remove failed with error: \(error)") } }}The methods in this class simply call their Amplify counterpart. Amplify Storage has three file protection levels:
Public: Accessible by all users
Protected: Readable by all users, but only writable by the creating user
Private: Readable and writable only by the creating user
For this app, we want the images to only be available to the note owner, so we set the accessLevel: .private property in each operation's options.
Update the existing UI
1. Create a RemoteImage file
Create a new Swift file named RemoteImage.swift with the following content:
import SwiftUI struct RemoteImage: View { @EnvironmentObject private var storageService: StorageService @State private var image: UIImage? = nil @State private var isLoading = true var name: String var body: some View { content .task { if let data = await storageService.download(withName: name) { image = UIImage(data: data) } isLoading = false } } @ViewBuilder private var content: some View { if isLoading { ProgressView() } else if let image { Image(uiImage: image) .resizable() .aspectRatio(contentMode: .fill) } else { EmptyView() } }}This view will attempt to download the data using the storage service and the provided name, while displaying a loading view while the operation is in progress. If the data cannot be downloaded, it shows an empty view.
2. Update the NoteView file
Next, update NoteView.swift to use this new view when displaying the image:
if let image = note.image { Spacer() RemoteImage(name: image) .frame(width: 30, height: 30) }3. Update the GettingStartedApp file
Finally, update the GettingStartedApp.swift's body to set the StorageService object:
var body: some Scene { WindowGroup { LandingView() .environmentObject(NotesService()) .environmentObject(AuthenticationService()) .environmentObject(StorageService()) } }4. Create a PicturePicker file
In order to allow the user to select a picture from their library, create a new Swift file named PicturePicker.swift with the following content:
import PhotosUIimport SwiftUI struct PicturePicker: View { @State private var selectedPhoto: PhotosPickerItem? = nil @Binding var selectedData: Data? var body: some View { VStack { if let selectedData, let image = UIImage(data: selectedData) { Image(uiImage: image) .resizable() .frame(width: 100, height: 100) .clipShape(Circle()) .overlay(Circle().stroke(Color.white, lineWidth: 4)) .shadow(radius: 10) } PhotosPicker(title, selection: $selectedPhoto) } .onChange(of: selectedPhoto) { Task { selectedData = try? await selectedPhoto?.loadTransferable(type: Data.self) } } } private var title: String { return selectedPhoto == nil ? "Choose a picture" : "Change picture" }}5. Update the SaveNoteView file
Make the following changes to the SaveNoteView.swift files:
Add a new @EnvironmentObject private var storageService: StorageService property.
Replace the type of the image property to Data instead of String.
Display PicturePicker(selectedData: $image) on the Picture section instead of a text field.
Modify the Save Note button's action to also save the image using storageService. Keep in mind that the note's image value should match the name you give to the stored image.
You file should look like the following:
struct SaveNoteView: View { @Environment(\.dismiss) private var dismiss @EnvironmentObject private var notesService: NotesService @EnvironmentObject private var storageService: StorageService @State private var name = "" @State private var description = "" @State private var image: Data? = nil var body: some View { Form { Section("Details") { TextField("Name", text: $name) TextField("Description", text: $description) } Section("Picture") { PicturePicker(selectedData: $image) } Button("Save Note") { let imageName = image != nil ? UUID().uuidString : nil let note = Note( name: name, description: description.isEmpty ? nil : description, image: imageName ) Task { if let image, let imageName { await storageService.upload(image, name: imageName) } await notesService.save(note) dismiss() } } } }}6. Configure image deletion
To delete images that are associated with a note that is deleted, update the NotesView.swift file:
Add a new @EnvironmentObject private var storageService: StorageService property
Call storageService.remove(withName:) inside the onDelete callback after calling notesService.delete(_:).
Your file should look like the following:
struct NotesView: View { @EnvironmentObject private var authenticationService: AuthenticationService @EnvironmentObject private var notesService: NotesService @EnvironmentObject private var storageService: StorageService @State private var isSavingNote = false var body: some View { NavigationStack{ List { if notesService.notes.isEmpty { Text("No notes") } ForEach(notesService.notes, id: \.id) { note in NoteView(note: note) } .onDelete { indices in for index in indices { let note = notesService.notes[index] Task { await notesService.delete(note) if let image = note.image { await storageService.remove(withName: image) } } } } } .navigationTitle("Notes") .toolbar { Button("Sign Out") { Task { await authenticationService.signOut() } } } .toolbar { ToolbarItem(placement: .bottomBar) { Button("⨁ New Note") { isSavingNote = true } .bold() } } .sheet(isPresented: $isSavingNote) { SaveNoteView() } } .task { await notesService.fetchNotes() } }}Build and test
1. Run the project
To verify everything works as expected, build, and run the project.
Choose the ► button in the toolbar. Alternatively, you can also do it by going to Product -> Run, or by pressing Cmd + R.
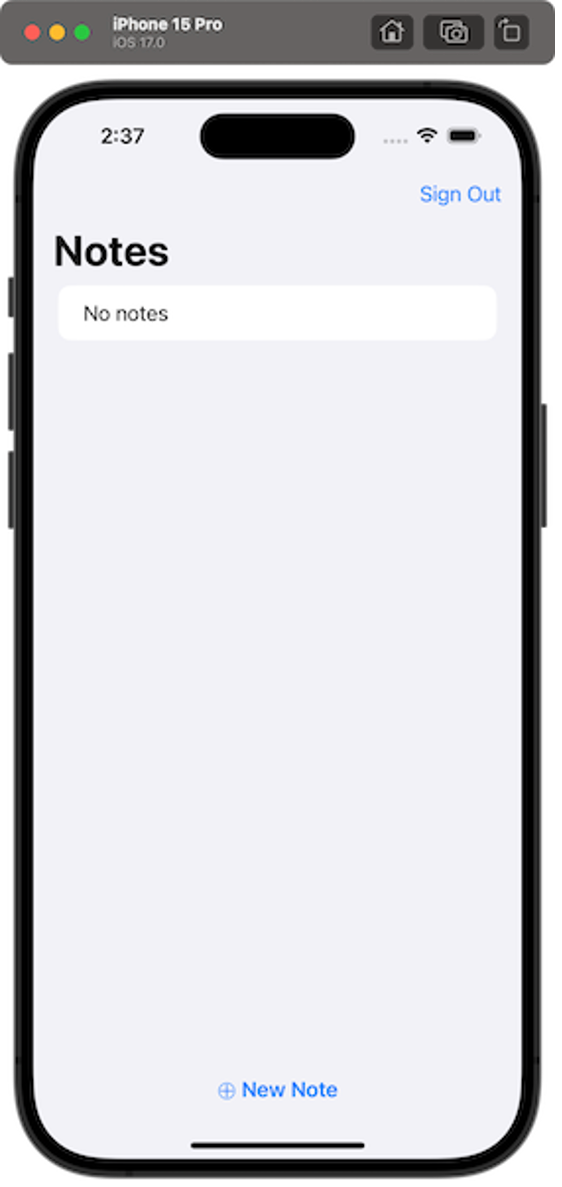
The iOS simulator will open and the app should show you the Notes view, assuming you are still signed in.
You can tap on the "⨁ New Note" button at the bottom to create a new list, and now you should be able to select a picture from the device's photo library.
List of notes
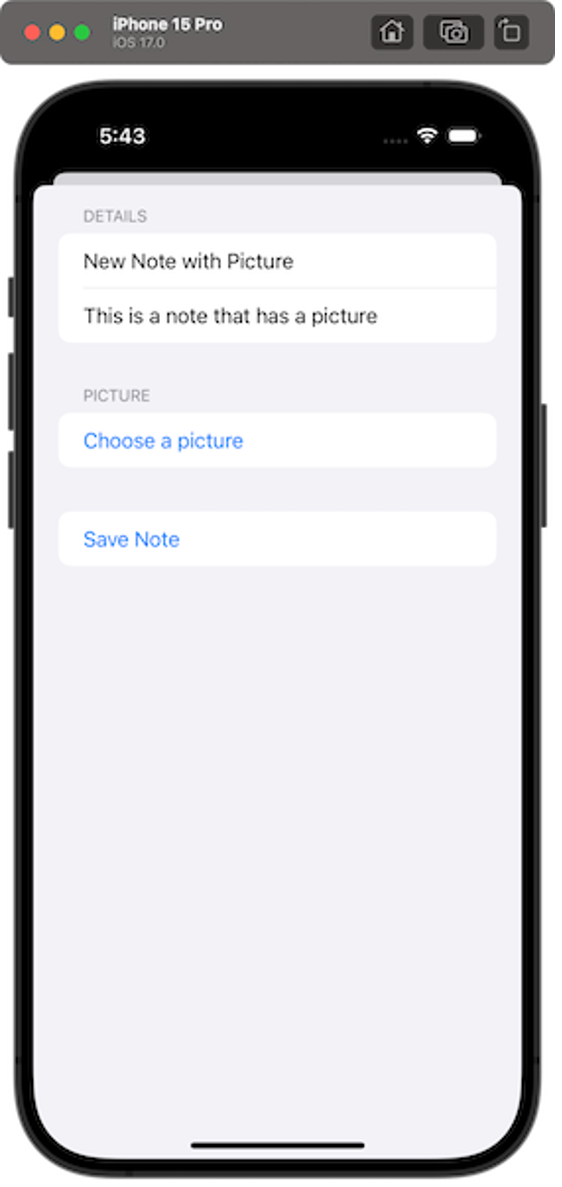
Create a note
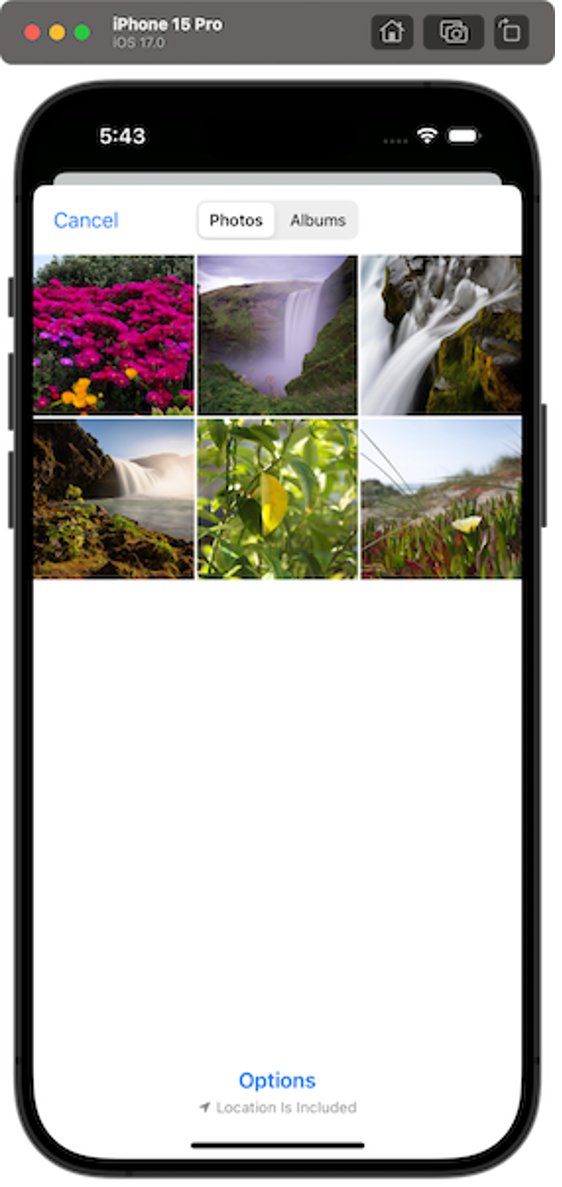
Select a picture
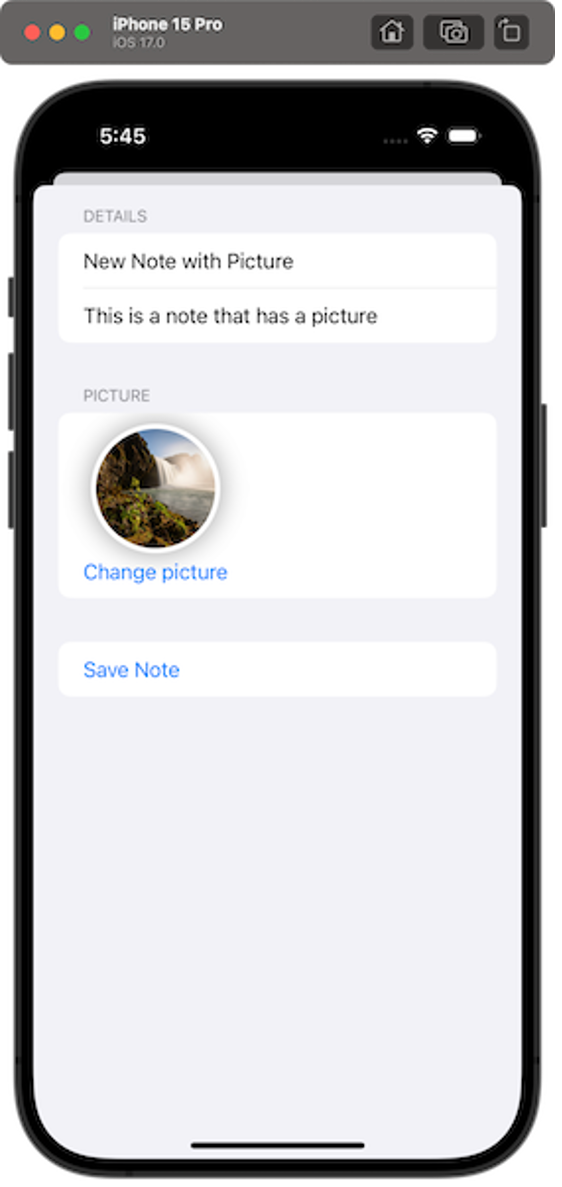
Note with picture
Conclusion
You have built an iOS application using AWS Amplify! You have added authentication to your app allowing users to sign up, sign in, and manage their account. The app also has a scalable GraphQL API configured with an Amazon DynamoDB database which users can use to create and delete notes. You have also added file storage using Amazon S3, which users can use to upload images and view them in their app.
To conclude this guide, you can find instructions to reuse or delete the backend you have been using in this tutorial.
1. Synchronize your local project
Open the Terminal, navigate to your other project directory, and run the following command:
amplify pull2. Configure options
When prompted, make the following selections:
Select the authentication method you want to use ❯ AWS profile Please choose the profile you want to use (Use arrow keys) ❯ default Which app are you working on? ❯ GettingStarted («id») Choose your default editor: ❯ «Choose your desired editor» Choose the type of app that you're building … ❯ «Choose your desired app type, and any subsequent configuration related to it» Do you plan on modifying this backend? NDelete your backend
When creating a backend for a test or a prototype, or just for learning purposes like this tutorial, you should delete the Cloud resources you created.
1. Delete the project
Open Teminal, navigate to your project root folder, and run the following command:
amplify deleteCongratulations!
You successfully built a web application on AWS! As a great next step, dive deeper into specific AWS technologies and take your application to the next level.
Did you find what you were looking for today?
Let us know so we can improve the quality of the content on our pages