Containers
Announcing AWS CDK Support and CodeBuild Provisioning for AWS Proton
Introduction
Today, AWS Proton announced CodeBuild provisioning, which allows customers to define a series of commands to determine how Infrastructure as Code (IaC) templates get deployed via AWS Proton. With CodeBuild provisioning, customers can use the IaC tool of their choice, such as the AWS Cloud Development Kit (AWS CDK) when defining templates. Previous to this feature release, customers were limited to AWS CloudFormation or Hashicorp Terraform as their IaC tools, and were required to follow the opinionated workflows provided by AWS Proton for deploying resources. By using CodeBuild provisioning, customers have more control over their deployment logic for the IaC tooling that they choose.
Provisioning AWS Proton templates via the AWS CDK served as the catalyst for building this provisioning method, as it was one of our most widely requested features on our roadmap. It’s evident that customers want to build self-service developer portals for their end users while expressing their desired infrastructure definition using a familiar programming language, such as Python or Typescript. While the AWS CDK played a big role in launching this feature, it’s also important to note that this feature is not limited to the AWS CDK. It opens the door for customers that use IaC tooling (e.g., Pulumi or Terraform [outside of the supported mode today with pull request provisioning]) with their own custom steps for deployment.
Let’s walk through a demonstration of how we can take infrastructure that we’ve defined using the AWS CDK, and build a self-service interface with AWS Proton to deploy the resources with CodeBuild provisioning. As we walk through the process in this post, we’ll talk about AWS Proton concepts at a high level and provide links for further reading, if needed. If you want to get straight into the demo, then head down to the Walkthrough section of the post.
Benefits of using AWS Proton and the AWS CDK together
A common use case customers take advantage of when using the AWS CDK is creating reusable libraries called Constructs. This pattern enables teams to define a common set of patterns to be reused when defining infrastructure. To publish these libraries, this requires that customers version them. While this is a recommended practice for providing software, problems arise when customers try to gain insight into what version of software is being used across the organization. With AWS Proton’s built-in template versioning, customers can now have insight into what version of IaC software is deployed to, and where. Let’s take a look at a sample environment and service template bundles defined using the AWS CDK, and then walk through how to create and deploy from them in AWS Proton.
Solution overview
Reviewing the template bundle
A template bundle in Proton is comprised of IaC templates that define the desired state of resources in a generic/reusable manner, a schema file defining required/optional inputs, as well as a manifest which defines the mechanism for provisioning the IaC templates. The steps to provision and de-provision resources are defined in the manifest file. Below is an example of a manifest file for a AWS CDK deployment.
We begin by setting the rendering_engine value to CodeBuild, and pass in the settings to meet our needs. Then we set the container image that we want to use for our CodeBuild job. In this example, we are leveraging Typescript for our cdk project. This means that we need to have nodejs installed, which we set under runtimes. Next, we define the steps to provision and de-provision our resources. The steps listed should be familiar to those who work with the AWS CDK as we are simply installing our dependencies and then deploying our IaC. When the user provisions their environment and/or service, AWS Proton needs a way to provide the input values to our cdk code. As a part of the provisioning process, AWS Proton provides a file (proton-inputs.json), which is where our code can render the input values as well as the shared environment outputs for when services are provisioned. Here is an example inputs file for one of our environment samples.
Finally, we provide a helper script which takes the cdk outputs and organizes them in a format required to send to AWS Proton post deployment, which is the last step in the manifest above. For more information on working with CodeBuild provisioning, check out the documentation here. Now that we understand how to define the deployment steps, let’s walkthrough creating a template, and then deploying a development environment from that template.
Walkthrough
We’re going to start by creating an environment template bundle and publishing our first version. This template bundle contains our cdk code which is where we define a virtual private cloud (VPC), Amazon Elastic Container Service (Amazon ECS) Cluster as well as some optional resources based on schema inputs. The full template bundle example can be referenced here. When we talk about environments in AWS Proton, think of them as the resources that are shared across applications. Environments are commonly isolated by deployment environment (such as test, staging, and production) or may align to business verticals (i.e., finance-dev).
There are presently two ways to sync our templates with AWS Proton: point to an artifact template bundle stored in an Amazon Simple Storage Service (Amazon S3) Bucket, or by pointing to a template repository in version control like GitHub with a feature called Template Sync. For this walkthrough, we’re going to package our environment templates and push them up to an Amazon S3 Bucket, but the recommended approach is to use Template Sync, which provides Git as the central source of truth and change control for your templates. Additionally, AWS Proton automatically stages templates for version bumps based on Git commits, which removes the need for any custom automation to be built by the customer.
In the sample repository, let’s navigate to the directory of the template that we want to publish to AWS Proton, cdk/environment-templates/vpc-ecs-cluster/v1 and run the following commands to package and push the template bundle to Amazon S3.
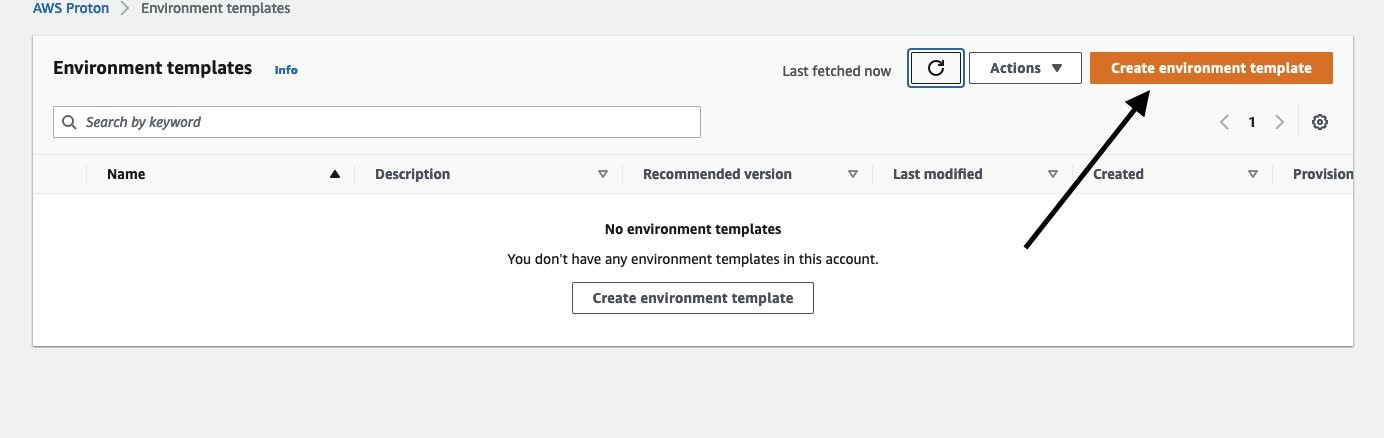
Next, let’s navigate to the AWS Proton console to upload and then publish our template bundle. Under Templates, select Environment templates. Then, select Create environment template:
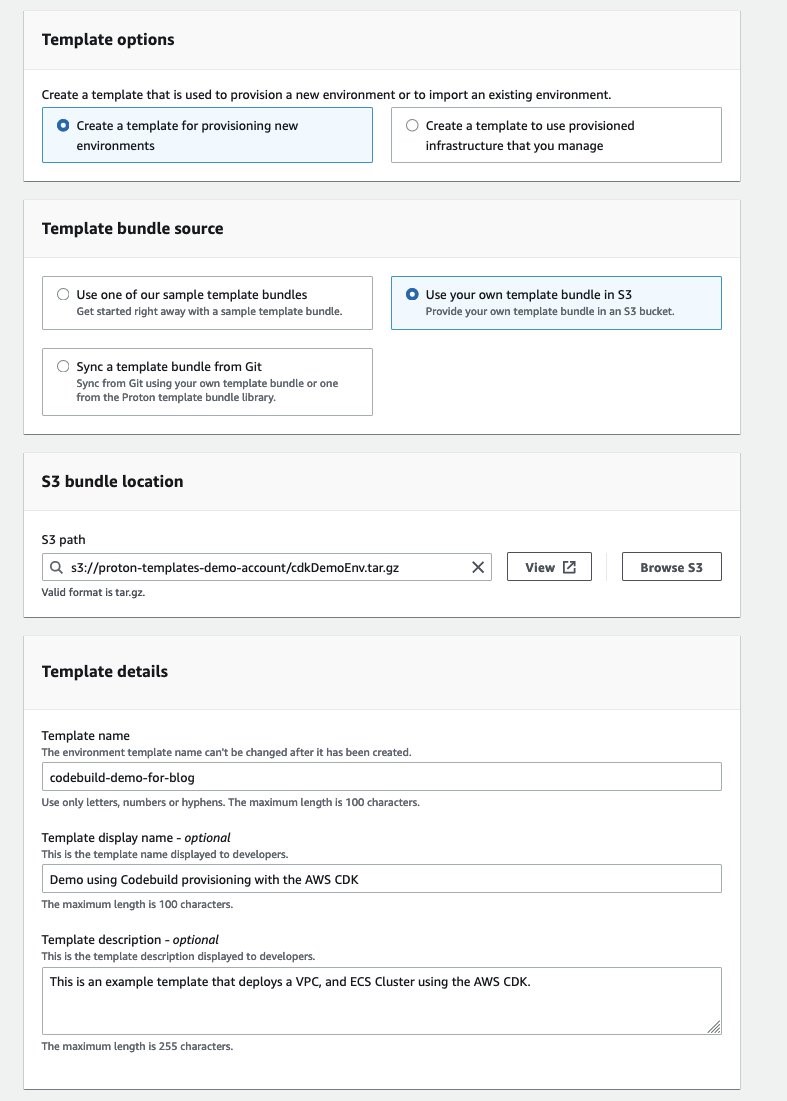
This is where we define the source of the template bundle as well as information about how we want to present the template to our end users in the self-service interface. Additionally, it’s a recommended practice to add any relevant information about the template in the template description section. Once we set our values, we will select Create environment template.
We then progress to the next screen, which provides us an overview of our template bundle that we just created along with details about the template, including versioning. We select Publish v1.0, and we are ready to deploy our first environment.

We should now see the Status showing as Published.

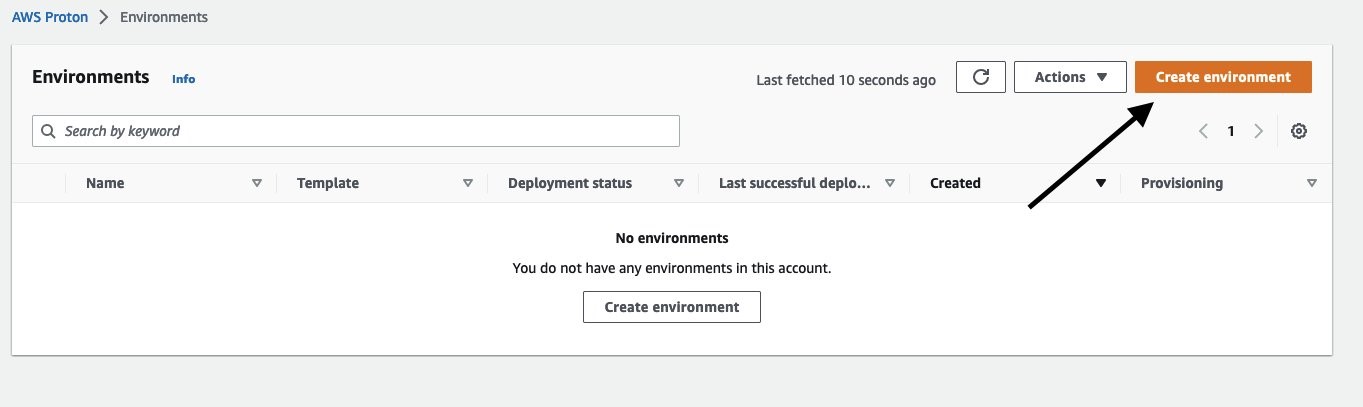
The next step is to deploy an environment via the self-service interface. Navigate back to the sidebar and select Environments, then Create environment.
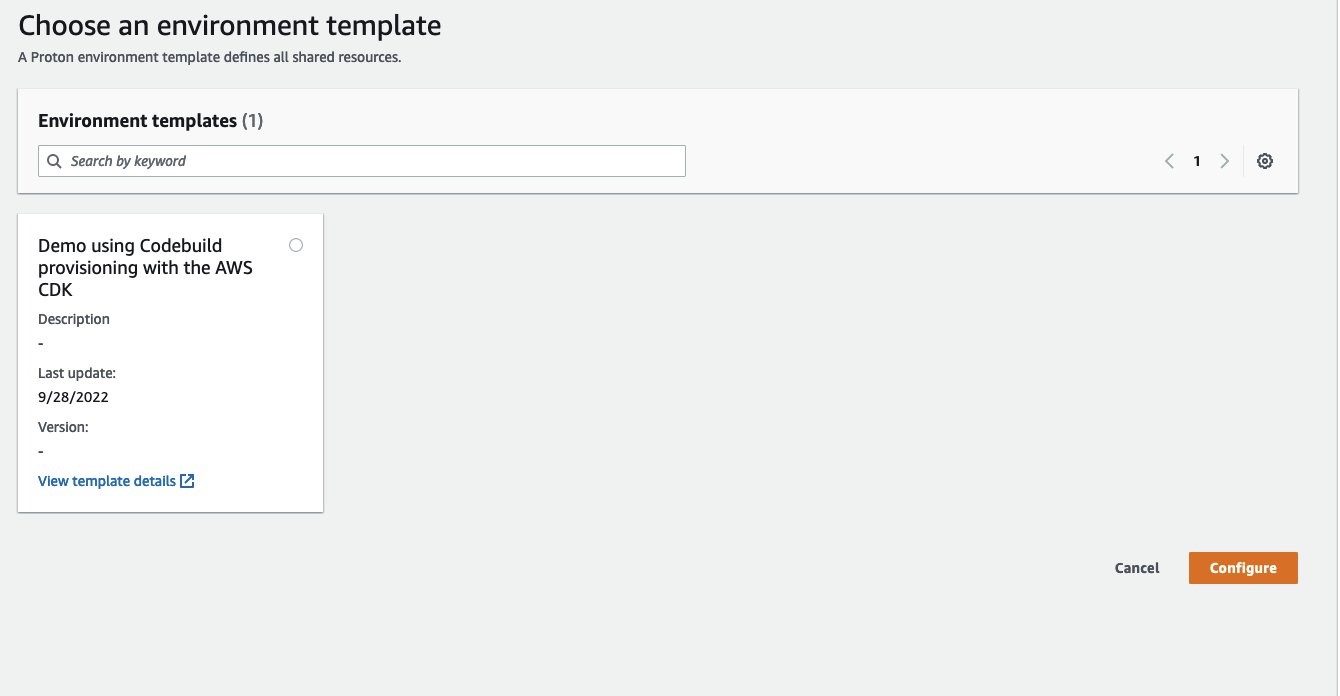
We are now presented with the available environment template to use. As we can see, for this demo I only have the single environment template to choose from which is our AWS CDK environment template. Select the radial button for our template, and choose Configure.
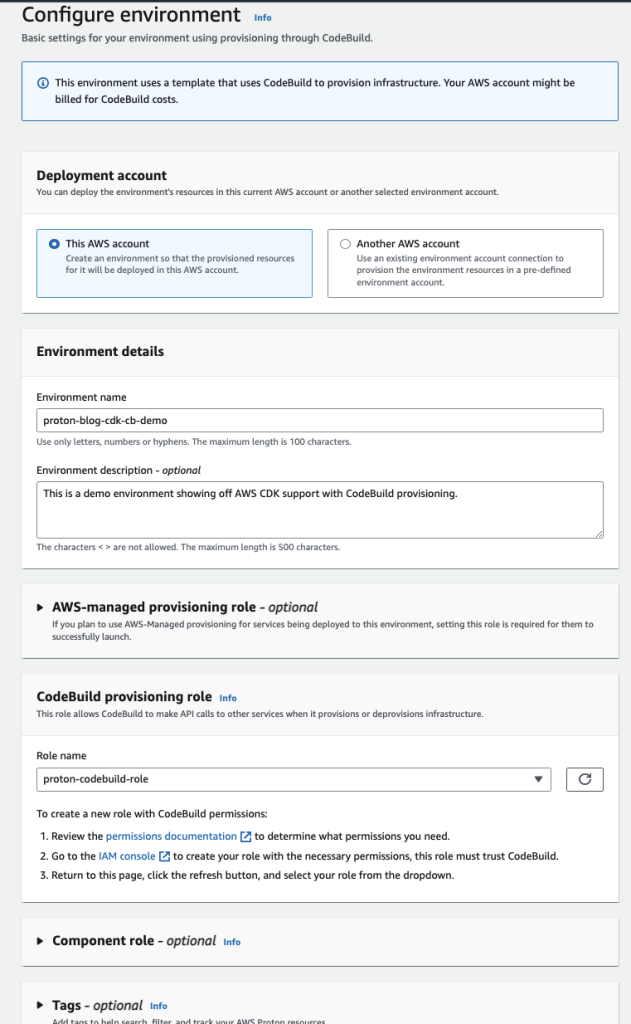
We start by setting up some prerequisite details about our environment. First, we select what account we want our environment to be deployed into. To configure multi-account access in AWS Proton, check out Environment account connections. Next, we provide a friendly name of our environment along with a description. The next section is important as this is where we choose the AWS Identity and Access Management (AWS IAM) role that the provisioning method assumes when deploying resources that are defined in the template. This is setup under the Codebuild provisioning role section and we need to select a role that the CodeBuild service can assume with the proper policies attached. For more information on the CodeBuild provisioning role, please refer to our documentation. You may also notice that there is a section for an AWS-managed provisioning role. We would add a role here if we wanted to allow for other AWS Proton services to be deployed to this environment that are using AWS-managed provisioning. Finally, not only will these roles be used when AWS Proton deploys this environment, but any service that launches to this environment as well. Once all of the information is filled in, select Next.
The next view is where we get to pass our configuration inputs to the template bundle. These inputs are defined in the schema.yaml file, which is included in our template bundle. We’ll stick with the defaults and add our service discovery namespace, then select Next and Create.

What happens next is AWS Proton renders the template bundle into the deployable artifacts, launches a CodeBuild job with said artifacts, and runs the deployment steps that are defined in the manifest file. If this is the first time that we are launching using CodeBuild provisioning, then AWS Proton creates the CodeBuild job first. While AWS Proton is deploying our infrastructure resources, we can navigate to the CodeBuild provisioning tab and watch the progress of deployment status via the log events. If you want to further dive in and troubleshoot any issues with the job, you can select the CodeBuild job link, which redirects you to the CodeBuild job run in the console.

We’ve successfully deployed an AWS Proton environment using CodeBuild provisioning!
Cleaning up
To clean up the resources, navigate via the console to the environment that was created above (named proton-blog-cdk-cb-demo). In the upper right hand side select Actions, Delete. This will trigger the CodeBuild job which will run the deprovision steps defined in the manifest, which will delete the resources.
Conclusion
In this post, we showed you that with CodeBuild provisioning, you’re empowered to use the IaC tool of their choice while taking advantage of the features native to Proton, such as template versioning, self-service, CI/CD pipeline automation, and more. We look forward to hearing how our customers are leveraging this new functionality, and encourage you to reach out to us with any feedback and feature requests via our public roadmap. To get started, head over to our sample repository for examples, as well as our documentation for a deeper dive into the functionality.