Module 3: Add Authentication
In this module, you will use the Amplify CLI and libraries to configure and add authentication to your app
Introduction
Implementation
Create the authentication service
3. Deploy the service
Run the following command to deploy the service:
amplify pushPress Enter (Y) when asked to continue.
Add the Amplify Authentication library to the project
1. Open the general tab
To add the Amplify Authentication library to the dependencies of your project, navigate to the General tab of your Target application (Your Project > Targets > General).
Select the plus (+) in the Frameworks, Libraries, and Embedded Content section.
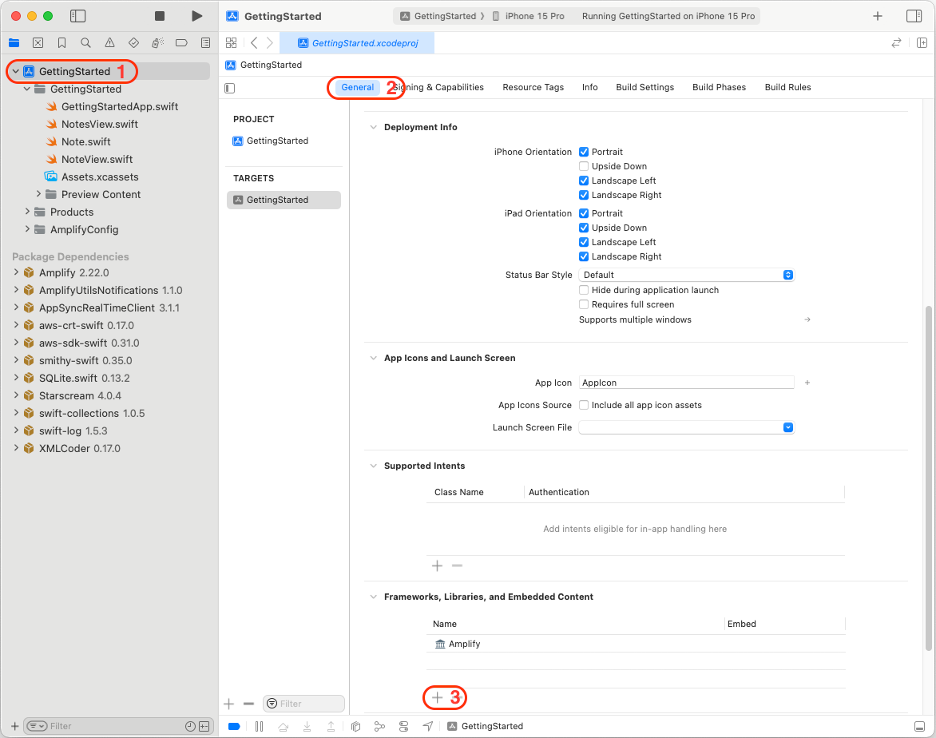
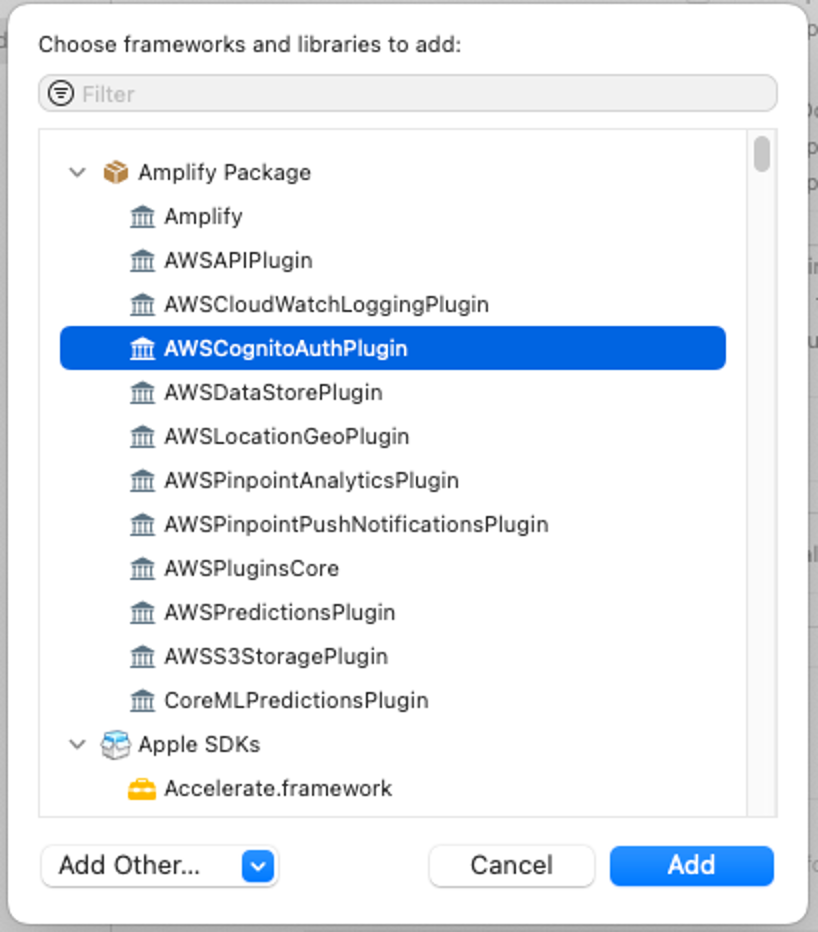
2. Select the plugin
Select AWSCognitoAuthPlugin,and choose Add.
Configure the Amplify Authentication library at runtime
Add GraphQL API & a Database
Start Module Four1. Configure authentication
Navigate back to Xcode, and open the GettingStartedApp.swift file. To configure Amplify Authentication, you will need to:
Add theimport AWSCognitoAuthPluginstatement.
Create the AWSCognitoAuthPlugin plugin and register it with.
Your code should look like the following:
import Amplifyimport AWSCognitoAuthPluginimport SwiftUI @mainstruct GettingStartedApp: App { init() { do { try Amplify.add(plugin: AWSCognitoAuthPlugin()) try Amplify.configure() print("Initialized Amplify"); } catch { print("Could not initialize Amplify: \(error)") } } var body: some Scene { WindowGroup { NotesView() } }}Create a class to support authentication operations
Create a new Swift file named AuthenticationService.swiftwith the following content:
import Amplifyimport AuthenticationServicesimport AWSCognitoAuthPluginimport SwiftUI @MainActorclass AuthenticationService: ObservableObject { @Published var isSignedIn = false func fetchSession() async { do { let result = try await Amplify.Auth.fetchAuthSession() isSignedIn = result.isSignedIn print("Fetch session completed. isSignedIn = \(isSignedIn)") } catch { print("Fetch Session failed with error: \(error)") } } func signIn(presentationAnchor: ASPresentationAnchor) async { do { let result = try await Amplify.Auth.signInWithWebUI( presentationAnchor: presentationAnchor, options: .preferPrivateSession() ) isSignedIn = result.isSignedIn print("Sign In completed. isSignedIn = \(isSignedIn)") } catch { print("Sign In failed with error: \(error)") } } func signOut() async { guard let result = await Amplify.Auth.signOut() as? AWSCognitoSignOutResult else { return } switch result { case .complete, .partial: isSignedIn = false case .failed: break } print("Sign Out completed. isSignedIn = \(isSignedIn)") }}This class takes care of handling authentication by relying on Amplify's HostedUI capabilities, while also informing whether a user is signed in or not.
Update the UI with authentication
1. Create authentication for signing in
Create a new Swift file named LandingView.swift with the following content:
import AuthenticationServicesimport SwiftUI struct LandingView: View { @EnvironmentObject private var authenticationService: AuthenticationService @State private var isLoading = true var body: some View { ZStack { if isLoading { ProgressView() } Group { if authenticationService.isSignedIn { NotesView() } else { Button("Sign in") { Task { await authenticationService.signIn(presentationAnchor: window) } } } } .opacity(isLoading ? 0.5 : 1) .disabled(isLoading) } .task { isLoading = true await authenticationService.fetchSession() if !authenticationService.isSignedIn { await authenticationService.signIn(presentationAnchor: window) } isLoading = false } } private var window: ASPresentationAnchor { if let delegate = UIApplication.shared.connectedScenes.first?.delegate as? UIWindowSceneDelegate, let window = delegate.window as? UIWindow { return window } return ASPresentationAnchor() }}This view takes care of the following:
Before the view first appears, it will fetch the current user status using the authenticationService property. This is done in the view's task(priority:_:) method.
If the user is signed in, it will display the NotesView.
If the user is not signed in, it will automatically invoke the HostedUI workflow. If the user does not sign in and closes that workflow, a "Sign In" button will be displayed that can be used to start the authentication workflow again.
We've marked the authenticationService variable with a @EnvironmentObject property wrapper annotation, meaning we need to set it using the environmentObject(_:) view modifier on an ancestor view.
Update the GettingStartedApp.swift file body to create this view instead, and to set the AuthenticationService object with the following:
var body: some Scene { WindowGroup { LandingView() .environmentObject(AuthenticationService()) } }2. Create authentication for signing out
Open the NotesView.swift file and replace its contents with the following:
struct NotesView: View { @EnvironmentObject private var authenticationService: AuthenticationService @State var notes: [Note] = [] var body: some View { NavigationStack{ List { if notes.isEmpty { Text("No notes") } ForEach(notes, id: \.id) { note in NoteView(note: note) } } .navigationTitle("Notes") .toolbar { Button("Sign Out") { Task { await authenticationService.signOut() } } } } }}We've added a Sign Out button in the toolbar that calls authenticationService.signOut(). As this object has already been added when creating the LandingView ancestor, we don't need to do anything else.
Build and test
Build and launch the app in the simulator by pressing the ► button in the toolbar. Alternatively, you can also do it by going to Product -> Run, or by pressing Cmd + R.
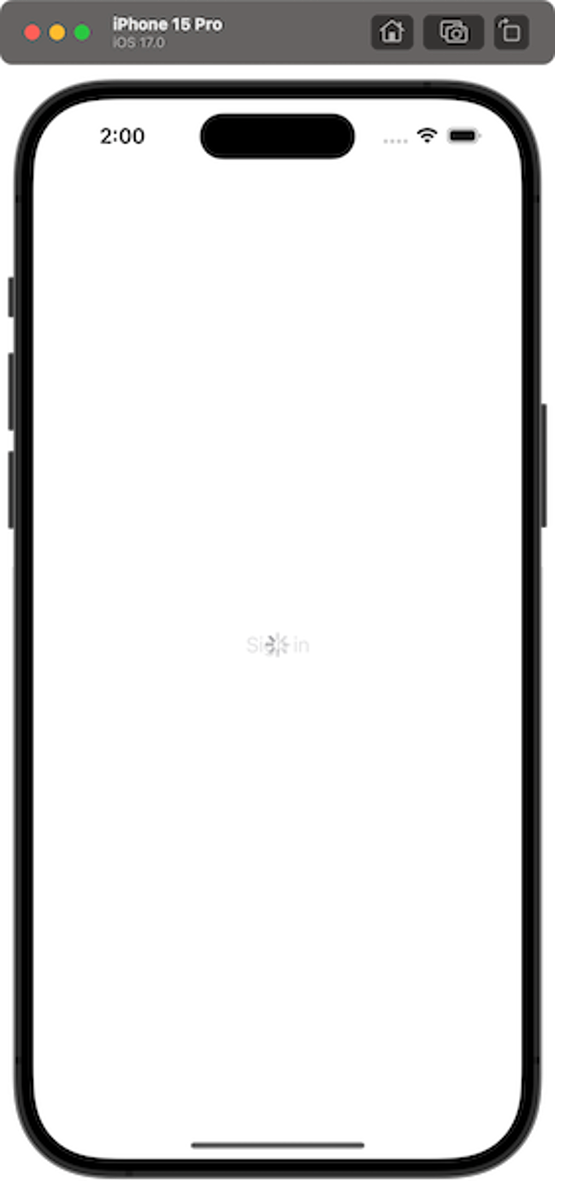
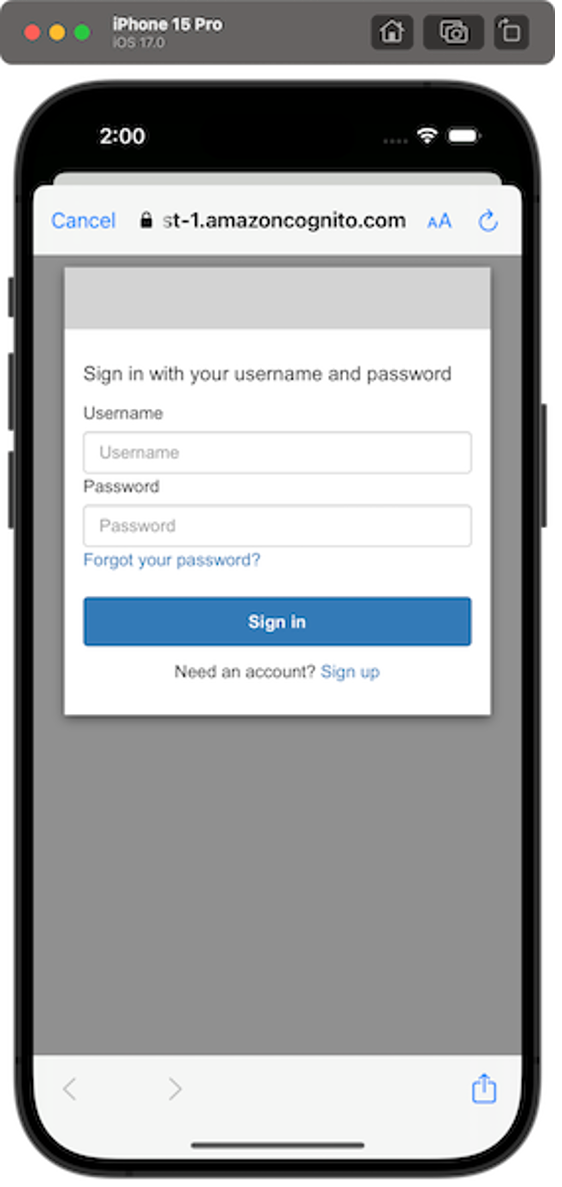
The iOS simulator will open and the app should prompt you to sign in first.
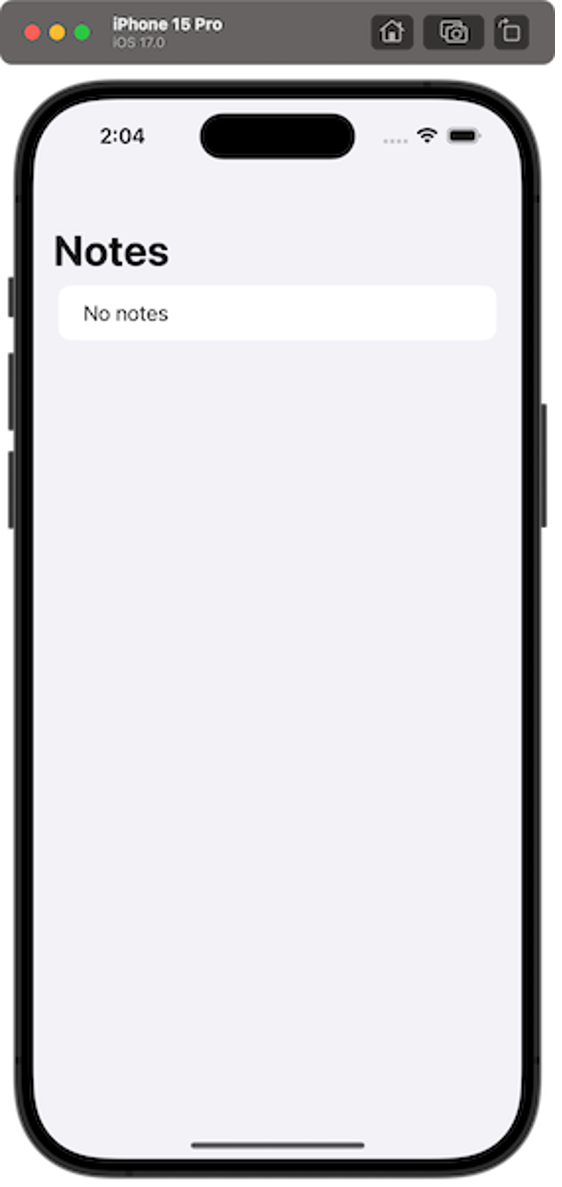
Once you've finished that process, the Notes view will display with a Sign Out button at the top right. If you choose it, you should land in the Sign in view again.
Landing view
Hosted UI: Sign in
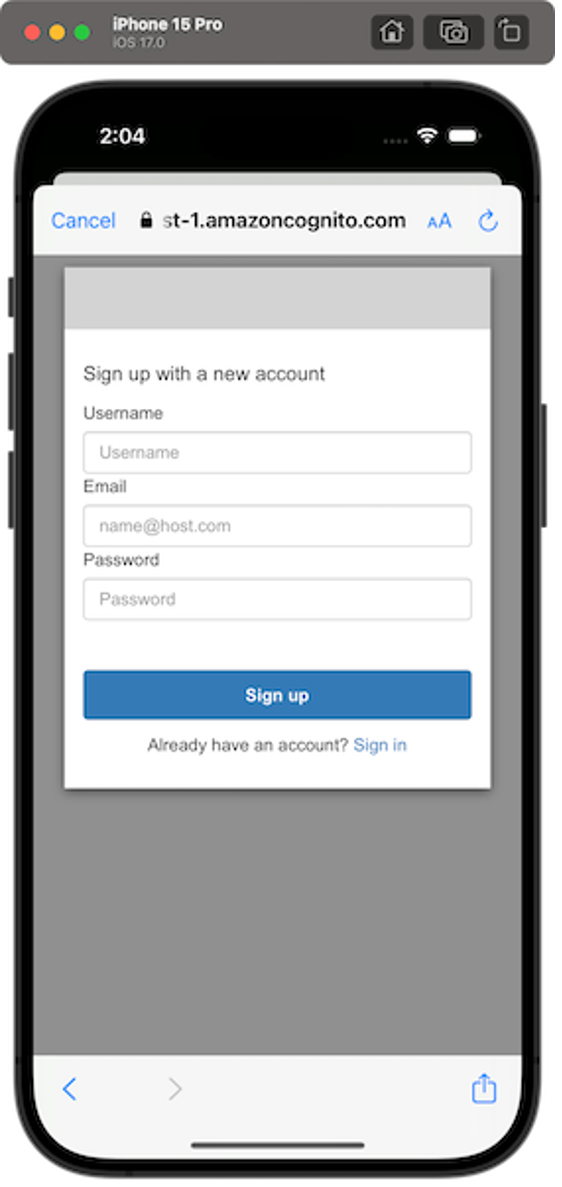
Hosted UI: Sign up
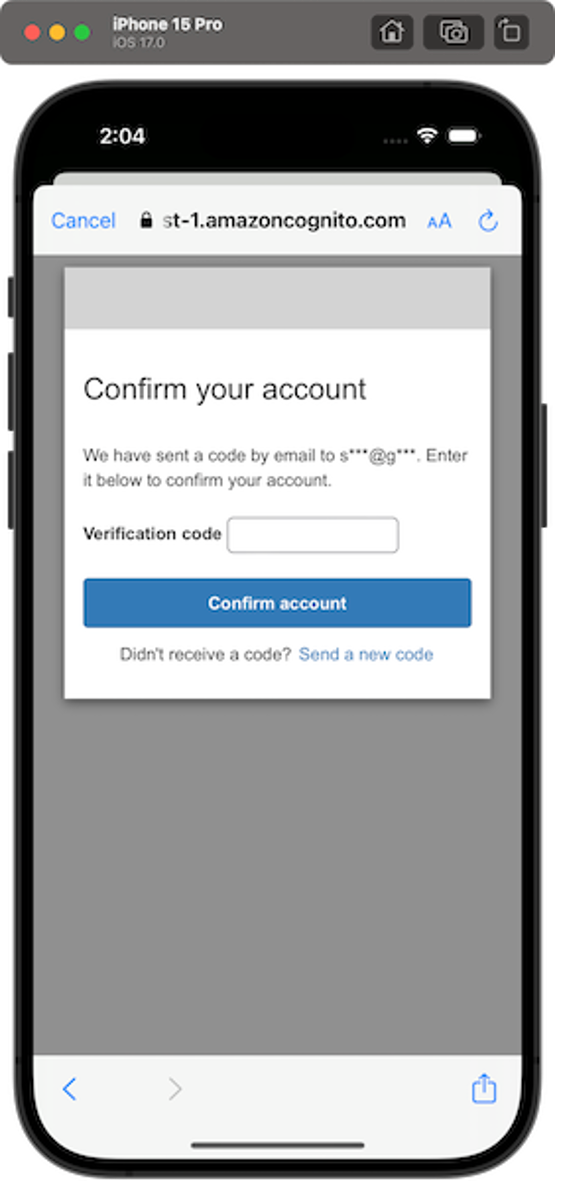
Hosted UI: Confirmation
List of notes
Did you find what you were looking for today?
Let us know so we can improve the quality of the content on our pages