AWS Big Data Blog
Cross-account lakehouse governance with Amazon S3 Tables and SageMaker Catalog
Organizations increasingly face challenges when analyzing data stored across multiple AWS accounts and storage formats. Data teams often need to query both traditional Amazon Simple Storage Service (Amazon S3) objects and Apache Iceberg tables, leading to costly data duplication, potential inconsistencies, and complex permission management across accounts.
To address these challenges, you can combine Amazon S3 Tables, which provides native Apache Iceberg support within S3, with Amazon SageMaker Catalog for unified data governance. This solution supports secure cross-account data access without duplicating datasets or compromising security controls.
In this post, we walk you through a practical solution for secure, efficient cross-account data sharing and analysis. You’ll learn how to set up cross-account access to S3 Tables using federated catalogs in Amazon SageMaker, perform unified queries across accounts with Amazon Athena in Amazon SageMaker Unified Studio, and implement fine-grained access controls at the column level using AWS Lake Formation.
This post helps you establish proper governance and security controls for S3 Tables in a multi-account environment, enabling secure and efficient cross-account data access.
Solution overview
We walk you through implementing a three-account lakehouse governance architecture where you can securely share data. As shown in the following diagram, Account A serves as your data producer with S3 Tables, Account B acts as your central governance hub with SageMaker Catalog, and Account C represents your data consumers. We’ll demonstrate step-by-step how to configure cross-account access and implement governance controls so consumers can discover and query data from both S3 tables and traditional S3 buckets.

Prerequisite and Set up
In this post, we focus on how to do the cross account set up and how to onboard S3 Tables. All three accounts are in the same AWS Region. To implement this solution, you will need three individual accounts (A, B, C). The setup in the accounts should look like the following:
- Account A (Producer): Create an Amazon S3 Table on the account.
- Account B (Central governance and producer): This is another account where you have data in Amazon S3 buckets catalog via Glue Catalog. You would onboard these into domain portal.
- S3 cataloged in Glue Data Catalog.
- Create a SageMaker Domain in Account B.
- Account C (Consumer account): Identify an account where you have consumers query data using Athena to follow along.
The following are the high-level implementation steps for this solution:
Step 1: Configure cross-account association for governance.
Step 2: Create three Project Profiles in Account B pointing to tables in Account A, B, and C.
Step 3: Create three Projects.
Step 4: Set up permissions for Projects in AWS Lake Formation.
Step 5: In Account B, create Datasource to connect S3 Table from Account A and Glue Catalog Tables from Account B.
Step 6: Publish and Subscribe to asset.
Step 7: Query S3 table (Account A) and S3 (Account B) data together in SQL editor (Account C).
Step 1
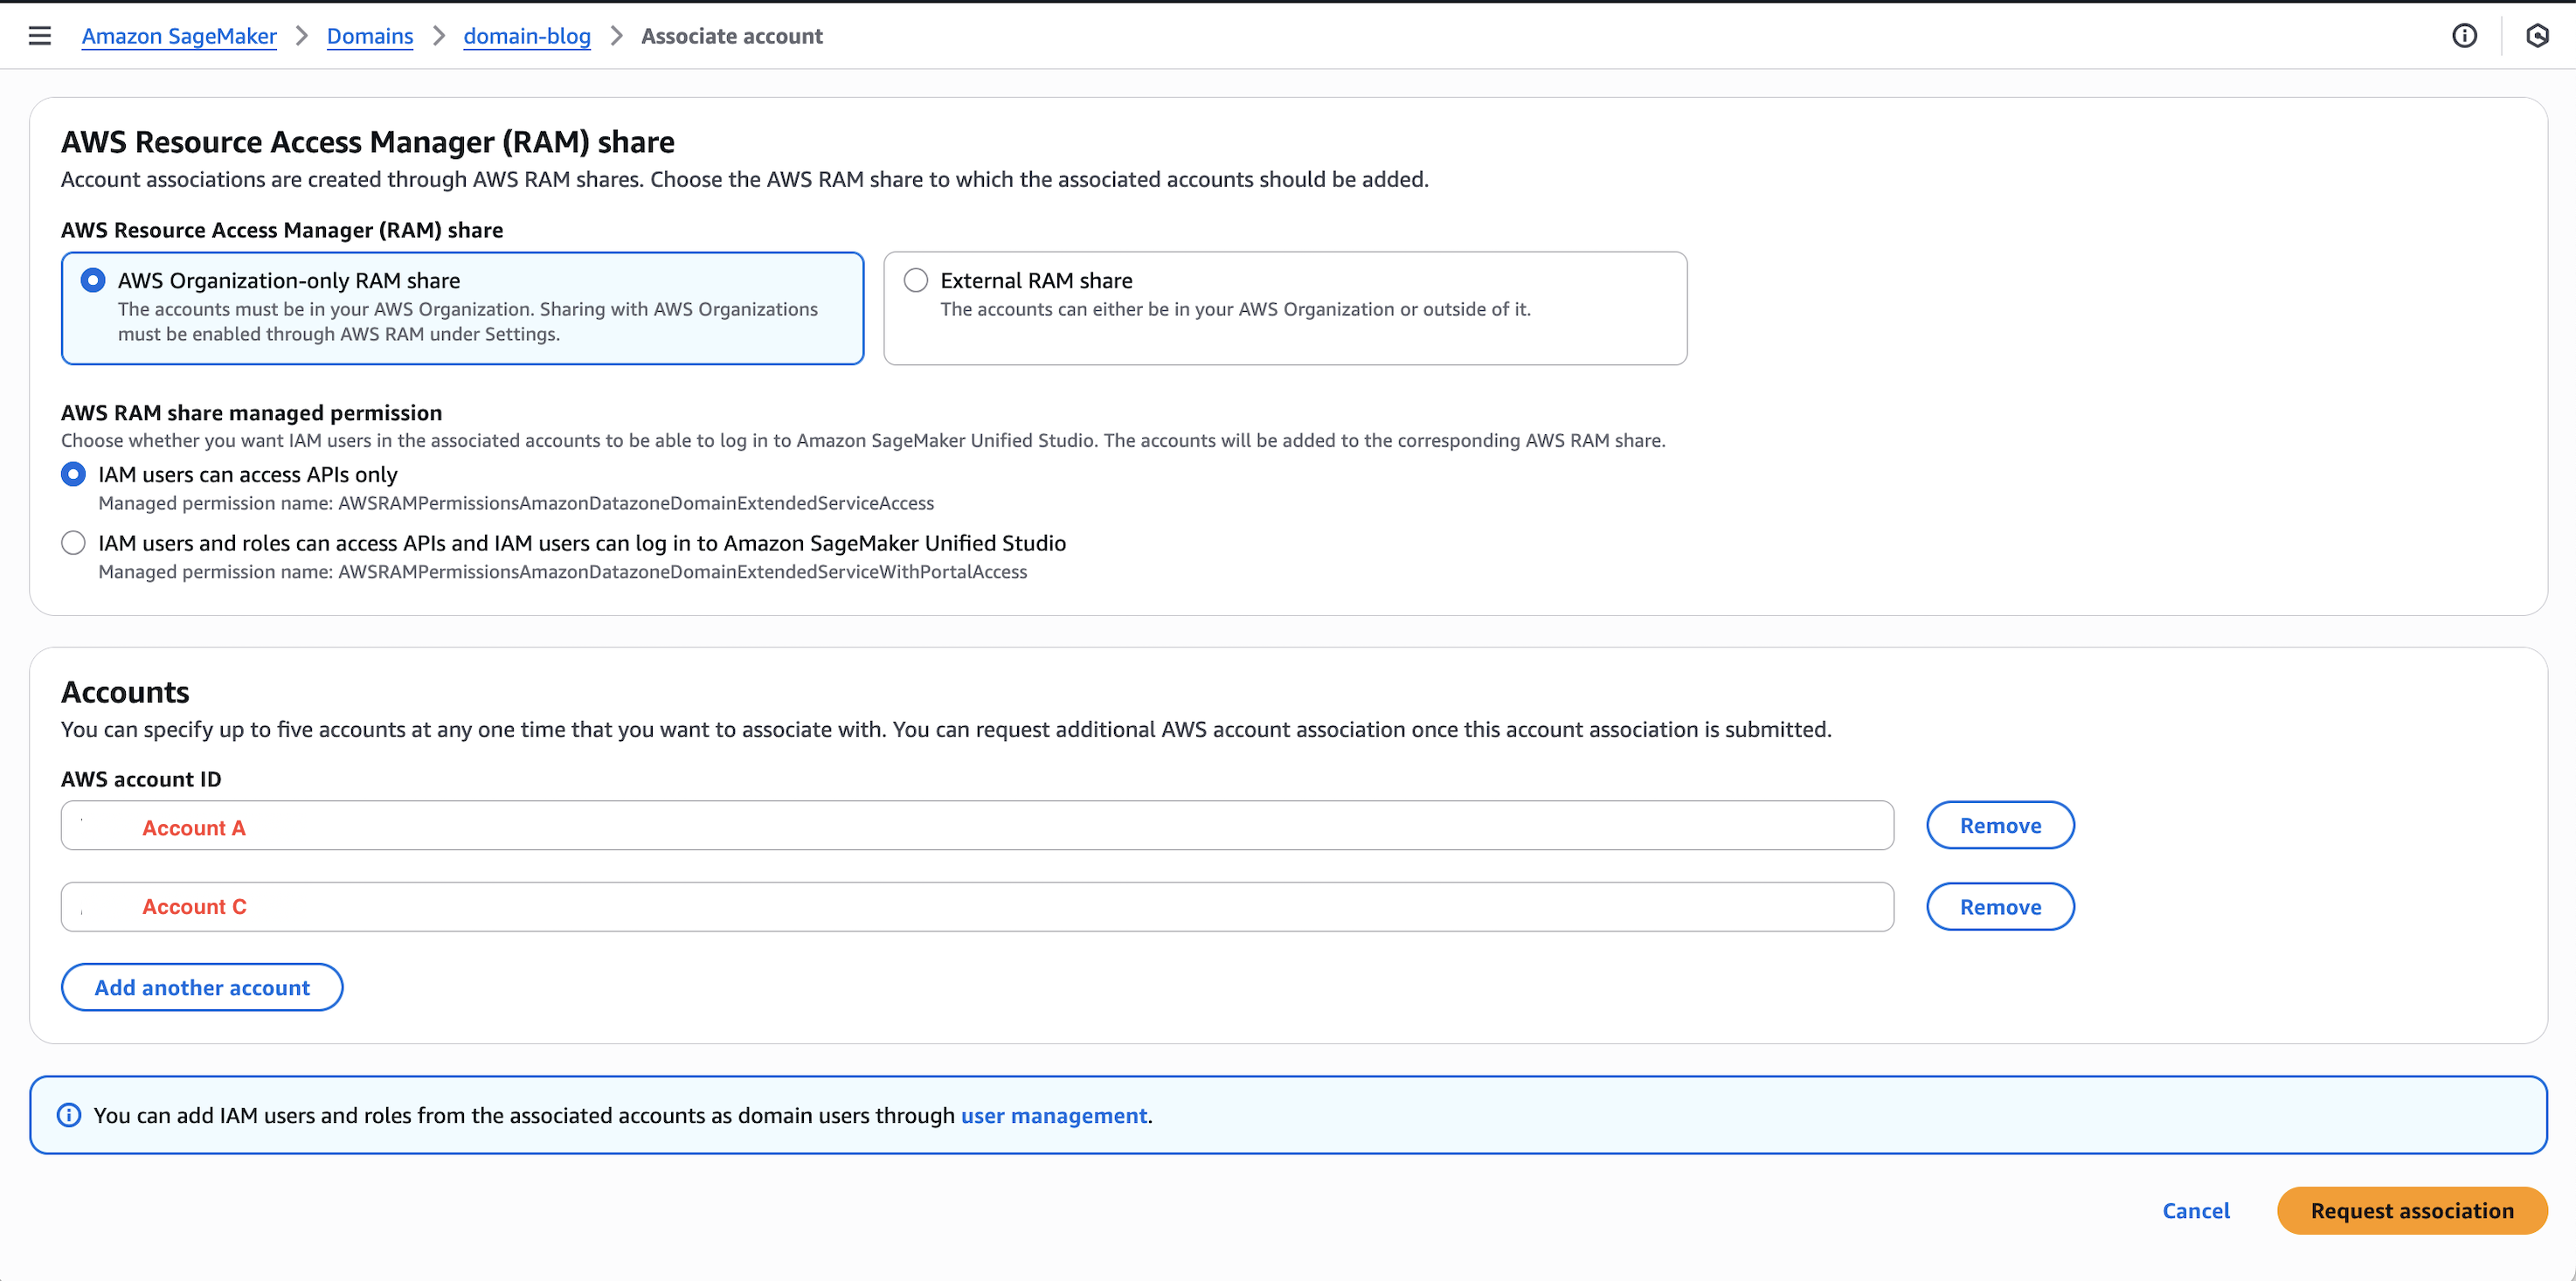
A. Configure cross-account association for governance
In this section, we associate Account A and C in the Governance account B.
- Open the SageMaker Unified Studio console in Account B.
- Navigate to Domains, select your domain, then choose the Account associations tab.
- Choose Request association and enter the Account IDs for Account A and Account C.
- Submit the association request and verify the accounts appear with “Requested” status.
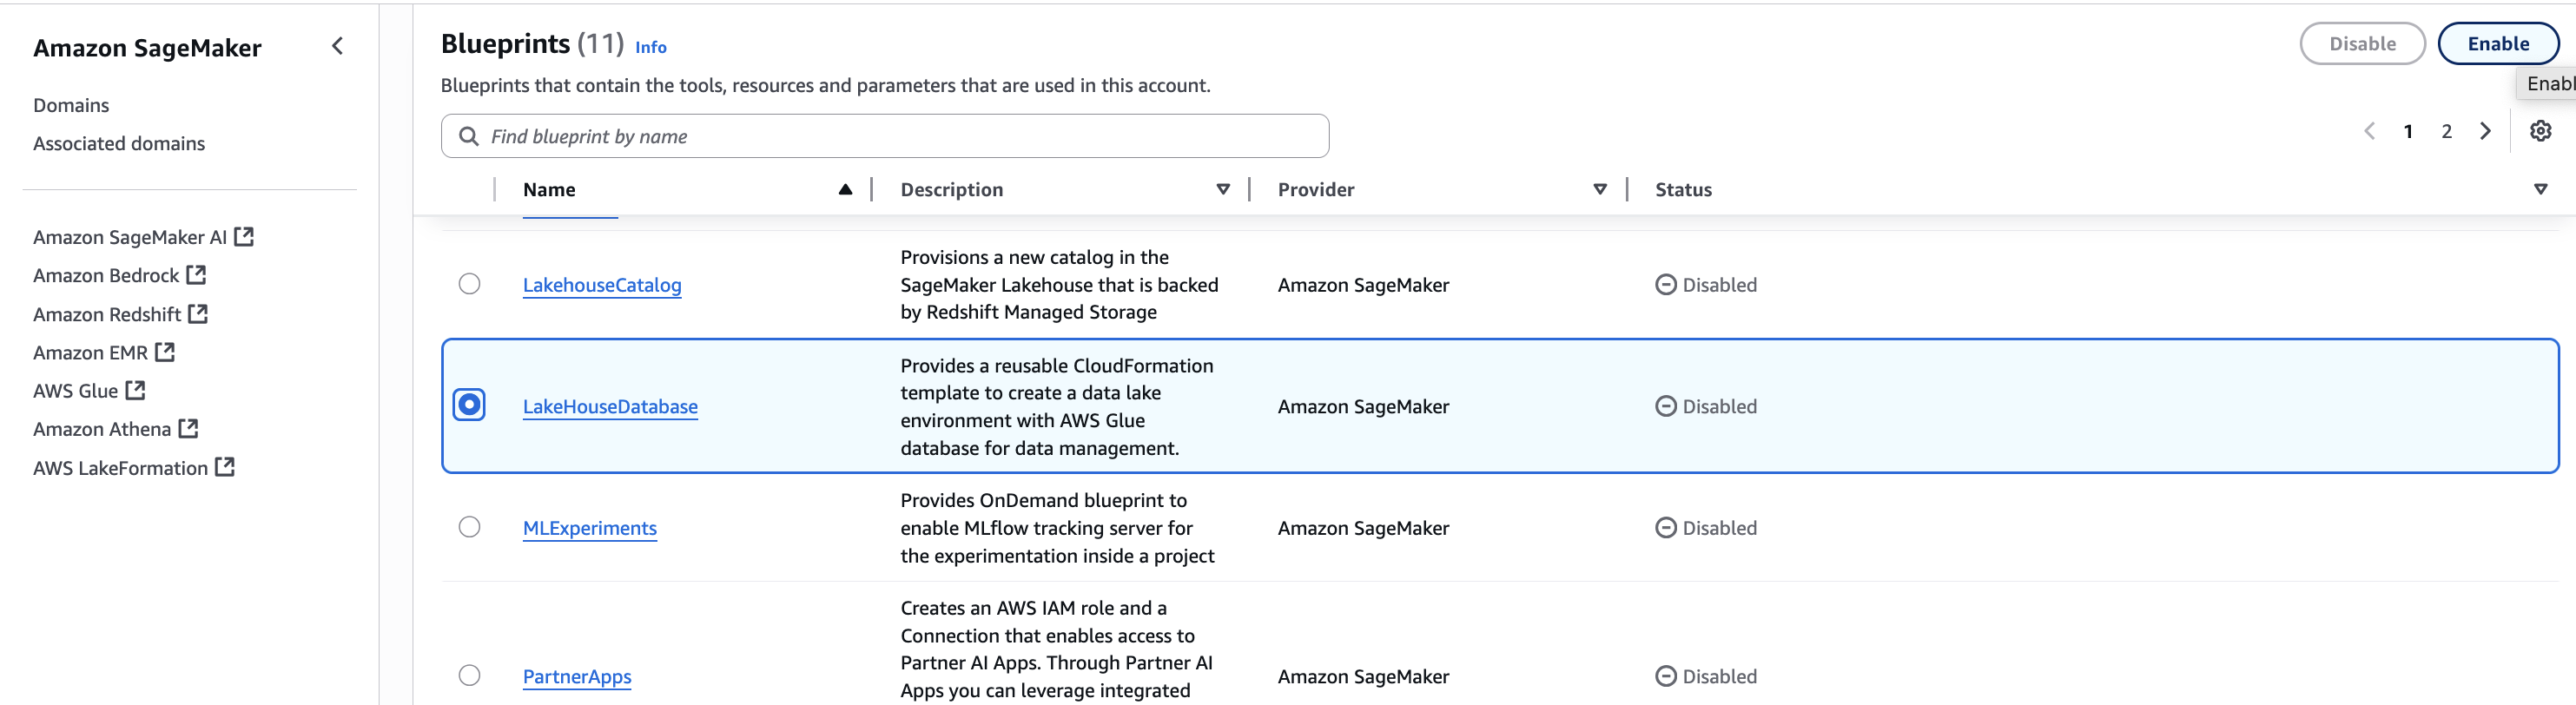
B. Enable Blueprints for your domain in Accounts A, B, and C
The LakeHouseDatabase blueprint enables SageMaker Unified Studio to securely manage, query, and share data from S3, Redshift, and other sources using open standards—so in this step, you enable it in Accounts A, B, and C to support unified data access and collaboration.
- In Account A, in the SageMaker console, navigate to your domain and select the Blueprints tab.
- Select the LakeHouseDatabase blueprint and choose Enable.
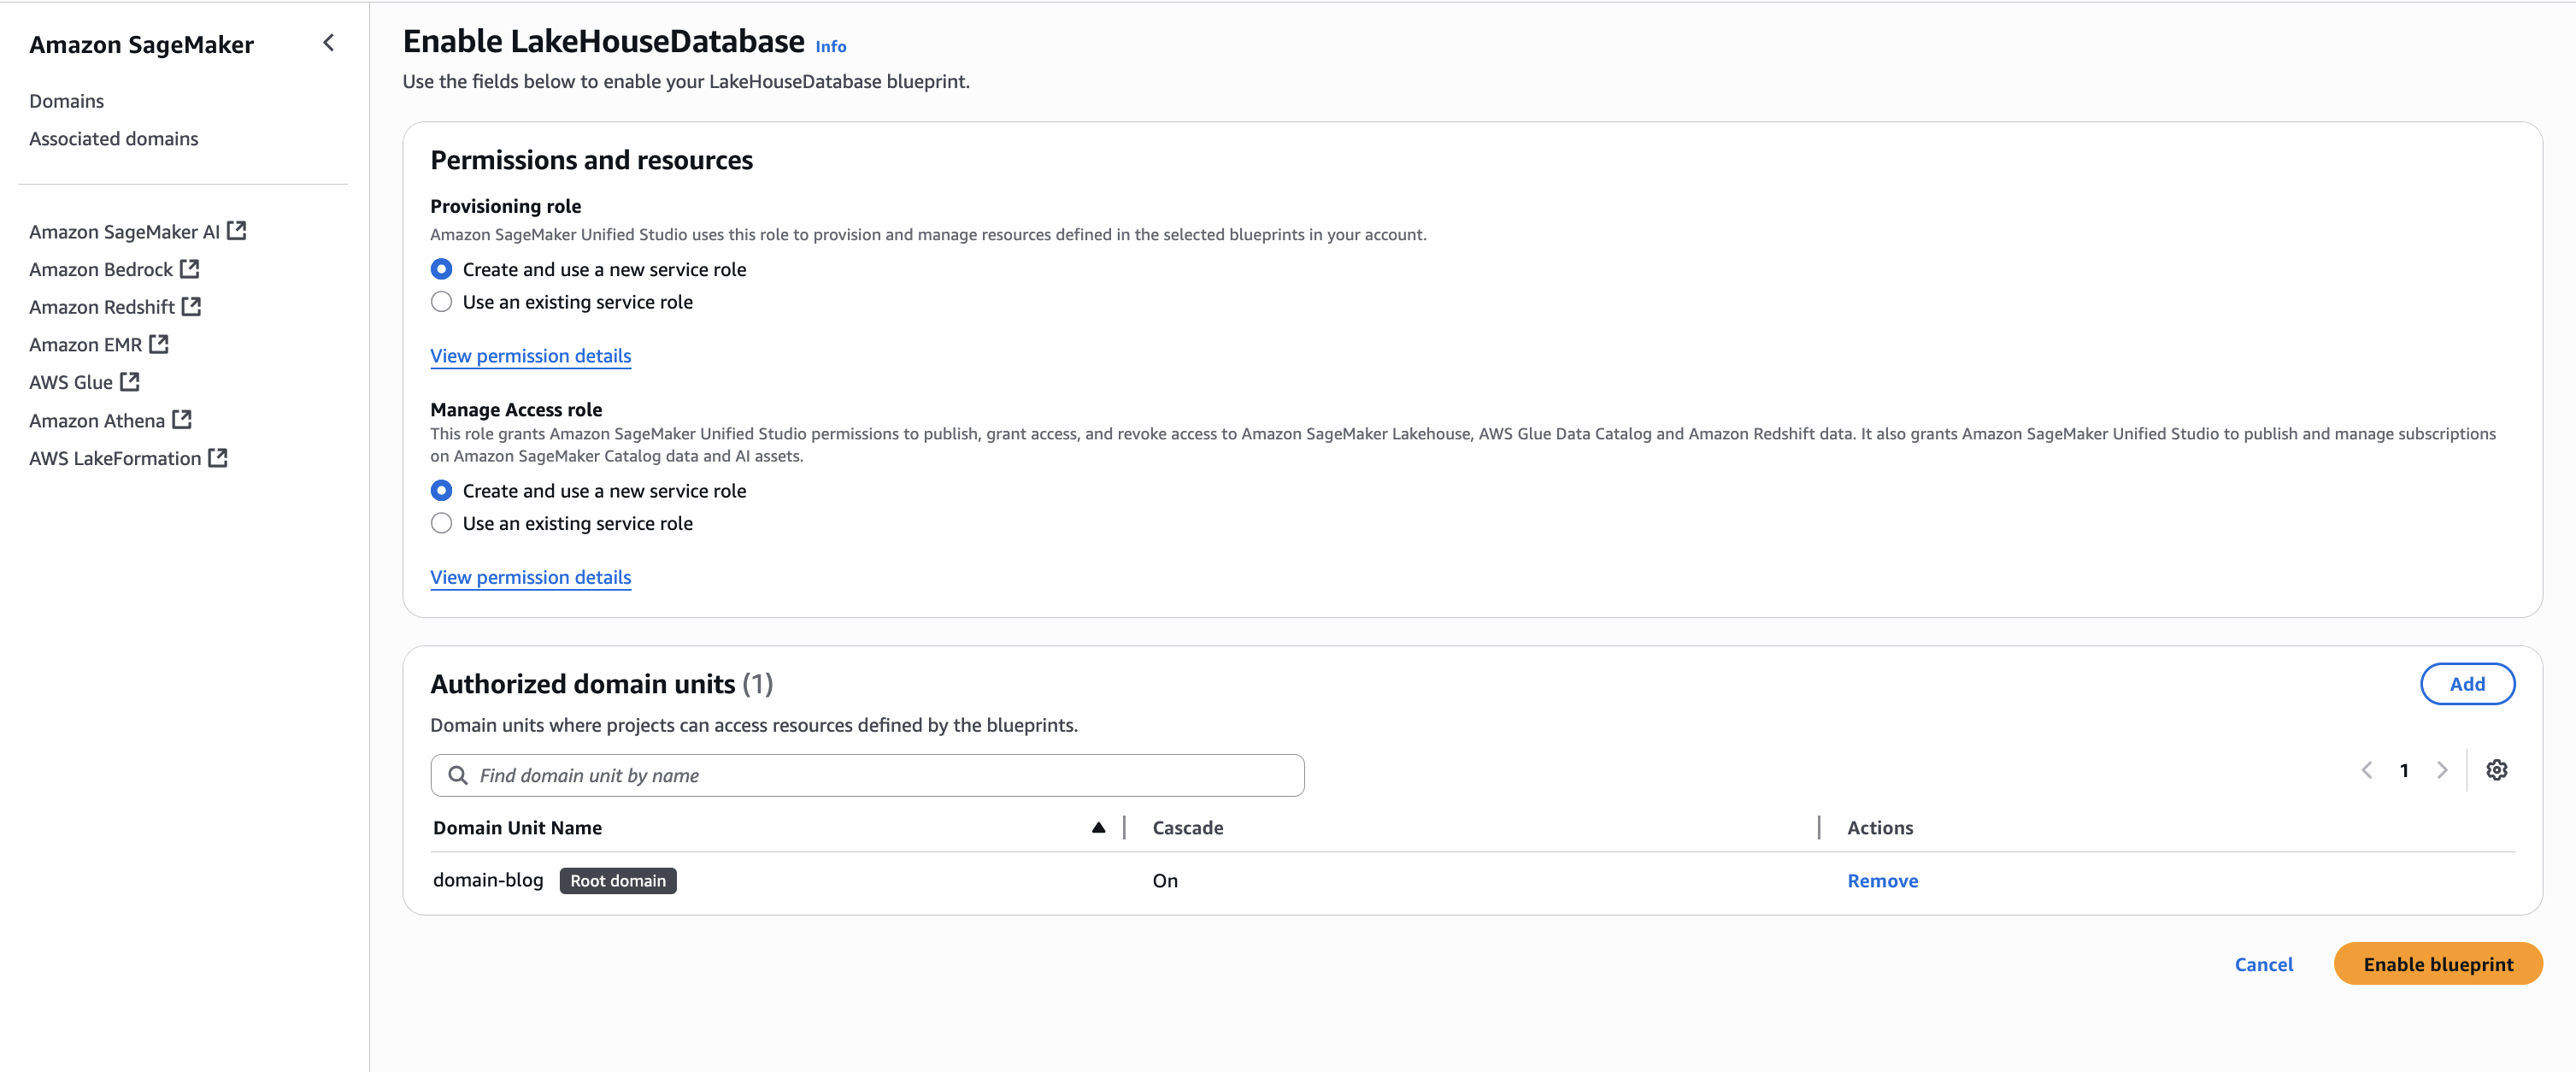
- Keeping the Permissions and resources section at the default settings, choose Enable Blueprint.
- Back on the blueprints screen, select the Tooling blueprint and choose Enable.
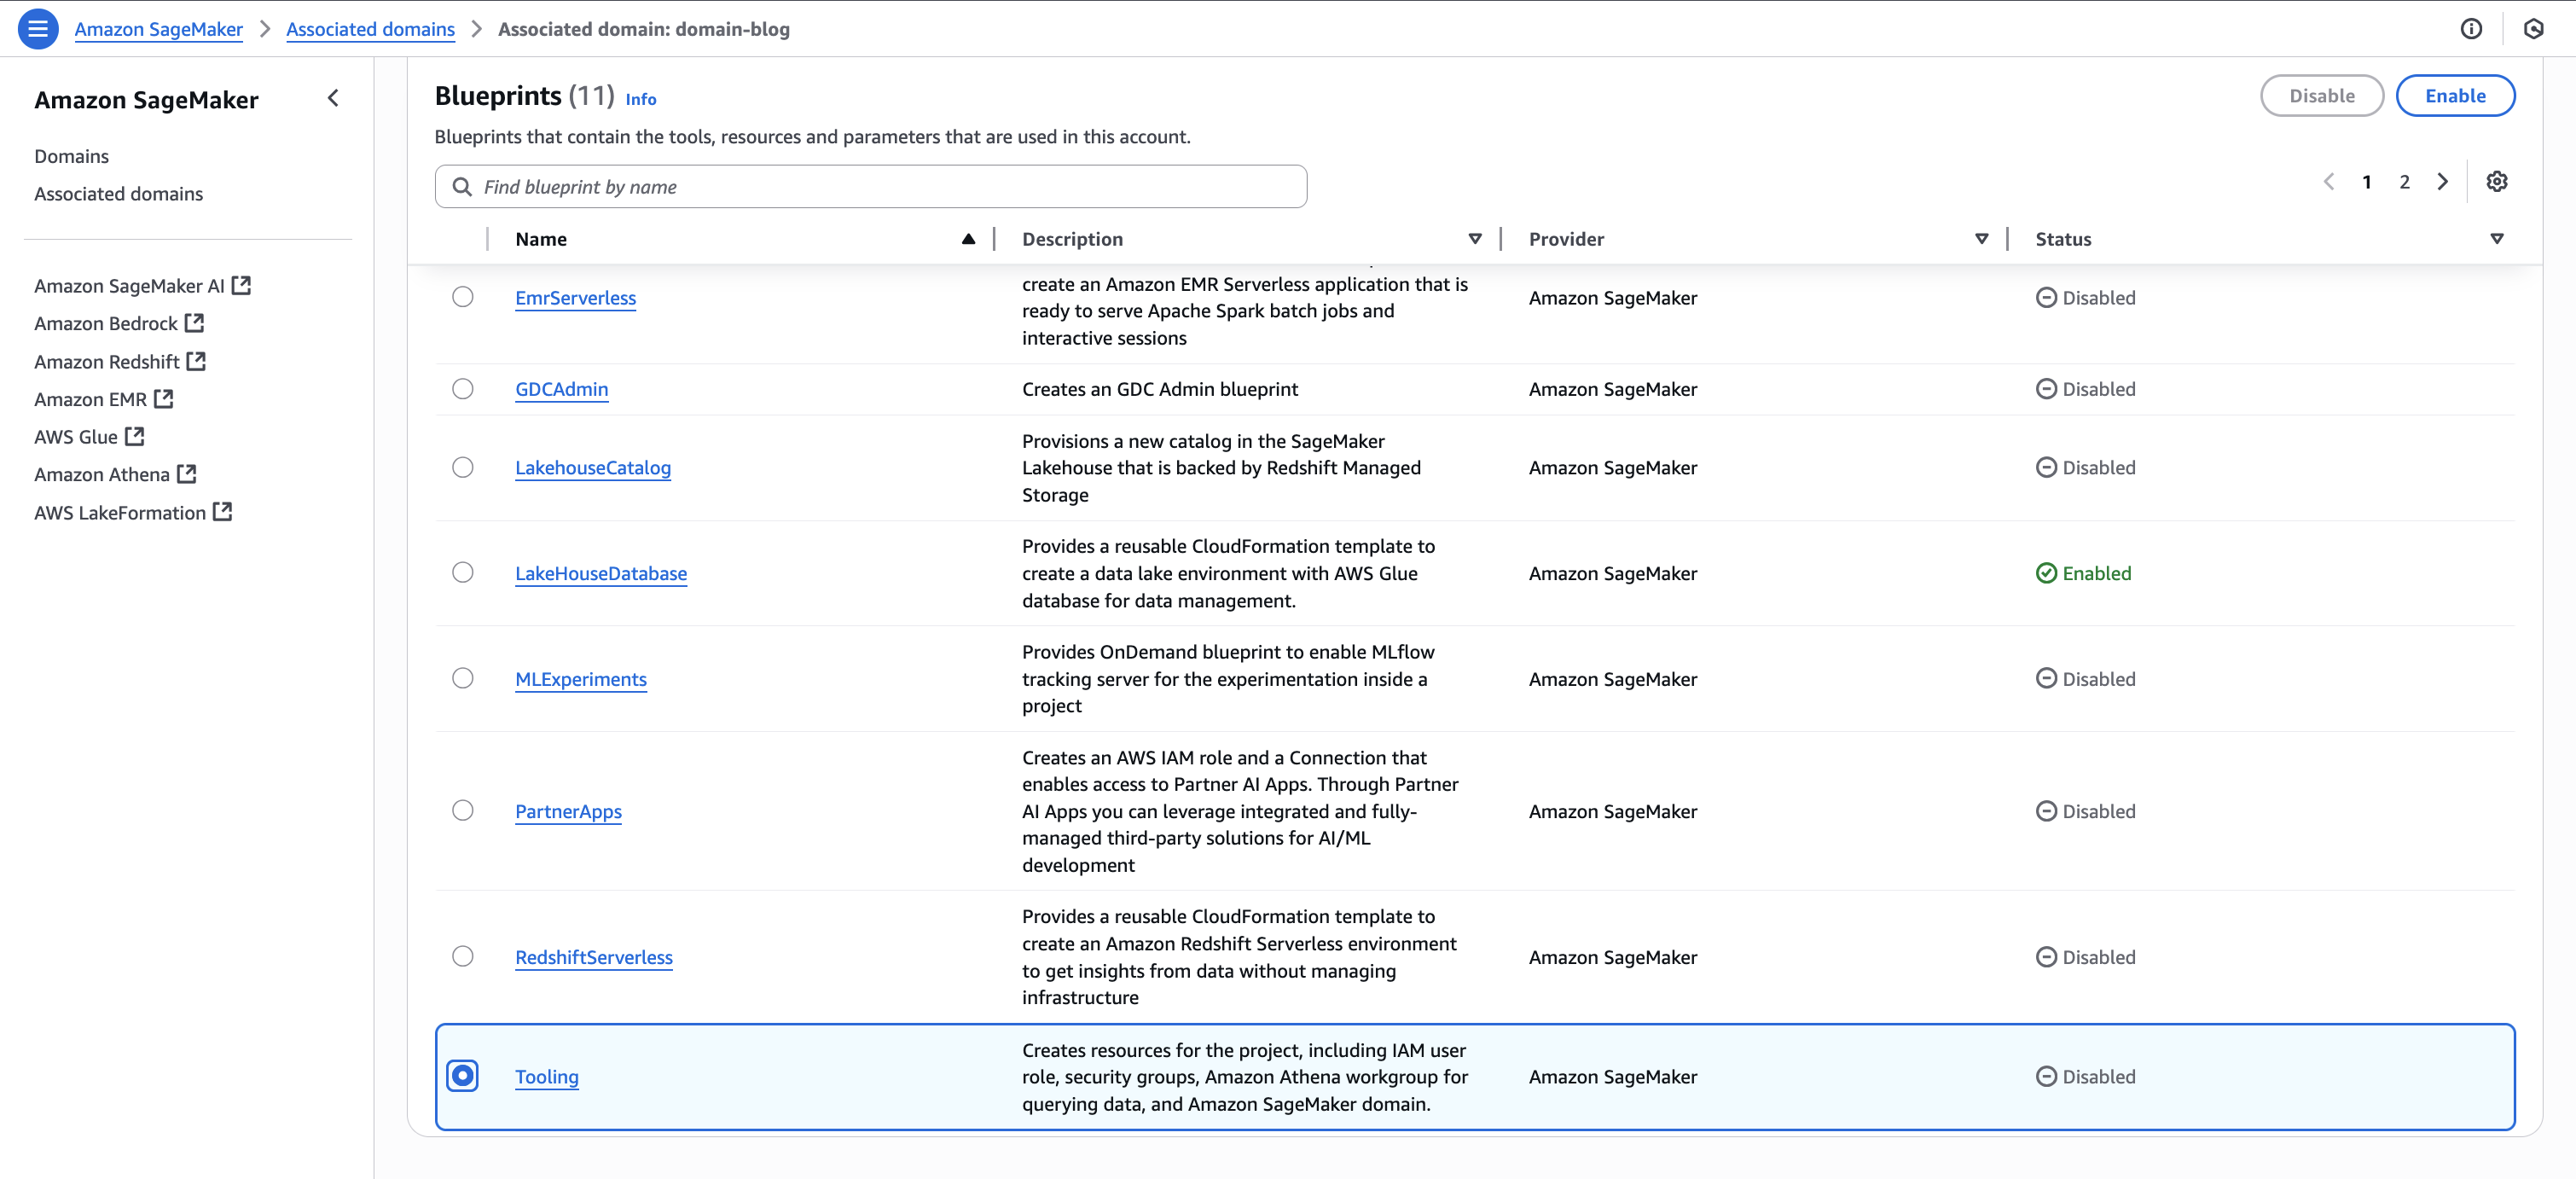
- Keeping the Permissions and resources section at the default settings, configure the Networking section with the desired VPC and subnet configurations.
- Choose Enable Blueprint.

- Repeat Step1.B and enable the same blueprints in Account B to make S3 data publishable and Account C so consumers can query the data using Athena.
Step 2: Create Project Profiles in Account B
Use the documentation to create three project profiles in Account B using the ‘LakeHouseDatabase’ Blueprint, with each profile configured for Accounts A, B, and C respectively. For this post, we use the following naming convention:
- datalake-project-profile-s3tables (for Account A)
- datalake-project-profile (for Account B)
- datalake-project-profile-consumer (for Account C)
Step 3: Create three Projects for accounts A, B, and C
- Using the documentation, create one Project in each account. For this post, we use the following naming convention:
- ‘producer-s3tables’ – This is configured for Account A
- ‘producer-s3’ – This is configured for Account B
- ‘consumer’ – This is configured for Account C
- After creating the Project, locate and make note of the Project role ARN listed under Project details on the project overview page.

Step 4: Set up permissions for Projects in AWS Lake Formation
In Account A, onboard the S3 table in SageMaker Lakehouse and grant permissions to the project role:
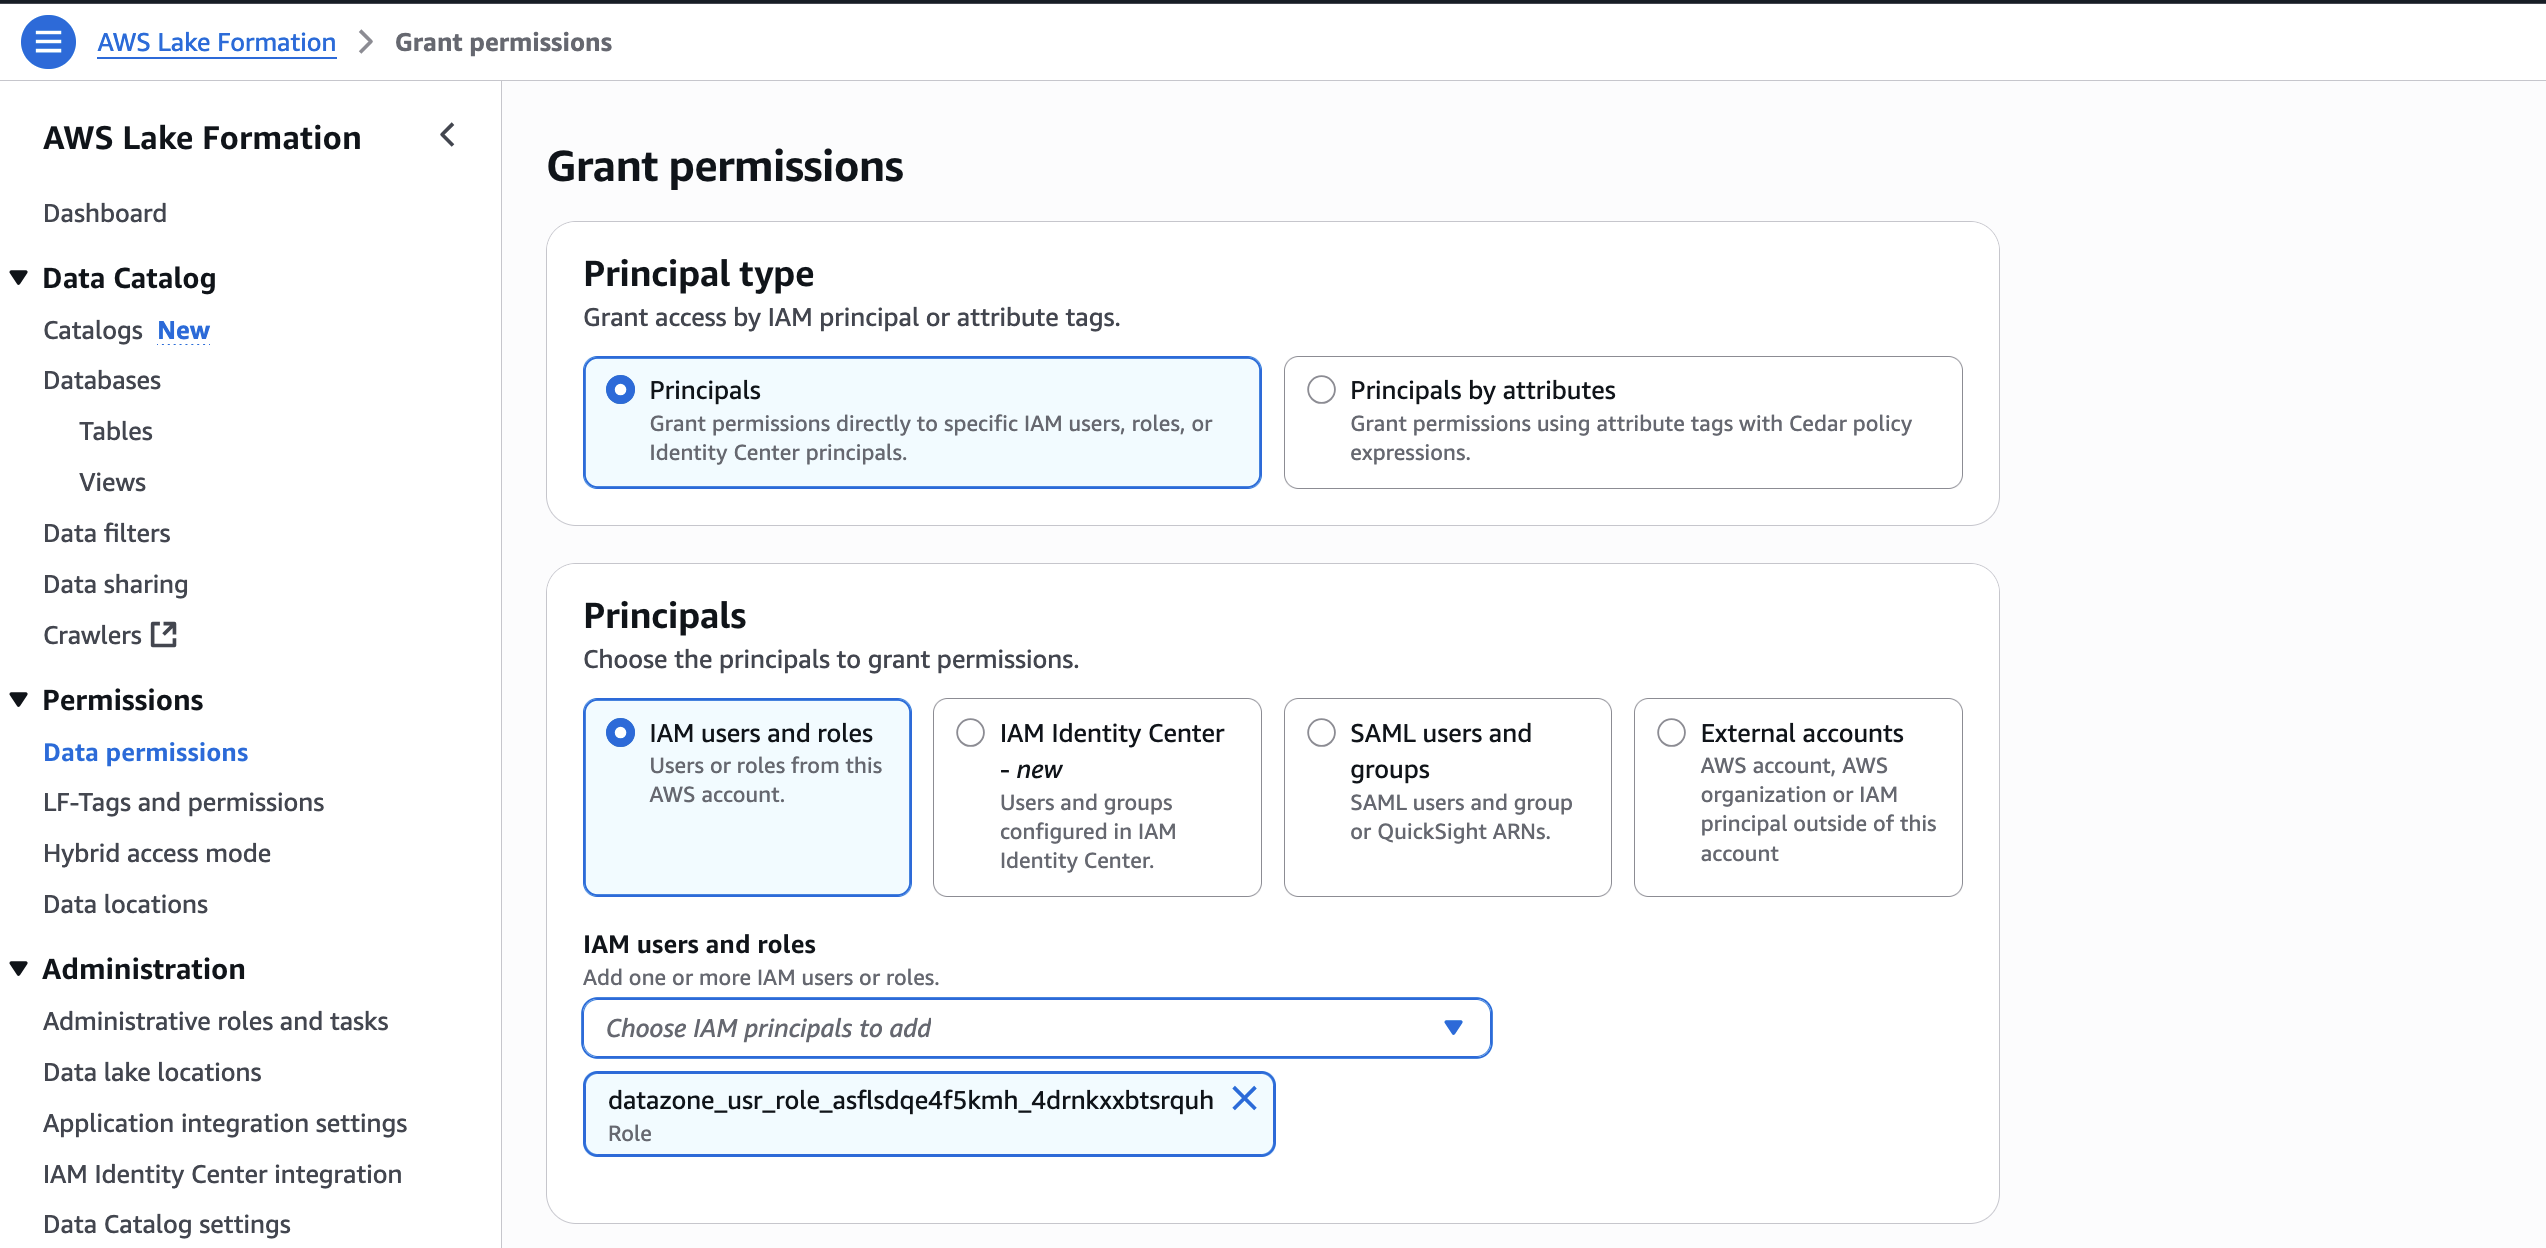
- In the AWS Lake Formation console, choose Permissions, choose Data permissions, and then choose Grant.
- Choose Principals, select IAM users and roles, then select the role generated by the project
producer-s3tablesin Step 3.
- In LF-Tags or catalog resources, choose Named data catalog resources, select the S3 table catalog from the Catalogs list.
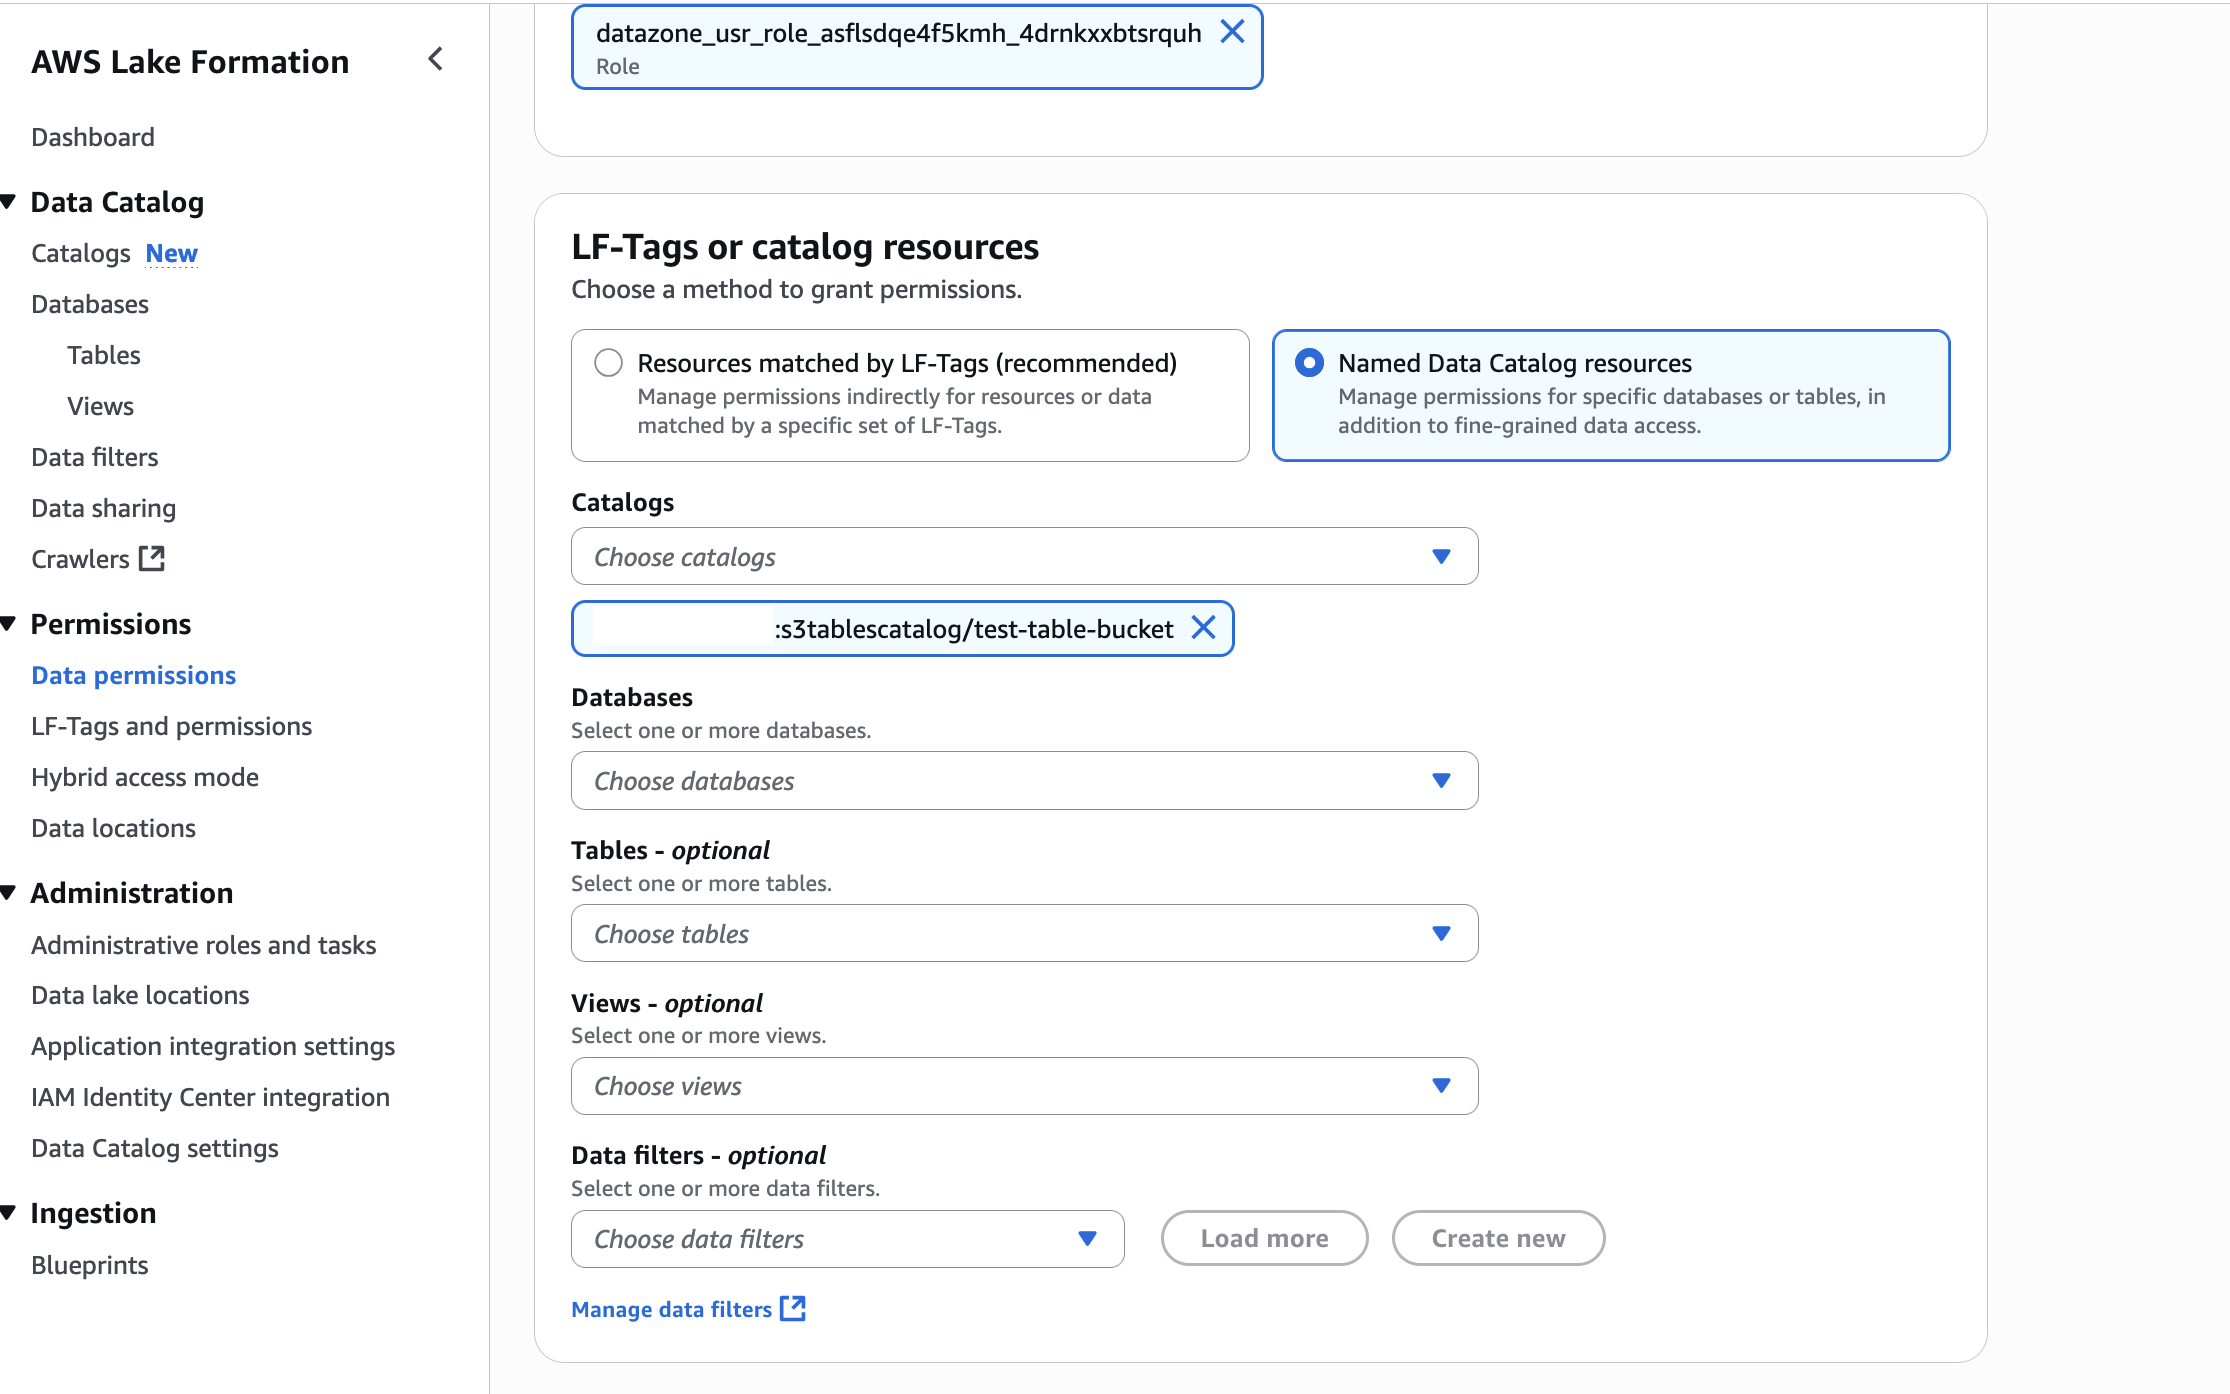
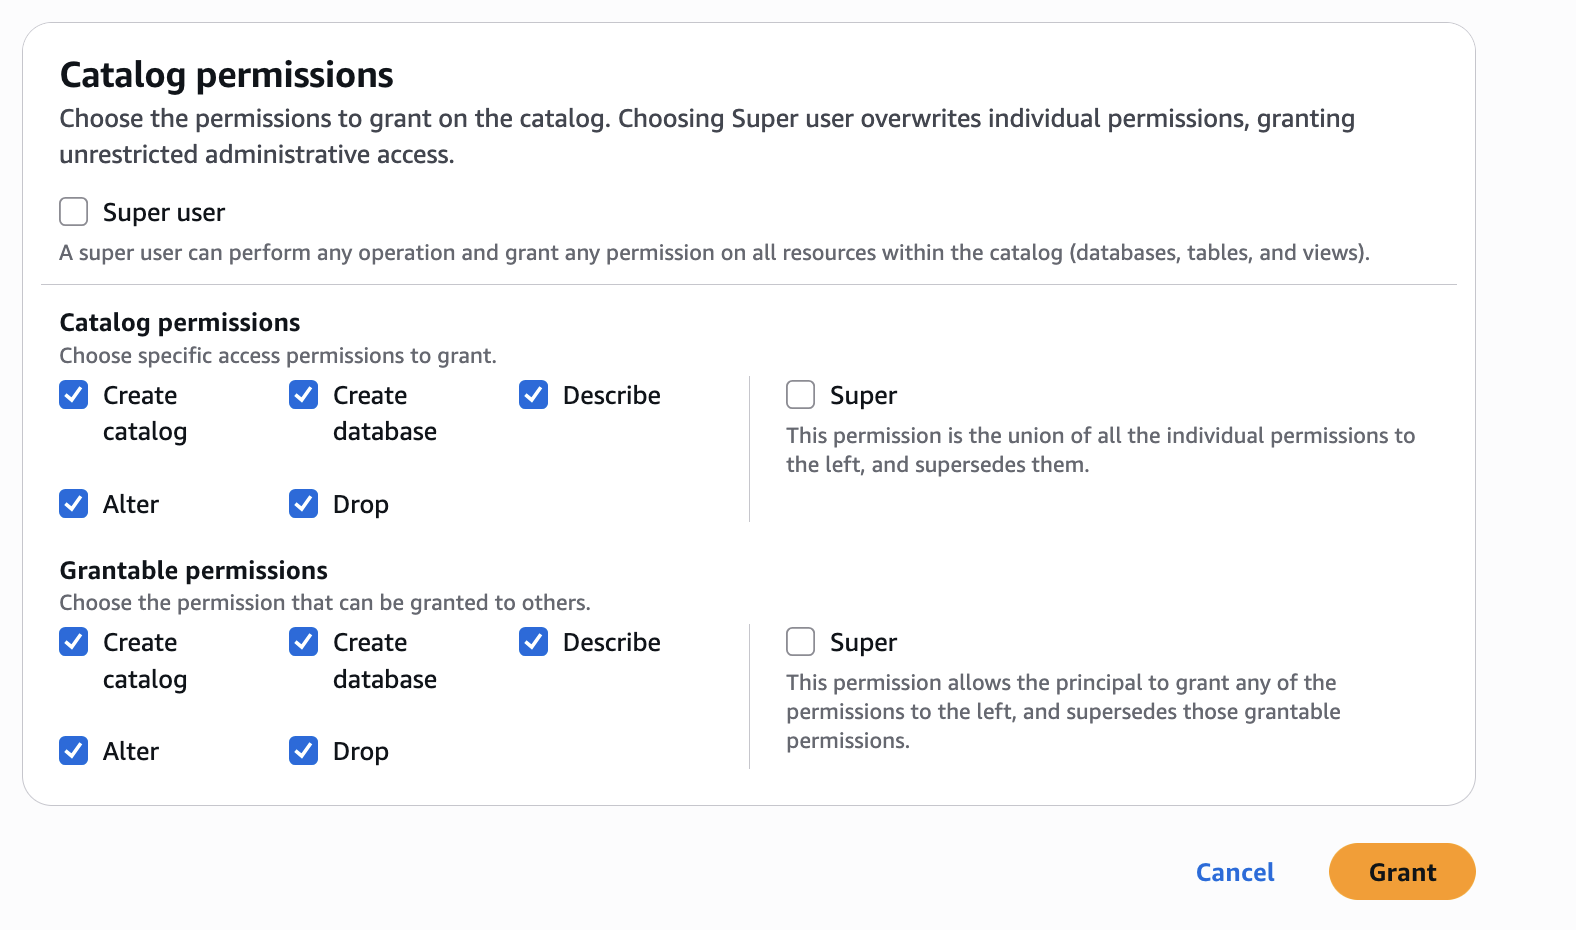
- In Catalog permissions, configure the Catalog permissions and grantable permissions. Choose Grant to apply the following permissions.
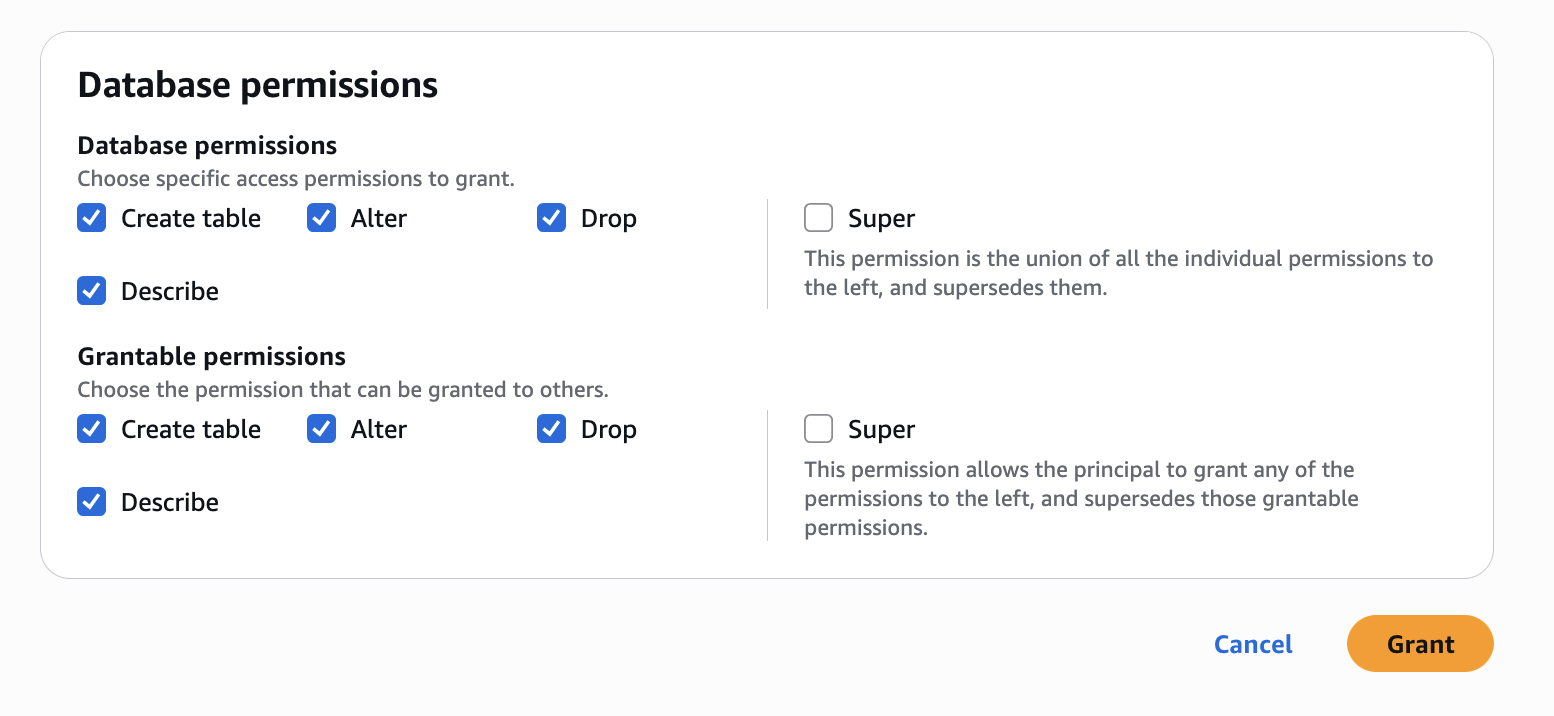
In Account A, we repeat these steps for grant permissions to the database:
- In the AWS Lake Formation console, choose Permissions, choose Data permissions, and then choose Grant.
- Choose Principals, select IAM users and roles, then select the role generated by the project
producer-s3tablesin Step 3.
- In LF-Tags or catalog resources, choose Named data catalog resources, choose both the S3 table catalog and database from their respective dropdown lists.
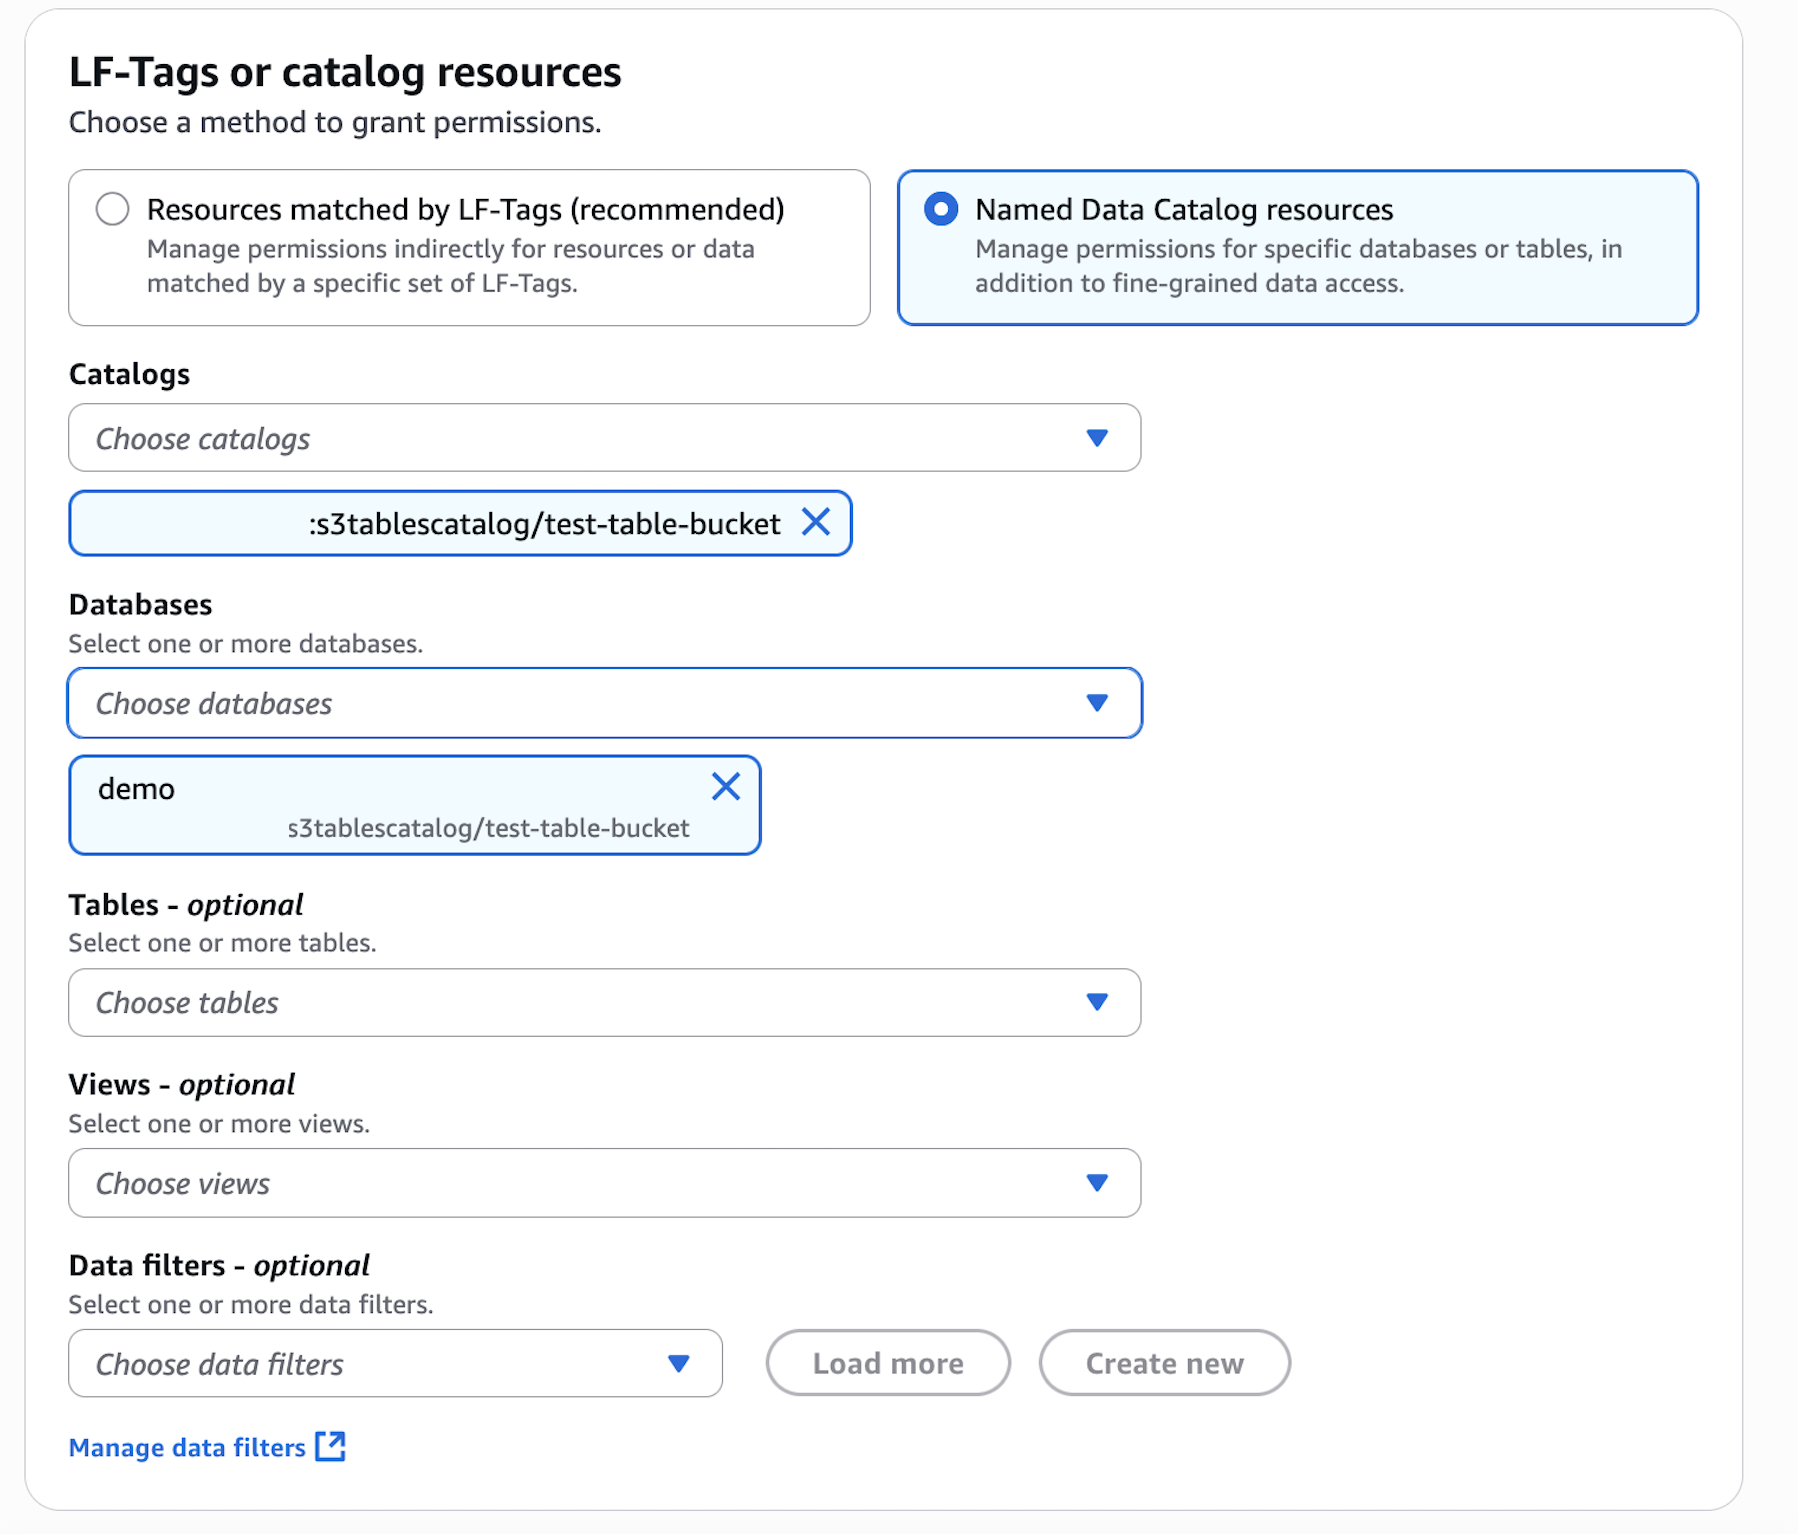
- Configure database permissions and grantable permissions. Choose Grant to apply the following permissions.
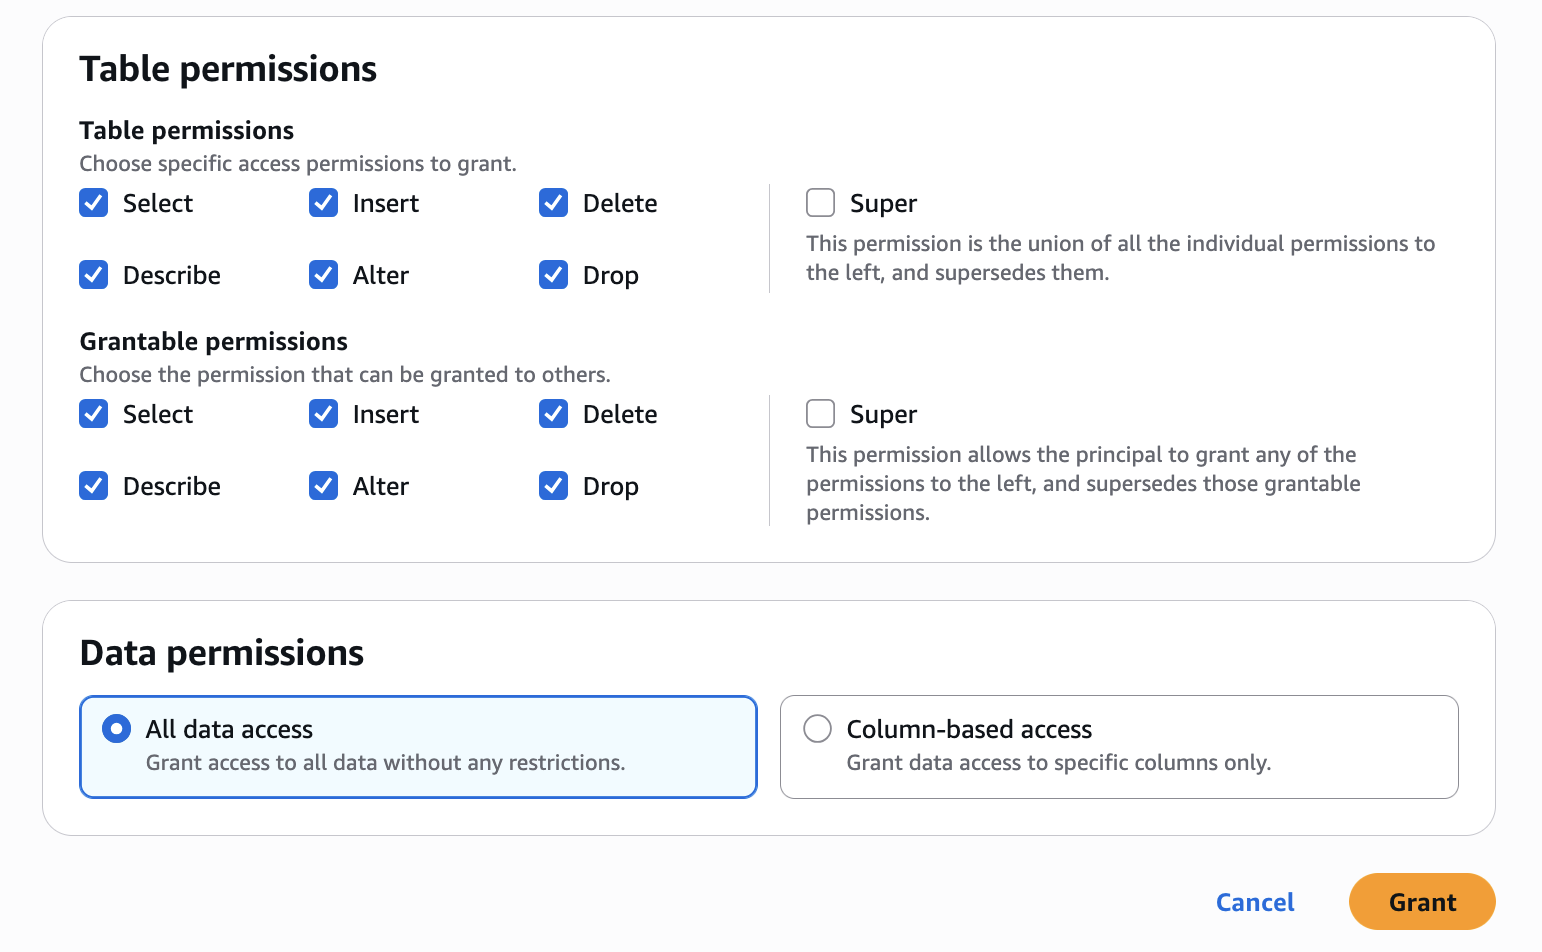
In Account A, repeat these steps for grant permissions to the table in the database:
- In the AWS Lake Formation console, choose Permissions, choose Data permissions, and then choose Grant.
- Choose Principals, select IAM users and roles, then select the role generated by the project
producer-s3tablesin Step 3.
- In LF-Tags or catalog resources, choose Named data catalog resources, choose both the S3 table catalog, database, and S3 table from their respective dropdown lists.
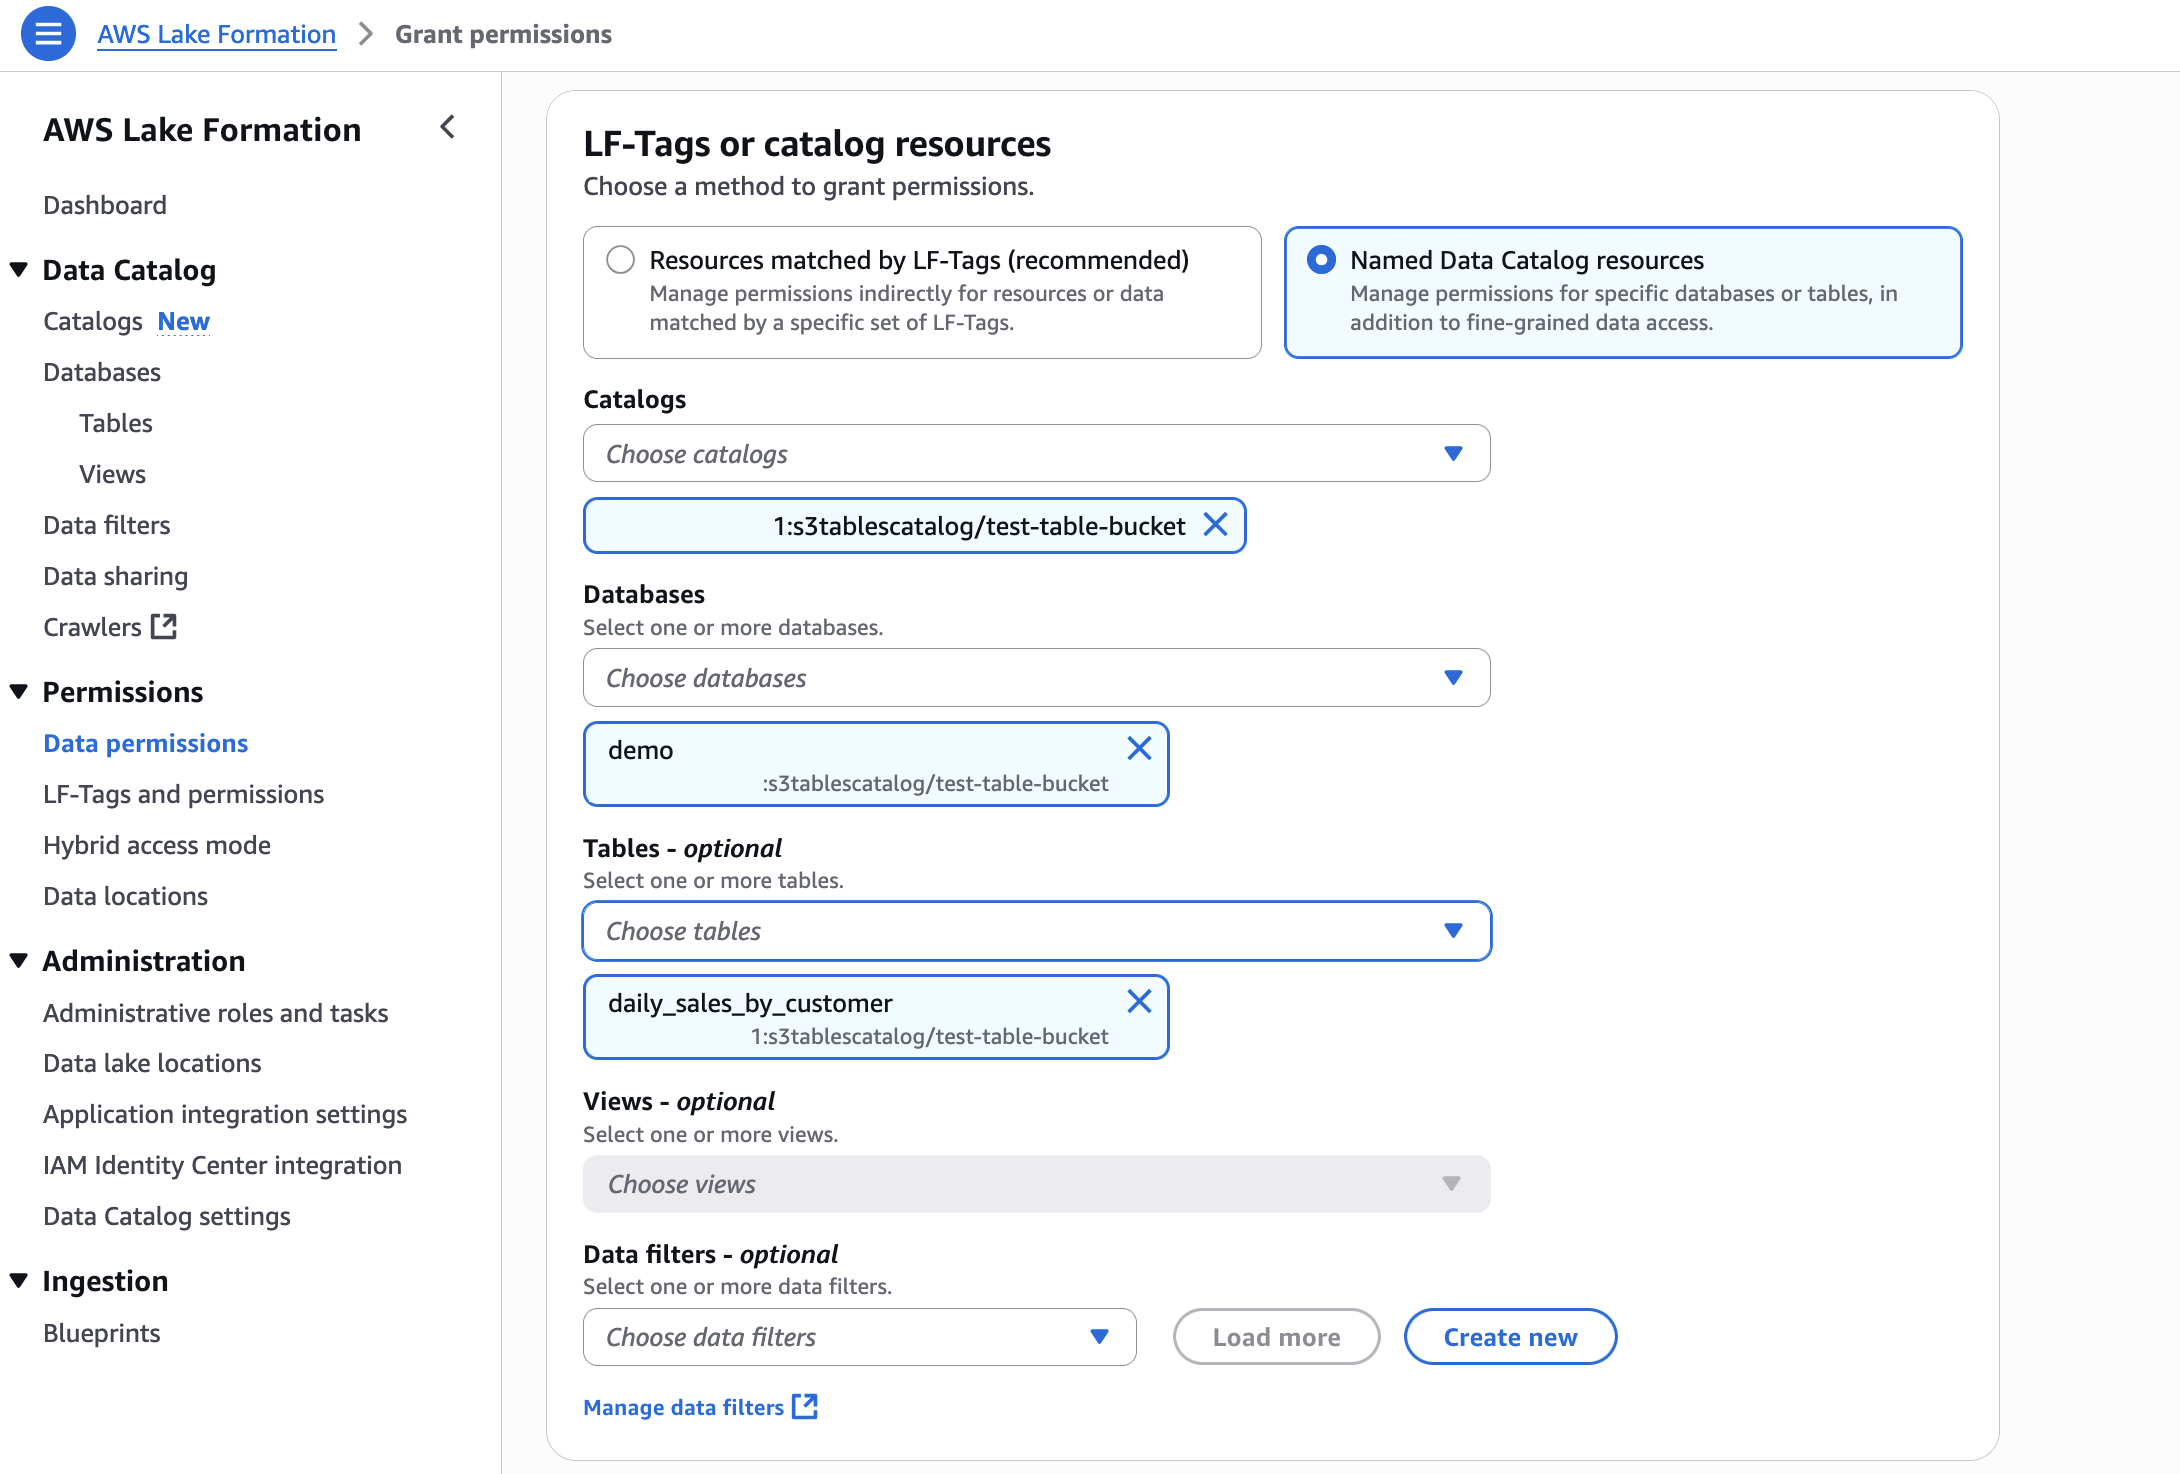
- Configure table permissions and grantable permissions. Choose Grant to apply the following permissions.
Repeat Step 4 in Accounts B to onboard S3 to SageMaker Lakehouse and grant the necessary permissions to the role created by your project for Account B.
Step 5: Create Datasource and onboard S3 Table from Account A and Glue Catalog Tables from Account B
To enable unified access and cross-account analytics with data lineage tracking, you’ll connect your SageMaker Unified Studio project to S3 tables from both accounts:
- Navigate to your project in SageMaker Unified Studio, select Data sources under the Project catalog section and choose Create data source.
- Enter a name, description, and select AWS Glue as the Data source type. Under Data selection, specify the S3 table catalog name.
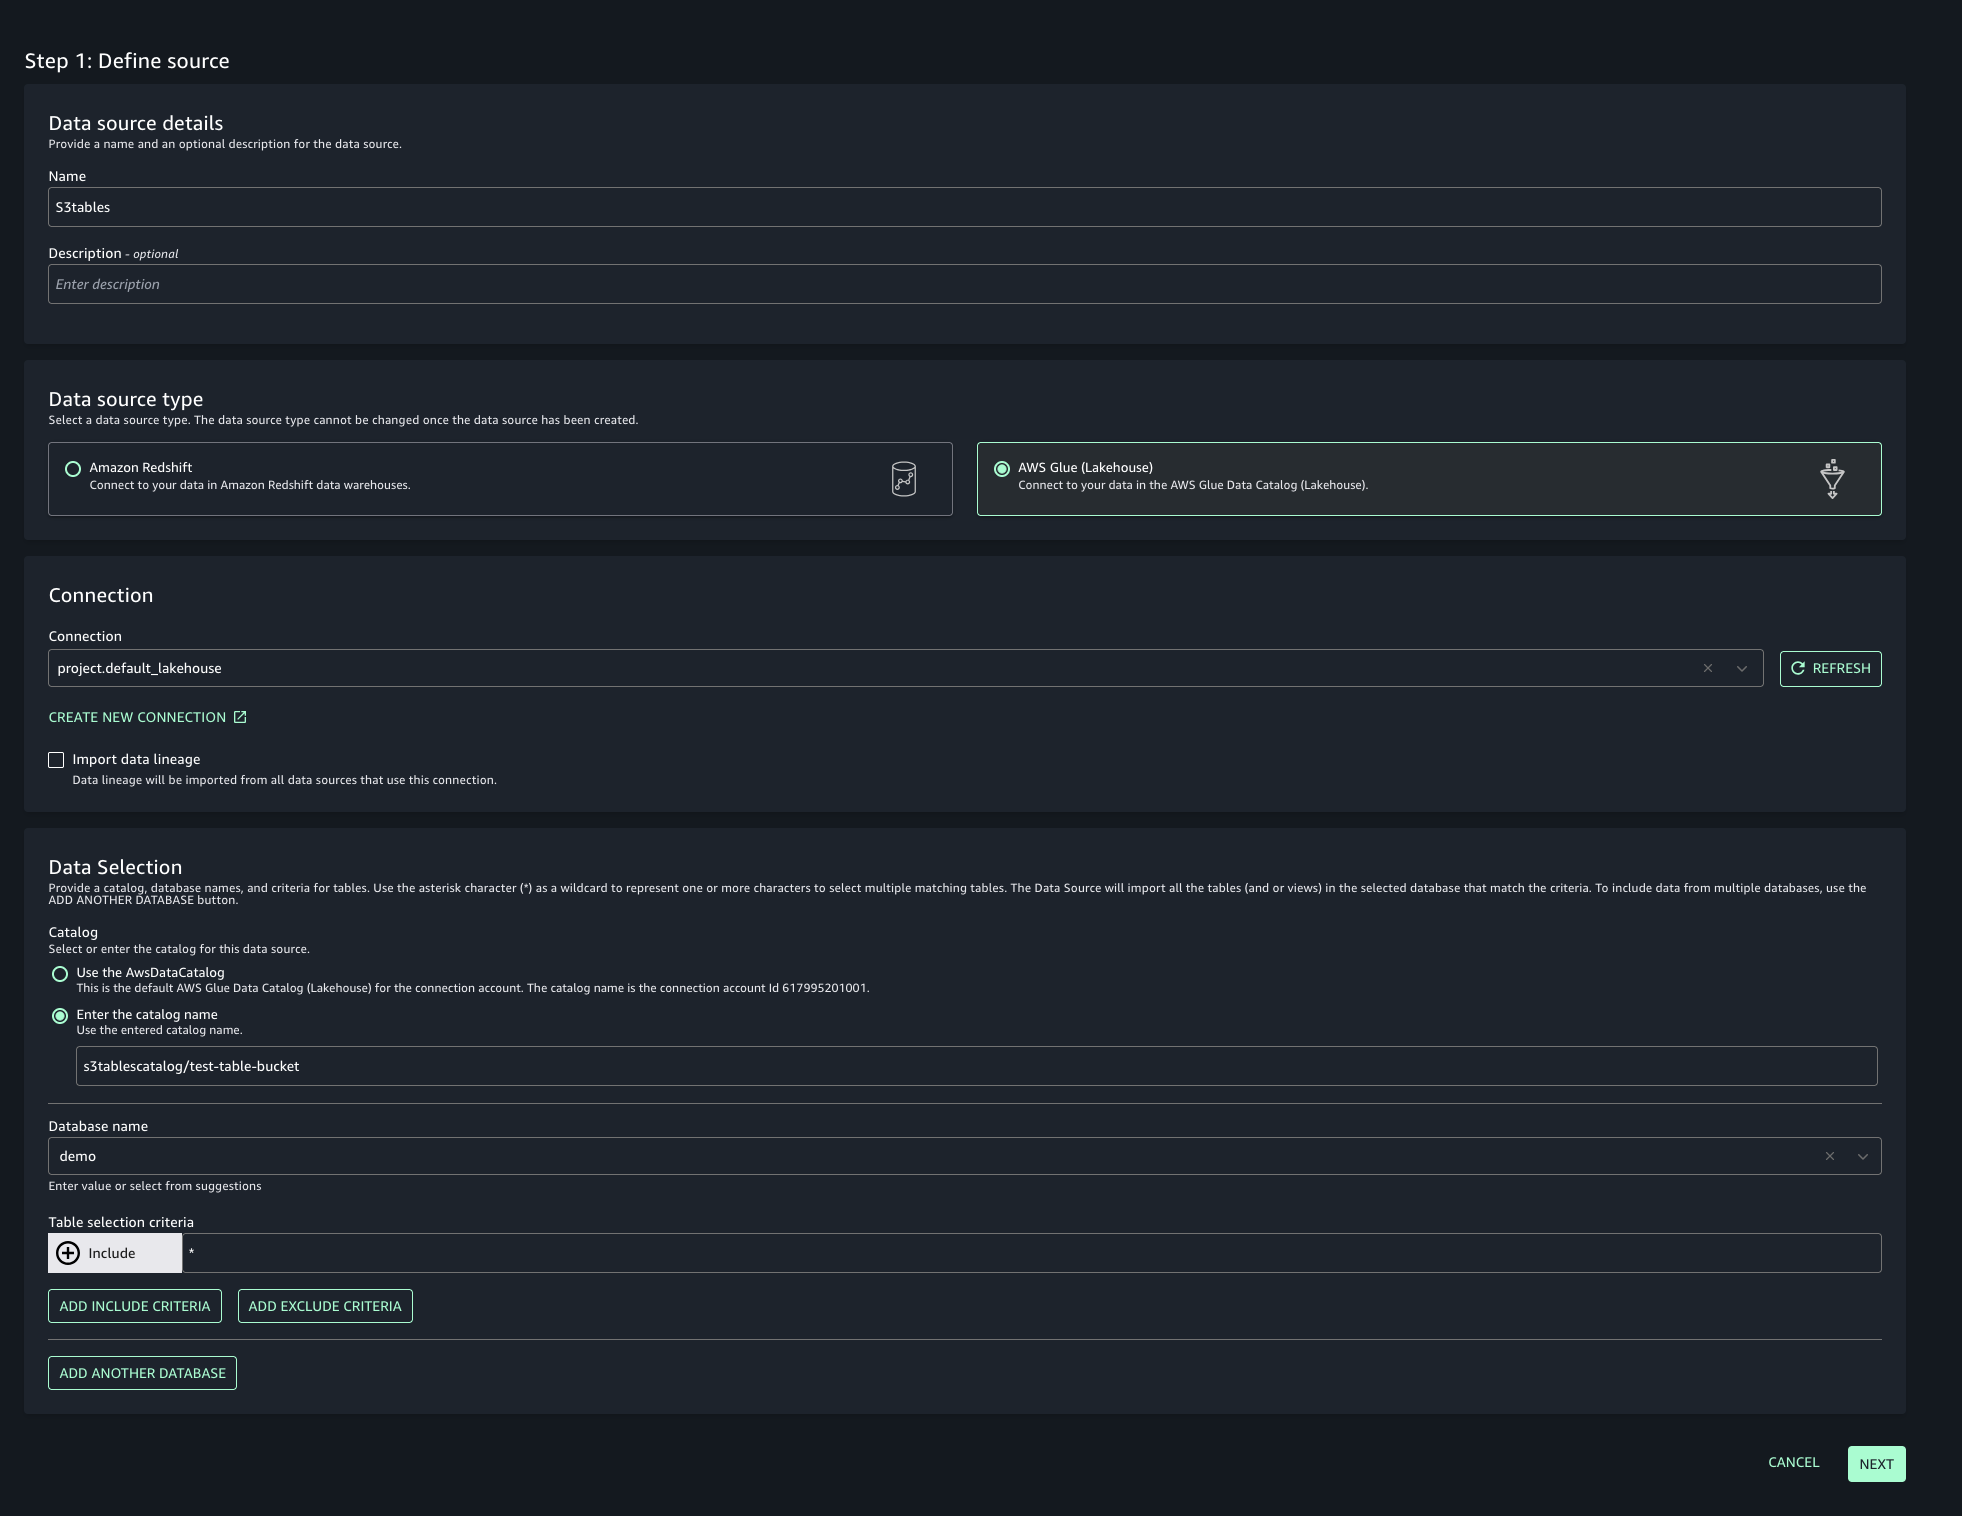
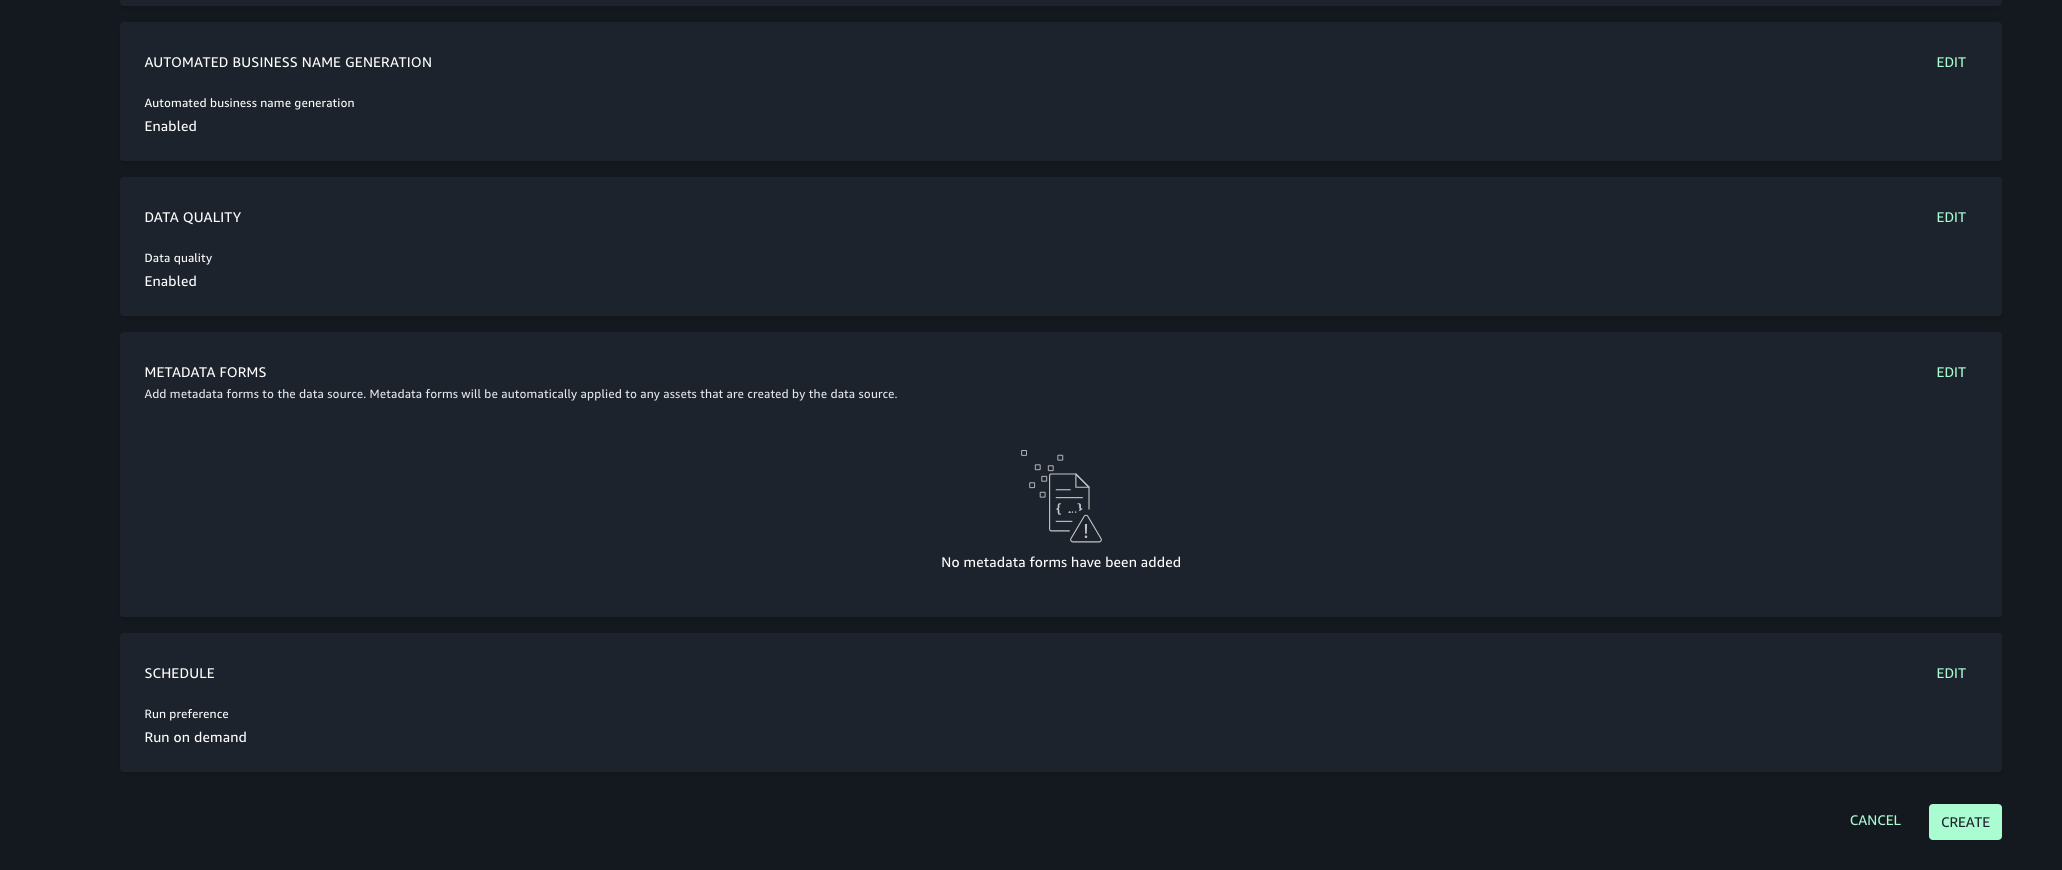
- In this post, we will keep the Publishing setting and Metadata settings as the default configuration.
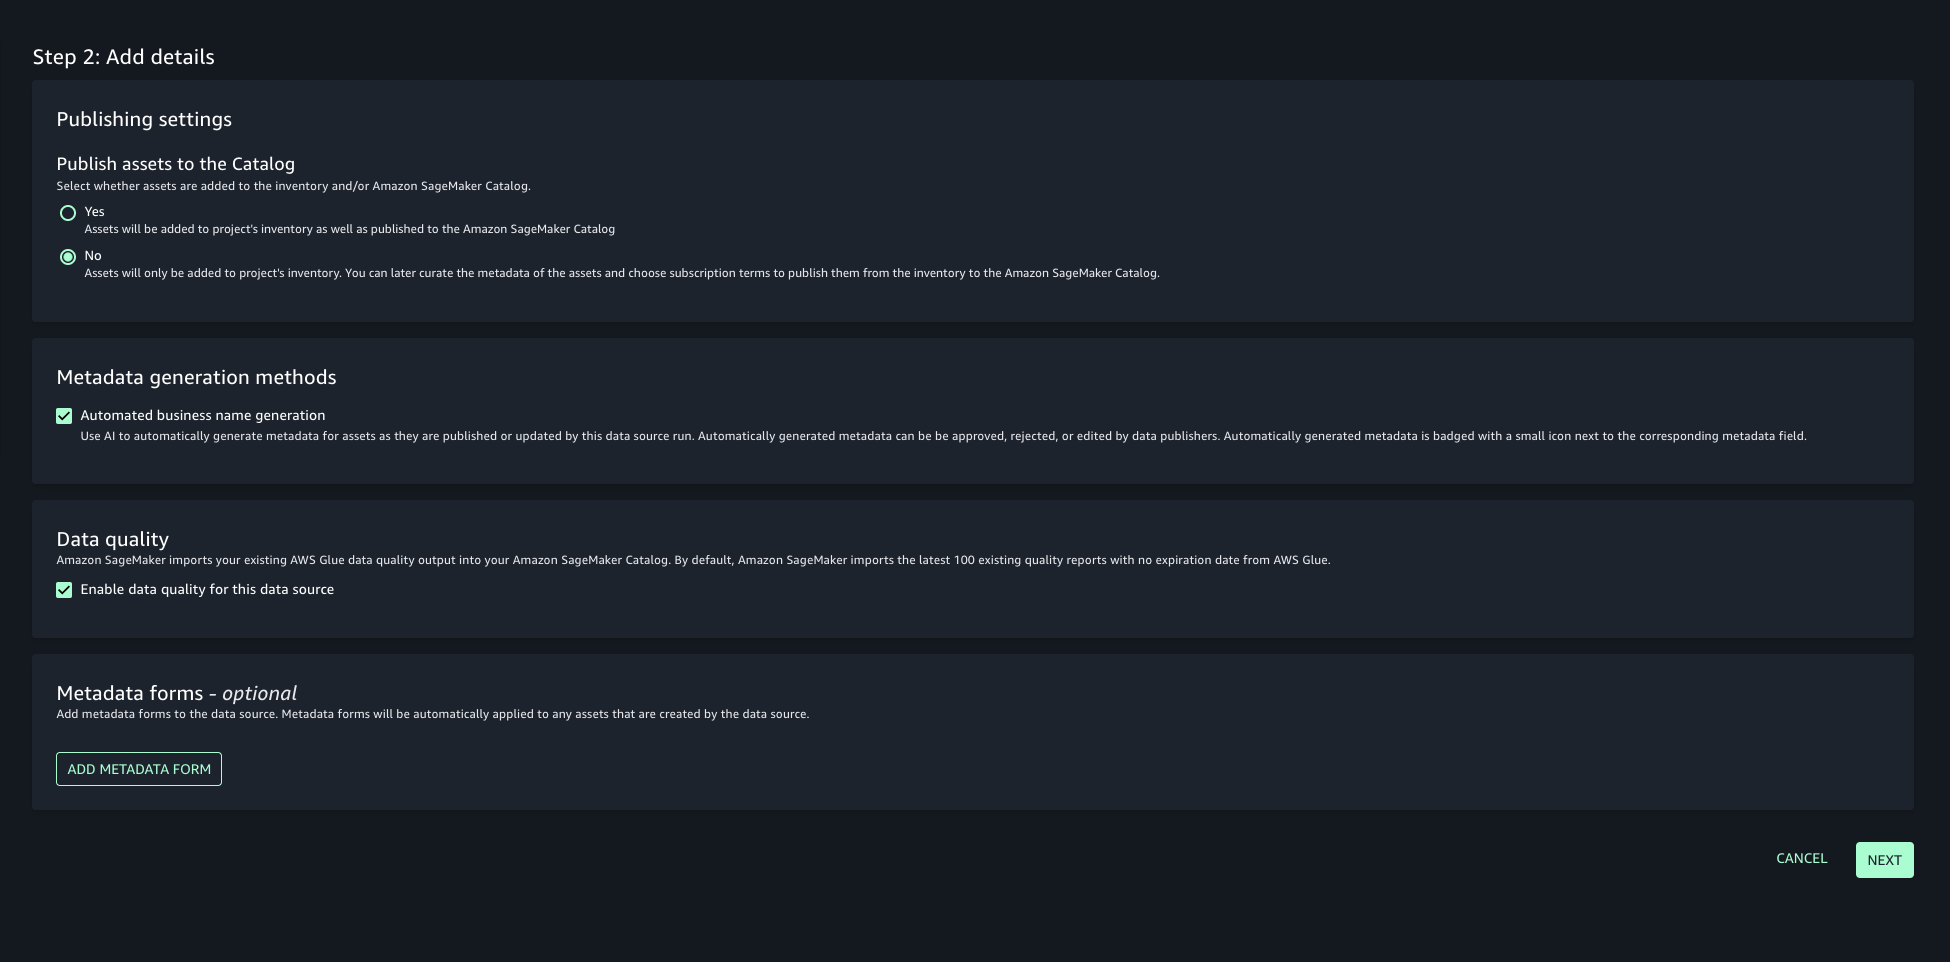
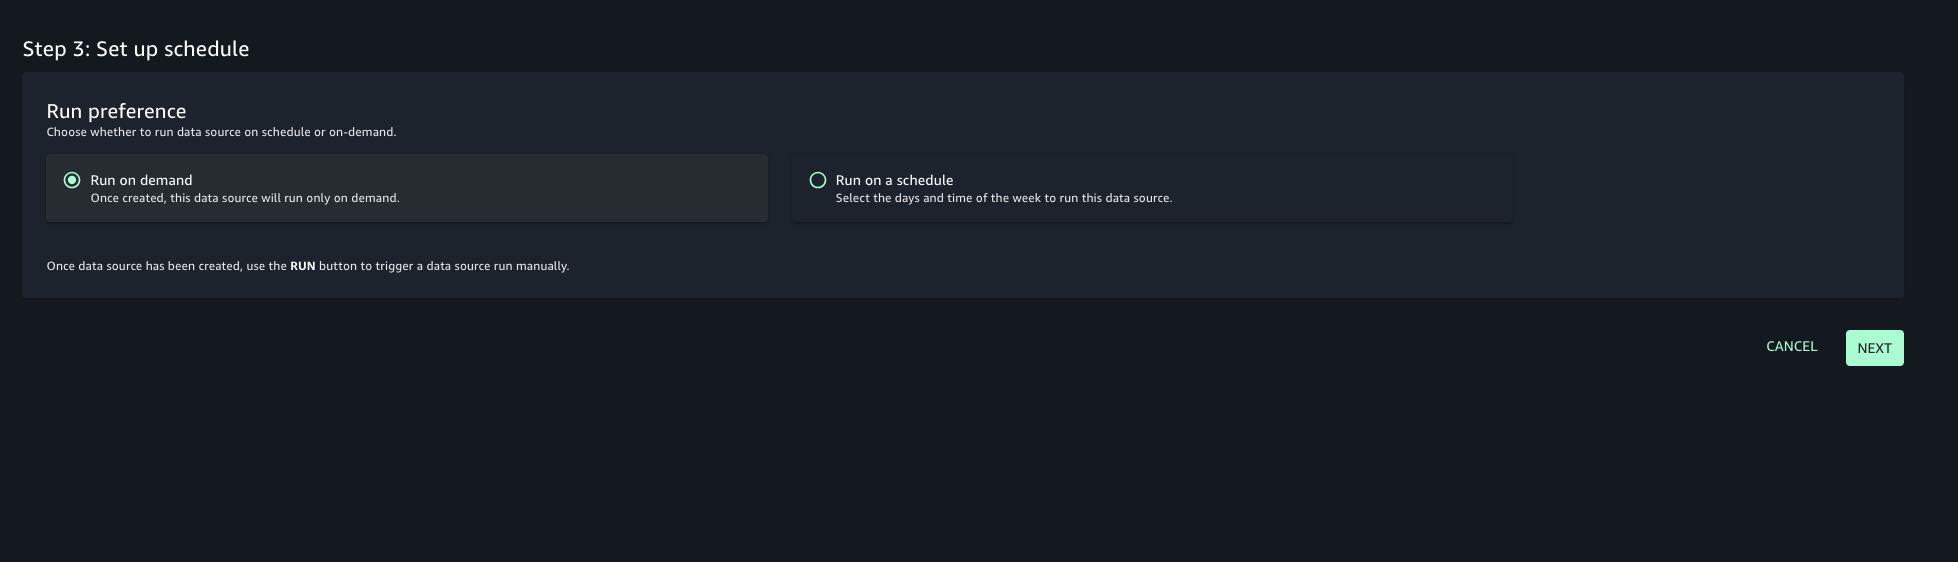
- Choose the run preference as Run on demand to manually initiate data source runs.
- Configure any optional connection settings, such as importing data lineage or setting up data quality options. Review your configuration and create the data source.
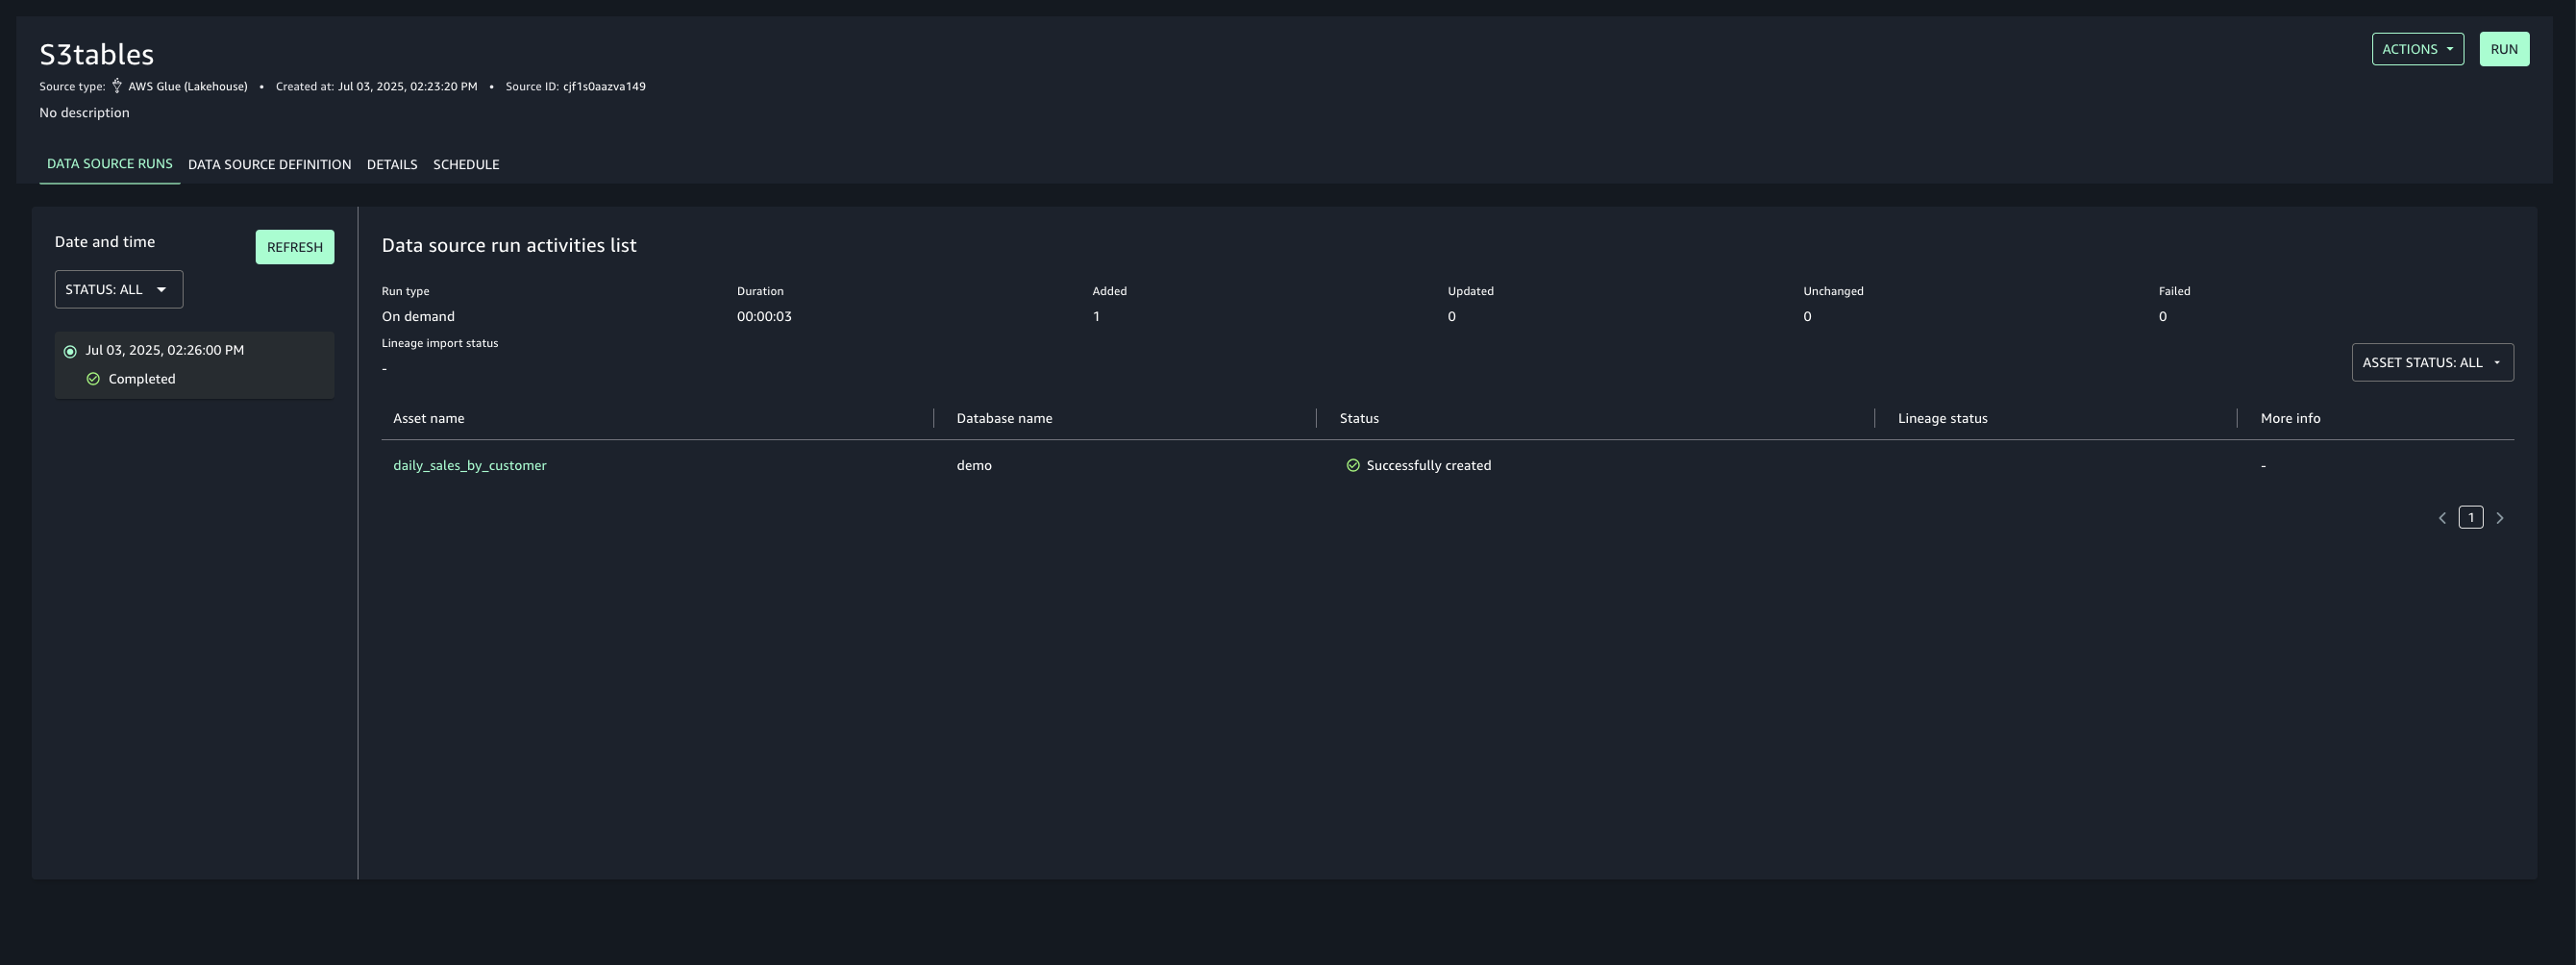
- Once created, run the data source to import the Glue assets into your project’s inventory.
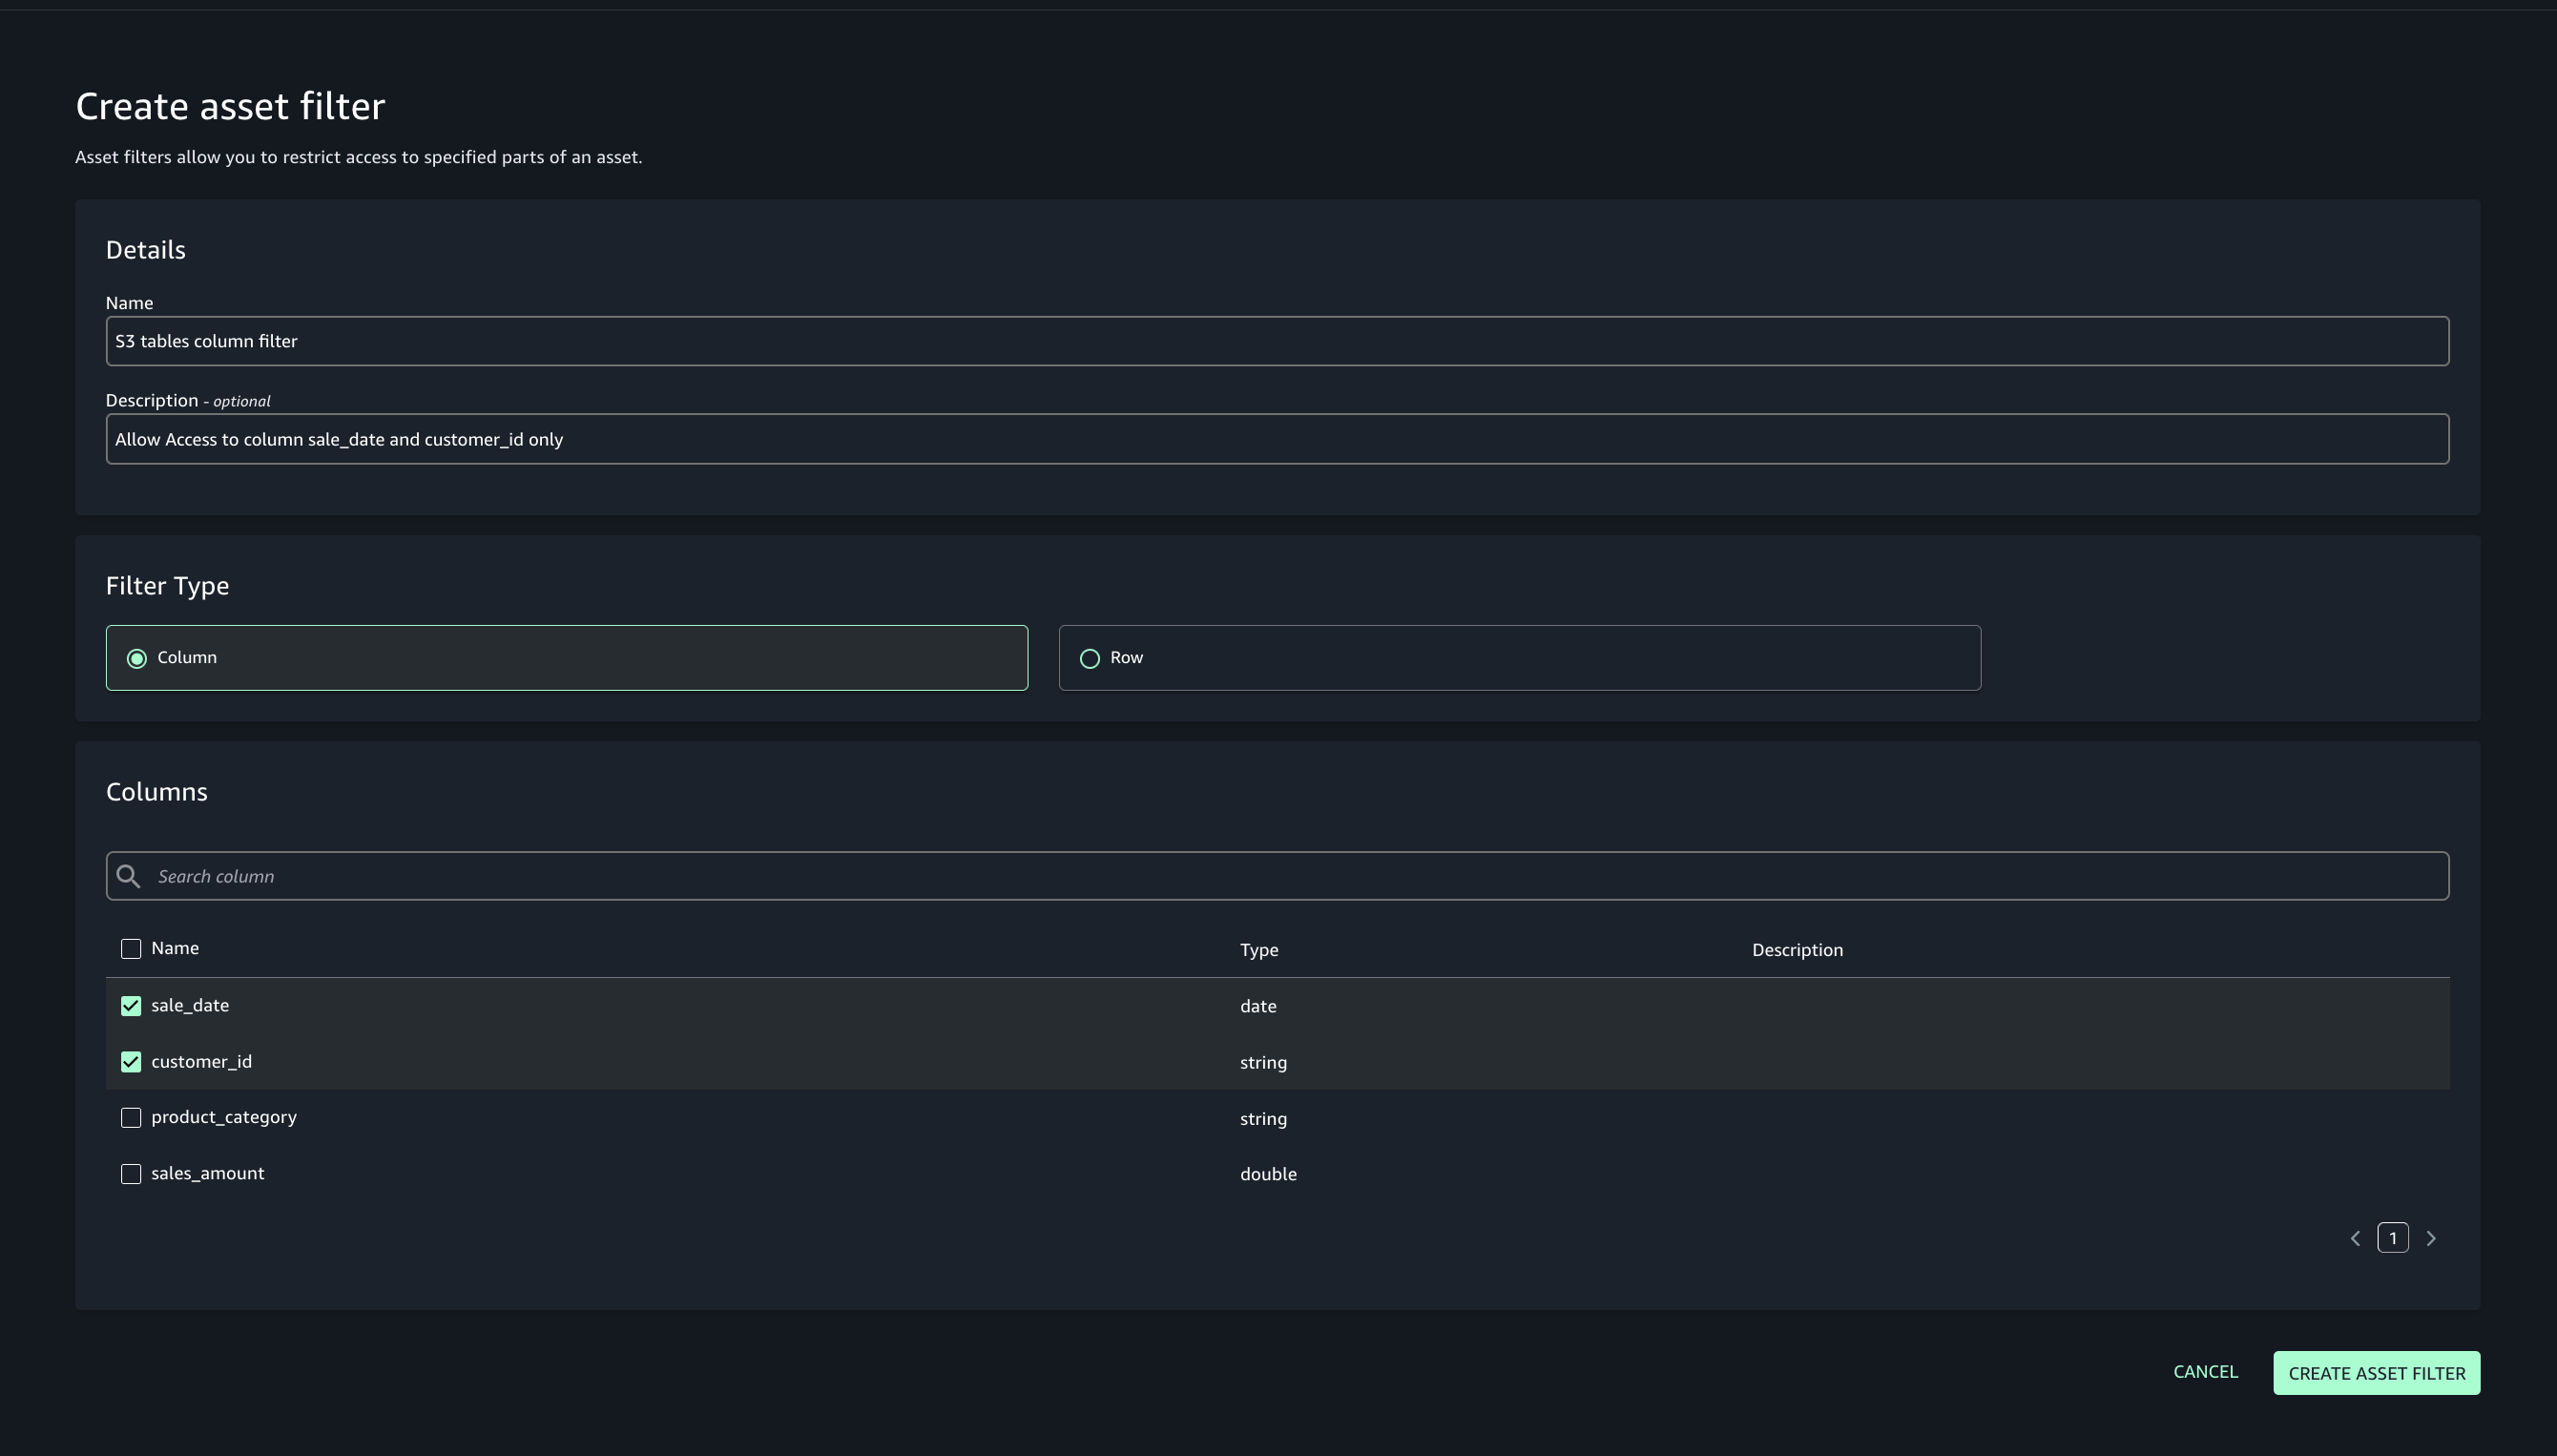
- Add asset filter to restrict consumer access, On the Asset filters tab, choose Add asset filter.
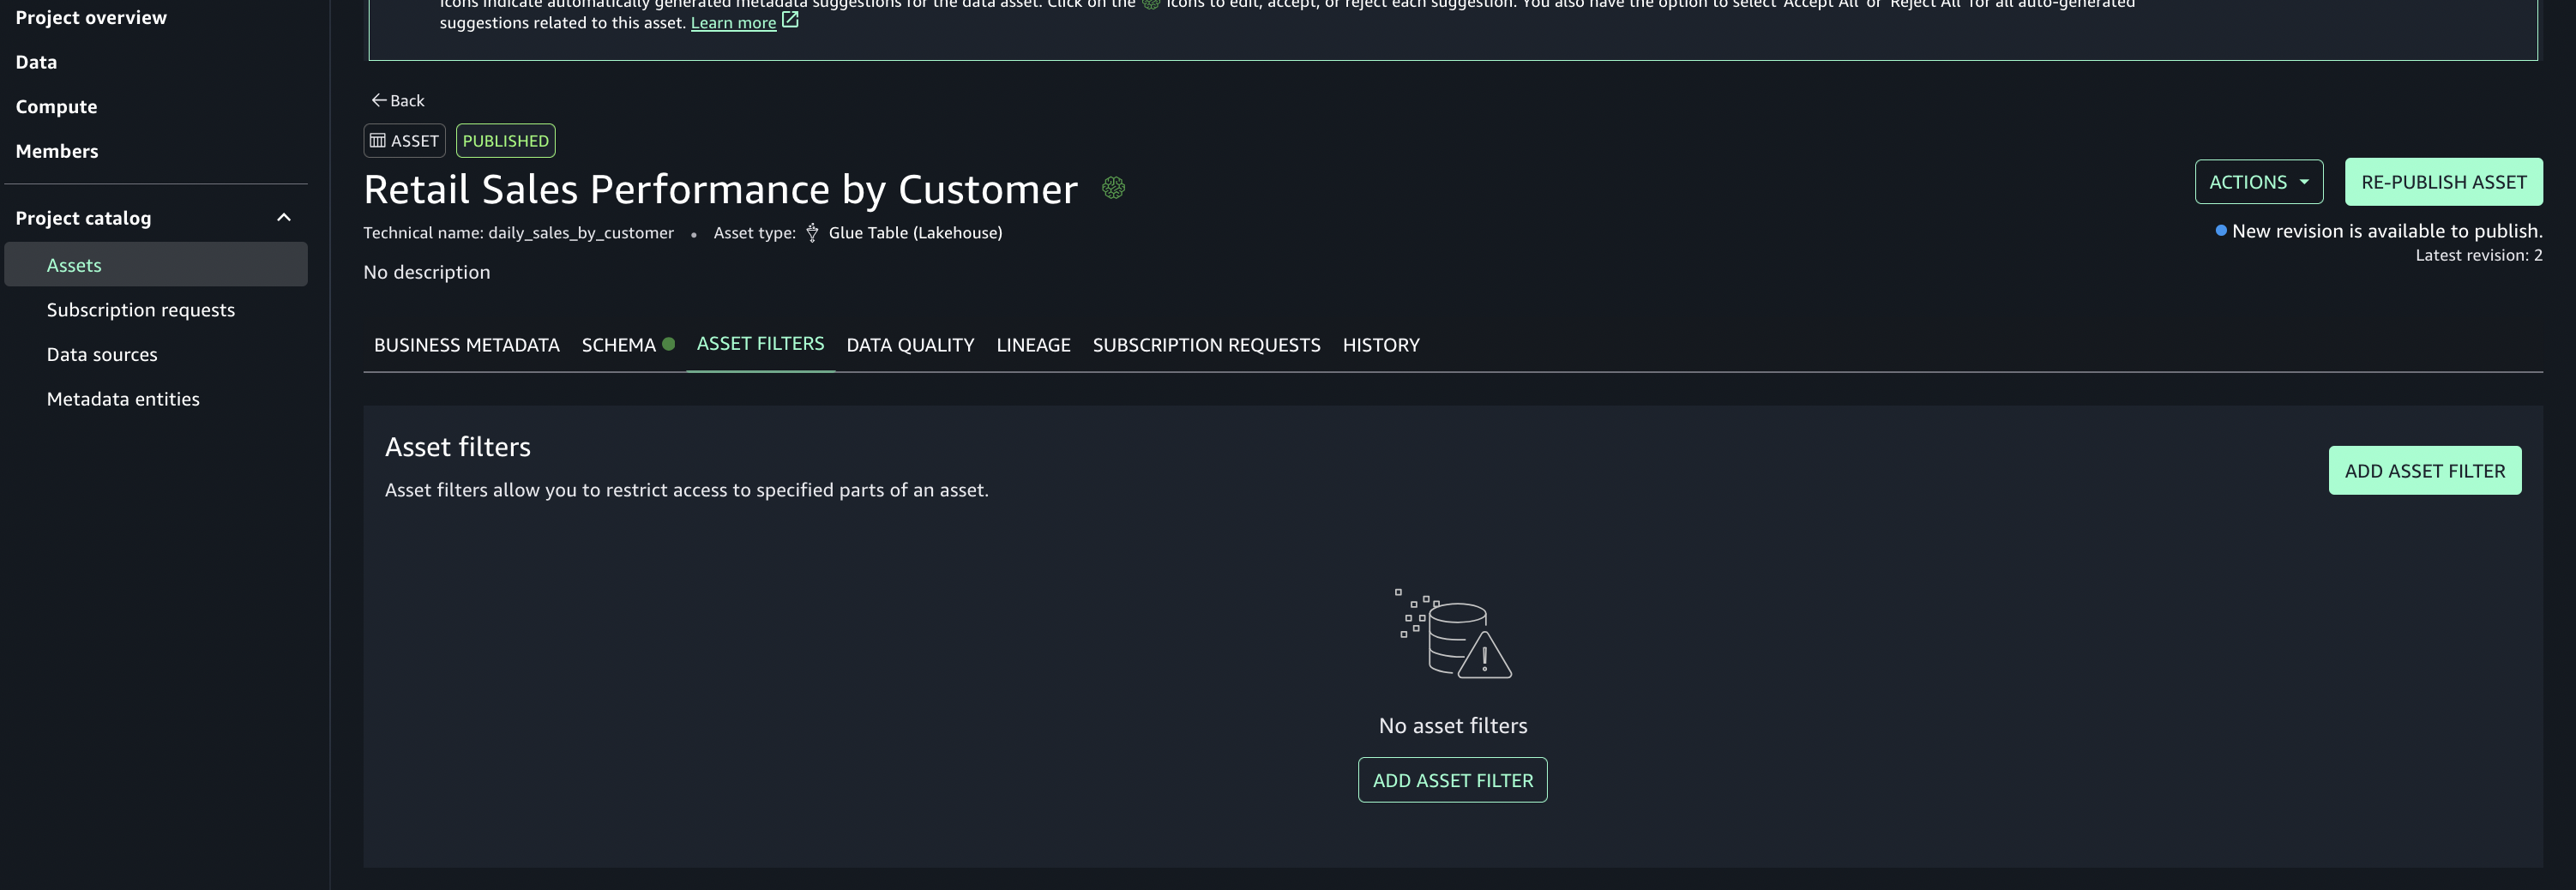
- Select Column as the filter type, choose the columns for consumer access, and create the asset filter.
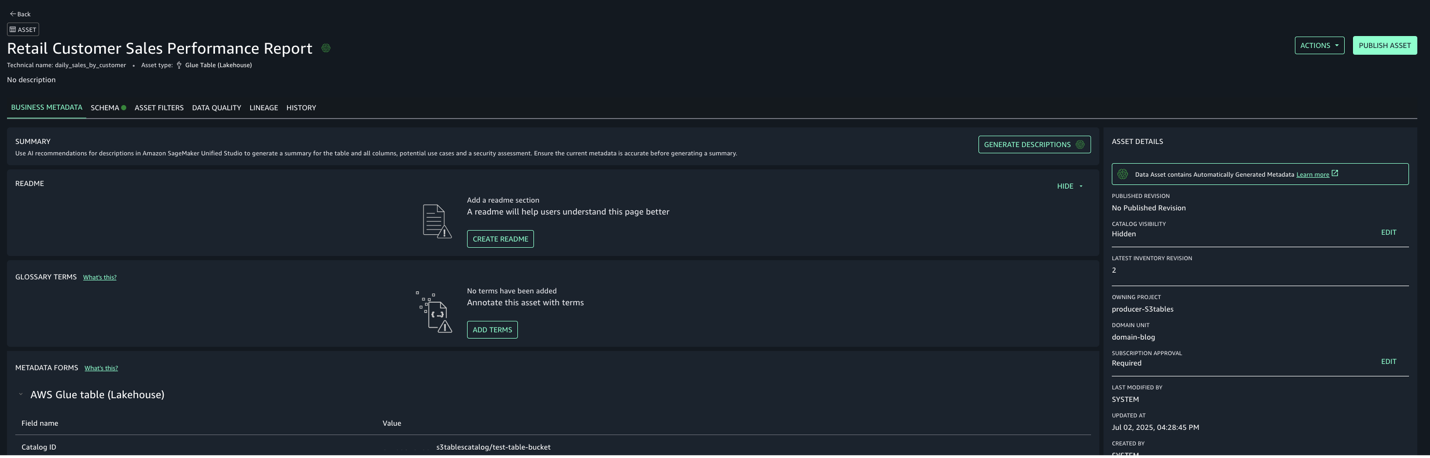
- Select the assets created and choose Publish assets to the SageMaker Unified Studio catalog to make them discoverable by other users.
- Use the documentation to add Glue catalog as data source for S3.
Step 6: Subscribe to the asset from Consumer account in Account C
In Account C, enable the consumer teams to discover, request, and subscribe to those assets for secure, governed data sharing and collaboration across projects.
- In SageMaker Unified Studio, select the consumer project.
- Use the Discover menu (top navigation) and go to Catalog.
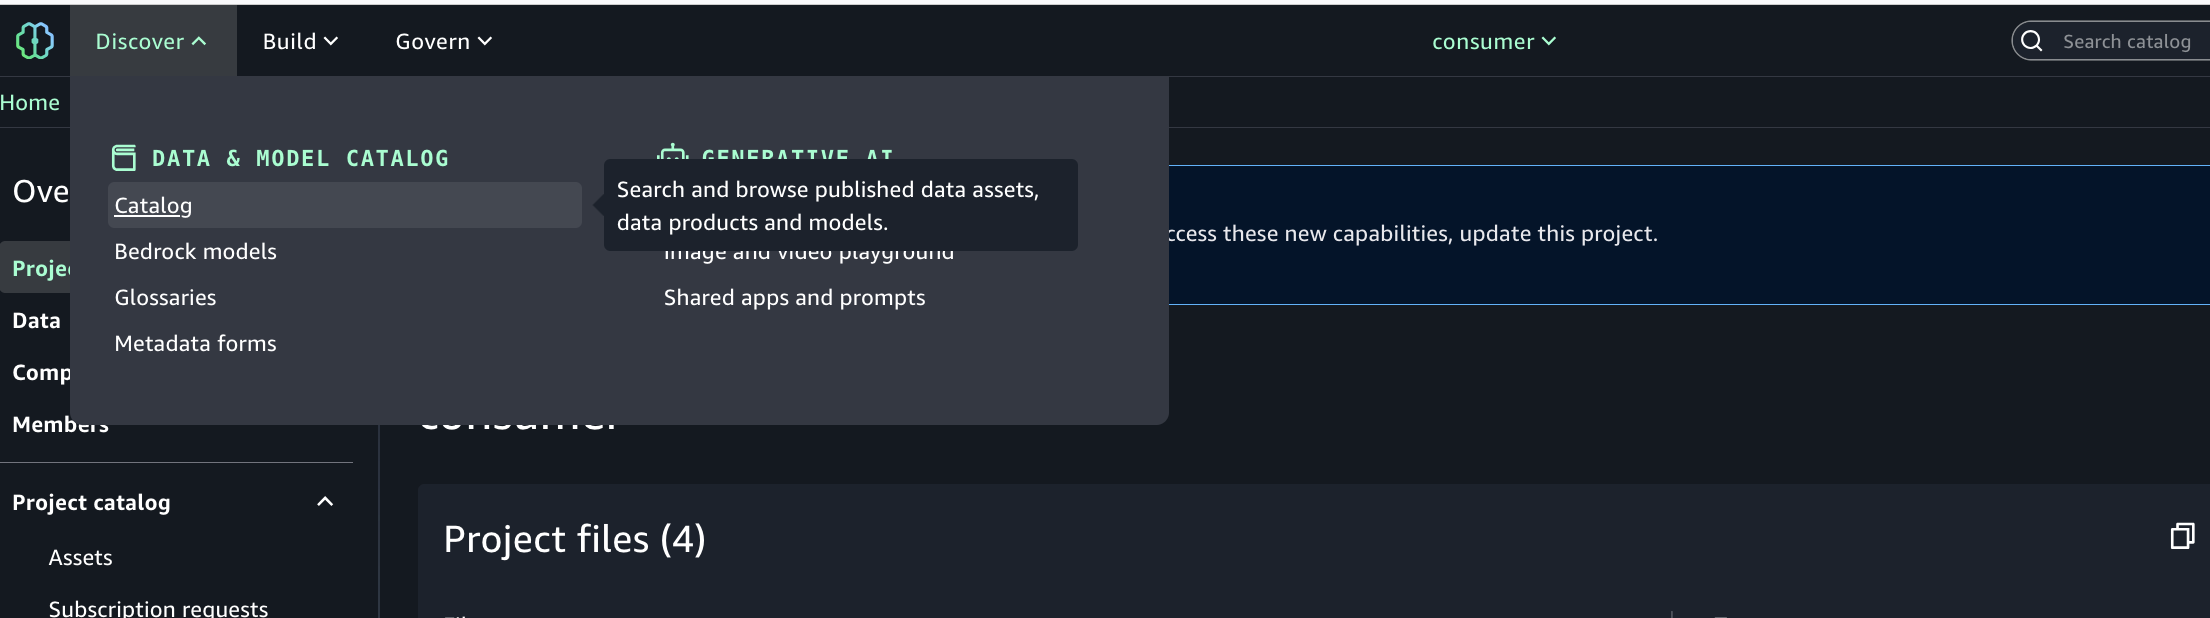
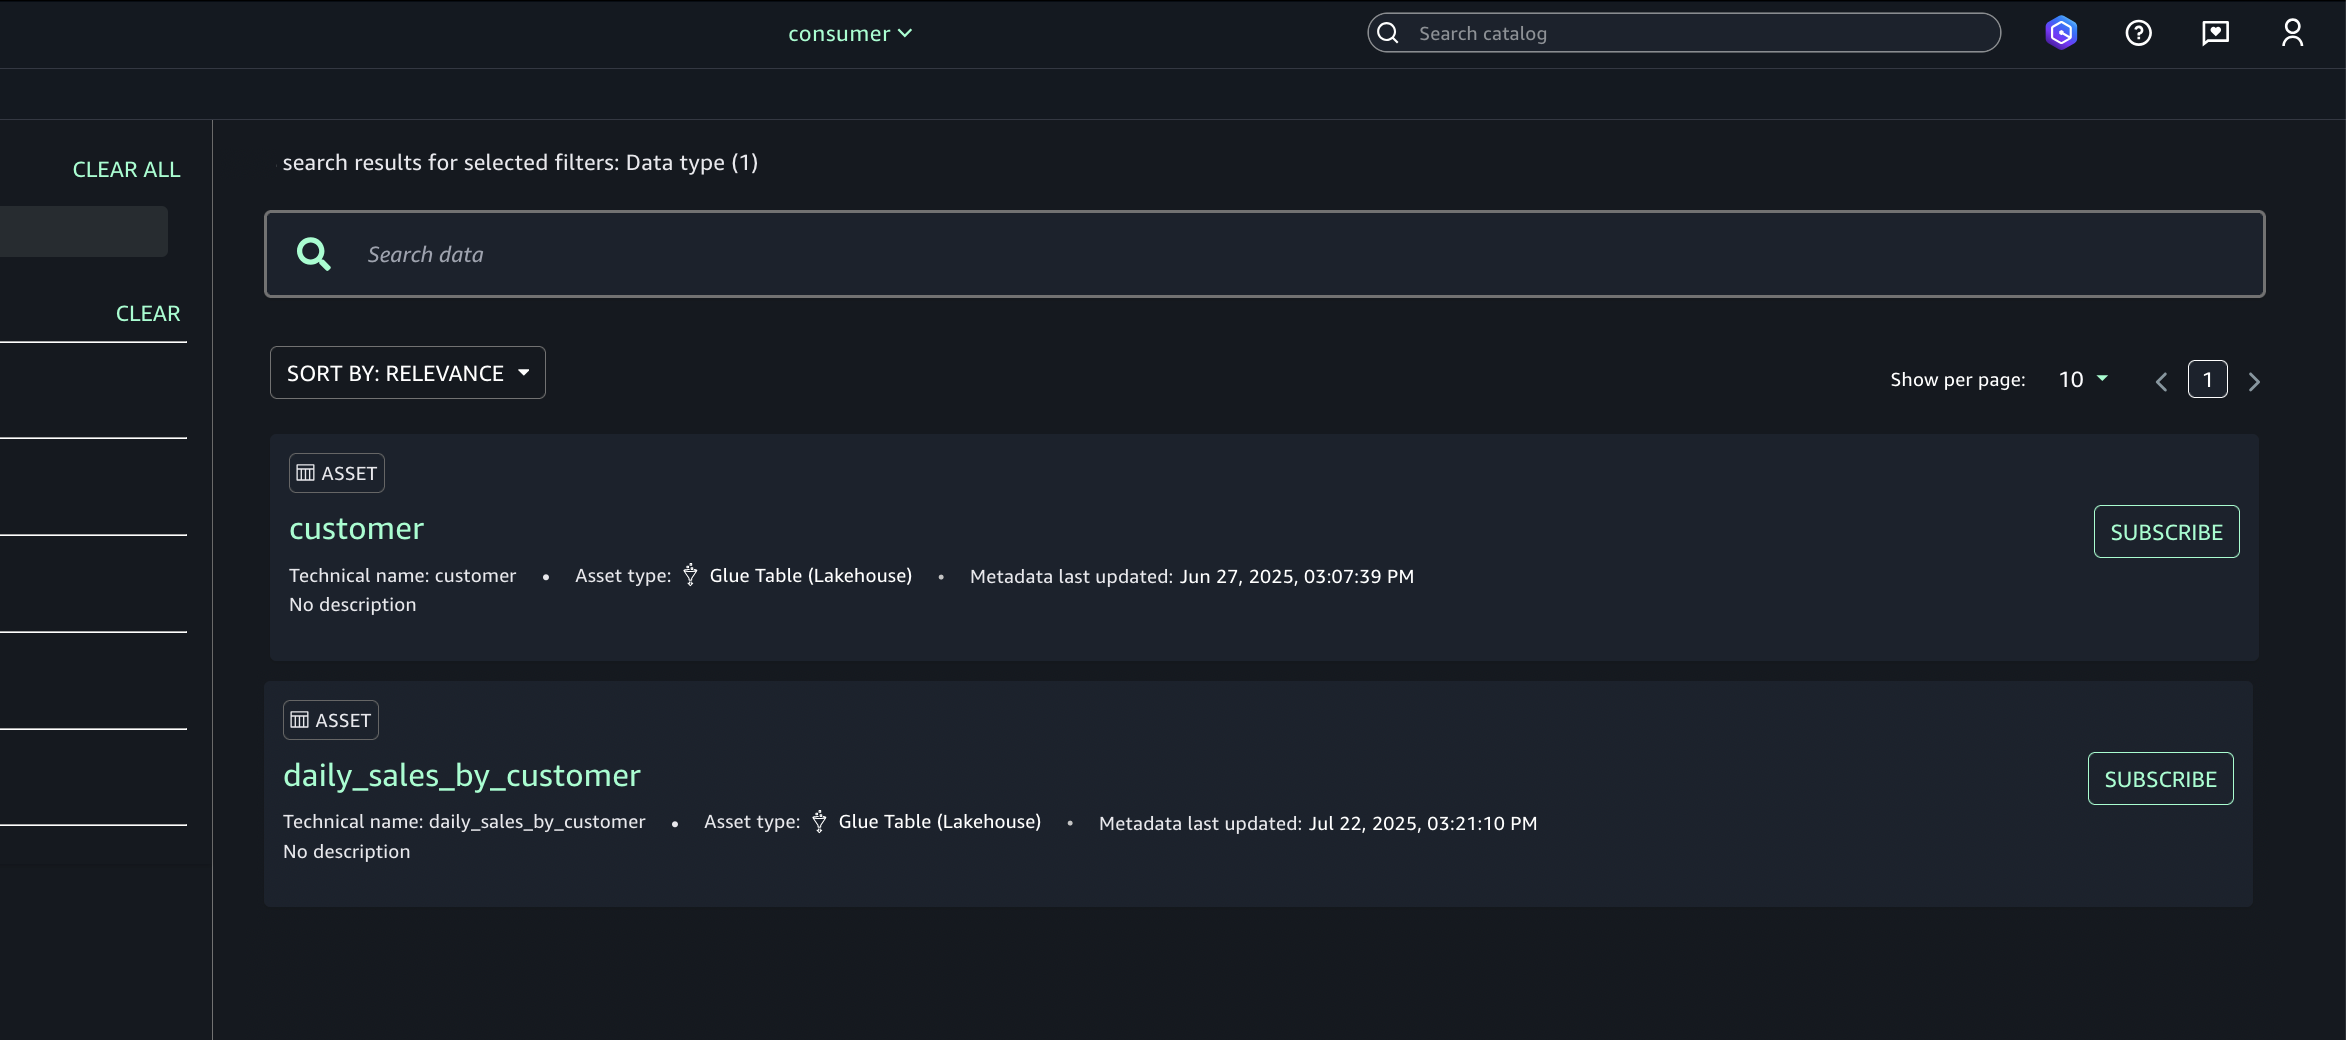
- Browse or search for the published asset (S3 tables from Account A).
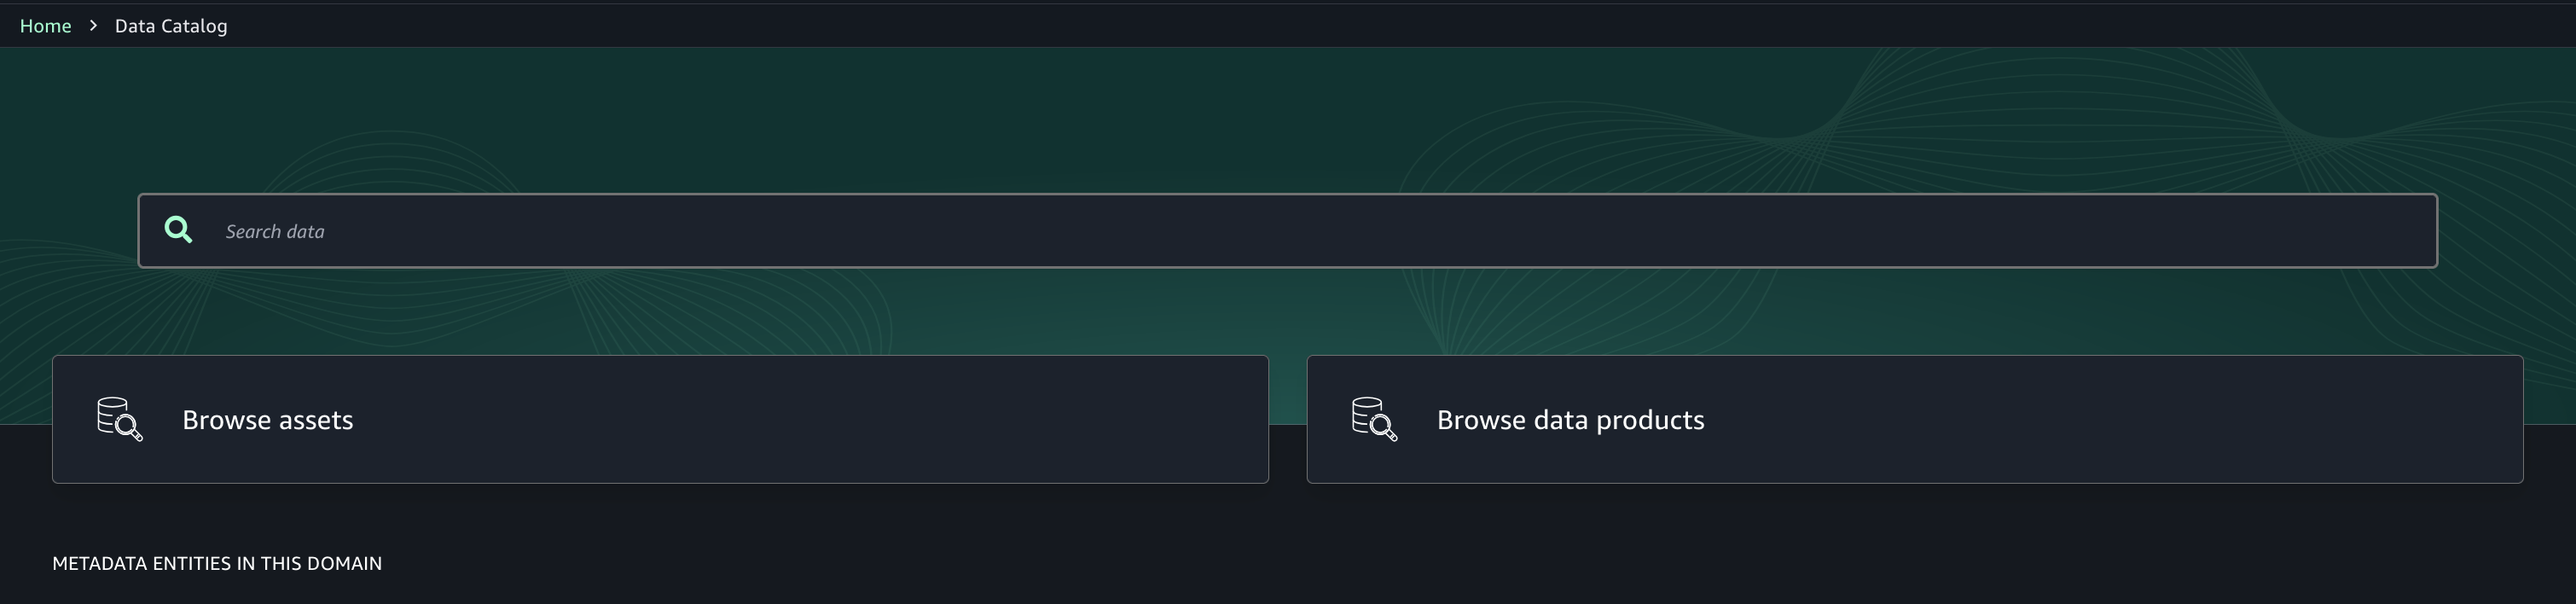
- Select the desired asset (S3 tables from Account A) and choose Subscribe.
- In the subscription pop-up:
- Choose the target project for asset access.
- Provide a short justification for the access request.
- Submit the subscription request.
- Repeat step 6 to enable the consumer (Account C) teams to discover assets in Account B.
Approve or reject a subscription request
- In Account A, open the SageMaker Unified Studio portal.
- Under Project catalog, Subscription requests, Incoming requests tab locate and view the subscription request.
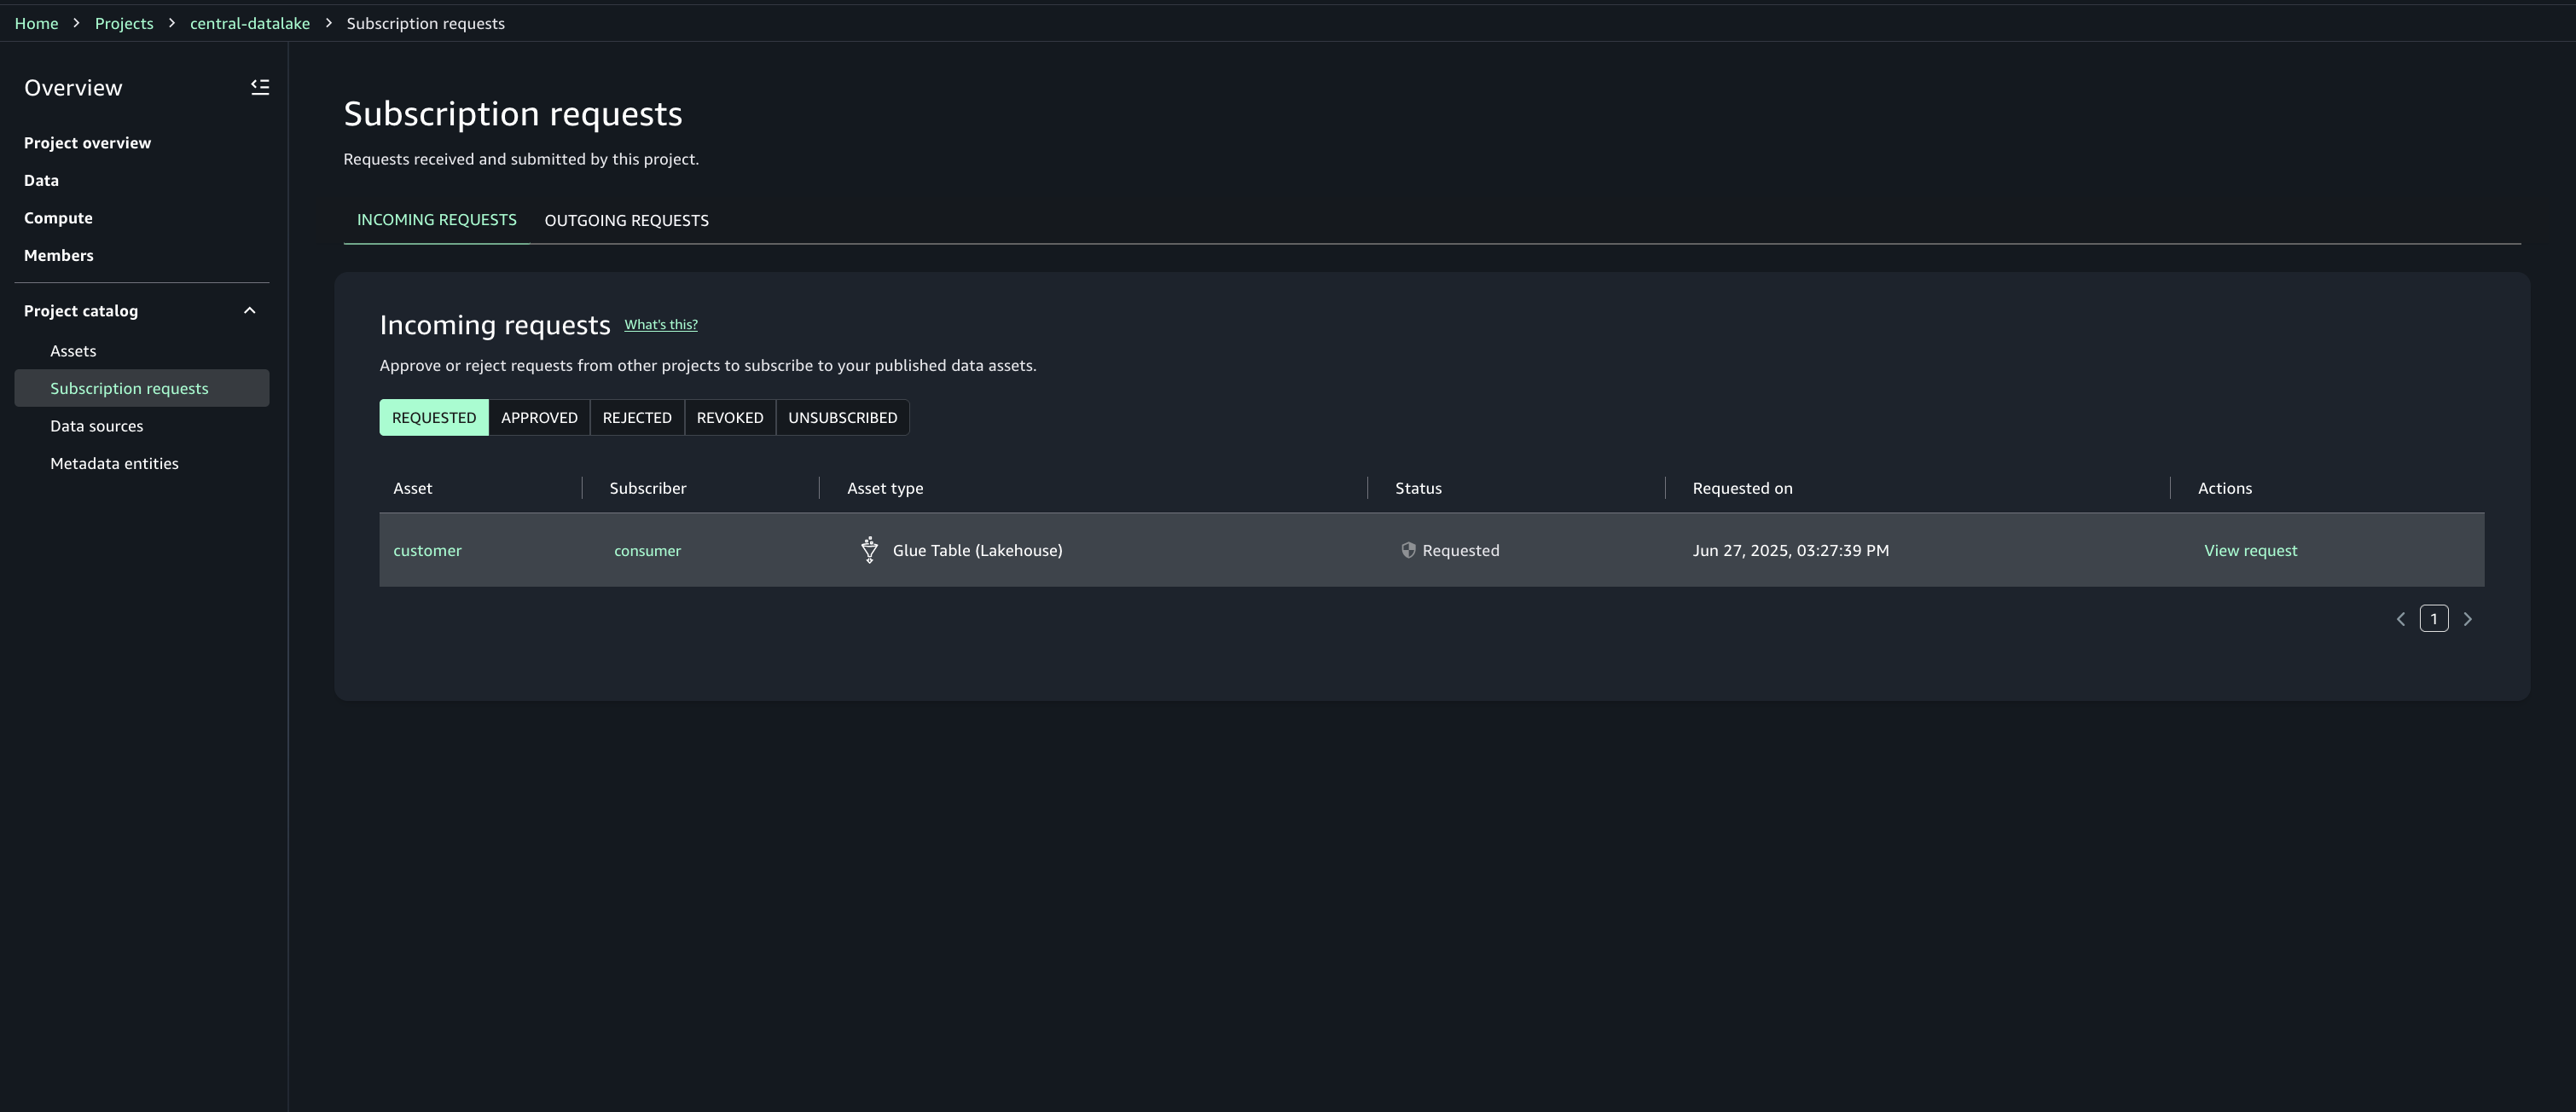
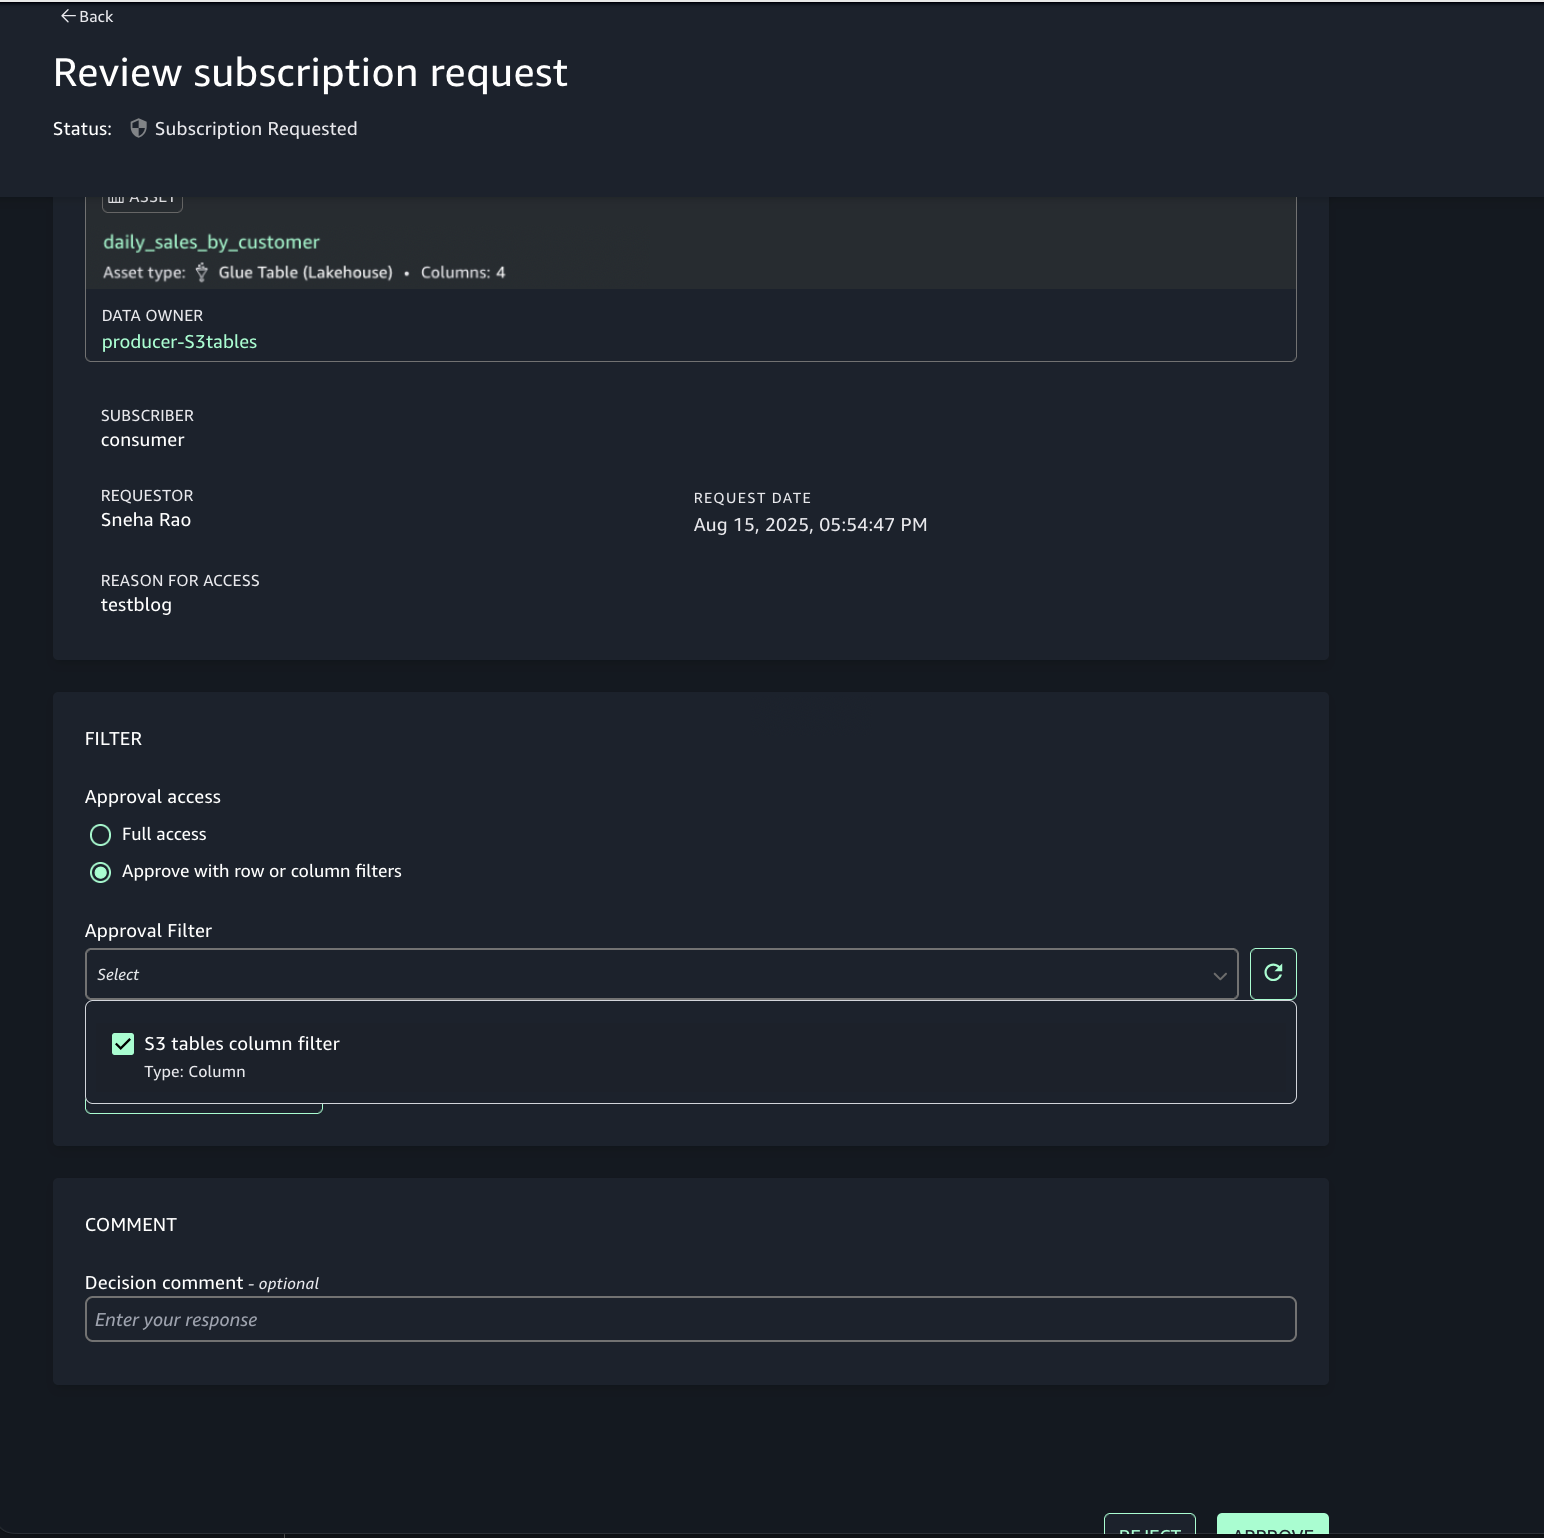
- Review the requester and justification.
- Choose the option to approve with row and column filters. For this post, we use the filter that we created earlier.
- Repeat step 6 to enable the consumer (Account C) teams to discover assets in Account B.
Step 7: Analyze S3 table and S3 data together in query editor
Account C (consumer) now has full access to the customer data in S3 from Account B, and the daily_sales_by_customer data in S3 tables from Account A with restricted columns. Both datasets contain a common column Customer_id.
To generate combined insights, assets from Account A and Account B can be queried and joined on Customer_id.
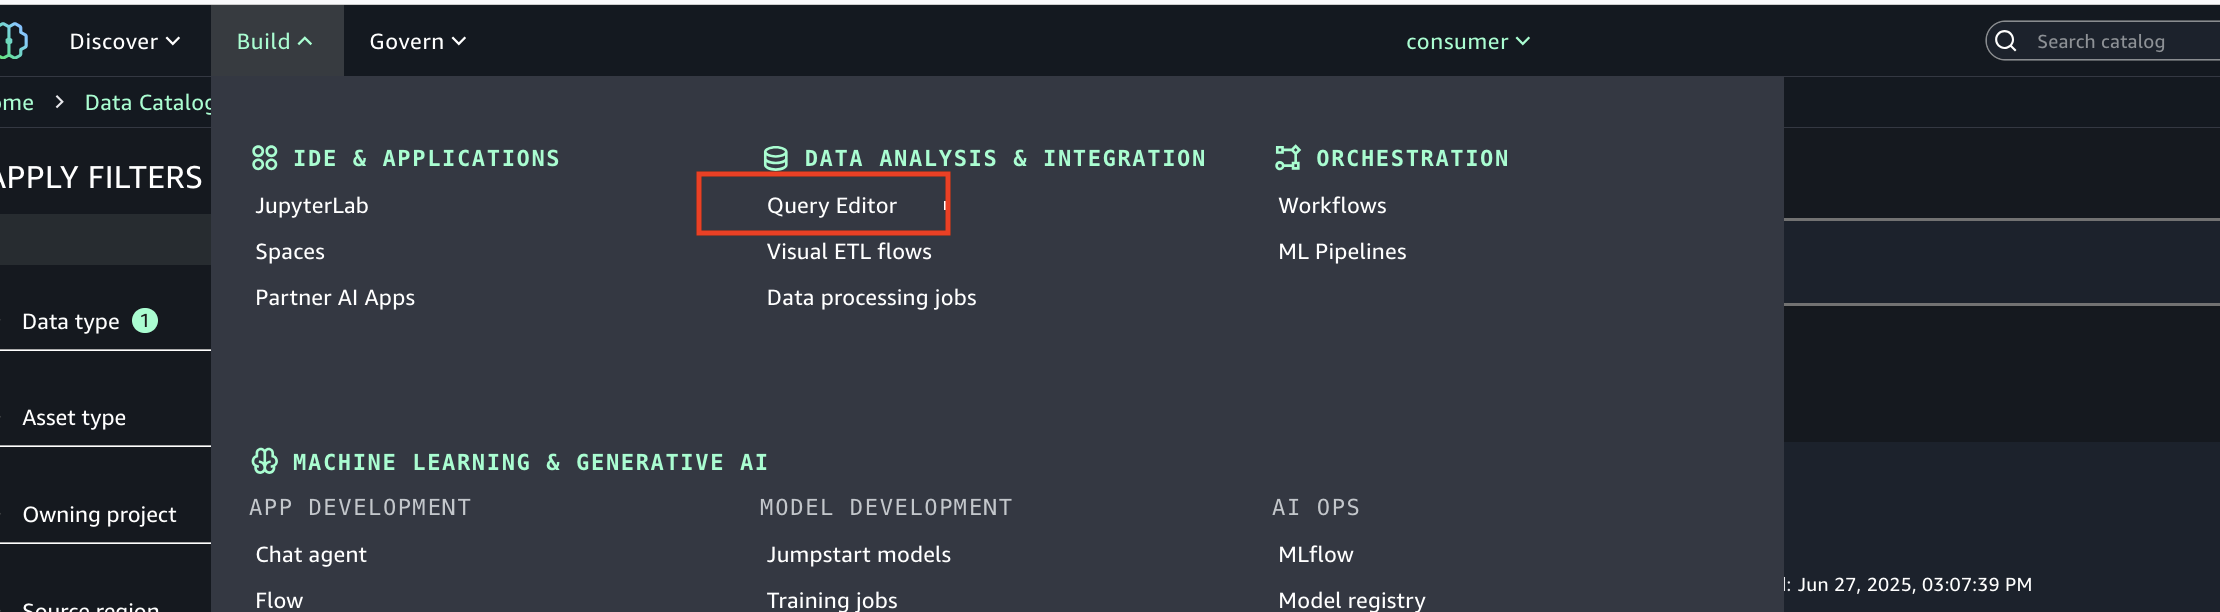
- In SageMaker Unified Studio (consumer project in Account C), go to the Build section and select Query Editor.
- Run the following SQL query to join the assets from Account B and Account A on the common column Customer_id, enabling unified cross-account analytics.
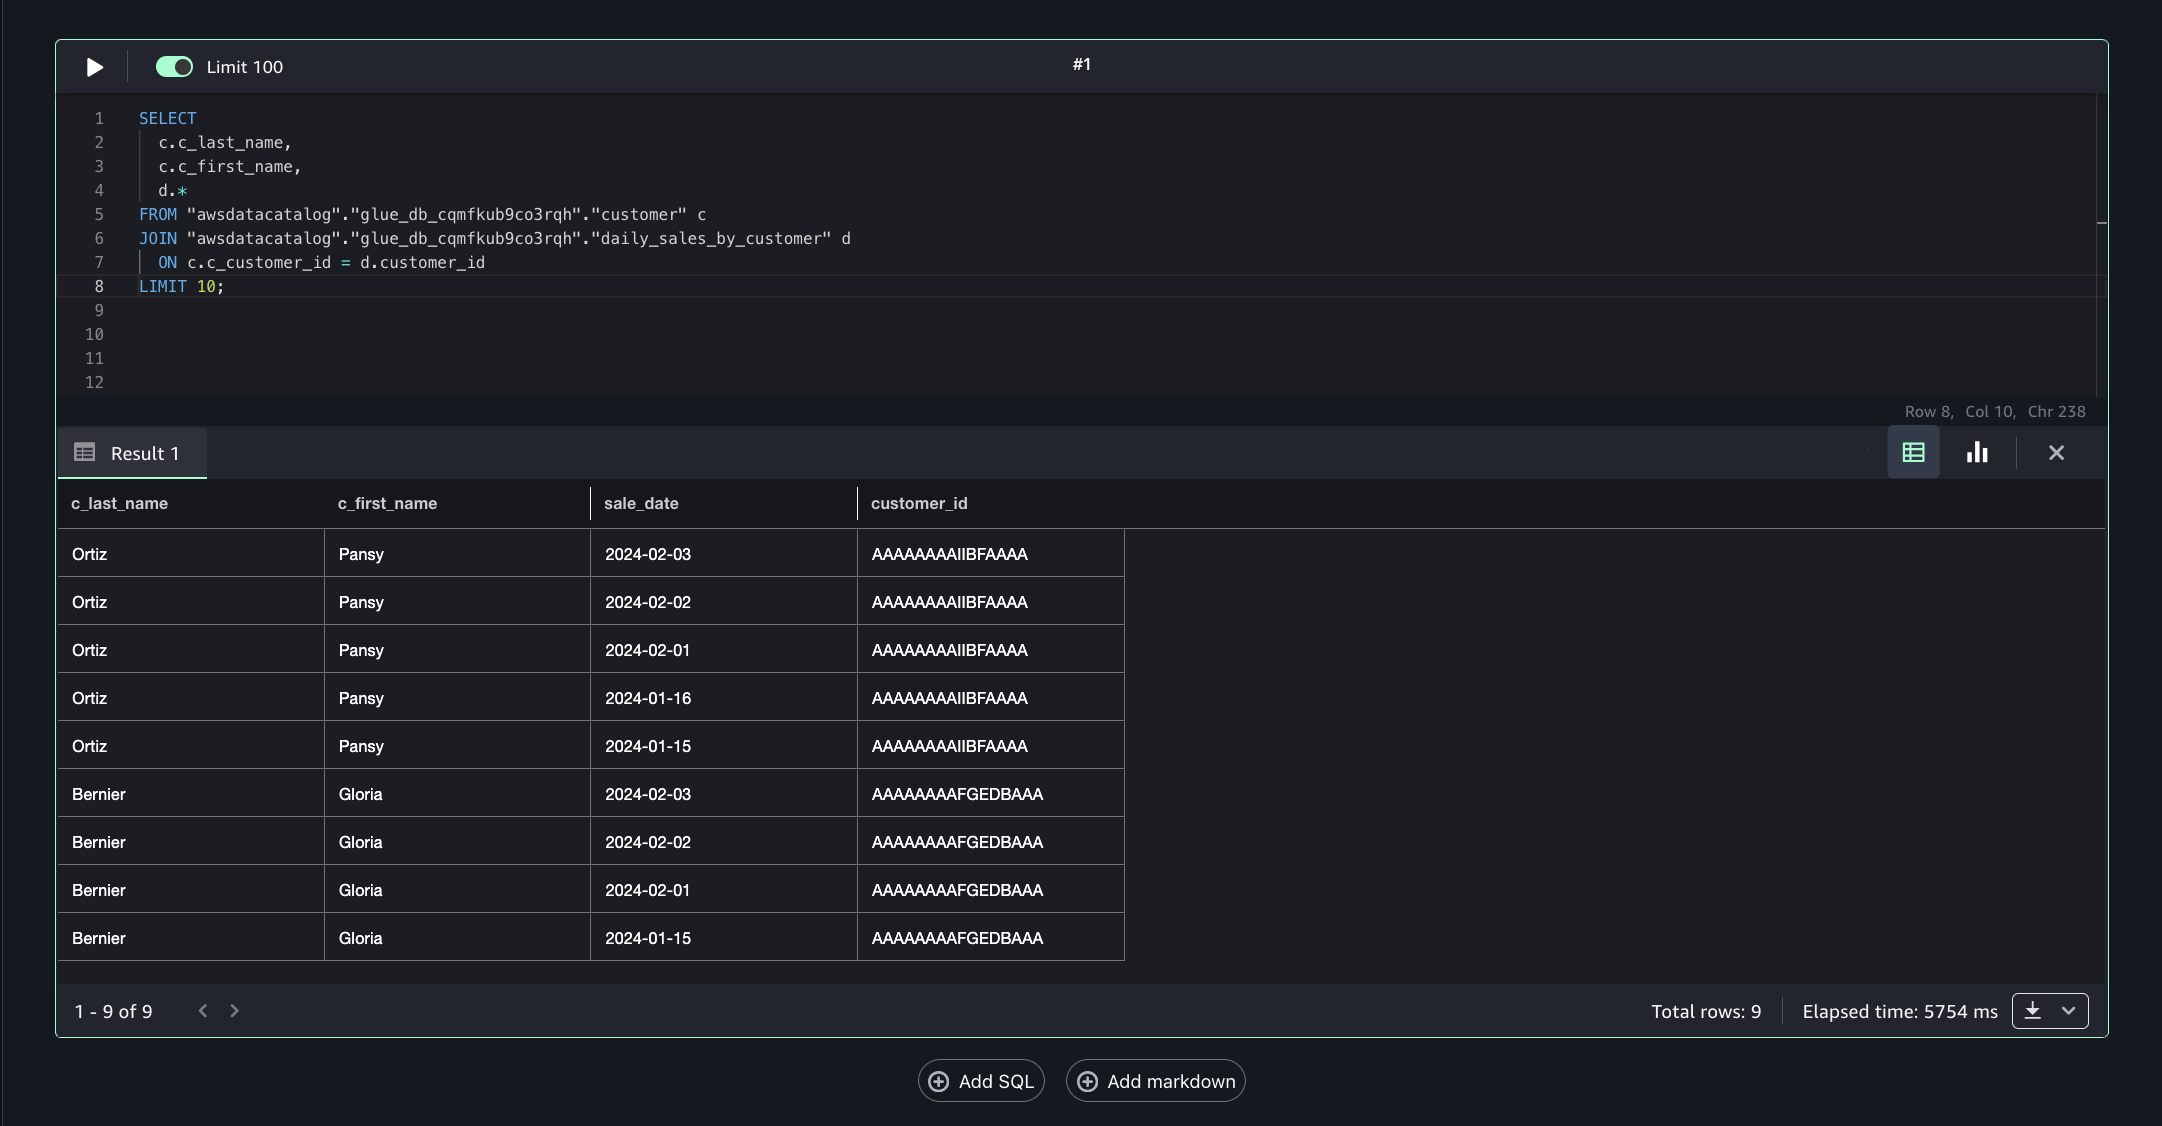
This approach allows combining filtered, governed data from multiple accounts into a single query for comprehensive insights.
Clean up
To avoid ongoing charges, clean up the resources created during this walkthrough. Complete these steps in the specified order to facilitate proper resource deletion. You might need to add respective delete permissions for databases, table buckets, and tables if your IAM user or role doesn’t already have them.
- Delete any created IAM roles or policies.
- Delete all the projects you created in the SageMaker Unified Studio domain.
- Delete the SageMaker Unified Studio domain you created.
Conclusion
In this post, we explored how Amazon SageMaker Catalog integrates with S3 Tables to provide comprehensive data governance in cross-account environments. We demonstrated how data publishers can onboard S3 Tables to SageMaker Lakehouse while data consumers can efficiently search, request access, and leverage approved datasets for analytics and AI development.
The integration between SageMaker Catalog, S3 Tables, and AWS AWS Lake Formation creates a unified governance framework that eliminates data silos while maintaining robust security controls. Through automated subscription workflows and fine-grained access permissions, organizations can implement self-service data access without compromising compliance or data quality.