AWS Contact Center
Securely implement enterprise-ready video calling in Amazon Connect
Introduction
Video calling capabilities in Amazon Connect enable organizations to provide face-to-face interactions between human agents and customers. However, organizations must be mindful of implementing this feature securely while ensuring proper authentication. In this blog post, we will demonstrate how you can easily and quickly set up secure video calling in Amazon Connect with end-user authentication using AWS services.
Overview of solution
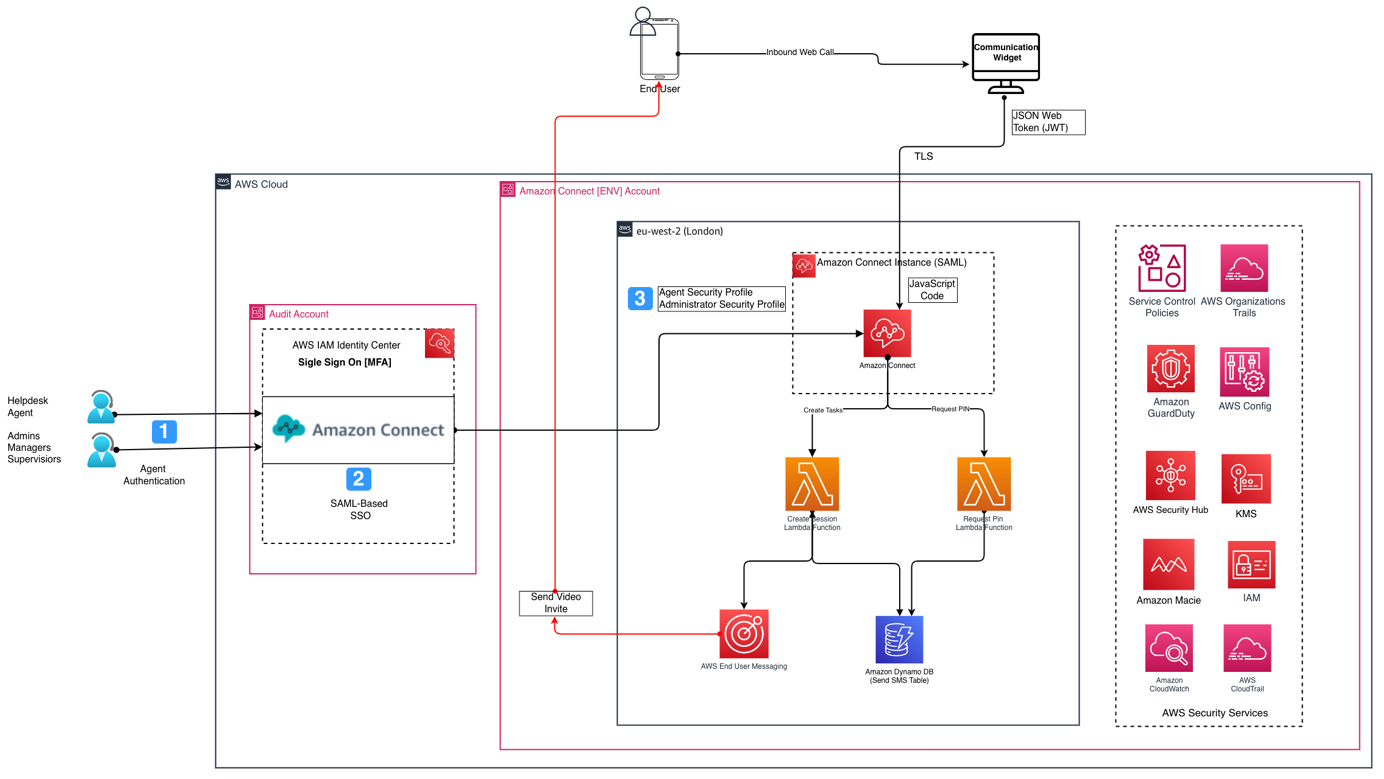
The solution integrates Amazon Connect with other AWS services to create a secure, enterprise-scale video calling solution for customer support. In this blog post, you will learn how to implement video calling using out-of-the-box Amazon Connect capabilities for customer authentication. We leverage AWS End User Messaging to send an SMS with a one-time password and video session link to the user’s mobile device. This ensures that the video call is routed to the same agent with whom the customer was conversing.
Walkthrough
- Call reception
- Incoming customer calls are received and processed in Amazon Connect
- Agent assessment and SMS initiation
- The assigned contact center agent receives and evaluates the call.
- Based on the assessment, the agent determines the necessity to initiate video calling and sends a SMS to the end-user containing a URL and a PIN.
- Amazon Connect task template
- The agent proceeds to complete a standardised task template within the Agent workspace
- Mandatory information includes:
- Customer’s mobile number
- Agent’s unique identifier/username
- Configuration processing
- The completed task triggers an Inbound contact flow and invokes an AWS Lambda.
- The AWS Lambda function executes to:
- Query necessary configuration parameters.
- Stores PIN and customer details (phone number, contact id) in a DynamoDB table.
- Video call authentication
- After receiving the SMS, the customer clicks on the video link URL shared and clicks on the video call button to start the video calling.
- A new Amazon Connect Flow is initiated and the IVR prompts the customer to enter the PIN for authentication.
- Customer enters the designated PIN code received via SMS.
- Verification protocol
- Secondary AWS Lambda function triggers to:
- Retrieve stored PIN from DynamoDB.
- Validate entered PIN against stored credentials.
- Authenticate user access.
- Secondary AWS Lambda function triggers to:
- Data management
- DynamoDB implements automatic data cleanup protocol to expire the PIN sent for each customer after 5 minutes.
- All stored configuration data and credentials are systematically removed after a 30-minute interval.
Prerequisites
For this walkthrough, you should have the following prerequisites:
Deployment
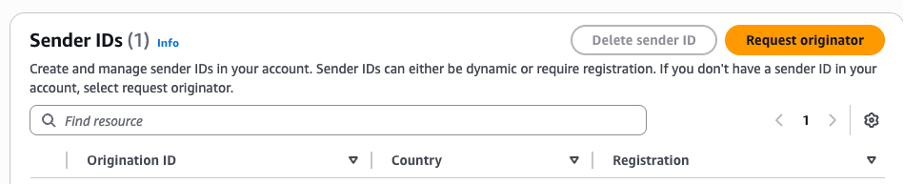
Configure SenderID using AWS End User Messaging
- Sign into AWS Console and navigate to AWS End User Messaging
- Click Sender IDs under Configurations
- Click Request Originator
4. Within the ‘Message destination country’ dropdown, select United Kingdom (GB)
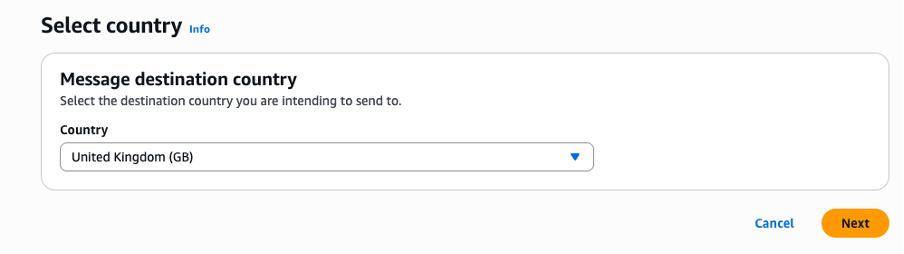
5. Click Next
6. Check into ‘Text Messages (SMS)’ under ‘Messaging Use Case’
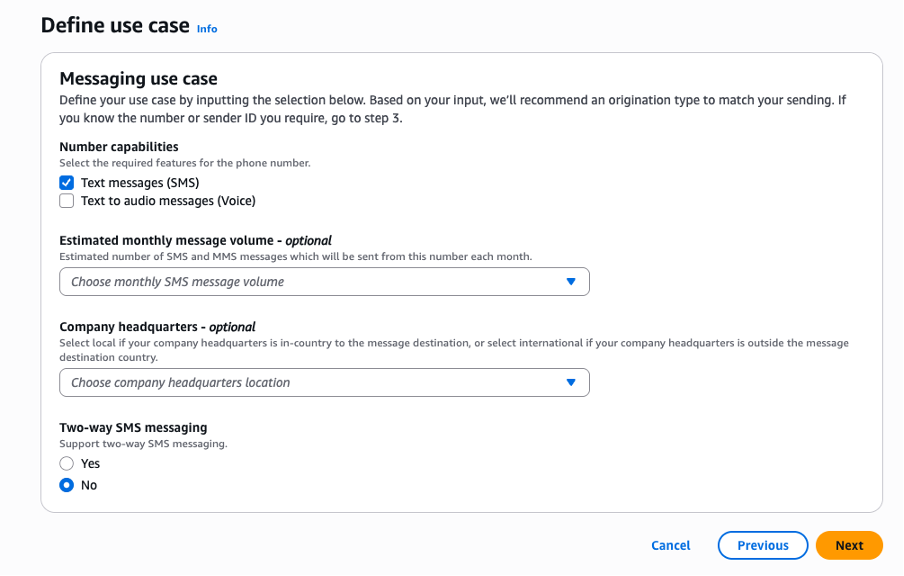
7. Select ‘Two-way messaging’ to NO
8. Click Next
9. Select ‘Sender ID – Recommended’ and enter Sender ID name (example ABC-Corp)
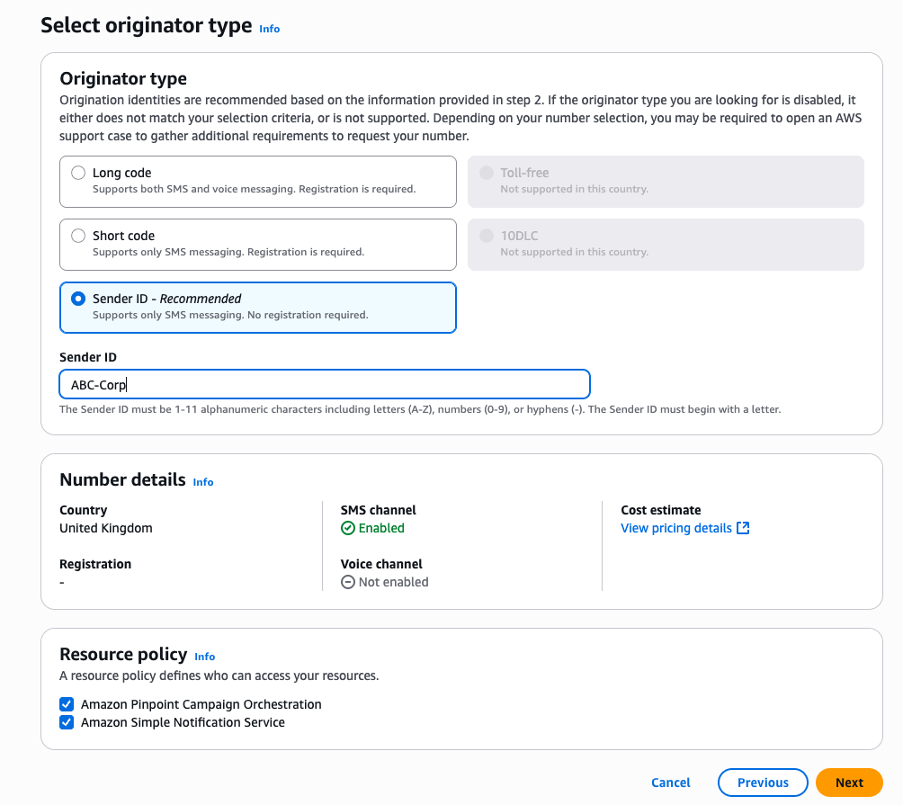
10. Click Next. Keep the Sender ID handy for next steps.
11. Click Request.
Deploy CloudFormation template
Before following below steps, please download the CloudFormation template from here
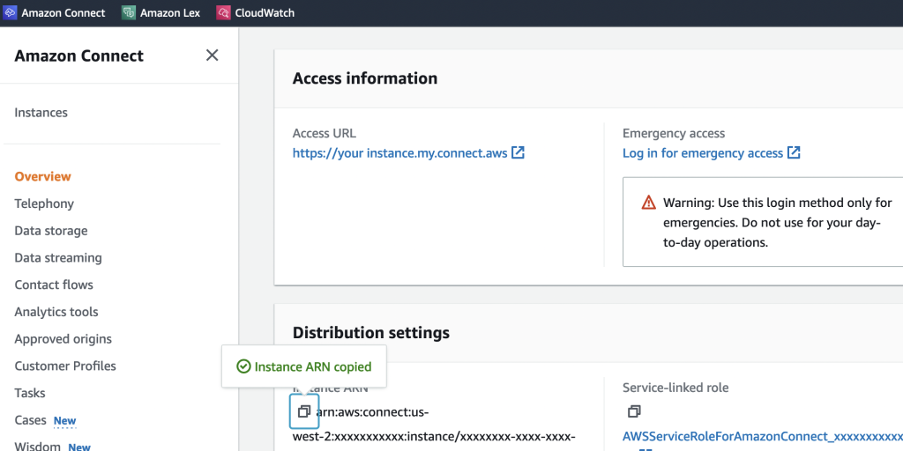
- Sign into your AWS Management Console, navigate to the Amazon Connect Console, and select your instance.
- Navigate to Overview and click the ‘Copy’ button next to your Instance ARN
- Enter a unique name for your stack, such as ‘amazon-connect-video-calling-solution-blog’

4. Paste the ARN of your Amazon Connect instance and click Next.
5. Paste the Sender ID created in AWS EndUserMessaging and click Next.
6. Click Next again, enable the checkbox for “I acknowledge that AWS CloudFormation might create IAM resources”.
7. Choose Create Stack. The AWS CloudFormation template takes about 10 minutes to create all the resources. Once done, the status changes to CREATE_COMPLETE.
8. Navigate to the Outputs section of the newly created stack.
9. Copy the value of AWS CloudFront Endpoint.
Note: Once the stack run is complete, go to the DynamoDB table created by the stack and add TTL configuration of 30 minutes. Please follow this for enabling TTL on the table using AWS Console.
Configure communication widget
- Sign into your Amazon Connect instance and navigate to Home and choose View Communication Widgets.
- Click Add Widget.
- Enter ‘Video Calling’ for the Name and add a description.
- Uncheck the chat checkbox and select web calling. Add Video and screen sharing checkboxes as well.
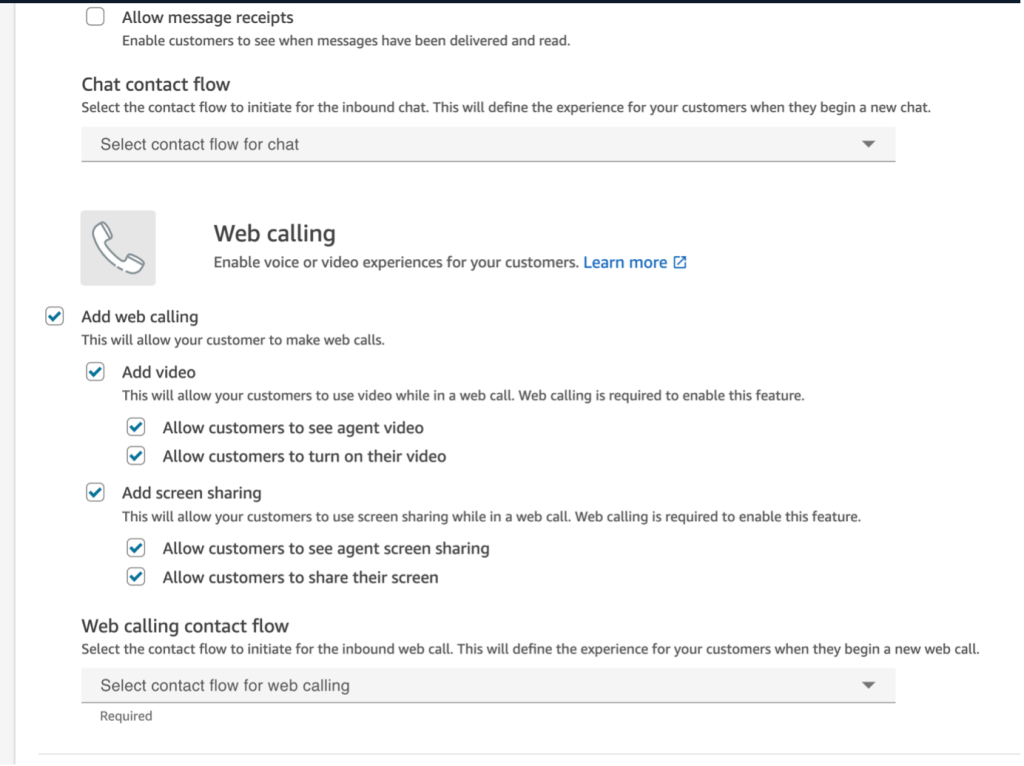
- Select the deployed web calling contact flow from the dropdown. Click Save and Continue.
- Customise widget if needed if not, this step can be skipped.
- Under Domain & Security, Add the required domains for the communication widget by copying the domain URL created via CFT template output.

- For this blog, select No for Add security for new communication widget requests. Click Save and Continue.
- Copy the generated widget script to below sample index.html.
- Upload the updated index.html to your S3 bucket (deployed via CloudFormation template)
Note: Once you upload the newly updated index.html, re-deploy the AWS CloudFront to avoid access denied error.
Configure security profile
- Navigate to Users and select Security Profiles.
- Select the Security Profile you will be using for testing.
- Expand the Task section and ensure that View is enabled.
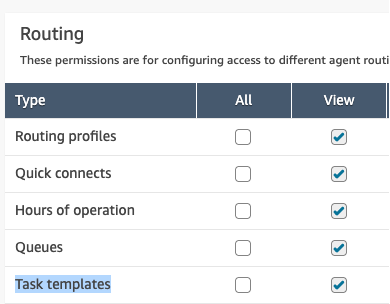
- Expand the Contact Control Panel (CCP) section and ensure that “Video calls” is enabled.
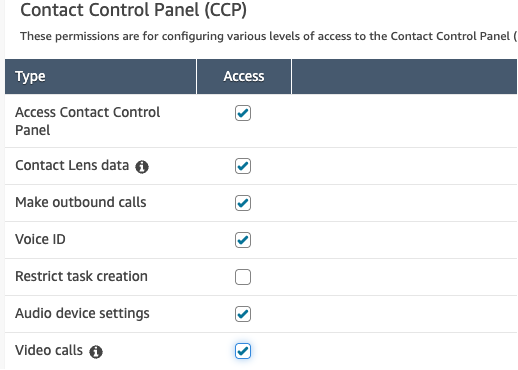
- Once above changes are made to the profile, click save.
Testing
- Log into AWS access portal and go to your Amazon Connect instance.
- Open the ‘Agent Workspace’ (opens in a pop-up window). Initiate video call by clicking on the ‘Create Task’ button.
- Select ‘VideoCallingTask’ from the template dropdown.
- Enter in the customer phone number where the SMS would be sent and the agent username used to log into Amazon Connect, i.e. login email address.
- The phone number entered should receive a SMS with a link to the site and their PIN.
- Click on the link in the SMS, it should open a webpage with the calling icon (located in the bottom right of the page).
- Click on the call icon and a notification should pop up to access to your microphone and camera. Click Allow.
- Once prompted, enter the PIN received in the SMS. Once done, hit the ‘<’ to go back to the main screen.
- Click on ‘Start Video’, to be able to see and talk to the agent.
- The agent whose email address was entered while creating the task should receive an incoming call, ensure the agent status is ‘Available’ to take calls.
- The agent should enable their video by clicking on the ‘Video disabled’ button.
- Once the call is done, click on ‘Close contact’ to ensure you’re able to take the next call.
Cleaning Up
To avoid incurring future charges, delete the resources created for this blog:
- Delete the CloudFormation stack.
- Remove any manually created resources.
- Disable video calling in your Amazon Connect instance if no longer needed.
Conclusion
This solution provides a secure and scalable way to implement video calling using Amazon Connect. By following this blog, you can enhance your customer support capabilities while maintaining a high level of security and efficiency. As video communication continues to grow in importance, this architecture will help you stay ahead of the curve in customer experience.
Related links
To learn more about the technologies or features used to create this solution, see the following: