AWS for Games Blog
Open source 3D game asset generation using AWS
Introduction
Open source 3D asset generation is evolving rapidly, creating a flood of competing models that produce inconsistent quality. High-quality outputs are hard to achieve reliably and cost effectively at scale. Unlike 2D image generation, producing a usable 3D asset requires solving geometry, texturing, and physical consistency all at once, resulting in longer time spent designing and testing different models.
The purpose of this post is to highlight how to convert 2D art and game assets into 3D assets using open source models on the lowest level of the tech stack possible: Amazon Elastic Compute Cloud (Amazon EC2) instances. The solution in this post is focused on testing the quality of assets and experimentation, rather than on creating production-ready assets. This post involves using Amazon Simple Storage Service (Amazon S3), Tripo (a third-party 3D model generator) on Amazon EC2, and MV-Adapter for multi-view texture generation.
Prerequisites
To follow the steps in this solution, you need to first have the following prerequisites in place:
- An AWS account with console access to AWS services. If you don’t have an AWS account, follow the steps to create an AWS Account.
- Launch a g4dn.2xlarge EC2 instance with AMI: Deep Learning OSS Nvidia Driver AMI GPU PyTorch 2.5.1 (Amazon Linux 2023) 20250216. See Find an AMI that meets the requirements for your EC2 instance for information about how to search for this AMI in the Launch EC2 Instance page. This AMI has CUDA preinstalled, which is a requirement for Tripo to run.
- Launch a g6e.2xlarge instance with AMI name: Deep Learning OSS Nvidia Driver AMI GPU PyTorch 2.5.1 (Amazon Linux 2023) 20250216. Because of elevated GPU vRAM requirements, this instance is required for texturing in the MV-Adapter segment.
- Create an S3 bucket in your AWS account to store your images and output.
Choose or create 2D images and upload to S3
The following figure shows two images that we generated of a medieval knight with a blank background. You can generate your own images or input images already created by your artists.
Upload the images you want to use to your S3 bucket for use later.
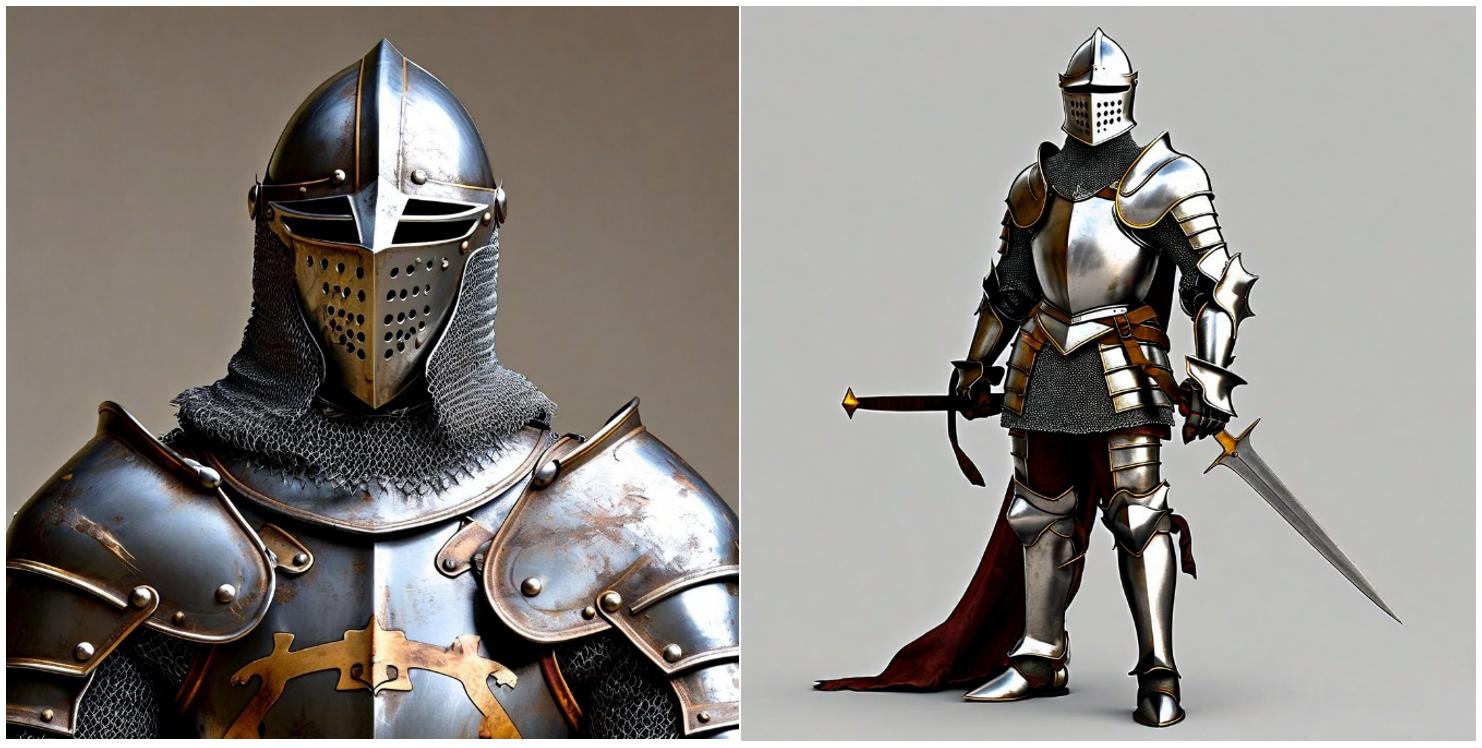
Figure 1: Uploaded images of a medieval knight
Note: The placeholder for the S3 bucket name in commands throughout this post will be <bucket-name>, replace it with the value for your environment.
Connect to the EC2 instance
To create the 3D model, first upload the generated 2D images to the S3 bucket and then connect to the launched g4dn EC2 instance.
- Navigate to the AWS Management Console for Amazon EC2 and select your g4dn instance for connection. You will use EC2 Instance Connect to connect to the instance using SSH.
- Choose Instances on the left navigation pane.
- On the Instances page:
- a. Select the checkbox next to the name of the instance that was launched.
- b. Choose Connect on the top of the page.

Figure 2: Select the instance to connect to.
- You should be on the page for EC2 Instance Connect. Choose Connect at the bottom of the page.
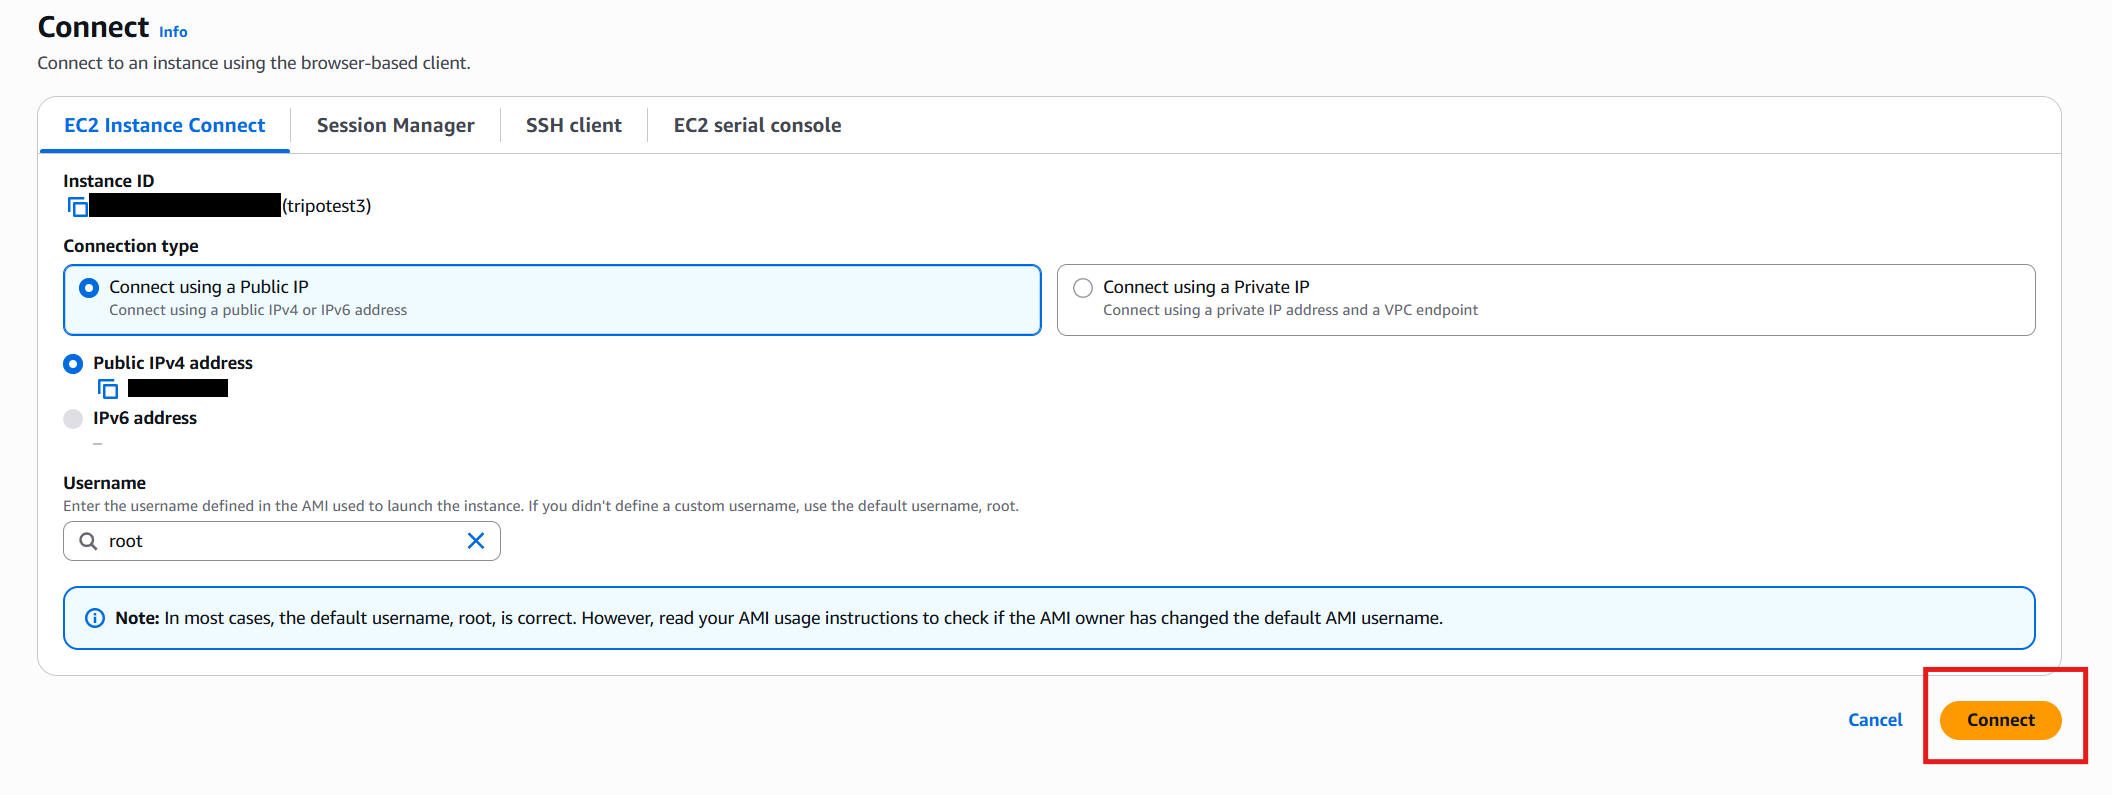
Figure 3: On the EC2 Instance Connect page, you will see the connection details.
If you encounter issues connecting to your instance, review the prerequisites for EC2 Instance Connect.
Install and run Tripo for 3D asset generation
With the assets uploaded onto the S3 bucket, you can install Tripo on the g4dn EC2 instance for 3D model generation. For more information about this model, see the TripoSG Github repository that’s used for this portion of the solution.
Step 1. In the EC2 Instance Connect console, run the following command to create a Tripo directory within the instance.
mkdir tripoNote: The CUDA version used by this AMI is 12.4 – this will be referenced in a dependency that will be installed in step 6. You can find the CUDA version on instance startup with EC2 Instance Connect, as shown in the following figure.
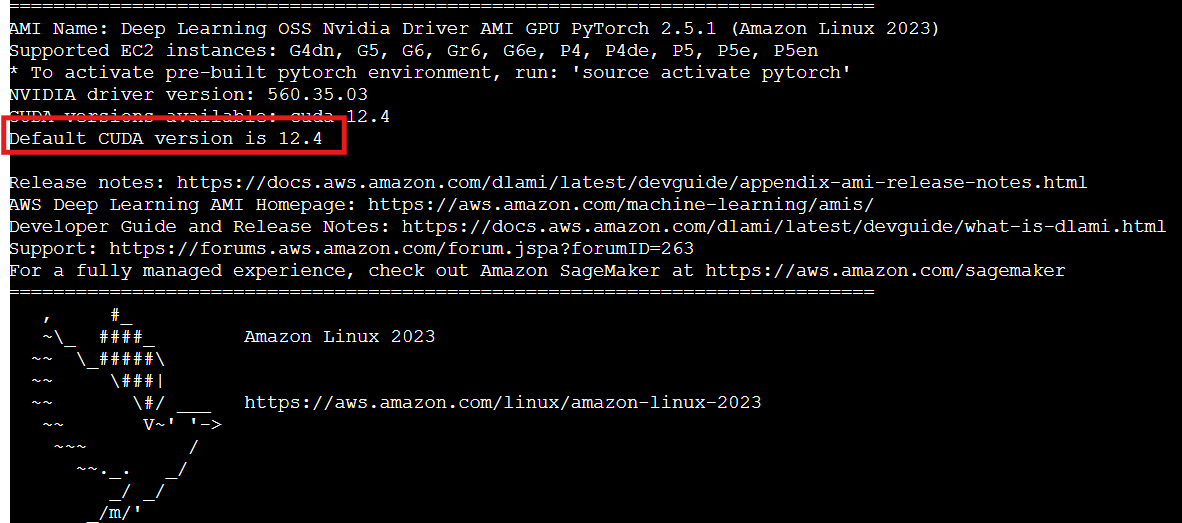
Figure 4: Check the CUDA version
Step 2. Navigate to the directory.
cd tripoStep 3. Clone the TripoSG repository and navigate into the TripoSG directory.
git clone https://github.com/VAST-AI-Research/TripoSG.git
cd TripoSG
Step 4. Run the following command to copy the 2D images from your S3 bucket. Replace <image-name> and <bucket-name> with the values for your image and bucket. In this example, we’re in the TripoSG directory.
aws s3 cp s3://<bucket-name>/<image-name>.jpegStep 5. Create a Python virtual environment using conda. The virtual environment will host the installed dependencies instead of them being stored on the instance.
conda create -n tripoSG python=3.10
conda init
Refresh the instance connect page and go back into the TripoSG directory.
cd TripoSG
conda activate tripoSG
Step 6. Now that the virtual environment has been created, install PyTorch. Note that the CUDA version (12.4) is referenced in the version of PyTorch that is being installed.
pip install torch torchvision --index-url https://download.pytorch.org/whl/cu124Step 7. Then, run the requirements.txt dependencies.
pip install -r requirements.txtStep 8. You can now test Tripo using your generated 2D images. Note that the –faces field determines the polygon count of the model. This can be changed to your desired value. Replace <image-name-3d> with the name of your 3D asset.
python -m scripts.inference_triposg --image-input <image-name>.jpeg --faces 5000 --output-path ./<image-name-3d>.glbStep 9. Save the output to the S3 bucket.
aws s3 cp your_3d_name.glb s3://<bucket-name>/<image-name-3d>.glbFor this example, we used the two knight images generated at the start and used them as input for the Tripo model with faces set to 20000. The following image shows the output of the full 3D model from one quarter rotated front and back views.
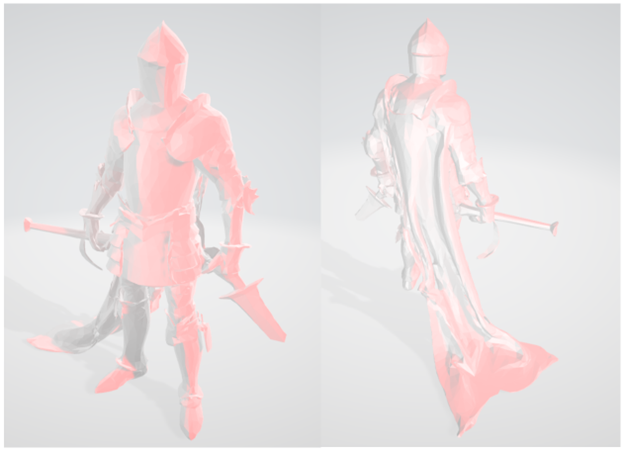
Figure 5: One quarter rotated front and back views of the entire 3D model
The next image shows a front and side view of top third of the 3D output of the same model.
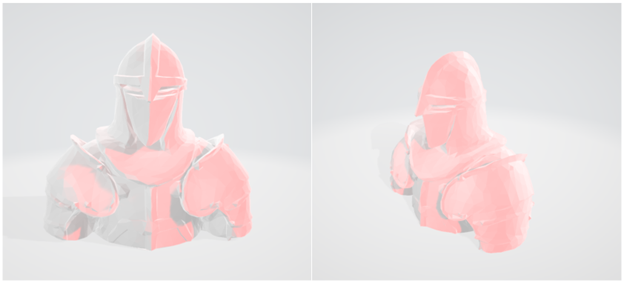
Figure 6: Front and side views of the top third of the 3D model
Use MV-Adapter for multi-view generation
Now that you have created a model, you can use MV-Adapter to apply textures through multi-view image generation. You will use the generated 2D image as a reference for the texture and upload the previously generated .glb model as the asset to be modified.
Step 1. Connect to the g6e instance and upload the generated images using the steps from the Connect to the EC2 instance and uploading the images section.
Step 2. After you have connected to the instance, create a directory and clone the MV-Adapter GitHub.
mkdir mvadapter
cd mvadapter
git clone https://github.com/huanngzh/MV-Adapter.git
cd MV-Adapter
Step 3. Create the conda environment to have an environment to install the dependencies necessary for MV-Adapter to run.
conda create -n mvadapter python=3.10
conda init
Step 4. Refresh the terminal and go back into the MV-Adapter directory before running MV-Adapter:
cd mvadapter
cd MV-Adapter
conda activate mvadapter
Step 5. Now you need to install the long list of dependencies and specific versions needed for MV-Adapter to run:
pip install torch torchvision --index-url https://download.pytorch.org/whl/cu124
pip install cvcuda-cu12
pip install -r requirements.txt --no-build-isolation
mkdir -p checkpoints
wget https://github.com/xinntao/Real-ESRGAN/releases/download/v0.2.1/RealESRGAN_x2plus.pth -O ./checkpoints/RealESRGAN_x2plus.pth
wget https://github.com/Sanster/models/releases/download/add_big_lama/big-lama.pt -O ./checkpoints/big-lama.pt
Step 6. The next step is to install the additional dependencies needed for MV-Adapter to work. This command executes multiple commands sequentially. Make sure to allow the downloads as prompted.
sudo yum install mesa-libEGL-devel && pip install pymeshlab==2022.2 && pip install jaxtyping && pip install ninja && pip install gltflib && pip install transformers==4.56.2 && pip install typeguardStep 7. With all the dependencies installed, run the script with the sample assets provided in the GitHub repository.
python -m scripts.texture_i2tex --image assets/demo/ig2mv/1ccd5c1563ea4f5fb8152eac59dabd5c.jpeg --mesh assets/demo/ig2mv/1ccd5c1563ea4f5fb8152eac59dabd5c.glb --save_dir outputs --save_name i2tex_sample --remove_bgStep 8. You can use the meshes made in Tripo and run them through MV-Adapter to apply a texture. However, some of the meshes created by Tripo are non-manifold, and you will need to convert them to manifold objects for MV-Adapter to work.
a. Create an inputs directory to keep things orderly.
mkdir inputsb. Copy the .glb object from the g4dn instance into this one:
aws s3 cp s3://<bucket-name>/<image-name-3d>.glb /root/mvadapter/MV-Adapter/inputsc. Copy and paste the custom Python function from this file to the EC2 instance to convert the asset to manifold.
d. Create the script using nano.
nano fix_manifold.pye. Copy and paste the code into the nano editor and then use Ctrl+O to save and Ctrl+X to exit.
f. Run the following command. Replace <image-name-3d-manifold> with the name of your output file.
python fix_manifold.py inputs/<image-name-3d>.glb inputs/<image-name-3d-manifold>.glbStep 9. Now that you have converted meshes to manifold objects, you can upload them to the EC2 instance for texturing. Copy the 2D asset into the EC2 instance. Replace <image-name> with the name of your 2D asset.
aws s3 cp s3://<bucket-name>/<image-name>.jpeg /root/mvadapter/MV-Adapter/inputsStep 10. After you have uploaded the assets, use the mv-adapter python script to texture your 3D asset. Replace <image-name-3d-textured> with the name of your textured output.
python -m scripts.texture_i2tex --image /root/mvadapter/MV-Adapter/inputs/<image-name>.jpeg --mesh /root/mvadapter/MV-Adapter/inputs/<image-name-3d-manifold>.glb --save_dir outputs --save_name <image-name-3d-textured> --remove_bgStep 11. Load the asset in your output S3 bucket and download it to view.
aws s3 cp /root/mvadapter/MV-Adapter/outputs/<image-name-3d-textured>.glb s3://<bucket-name>/<image-name-3d-textured>.glbThe following image shows the original generated 2D image on the left and front view of the final 3D asset on the right.
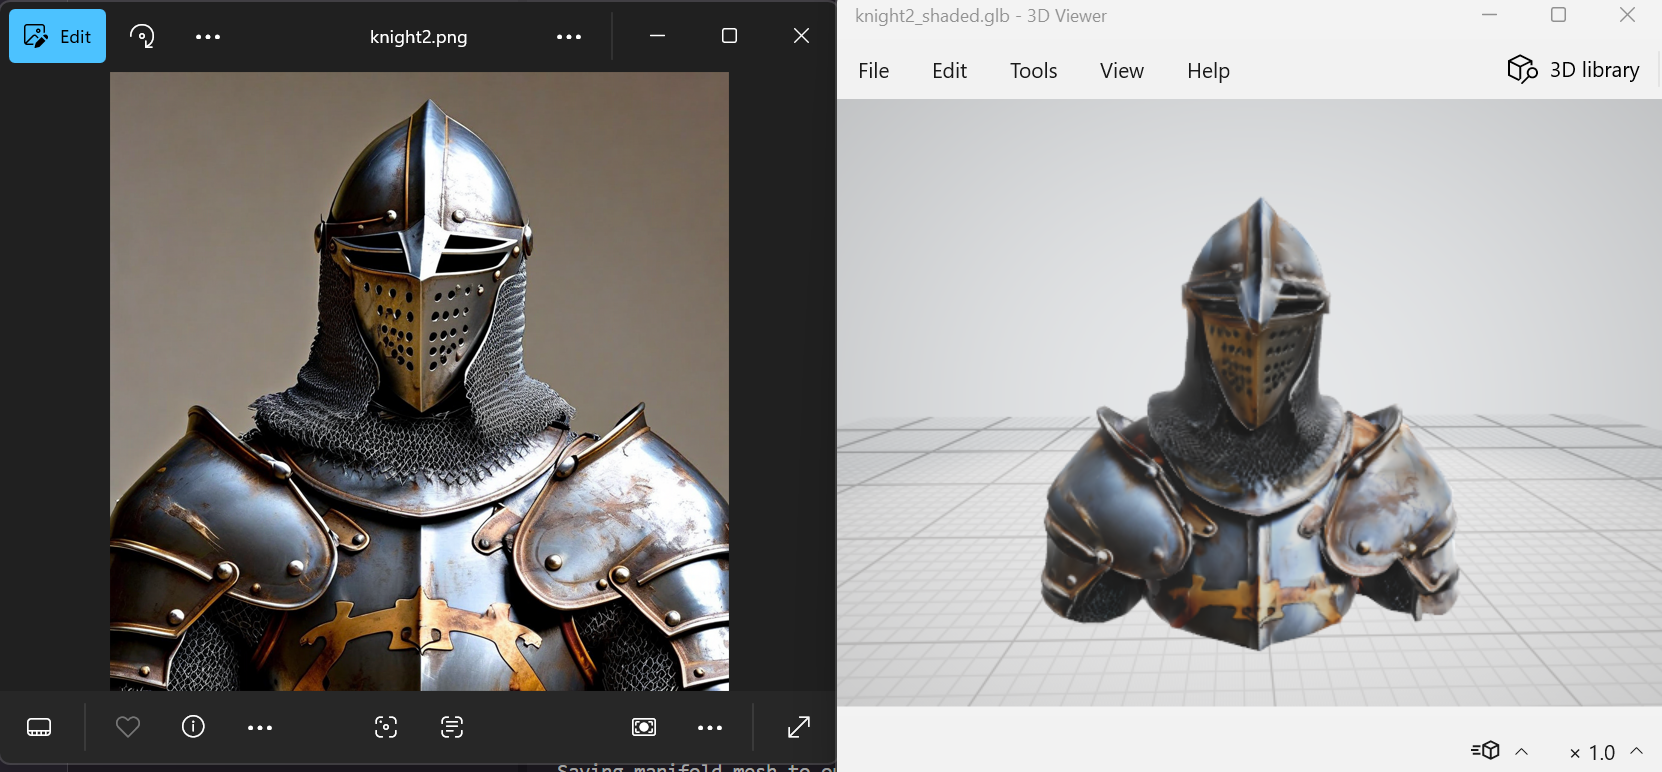
Figure 7: Original 2D image and front view of the generated 3D image
The following image shows the original 2D image on the left, and the back view of the final 3D asset on the right.
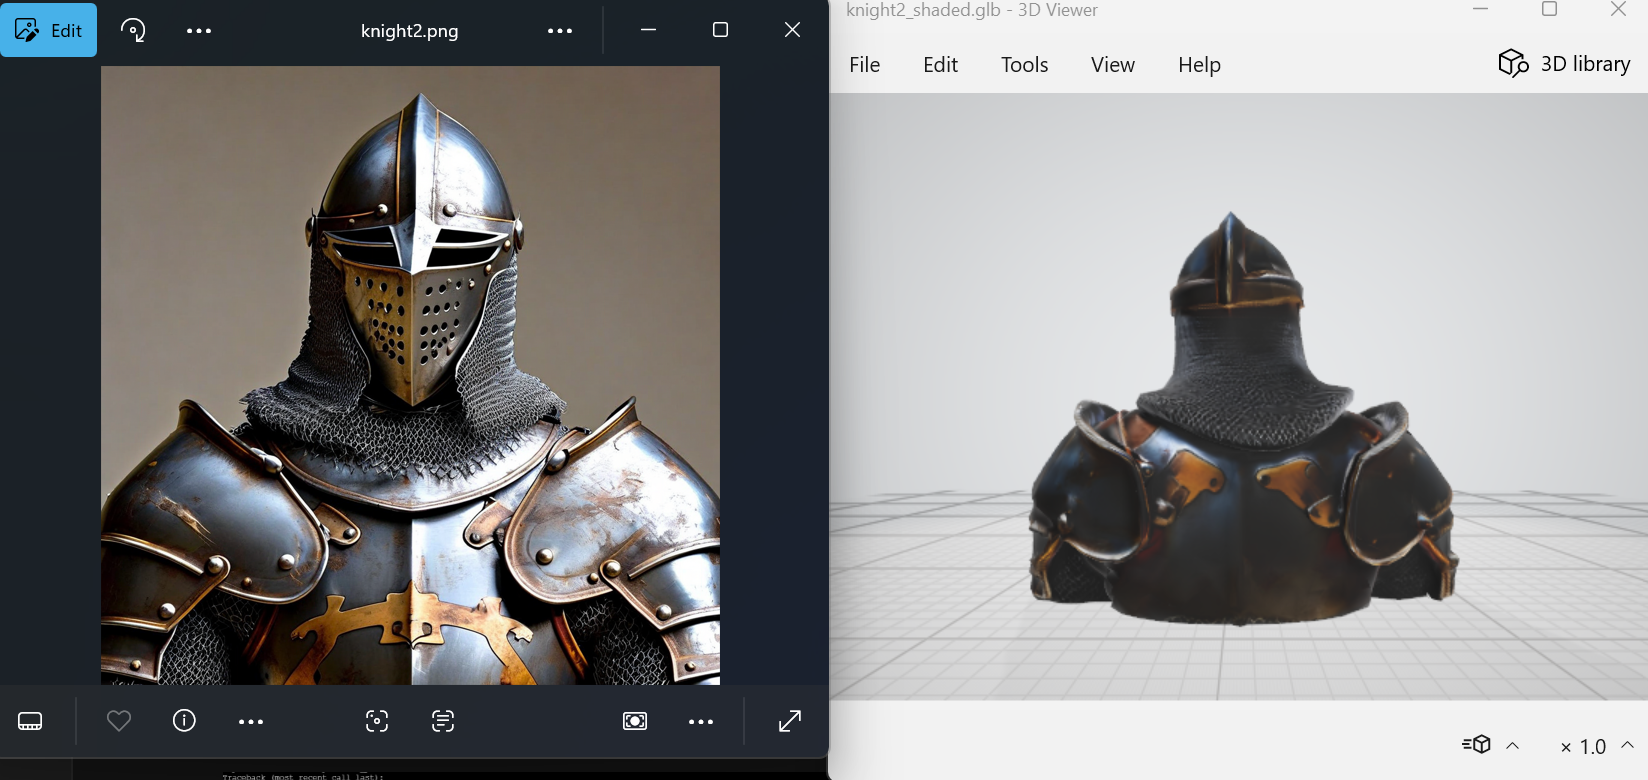
Figure 8: Original 2D image and back view of the generated 3D image
Conclusion
In this solution, we showed you the process of hosting 3D asset generation on AWS. You can use this solution to help decide which open source 3D asset model will work best for your game. Contact an AWS representative to learn how we can help your game studio get started on the cloud.