Front-End Web & Mobile
Amazon Location Service enables Position Filtering to reduce position jitter and cost of tracking.
Amazon Location Service introduces Position Filtering as a new option to Trackers that enables cost reduction and reduces jitter from inaccurate device location updates, along with the addition of three position filtering options.
DistanceBased filtering ignores location updates wherein devices have moved less than 30 meters (98.4 ft). When utilizing DistanceBased position filtering, Amazon Location won’t evaluate these updates against geofences, nor will it store the updates. A geofence is a virtual perimeter for a real-world geographic area.
The average location position accuracy is within approximately 15 meters (49.21 ft) for most mobile devices. For example, a mobile phone with a good signal will record on average a lower bound of 10 meters horizontal accuracy with 67% confidence. Horizontal accuracy represents the radius of the margin of error (confidence) of the measurement.
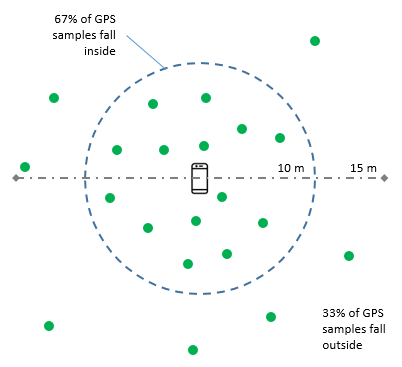
Figure 1: Average mobile phone location accuracy
This means that for a mobile phone sitting still while continuously sampling the GPS position, approximately two-thirds of the samples will be within 10 meters of accuracy, while the remaining one-third will be further away.
DistanceBased filtering can reduce issues caused by location jitter when displaying device trajectories on a map, such as bouncing multiple consecutive entry and exit events when devices are near a geofence border. In addition, this helps reduce application costs by evaluating fewer positions against linked geofence collections, as well as by storing few positions, thereby leading to a smaller number of records in GetDevicePositionHistory responses.
If you are utilizing specialized hardware with better accuracy (for example, precision vehicle tracking equipment) in order to calculate device positions, then utilize default TimeBased filtering. In TimeBased filtering, every location update is evaluated against linked geofence collections, but not every location update is stored. If your update frequency is more often than 30 seconds, then only one update per 30 seconds is stored for each unique device ID.
If you using a device that provides an accuracy measurement, such as mobile devices, consider using Acccuracy-based filtering. The accuracy of each position measurement is affected by many environmental factors, including GPS satellite reception, landscape, and the proximity of wifi and bluetooth devices. Most devices, including most mobile devices, can provide an estimate of the accuracy of the measurement along with the measurement. With AccuracyBased filtering, Amazon Location ignores location updates if the device moved less than the measured accuracy.
When accuracy is not provided, it is treated as zero, and the measurement is considered perfectly accurate. You can also use accuracy-based filtering to remove all filtering. If you select accuracy-based filtering, but override all accuracy data to zero, or omit the accuracy entirely, then Amazon Location will not filter out any updates.
Introducing Tracking with position filtering
Set up an Amazon Location Service Tracker
Step 1: To set up a tracker in the Amazon Location Service console, select Trackers from the list of available features.
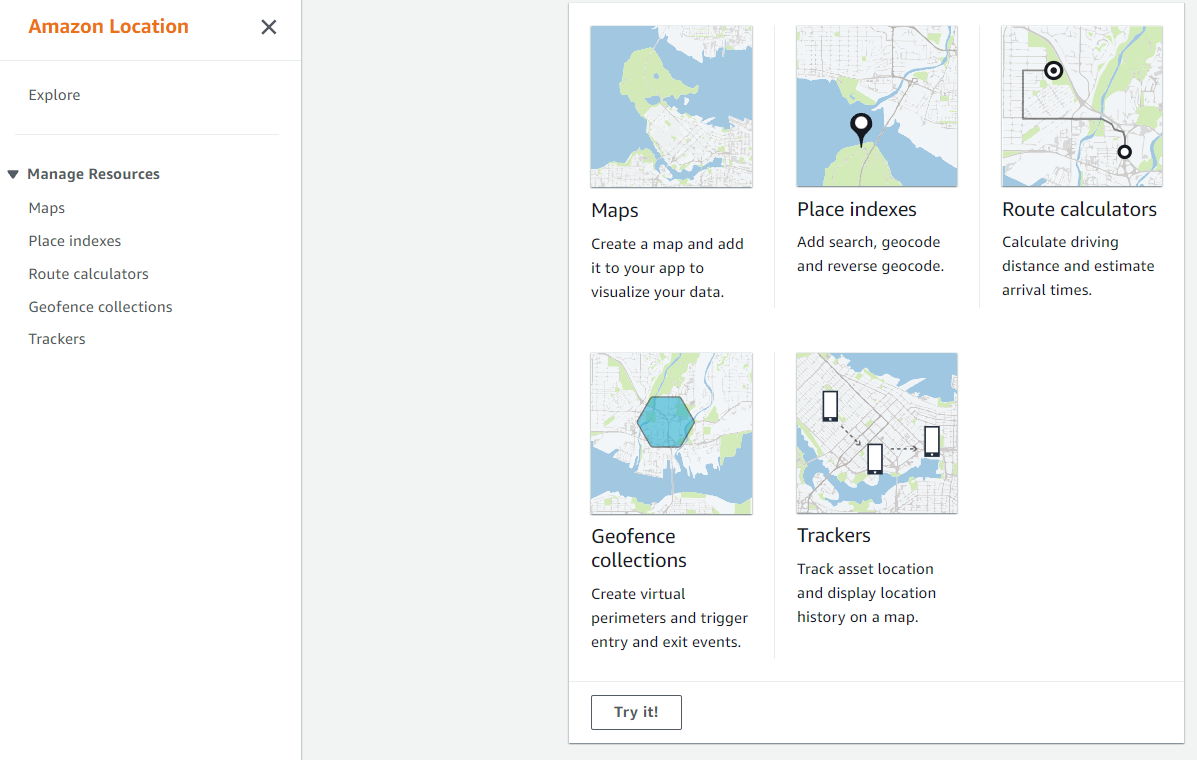
Figure 2: Amazon Location Service console
Step 2: From the Trackers screen, select the Create Tracker button in order to add a tracker to the list of My trackers.
Figure 3: Trackers console
Step 3: Give the tracker a “Name”, and select the pricing plan type that you want to use. Providing a description is optional.
Figure 4: Create Tracker
Step 4: Select a Position Filtering method.
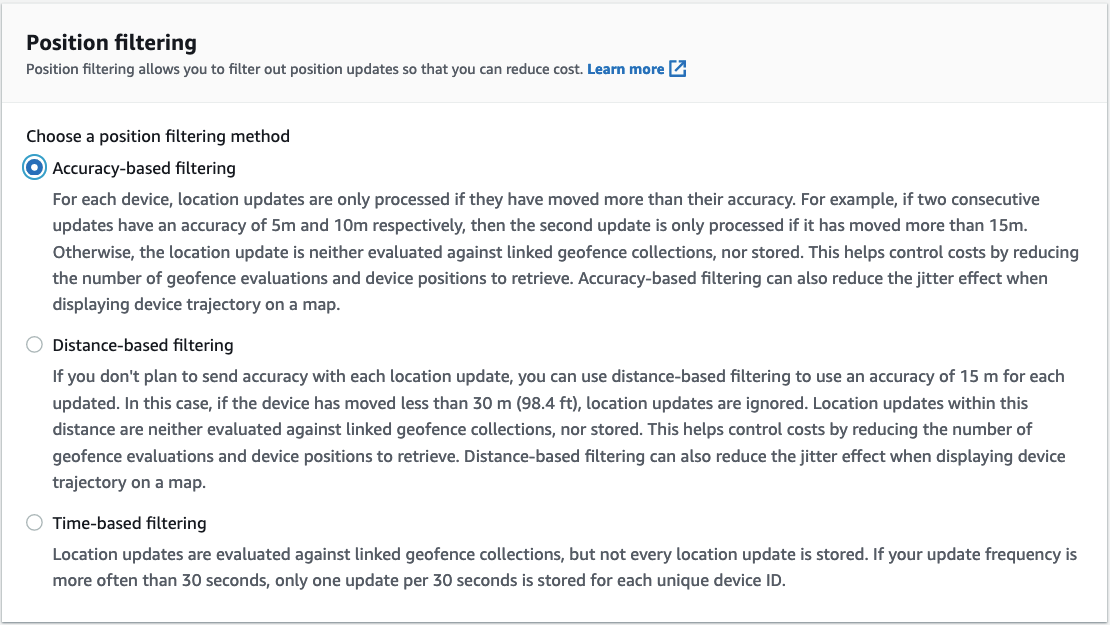
Figure 5: Filtering options
The accuracy-based filtering option takes the accuracy information sent as metadata into consideration when deciding to store and evaluate a position against a geofence.
If you receive two consecutive updates of 5m and 10m, for example, with an accuracy of 15m, , then the second update is only processed if it has moved more than 15m.
The distance-based filtering option causes device location updates to be stored and evaluated only when the position has moved over 30 meters from what was previously stored.
This method is best for devices without high-accuracy positioning. This option helps reduce the position jitter of device updates, where samples can move around within the 15 meter radius, by only evaluating device position updates against linked geofence collections when they have moved at-least 30 meters.
The default time-based filtering method ensures that no matter the frequency of the location updates from a unique device, only one update per-30 second window will be stored. Every device-position update, no matter their frequency, is evaluated against linked geofence collections.
Time-based filtering is best for devices producing highly-accurate device positions, such as industrial or precision vehicle tracking systems. This is because position updates will be evaluated against linked geofence collections for the active tracking of a device within a geofence.
Step 5: Provision the Tracker by choosing the Create button. This will take you to the Tracker summary page, as shown in Figure 6.
Figure 6: Tracker details
Geofence collections
Once you have the tracker configured, link it to a Geofence Collection.
A geofence collection groups a set of geofences together, and it can be linked to a tracker. When linked, each device position update is evaluated against each geofence in order to determine whether it has entered or exited any of them. If so, then an EventBridge event is published for each device/geofence pair. This enables actions to be taken based on position updates received from devices. For example, you can trigger an event displaying a notification when a customer who ordered coffee using a mobile app enters the virtual perimeter near the store where it’s being made.
For more details on creating a Geofence Collection, refer to Geofencing an area of interest using Amazon Location.
Test the Tracker
Utilize the following AWS Lambda function to send locations to your Amazon Location Tracker.
Step 1: Create a Lambda Function
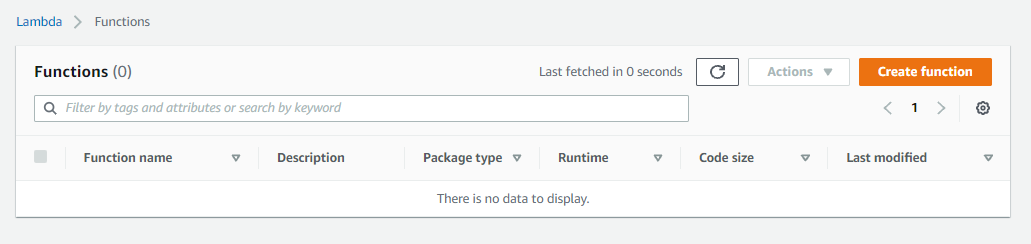
Figure 7: Lambda console
In the AWS Lambda console, select Create function in order to navigate to the new function wizard.
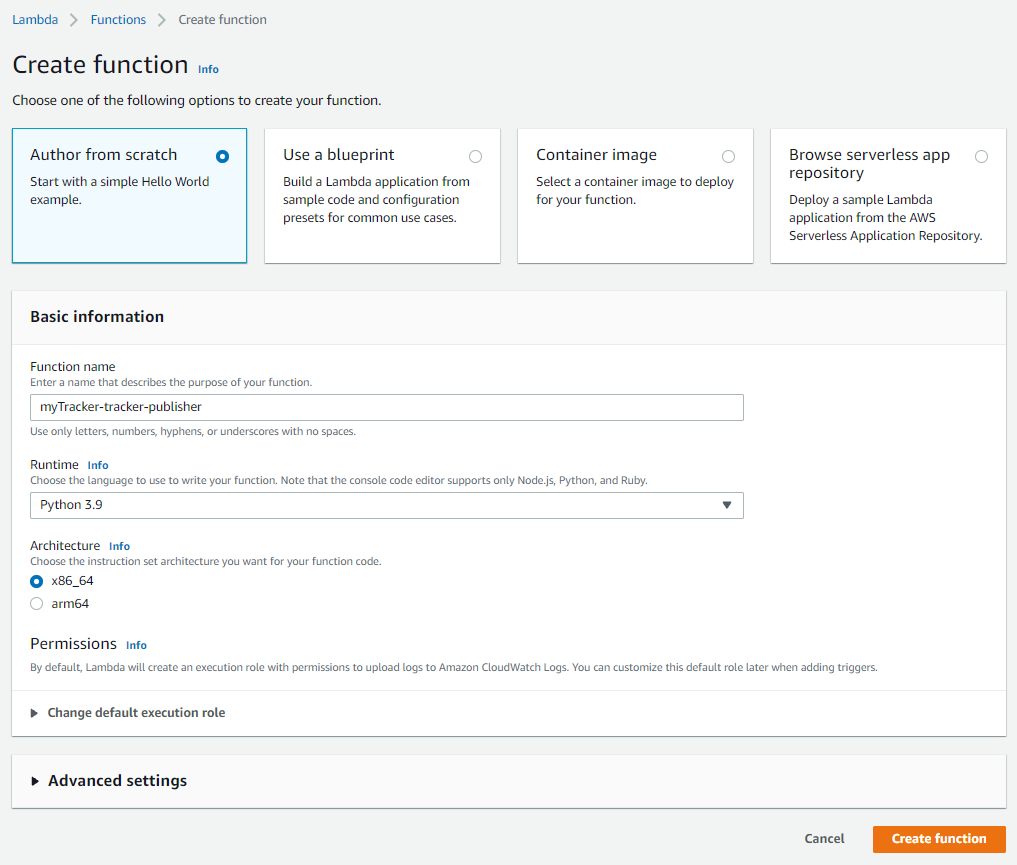
Figure 8: Create Lambda function wizard
Select the Author from scratch option, and then set the Function name to myTracker-tracker-publisher (or similar if you wish to follow your own naming standards).
Select Python 3.9 for the Runtime, and leave the rest of the options with their default values. Choose Create function in order to finalize the creation of your Lambda function.
Step 2: Writing the Lambda
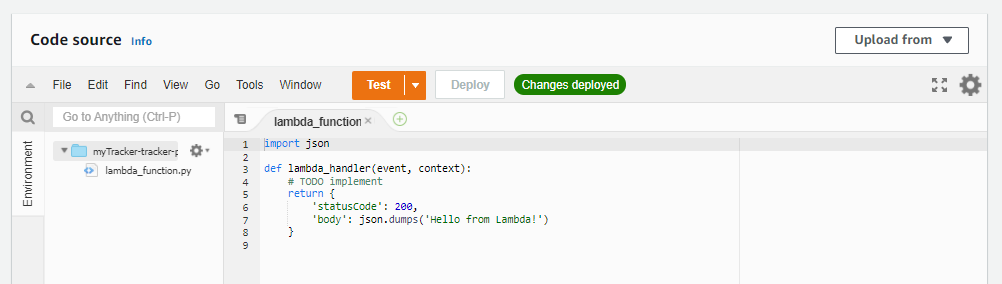
Figure 9: Lambda source code
Once the Lambda function has been created, the Code source will contain a lambda_function.py with a default Python handler, as seen in Figure 8.
Replace the content of lambda_function.py with the following code:
from datetime import datetime
import json
import boto3

# Update this to match the name of your Tracker resource
TRACKER_NAME = "myTracker"

client = boto3.client("location")

def lambda_handler(event, context):
    updates = [{
        'DeviceId': event['deviceid'],
        'SampleTime': datetime.now().isoformat(),
        'Position': [event['long'], event['lat']]
    }]
    client.batch_update_device_position(TrackerName=TRACKER_NAME, Updates=updates)
    return {
        'statusCode': 200,
        'body': json.dumps('Success')
    }
Step 3: Configure Lambda permissions
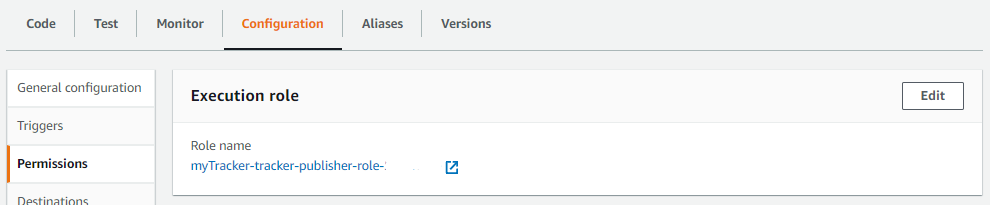
Figure 10: Allow the Lambda function to update your tracker
In the Lambda Configuration tab, go to the Permissions option and select the execution role. The name should be similar to myTracker-tracker-publisher-role-<id>. This will open the Identity and Access Management execution role.
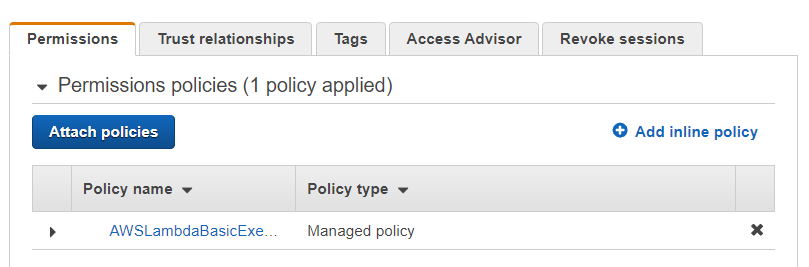
Figure 11: Role Summary
From the Lambda execution roles summary page, choose Add inline policy and open the JSON tab.
Overwrite the policy with the following JSON:
{
  "Version": "2012-10-17",
  "Statement": [
    {
      "Effect": "Allow",
      "Action": "geo:BatchUpdateDevicePosition",
      "Resource": "arn:aws:geo:*:*:tracker/myTracker"
    }
  ]
}
This will let your Lambda function update device positions managed by the myTracker resource.
Choose Review policy, set the name of your policy to AmazonLocationUpdateMyTracker, and select Create policy in order to finalize the policy creation.
Step 4: Send test data to Location Tracker
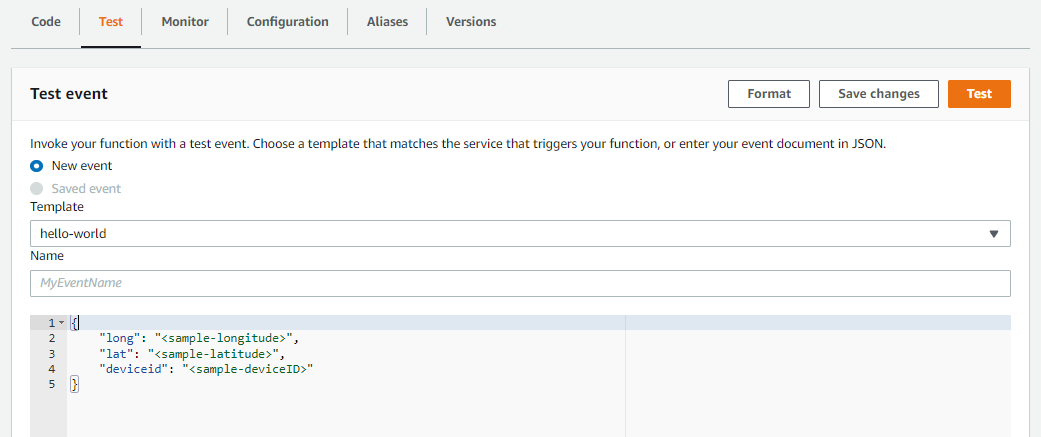
Figure 12: Lambda Test event
From the Lambda Test tab, update the test event with the following JSON:
{
    "long": <sample-longitude>,
    "lat": <sample-latitude>,
    "deviceid": <sample-deviceID>
}
Make sure to replace <sample-longitude>, <sample-latitude>, and <sample-deviceID> each with your test data for longitude, latitude, and a device ID.
Executing the Lambda test will send the test data to the Lambda function’s event_handler as the event parameter. Then, the event_handler will send the test data to Amazon Location Service’s BatchUpdateDevicePosition API.
For a more detailed look at testing Amazon Location Trackers, read this walkthrough.
Get started today
Tracker position filtering options are now available in Amazon Location Service, and in all Regions where Amazon Location Service is supported.
Evaluate Amazon Location Service by using the free tier during your first three months of request-based usage. During that time, you will not be billed for monthly request-based usage of up to 200,000 positions written and 10,000 batch-position reads.
Learn more about this new capability by reading its documentation.