Migrate an ASP.NET Web Application to Elastic Beanstalk
with the Windows Web Application Migration Assistant
Introduction
Implementation
Sign up for AWS
The CloudFormation template used in this tutorial launches a t3.medium EC2 instance, which is not included in the Free Tier. You can estimate EC2 costs on the EC2 pricing page.
Already have an account? Sign in.
Set up and configure the stack
Use CloudFormation to launch the EC2 instance that will host the sample website. Then, set up the required IAM permissions.
1. Launch an EC2 instance
Use CloudFormation to launch an EC2 instance in the US-East-1 Region.
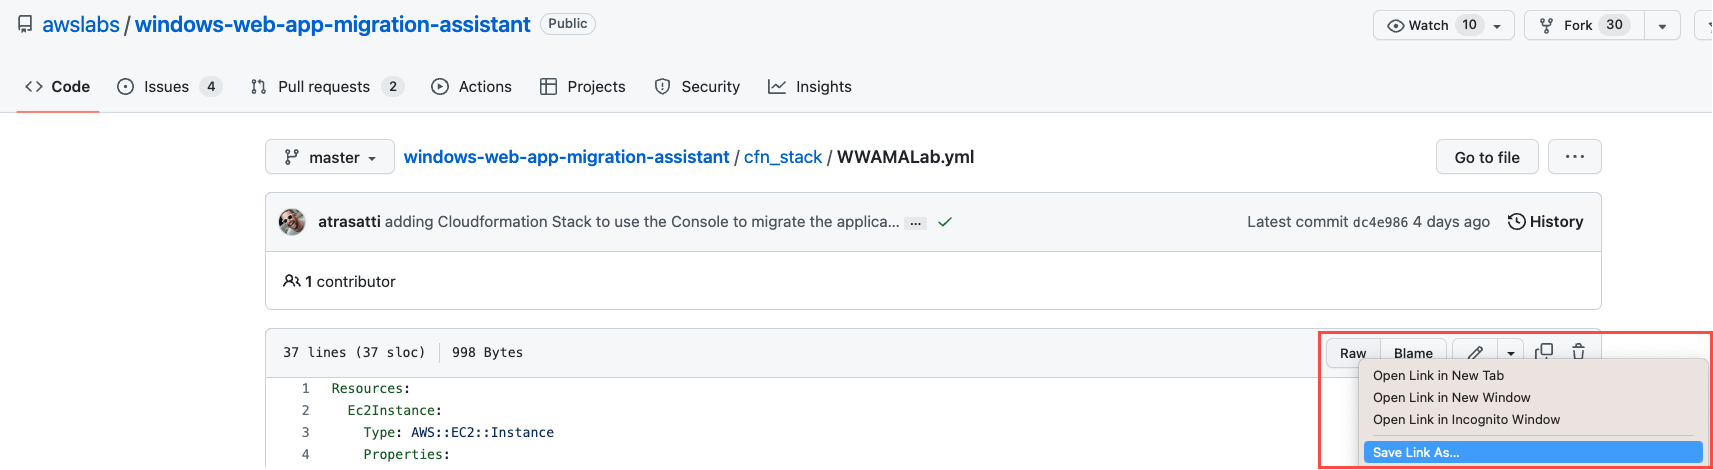
First, you will need to download the YAML file we will use for the CloudFormation template from GitHub. In GitHub, open the context (right-click) menu of the Raw button at the top of the file, select Save Link As. Choose the location on your computer where you want to save the file, and select Save.
2. Create the stack
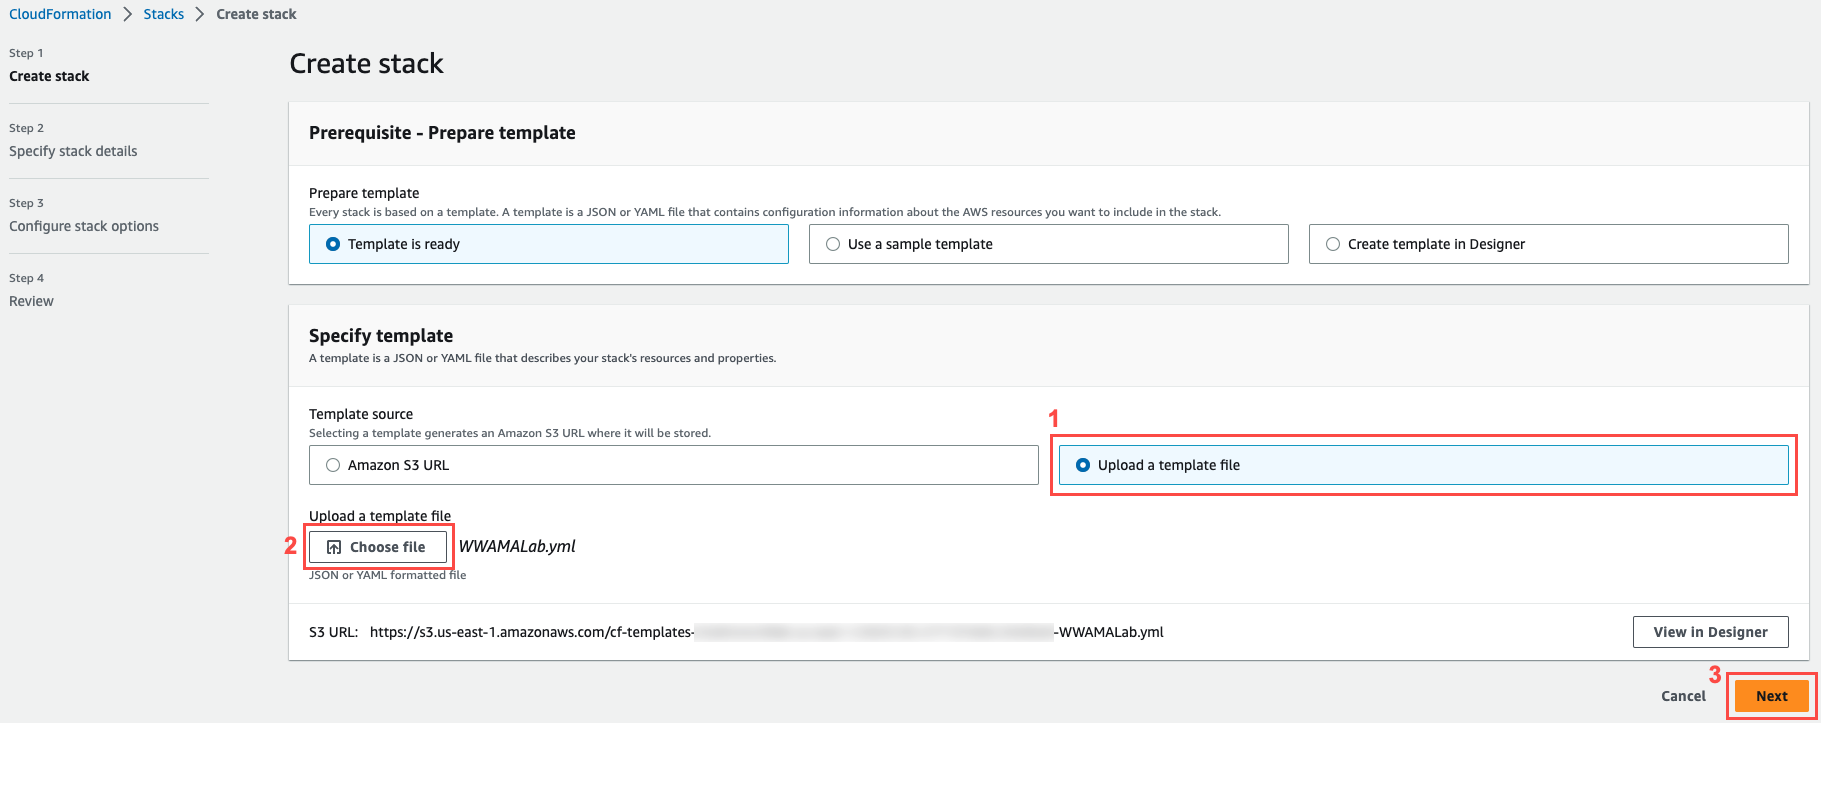
Once you have saved the file locally, open the Create stack page within the AWS CloudFormation console. In the Specify template section, select Upload a template file.
Choose the Choose file button and navigate to the YAML file on your local machine and select Open.
Then choose Next.
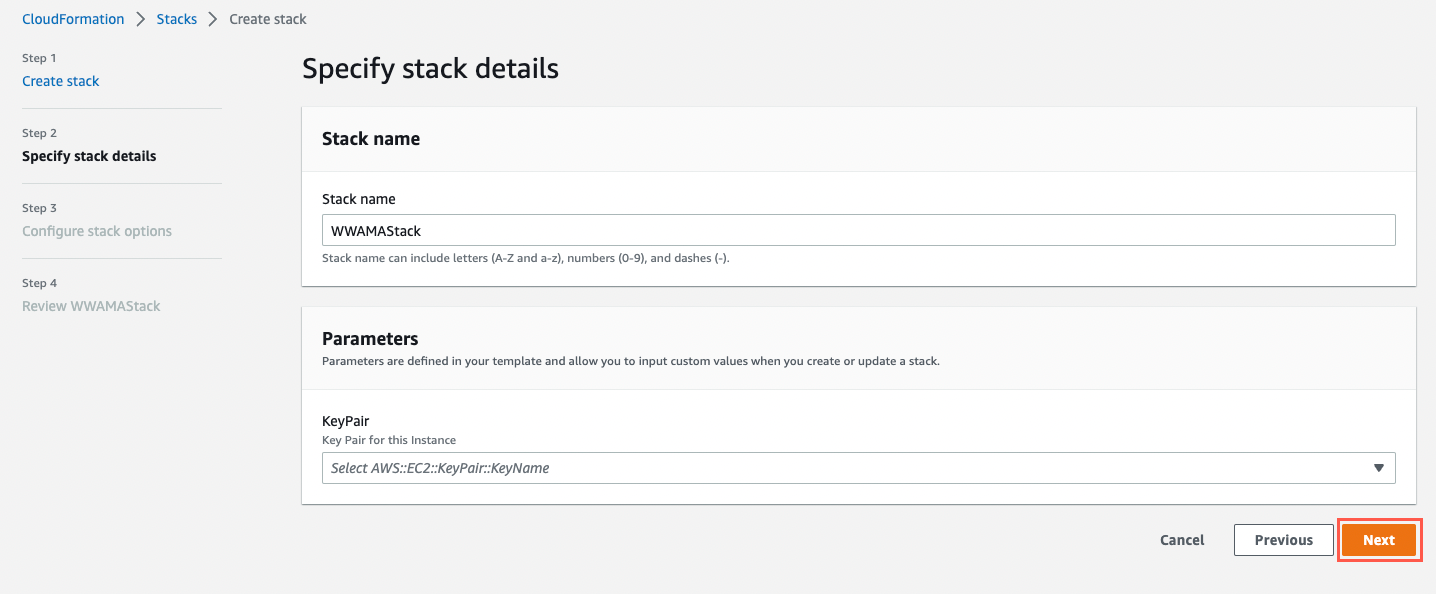
3. Add a key pair
Select an existing key pair or create a key pair if you do not have one.
Then choose Next.
4. Review the configuration
On the Configure stack options screen, choose Next. At the bottom of the Review screen, choose Submit.

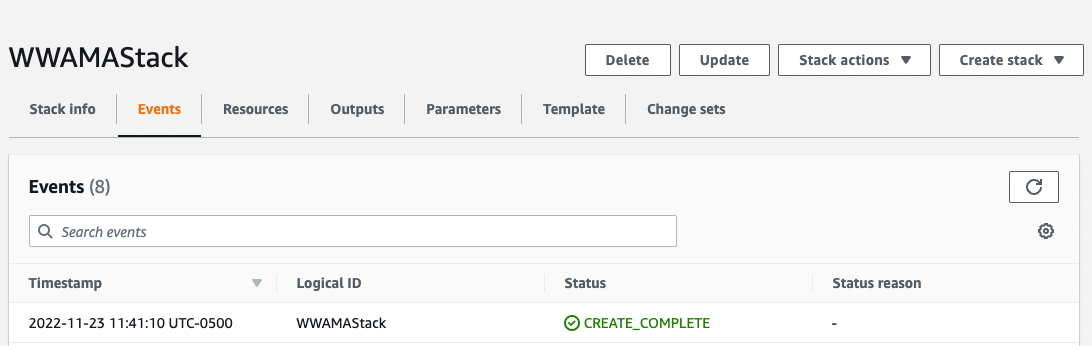
5. Verify completion
Once the stack has been created, you will see its status change to CREATE_COMPLETE.
Create the IAM user
1. Log into the console and add a user
Log in to the IAM console.
In the left navigation pane, select Users, then choose Add users.
Enter the User name MigrationUser, check the box for Programmatic access, then choose Next:Permissions.

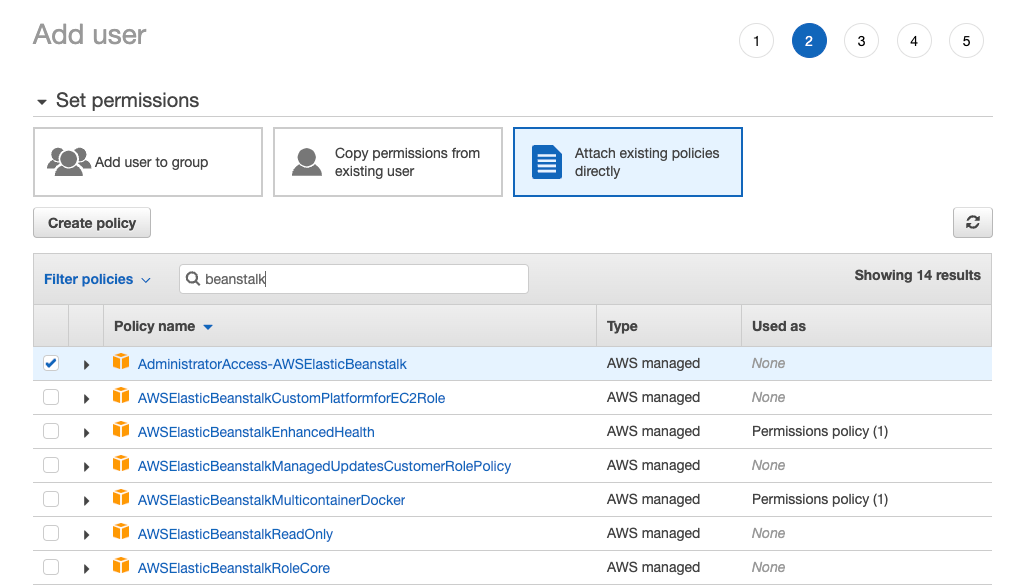
2. Attach Elastic Beanstalk policy
Select Attach existing policies directly, and enter beanstalk in the search bar to filter the policies. Select the checkbox next to AdministratorAccess-AWSElasticBeanstalk.
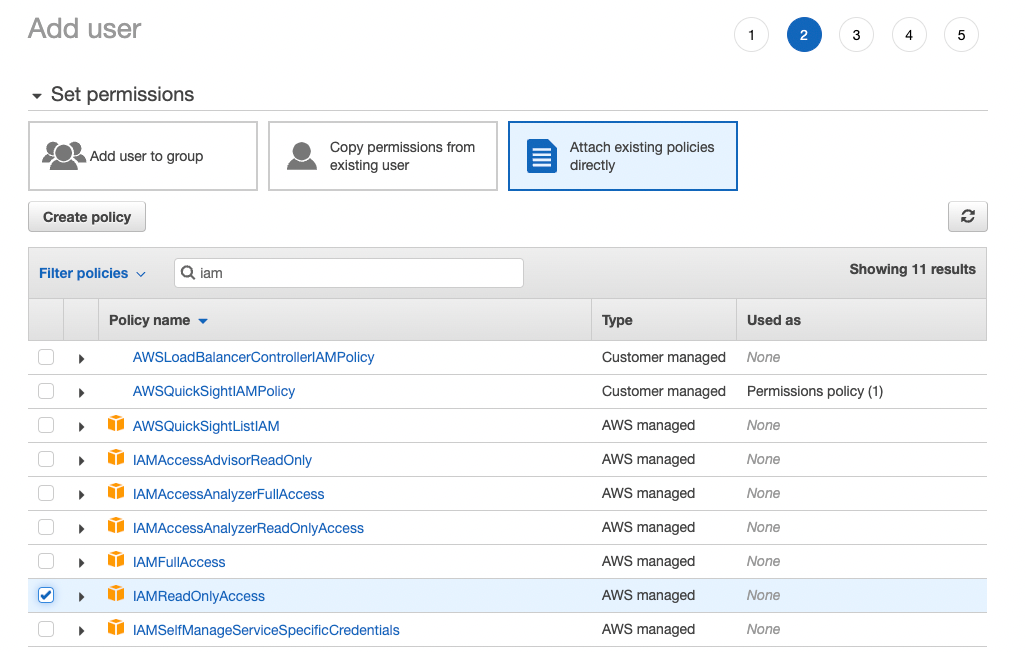
3. Attach IAM policy
Enter iam in the search bar and select the checkbox next to IAMReadOnlyAccess.
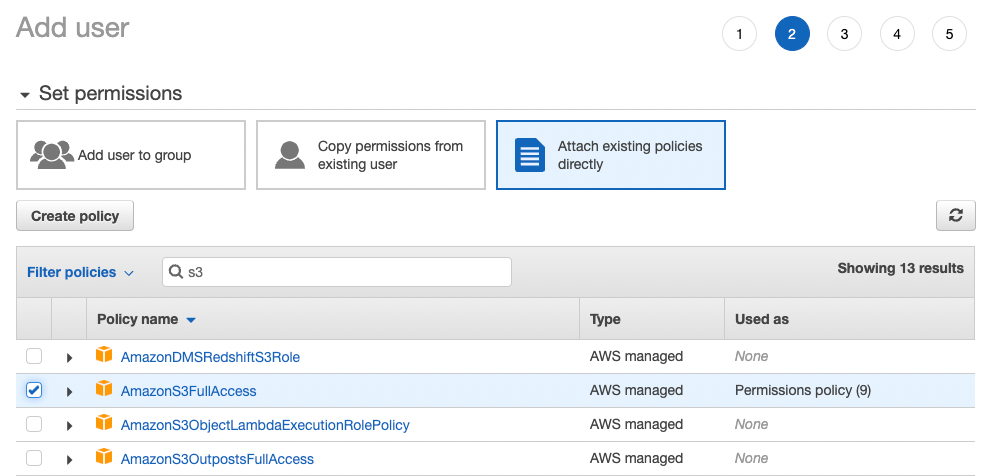
4. Attach S3 policy
Enter s3 in the search bar and select the checkbox next to AmazonS3FullAccess.
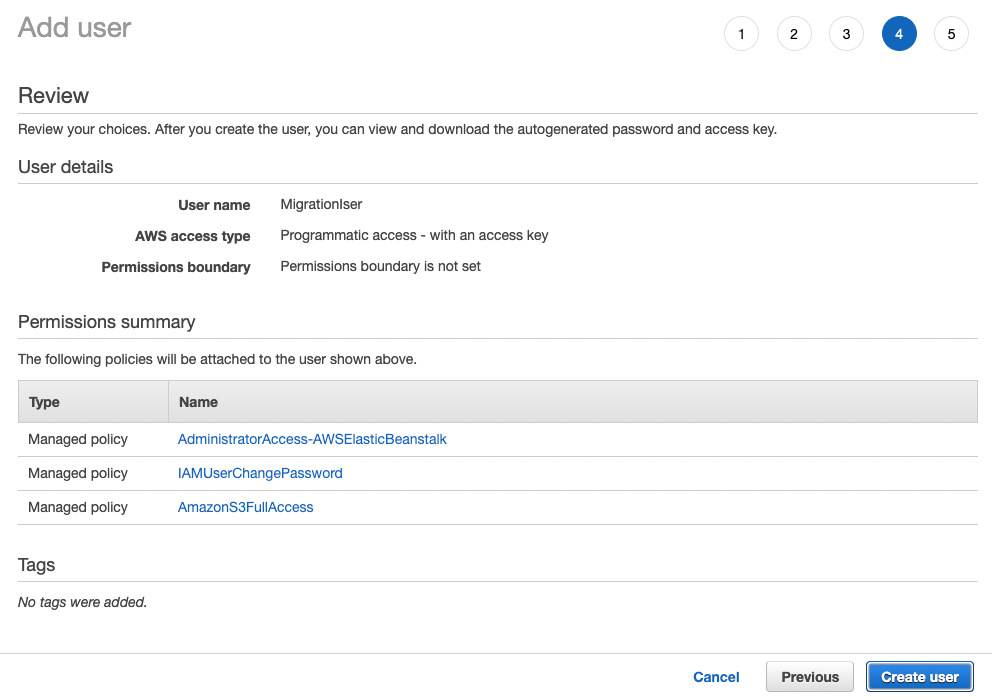
5. Review configuration and create user
Choose Next:Tags, then Next:Review, and then Create user.
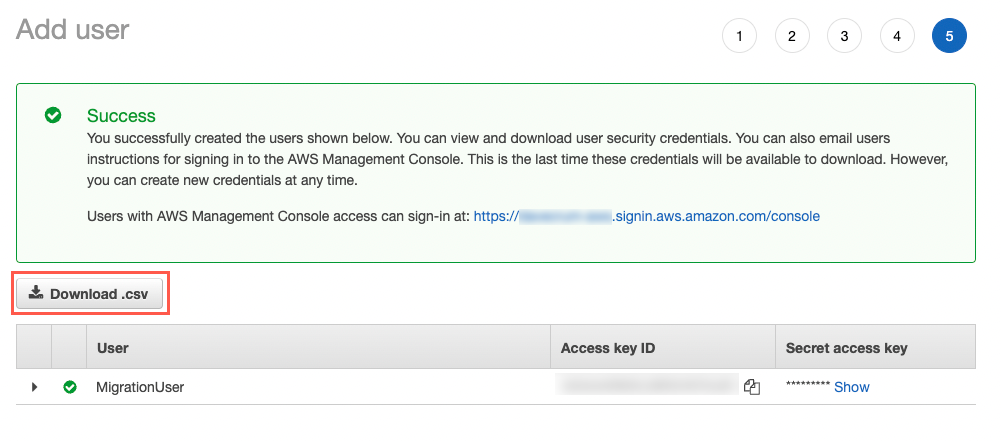
6. Download credentials
After the user is created, choose the Download .csv button when the prompt appears.
Log in to the EC2 console and set up to run the WWAMA tool
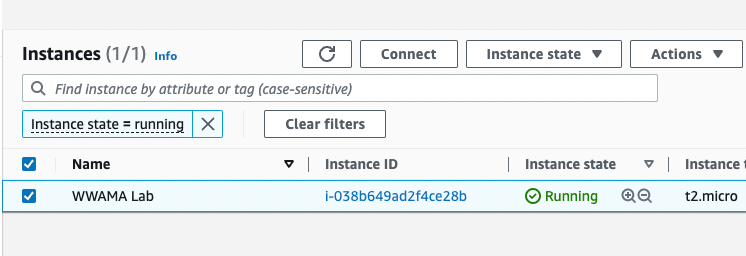
1. Log into the EC2 console
Log in to EC2 console.
Select the WWAMA instance and choose Connect.
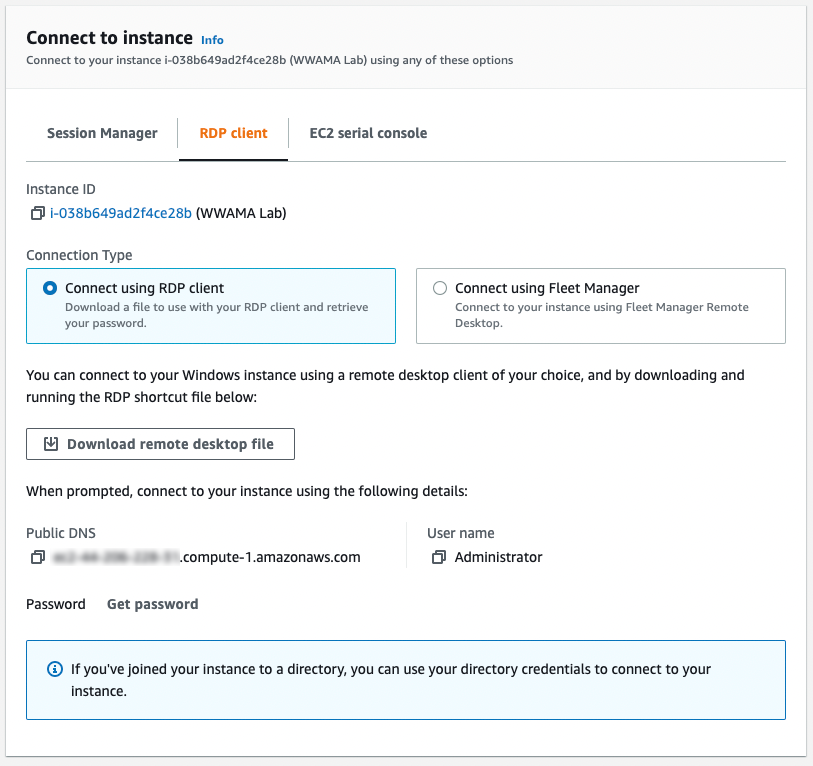
2. Connect to the instance
Select the RDP client tab, then choose the Download remote desktop file button and save the RDP file. Then choose Get password.
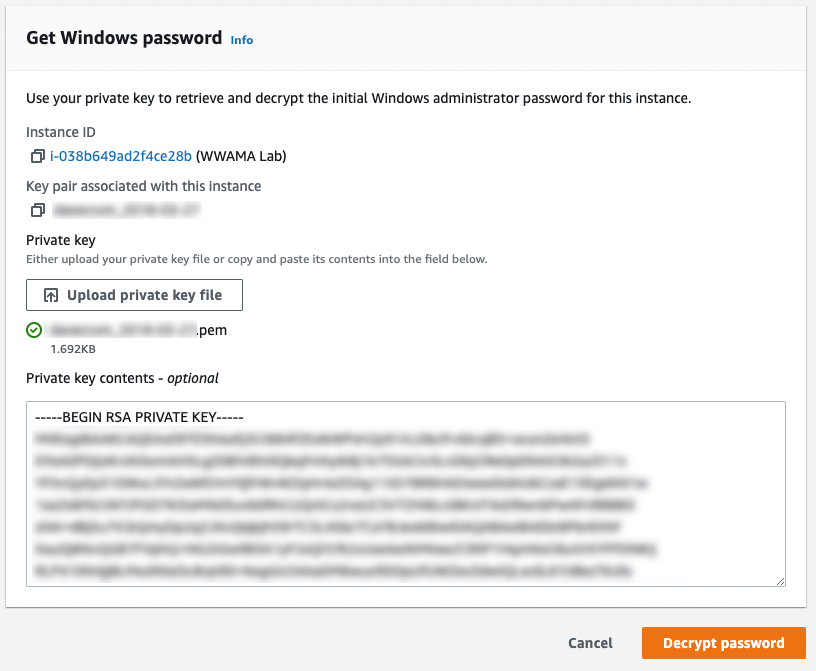
3. Upload private key
Choose Upload private key file to upload your private key, then choose Decrypt password to get your Windows Server password. You will see the password in plain text.
Copy it because you will need it in the next step.
4. Log into the instance
Log in to the EC2 instance using the RDP file you saved earlier and provide your password.
5. Open a PowerShell terminal
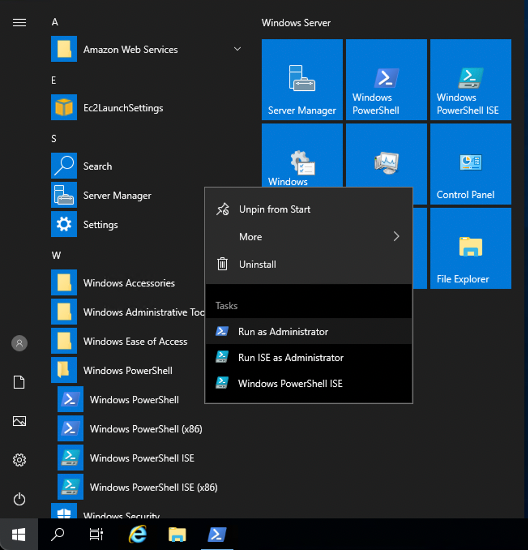
Open a PowerShell terminal as an Administrator by choosing the Windows icon in the lower left corner of the screen, open the Windows PowerShell folder, open the context (right-click) menu for Windows PowerShell, and then choose Run as Administrator.
6. Configure credentials
In the PowerShell window, run the commands provided in the PowerShell sample to configure the AWS credentials. Replace ACCESS_KEY and SECRET_ACCESS_KEY with the values in the CSV file you downloaded earlier during the creation of the MigrationUser.
PS C:\> Import-Module AWSPowerShellPS C:\> Set-AWSCredential -AccessKey ACCESS_KEY -SecretKey SECRET_ACCESS_KEY -StoreAs default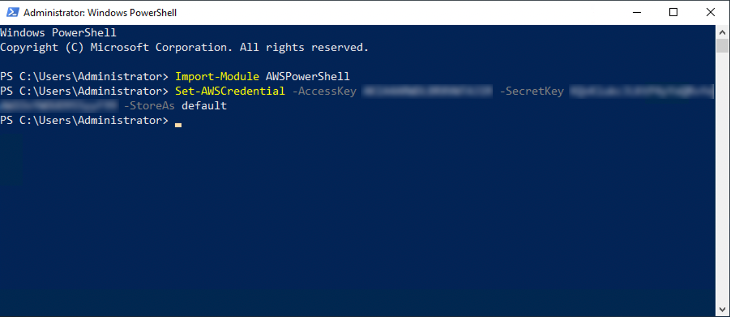
7. Extract Migration Assistant files
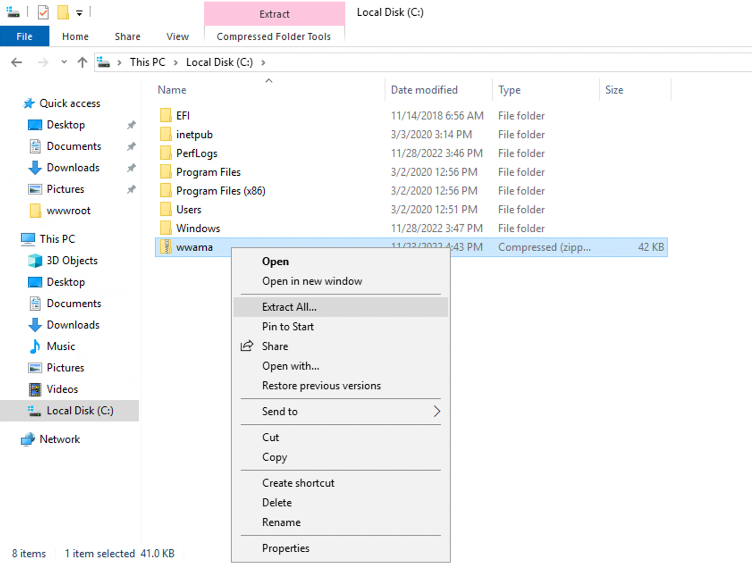
The migration assistant has been pre-downloaded on the C:\ drive by the CloudFormation template. The file is wwama.zip.
Open the context (right-click) menu for the wwama.zip file and extract the archive.
8. View the sample website
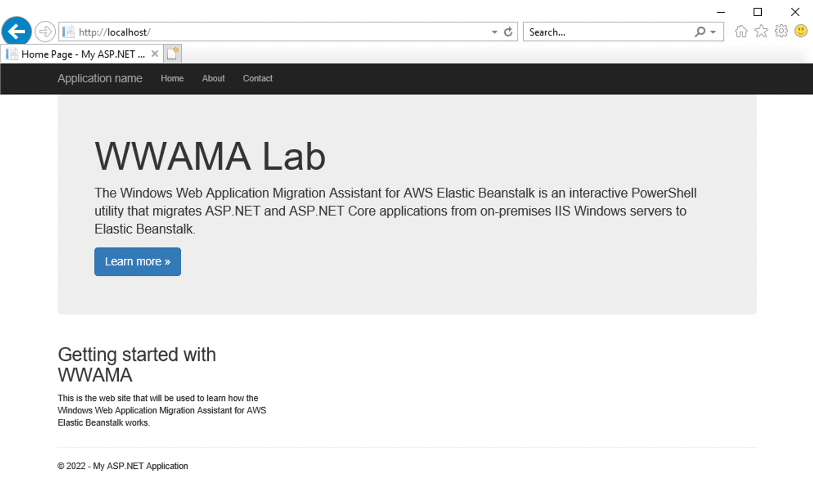
Open a web browser on the EC2 Windows Server instance and navigate to http://localhost/.
You will see the sample website that the migration assistant will migrate.
Run the Migration Assistant
1. Launch the script
In the PowerShell terminal you opened earlier, change to the migration assistant directory and launch the migration script.
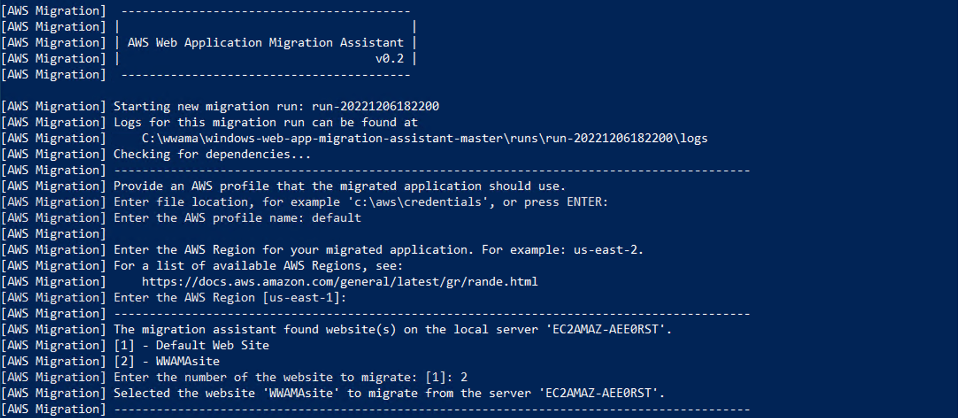
PS C:\> cd \wwama\windows-web-app-migration-assistant-masterPS C:\wwama\windows-web-app-migration-assistant-master> .\MigrateIISWebsiteToElasticBeanstalk.ps1The assistant prompts you for the location of your credentials file. Press Enter to skip.
When prompted for AWS Profile Name, enter default.
2. Select a Region
Enter the AWS Region where you'd like your Elastic Beanstalk environment to run.
For example: us-east-1. For a list of AWS Regions where Elastic Beanstalk is available, see AWS Elastic Beanstalk endpoints and quotas.
3. Select the web application you want to migrate
The assistant then discovers any websites running on your IIS server and lists them, as in the example.
Enter the number 2 to migrate the sample site.
4. Update connection strings
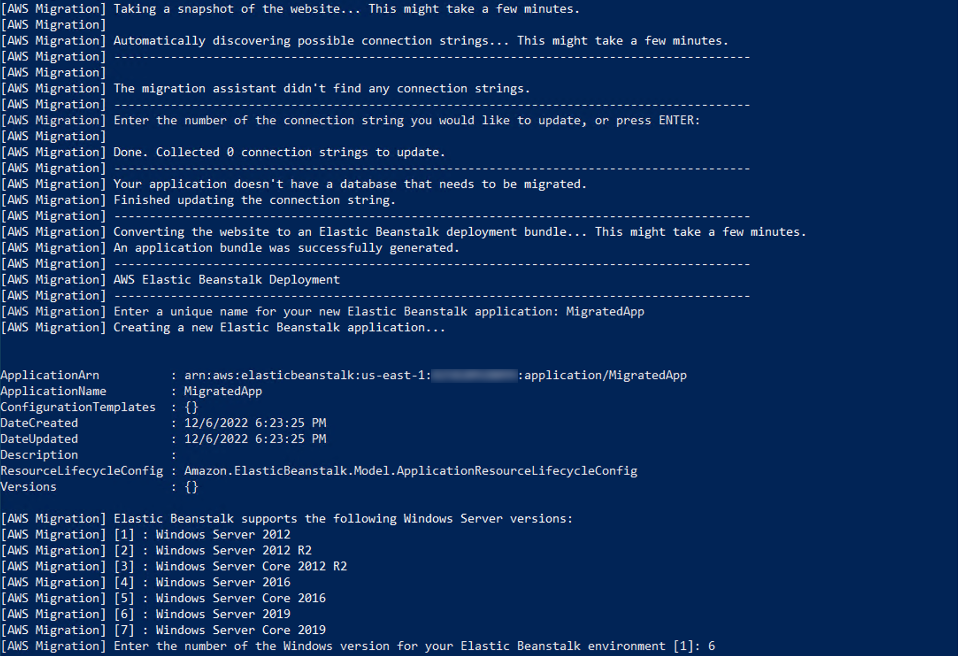
The assistant then prompts you to update any connection strings selected above. Press Enter as there aren’t any connection strings in this application.
This message will appear: The migration assistant didn't find any connection strings.
5. Set up your Elastic Beanstalk application
Next, name your new Elastic Beanstalk application.
When prompted to select the Windows Server version, enter 6 and press Enter.
6. Configure application
For instance type that the application will run on, press Enter to select the default (t3.medium).
Enter the instance type (default t3.medium) : For environment type, enter 1 for single instance.
Enter the environment type [1]:The migration assistant then migrates your application to Elastic Beanstalk.
7. Verify completion
When the migration completes, you will see a success message in the CLI.
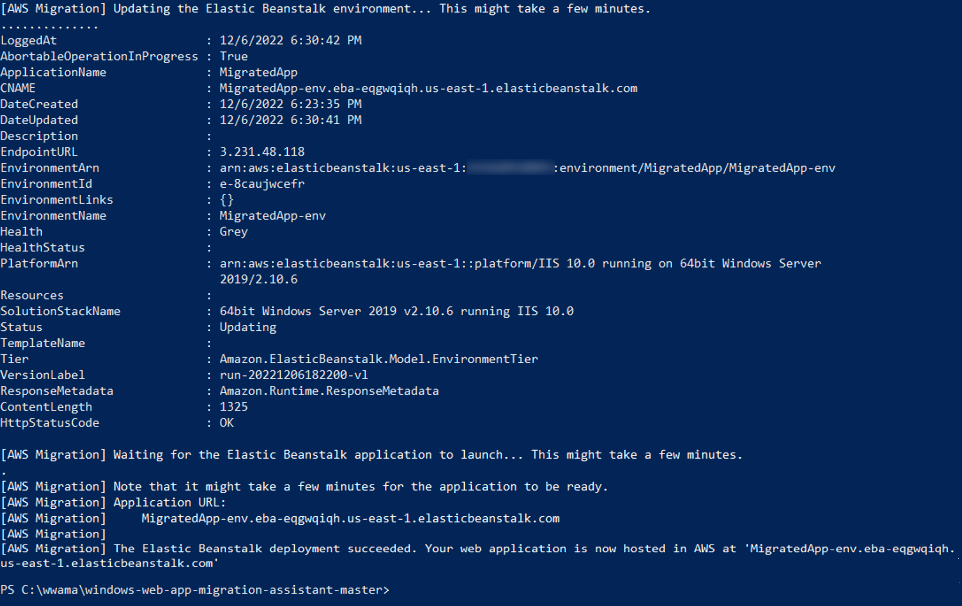
1. Locate the application URL
Get the URL from the output of the PowerShell script.

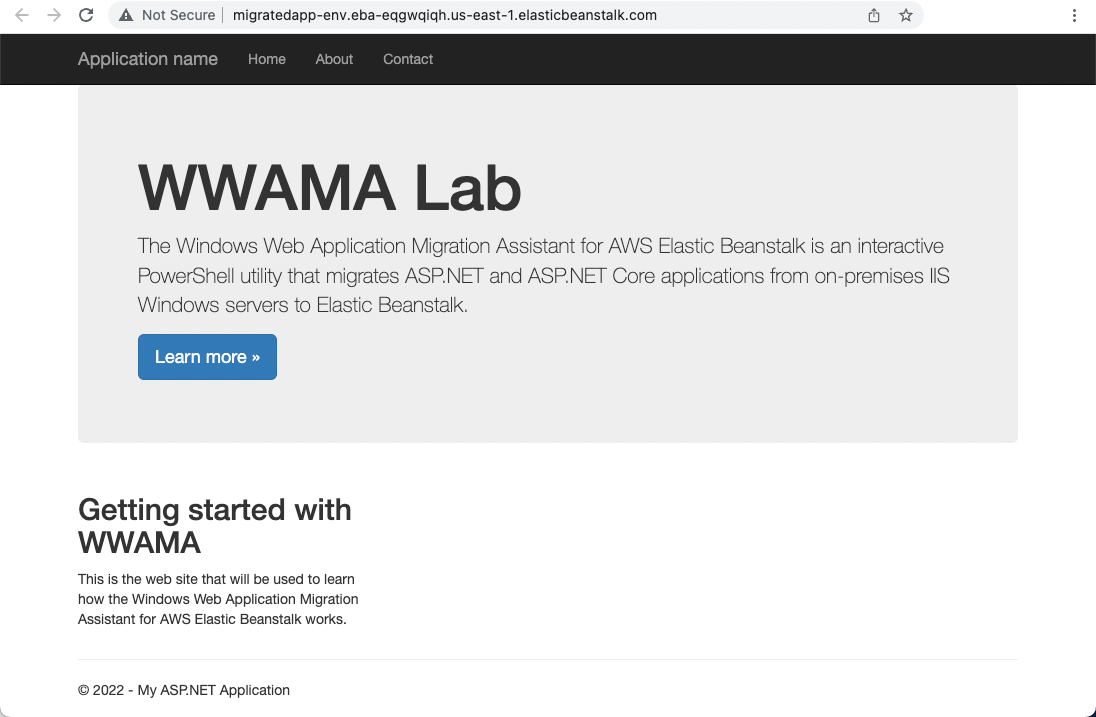
2. View the page
Input the URL into your web browser, and you should see your web application, now running on Elastic Beanstalk.
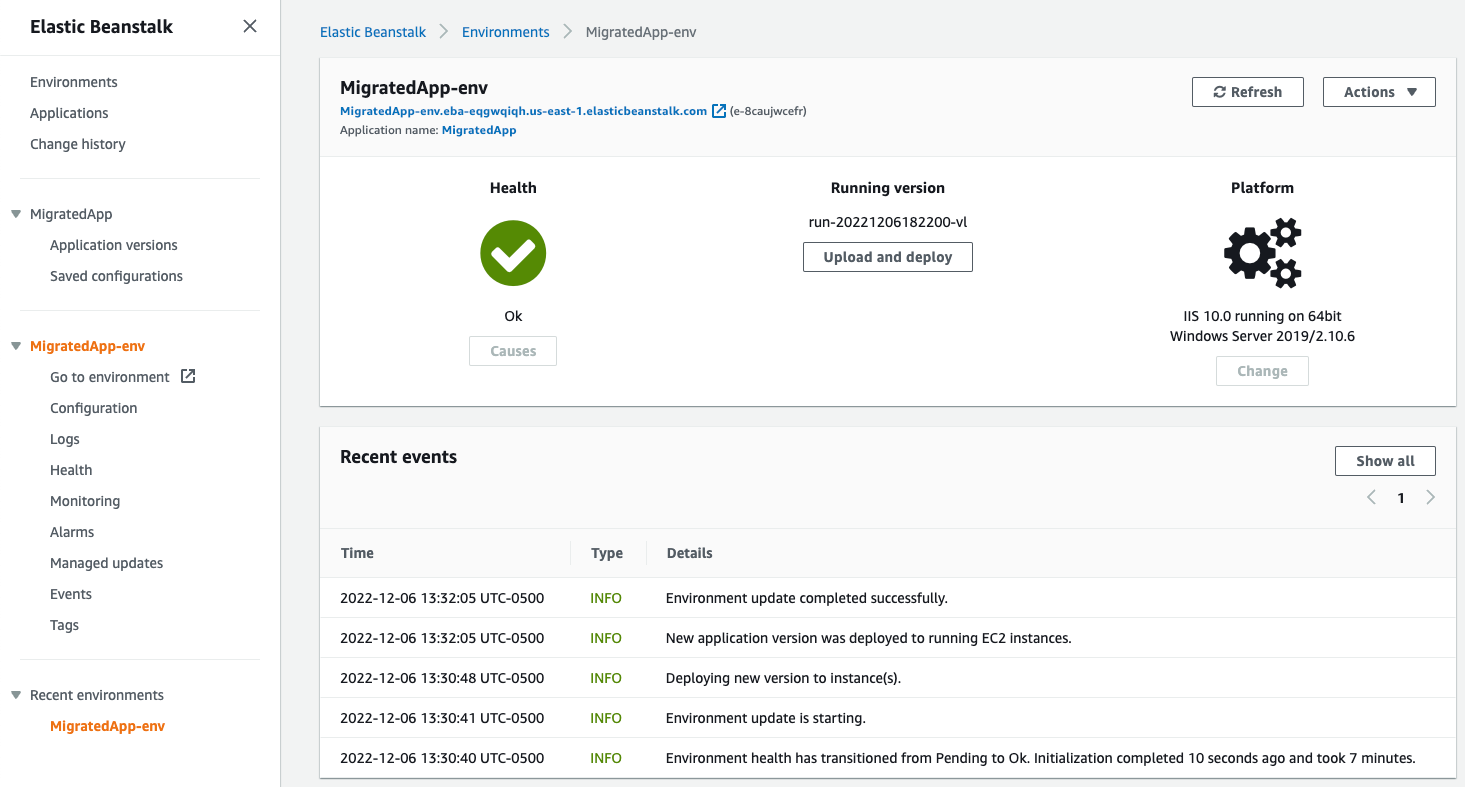
3. Access the app in Beanstalk
You can also view the Elastic Beanstalk environment from the AWS console. Make sure you're seeing the console for the same Region you deployed your application to. Feel free to explore what you can do with your application by using the menu on the left side.
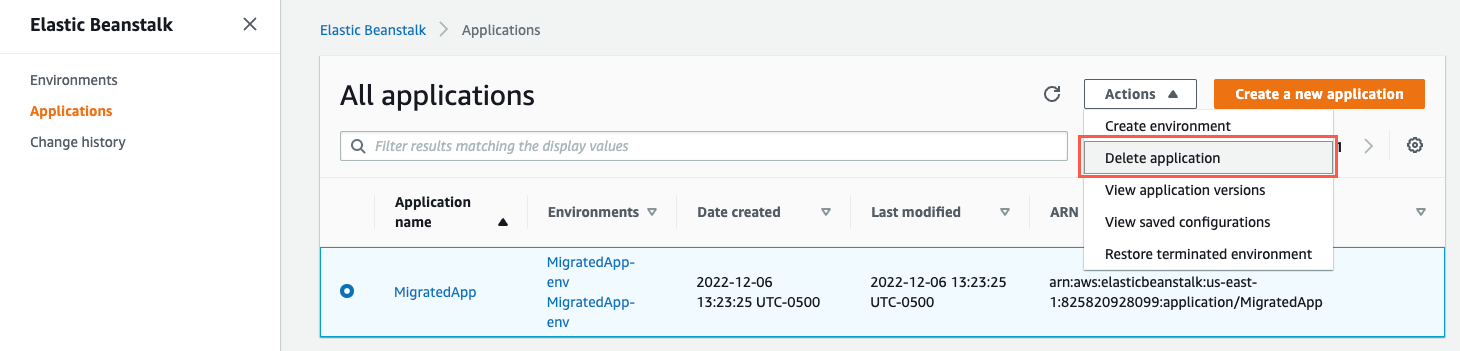
1. Delete the Elastic Beanstalk application
Go to the Elastic Beanstalk console.
In the Applications view, select the radio button next to your application, choose the Actions menu, then select Delete application. In the confirmation dialog, enter the name of your application and choose Delete. This will delete both your application and the Elastic Beanstalk environment.
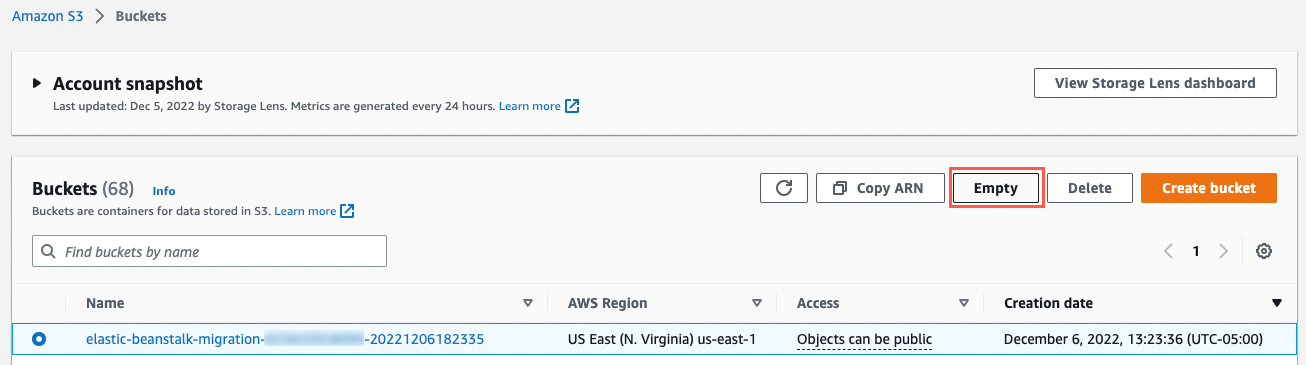
3. Delete temporary files from Amazon S3
Go to the Amazon S3 console, select the radio button next to the bucket named elastic-beanstalk-migration-ACCOUNT_ID-TIMESTAMP, where ACCOUNT_ID is your AWS account ID and TIMESTAMP is the time that your application was deployed.
Then choose Empty to first empty the contents of the bucket. You will need to confirm this action by entering permanently delete in a text box and choose Empty. Choose Exit to go back to the S3 buckets view.
Now that the S3 bucket is empty, select the radio button next to the bucket again and choose Delete. You will need to confirm this action by entering the name of the bucket in the text box and choose Delete bucket.
2. Delete the CloudFormation stack
Go to the CloudFormation console and delete the CloudFormation stack WWAMAStack created at the start of the lab.
Conclusion
Congratulations! You have successfully migrated a sample ASP.NET web application to a fully managed Elastic Beanstalk environment using the Windows Web Application Migration Assistant (WWAMA).
AWS Elastic Beanstalk is an easy-to-use service for deploying and scaling web applications and services developed with Java, .NET, PHP, Node.js, Python, Ruby, Go, and Docker on familiar servers such as Apache, Nginx, Passenger, and IIS.
You can simply upload your code, and Elastic Beanstalk automatically handles the deployment, from capacity provisioning, load balancing, auto scaling, to application health monitoring. At the same time, you retain full control over the AWS resources powering your application and can access the underlying resources at any time.
Visit AWS Elastic Beanstalk to learn more.
Did you find what you were looking for today?
Let us know so we can improve the quality of the content on our pages