AWS News Blog
Amazon Braket – Go Hands-On with Quantum Computing

|
Last year I told you about Amazon Braket and explained the basics of quantum computing, starting from qubits and progressing to quantum circuits. During the preview, AWS customers such as Enel, Fidelity (Exploring Quantum Computing with Amazon Web Services), and Volkswagen have been using Amazon Braket to explore and gain experience with quantum computing.
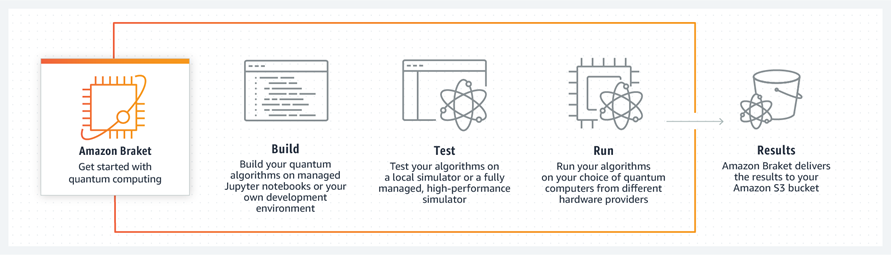
I am happy to announce that Amazon Braket is now generally available and that you can now make use of both the classically-powered circuit simulator and quantum computers from D-Wave, IonQ, and Rigetti. Today I am going to show you both elements, creating and simulating a simple circuit and then running it on real hardware (also known as a QPU, or Quantum Processing Unit).
Creating and Simulating a Simple Circuit
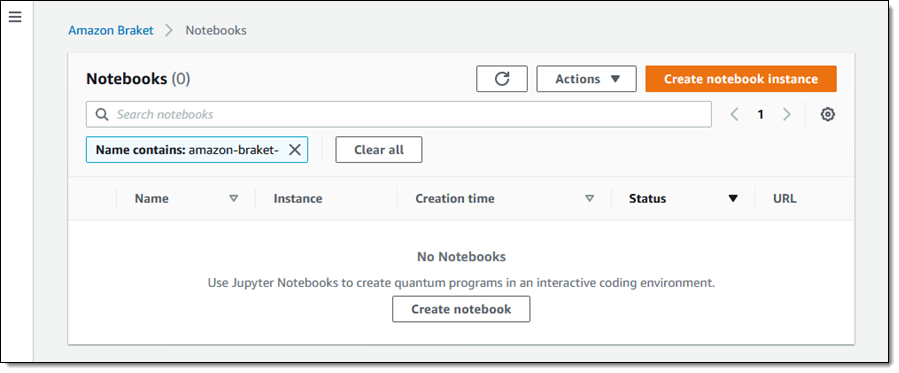
As I mentioned in my earlier post, you can access Amazon Braket through a notebook-style interface. I start by opening the Amazon Braket Console, choose the desired region (more on that later), and click Create notebook instance:
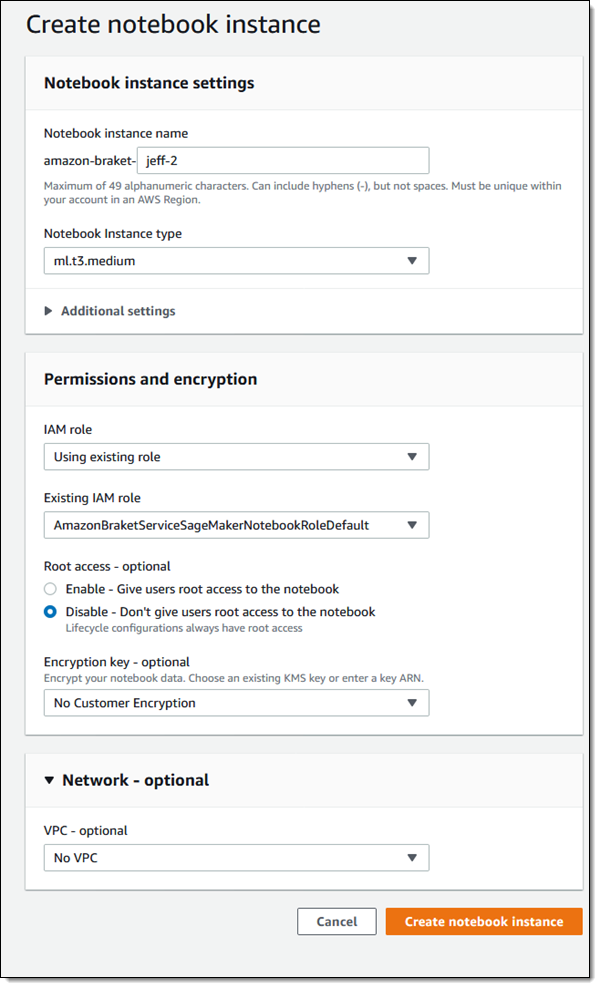
I give my notebook a name (amazon-braket-jeff-2), select an instance type, and choose an IAM role. I also opt out of root access and forego the use of an encryption key for this example. I can choose to run the notebook in a VPC, and I can (in the Additional settings) change the size of the notebook’s EBS volume. I make all of my choices and click Create notebook instance to proceed:
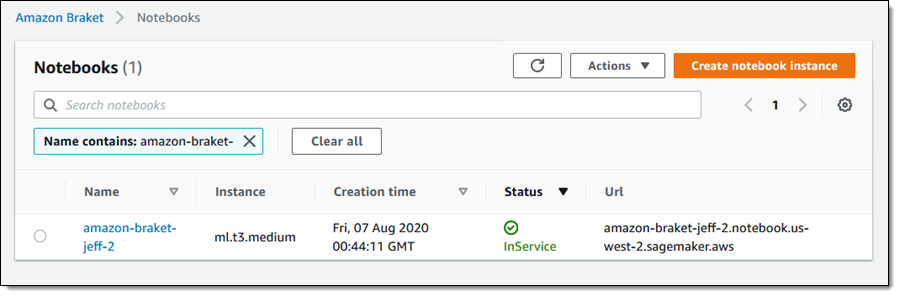
My notebook is ready in a few minutes and I click to access it:
The notebook model is based on Jupyter, and I start by browsing the examples:
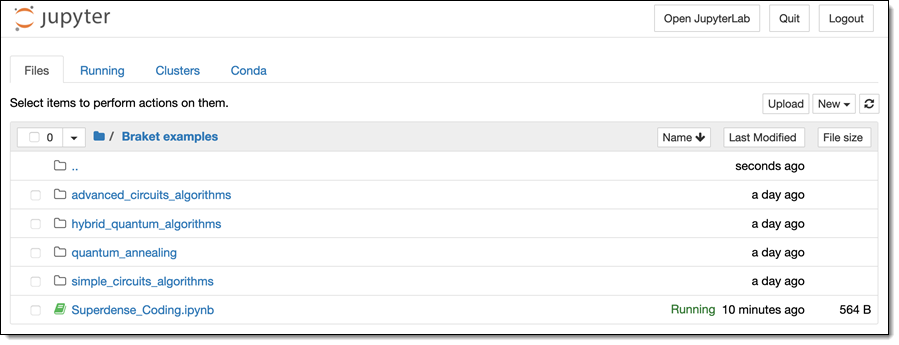
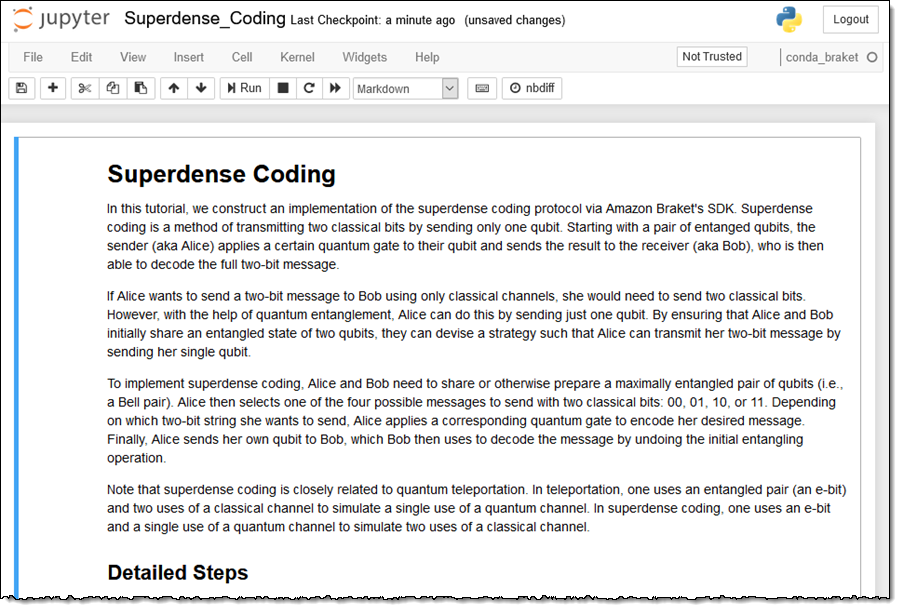
I click on the Superdense Coding example to open it, and then read the introduction and explanation (the math and the logic behind this communication protocol is explained here if you are interested in learning more):
The notebook can run code on the simulator that is part of Braket, or on any of the available quantum computers:
This code chooses the SV1 managed simulator, which shows its strength for larger circuits (25 or more qubits), and on those that require lots of compute power to simulate. For small circuits, I can also use the local simulator that is part of the Braket SDK, and which runs on the notebook instance:
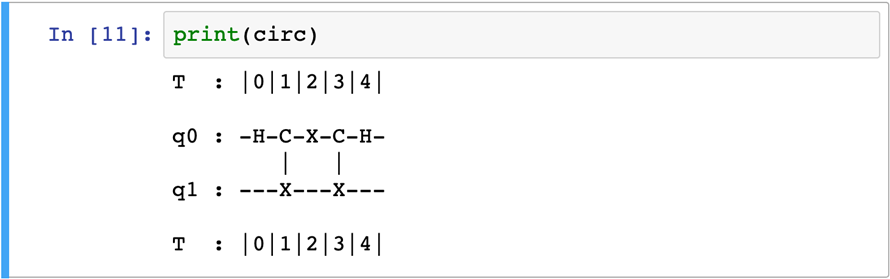
I step through the cells of the notebook, running each one in turn by clicking the Run arrow. The code in the notebook uses the Braket API to build a quantum circuit from scratch, and then displays it in ASCII form (q0 and q1 are qubits, and the T axis indicates time, expressed in moments):
The next cell creates a task that runs the circuit on the chosen device and displays the results:
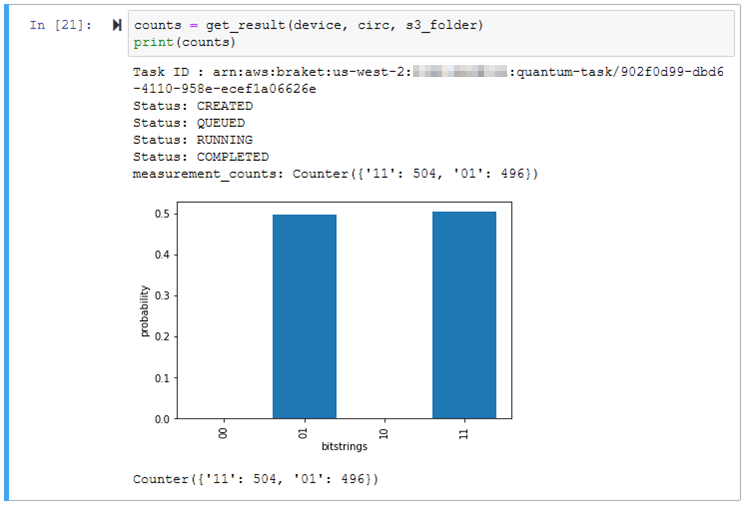
The get_result function is defined within the notebook. It submits a task to the device, monitors the status of the task, and waits for it to complete. Then it captures the results (a set of probabilities), plots them on a bar graph, and returns the probabilities. As you could learn by looking at the code in the function, the circuit is run 1000 times; each run is known as a “shot.” You can see from the screen shot above that the counts returned by the task (504 and 496) add up to 1000. Amazon Braket allows you to specify between 10 and 100,000 shots per task (depending on the device); more shots leads to greater accuracy.
The remaining cells in the notebook run the same circuit with the other possible messages and verify that the results are as expected. You can run this (and many other examples) yourself to learn more!
Running on Real Hardware
Amazon Braket provides access to QPUs from three manufacturers. I click Devices in the Console to learn more:
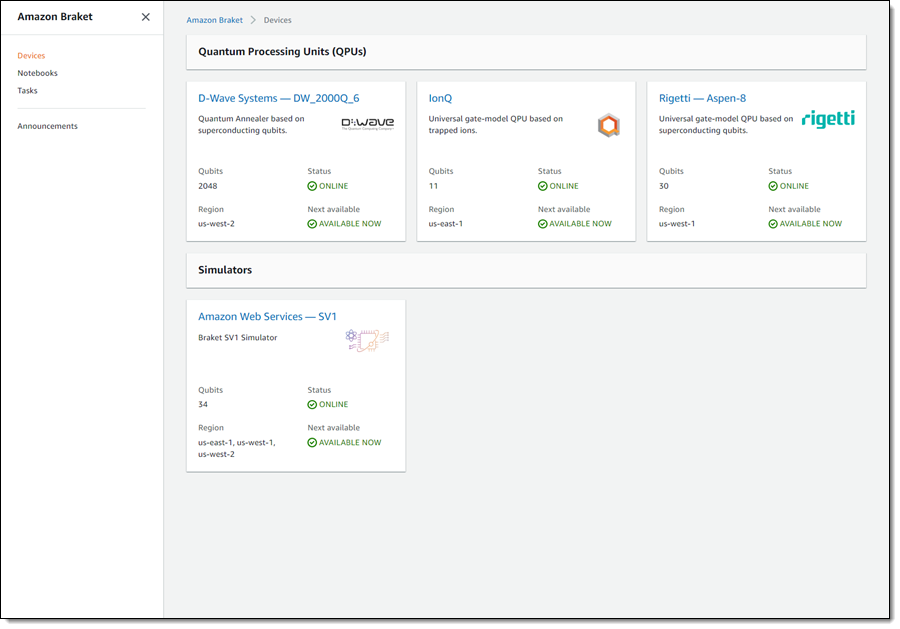
Each QPU is associated with a particular AWS region, and also has a unique ARN. I can click a device card to learn more about the technology that powers the device (this reads like really good sci-fi, but I can assure you that it is real), and I can also see the ARN:
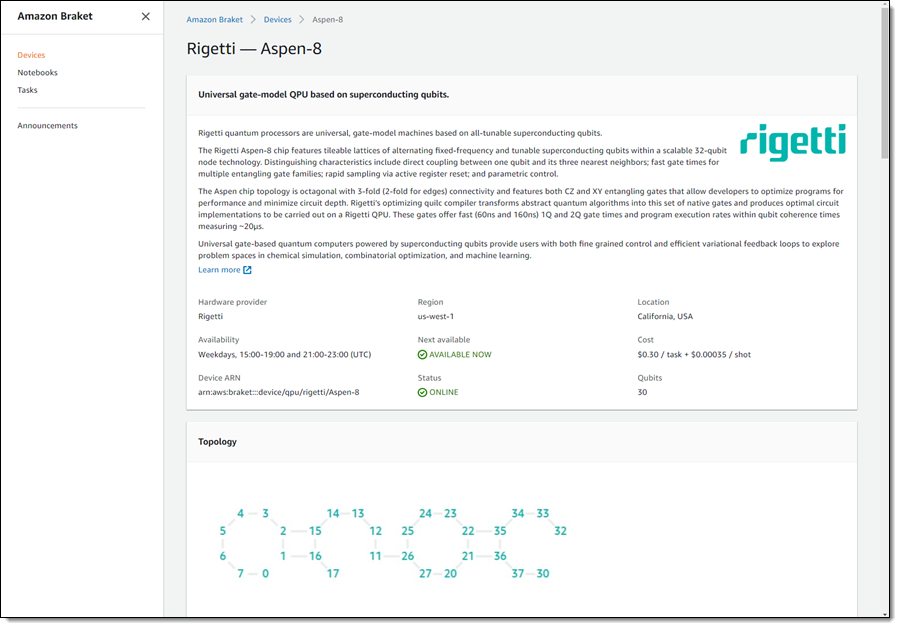
I create a new cell in the notebook and copy/paste some code to run the circuit on the Rigetti Aspen-8:
This creates a task and queues it up for the QPU. I can switch to the console in the region associated with the QPU and see the tasks:
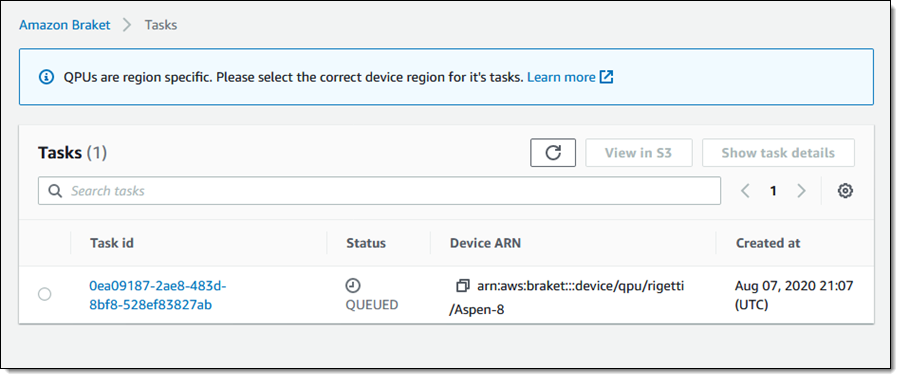
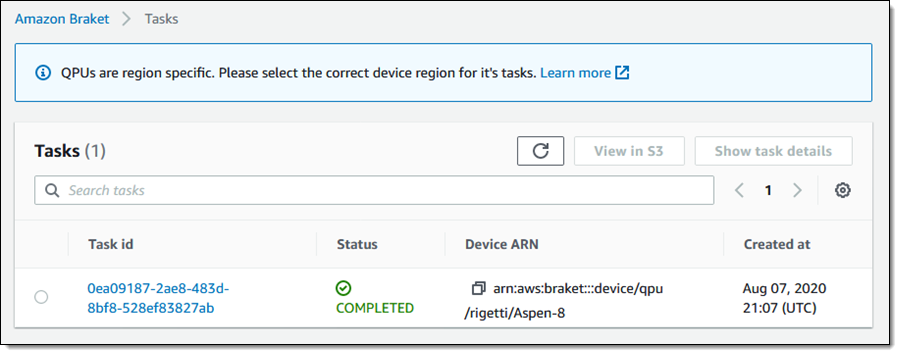
The D-Wave QPU processes Braket tasks 24/7. The other QPUs currently process Amazon Braket tasks during specific time windows, and tasks are queued if created while the window is closed. When my task has finished, its status changes to COMPLETED and a CloudWatch Event is generated:
The Amazon Braket API
I used the console to create my notebook and manage my quantum computing tasks, but API and CLI support is also available. Here are the most important API functions:
CreateQuantumTask – Create a task that runs on the simulator or on a QPU.
GetQuantumTask – Get information about a task.
SearchDevices – Use a property-based search to locate suitable QPUs.
GetDevice – Get detailed information about a particular QPU.
As you can see from the code in the notebooks, you can write code that uses the Amazon Braket SDK, including the Circuit, Gates, Moments, and AsciiCircuitDiagram modules.
Things to Know
Here are a couple of important things to keep in mind when you evaluate Amazon Braket:
Emerging Technology – Quantum computing is an emerging field. Although some of you are already experts, it will take some time for the rest of us to understand the concepts and the technology, and to figure out how to put them to use.
Computing Paradigms – The QPUs that you can access through Amazon Braket support two different paradigms. The IonQ and Rigetti QPUs and the simulator support circuit-based quantum computing, and the D-Wave QPU supports quantum annealing. You cannot run a problem designed for one paradigm on a QPU that supports the other one, so you will need to choose the appropriate QPU early in your exploratory journey.
Pricing – Each task that you run will incur a per-task charge and an additional per-shot charge that is specific to the type of QPU that you use. Use of the simulator incurs an hourly charge, billed by the second, with a 15 second minimum. Notebooks pricing is the same as for SageMaker. For more information, check out the Amazon Braket Pricing page.
You can also watch this New Video to learn more:
Give it a Shot!
As I noted earlier, this is an emerging and exciting field and I am looking forward to hearing back after you have had a chance to put Amazon Braket to use.
— Jeff;