AWS Database Blog
Enabling SSL encrypted connections to Microsoft SQL Server using AWS Certificate Manager Private Certificate Authority
Organizations moving to secure their critical data worry about while it’s both at-rest and in transit. Relational databases are a common example of situations in which business-critical data must be secured. Microsoft SQL Server lets you secure the in-transit data using Secure Sockets Layer (SSL) encryption.
This post reviews the process of enabling SSL encryption for SQL Server connections using AWS Certificate Manager (ACM) and the AWS Certificate Manager Private Certificate Authority (ACM Private CA).
Review of SSL encryption options in SQL Server
Microsoft SQL Server provides two mechanisms to enable connection encryption.
- Force encryption from every client
- Force encryption from the server
To ensure secure connectivity between client and server, configure the client to request encrypted connections. This ensures that, before a client makes a connection to the server running SQL Server, it validates the certificate presented by the server.
You can also use the Force Server Encryption option. However, this option on its own leaves you vulnerable to man-in-the-middle attacks because the client may not validate the certificate and implicitly trust it.
This post only discusses the first option.
Introduction to ACM root CA and private CA
ACM Private CA extends ACM certificate management to private certificates, enabling you to manage public and private certificates in one console. It is a managed private certificate authority (CA) service that easily and securely manages your certificate authority infrastructure and your private certificates. ACM Private CA provides a highly available private CA service without the investment and maintenance costs of operating your own certificate authority.
Prerequisites
Make sure that you have installed OpenSSL on your Windows Server machine. Also, make sure that the OpenSSL executable is added to the PATH environment variable.
Steps to implement the solution
Follow these steps to use ACM and ACM Private CA to enable SSL encryption for SQL Server connections.
Create the Root CA
Follow these steps to create the root CA.
- Open the Certificate Manager
- In the left navigation pane, under Private certificate authority, choose Private CAs, Create CA, as shown in the following screenshot.

Fig 1. Certificate Manager Console
- Under Select the certificate authority (CA) type, select Root CA, then choose Next, as shown in the following screenshot.

Fig 2. Create CA screen – Root CA
- In the Configure the certificate authority (CA) name dialog, fill out the fields. The following screenshot shows the values for creating a root CA for test.db.
This example uses the following values:
– Organization (O): testdb
– Organization Unit (OU): dbaCountry
– Name (C): United States
– State or province name: TX
– Locality Name: DL
– Common Name (CN): test.db
Fig 3. Create CA screen – configuration options
- Leave the default values on the rest of the screens. Choose Confirm and Create. The next screen should show a success message. Choose Get started to install the root CA certificate.
- Choose Install for the root CA, keep the default values, and choose Next, as shown in the following screenshot.

Fig 4. Install Root CA certificate
- Choose Confirm and install on the next screen. You should see a success message on the next screen.
You have now successfully created a Root CA. You use the Root CA to issue certificates in this example.
Issuing certificates to identify clients and servers from a subordinate CA that chains up to the root is a best practice. This example uses the Root CA to issue the certificate in this post for simplicity. At least a two-level CA hierarchy is recommended, such as an intermediate Windows Certificate Authority that chains up to the Root CA created in this example.
Issue a server certificate using the root CA
Follow these steps to issue a server certificate using the root CA.
- ACM generates the key pair and certificate using the CA you just created. To get started, go back to the console home. Locate Certificate Manager on the left-hand navigation pane and then choose Request a certificate, as shown in the following screenshot.

Fig 5. Request certificate
- Select the root CA you just created (test.db).

Fig 6. Select the root CA
- Add the domain name, as shown in the following screenshot. Make sure to use the Fully Qualified Domain Name(FQDN) of the SQL Server for which you are trying to generate the SSL certificate.

Fig 7. Add FQDN of the server
- Choose Confirm and request.

Fig 8. Confirm and request private cert
You should now have a private certificate issued and see the success message shown in the following screenshot.
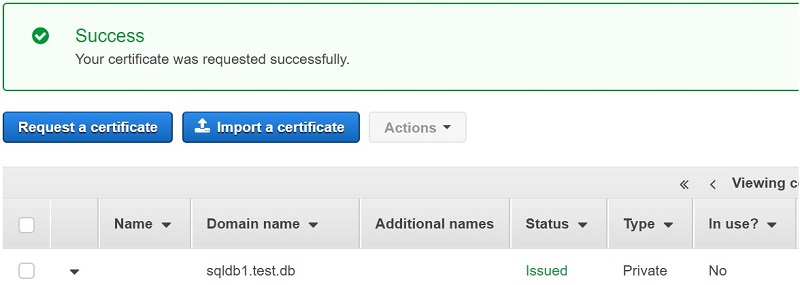
Fig 9. Success Screen
Import and install the SSL certificate on the SQL Server
Follow these steps to import and install the SSL certificate.
- Log on to the server (SQL Server machine).
- Create a folder named c:\certs on the server. Use this folder to save the certificate and keys.
- Using a browser, go back to the console home. On the left navigation page, Certificate Manager.
- Select the appropriate certificate, then choose Actions, Export.
- Enter a passphrase and generate PEM encoding, as shown in the following screenshot.

Fig 10. Export certificate Screen
- Download the certificate body and private key on the next screen. The certificate body is named certificate.txt and the private key is named private_key.txt. Save both files to c:\certs.
- Before you can use the issued certificate on the SQL Server, you must combine the certificate with the private key you created using the following OpenSSL command.
C:\certs>openssl pkcs12 -export -out sqldb1.pfx -inkey private_key.txt -in certificate.txt - Enter the passphrase you created.
- Open an admin command prompt, and run the following command. This imports the certificate in Windows personal certificate store.
C:\certs>certutil -f -p <password> -importpfx "c:\certs\sqldb1.pfx"
Import the root certificate on the SQL Server machine
Follow these steps to import the root certificate.
- Using a browser, go back to the console home. On the left navigation pane, choose Certificate Manager.
- Choose Private CAs. Select the test.db root CA you created. Choose CA Certificate.

Fig 11. Private CA certificate details
- Scroll down to the Certificate Body. Choose Export Certificate body, as shown in the following screenshot. This downloads a file named certificate.pem to your Downloads folder.
- Rename certificate.pem to cacert.pem and copy to the c:\certs folder.

Fig 11. Export certificate to a file
- The certificate is in base64-encoded PEM format. Convert it to DER format using the following OpenSSL command.
C:\certs>openssl.exe x509 -outform der -in cacert.pem -out cacert.cer
- Import the certificate to the Windows root certificate store by running the following command from an admin command prompt.
C:\certs>certutil –f -addstore Root "c:\certs\cacert.cer"
Make SQL Server configuration changes on the server
Follow these steps to make configuration changes on the server.
- Choose Start, Run, and then type msc. This opens the ACM mmc snap-in for the local computer.
- Choose Personal, Certificates. On the right-hand pane, select the imported certificate, and right-click on it. This certificate was imported a previous step in this solution.
- Choose All tasks, Manage private keys. In the permissions box, add the SQL Server service account read permissions, as shown in the following screenshots.


Fig 12. Add certificate permissions
- Open SQL Server configuration manager by choosing Start, Microsoft SQL Server <version>, SQL Server <version> configuration manager.
- Expand the SQL Server network configuration. For Protocols, open the context (right-click) menu for your SQL Server name, and choose Properties.
- Choose Certificate, and select the certificate. Choose OK. This certificate is used for connection encryption.
- Restart the restart the SQL Server service.

Fig 13. Choose SSL certificate for SQL server
Import and install certificates on the client machines
Repeat these steps on each client machine you want to communicate with the SQL Server. This creates the required certificate hierarchy on the client machine on which your applications run. You must secure the connection using SSL between the client machine and the SQL Server.
- Log on to the client machine.
- Create a folder named c:\certs.
- Copy the sqldbl.pfx and cacert.cer certificate files from the SQL Server machine and paste them on the client machine in the c:\certs folder. You created these files in previous steps.
- Import the certificate to the Windows root certificate store by running the following command from an admin command prompt.
C:\certs>certutil –f -addstore Root "c:\certs\cacert.cer" - Open an admin command prompt, and run following command. This imports the certificate to the windows personal certificate store.
C:\certs>certutil -f -p <password> -importpfx "c:\certs\sqldb1.pfx"
You now have the required infrastructure in place to establish an SSL-encrypted connection with SQL Server. This allows the client machine to trust certificates issued by the root CA you created.
Common client connection scenarios and configurations
All scenarios listed below assume that you have the certificates imported on the client machine. If you haven’t done this already, follow the previous instructions for doing so.
Encrypting SQL Server management studio connections using SSL
To encrypt SQL Server management studio connections, follow these steps.
- Download and install SSMS.
- Open SSMS and choose File, then Connect Object Explorer…, as shown in the following screenshot.

Fig 14. Connect to the SQL Server – SSMS
- Enter the server name and login details, as shown in the following screenshot. Then choose Options.

Fig 15. Enter login details- SSMS
- Select the Connection Properties Make sure that the Encrypt connection check box is checked, as shown in the following screenshot. Also, verify that the Trust server certificate check box is not checked. Checking this box skips certificate validation by the client.

Fig 16. Connection properties – SSMS
- Choose Connect.
- If you get the error “The target principal name is incorrect” while connecting, you are not using the FQDN specified in the certificate. The connection string must use the same name as the one specified while issuing the certificate. For example, if you are using the IP address to connect, you see the error shown in the following screenshot.

Fig 17. Possible error message- SSMS
- Verify that you have an encrypted connection by running the following query. The value in the encrypt_option column should be TRUE as shown in the screenshot.

Fig 18. Query results – SSMS
Forcing encryption on all SQL Server connections from a client machine
To force all SQL Server connections to be encrypted from a client machine, follow these steps.
- Open the SQL Server configuration manager on the client by choosing Start, then Microsoft SQL Server <version>, then SQL Server <version> configuration manager.
If you get a WMI error, use this guide to fix it.
- Expand SQL Server configuration manager, then right-click on SQL Native Client Configuration and choose Properties.
- On the Flags tab, change the value for Force Protocol Encryption to Yes, as shown in the following screenshot.
- Keep the Trust Server Certificate value as No.

Fig 19. SQL client properties – force encryption
Encrypting the application connection via connection string parameter
You can use the connection string parameter Encrypt to enable SSL encryption from a client.
Do not use the Trust Server Certificate parameter. This presents the client to trust certificates from the server without validation.
Managed Certificate Renewal
ACM provides managed renewal for your Amazon-issued SSL/TLS certificates. If possible, ACM renews your certificates automatically with no action required from you. A certificate is eligible for renewal after it has been exported since being issued or last renewed. You exported the certificate in the previous steps, which makes it eligible for managed auto-renewal.
You can verify the certificate renewal eligibility by looking at the Renewal Eligibility status of the certificate under Certificate Manager in the console, as shown in the following screenshot.

Fig 20. Certificate Renewal eligibility
You can also manually test the ACM-managed renewal workflow. This confirms that your certificate auto-renews upon expiration.
To check the renewal status of a certificate, you can use various methods, such as checking on the console, CLI, API, and Personal Health Dashboard).
You can also automate the process of certificate download upon renewal, using an Amazon CloudWatch event. After auto-renewal, ACM Private CA sends a CloudWatch notification. You can write client-side code to download renewed certificates and private keys and deploy them with your application.
Conclusion
You can use the process described above to issue private certificates in several other scenarios on a server running Windows Server. You can use the certificates to identify resources such as clients, servers, applications, services, devices, and users. Internal API endpoints, web servers, VPN users, IoT devices, and many other applications use private certificates to establish encrypted communication channels that are necessary for their secure operation.
About the Author

Aditya Samant is a Solutions Architect with Amazon Web Services, specializing in databases. He loves retro tech, playing computer games and spending time with his family and friends.