AWS Architecture Blog
Deloitte optimizes EKS environment provisioning and achieves 89% faster testing environments using Amazon EKS and vCluster
Managing multiple Amazon Elastic Kubernetes Service (Amazon EKS) clusters for development and testing environments can present significant operational and cost challenges for enterprises. Deloitte, a global professional services organization, faced these challenges while provisioning dedicated Amazon EKS clusters for their quality assurance (QA) testing environments. In this post, we explore how Deloitte used Amazon EKS and vCluster to transform their testing infrastructure.
Business challenges
Before implementing vCluster, Deloitte provisioned dedicated Amazon EKS clusters on AWS for each ephemeral testing need. This approach could take up to 45 minutes per cluster. QA engineers required isolated environments to test specific combinations of application components, but they relied heavily on the platform team to provision and manage those clusters. Each environment also carried the overhead of its own ingress controllers, DNS setup, and monitoring agents, creating significant infrastructure duplication and operational load.
Key challenges included:
- Slow provisioning times of 30-45 minutes for each new environment, including a dedicated Amazon EKS cluster, Application Load Balancers (ALB), Amazon Route 53 records
- High AWS infrastructure costs from running multiple dedicated Amazon EKS clusters
- Significant platform team overhead managing multiple environments
- Resource duplication across clusters, such as load balancers, Route 53 entries, and monitoring agents
- Complex access management across multiple AWS Identity and Access Management (AWS IAM) roles and Kubernetes Role-based access control (RBAC) configurations
These operational inefficiencies not only slowed down QA team development cycles but also increased costs and created bottlenecks that prevented teams from working independently.
Solution overview
To address these challenges, Deloitte implemented a solution combining Amazon EKS with vCluster. The Amazon EKS host cluster serves as the foundation, providing the underlying compute and networking resources. On top of this infrastructure, vCluster enables the creation of lightweight, fully functional virtual clusters that act like independent Kubernetes environments. This gives QA teams dedicated spaces for their work without the overhead of managing dozens of separate Amazon EKS clusters.
Essential platform services such as Kubernetes controllers and monitoring agents are deployed once on the host cluster and shared across all virtual clusters. This approach reduces resource duplication and streamlines management. With Amazon EKS Auto Mode, the solution also brings dynamic autoscaling, ensuring that compute resources are allocated just in time to meet demand, further optimizing costs.
Architecture overview
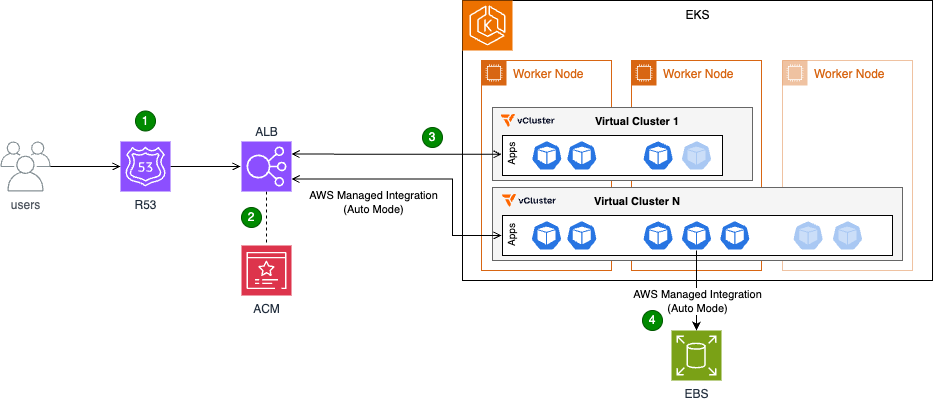
Figure 1: Architecture diagram illustrating users accessing applications hosted across multiple virtual clusters.
- Users access the applications over the public internet via HTTPS requests.
- Their connections are secured via HTTPS, which is terminated at the Application Load Balancer (ALB).
- The Application Load Balancer (ALB) directs users to the appropriate application based on predefined rules.
- Each application that users deploy runs in its own virtual cluster with dedicated Amazon Elastic Block Store (Amazon EBS) storage.
Key components:
- Amazon EKS host cluster with Auto Mode enabled: The foundation of the solution, providing the underlying Kubernetes infrastructure
- Virtual clusters (vCluster): Multiple isolated Kubernetes clusters running within the host cluster. Each virtual cluster represents an isolated testing environment for QA validation and application testing.
- Shared controllers: These controllers run on the host cluster and are shared across all virtual clusters:
- Load Balancer Controller: Manages the creation and configuration of load balancers for applications running in the virtual clusters
- Storage Controller: Manages the creation of Amazon EBS volumes or Amazon Elastic File System (Amazon EFS) mount points, providing persistent storage for applications
- Application Load Balancer (ALB): Fronts the host cluster nodes, distributing traffic and ensuring high availability
- AWS Certificate Manager (ACM): An ACM certificate is attached to the ALB to terminate HTTPS connections and provide secure communication
Outcomes
Deloitte’s implementation of Amazon EKS with vCluster delivered measurable results. Environment provisioning time dropped from 45 minutes to under 5 minutes, representing an 89% reduction that translates to immediate productivity gains. The QA team has reclaimed around 500 hours annually, shifting focus from repetitive setup tasks to higher-value testing work. Infrastructure efficiency improved significantly through resource consolidation. By deploying workloads to a shared host cluster and enabling virtual clusters to share those resources, Deloitte saves over 50 vCPUs and more than 200 GB of memory at peak usage.
On the AWS front, consolidating to fewer Amazon EKS control planes reduced management overhead and costs. Cost optimization improved further, with up to 70% savings by running workloads on Amazon Elastic Compute Cloud (Amazon EC2) Spot Instances, with Amazon EKS Auto Mode providing efficient, automated autoscaling and provisioning. The architecture was further streamlined by implementing a single load balancer capable of serving traffic to applications across multiple virtual clusters. This reduced complexity and simplified monitoring and troubleshooting.
The vCluster itself proved transformative. Deloitte now runs more than 50 virtual clusters efficiently on a single shared Amazon EKS host cluster. Teams can now provision their own testing environments in under 5 minutes without platform team involvement, compared to submitting requests and waiting 30-45 minutes previously. Both QA and application teams now have faster access to the environments they need. Tooling complexity decreased significantly. Instead of managing more than ten separate tool deployments (reverse proxy, monitoring agents, controllers, etc.), teams now rely on a single shared stack that’s easier to maintain and operate. These improvements collectively position Deloitte with a more scalable, cost-effective, and manageable AWS environment that’s ready to grow with evolving business needs.
Walkthrough
This section provides a simplified overview of the solution, preserving the core elements implemented at Deloitte. It covers the deployment of two applications on separate virtual clusters, the ability to access the vCluster platform, and the configuration of both applications to operate under the same domain and load balancer.
Prerequisites
Before beginning the deployment, verify that the following resources are in place:
- Amazon Virtual Private Cloud (Amazon VPC) and subnets: An Amazon VPC and the necessary subnets must be created
- Amazon EKS Cluster: An Amazon EKS cluster should be set up within the designated Amazon VPC and subnets, with Auto Mode enabled
- Service IPv4 range: The Amazon EKS service IPv4 range must be set to 10.96.0.0/12 (the service Classless Inter-Domain Routing (CIDR) range used by vCluster)
- IAM roles: The following IAM roles must be created
- EKS Cluster Role with the AmazonEKSClusterPolicy managed policy
- EKS Node Role with AmazonEKSWorkerNodePolicy, AmazonEC2ContainerRegistryReadOnly, and AmazonEKS_CNI_Policy managed policies
- (For Auto Mode) EKS Auto Mode Node Role with permissions for EC2, EBS, and Auto Scaling operations
- Domain name: A domain name, along with the necessary certificate and DNS configuration, must be obtained
- kubectl and Helm: Command-line tools for Kubernetes management
Deployment steps
The following walkthrough guides you through deploying the solution. You’ll start by creating and validating the required certificate, then deploy vCluster with Amazon EKS Auto Mode and configure the ALB. Next, you’ll access the vCluster console to create two virtual clusters. Finally, you’ll deploy an application in both virtual clusters and expose it through an Application Load Balancer using path-based routing.
Step 1: Create and validate certificate
export DOMAIN_NAME=<sub domain name to create>
export ZONE_ID=<domain zone ID>
export CERTIFICATE_ARN=$(aws acm request-certificate \
  --domain-name $DOMAIN_NAME \
  --validation-method DNS \
  --output text)

# Get certificate validation records
CERT_NAME=$(aws acm describe-certificate \
  --certificate-arn $CERTIFICATE_ARN \
  --query 'Certificate.DomainValidationOptions[0].ResourceRecord.Name' \
  --output text)

CERT_VALUE=$(aws acm describe-certificate \
  --certificate-arn $CERTIFICATE_ARN \
  --query 'Certificate.DomainValidationOptions[0].ResourceRecord.Value' \
  --output text)

# Create DNS validation record
aws route53 change-resource-record-sets \
  --hosted-zone-id $ZONE_ID \
  --change-batch '{
    "Changes": [{
      "Action": "CREATE",
      "ResourceRecordSet": {
        "Name": "'"$CERT_NAME"'",
        "Type": "CNAME",
        "TTL": 300,
        "ResourceRecords": [{"Value": "'"$CERT_VALUE"'"}]
      }
    }]
  }'
The expected outcome of the preceding commands is the creation and validation of a certificate in AWS Certificate Manager (ACM) within the specified region.
Step 2: Deploy vCluster with Amazon EKS Auto Mode and Application Load Balancer
The following command configures the ingress class for ALB provisioning and the storage class for Amazon EBS persistent volumes.
kubectl apply -f - <<EOF
apiVersion: eks.amazonaws.com/v1
kind: IngressClassParams
metadata:
  name: alb
spec:
  scheme: internet-facing
  group:
    name: vcluster
---
apiVersion: networking.k8s.io/v1
kind: IngressClass
metadata:
  name: alb
  annotations:
    ingressclass.kubernetes.io/is-default-class: "true"
spec:
  controller: eks.amazonaws.com/alb
  parameters:
    apiGroup: eks.amazonaws.com
    kind: IngressClassParams
    name: alb
---
apiVersion: storage.k8s.io/v1
kind: StorageClass
metadata:
  name: auto-ebs-sc
  annotations:
    storageclass.kubernetes.io/is-default-class: "true"
provisioner: ebs.csi.eks.amazonaws.com
volumeBindingMode: WaitForFirstConsumer
parameters:
  type: gp3
  encrypted: "true"
EOF
Next, deploy the vCluster application:
helm repo add vcluster https://charts.loft.sh
helm upgrade --install vcluster-pro vcluster/vcluster-platform -n vcluster-poc --create-namespace --version 4.0.1 --values <(cat <<EOF
resources:
  limits:
    memory: 4Gi
  requests:
    cpu: "1"
    memory: 4Gi
replicaCount: 1
config:
  projectNamespacePrefix: loft-p-
  audit:
    enabled: true
  loftHost: <domain>
admin:
  create: true
  username: admin
  password: password
ingress:
  enabled: true
  name: loft-ingress
  annotations:
    alb.ingress.kubernetes.io/subnets: <public subnets> # 2 public subnets minimum
    alb.ingress.kubernetes.io/certificate-arn: <ACM cert ARN>
    alb.ingress.kubernetes.io/scheme: internet-facing
    alb.ingress.kubernetes.io/load-balancer-name: vcluster-alb
  host: <domain>
  ingressClass: alb
  path: /*
  tls:
    enabled: false
    secret: loft-tls
affinity:
  nodeAffinity:
    preferredDuringSchedulingIgnoredDuringExecution:
      - weight: 1
        preference:
          matchExpressions:
            - key: eks.amazonaws.com/compute-type
              operator: In
              values:
                - auto
EOF
)
Note: Replace admin and password in the preceding Helm chart installation with custom username and password as appropriate.
After you have provisioned the load balancer, create an alias for the Application Load Balancer:
export ALB_NAME=vcluster-alb

# Get ALB details
ALB_HOSTED_ZONE=$(aws elbv2 describe-load-balancers \
  --names $ALB_NAME \
  --query 'LoadBalancers[0].CanonicalHostedZoneId' \
  --output text)

ALB_DNS_NAME=$(aws elbv2 describe-load-balancers \
  --names $ALB_NAME \
  --query 'LoadBalancers[0].DNSName' \
  --output text)

# Create Route 53 alias record
aws route53 change-resource-record-sets \
  --hosted-zone-id $ZONE_ID \
  --change-batch '{
    "Changes": [{
      "Action": "CREATE",
      "ResourceRecordSet": {
        "Name": "'"$DOMAIN_NAME"'",
        "Type": "A",
        "AliasTarget": {
          "HostedZoneId": "'"$ALB_HOSTED_ZONE"'",
          "DNSName": "'"$ALB_DNS_NAME"'",
          "EvaluateTargetHealth": false
        }
      }
    }]
  }'
The expected outcome is the successful deployment of the vCluster platform on the Amazon EKS cluster, accessible via the load balancer and domain provisioned in the previous steps.
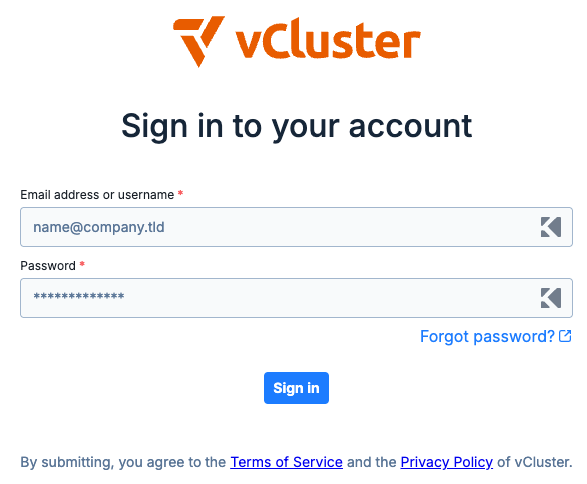
Figure 2: vCluster environment login page.
Step 3: Access the vCluster console and create virtual clusters
- Open a web browser and navigate to the vCluster domain set up earlier
- Log in with the following credentials:
- Username: admin
- Password: password
- On first login, complete the setup questions to start the 13-day vCluster platform trial by providing:
- Name
- Email address
- Company name
Step 4: Create two virtual clusters through the console
Using the vCluster UI, create a new virtual cluster and select the “Deploy with vCluster platform (default)” option. Replace the content of the vcluster.yaml file with the following configuration:
sync:
  fromHost:
    ingressClasses:
      enabled: true
    storageClasses:
      enabled: true
  toHost:
    ingresses:
      enabled: true
controlPlane:
  coredns:
    enabled: true
    embedded: true
This configuration enables synchronization between the host cluster and the virtual cluster for both ingress classes and storage classes, making host cluster resources available within the virtual cluster. It also synchronizes ingress resources from the virtual cluster back to the host cluster. The coredns section configures the virtual cluster control plane to deploy a DNS management pod, supporting DNS resolution for applications within the virtual cluster. After adding the configuration, create the cluster. After you have created the cluster and it is healthy, repeat the process to create the second cluster.
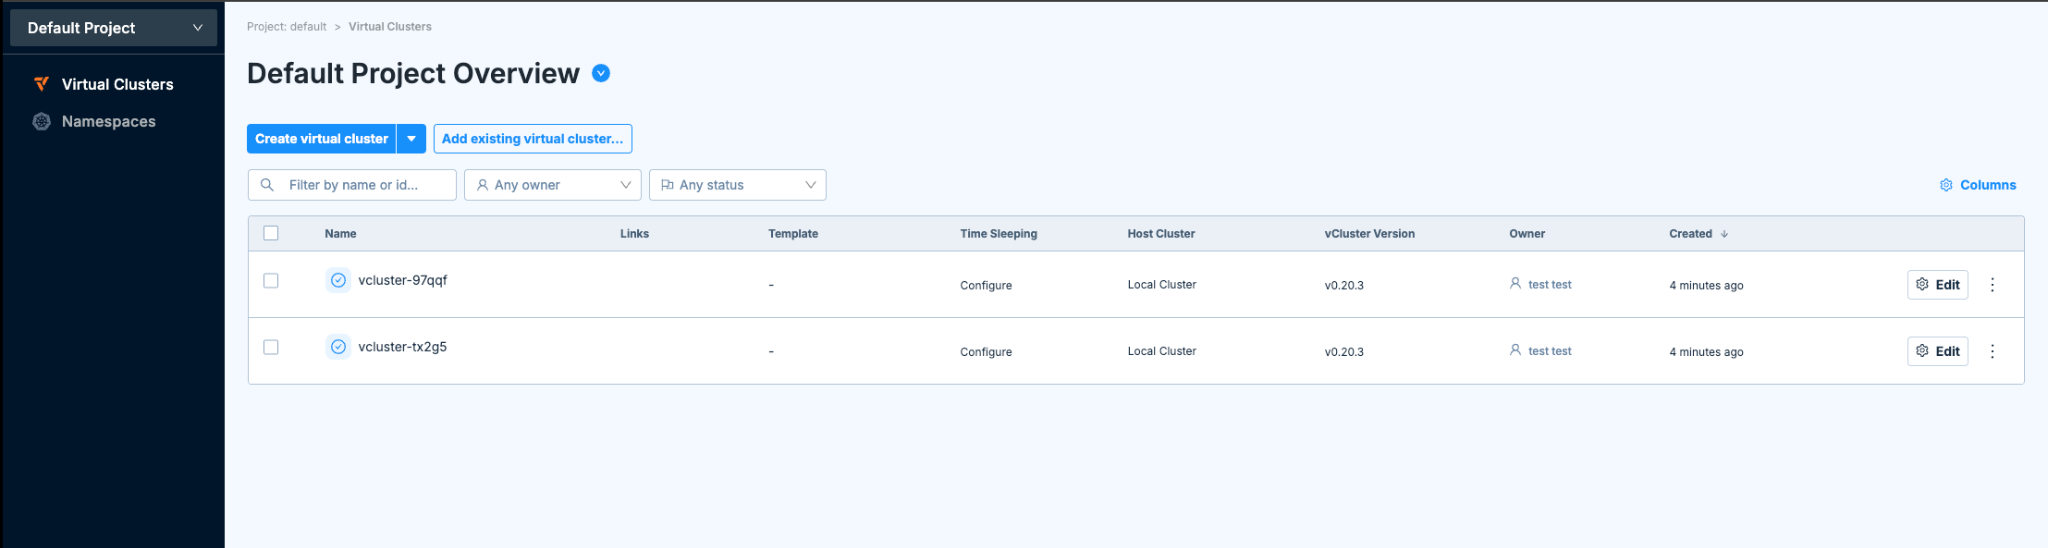
Figure 3: vCluster environment with two newly created virtual clusters.
Step 5: Deploy applications
After both clusters are up and running:
- Select and connect to the virtual cluster as shown in the following figure.
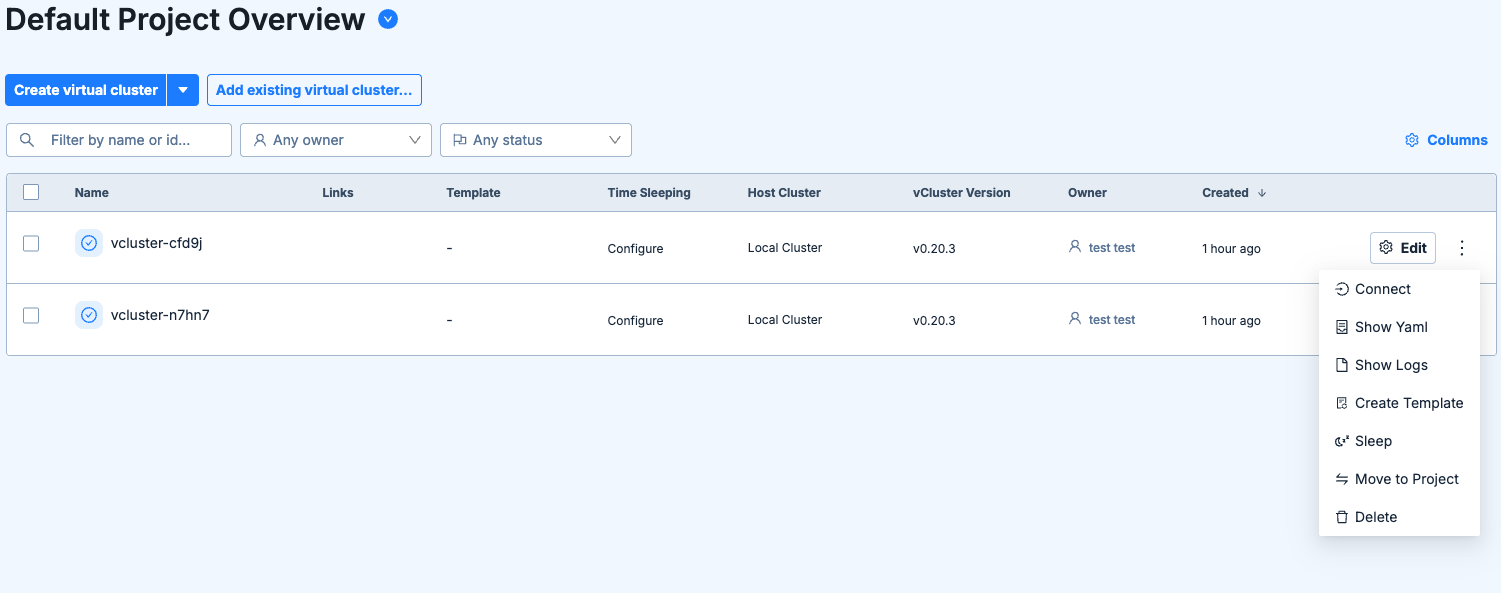
Figure 4: vCluster main page and connect option to a single virtual cluster.
- Download the kubeconfig file and use it to connect to the cluster.
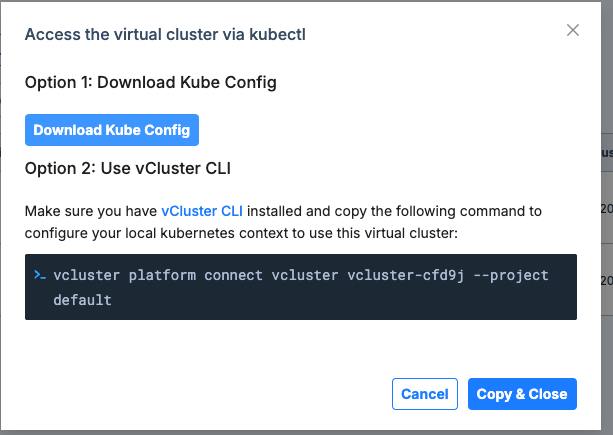
Figure 5: Connect to virtual cluster menu.
- After you have established access to the newly created virtual cluster via kubectl, run the following command to deploy the application to the cluster.
kubectl apply -f - <<EOF
apiVersion: v1
kind: Namespace
metadata:
  name: echoserver
---
apiVersion: v1
kind: Service
metadata:
  name: echoserver
  namespace: echoserver
spec:
  ports:
    - port: 80
      targetPort: 8080
      protocol: TCP
  type: NodePort
  selector:
    app: echoserver
---
apiVersion: apps/v1
kind: Deployment
metadata:
  name: echoserver
  namespace: echoserver
spec:
  selector:
    matchLabels:
      app: echoserver
  replicas: 1
  template:
    metadata:
      labels:
        app: echoserver
    spec:
      containers:
      - image: registry.k8s.io/e2e-test-images/echoserver:2.5
        imagePullPolicy: Always
        name: echoserver
        ports:
        - containerPort: 8080
        volumeMounts:
        - name: ebs-volume
          mountPath: /mnt/data
      volumes:
      - name: ebs-volume
        persistentVolumeClaim:
          claimName: ebs-claim
---
apiVersion: networking.k8s.io/v1
kind: Ingress
metadata:
  name: echoserver
  namespace: echoserver
  annotations:
    alb.ingress.kubernetes.io/load-balancer-name: vcluster-alb
    alb.ingress.kubernetes.io/subnets: <subnet ids>
    alb.ingress.kubernetes.io/certificate-arn: <certificate arn>
    alb.ingress.kubernetes.io/scheme: internet-facing
    alb.ingress.kubernetes.io/group.order: "-999"
spec:
  ingressClassName: alb
  rules:
    - host: <domain name>
      http:
        paths:
          - path: /<app name>
            pathType: ImplementationSpecific
            backend:
              service:
                name: echoserver
                port:
                  number: 80
---
apiVersion: v1
kind: PersistentVolumeClaim
metadata:
  name: ebs-claim
  namespace: echoserver
spec:
  accessModes:
    - ReadWriteOnce
  resources:
    requests:
      storage: 1Gi
  storageClassName: auto-ebs-sc
EOF
This manifest creates the following:
- Namespace: Creates a new namespace called echoserver
- Service: Creates a service named echoserver within the echoserver namespace
- Deployment: Creates a deployment named echoserver in the echoserver namespace
- Ingress: Creates an ingress resource that routes traffic to the echoserver service on port 80 via internet-facing load balancer (for testing purposes)
- Persistent Volume Claim (PVC): Requests storage resources for the application
Note: Replace placeholders in the YAML file with the appropriate values.
Repeat the preceding steps on the second virtual cluster. Upon resource deployment, Amazon EKS adds new path-based rules to the ALB that match the deployed Ingress objects, exposing the applications.
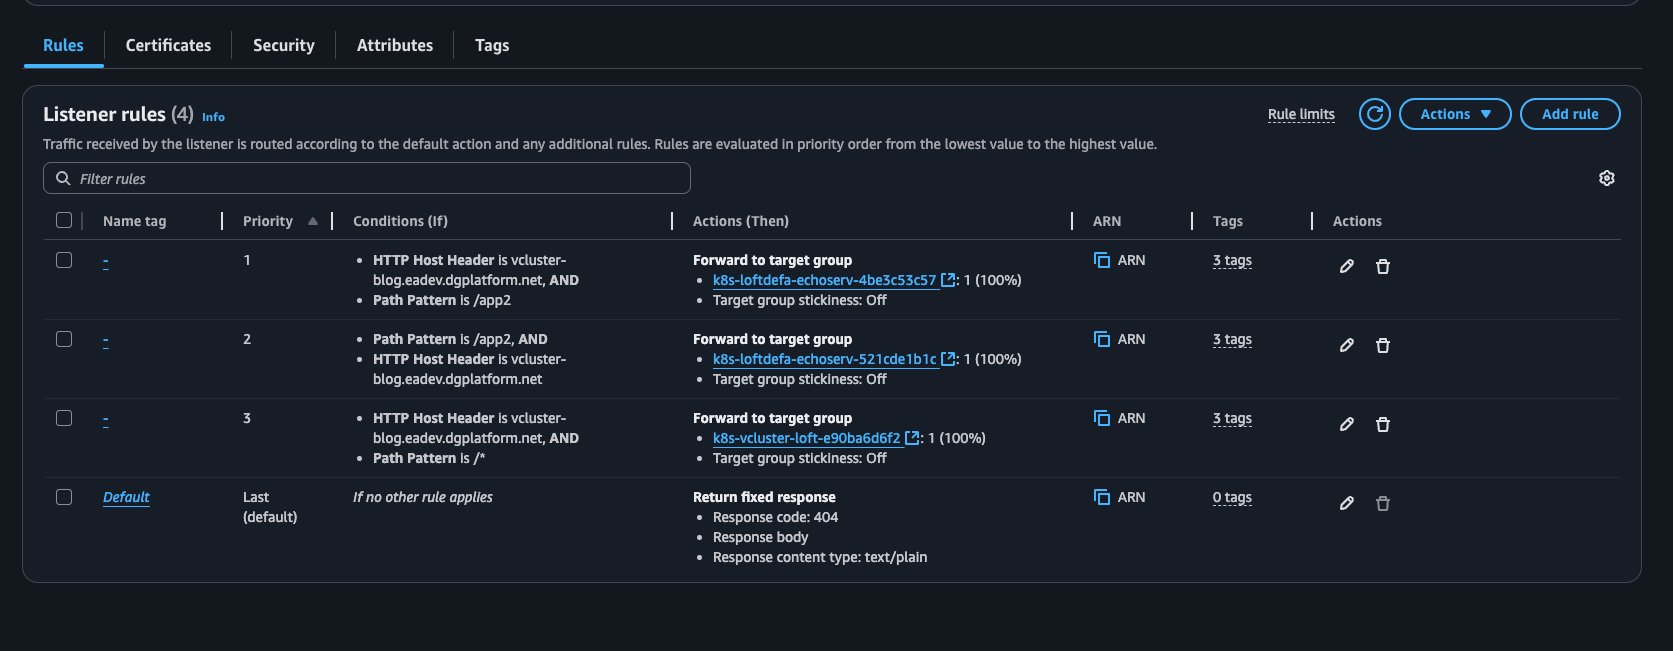
Figure 6: Application Load Balancer rules illustrating rules from different applications through the ingress object.
Step 6: Validate the implementation
To verify that the virtual cluster setup is working correctly, perform the following validation checks:
- Cluster deployment verification: Verify the successful deployment of both App1 and App2 in their respective virtual clusters. Validate pod status and service functionality
- Application accessibility testing: Test that both applications are properly exposed through the single Application Load Balancer:
- App1:
https://<domain-name>/app1 - App2:
https://<domain-name>/app2
- App1:
Clean up
To avoid incurring unnecessary charges, remove the deployed resources when they’re no longer needed. Start by uninstalling the vCluster Helm release, then delete the Amazon Route 53 DNS records and AWS Certificate Manager certificate:
# Uninstall vCluster
helm uninstall vcluster-pro

# Set these variables if running in a new terminal session
export DOMAIN_NAME=<your domain name>
export ZONE_ID=<your zone ID>
export ALB_NAME=vcluster-alb

# Look up certificate ARN by domain name
export CERTIFICATE_ARN=$(aws acm list-certificates \
  --query "CertificateSummaryList[?DomainName=='$DOMAIN_NAME'].CertificateArn" \
  --output text)

# Get ALB details
ALB_HOSTED_ZONE=$(aws elbv2 describe-load-balancers \
  --names $ALB_NAME \
  --query 'LoadBalancers[0].CanonicalHostedZoneId' \
  --output text)

ALB_DNS_NAME=$(aws elbv2 describe-load-balancers \
  --names $ALB_NAME \
  --query 'LoadBalancers[0].DNSName' \
  --output text)

# Get certificate validation records
CERT_NAME=$(aws acm describe-certificate \
  --certificate-arn $CERTIFICATE_ARN \
  --query 'Certificate.DomainValidationOptions[0].ResourceRecord.Name' \
  --output text)

CERT_VALUE=$(aws acm describe-certificate \
  --certificate-arn $CERTIFICATE_ARN \
  --query 'Certificate.DomainValidationOptions[0].ResourceRecord.Value' \
  --output text)

# Delete Route 53 alias record
aws route53 change-resource-record-sets \
  --hosted-zone-id $ZONE_ID \
  --change-batch '{
    "Changes": [{
      "Action": "DELETE",
      "ResourceRecordSet": {
        "Name": "'"$DOMAIN_NAME"'",
        "Type": "A",
        "AliasTarget": {
          "HostedZoneId": "'"$ALB_HOSTED_ZONE"'",
          "DNSName": "'"$ALB_DNS_NAME"'",
          "EvaluateTargetHealth": false
        }
      }
    }]
  }'

# Delete Route 53 validation record
aws route53 change-resource-record-sets \
  --hosted-zone-id $ZONE_ID \
  --change-batch '{
    "Changes": [{
      "Action": "DELETE",
      "ResourceRecordSet": {
        "Name": "'"$CERT_NAME"'",
        "Type": "CNAME",
        "TTL": 300,
        "ResourceRecords": [{"Value": "'"$CERT_VALUE"'"}]
      }
    }]
  }'

# Delete ACM certificate
aws acm delete-certificate --certificate-arn $CERTIFICATE_ARN
Conclusion
In this post, we showed how Deloitte used Amazon EKS with vCluster to reduce environment provisioning time by 89%, reclaim 500 hours annually, and cut infrastructure costs through resource consolidation. Ready to transform your development and testing infrastructure? Start by evaluating your current environment provisioning process and identifying opportunities to consolidate workloads using Amazon EKS with vCluster. Whether you’re looking to reduce setup times from hours to minutes, empower your teams with self-service capabilities, or optimize AWS costs through resource consolidation, this solution provides a proven path forward.
Visit the Amazon EKS documentation to learn more about Auto Mode and explore how virtual clusters can help your organization achieve similar gains in speed, efficiency, and operational agility. If you have questions or feedback about this post, leave a comment in the comments section.