AWS Big Data Blog
Automate building data lakes using AWS Service Catalog
Today, organizations spend a considerable amount of time understanding business processes, profiling data, and analyzing data from a variety of sources. The result is highly structured and organized data used primarily for reporting purposes. These traditional systems extract data from transactional systems that consist of metrics and attributes that describe different aspects of the business. Non-traditional data sources such as web server logs, sensor data, clickstream data, social network activity, text, and images drive new and interesting use cases like intrusion detection, predictive maintenance, ad placement, and numerous optimizations across a wide range of industries. However, storing the varied datasets can become expensive and difficult as the volume of data increases.
The data lake approach embraces these non-traditional data types, wherein all the data is kept in its raw form and only transformed when needed. A data lake is a centralized repository that allows you to store all your structured and unstructured data at any scale. Data lakes can collect streaming audio, video, call logs, and sentiment and social media data to provide more complete, robust insights. This has a considerable impact on the ability to perform AI, machine learning (ML), and data science.
Before building a data lake, organizations need to complete the following prerequisites:
- Understand the foundational building blocks of data lake
- Understand the services involved in building a data lake
- Define the personas needed to manage the data lake
- Create the security policies required for the different services to work in harmony when moving the data to create the data lake
To make building a data lake easier, this post presents a solution to manage and deploy your data lake as an AWS Service Catalog product. This enables you to create a data lake for your entire organization or individual lines of business, or simply to get started with analytics and ML use cases.
Solution overview
This post provides a simple way to deploy a data lake as an AWS Service Catalog product. AWS Service Catalog allows you to centrally manage and deploy IT services and applications in a self-service manner through a common, customizable product catalog. We create automated pipelines to move data from an operational database into an Amazon Simple Storage Service (Amazon S3) based data lake as well as define ways to move unstructured data from disparate data sources into the data lake. We also define fine-grained permissions in the data lake to enable query engines like Amazon Athena to securely analyze data.
The following are some advantages of having your data lake as an AWS Service Catalog product:
- Enforce compliance with corporate standards so you can control which IT services and versions are available and who gets permission access by individual, group, department, or cost center.
- Enforce governance by helping employees quickly find and deploy only approved IT services without giving direct access to the underlying services.
- End-users, like developers, data scientists, or business users, have quick and easy access to a custom, curated list of products that can be deployed consistently, is always in compliance, and is always secure through self-service, which accelerates business growth.
- Enforce constraints such as limiting the AWS Region in which the data lake can be launched.
- Enforce tagging based on department or cost center to keep track of the data lake built for different departments.
- Centrally manage the IT service lifecycle by centrally adding new versions to the data lake product.
- Improve operational efficiency by integrating with third-party products and ITSM tools such as ServiceNow and Jira.
- Build a data lake based on a reusable foundation provided by a central IT organization.
The following diagram illustrates how data lake can be bundled as a product inside a Service Catalog Portfolio along with other products:

Solution architecture
The following diagram illustrates the architecture for this solution:

We use the following services in this solution:
- Amazon S3 – Amazon S3 is an object storage service that offers industry-leading scalability, data availability, security, and performance. For this use case, you use Amazon S3 as storage for the data lake.
- AWS Lake Formation – Lake Formation makes it simple to set up a secure data lake—a centralized, curated, and secured repository that stores all your data—both in its original form and prepared for analysis. The data lake admin can easily label the data and give users granular permissions to access authorized datasets.
- AWS Glue – AWS Glue is a serverless data integration service that makes it easy to discover, prepare, and combine data for analytics, ML, and application development.
- Amazon Athena – Athena is an interactive query service that makes it simple to analyze data in Amazon S3 using standard SQL. Athena is serverless, so there is no infrastructure to manage, and you pay only for the queries you run and the amount of data being scanned.
Datasets
To illustrate how data is managed in the data lake, we use sample datasets that are publicly available. The first dataset is United States manufacturers census data that we download in a structured format into a relational database. In addition, we can load United States school census data in its raw format into the data lake.
Walkthrough overview
AWS Service Catalog allows organizations to create and manage catalogs of IT services that are approved for use on AWS. It allows you to centrally manage deployed IT services and your applications, resources, and metadata. Following the same concept, we deploy a data lake as a collection of AWS services and resources as an AWS Service Catalog product. This helps you achieve consistent governance and meet your compliance requirements, while enabling users to quickly deploy only the approved services.
Follow the steps in the next sections to deploy a data lake as an AWS Service Catalog product. For this post, we load United States public census data into an Amazon Relational Database Service (Amazon RDS) for MySQL instance to demonstrate ingestion of data into the data lake from a relational database. We use an AWS CloudFormation template to create S3 buckets to load the script for creating the data lake as an AWS Service Catalog product as well as scripts for data transformation.
Deploy the CloudFormation template
Be sure to deploy your resources in the US East (N. Virginia) Region (us-east-1). We use the provided CloudFormation template to create all the necessary resources. This step removes any manual errors by increasing efficiency, and provides consistent configurations over time.
- Choose Launch Stack:

- On the Create stack page, Amazon S3 URL should show as
https://aws-bigdata-blog.s3.amazonaws.com/artifacts/datalake-service-catalog/datalake_portfolio.yaml. - Choose Next.

- Enter
datalake-portfoliofor the stack name. - For Portfolio name, enter a name for the AWS Service Catalog portfolio that holds the data lake product.
- Choose Next.
- Choose Create stack and wait for the stack to create the resources in your AWS account.
On the stack’s Resources tab, you can find the following:
- DataLakePortfolio – The AWS Service Catalog portfolio
- ProdAsDataLake – The data lake as a product
- ProductCFTDataLake – The CloudFormation template as a product
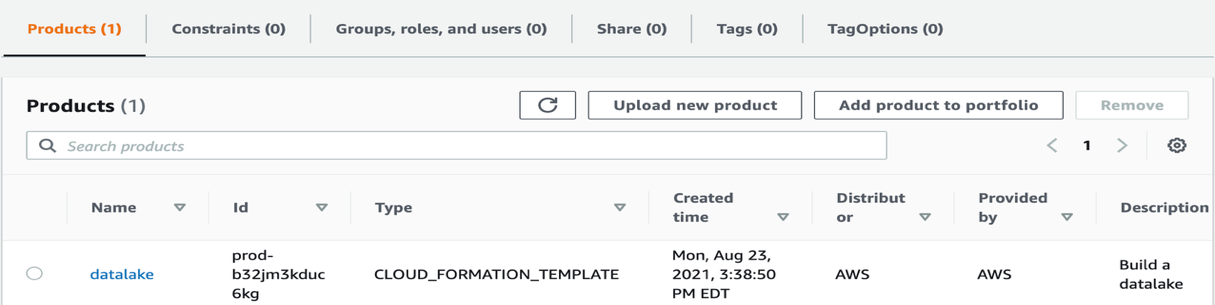
If you choose the arrow next to the DataLakePortfolio resource, you’re redirected to the AWS Service Catalog portfolio, with datalake listed as a product.
Grant permissions to launch the AWS Service Catalog product
We need to provide appropriate permissions for the current user to launch the datalake product we just created.
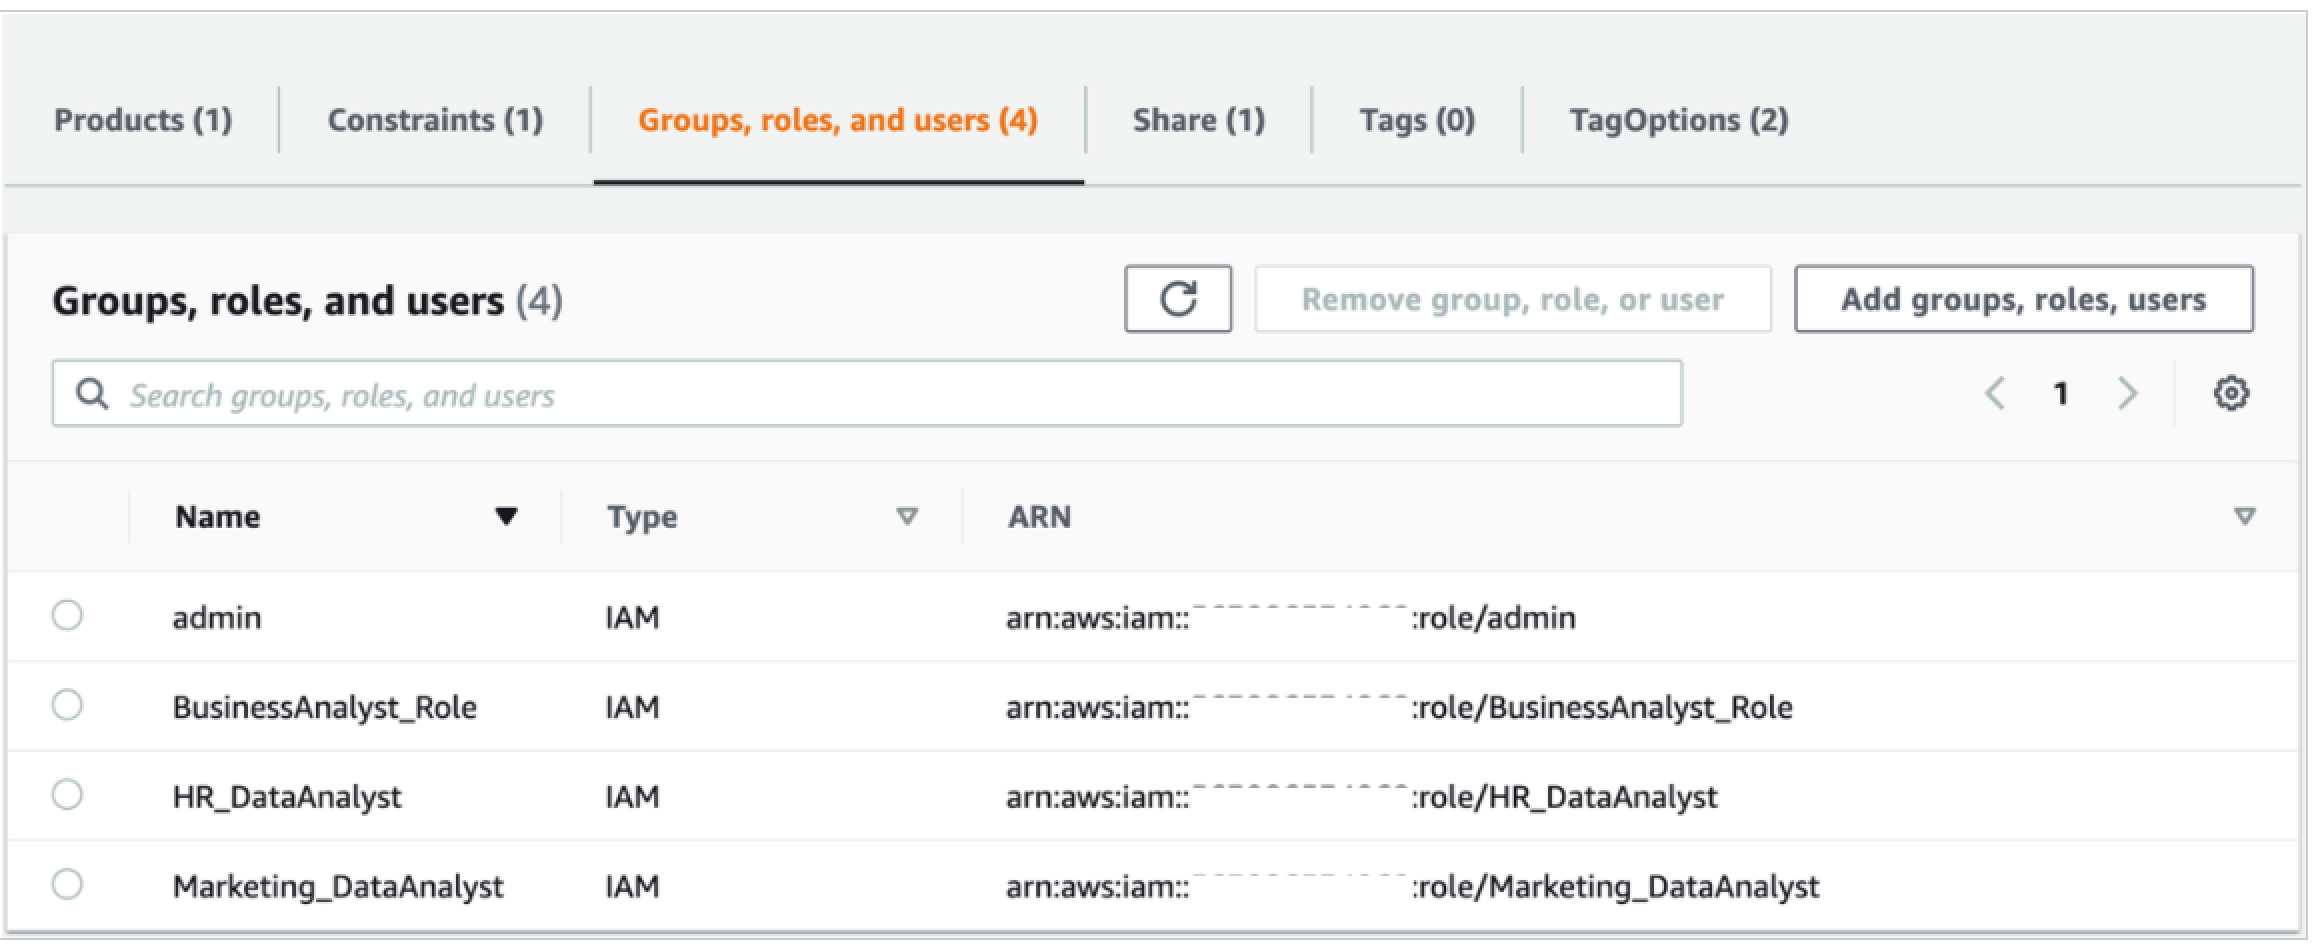
- On the portfolio page on the AWS Service Catalog console, choose the Groups, roles, and users tab.
- Choose Add groups, roles, users.
- Select the group, role, or user you want to grant permissions to launch the product.

Another approach is to enhance the capability of the data lake by building a multi-tenant data lake. A multi-tenant data lake enables hosting data from multiple business units in the same data lake and maintaining data isolation through roles with different permission sets. To build a multi-tenant data lake, you can add a wide range of stakeholders (developers, analysts, data scientists) from different organizational units. By defining appropriate roles, multi-tenancy helps achieve data sharing and collaboration between different teams and integrate multiple data silos to get a unified view of the data. You can add these appropriate roles on the portfolio page.
In the following example screenshot, data analysts from HR and Marketing have access to their own datasets, the business analyst has access to both datasets to get a unified view of the data to derive meaningful insights, and the admin user manages the operations of the central data lake.
In addition, you can enforce constraints on the data lake from the AWS Service Catalog console as opposed to the data lake product launched independently as a CloudFormation script. This allows the central IT team to enable governance control when a department chooses to build a data lake for their business users.
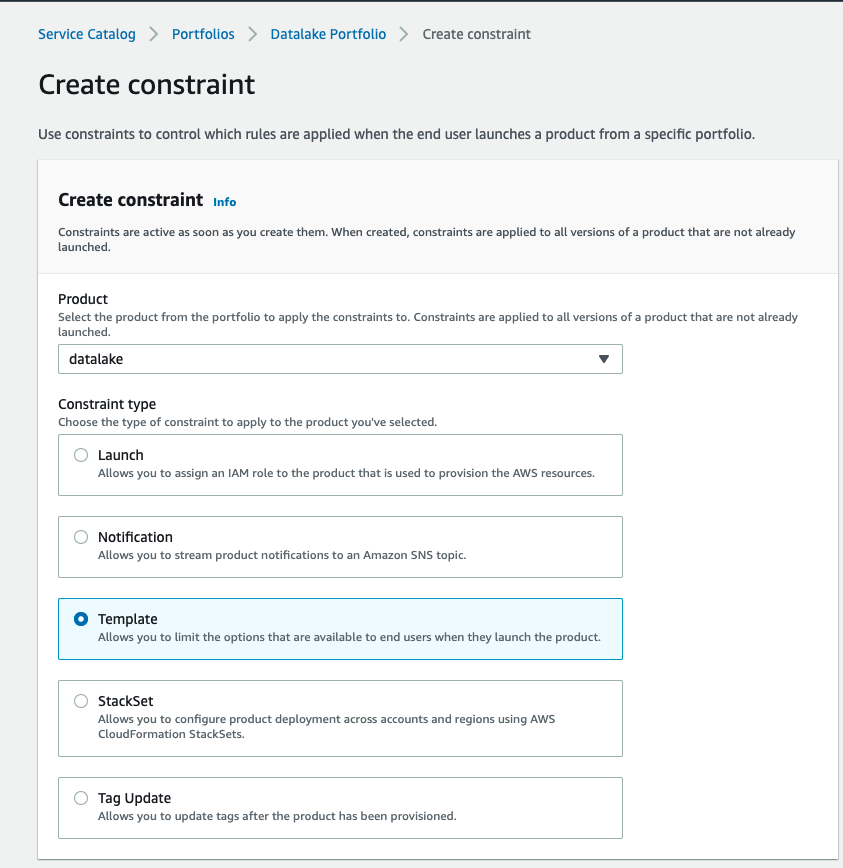
- To enable constraints, choose the Constraints tab on the portfolio page.
For example, a template constraint allows you to limit the options that are available to end-users when they launch the product. The following screenshot shows an example of configuring a template constraint.
The VPC CIDR range is restricted to a certain range when launching the data lake.

We can now see the template constraint listed on the Constraints tab.

If the constraint is violated and a different CIDR range is entered while launching the product, the template throws an error, as shown in the following screenshot.

In addition, while launching the product to track costs per department or team, the central IT team can define tags in the TagOptions library and force the operations team to select tags from a list of values to distinctly select the business unit for which the data lake is being created and eventually track costs per department or business unit.
- Choose the Tags tab to manage tags.

- After setting your organization’s standards for roles, constraints, and tags, the central IT team can share the AWS Service Catalog
datalakeportfolio with accounts or organizations via AWS Organizations.
AWS Service Catalog administrators from another AWS account can then distribute the data lake product to their end-users.

You can view the accounts with access to the portfolio on the Share tab.

Launch the data lake
To launch the data lake, complete the following steps:
- Sign in as the user or role that you granted permissions to launch the data lake. If you have never launched AWS Lake Formation service and not defined an initial administrator, please go to the service and add an administrator.
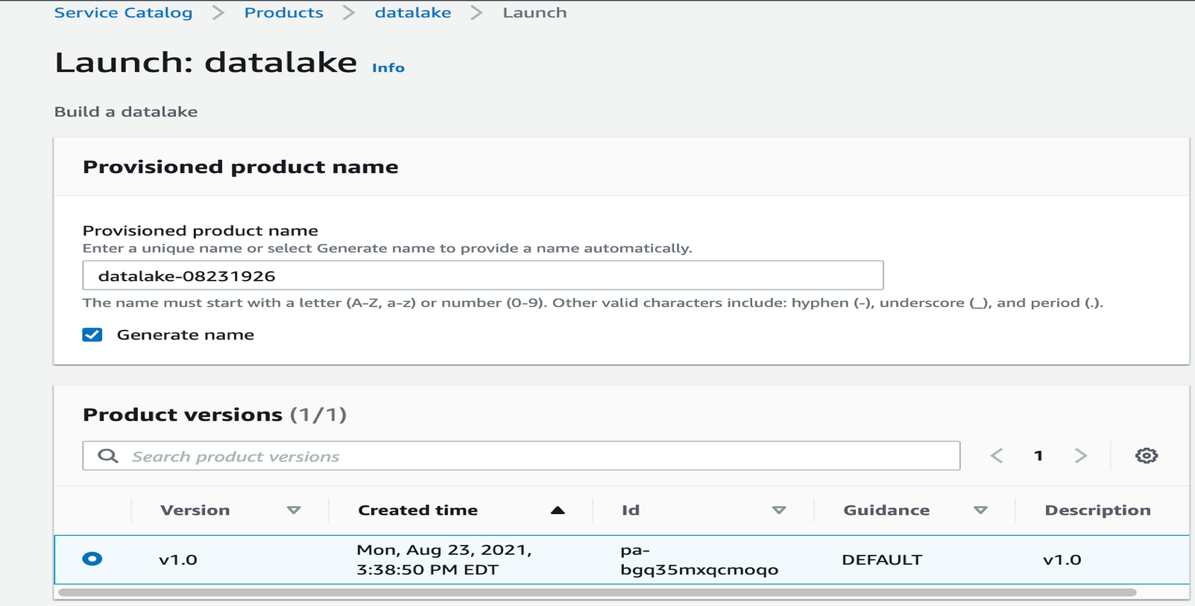
- On the AWS Service Catalog console, select the
datalakeproduct and choose Launch product.

- Select Generate name to automatically enter a name for the provisioned product.
- Select your product version (for this post, v1.0 is selected by default).
- Enter DB username and password.
- Verify the stack name of the previously launched CloudFormation template,
datalake-portfolio. - Choose Launch product.
The datalake product triggers the CloudFormation template in the background, creates all the resources, and launches the data lake in your account.
- On the AWS Service Catalog console, choose Provisioned products in the navigation pane.

- Choose the output value with the link to the CloudFormation stack that created the data lake for your account.
- On the Resources tab, review the details of the resources created.
The following resources are created in this step as part of the launching the AWS Service Catalog product:
- Data ingestion:
- A VPC with subnets and security groups for hosting the RDS for MySQL database with sample data.
- An RDS for MySQL database as a sample source to load data into the data lake. Verify the VPC CIDR range to host the data lake as well as database subnet CIDR ranges for the database.
- The default RDS for MySQL database. You can change the password as needed on the Amazon RDS console.
- An AWS Glue JDBC connection to connect to the RDS for MySQL database with the sample data loaded.
- An AWS Glue crawler for data ingestion into the data lake.
- Data transformation:
- AWS Glue jobs for data transformation.
- An AWS Glue Data Catalog database to hold the metadata information.
- AWS Identity and Access Management (IAM) AWS Glue and AWS Lambda workflow roles to read data from the RDS for MySQL database and load data into the data lake.
- Data visualization:
- IAM data lake administrator and data lake analyst roles for managing and accessing data in the data lake through Lake Formation.
- Two Athena named queries.
- Two users:
- datalake_admin – Responsible for day-to-day operations, management, and governance of the data lake.
- datalake_analyst – Has permissions to only view and analyze the data using different visualization tools.
Data ingestion, transformation, and visualization
After the CloudFormation stack is ready, we complete the following steps to ingest, transform, and visualize the data.
Ingest the data
We run an AWS Glue crawler to load data into the data lake. Optionally, you can verify that the data is available in the data source by following the steps in the appendix of this post. To run the crawler, complete the following steps:
- On the AWS Glue console, choose Crawlers in the navigation pane.
The Crawlers page shows four crawlers created as part of the data lake product deployment.
- Select the crawler
GlueRDSCrawler-xxxx. - Choose Run crawler.
A table is added to the AWS Glue database gluedatabasemysql-blogdb.
The raw data is now ready to run any kind of transformations that are needed. In this example, we transform the raw data into Parquet format.
Transform the data
AWS Glue provides a console and API operations to set up and manage your extract, transform, and load (ETL) workload. A job is the business logic that performs the ETL work in AWS Glue. When you start a job, AWS Glue runs a script that extracts data from sources, transforms the data, and loads it into targets. In this case, our source is the raw S3 bucket and the target is the curated S3 bucket to store the transformed data in Parquet format after the AWS Glue job runs.
To transform the data, complete the following steps:
- On the AWS Glue console, choose Jobs in the navigation pane.
The Jobs page lists the AWS Glue job created as part of the data lake product deployment.
- Select the job that starts with
GlueRDSJob. - On the Action menu, choose Edit script.

- Update the name of the S3 bucket on line 33 to the
ProcessedBucketS3value on the Outputs tab of the second CloudFormation stack. - Select the job again and on the Action menu, choose Run job.
You can see the status of the job as it runs.

The ETL job uses the AWS Glue IAM role created as part of the CloudFormation script. To write data into the curated bucket of the data lake, appropriate permissions need to be granted to this role. These permissions have already been granted as part of the data lake deployment. When the job is complete, its status shows as Succeeded.

The transformed data is stored in the curated bucket on the data lake.

The sample data is now transformed and is ready for data visualization.
Visualize the data
In this final step, we use Lake Formation to manage and govern the data that determines who has access to the data and what level of access they have. We do this by assigning granular permissions for the users and personas created by the data lake product. We can then query the data using Athena.
The users datalake-admin and datalake-analyst have already been created. datalake_admin is responsible for day-to-day operations, management, and governance of the data lake. datalake_analyst has permissions to view and analyze the data using different visualization tools.
As part of the data lake deployment, we defined the curated S3 bucket as the data lake location in Lake Formation. To read from and write to the data lake location, we have to make sure all the permissions are properly assigned. In the previous section, we embedded the permission for the AWS Glue ETL job to read from and write to the data lake location in the CloudFormation template. Therefore, the role SC-xxxxGlueWorkFlowRole-xxxxx has appropriate permissions to assume by the crawlers and create the required database and table schema for querying the data. Note that the first crawler analyzes data in the RDS for MySQL database and doesn’t access the data lake, so we didn’t need to give it permissions for the data lake.
To run the crawler, complete the following steps:
- On the AWS Glue console, choose Crawlers in the navigation pane.
- Select the crawler
LakeCuratedZoneCrawler-xxxxxand choose Run crawler.

The crawler reads the data from the data lake and populates the table in the AWS Glue database created in the data ingestion stage and makes it available to query using Athena.
To query the populated data in the AWS Glue Data Catalog using Athena, we need to provide granular permissions to the role using Lake Formation governance and management.
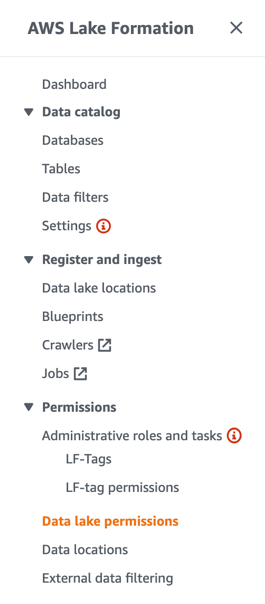
- On the Lake Formation console, choose Data lake permissions in the navigation pane.
- Choose Grant.
- For IAM users and roles, choose the role you want to assign the permissions to.
- Select Named data catalog resources.
- Choose the database and table.

- For Table permissions, select Select.
- For Data permissions, select All data access.
This allows the user to see all the data in the table but not modify it.
- Choose Grant.

Now you can query the data with Athena. If you haven’t already set up the Athena query results path, see Specifying a Query Result Location for instructions.
- On the Athena console, open the query editor.
- Choose the Saved queries tab.
You should see the two queries created as part of the data lake product deployment.
- Choose the query
CensusManufacturersQuery.

The database, table, and query are pre-populated in the query editor.
- Choose Run query to access the data in the data lake.

We have completed the process to load, transform, and visualize the data in the data lake by rapid deployment of a data lake as an AWS Service Catalog product. We used sample data ingested in an RDS for MySQL database as an example. You can repeat this process and implement similar steps using Amazon S3 as a data source. To do so, the sample data file schools-census-data.csv is loaded and the corresponding AWS Glue crawler and job to ingest, transform, and visualize the data has been created for you as part of this AWS Service Catalog data lake product deployment.
Conclusion
In this post, we saw how you can minimize the time and effort required to build a data lake. Setting up a data lake helps organizations to be data-driven, identifying patterns in data and acting quickly to accelerate business growth. Additionally, to take full advantage of your data lake, you can build and offer data-driven products and applications with ease through a highly customizable product catalog. With AWS Service Catalog, you can easily and quickly deploy a data lake following common best practices. AWS Service Catalog also enforces constraints for network and account baselines to securely build a data lake in an end-user environment.
Appendix
To verify the sample data is loaded into Amazon RDS, complete the following steps:
- On the Amazon Elastic Compute Cloud (Amazon EC2) console, select the
EC2SampleRDSdatainstance. - On the Actions menu, choose Monitor and troubleshoot.
- Choose Get system log.
The system log shows the count of records loaded into the RDS for MySQL database:

Next, we can test the connection to the database.
- On the AWS Glue console, choose Connections in the navigation pane.
You should see RDSConnectionMySQL-xxxx created for you.
- Select the connection and choose Test connection.

- For IAM role¸ choose the role
SC-xxxxGlueWorkFlowRole-xxxxx.

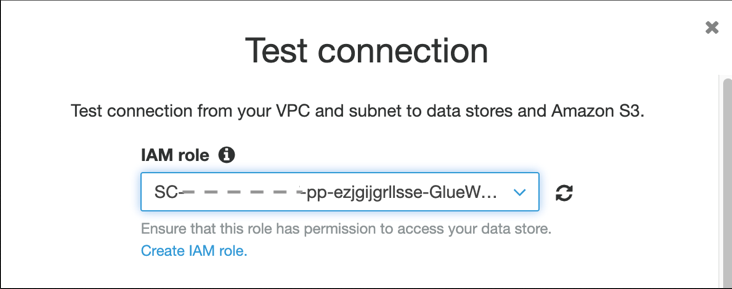
RDSConnectionMySQL-xxxx should successfully connect to your RDS for MySQL DB instance.
About the Authors
 Mamata Vaidya is a Senior Solutions Architect at Amazon Web Services(AWS) accelerating customers in their adoption to the cloud in the area of bigdata analytics and foundational architecture. She has over 20 years of experience in building and architecting enterprise systems in healthcare, finance and cybersecurity with strong management skills. Prior to AWS, Mamata worked for Bristol-Myers Squibb and Citigroup in senior technical management positions. Outside of work, Mamata enjoys hiking with family and friends and mentoring high school students.
 Shan Kandaswamy is a Solutions Architect at Amazon Web Services (AWS) who is passionate about helping customers solve complex problems. He is a technical evangelist who advocates for distributed architecture, bigdata analytics and serverless technologies to help customers navigate the cloud landscape as they move to cloud computing. He’s a big fan of travel, watching movies and learning something new every day.