AWS Big Data Blog
Automate data discovery and centralized management with AWS Glue Data Catalog
Managing sensitive data across sprawling data environments is hard. In this post, we show you how to tackle data discovery, classification, and governance across your databases, data warehouses, and object storage to regain visibility and control over your data landscape. As you build new features, products, and services, your data naturally spreads across multiple systems to meet immediate application and business needs. Different teams spin up their own data stores, and before long, you’re dealing with a complex web of repositories—often with limited visibility into what exists where. This data sprawl becomes most challenging when you must understand and protect your sensitive data. Security teams often struggle to maintain accurate inventories of data categorization and classification. Stakeholders demand comprehensive insights into data classification and processing activities, usually on tight deadlines, and keeping up-to-date data inventories becomes increasingly daunting as your data grows. Without automation, you’re left with manual processes that stretch over weeks, leave room for human error, and create unnecessary business risk.
The need for automation
In a typical manual scenario, creating a new database triggers a chain of time-consuming events. The governance team reviews the new data source, documents its contents, and scans for sensitive data. The security team assesses its configuration and access controls. Days or weeks pass before you fully understand this new asset’s sensitivity.
With automation, creating a new database triggers immediate action. The system detects the new source, catalogs its structure, identifies sensitive data, and updates a central inventory within minutes, supporting proper governance from the moment you create it. Here’s how it works on AWS: When you create an Amazon Simple Storage Service (Amazon S3) bucket for customer orders, you add tags such as Business Function, Data Owner, and Purpose. After the bucket is in use, the system detects it, creates catalog entries, analyzes data patterns, identifies sensitive information, and updates governance records without additional input from you. This gives your organization real-time visibility. Security teams instantly see which repositories contain sensitive information. Governance teams generate up-to-date inventory reports on demand, and data teams immediately understand sensitivity levels, helping them use data responsibly.
Solution overview
The solution uses key AWS services across three layers that work together for comprehensive data visibility and categorization.
Detection Layer: Continuously monitors your AWS environment for new resource creation. When you provision an Amazon S3 bucket, Amazon Relational Database Service (Amazon RDS) database, or Amazon DynamoDB table, Amazon EventBridge rules capture this activity and initiates the governance workflow, so no data source goes unnoticed.
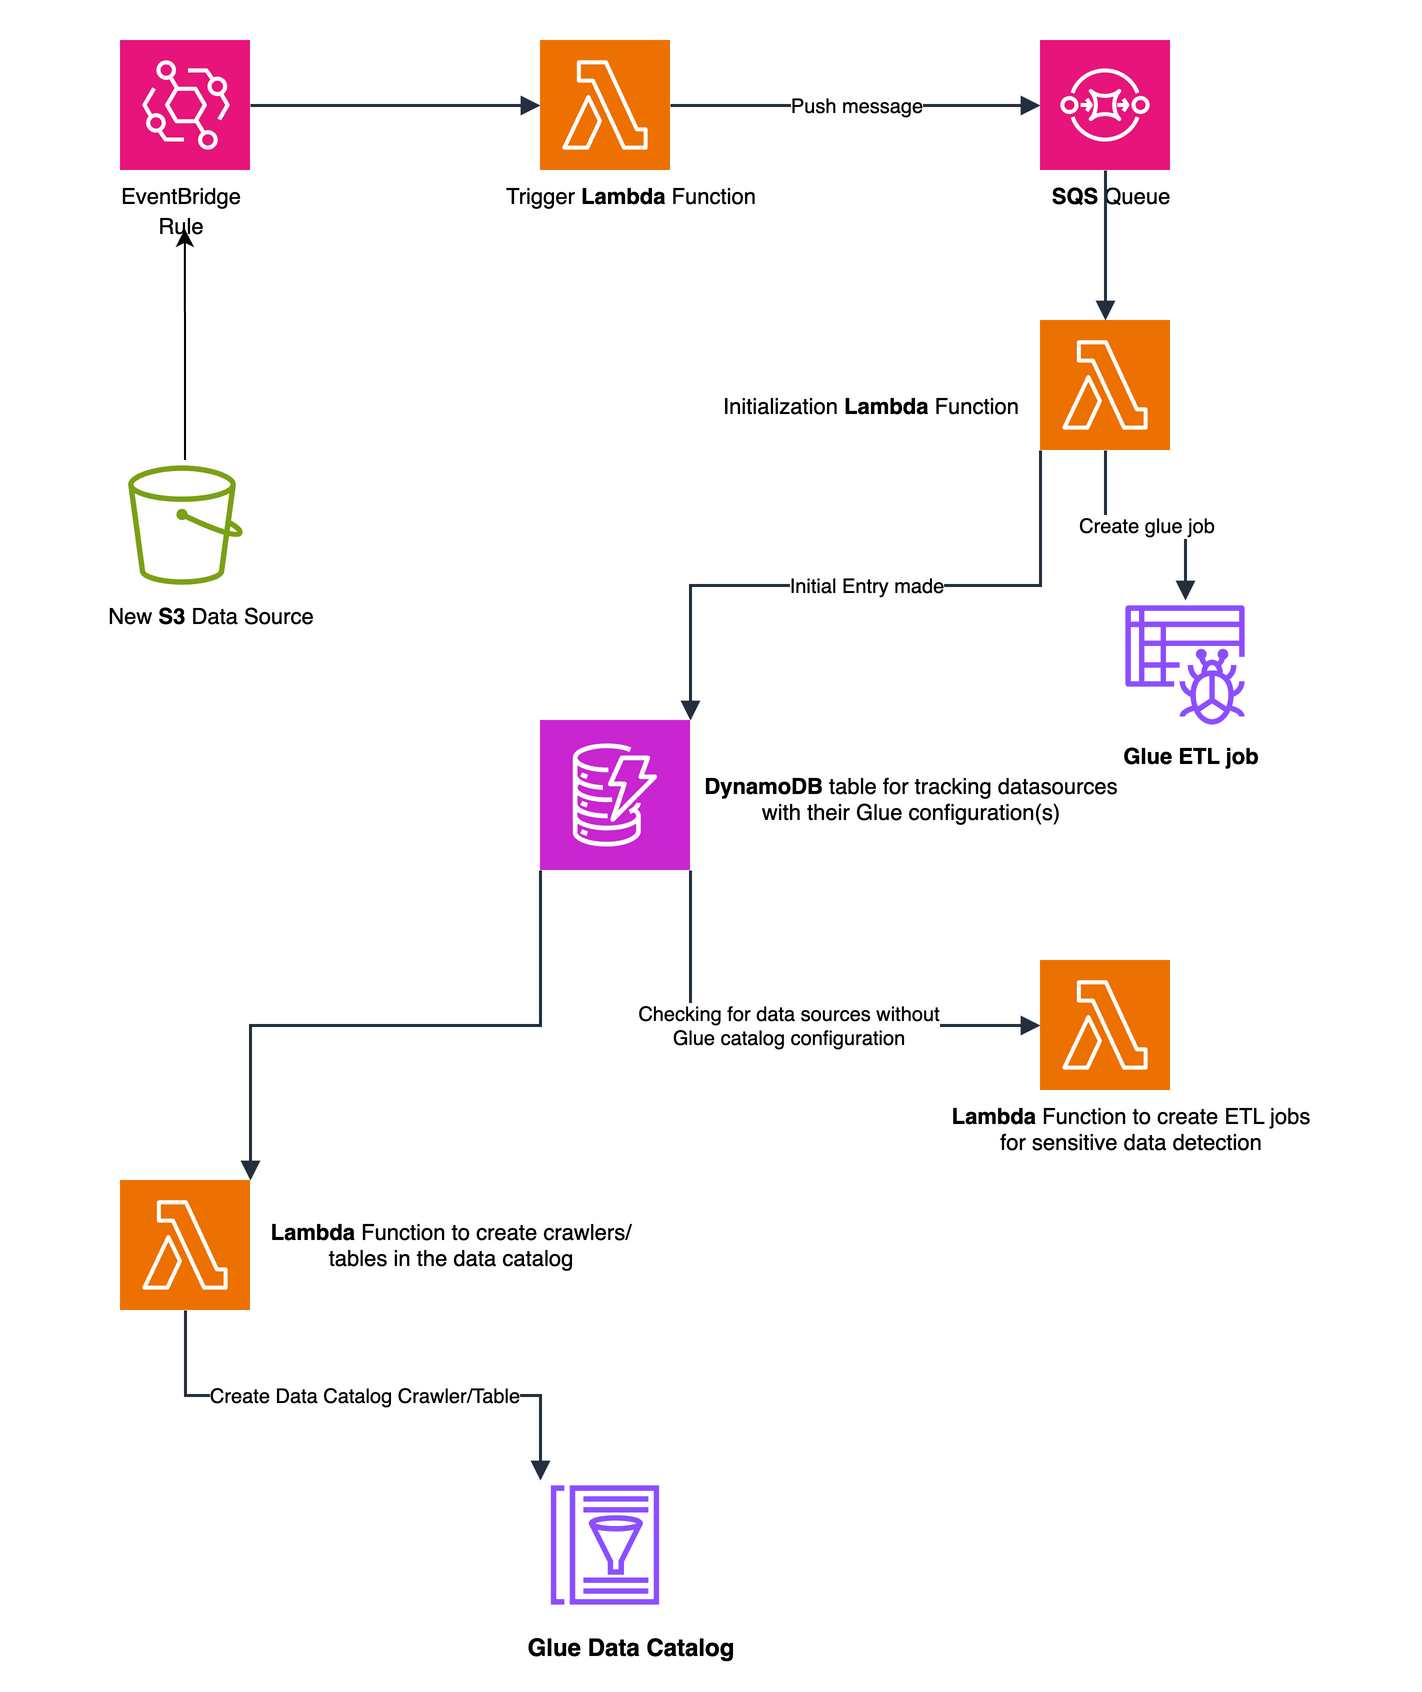
Figure 1 Automated data source discovery (S3 example) workflow using EventBridge Rules and Lambda functions
Processing Layer: After a new source is detected, AWS Glue crawlers analyze its schema while specialized jobs scan for sensitive data patterns. The system also extracts metadata from resource tags, enriching your understanding of each repository’s purpose and ownership.
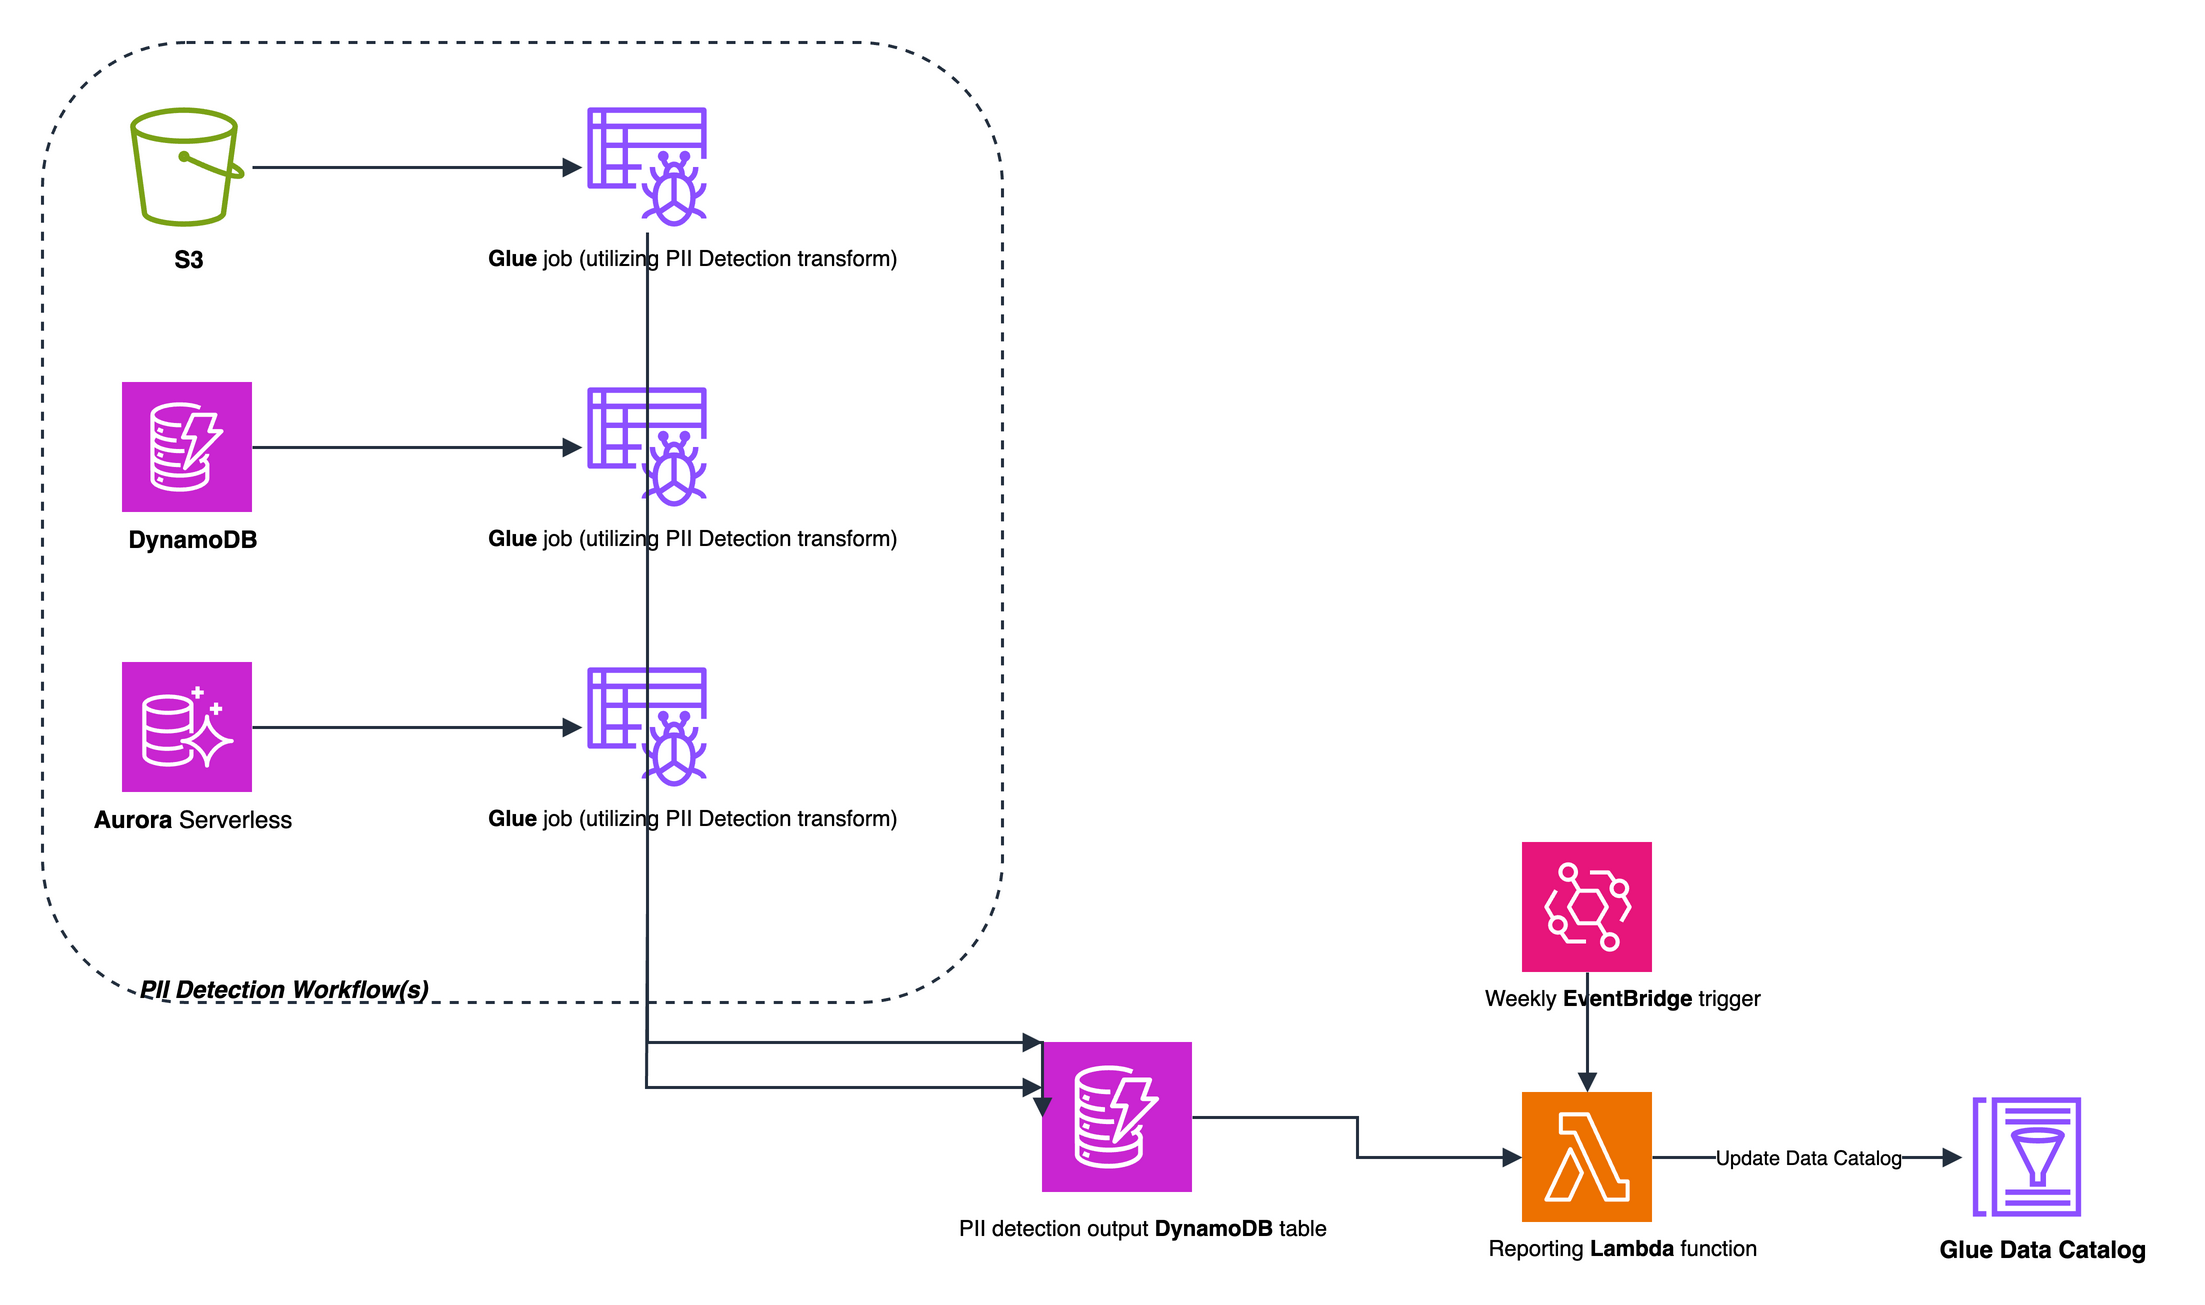
Figure 2 PII detection and processing workflow using AWS Glue jobs and DynamoDB staging
Management Layer: Maintains a central source of truth about your data assets. AWS Glue Data Catalog provides a unified view across your organization, tracking schema changes and sensitivity levels. This layer also manages the processing workflow state and generates insights for stakeholders.
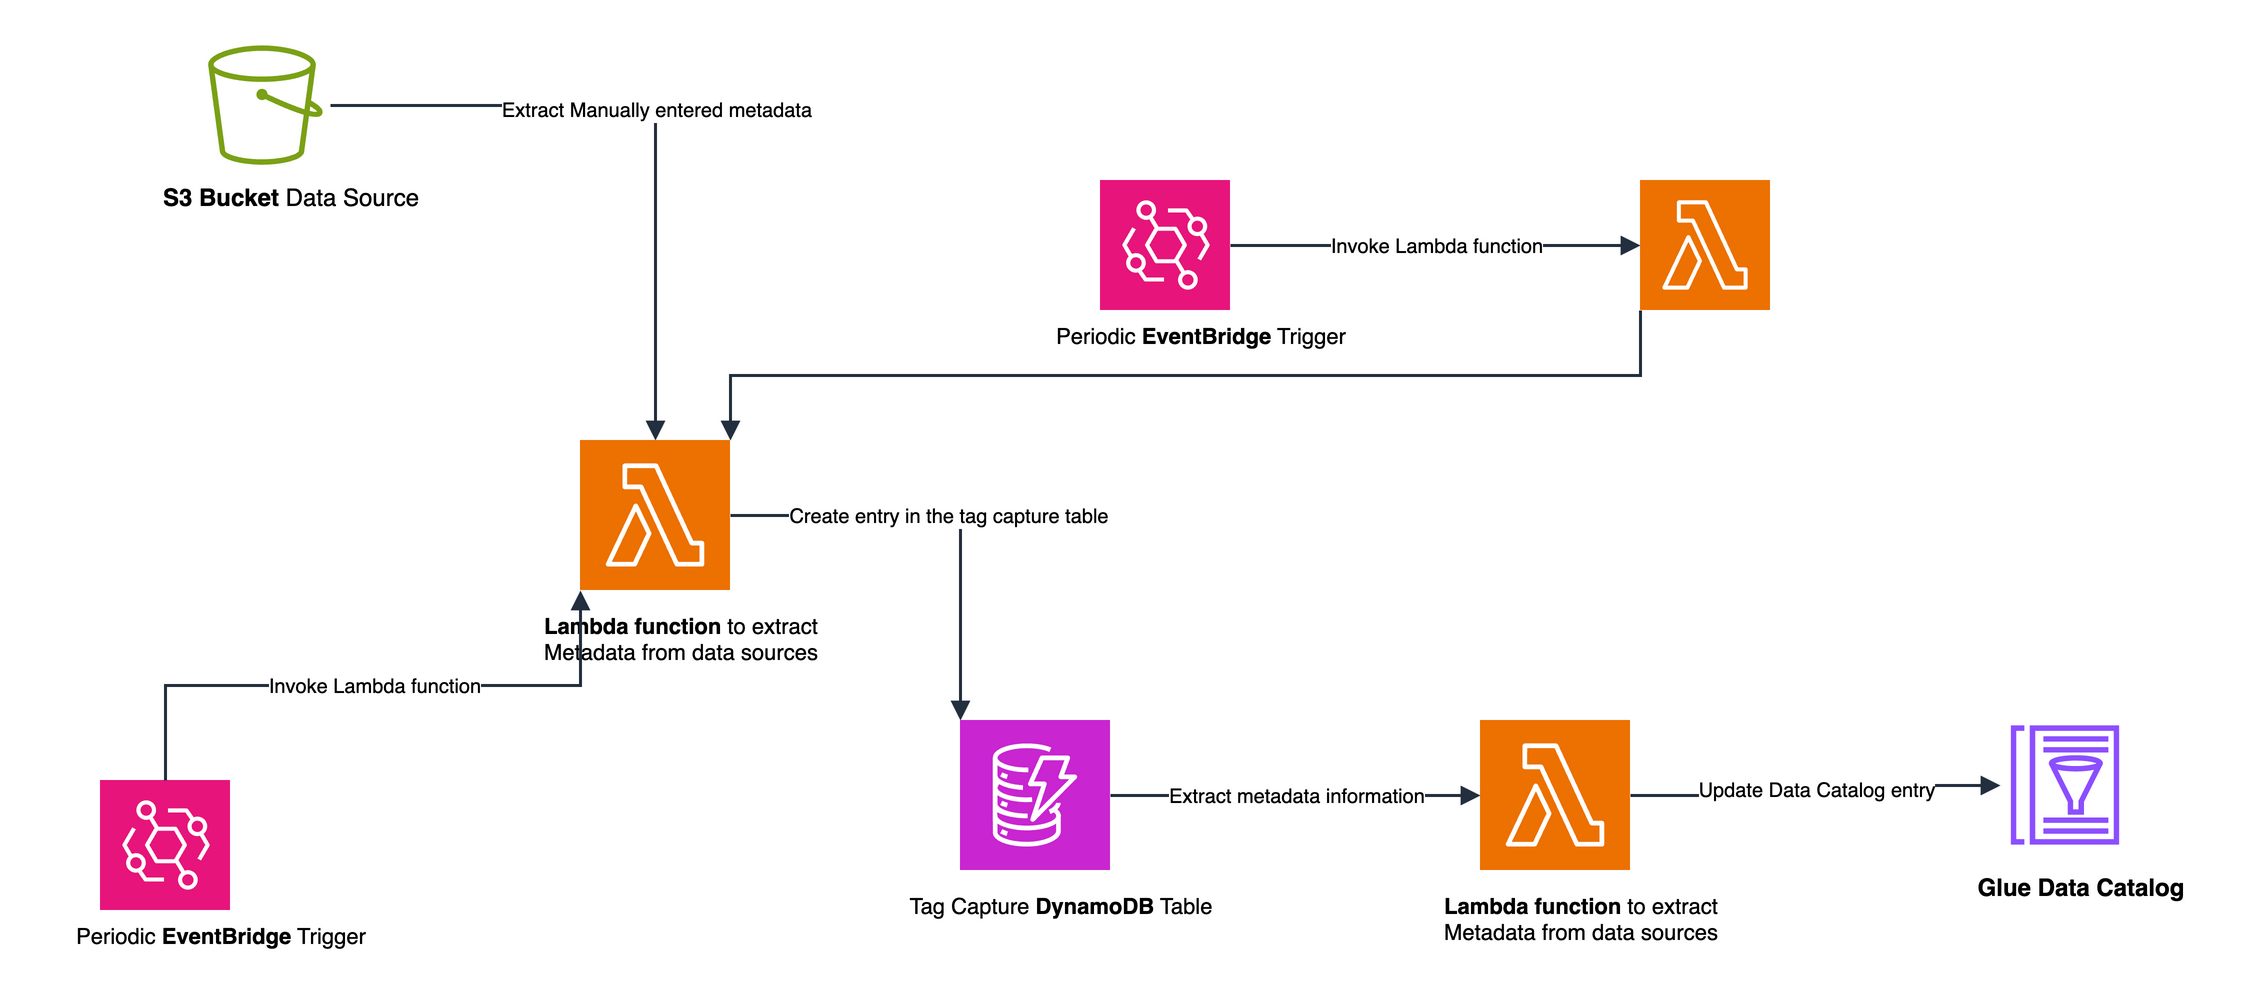
Figure 3 Tag-based metadata capture and Data Catalog update workflow
Setting up the solution
This solution uses AWS Cloud Development Kit (AWS CDK) for deployment, organized into four stacks that build upon each other.PrerequisitesBefore deployment, verify that you have:
- Access to an AWS account with permissions to create resources in Amazon S3, AWS Lambda, Amazon DynamoDB, AWS Glue, and Amazon EventBridge
- Node.js (version 18 or later) and npm installed
- Access to a terminal to run AWS CDK CLI commands
- Basic familiarity with AWS Console navigation
Step 1: Infrastructure deployment
Deploy four stacks using AWS CDK. Each establishes components for data discovery, cataloging, and PII detection.
- BaseInfraStack: Deploys core infrastructure—Amazon Virtual Private Cloud (Amazon VPC), DynamoDB tables for state management, EventBridge rules for monitoring, and Lambda functions for orchestration.
- GlueAssetsStack: Sets up S3 buckets for AWS Glue ETL scripts and deploys PySpark code for PII detection.
- GlueJobCreationStack: Creates Data Catalog databases and deploys Lambda functions that automate the creation of AWS Glue crawlers and PII detection jobs for newly discovered data sources.
- ReportingStack: Deploys Lambda functions that process PII detection results and tag metadata, updating the Data Catalog accordingly.
To deploy these stacks, you will use the AWS CDK CLI, running the following commands:
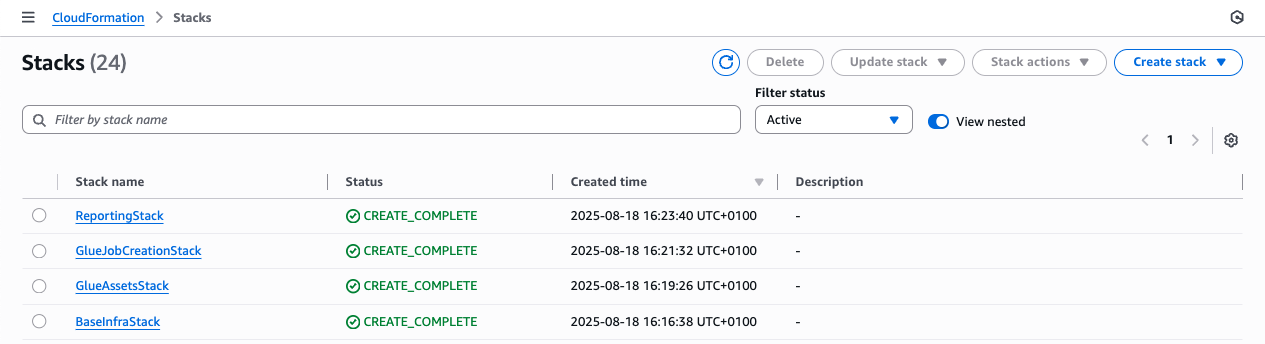
Figure 4 CloudFormation console showing successful stack deployment
Step 2: Verify initial setup
In the AWS Management Console, open DynamoDB and find the glueJobTracker table. This table is a critical component of the framework:
- Purpose: Central state management – tracks processing states and configurations for discovered data sources.
- Current state: The table should be empty because no discovery processes have been triggered yet.
- Structure: Tracks states such as Data Catalog entry creation and PII detection job setup for each data source.
By verifying this table, you confirm that the infrastructure is ready to begin tracking new data sources.
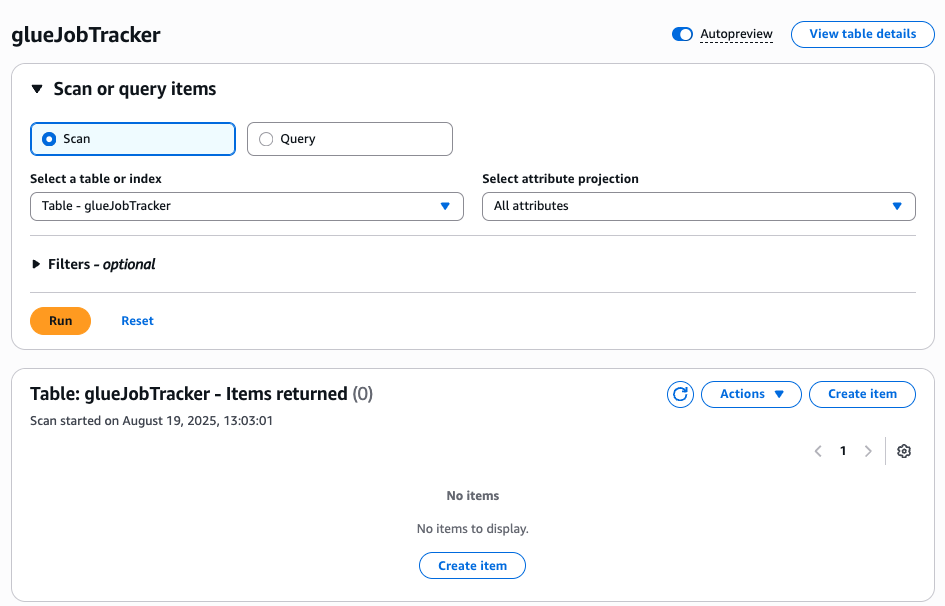
Figure 5 Empty DynamoDB glueJobTracker table before execution
Solution in action
This solution runs automatically in production through EventBridge triggers and scheduled AWS Glue crawlers. The following walkthrough executes each step manually so you can observe the workflow.You follow the journey of a newly created S3 bucket containing sensitive data, seeing how the solution discovers, catalog, and processes it through each stage.
Step 3: Create a new S3 bucket
- Open the Amazon S3 console.
- Choose Create bucket.
- Enter a unique name for your bucket (for example, demo-customer-data-20250819).
- In the Tags section, add the following tags:
- Key: gdpr-scan, Value: true
- Key: Business Function, Value: Sales – US
- Key: Data Classification, Value: Confidential
- Keep other settings as default and choose Create bucket.
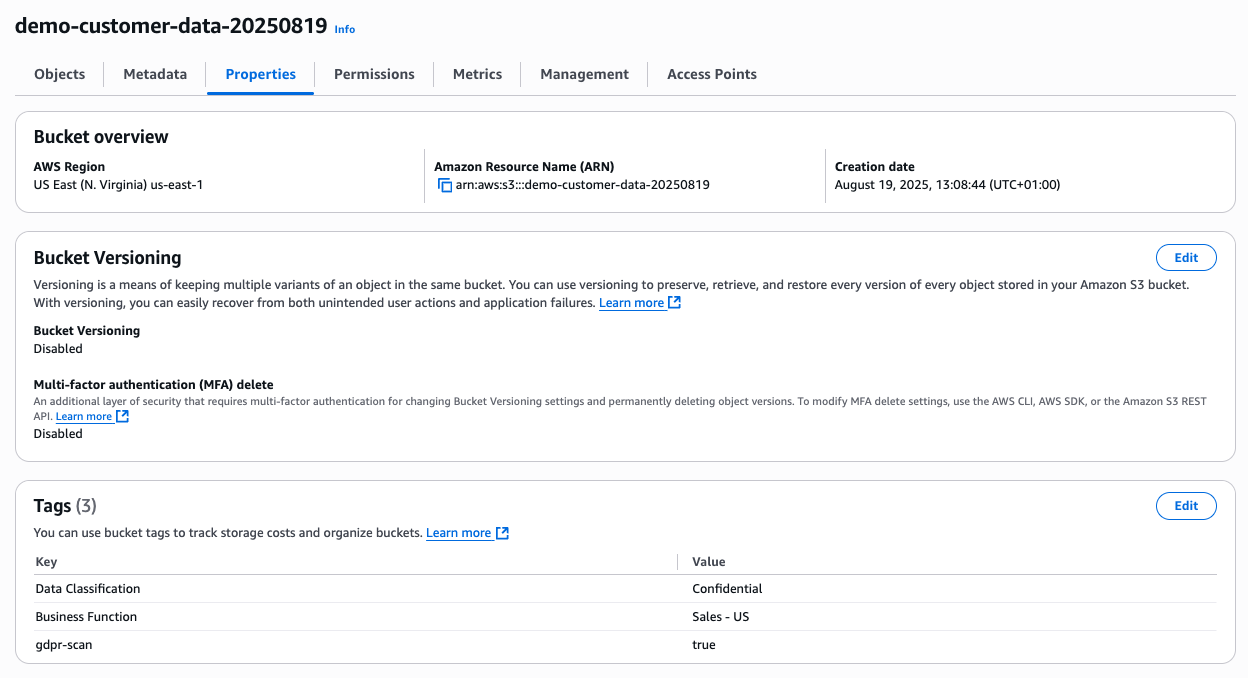
Figure 6 S3 console showing new bucket creation with tags
Step 4: Upload sample data
- In the S3 console, open your newly created bucket.
- Choose Upload.
- Create a new file named customer_orders.csv with the below content.
- Upload this file to a folder named orders/ in your bucket.
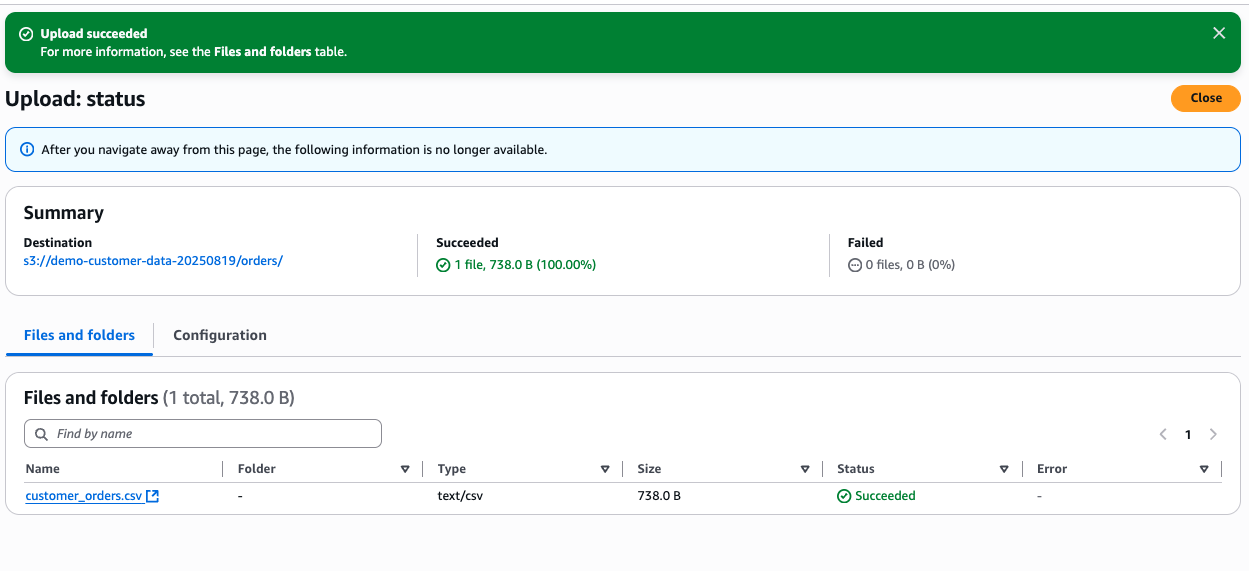
Figure 7: S3 console showing uploaded CSV file in the orders folder
Step 5: Verify automated detection
- Open the DynamoDB console.
- Navigate to the glueJobTracker table.
- Choose the Items tab.
- You should see a new item with an s3_location matching your bucket name.
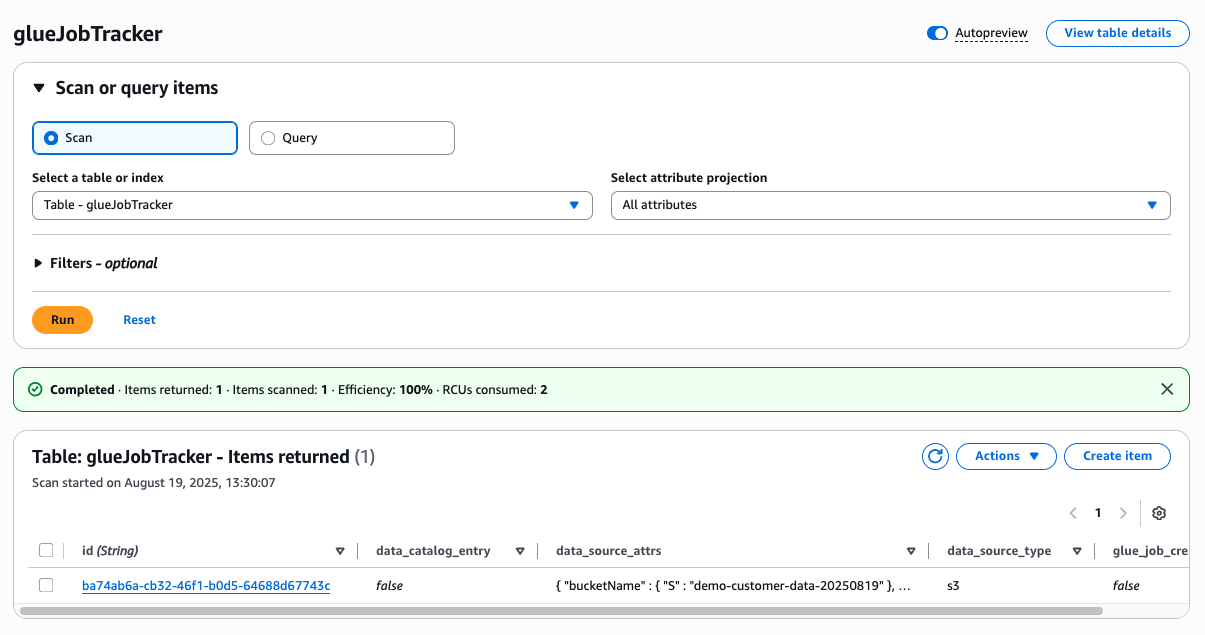
Figure 8 DynamoDB console showing detected bucket entry in glueJobTracker table
Step 6: Initiate catalog creation
- Open the AWS Lambda console.
- Find the function with a name containing s3GlueCatalogCreator.
- Choose the function name to open its details.
- Choose the Test tab.
- Create a new test event with an empty JSON object {}.
- Choose Test to invoke the function.
- Check the execution result for a successful response.
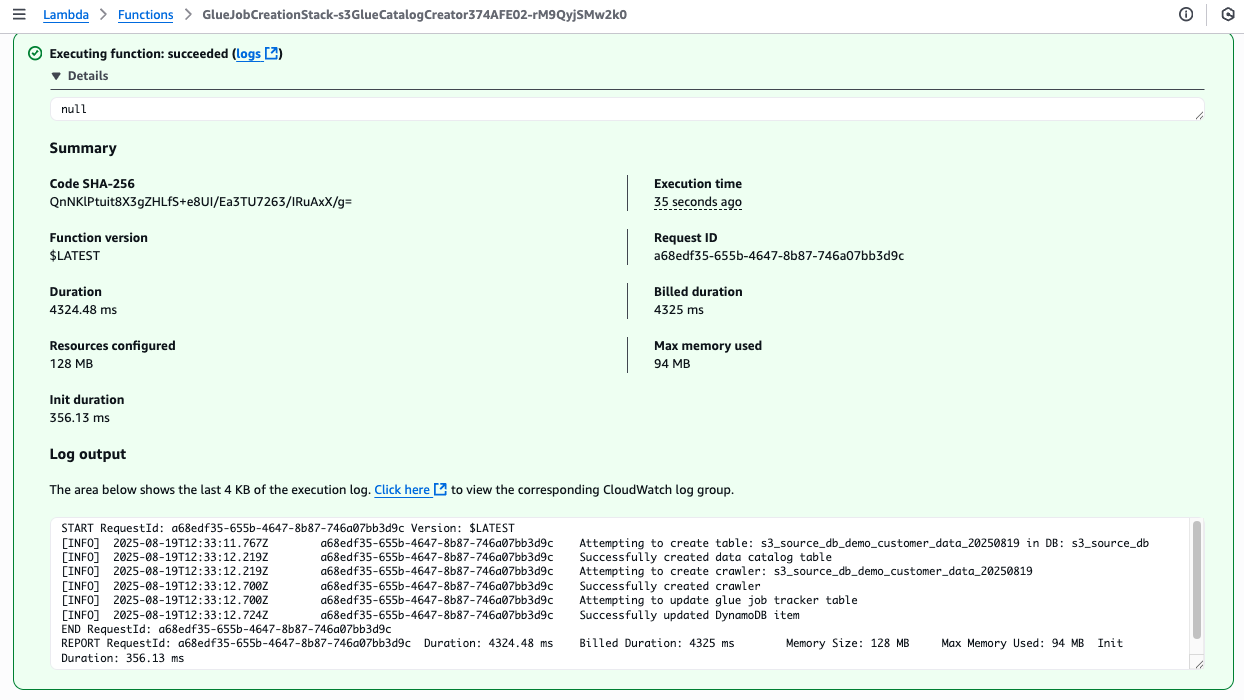
Figure 9 Lambda console showing successful function execution
Step 7: Run the AWS Glue crawler
- Navigate to the AWS Glue console.
- In the left sidebar, choose Crawlers.
- Find the crawler with a name related to your S3 bucket.
- Select the crawler and choose Run crawler.
- Wait for the crawler to complete (typically 3–5 minutes).
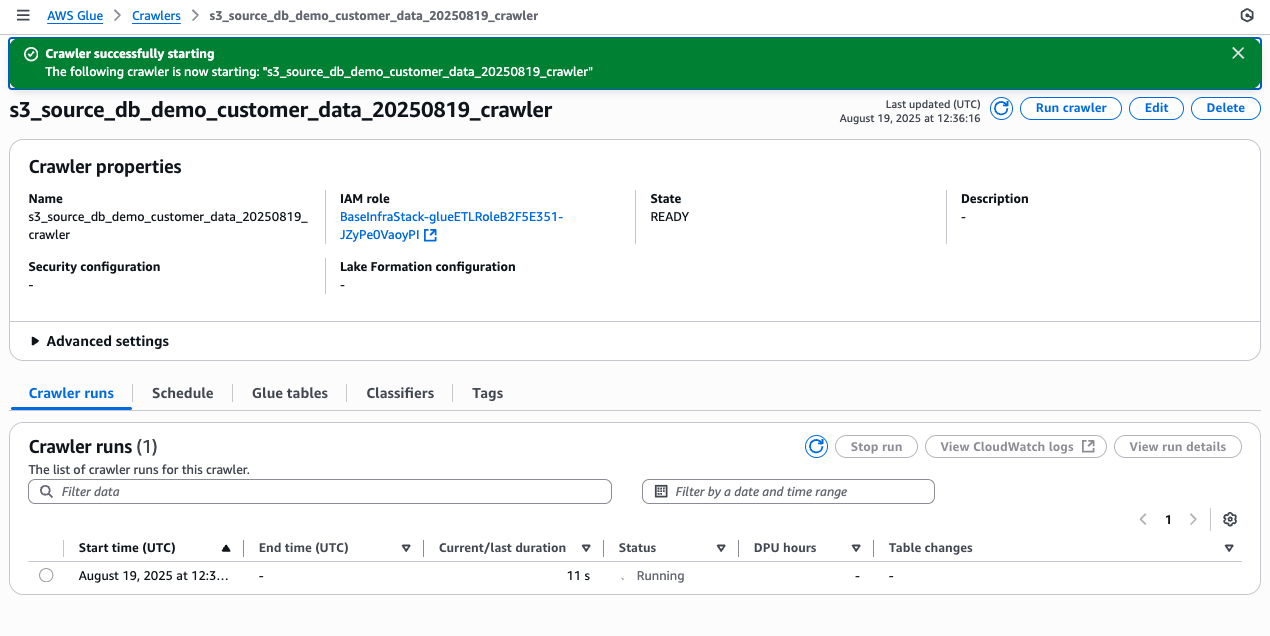
Figure 10 Glue console showing crawler in “Running” state
Step 8: Verify schema discovery
- In the AWS Glue console, go to Databases in the left sidebar.
- Choose the s3_source_db database.
- You should see a new table corresponding to your uploaded data.
- Choose the table name to view its schema.
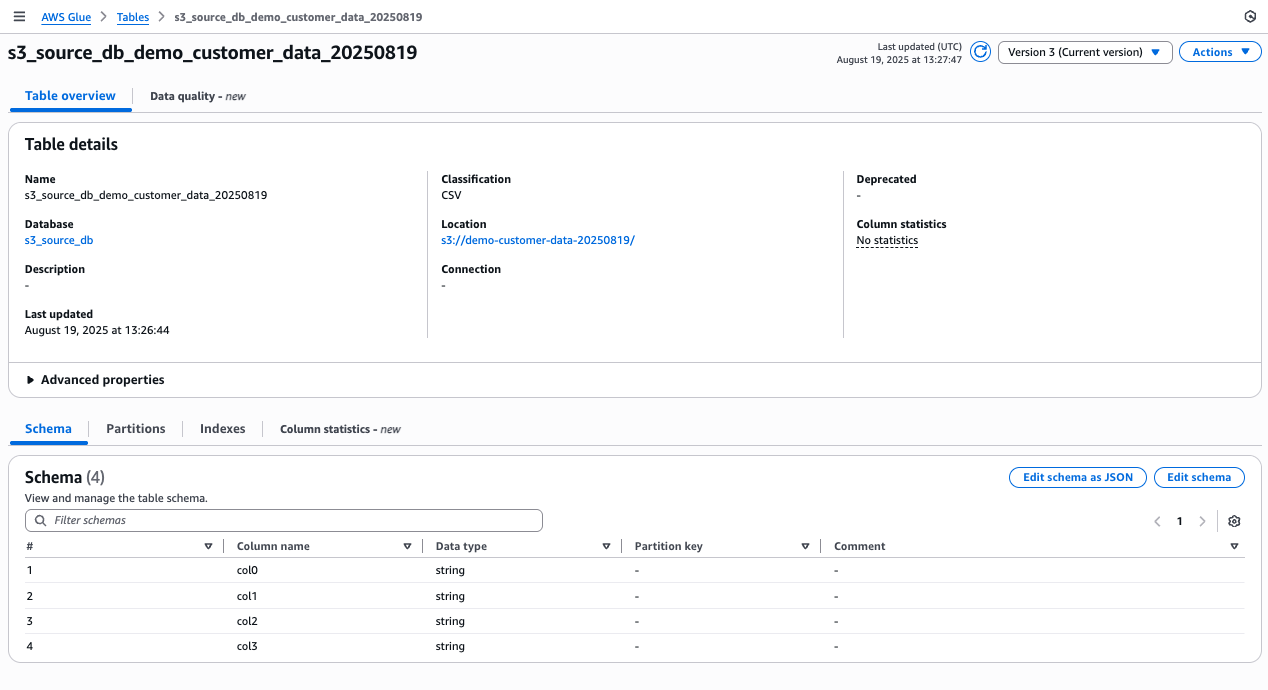
Figure 11 Glue console showing detected table schema
Step 9: Execute PII detection
- Return to the Lambda console.
- Find and open the function with a name containing s3GlueCreator.
- Use the Test tab to invoke this function with an empty JSON object {}.
- After successful execution, go to the AWS Glue console.
- Navigate to Jobs in the left sidebar.
- Find the newly created PII detection job (it should contain your bucket name).
- Select the job and choose Run job.
- Monitor the job execution in the Glue console.
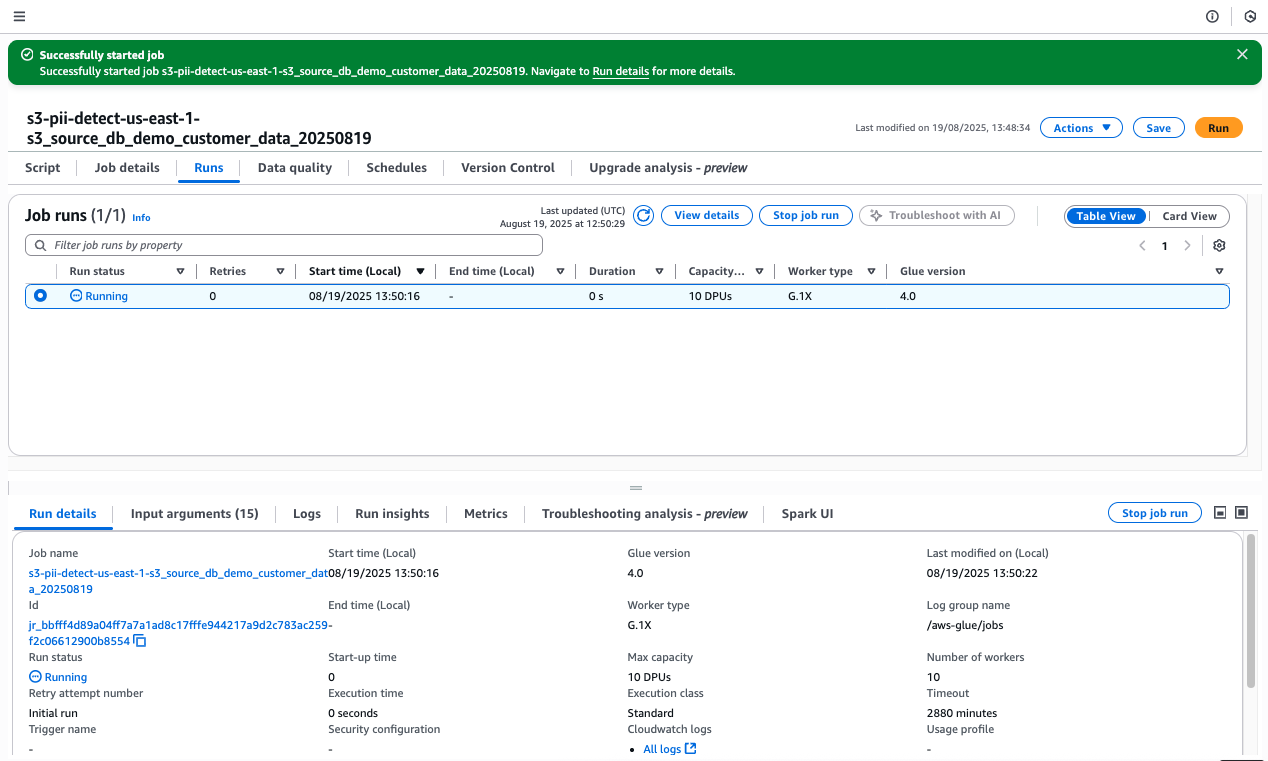
Figure 12 Glue console showing PII detection job in “Running” state
Step 10: Review PII detection results
- Open the DynamoDB console.
- Navigate to the piiDetectionOutputTable.
- In the Items tab, you should see new entries related to your data.
- These entries will show detected PII types and confidence scores.
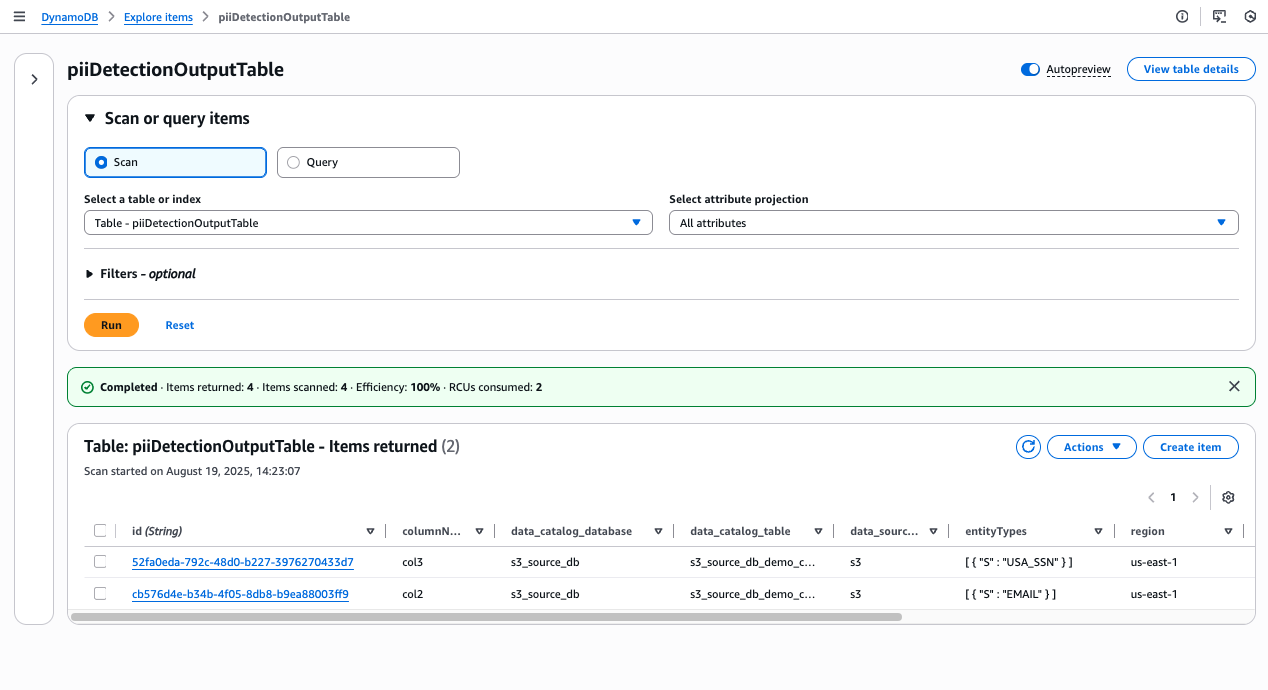
Figure 13 DynamoDB console showing PII detection results in piiDetectionOutputTable
Step 11: Verify Data Catalog updates
- Open the AWS Lambda console.
- Find the function with a name containing ReportingStack-PIIReportS3.
- Choose the function name to open its details.
- Choose the Test tab.
- Create a new test event with an empty JSON object {}.
- Choose Test to invoke the function.
- Check the execution result for a successful response.
- Return to the AWS Glue console.
- Go to Databases > s3_source_db > Your table.
- Review the schema. PII columns should now have comments indicating their classification.
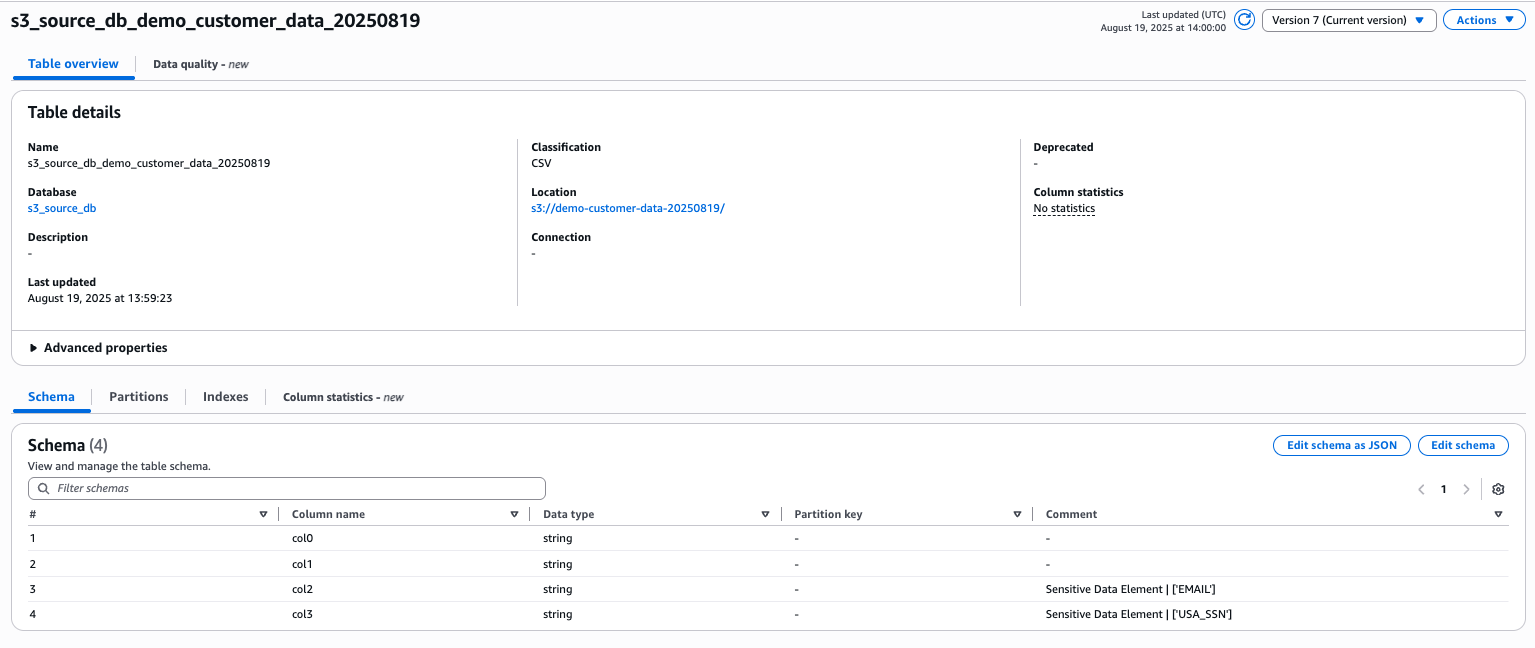
Figure 14 Glue console showing updated table schema with PII classifications
Note: While we focus on S3 data sources in this walkthrough, the framework extends to other data stores, offering a unified approach for PII detection and compliance management, so organizations can automatically discover, catalog, and monitor sensitive data elements across your entire data ecosystem. For more information, see aws-samples/automated-datastore-discovery-with-aws-glue.
Best practices and operational excellence
As you implement this solution, consider these key practices for effective results:
- Design your tagging strategy to capture essential business context about each data source. Implement automated tag enforcement through AWS Organizations for consistency across teams.
- Monitor automated workflows regularly and configure retention policies for processed data to manage costs.
- For enhanced security, configure VPC endpoints for services such as Amazon S3, DynamoDB, and other data sources. This keeps traffic within the AWS network, which is especially important when processing sensitive data. Verify that server-side encryption (SSE) is enabled on your data stores. This solution uses AWS Key Management Service (AWS KMS) keys for DynamoDB tables and SSE-S3 for S3 buckets by default, aligning with data-at-rest encryption best practices.
- For teams with multiple AWS accounts, implement cross-account discovery and cataloging to maintain a comprehensive view of your data landscape.
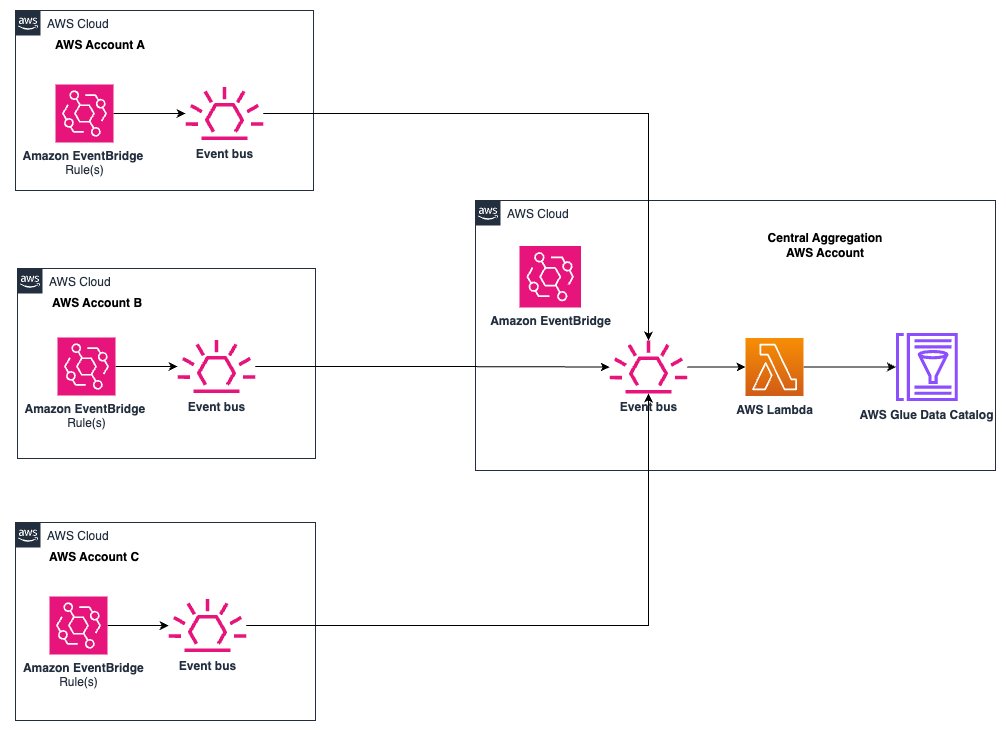
Figure 15 Centralized Storage of Glue PII Detection Results in AWS Data Catalog
Clean up
To avoid ongoing charges and remove the resources created by this solution, follow these steps:
- Empty and delete the S3 buckets created for sample data and AWS Glue assets.
- Delete the AWS CloudFormation stacks in reverse order of creation:
- ReportingStack
- GlueJobCreationStack
- GlueAssetsStack
- BaseInfraStack
- Manually delete any remaining resources:
- DynamoDB tables (glueJobTracker, piiDetectionOutput, tagCaptureTable)
- AWS Glue databases and crawlers
- Lambda functions
- EventBridge rules
- Review your AWS account to ensure that all related resources have been removed.
Remember, deleting these resources will remove all data and configurations associated with this solution. Make sure that you have saved any important information before proceeding with the clean-up.
Conclusion
In this post, you learned how to build an automated data governance framework using AWS Glue Data Catalog. You set up detection, processing, and management layers that automatically discover, catalog, and classify your data sources.This approach improves how you manage sensitive data assets. Teams spend less time on manual discovery and categorization, freeing them to derive value from data. The system gives you current insights into your data landscape and automatically identifies sensitive data, creating a trusted source of truth that helps teams work efficiently while maintaining controls.You can extend this framework with custom sensitivity patterns for your industry. Its modular design supports continuous improvement and integrates with existing workflows. This turns data governance from a manual burden into an efficient process that scales with your organization.