AWS Compute Blog
Migrating your Java applications to AWS Graviton using AWS Transform custom
For Java applications, modern JVMs like Amazon Corretto and OpenJDK are highly optimized for Arm64 and modern applications that are pure Java often require zero changes to run on Graviton. In many cases, applications aren’t fully modernized or purely Java and have a range of dependencies. When you’re responsible for migrating workloads, it’s helpful to use a systematic approach that surfaces issues, proposes solutions, and does the transformation work for you at scale.
That’s why we built the Java x86 to Graviton Migration transformation for AWS Transform custom (ATX). This is an AI-powered agent that analyzes your Java codebase, creates a migration plan, and executes the transformation—complete with version-controlled commits at every step. With ATX you can efficiently assess hundreds of Java applications simultaneously and quickly learn which applications require no changes and which ones need modifications. This streamlines the process of estimating the scope of effort, while also having suggested code updates before you even start.
ATX is available as a Kiro power, a VS Code extension, and an Agent Skill if you’d like to use it directly within other AI assistants to reduce context switching. While we will be using ATX to highlight how you can rapidly accelerate a Graviton migration, we have also published an open source Graviton universal skill based on the Agent Skills open standard so that you have the flexibility to use the skill natively within Kiro, Claude Code, Codex, or the platform of your choice.
AWS Graviton processors, based on the Arm64 architecture, can provide up to 40% better price performance over comparable x86-based instances for a wide variety of workloads. Now customers can use AI tools to quickly migrate workloads to Graviton.
The Java x86 to Graviton migration transformation
At a high level, we recommend customers finish any major version Java updates prior to migrating to Graviton and there’s a separate Java Version Upgrade transformation available for this use case. The Java x86 to Graviton Migration transformation requires a minimum of Java 8 and won’t incorporate Java version updates into the code changes.
The Java x86 to Graviton Migration completes multiple steps with work divided across multiple AI agents within the AWS Transform service, covering things like:
- Native library analysis – Identifies Java Native Interface (JNI) dependencies and finds Arm64-compatible alternatives
- Dependency updates – Updates libraries to versions with Arm64 support
- Build configuration – Modifies Maven/Gradle configs for multi-architecture builds
- Architecture-specific code – Refactors hard-coded x86 assumptions
- Unit Test – Verifies compatibility at runtime given unit tests are in the project
- Documentation – Creates migration notes and runbooks for your team
The agent automatically detects your Java version, manages runtime switching as needed during analysis, and handles much of the environment complexity for you such as multi-module project detection or Maven or Gradle auto-detection. Transformation completion times vary, but for many applications you can expect it to take roughly an hour (ATX works well with repos under 300K lines of code).
In this post, we:
- Walk through the requirements for running the Java x86 to Graviton Migration transformation.
- Help you familiarize yourself with ATX using a single Java application with Interactive Mode
- Outline how to assess Graviton compatibility across the Java applications that you want to migrate to Graviton in a single batch and summarize the results with Campaign Mode.
By the end, you should have a good idea of how Java x86 to Graviton Migration transformation functions and have a summary of the expected code changes and dependency updates needed for each of your Java applications, along with version-controlled code updates.
Graviton transformation requirement
The Java x86 to Graviton migration transformation should run on an Arm64 machine.
The agent doesn’t just read your code, it builds, loads native libraries, and validates your application’s runtime behavior on Arm64. If you run the transformation on an x86 machine, the agent can identify compatibility issues but can’t execute build validation or run tests.
If you try to run on x86, you will see the following error message:
⚠  This transformation requires Arm64 architecture.
Detected: x86_64
Please run ATX on an Arm64 environment. See documentation for options.
To get started you need a Graviton instance or Apple Mac laptop running Arm64 with the ATX CLI, build tools, and Java JDKs that your project requires. The project source code should also be loaded locally onto the machine running the ATX CLI. Because Apple silicon is Arm64-based, it’s possible to build, load, and verify Arm64 based dependencies for a quick proof-of-concept. However, we recommend running the transformation in an environment that reflects what you plan to deploy in production to surface any potential OS level incompatibilities.
Requirements
| Requirement | Details |
|---|---|
| AWS Transform custom permissions | AWS Identity and Access Management (IAM) policies for the Transform service (see Authentication docs) |
| Arm64 execution environment | Amazon Elastic Compute Cloud (Amazon EC2) Graviton instance or Apple Silicon Mac. Running on x86 limits validation to static analysis only. Phase 3 (build/test) requires Arm64. |
| Node.js 20+ | Required by the AWS Transform CLI. Use the official installer at nodejs.org/en/download. Package managers (dnf, yum) can install an older version. |
| Git | AWS Transform custom uses local Git for version control during the transformation. |
| AWS Transform CLI | Installed using the setup script (see Client Setup for the curl command). |
| Java build tooling | A JDK (Arm64 build, e.g. Amazon Corretto or OpenJDK), Maven and/or Gradle as required by the target project. These are not optional for Java transformations. The agent needs them for dependency analysis, native library scanning, and build validation. |
Running the Graviton transformation with Interactive Mode
With your code on an Arm64 environment and all the prerequisites for the transformation, we can begin the transformation.
Step 1: Navigate to Your Project and create or clone a git repo
cd /home/developer/workspace # Docker
# or
cd ~/workspace # AMI
git init
We recommend not pointing to the main branch of the repository of your application. You can work in a local git environment or create a separate branch. ATX needs the ability to commit changes as it iteratively transforms your code. The final decision on which commits are pushed is up to the developer.
Step 2: Launch ATX Interactive Mode
Enter the following command to launch ATX interactive mode.
atxATX starts in interactive mode:
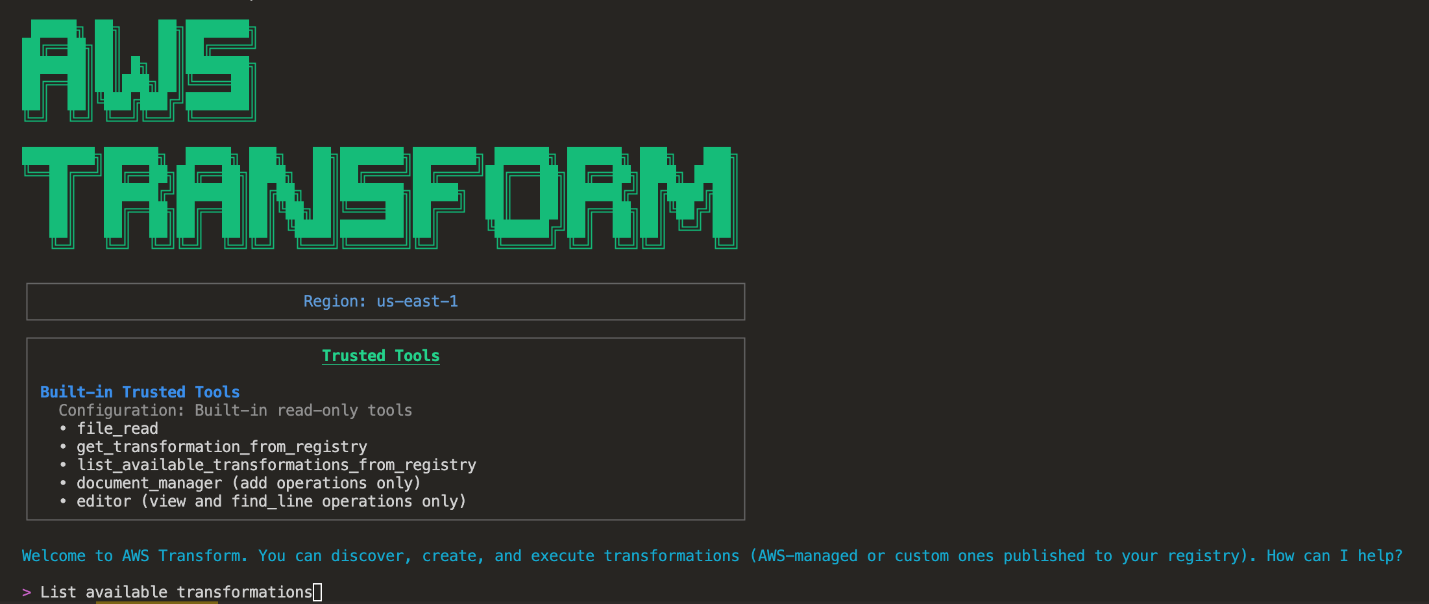
To view available transformations, in a separate terminal enter:
atx custom def list > custom_list.txtThe AWS Managed transformations will be listed first, followed by User-created transformations that you’ve developed.
Step 3: Select the Graviton transformation
Enter the following into atx cli:
>AWS/early-access-java-x86-to-gravitonATX will prompt you for next steps and your project details:
> Would you like to:+ c to abort or provide feedback)
1. View the entire transformation definition
2. View specific sections of the transformation definition
3. Apply this transformation to your code
4. Modify this transformation
> 3
> What is the file system path to the code repository where you want to apply this transformation?
> .
Note that because this is an AWS Managed Transformation, you can’t view the complete transformation definition or modify it. However, you can provide additional context customized to your use case. Keep in mind that the Transformation won’t make permanent changes to your code through the transformation process.
Step 4: Provide additional context
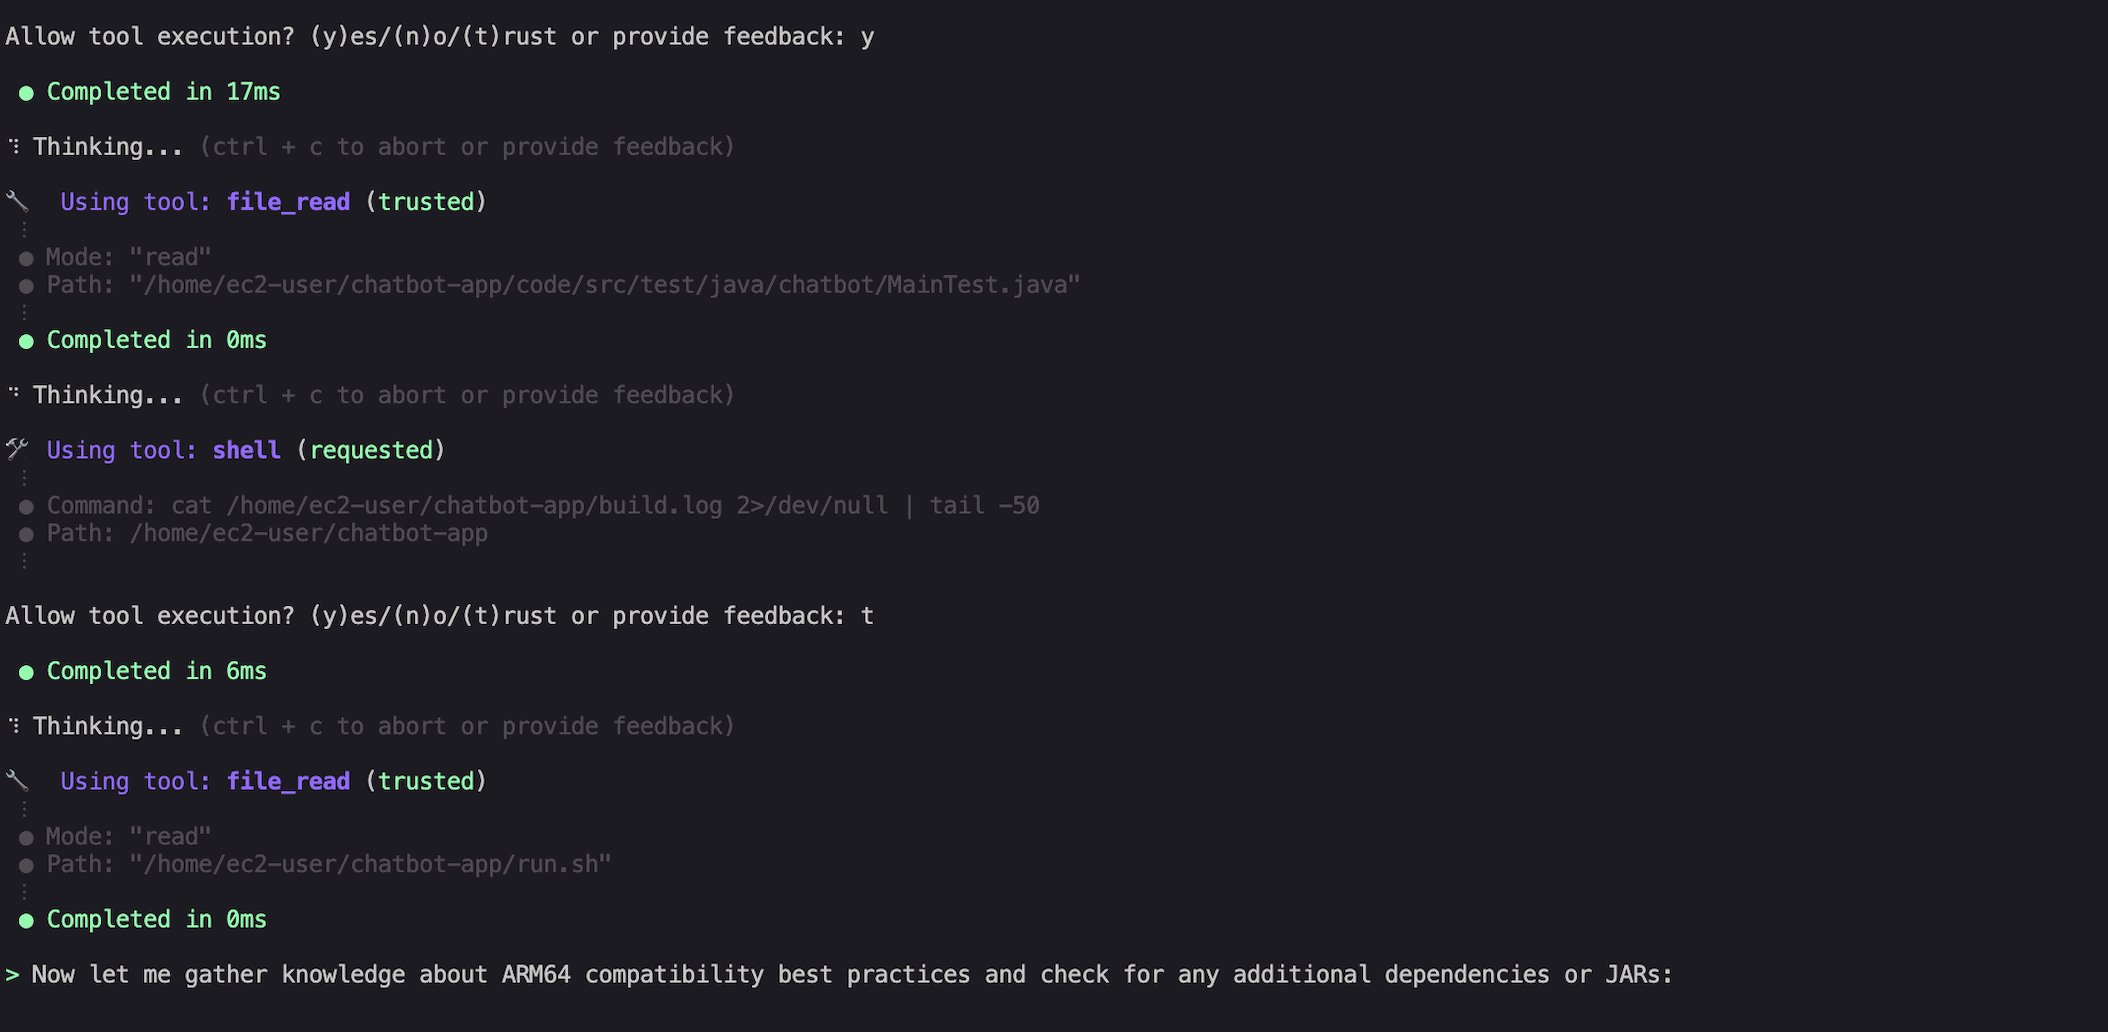
ATX might ask clarifying questions to tailor the transformation:
Step 5: Review the analysis
ATX analyzes your codebase:
Analyzing your codebase...[████████████████████████████████████████] 100%
✓ Parsed 847 Java files
✓ Analyzed 234 dependencies
✓ Identified 12 native library usages
✓ Scanned build configuration
✓ Evaluated test coverage
Analysis complete. Preparing migration plan...
Step 6: Review the migration plan
ATX presents a detailed plan before making changes:
═══════════════════════════════════════════════════════════════
                    MIGRATION PLAN
═══════════════════════════════════════════════════════════════

I've analyzed your project and here's what I'll do:

PHASE 1: Dependency Updates (12 changes)
────────────────────────────────────────
 • Update netty-transport-native-epoll 4.1.85 → 4.1.100
   Reason: Arm64 support added in 4.1.94

 • Update snappy-java 1.1.8.4 → 1.1.10.5
   Reason: Current version lacks Arm64 native binaries

 • Update lz4-java 1.7.1 → 1.8.0
   Reason: Arm64 optimization improvements

 • ... (9 more dependency updates)

PHASE 2: Build Configuration (3 changes)
────────────────────────────────────────
 • Add Arm64 classifier to native dependency declarations
 • Configure multi-architecture Docker build
 • Add Graviton-optimized JVM flags to startup scripts

PHASE 3: Code Modifications (2 changes)
────────────────────────────────────────
 • Refactor ProcessorArchitecture.java
   Current: Hard-coded x86_64 assumption
   Change: Add Arm64 detection logic

 • Update NativeLibraryLoader.java
   Current: Loads x86-specific .so files
   Change: Architecture-aware library loading

PHASE 4: Testing & Validation
────────────────────────────────────────
 • Run build and tests on Arm64
 • Generate migration report and documentation

═══════════════════════════════════════════════════════════════

? How would you like to proceed?
  ❯ Execute the full plan
    Execute phase by phase (review each)
    Modify the plan
    Ask questions about the plan
    Export plan and exit
Step 7: Ask questions, request changes
This is your chance to understand and adjust:
? Ask questions about the plan:

You: Why are you updating netty to 4.1.100?

ATX: Good concern. Netty 4.1.94 was the first version with Arm64
     native transport support, which is required for optimal
     performance on Graviton.

     However, I can adjust this:

     Option 1: Use 4.1.94 (minimum Arm64 support)
     Option 2: Use 4.1.97 (includes Arm64 bug fixes)
     Option 3: Keep 4.1.100 (latest stable with Arm64)

     Which would you prefer?

You: Let's go with 4.1.100.
Step 8: Execute the Transformation
When you’re ready:
? How would you like to proceed?
  ❯ Execute the full plan

Starting transformation...

Phase 1: Dependency Updates
───────────────────────────
[1/12] Updating netty-transport-native-epoll...
       ✓ Modified pom.xml
       ✓ Committed: "chore(deps): update netty to 4.1.97 for Arm64 support"

[2/12] Updating snappy-java...
       ✓ Modified pom.xml
       ✓ Committed: "chore(deps): update snappy-java to 1.1.10.5 for Arm64"

... (progress continues)

Phase 2: Build Configuration
───────────────────────────
[1/3] Adding Arm64 classifiers...
      ✓ Modified pom.xml
      ✓ Committed: "build: add Arm64 native classifiers"

... (progress continues)

Phase 3: Code Modifications
───────────────────────────
[1/2] Refactoring ProcessorArchitecture.java...
      ✓ Modified src/main/java/com/example/util/ProcessorArchitecture.java
      ✓ Committed: "feat: add Arm64 architecture detection"

... (progress continues)

Phase 4: Validation
───────────────────
Running build... ✓
Running tests... ✓ (847 passed, 0 failed)

═══════════════════════════════════════════════════════════════
                 TRANSFORMATION COMPLETE
═══════════════════════════════════════════════════════════════

Summary:
 • 17 files modified
 • 3 files created
 • 14 commits made
 • All tests passing

Generated Artifacts:
 • GRAVITON_MIGRATION_REPORT.html  - Full migration report
 • MIGRATION_RUNBOOK.md            - Deployment guide for your team
 • commit-log.txt                  - All commits with descriptions

Your code is now Graviton-ready!
After the transformation is complete, you can now performance test and load test on Graviton instances to configure your scaling policies or target thresholds to maximize price/performance on Graviton. For more guidance on performance testing, see the AWS Graviton Technical Guide.
What you get after transformation
Version-controlled history
Every logical change is a separate commit:
$ git log --oneline -10

a3f2b1c (HEAD) docs: add Graviton migration runbook
b82d4e5 test: add Arm64 architecture verification tests
c9a1f3d feat: add Arm64 architecture detection
d4e7c2a build: configure multi-arch Docker build
e5f8d1b build: add Arm64 native classifiers
f6a9e2c chore(deps): update lz4-java to 1.8.0
g7b0f3d chore(deps): update snappy-java to 1.1.10.5
h8c1a4e chore(deps): update netty to 4.1.97 for Arm64 support
...
Each commit is atomic and revertible. If something doesn’t work, you can git revert specific changes.
Migration report
A comprehensive markdown report covering:
- What was changed and why
- Dependencies that were updated
- Code modifications with before and after diffs
- Performance optimization recommendations
Migration runbook
A deployment guide for your team:
- Pre-deployment checklist
- JVM flags designed for Graviton
- Monitoring and rollback procedures
Additional resources on migrating to Graviton on an infrastructure level can be found in the Transition Guide.
Assessing Graviton compatibility for multiple Java applications with Campaign Mode
When you’re ready to start migrating multiple applications, you might want to opt for an automated process that removes the manual effort of going back and forth with the transformation agent after each transformation step with campaign mode. The following command allows ATX CLI to go through a full transformation that you can check back in with after it’s completed. This limits the additional customization and context that you might want to provide the agent.
As mentioned in the first step of running a Graviton Transformation, the environment that the code is transformed in and decision of which commits are pulled into the main repo is up to the developer. Running in campaign mode across several applications doesn’t require accepting and pushing code changes. Therefore, this automated method is most useful when you want to gauge a high-level overview of effort required to migrate across several or even hundreds of applications.
atx custom def exec \
--code-repository-path /path/to/myapp \
--non-interactive \
--trust-all-tools \
--campaign  \
--repo-name myapp \
--add-repo
This command can be added into scripts, allowing further automations to be built into continuous integration and delivery (CI/CD) pipelines or scaling transformation jobs across several repos without manually entering prompts as previously shown through interactive mode.
The status of transformations running with campaign mode will be displayed in the AWS Transform Web UI. Setting up the Web UI is a prerequisite to running a transformation in campaign mode.
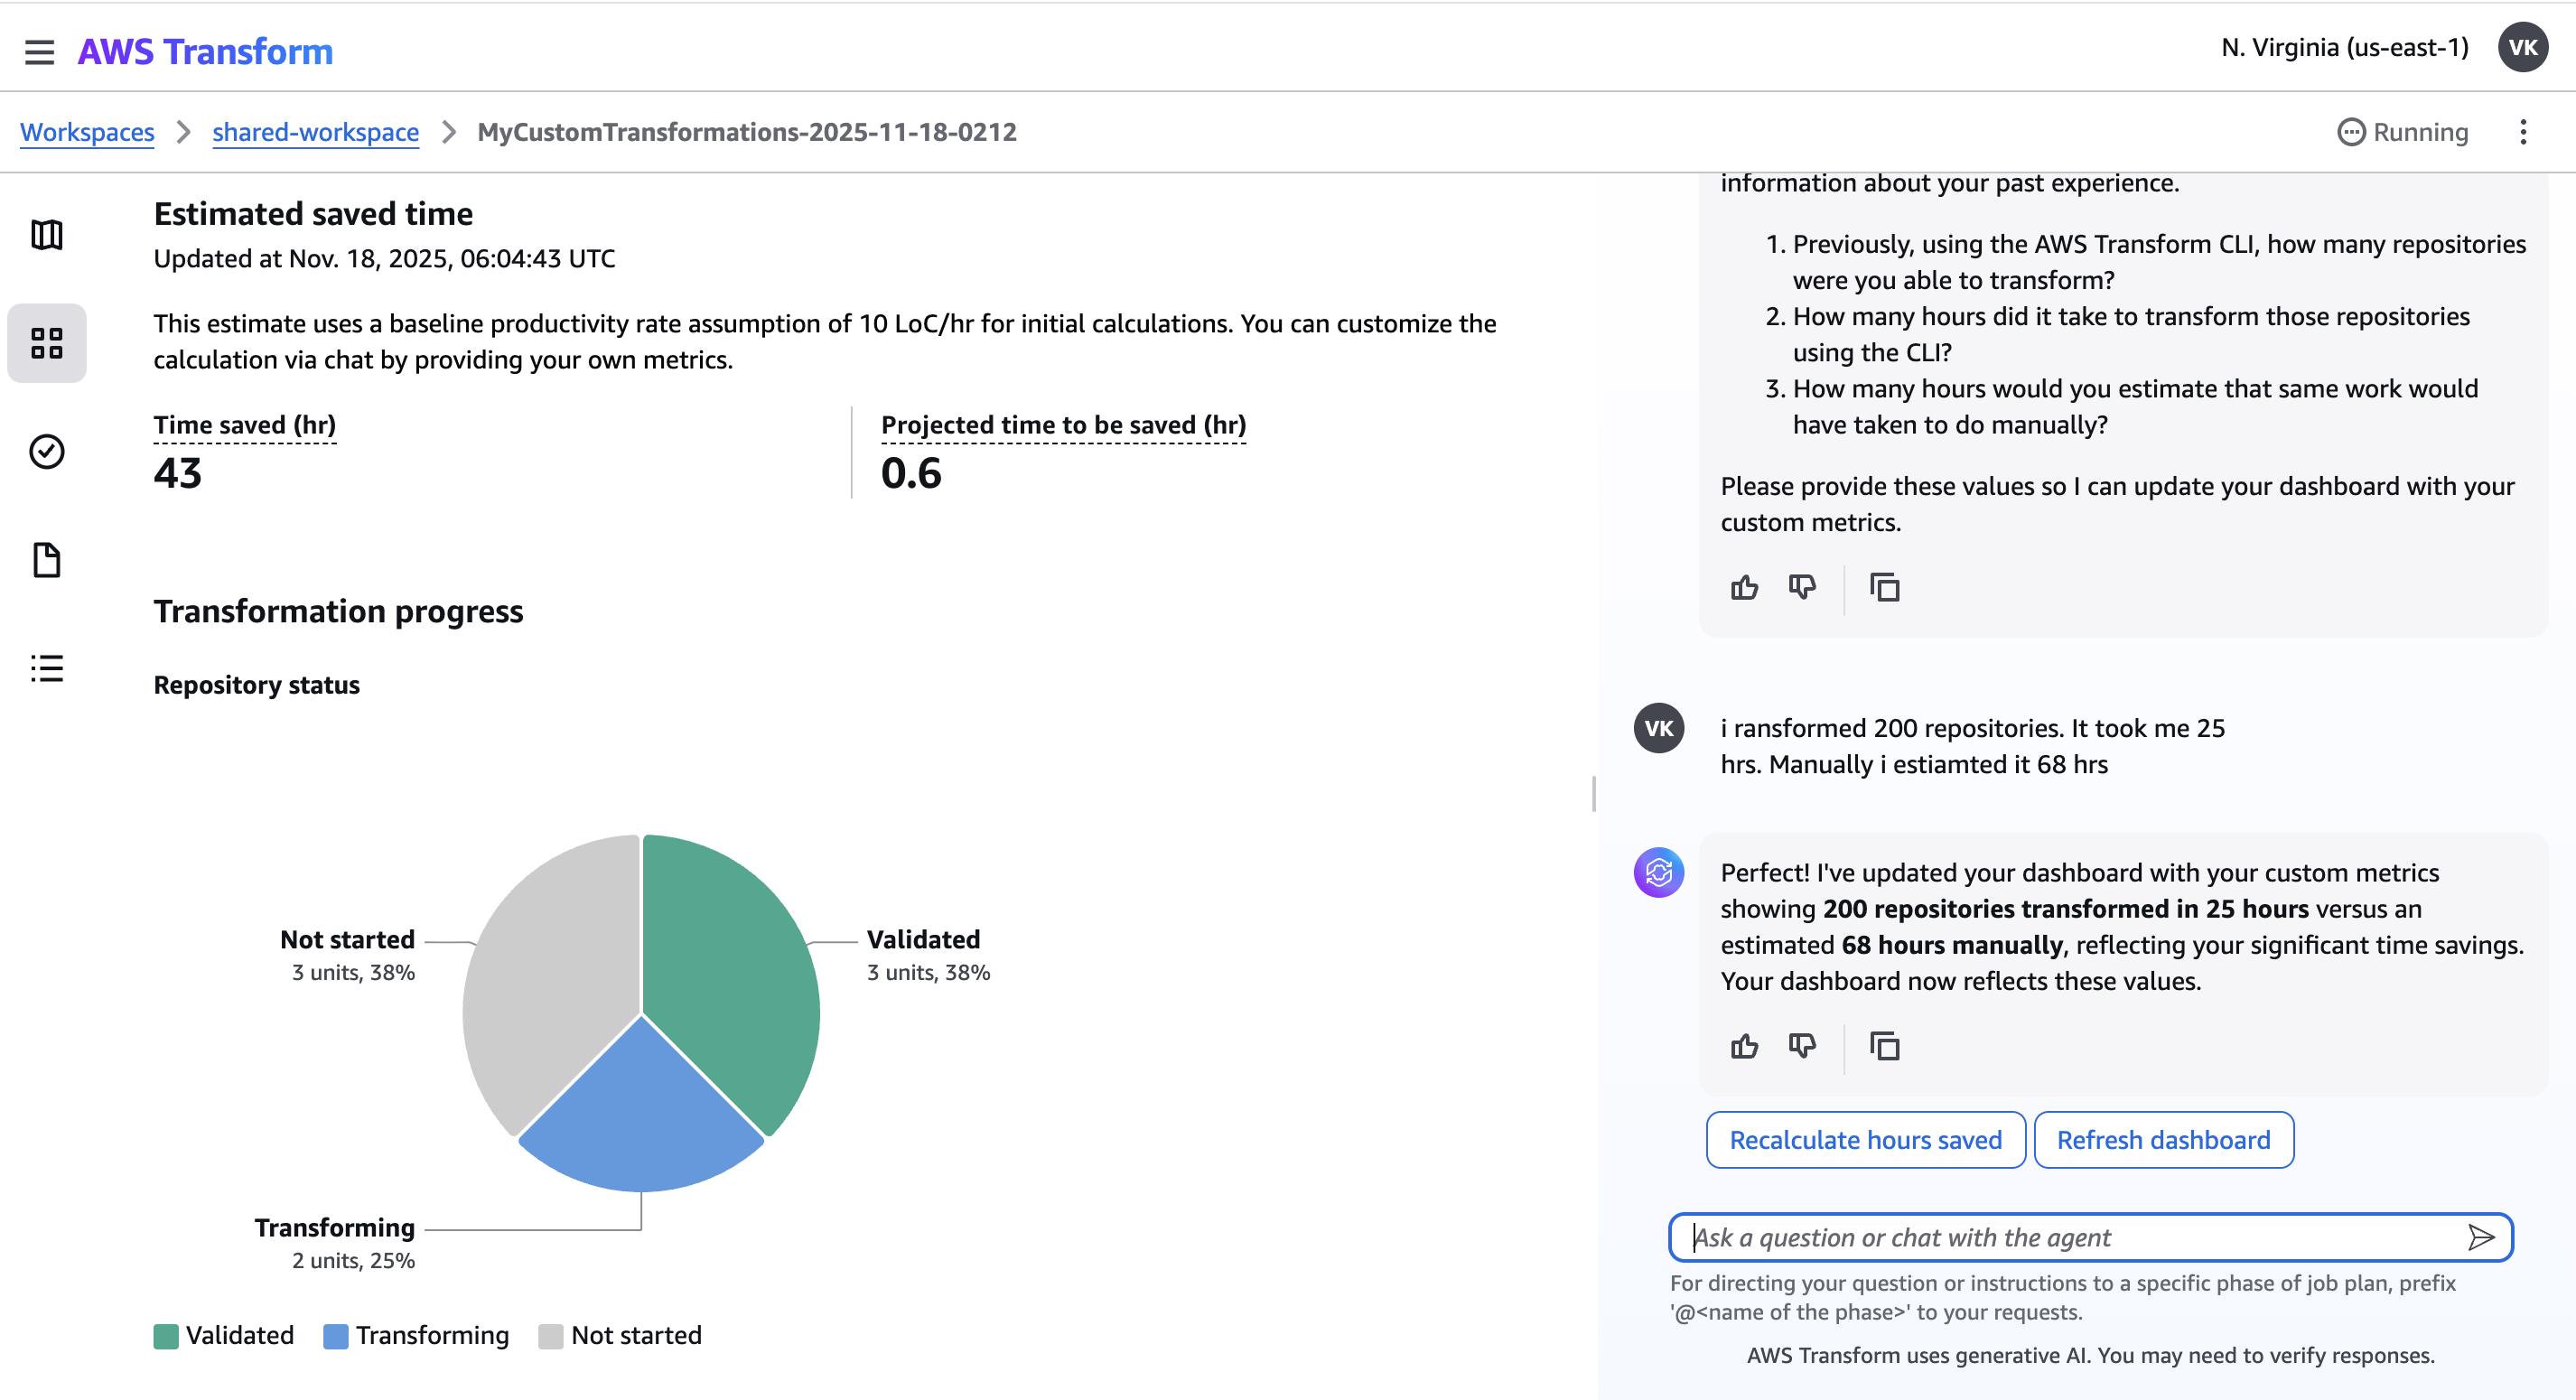
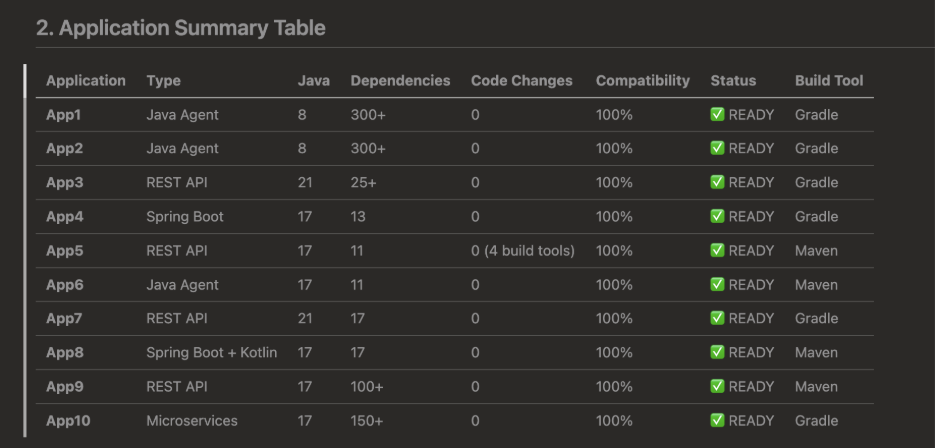
In addition to this view, if you run the transformation across multiple applications, you can generate a consolidated dashboard with an agent of your choice. Gather the transformation results into a centralized directory, then use the following prompt for example:
Analyze all Java application Graviton transformation summaries in <directory>/<path>/ and create a comprehensive dashboard that includes:

1. Executive summary with key metrics (total apps, compatibility rate, code changes required)
2. Application summary table with columns: Application name, Type, Java version, Dependencies count, Code changes, Compatibility %, Status
3. Code changes analysis - which apps needed changes and why
4. Dependency transformation analysis - common dependencies and their ARM64 status, any upgrades required
5. Native library analysis - which apps use native libs and their compatibility
6. Performance expectations - JWT/crypto improvements, general performance gains, cost-performance ratios
7. JVM optimization patterns - common flags used across applications
8. Build system patterns - Maven/Gradle usage, Docker multi-arch support
9. Test results summary - pass/fail rates, pre-existing vs ARM64 issues
10. Common libraries requiring changes (or note if none)
11. Deployment readiness assessment
12. Risk assessment with mitigation strategies
13. Migration recommendations with phased approach
14. Documentation summary - total docs created and their coverage

Read graviton-validation/00-summary.md from each application subdirectory. Consolidate findings into a single comprehensive markdown dashboard with tables, metrics, and actionable insights.

Focus on: compatibility rates, code change requirements, dependency issues, performance expectations, and migration readiness.
Keep in mind that agents might output outcomes of the migration that aren’t sourced from the transformation summaries. As a result, we recommend that you use the summary as a high-level estimate of the technical effort required for migrating to Graviton.
Conclusion
The AWS Transform custom Java x86 to Graviton Migration transformation alleviates the guesswork in Graviton migrations by using AI for dependency analysis, compatibility assessment, code refactoring, and runtime validation. Development teams can evaluate hundreds of Java applications simultaneously, with each transformation providing atomic version-controlled commits for straightforward rollback and clear change tracking. The tool offers two modes: 1) interactive mode for hands-on, application-by-application migration with developer review at each step, or 2) campaign mode for automated assessment across multiple applications. ATX converts unknown Graviton migration effort into defined requirements through automated compilation and runtime testing. This provides a more efficient way to evaluate workload compatibility and migrate to Graviton.
The Java x86 to Graviton Migration transformation is one of a range of pre-built AWS Managed Transformations but you can also create custom transformations unique to your own use case that can be scaled to drive migrations across your organization. Learn more on the AWS Transform custom website or documentation.
Resources
- ATX Documentation: https://docs.aws.amazon.com/transform/latest/userguide/custom.html
- AWS-Managed Transformation Definitions: https://github.com/aws-samples/aws-transform-custom-samples/tree/main/aws-managed-definitions
- Graviton Getting Started: github.com/aws/aws-graviton-getting-started
- Agent Skills for Graviton migration: https://github.com/aws/aws-graviton-getting-started/tree/main/tools/skills