Migration & Modernization
Migrating Windows Server 2008 to AWS: Resolving PV Driver Issues and Boot Failures
Overview
Many organizations still run Windows Server 2008 workloads that cannot be upgraded before migration due to application dependencies, vendor support constraints, or licensing limitations. When migrating these servers to AWS using AWS Transform MGN, the choice of target Amazon EC2 instance type determines which drivers the guest operating system needs to communicate with the underlying hardware.
Amazon EC2 instances run on one of two hypervisor architectures:
- Nitro-based instances (m5, c5, t3, and newer) use NVMe for storage and Elastic Network Adapter (ENA) for networking. AWS Transform MGN reliably injects NVMe and ENA drivers during conversion, even for older operating systems.
- Xen-based instances (m4, c4, t2, and older) use Paravirtual (PV) drivers for both disk and network access. Without compatible PV drivers installed in the guest OS, the instance cannot access its boot volume and fails to start.
| Generation | Hypervisor | Disk Driver | Network Driver | Examples |
|---|---|---|---|---|
| Previous (m4, c4, t2) | Xen | PV (Paravirtual) | PV | m4.large |
| Current (m5, c5, t3) | Nitro | NVMe | ENA | m5.large |
For Windows Server 2008, the automated PV driver injection during AWS Transform MGN’s post-launch conversion may not succeed in all cases. conversion is unreliable. This can introduce driver compatibility challenges that may require manual intervention before and after migration.
This post covers:
- When and why you might need Xen-based instances for Windows Server 2008 migrations
- How to install the correct PV drivers on source servers before migration
- Five distinct boot failure scenarios and their offline fixes
- A complete post-migration fix checklist
This post is intended for customers currently in-flight with migrations who need to resolve boot failures on Xen-based instances. For new migration projects, consider the recommended alternatives in the next section.
When to use Xen-based vs. Nitro-based instances
Before committing to a Xen-based target, evaluate whether Nitro-based instances are viable for your workload. The following factors typically drive the decision:
| Factor | Favors Nitro (m5, c5, t3) if… | Favors Xen (m4, c4, t2) if… |
|---|---|---|
| Application compatibility | No hard dependency on instance metadata or device naming | Application hardcoded to legacy device paths (xvd*) |
| Licensing | License not tied to specific instance family | License locked to instance type or CPU socket count |
| Organizational policy | Flexible instance selection | Governance requires matching on-premises instance sizing |
| Driver support | NVMe/ENA injection works reliably via MGN | PV drivers must be pre-installed manually |
| Cost optimization | Current-generation pricing | Reserved Instance commitments on previous-generation types |
Recommended alternatives to the Xen workflow:
- Use Nitro-based instances (m5, c5, t3). Nitro instances use NVMe and ENA drivers instead of PV drivers. AWS Transform MGN handles driver injection reliably for Nitro targets, and Windows Server 2008 is supported on m5.large and similar types. This eliminates all five boot failure scenarios described in this post.
- Upgrade the OS before migration. If the application supports it, upgrade to Windows Server 2012 or later on-premises before migrating. Newer OS versions use AWS PV drivers (not Citrix), and AWS Transform MGN’s driver injection works reliably.
- Upgrade the OS after migration. Migrate to a Nitro-based instance first (avoiding PV driver issues entirely), then perform an in-place OS upgrade on AWS using AWS Systems Manager Automation.
If none of these alternatives are possible, the workflow below provides a proven path to resolve boot failures on Xen-based instances.
Prerequisites
- Source servers running Windows Server 2008 or 2008 R2 on VMware
- Target instance type: Xen-based (m4, c4, t2 families)
- AWS Transform MGN configured with agent-based replication
- A Windows Server 2012 or later helper instance in the target Availability Zone
- Citrix PV driver package (Citrix-Win_PV) downloaded from the AWS documentation reference
Key guidance before you begin
Review these practices before starting the migration workflow. Specific implementation details are provided in the step-by-step sections that follow.
- Install PV drivers on source before migration. For Windows Server 2008 on Xen-based instances, there is no reliable way to inject drivers post-migration. The Citrix installer requires a running OS.
- Take VM snapshots before installing drivers. The Citrix installer reboots the server and modifies system drivers. Always have a rollback path.
- Use the correct driver package. For Windows Server 2008, use the Citrix PV package (xenvbd.sys, xenutil.sys, xevtchn.sys). The AWS PV drivers support Windows Server 2012 and 2012 R2, but do not support Windows Server 2008. Do not look for xenbus.sys or xenfilt.sys, which belong to the newer AWS PV driver packages.
- Have a helper instance ready. AWS Transform MGN’s conversion frequently introduces BCD and registry issues on Windows Server 2008. Provision a Windows Server 2012 or later helper instance in the same Availability Zone before your first test launch.
- Disable VMware drivers proactively. After loading the offline hive, disable all VMware drivers as a standard post-migration step rather than waiting for a BSOD.
- Disable the recovery screen. Windows Error Recovery is unusable on EC2 since there is no interactive console input. Disable it via BCD to prevent boot loops.
- Create an AMI after successful fixes. If a server needs to be relaunched, having an AMI with all fixes applied saves hours of repeated troubleshooting.
- Correct the timezone after driver installation. The Citrix installer enables RealTimeIsUniversal, which shifts the displayed clock to UTC.
- Plan for at least one week between driver installation and cutover. This allows time for MGN replication resync and test launch troubleshooting. A typical timeline: Day 1 for driver installation and resync, Day 4 for test launch and fixes, Day 7 for cutover with all servers passing 2/2 status checks.
| Day | Activities |
|---|---|
| Day 1 |
|
| Day 4 |
|
| Day 7 |
|
The problem: Boot failures after migration
After the initial AWS Transform MGN test launch, servers fail with 1/2 status checks – the system status check passes (the hypervisor is running the VM) but the instance status check fails (the OS cannot boot properly). This failure of the post-launch conversion manifests as 1/2 status checks in the EC2 console.
The root cause: the source servers have VMware paravirtual drivers installed, which are incompatible with the Xen hypervisor. Without the correct Xen PV drivers, Windows cannot access the boot disk.
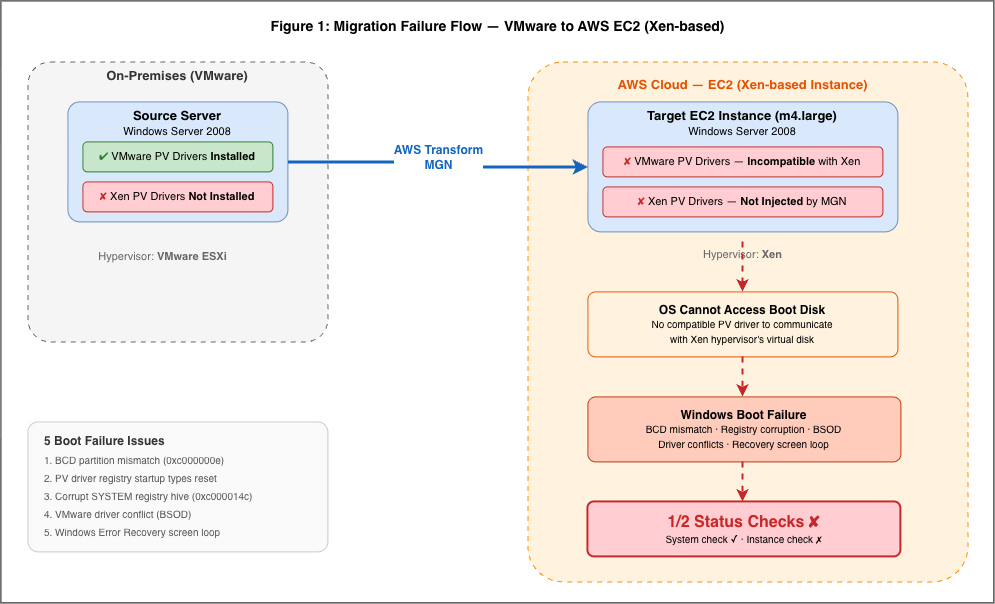
Figure 1: VMware to AWS migration failure diagram – driver incompatibility and boot failure cascade
Solution: A Two-Phase Approach
Phase 1: Install Citrix PV Drivers on Source Servers
For Windows Server 2008, the compatible PV driver package is the Citrix PV driver package (Citrix-Win_PV). The AWS PV drivers only support Windows Server 2012 and later.
Before you begin:
- Take VM snapshots on all source servers (rollback path)
- Stop application services during the maintenance window
- Copy Citrix-Win_PV.zip to C:\temp on each source server
Installation steps:
- Connect to the source server via RDP as Administrator.
- Run the installer: C:\temp\Citrix-Win_PV\Upgrade.bat
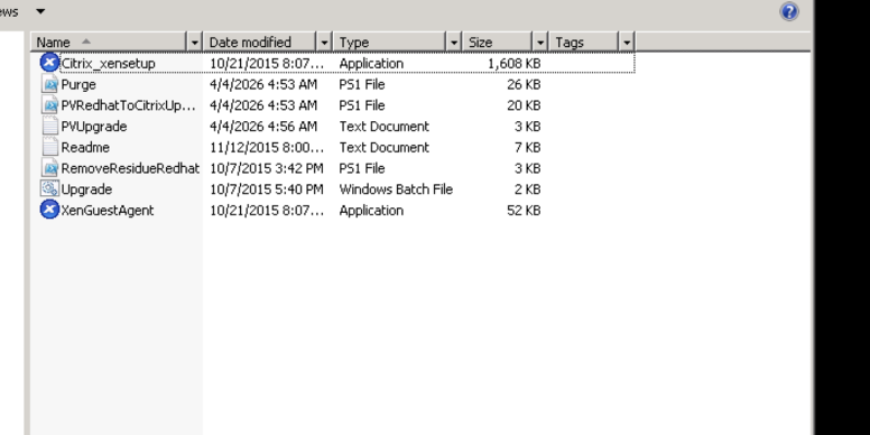
Figure 2: Citrix-Win_PV package contents on the source server (C:\Scripts) showing Upgrade.bat and installer files
- The installer detects Windows 2008, installs drivers, and displays “to be continued upon reboot.”
- Reboot the server:
shutdown /r /t 0 - After reboot, verify the installation:
pnputil -e– Look for Citrix Systems entries in the output. - Verify driver files exist:
dir C:\Windows\System32\drivers\xen*.sys1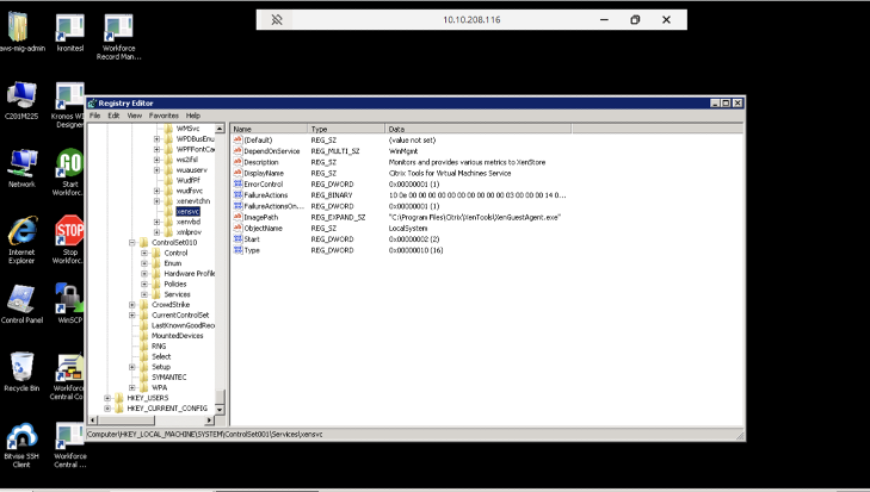
Figure 3: System32\drivers directory showing xenutil.sys, xenvbd.sys, and xevtchn.sys after successful Citrix PV driver installation
- Verify Citrix XenTools installation folder exists:
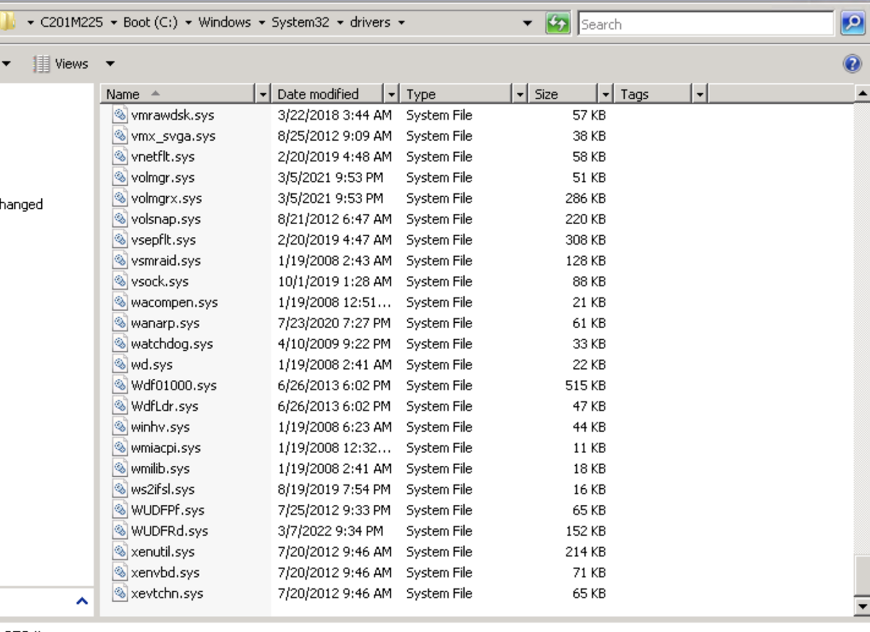
Figure 4: C:\Program Files\Citrix\XenTools folder confirming successful driver installation
- Verify registry entries:
reg query HKLM\SYSTEM\CurrentControlSet\Services /s /f xenExpected services: xenvbd (Start=0), xensvc (Start=2), xenevtchn (Start=1)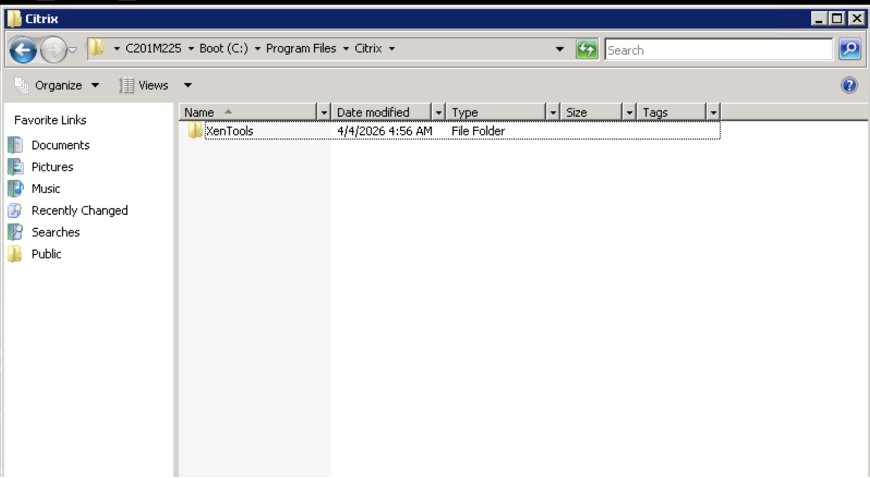
Figure 5: Registry Editor showing xensvc service with Start=2 (Automatic), ImagePath pointing to XenGuestAgent.exe, and DisplayName “Citrix Tools for Virtual Machines Service”
Important:
The Citrix installer sets RealTimeIsUniversal to Enabled, which shifts the displayed time to UTC. Correct the timezone after installation:00
reg add "HKLM\SYSTEM\CurrentControlSet\Control\TimeZoneInformation" /v TimeZoneKeyName /t REG_SZ /d "YOUR_TIMEZONE" /fAfter driver installation, allow MGN replication to resync before proceeding with test launch.
Phase 2: Resolve Post-Launch Boot Failures
Even with PV drivers installed, MGN’s post-launch conversion can introduce additional boot issues on Windows Server 2008. You may encounter five distinct issues that we addressing this blog post, each requiring an offline fix via a helper instance.
General workflow for each fix:
- Stop the failed instance
- Detach the root volume
- Attach the volume to a helper instance (appears as drive E: in this guide)
- Bring the volume online in Disk Management
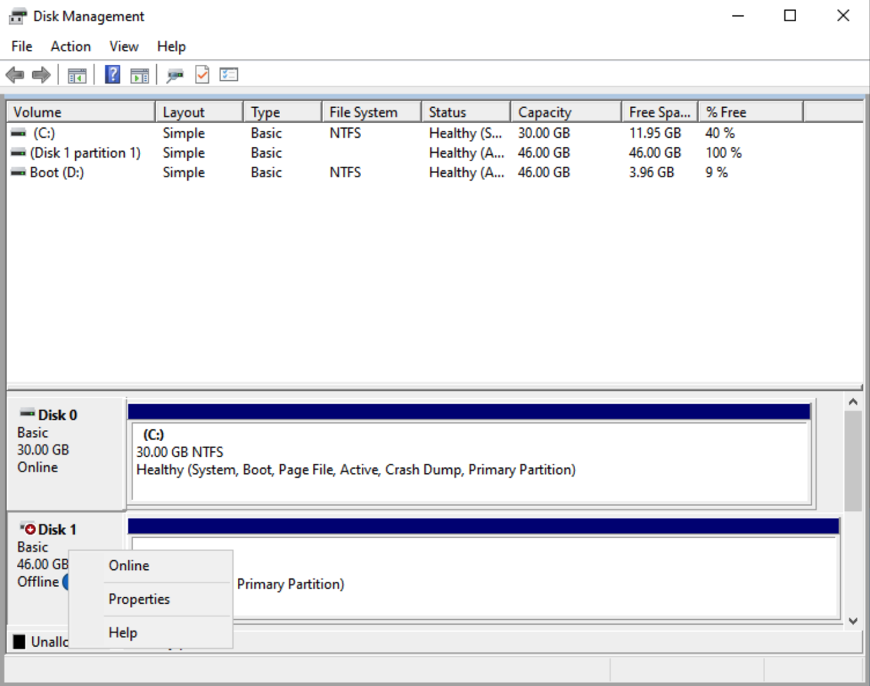
Figure 6: Disk Management utility showing Disk 1 (46 GB) in Offline state with context menu to bring Online
- Verify PV drivers on the attached volume:
dir E:\Program Files\Citrix\XenTools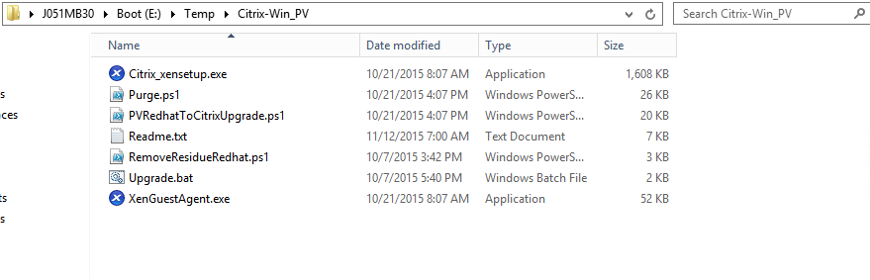
Figure 7: Citrix-Win_PV files visible on the attached Boot (E:) drive at E:\Temp\Citrix-Win_PV
- Apply the fix (see sections below for each issue)
- Mark the volume offline in Disk Management
- Detach from the helper instance
- Reattach to the original instance as
/dev/sda1 - Start the instance
Issue 1: BCD Partition Mismatch (Error 0xc000000e)
Symptom: Windows Boot Manager displays “winload.exe missing or corrupt” with status code 0xc000000e.
Root cause: MGN’s conversion process changed the boot partition reference in the BCD (Boot Configuration Data) store, but the actual OS volume is on a different partition.
Fix: Enumerate and correct BCD entries on the helper instance:
bcdedit /store E:\Boot\BCD /enum all
If entries show an incorrect partition reference, update all entries to match the mounted drive letter:
bcdedit /store E:\Boot\BCD /set {bootmgr} device partition=E:
bcdedit /store E:\Boot\BCD /set {default} device partition=E:
bcdedit /store E:\Boot\BCD /set {default} osdevice partition=E:
bcdedit /store E:\Boot\BCD /set {RESUME_GUID} device partition=E:
bcdedit /store E:\Boot\BCD /set {RESUME_GUID} filedevice partition=E:
bcdedit /store E:\Boot\BCD /set {memdiag} device partition=E:
bcdedit /store E:\Boot\BCD /set {ntldr} device partition=E:
Replace {RESUME_GUID} with the actual GUID from the resumeobject field in the BCD output.
The drive letter in the BCD is resolved to a partition identifier by bcdedit. When the volume boots as the root device on its own instance, Windows maps it correctly regardless of the letter used during the offline edit.
For more information on BCD repair, see Troubleshoot Windows boot issues on Amazon EC2 and Microsoft BCD boot configuration reference.
Issue 2: PV Driver Registry Startup Types Reset
Symptom: Instance boots but shuts down immediately, or fails the instance status check.
Root cause: The Citrix PV driver registry entries had incorrect Start types after MGN conversion. The xenvbd driver (disk access) must be set to Start=0 (Boot) to load before Windows attempts to access the disk.
Fix: Load the offline registry hive and correct the values.
Step-by-Step Registry Fix:
-
- Open Registry Editor and select File > Load Hive:
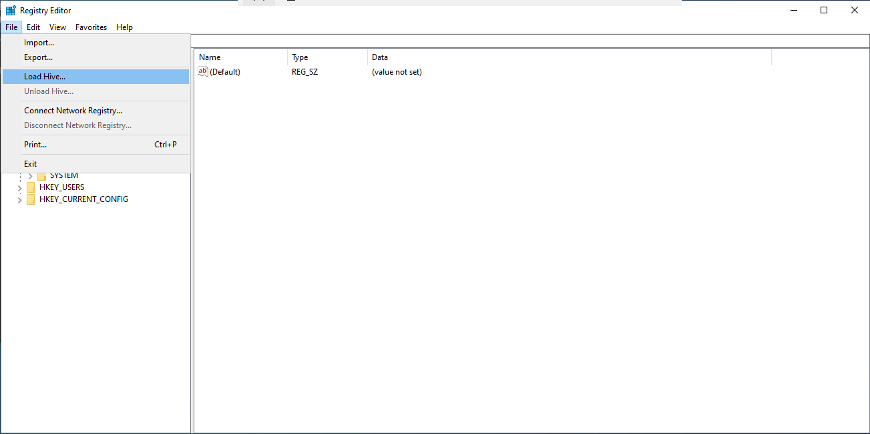
Figure 8: Registry Editor with File menu open showing “Load Hive…” option highlighted
- Load the SYSTEM hive from the attached volume
(E:\Windows\System32\config\SYSTEM)and mount it under a temporary key name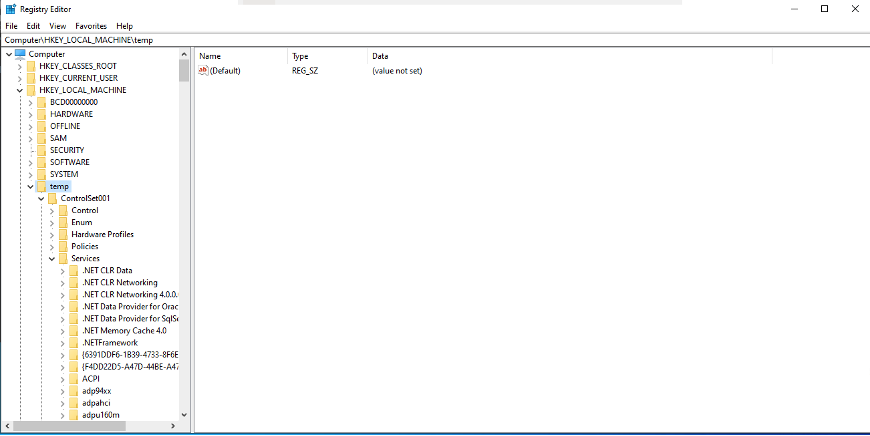
Figure 9: Registry Editor showing the loaded hive under HKEY_LOCAL_MACHINE\temp with ControlSet001\Services expanded
- Navigate to the
xenevtchnservice and verify/set Start value: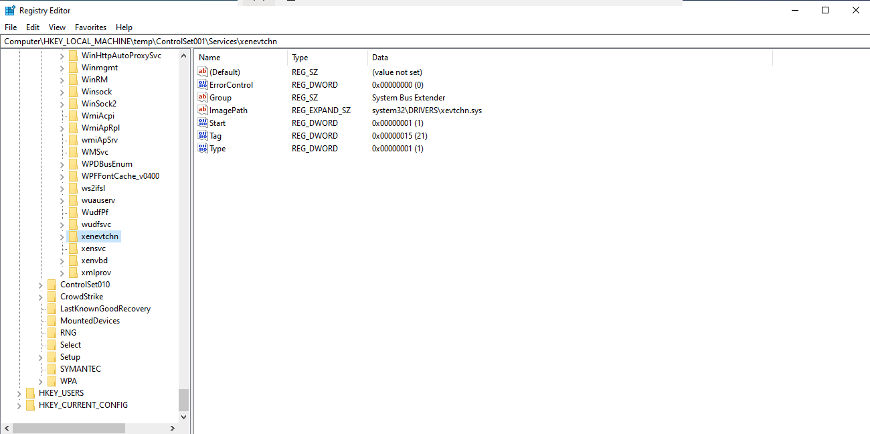
Figure 10: xenevtchn service registry entries showing ImagePath=system32\DRIVERS\xevtchn.sys, Group=System Bus Extender, Start=1
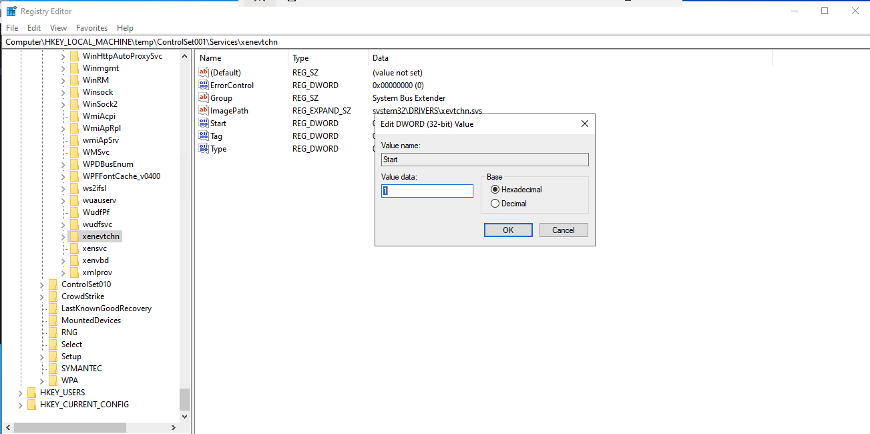
Figure 11: Edit DWORD dialog setting xenevtchn Start value to 1 (hexadecimal)
- Navigate to the
xensvcservice and set Start value to 2: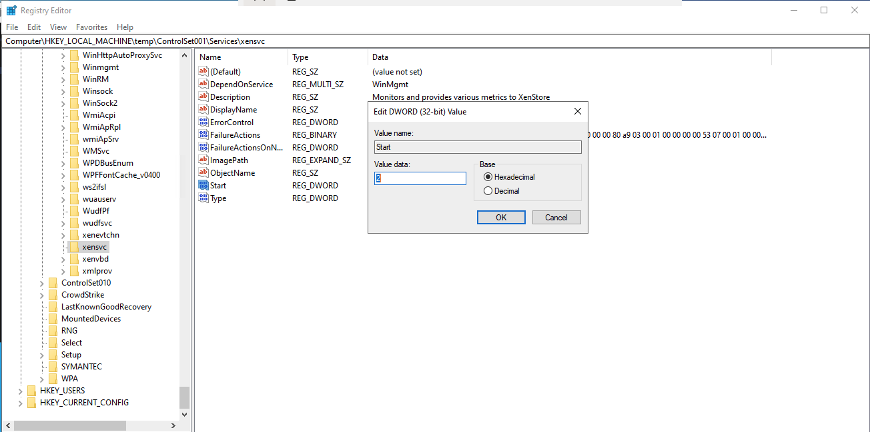
Figure 12: Edit DWORD dialog setting xensvc Start value to 2 (hexadecimal) for Automatic start
- Open Registry Editor and select File > Load Hive:
Complete registry commands:
reg load HKLM\OFFLINE E:\Windows\System32\config\SYSTEM
reg add HKLM\OFFLINE\ControlSet001\Services\xensvc /v Start /t REG_DWORD /d 2 /f
reg add HKLM\OFFLINE\ControlSet001\Services\xenevtchn /v Start /t REG_DWORD /d 1 /f
reg add HKLM\OFFLINE\ControlSet002\Services\xensvc /v Start /t REG_DWORD /d 2 /f
reg add HKLM\OFFLINE\ControlSet002\Services\xenevtchn /v Start /t REG_DWORD /d 1 /f
reg unload HKLM\OFFLINE
Windows driver Start types reference:
| Value | Type | Behavior |
|---|---|---|
| 0 | Boot | Loaded by kernel before disk access |
| 1 | System | Loaded after boot drivers |
| 2 | Automatic | Loaded at login |
| 3 | Manual | Loaded on demand |
| 4 | Disabled | Never loaded |
Issue 3: Corrupt SYSTEM Registry Hive (Error 0xc000014c)
Symptom: “Windows failed to load because the system registry file is missing, or corrupt.”
Root cause: The SYSTEM registry hive was corrupted during the MGN conversion process.
Fix: Restore from the Windows registry backup:
copy E:\Windows\System32\config\RegBack\system E:\Windows\System32\config\system /Y
If you previously modified driver startup types (Issue 2), the RegBack copy will overwrite those changes. Re-apply the startup type fixes after restoring.
Issue 4: VMware Driver Conflict (BSOD)
Symptom: Blue screen (BSOD) with PAGE_FAULT_IN_NONPAGED_AREA caused by disk.sys.
Root cause: VMware drivers from the source server were loading on the Xen hypervisor and conflicting with the Citrix PV drivers. MGN’s conversion process disables these automatically on most servers but can miss some.
Fix: Disable all VMware drivers in the offline registry:
reg load HKLM\OFFLINE E:\Windows\System32\config\SYSTEM
reg add HKLM\OFFLINE\ControlSet001\Services\vm3dmp /v Start /t REG_DWORD /d 4 /f
reg add HKLM\OFFLINE\ControlSet001\Services\vmbus /v Start /t REG_DWORD /d 4 /f
reg add HKLM\OFFLINE\ControlSet001\Services\vmci /v Start /t REG_DWORD /d 4 /f
reg add HKLM\OFFLINE\ControlSet001\Services\vmhgfs /v Start /t REG_DWORD /d 4 /f
reg add HKLM\OFFLINE\ControlSet001\Services\VMMemCtl /v Start /t REG_DWORD /d 4 /f
reg add HKLM\OFFLINE\ControlSet001\Services\vmmouse /v Start /t REG_DWORD /d 4 /f
reg add HKLM\OFFLINE\ControlSet001\Services\vmx_svga /v Start /t REG_DWORD /d 4 /f
reg add HKLM\OFFLINE\ControlSet001\Services\vmxnet /v Start /t REG_DWORD /d 4 /f
reg add HKLM\OFFLINE\ControlSet001\Services\vmxnet3ndis6 /v Start /t REG_DWORD /d 4 /f
reg add HKLM\OFFLINE\ControlSet001\Services\storflt /v Start /t REG_DWORD /d 4 /f
Repeat for ControlSet002, then unload the hive:
reg unload HKLM\OFFLINE
To find all VMware-related drivers in the registry:
reg query HKLM\OFFLINE\ControlSet001\Services /s /f vm
Issue 5: Windows Error Recovery Screen Loop
Symptom: Instance stuck on “Windows Error Recovery” screen with Safe Mode options. Since there is no interactive console access on EC2, no one can select “Start Windows Normally.”
Fix: Using the same helper instance workflow (stop instance → detach root volume → attach to helper as E:), disable the recovery screen via BCD:
bcdedit /store E:\Boot\BCD /set {default} recoveryenabled No
bcdedit /store E:\Boot\BCD /set {default} bootstatuspolicy ignoreallfailures
This tells Windows to skip the recovery menu and boot normally regardless of previous failures.
Complete Post-Migration Fix Checklist
Apply this checklist to any Windows Server 2008 instance that fails status checks after migration to a Xen-based instance type:
- Stop the failed instance
- Detach root volume
- Attach to helper instance as secondary volume
- Bring online in Disk Management (note the drive letter, e.g., E:)
- Verify PV drivers:
dir E:\Program Files\Citrix\XenTools - Fix BCD:
bcdedit /store E:\Boot\BCD /enum all- Update partition references if mismatched
- Disable recovery screen (recoveryenabled No, bootstatuspolicy ignoreallfailures)
- Fix registry:
reg load HKLM\OFFLINE E:\Windows\System32\config\SYSTEM- Verify xenvbd Start=0, xensvc Start=2, xenevtchn Start=1
- Disable VMware drivers (Start=4) as a standard step
reg unload HKLM\OFFLINE
- Mark volume offline in Disk Management
- Detach from helper
- Reattach to original instance as
/dev/sda1 - Start instance
- Verify 2/2 status checks
Conclusion
Migrating Windows Server 2008 to Xen-based EC2 instances requires additional preparation beyond a standard lift-and-shift, but with the right approach, it is fully achievable. The combination of a legacy operating system, Xen hypervisor driver requirements, and MGN conversion behavior creates a series of boot issues that require offline fixes via a helper instance.
By pre-installing Citrix PV drivers on the source, having a helper instance ready, and following a systematic fix checklist, you can reliably migrate legacy Windows workloads to AWS.
For organizations with flexibility on instance type, consider using Nitro-based instances (m5, c5, t3) which use NVMe and ENA drivers and avoid the PV driver requirement entirely. However, when Xen-based instances are a hard constraint, the approach described in this post provides a reliable path forward.