Migration & Modernization
Amazon EVS now offers Windows Server licensing: A step-by-step guide
Flexibility, control, and choice have always been core pillars of the Amazon Elastic VMware Service (Amazon EVS). Amazon EVS gives you the ability to maintain existing investments in VMware technologies while embracing the benefits of the cloud. With Amazon EVS, you can run VMware Cloud Foundation (VCF) directly within your Amazon VPC on EC2 bare-metal instances, allowing you to migrate workloads quickly and eliminate aging infrastructure while maintaining your existing tooling and operational processes.
We’re excited to share that Amazon EVS now offers Microsoft Windows Server licensing, enabling you to migrate or create Virtual Machines (VMs) running Microsoft Windows Server operating system directly in your EVS environment. In this post, we’ll share what it means for your migration journey, walk through how it works, and show you how to get started.
More flexibility: Your Windows Server licensing options on Amazon EVS
You now have two options for running your Windows-based VMs on Amazon EVS, depending on your situation:
Bring Your Own License (BYOL): If you hold eligible Windows Server licenses with portability rights, you can bring those licenses to your EVS environment. This lets you continue using licenses you’ve already invested in.
Microsoft Windows License Entitlements for Amazon EVS: For VMs without portability rights, you can now entitle those VMs directly through Amazon EVS. You pay on a per-vCPU-hour basis, and you can add or remove entitlements at any time, giving you flexibility to manage costs as your needs change. Refer to the Windows Server License Entitlement section of the user guide for more details on supported versions and key concepts.
Key concepts before you get started
Before configuring your licensing, there are two core concepts to understand: EVS connectors and Windows Server license entitlements.
EVS connectors: With this launch, we’re introducing EVS connectors. Connectors enable the Amazon EVS service to communicate with the VCF management appliances (such as vCenter Server) in your EVS environment. Each connector maps to a single management appliance and uses the fully qualified domain name (FQDN) along with credentials stored in AWS Secrets Manager for authentication. Windows Server licensing requires a vCenter connector in your Amazon EVS environment. This enables Amazon EVS to track your Windows Server license usage and monitor VM lifecycle events.
Windows Server license entitlements: You’ll need to create an entitlement for each Windows Server VM that uses an AWS-provided license. Once created, Amazon EVS monitors the VM’s power status and vCPU configuration, so billing aligns with actual usage, and you can scale consumption depending on workload demands.
How billing works: While monitoring starts at entitlement creation, you’re only charged based on the VM’s actual resource usage while running. Windows licensing on Amazon EVS is billed per vCPU-hour for the VMs you entitle. You’re only charged for the VMs you choose to license through AWS. The VMs covered by Windows Server license portability rights carry no additional licensing cost from AWS. For a pricing example, visit the Amazon EVS pricing page.
Step-by-step guide
The following steps guide you through configuring your licensing within your EVS environment.
Steps:
- Set up a user account within your VMware vCenter server with the ReadOnly role attached and store credential within AWS Secrets Manager.
- Create a vCenter connector within EVS.
- Add a Windows Server license entitlement within EVS using VMware VM IDs.
- Create Activation VPC endpoint and configure Windows Server VMs to use the AWS Key Management Server (KMS).
Step 1: Set up a user account in the VMware vCenter server running within your EVS environment with the ReadOnly role attached and store credential within AWS Secrets Manager
The EVS connector requires credentials to authenticate with the vCenter Server appliance in your EVS environment. Before creating the connector, create a dedicated user account with the ReadOnly role for the connector to use.
- Log into the vCenter Server in your Amazon EVS environment with an account that has the administrative privileges necessary to create new users and assign roles.
- Set up a local Single-Sign On user and assign that user to the ReadOnly group.
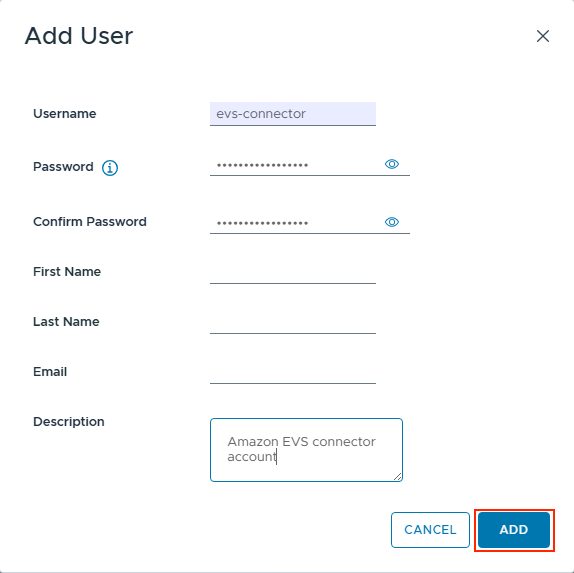
Figure 1: Set username, password, and description (recommended) for a new user
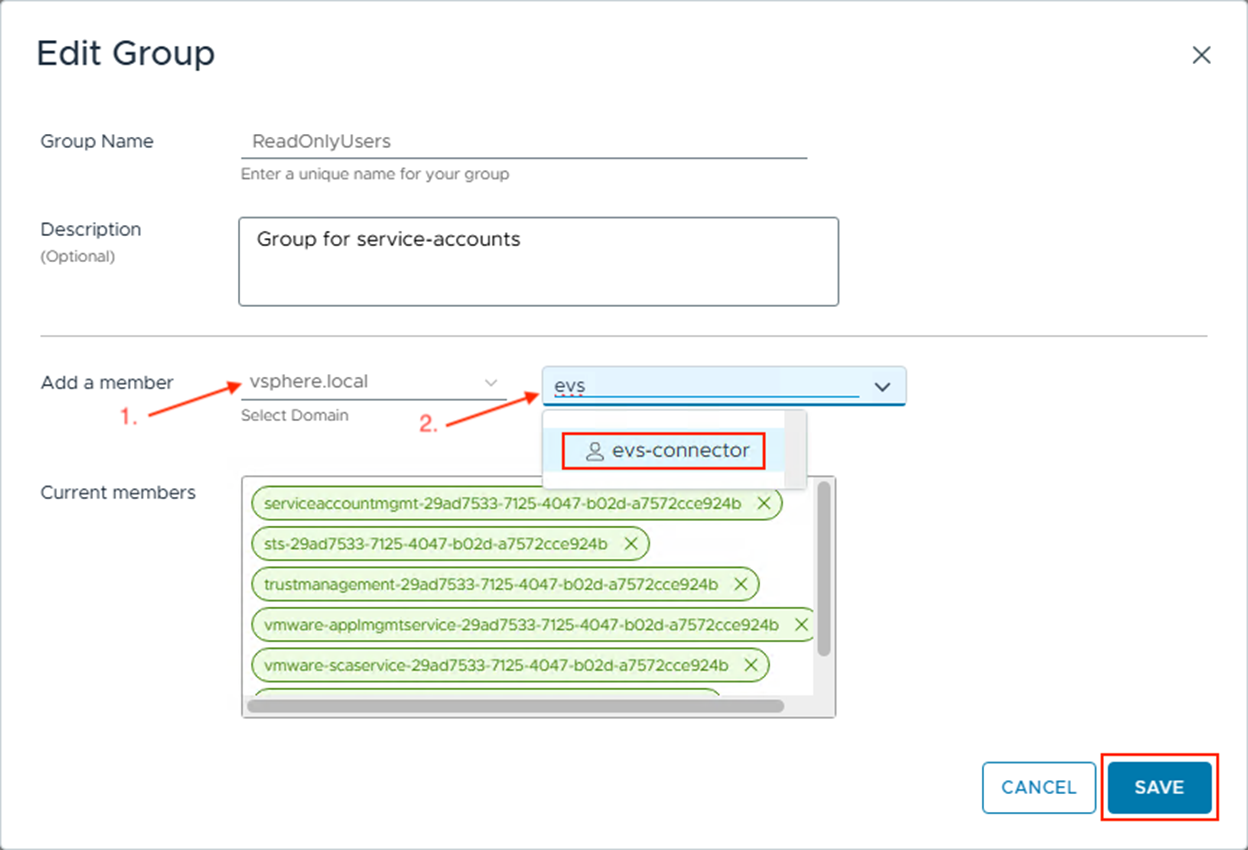
Figure 2: Add a newly created user to ReadOnlyUsers group
Next, for the EVS connector to work with your vCenter appliance, it needs the credentials you just created. To store and share these credentials securely with Amazon EVS, use AWS Secrets Manager with a specific tag that allows the EVS to retrieve the credential.
- From the AWS Console, access the AWS Secrets Manager landing page.
- Select Store a new secret.
- Select Other type of secret.
- The secret will require two keys:
a. The first key must be named ‘username‘ with a value containing the username of the ReadOnly user
b. The second key must named ‘password‘ with a value containing the password for the ReadOnly user
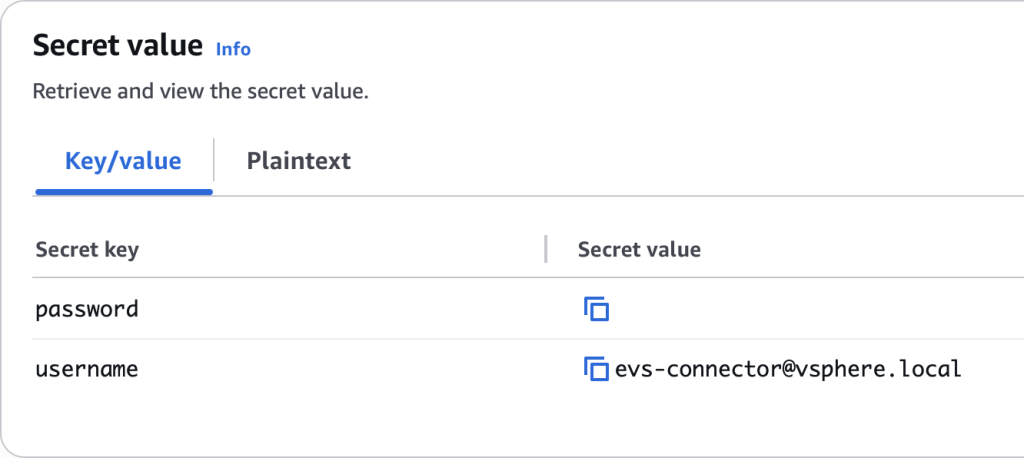
Figure 3: Example secret for EVS connector
- In the Secret name and description section, add a name for the secret. You can add a description as an option.
- In the Tags – optional section select Add.
- Add a key containing EvsAccess with the value of true.
Note:The Key and Value are case sensitive.

Figure 4: Tag secret with EvsAccess=true
- The Configure rotation section can be left as default. Select Next.
- Review the details and select Store.
Step 2: Create a vCenter connector within EVS
Now we will create an Amazon EVS connector to enable communication to your vCenter Server.
- From the AWS Console, access Amazon EVS.
- Select the EVS environment that you want to add the connector to.
- Select the Connector tab and then Create connector.
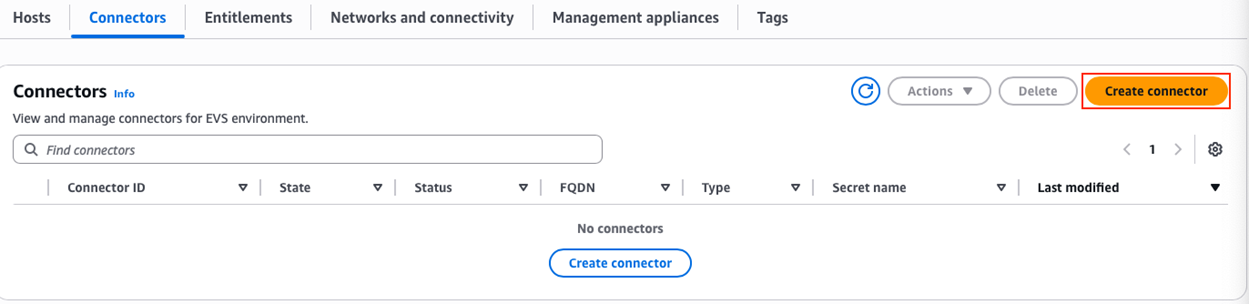
Figure 5: Create a new connector
- Enter the FQDN of your Amazon EVS vCenter appliance.
- Select the AWS Secrets Manager secret from the list that you previously created.
- Select the checkbox to confirm you have configured the necessary vCenter user access and permissions, then select Create connector.
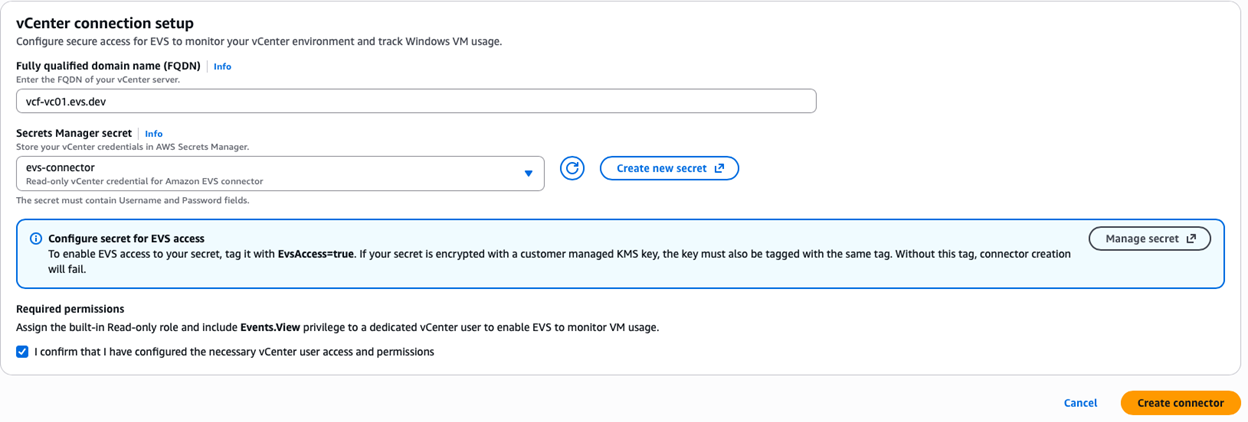
Figure 6: Submit a form to create a new connector with access to EVS vCenter
The connector may take up to 10 minutes for the connection to be validated. You can check the state of the connector via the connectors tab in the Amazon EVS environment.
You must wait for the State to be Active and Status to be Passed before continuing to the next step.
Step 3: Add a Windows Server license entitlement within EVS using VMware VM IDs
After setting up your user accounts and connectors, you’re now ready to entitle your VMs for Windows Server licenses.
-
- From the AWS Console, access Amazon EVS.
- Select the EVS environment where you need to add the connector.
- Select the Entitlements tab and then Add entitlements.
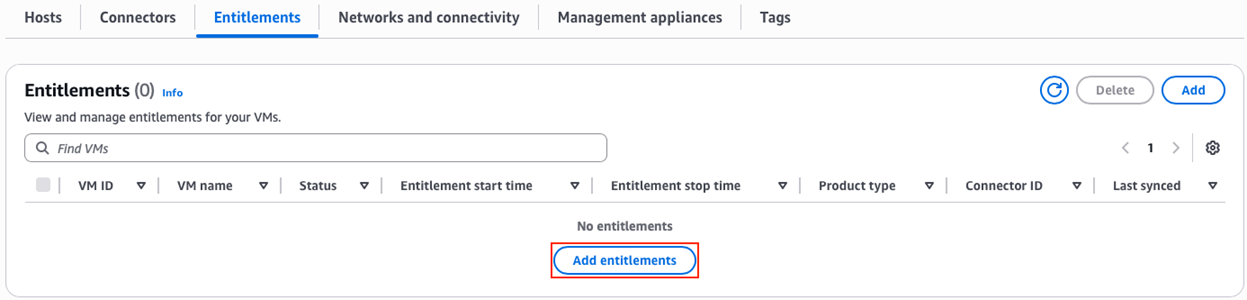
Figure 7: Add entitlements
- You can either upload a .csv file or add the VM IDs manually. For this walkthrough, we are adding the IDs manually.
Note: In vCenter you can use PowerCLI or other tooling to get the VM Managed Object ID.
Note: Each entitlement may only contain 100 VMs. You can request entitlements for the VMs in batches of 100 VMs.
- Provide the VM IDs in the text box, with each ID separated by a comma.
- Select Add entitlements.
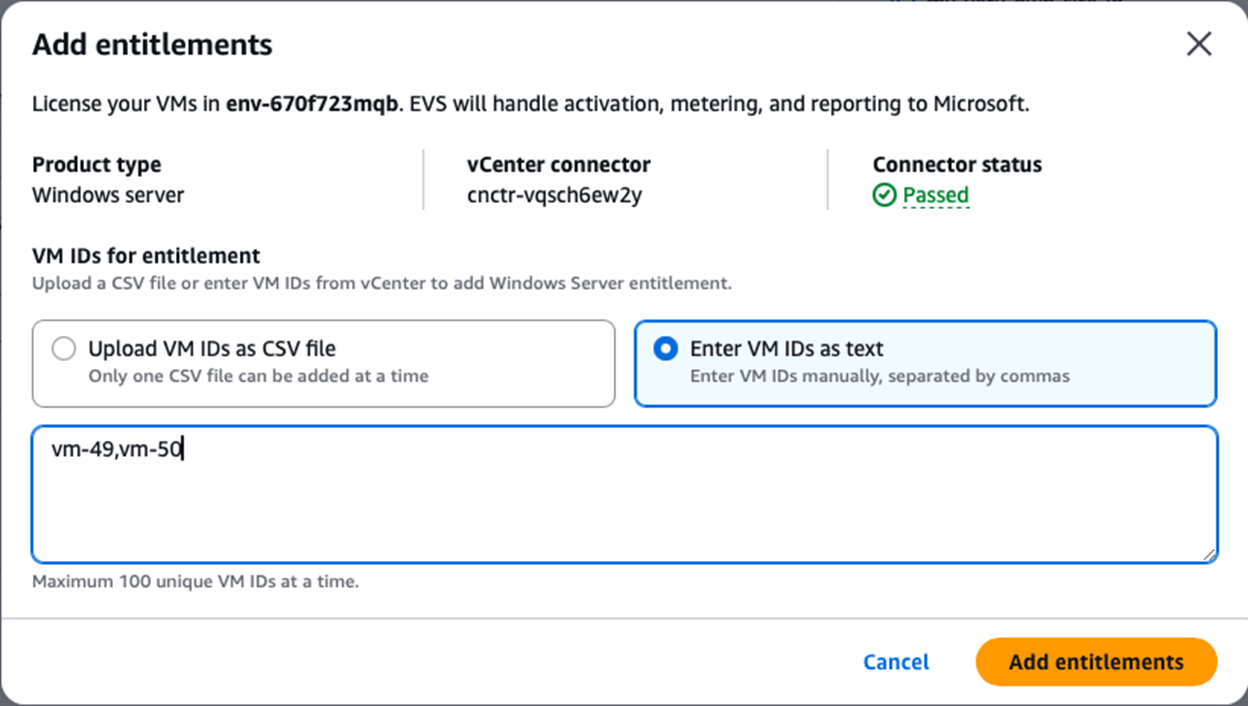
Figure 8: Submit VM IDs to a new entitlement
- To verify completion, check that the entitlement status has changed to Active.
Step 4: Create Activation VPC endpoint and configure Windows Server VMs to use the AWS Key Management Server (KMS)
Amazon EVS provides a Key Management Services (KMS) server endpoint to use within entitled VMs for activation. After creating entitlements you can create a VPC endpoint to enable connectivity to the Amazon EVS provided KMS server.
You can only create this endpoint if you have a running Amazon EVS environment where you are using AWS-offered windows server licensing.
- From the AWS Console, access Amazon VPC.
- From the navigation pane on the left, select Endpoints from the PrivateLink and Lattice section.
- Select Create endpoint.
- Input a name for the endpoint.
- Under Type select AWS services.
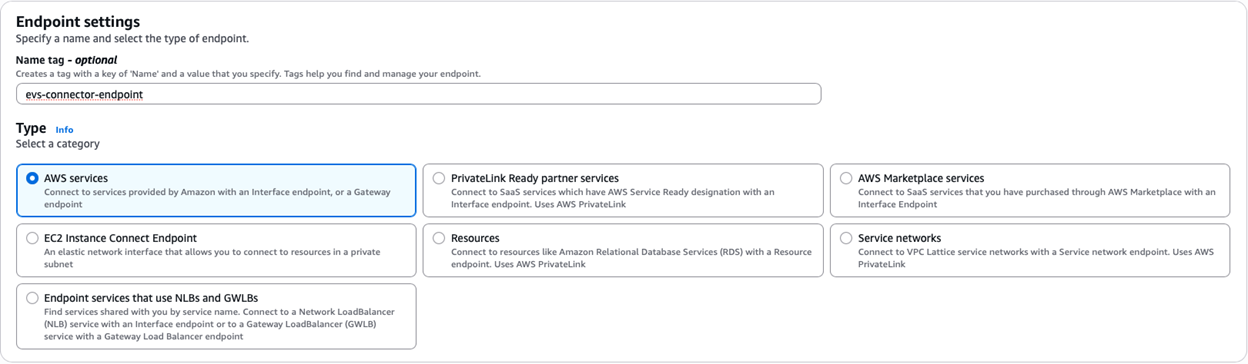
Figure 9: Create Activation VPC endpoint
- Select the service with the name: “com.amazonaws.<region>.evs-windows-server-activation“.
- Under network settings, select the Amazon EVS VPC in the drop down menu.
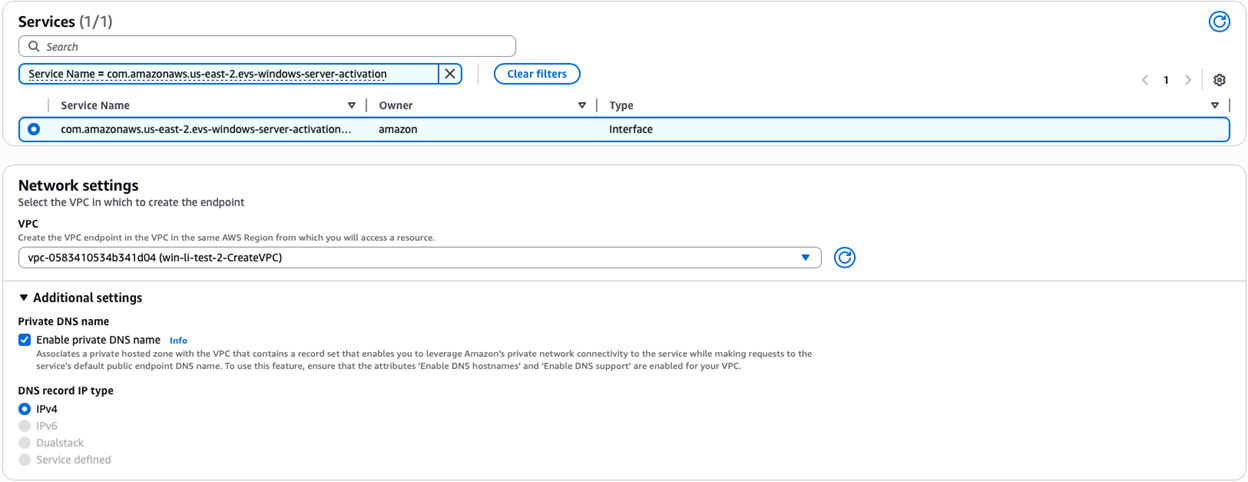
Figure 10: Setup activation service for a new endpoint
- Next, select the service access subnet from within the Subnets section.

Figure 11: Associate a Service Access Subnet for the new endpoint
- Select a security group to attach to the endpoint. The security group must permit inbound TCP 1688 from any Windows Server VM that will connect to the AWS KMS server.
- Once the endpoint status is Available, select the endpoint name and scroll down and find the Private DNS name, this will be required in the next task.

Figure 12: Obtain endpoint’s private DNS name
Next, you will need to configure the entitled VMs to use the Amazon EVS provided KMS server endpoint for windows activation. This can be done manually on each VM, or you can use PowerShell or group policies to automate the process. For the purposes of this blog, we’ll be showing the manual option using PowerShell.
- Log into your Windows Server VM and open a PowerShell window.
- Configure the VM to use the AWS KMS server with the following command, using the Private DNS name you copied:
slmgr /skms <VPC Endpoint Private DNS Name>:1688
For our example, the command would be:
slmgr /skms evs-windows-server-activation.us-east-2.amazonaws.com:1688
- Note the dialog window that notifies you that the Key Management Service machine has been set to the AWS KMS server:
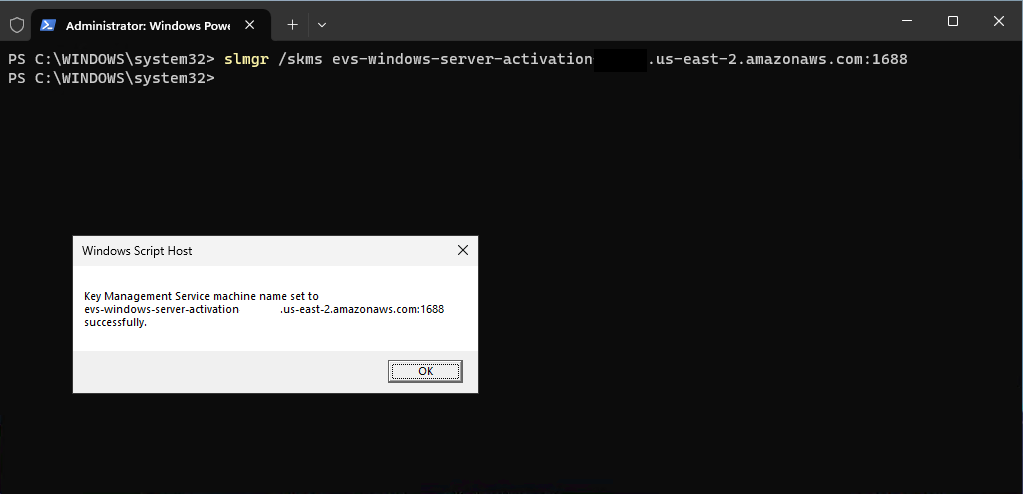
Figure 13: Successfully set Windows Server VM to use AWS KMS server
- Next, run the following command to activate your Windows Server VM:
slmgr /ato
If successful you will receive a dialog window notifying you that the product was activated successfully:
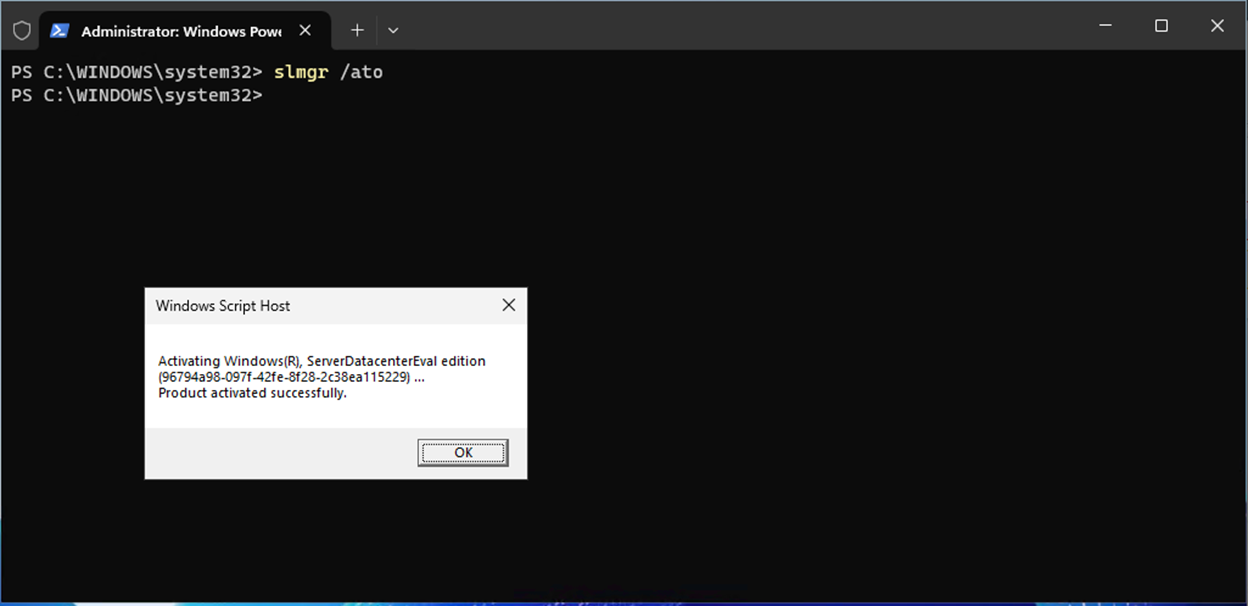
Figure 14: Successful activation of Windows Server VM1
- To confirm a Windows Server VM has been configured correctly, you may use the following command:
slmgr /dli
You will see the message below if successful:
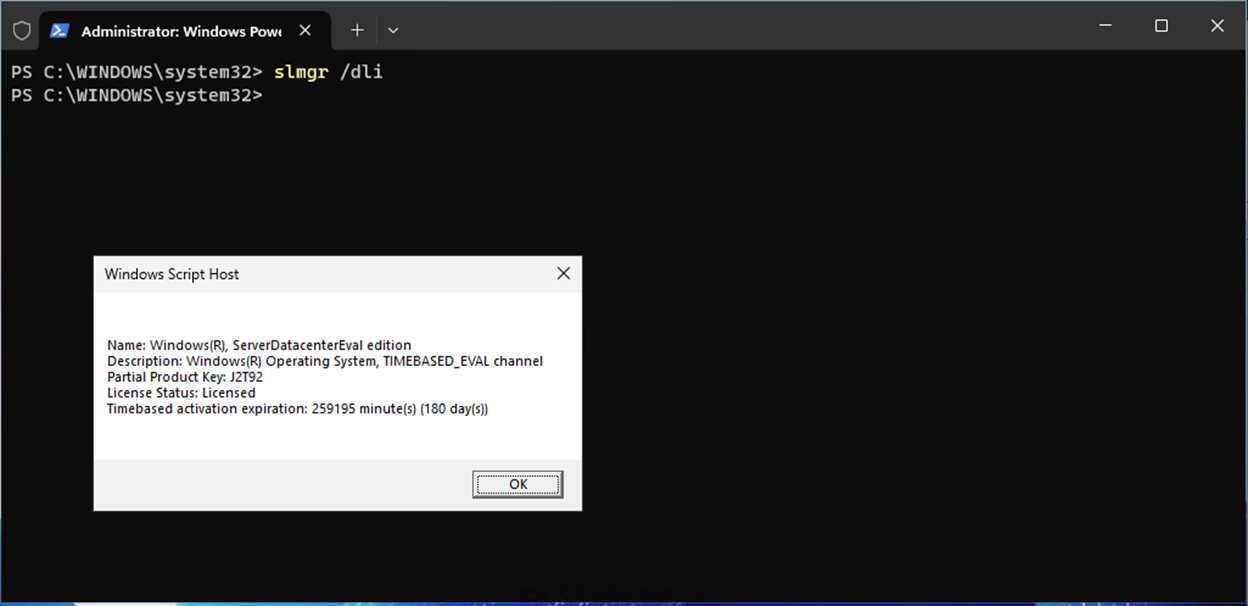
Figure 15: License activation confirmation
If you’re interested in using Command Line Interface (CLI), you can read through the user guide for guidance.
Getting started
Start your journey to AWS today. Whether you’re planning a strategic data center exit, looking to reduce operational costs, or ready to unlock cloud innovation, Amazon EVS provides a simplified path forward for your VCF-based workloads.
Get started: Access the Amazon EVS console today
Deep dive: Review our technical documentation to learn about Amazon EVS and licensing
Explore migration and modernization options: Visit the AWS for VMware page to discover all of your options to migrate and modernize VMware workloads to AWS
Start planning: Connect with us and start with no-cost assessment.