AWS Big Data Blog
Use Apache Airflow workflows to orchestrate data processing on Amazon SageMaker Unified Studio
Orchestrating machine learning pipelines is complex, especially when data processing, training, and deployment span multiple services and tools. In this post, we walk through a hands-on, end-to-end example of developing, testing, and running a machine learning (ML) pipeline using workflow capabilities in Amazon SageMaker, accessed through the Amazon SageMaker Unified Studio experience. These workflows are powered by Amazon Managed Workflows for Apache Airflow (Amazon MWAA).
While SageMaker Unified Studio includes a visual builder for low-code workflow creation, this guide focuses on the code-first experience: authoring and managing workflows as Python-based Apache Airflow DAGs (Directed Acyclic Graphs). A DAG is a set of tasks with defined dependencies, where each task runs only after its upstream dependencies are complete, promoting correct execution order and making your ML pipeline more reproducible and resilient.We’ll walk through an example pipeline that ingests weather and taxi data, transforms and joins datasets, and uses ML to predict taxi fares—all orchestrated using SageMaker Unified Studio workflows.
If you prefer a simpler, low-code experience, see Orchestrate data processing jobs, querybooks, and notebooks using visual workflow experience in Amazon SageMaker.
Solution overview
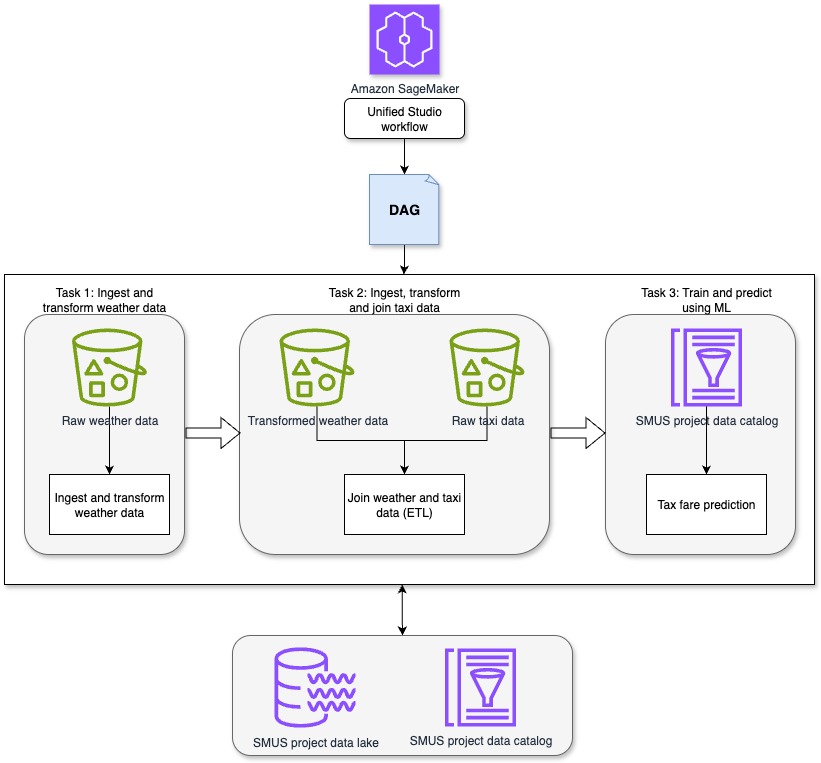
This solution demonstrates how SageMaker Unified Studio workflows can be used to orchestrate a complete data-to-ML pipeline in a centralized environment. The pipeline runs through the following sequential tasks, as shown in the preceding diagram.
- Task 1: Ingest and transform weather data: This task uses a Jupyter notebook in SageMaker Unified Studio to ingest and preprocess synthetic weather data. The synthetic weather dataset includes hourly observations with attributes such as time, temperature, precipitation, and cloud cover. For this task, the focus is on time, temperature, rain, precipitation, and wind speed.
- Task 2: Ingest, transform and join taxi data: A second Jupyter notebook in SageMaker Unified Studio ingests the raw New York City taxi ride dataset. This dataset includes attributes such as pickup time, drop-off time, trip distance, passenger count, and fare amount. The relevant fields for this task include pickup and drop-off time, trip distance, number of passengers, and total fare amount. The notebook transforms the taxi dataset in preparation for joining it with the weather data. After transformation, the taxi and weather datasets are joined to create a unified dataset, which is then written to Amazon S3 for downstream use.
- Task 3: Train and predict using ML: A third Jupyter notebook in SageMaker Unified Studio applies regression techniques to the joined dataset to create a model to determine how attributes of the weather and taxi data such as rain and trip distance impact taxi fares and create a fare prediction model. The trained model is then used to generate fare predictions for new trip data.
This unified approach enables orchestration of extract, transform, and load (ETL) and ML steps with full visibility into the data lifecycle and reproducibility through governed workflows in SageMaker Unified Studio.
Prerequisites
Before you begin, complete the following steps:
- Create a SageMaker Unified Studio domain: Follow the instructions in Create an Amazon SageMaker Unified Studio domain – quick setup
- Sign in to your SageMaker Unified Studio domain: Use the domain you created in Step 1 sign in. For more information, see Access Amazon SageMaker Unified Studio.
- Create a SageMaker Unified Studio project: Create a new project in your domain by following the project creation guide. For Project profile, select All capabilities.
Set up workflows
You can use workflows in SageMaker Unified Studio to set up and run a series of tasks using Apache Airflow to design data processing procedures and orchestrate your querybooks, notebooks, and jobs. You can create workflows in Python code, test and share them with your team, and access the Airflow UI directly from SageMaker Unified Studio. It provides features to view workflow details, including run results, task completions, and parameters. You can run workflows with default or custom parameters and monitor their progress. Now that you have your SageMaker Unified Studio project set up, you can build your workflows.
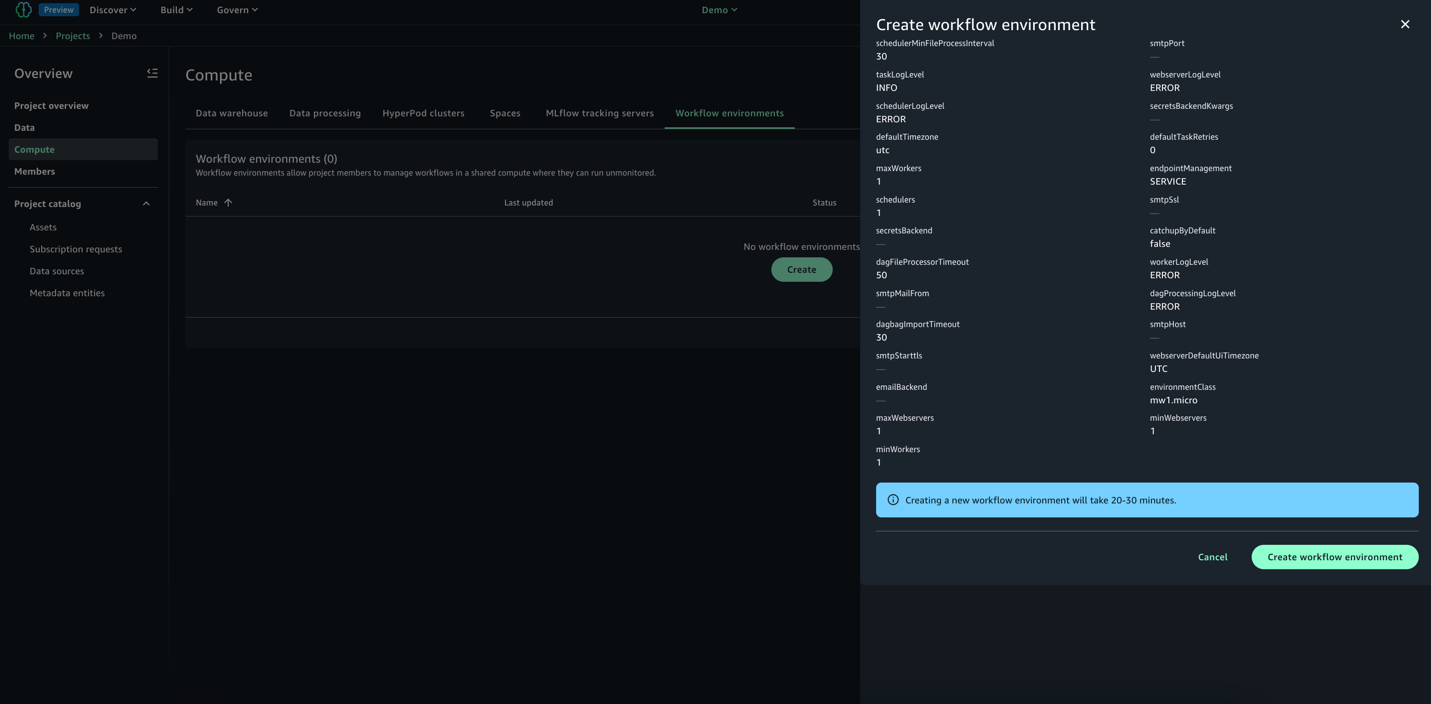
- In your SageMaker Unified Studio project, navigate to the Compute section and select Workflow environment.
- Choose Create environment to set up a new workflow environment.
- Review the options and choose Create environment. By default, SageMaker Unified Studio creates an mw1.micro class environment, which is suitable for testing and small-scale workflows. To update the environment class before project creation, navigate to Domain and select Project Profiles and then All Capabilities and go to OnDemand Workflows blueprint deployment settings. By using these settings, you can override default parameters and tailor the environment to your specific project requirements.
Develop workflows
You can use workflows to orchestrate notebooks, querybooks, and more in your project repositories. With workflows, you can define a collection of tasks organized as a DAG that can run on a user-defined schedule.To get started:
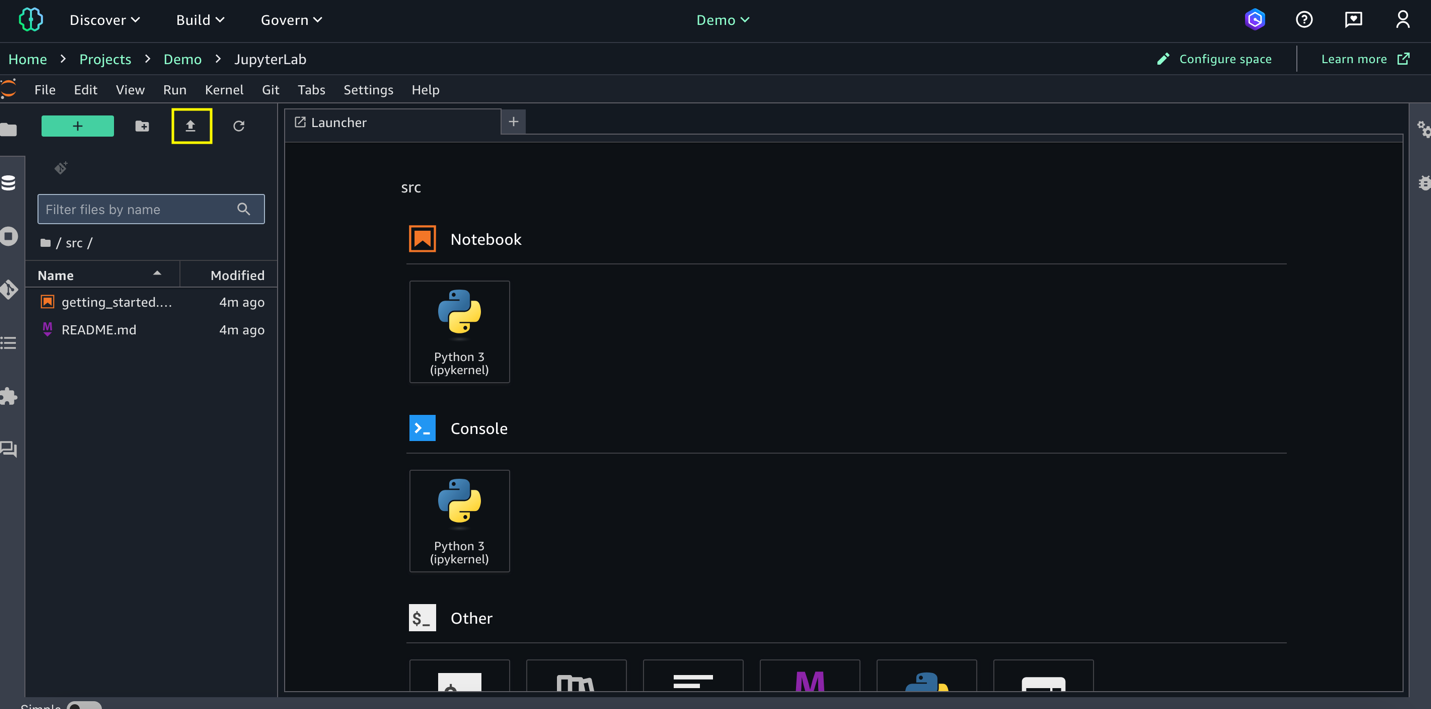
- Download Weather Data Ingestion, Taxi Ingest and Join to Weather, and Prediction notebooks to your local environment.
- Go to Build and select JupyterLab; choose Upload files and import the three notebooks you downloaded in the previous step.
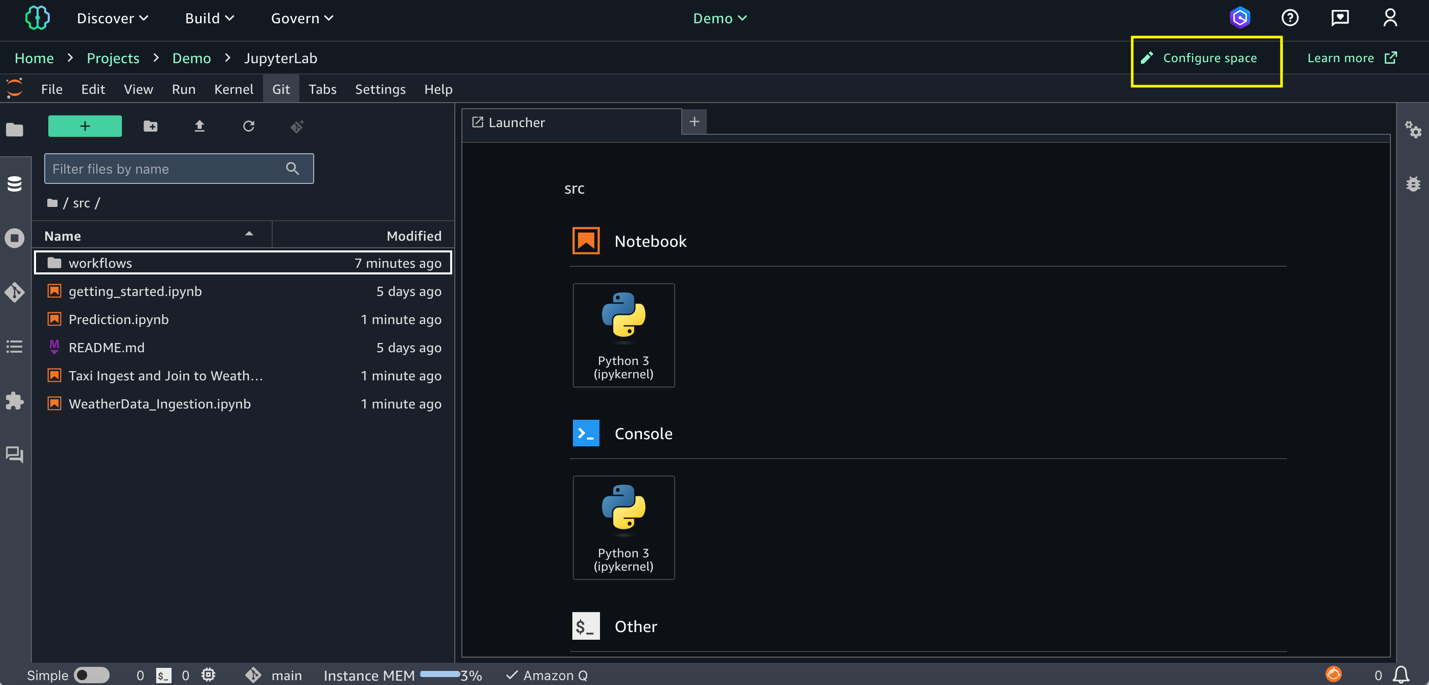
- Configure your SageMaker Unified Studio space: Spaces are used to manage the storage and resource needs of the relevant application. For this demo, configure the space with an ml.m5.8xlarge instance
- Choose Configure Space in the right-hand corner and stop the space.
- Update instance type to ml.m5.8xlarge and start the space. Any active processes will be paused during the restart, and any unsaved changes will be lost. Updating the workspace might take a take few minutes.
- Go to Build and select Orchestration and then Workflows.
- Select the down arrow (▼) next to Create new workflow. From the dropdown menu that appears, select Create in code editor.
- In the editor, create a new Python file named
multinotebook_dag.pyundersrc/workflows/dags. Copy the following DAG code, which implements a sequential ML pipeline that orchestrates multiple notebooks in SageMaker Unified Studio. Replace<REPLACE-OWNER>with your username. UpdateNOTEBOOK_PATHSto match your actual notebook locations.
The code uses the NotebookOperator to execute three notebooks in order: data ingestion for weather data, data ingestion for taxi data, and the trained model created by combining the weather and taxi data. Each notebook runs as a separate task, with dependencies to help ensure that they execute in sequence. You can customize with your own notebooks. You can modify the NOTEBOOK_PATHS list to orchestrate any number of notebooks in their workflow while maintaining sequential execution order.
The workflow schedule can be customized by updating WORKFLOW_SCHEDULE (for example: '@hourly', '@weekly', or cron expressions like ‘13 2 1 * *’) to match your specific business needs.
- After a workflow environment has been created by a project owner, and once you’ve saved your workflows DAG files in JupyterLab, they are automatically synced to the project. After the files are synced, all project members can view the workflows you have added in the workflow environment. See Share a code workflow with other project members in an Amazon SageMaker Unified Studio workflow environment.
Test and monitor workflow execution
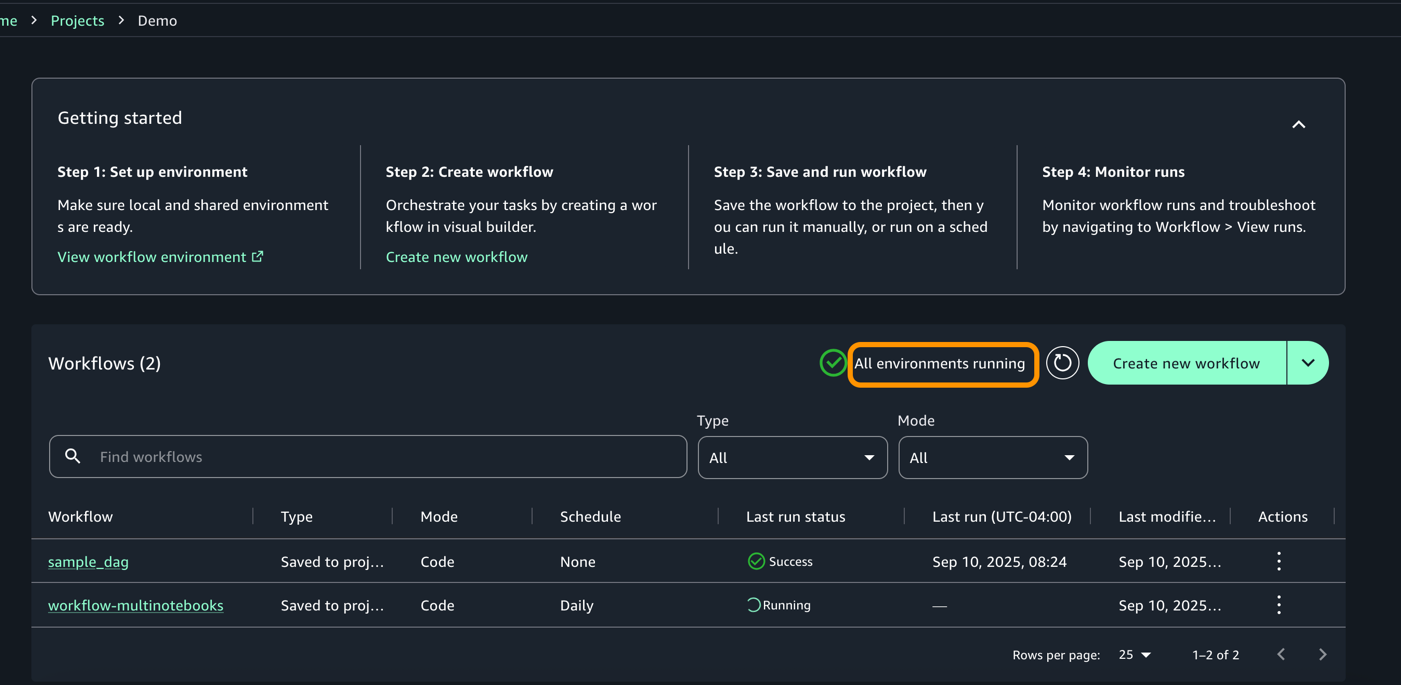
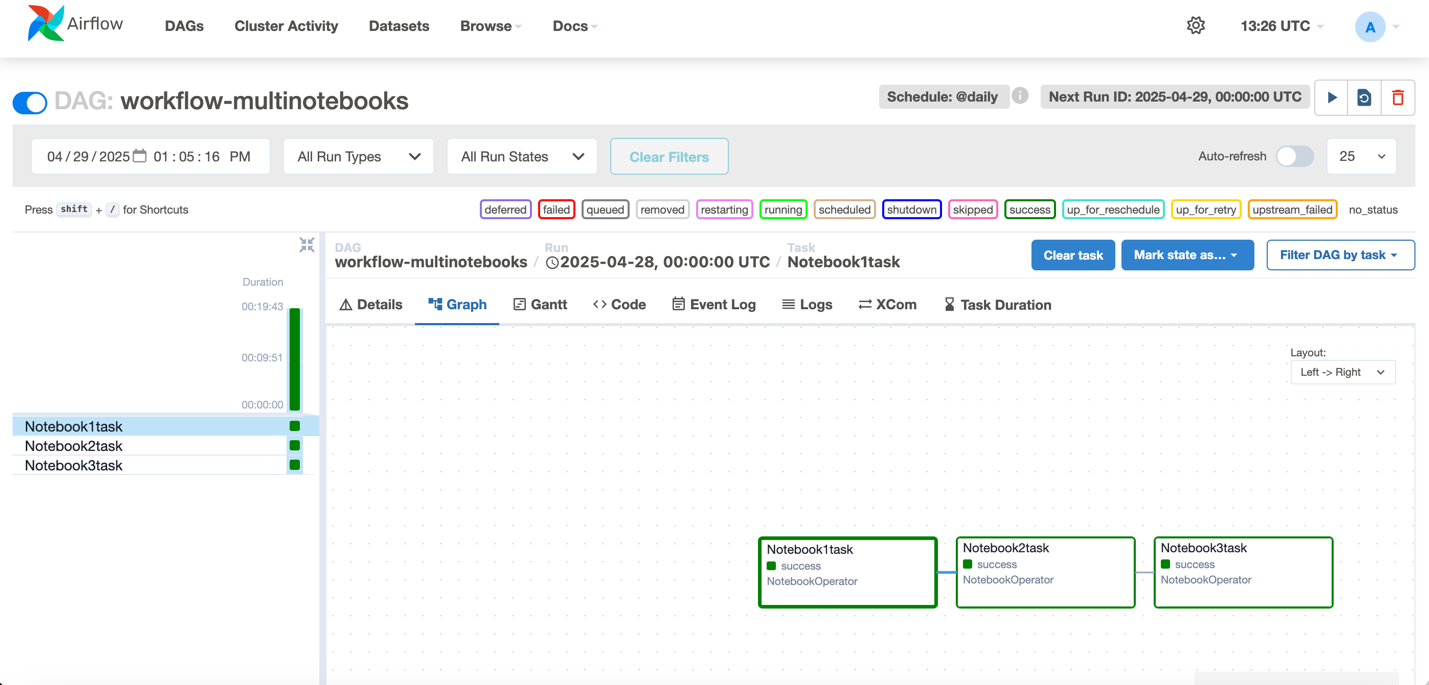
- To validate your DAG, Go to Build > Orchestration > Workflows. You should now see the workflow running in Local Space based on the Schedule.
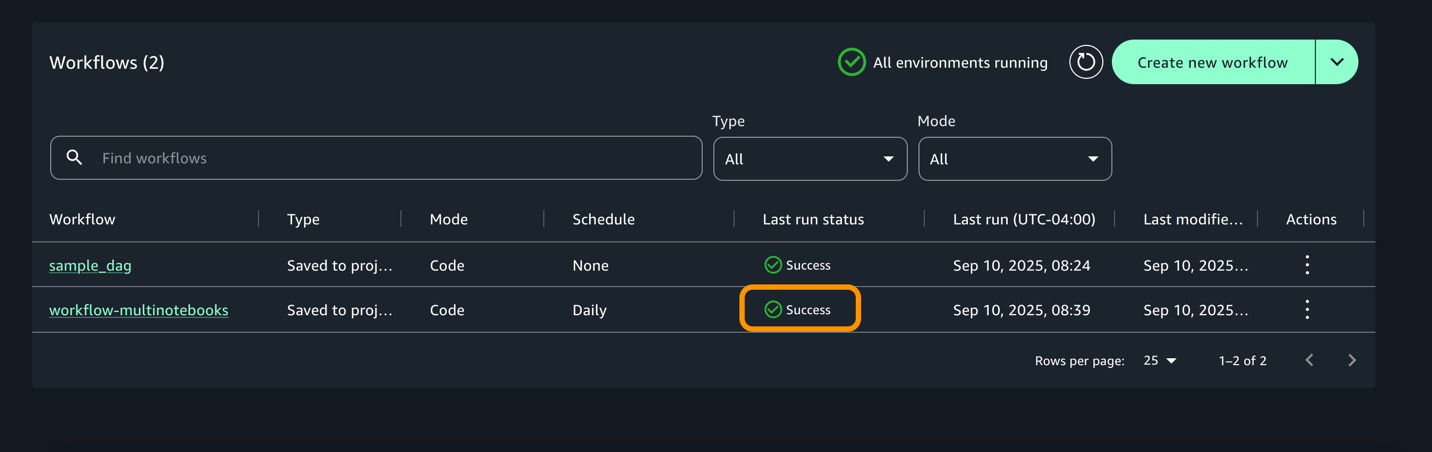
- Once the execution completes, workflow would change to success start as shown below.
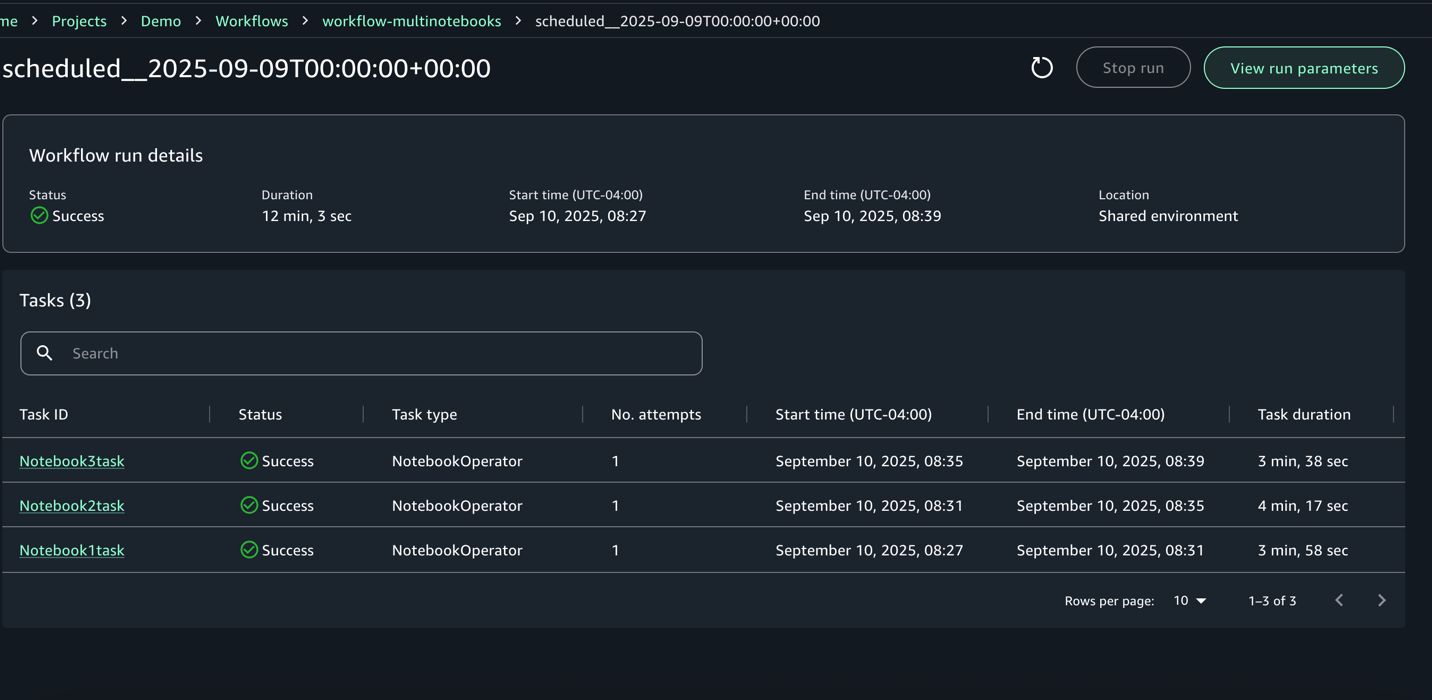
- For each execution, you can zoom in to get a detailed workflow run details and task logs
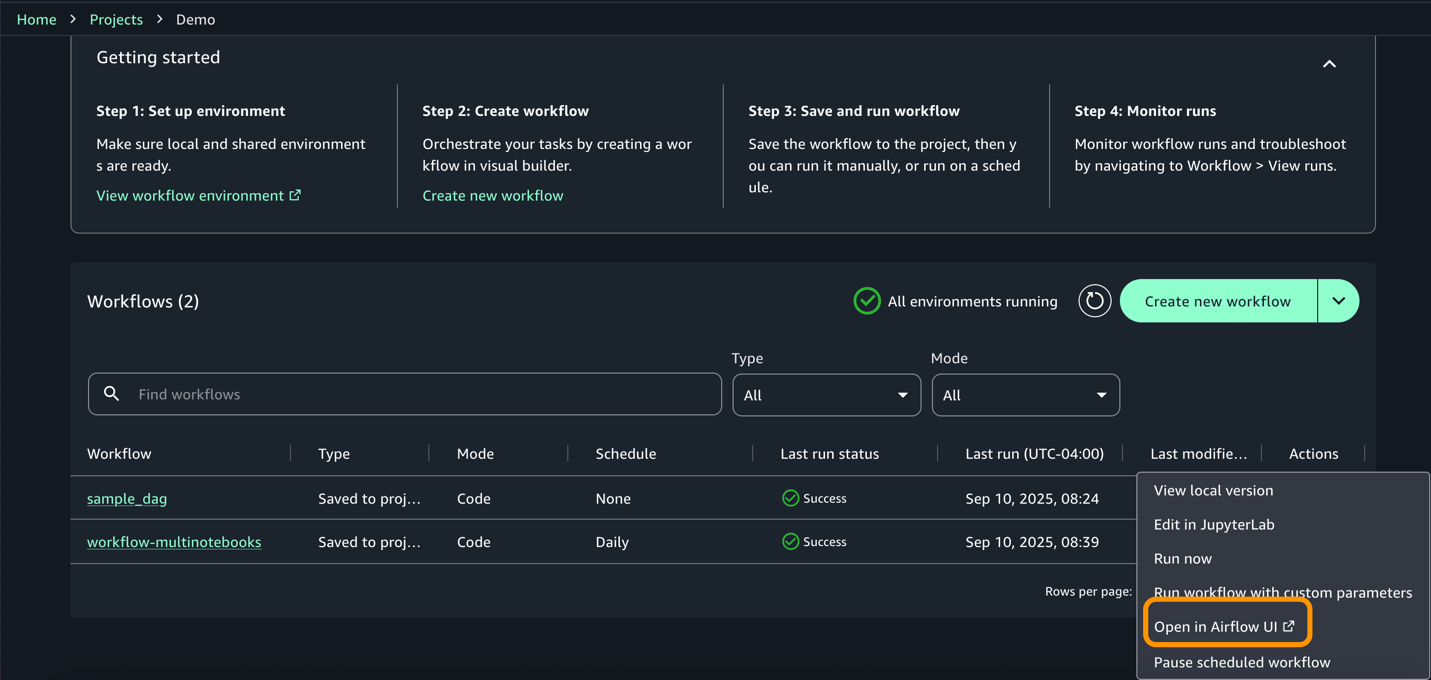
- Access the airflow UI from actions for more information on the dag and execution.
Results
The model’s output is written to the Amazon Simple Storage Service (Amazon S3) output folder as shown the following figure. These results should be evaluated for correctness of fit, prediction accuracy, and the consistency of relationships between variables. If any results appear unexpected or unclear, it is important to review the data, engineering steps, and model assumptions to verify that they align with the intended use case.
Clean up
To avoid incurring additional charges associated with resources created as part of this post, make sure you delete the items created in the AWS account for this post.
- The SageMaker domain
- The S3 bucket associated with the SageMaker domain
Conclusion
In this post, we demonstrated how you can use Amazon SageMaker to build powerful, integrated ML workflows that span the full data and AI/ML lifecycle. You learned how to create an Amazon SageMaker Unified Studio project, use a multi-compute notebook to process data, and use the built-in SQL editor to explore and visualize results. Finally, we showed you how to orchestrate the entire workflow within the SageMaker Unified Studio interface.
SageMaker offers a comprehensive set of capabilities for data practitioners to perform end-to-end tasks, including data preparation, model training, and generative AI application development. When accessed through SageMaker Unified Studio, these capabilities come together in a single, centralized workspace that helps eliminate the friction of siloed tools, services, and artifacts.
As organizations build increasingly complex, data-driven applications, teams can use SageMaker, together with SageMaker Unified Studio, to collaborate more effectively and operationalize their AI/ML assets with confidence. You can discover your data, build models, and orchestrate workflows in a single, governed environment.
To learn more, visit the Amazon SageMaker Unified Studio page.